
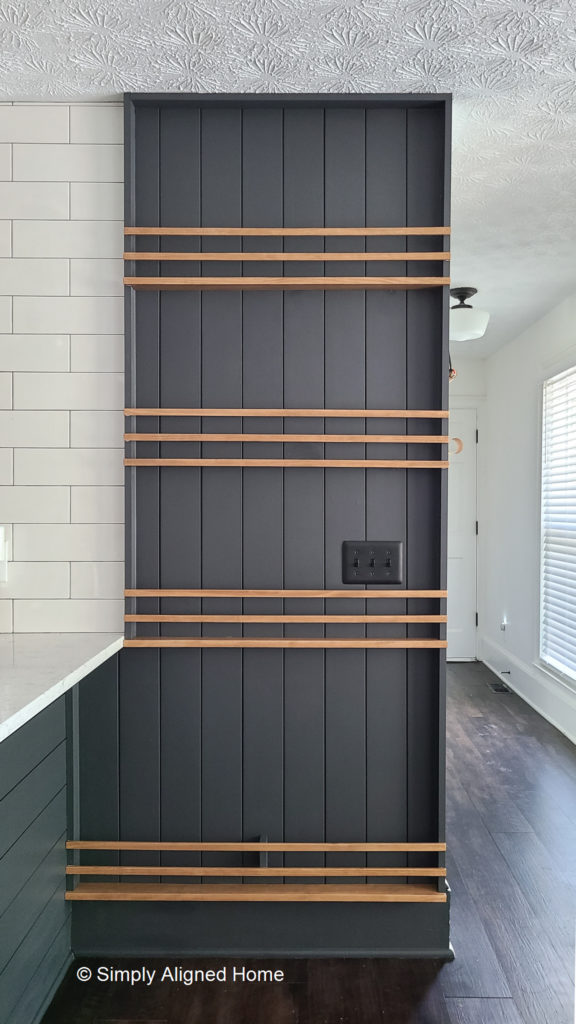
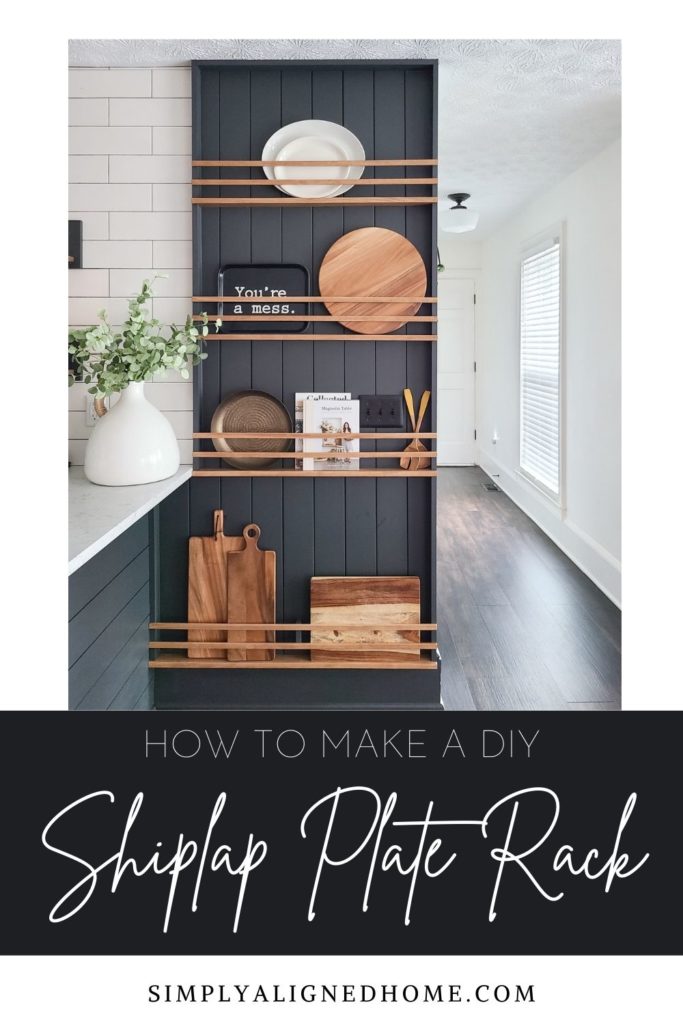
Do you feel the need to fill every awkward space in your home with something beautiful and functional?! I do! I recently updated my kitchen shelving and range hood. I had an awkward and boring wall in my kitchen and knew I needed to do something about it. I saw a smaller version of a modern plate rack and that was all the inspo that I needed! Here’s how I made my shiplap plate rack..
Install Trim on One Side
I installed this plate rack between my tile backsplash and the corner of a wall. The process for installing trim will differ depending on where the plate rack is being installed. Based on my method of installing the shelves, I did need trim on both sides of the plate rack.
**This post contains affiliate links to products that I recommend. If you purchase something through an affiliate link, I may receive a small percentage of the sale at no extra cost to you. I really appreciate your support.**
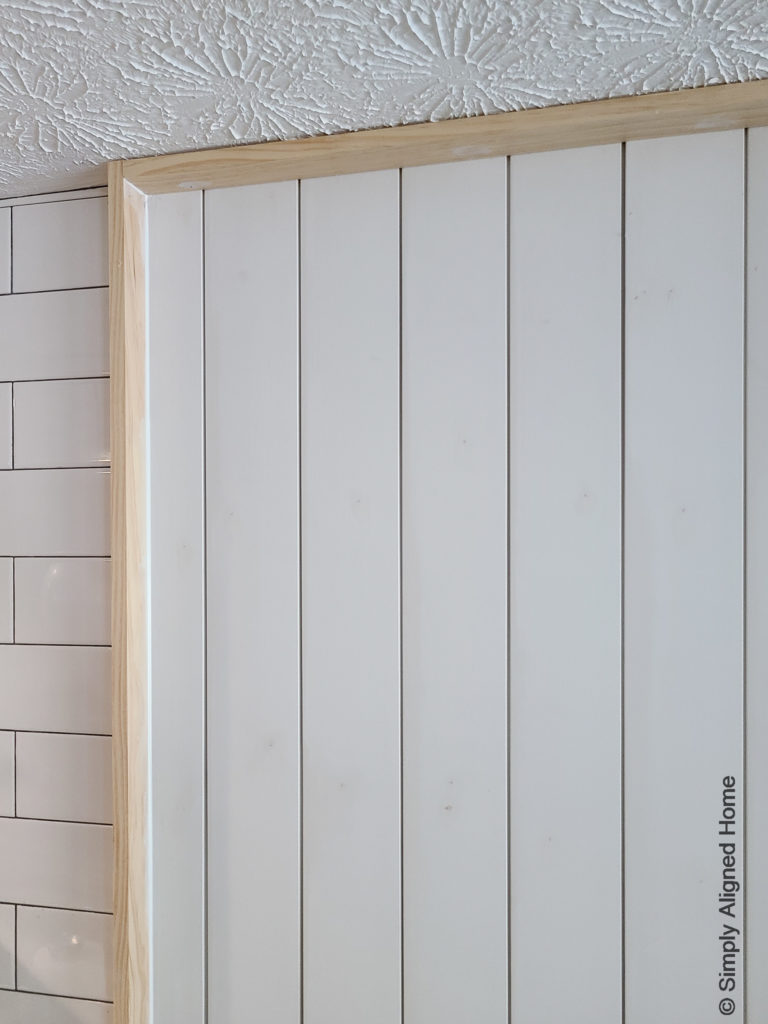
For the trim, I decided to use 1×3 select pine. I started by installing the trim next to the tile backsplash. I placed the 1×3 trim against the tile and nailed it into the wall with my finish nailer. I did this by angling the nail gun so that the nail would go in the face of the trim and out of the side into the wall (hope that makes sense).
Install Shiplap
Once the first side of trim was installed, it was time for shiplap! I decided to install the shiplap vertically to offset all of the horizontal lines that I already had in the kitchen.
I determined where the middle shiplap board would be located and did the math to figure out how wide the two outside boards needed to be. Using my table saw, I ripped my first board this width and nailed it to the wall against the first piece of trim. I installed the rest of the shiplap across the wall, leaving room for my last piece of trim.
Install Trim on Other Side and Top
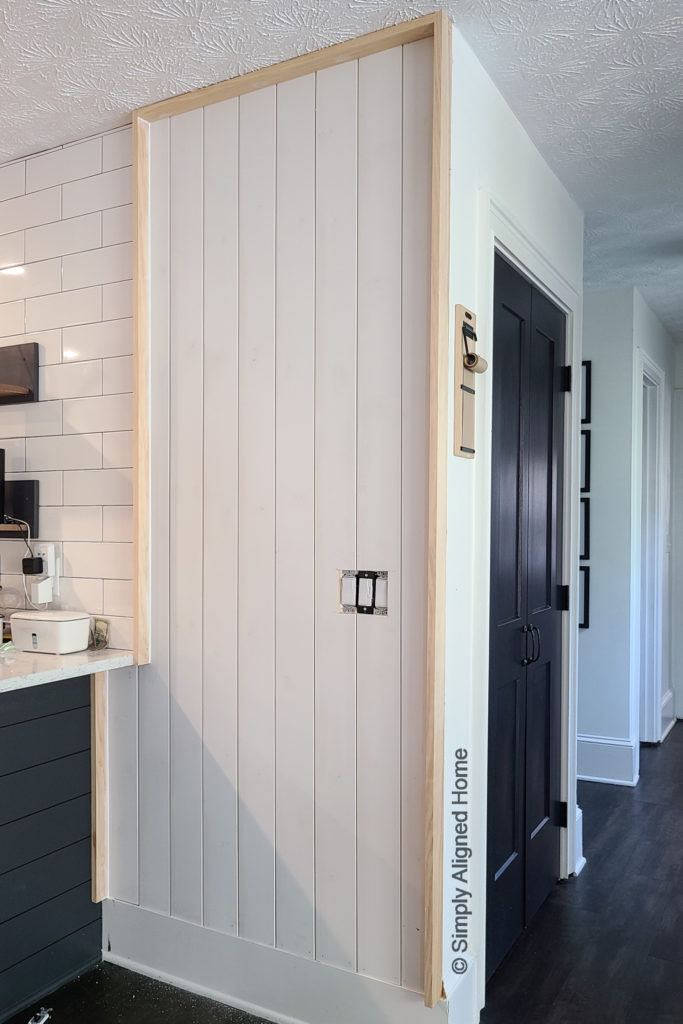
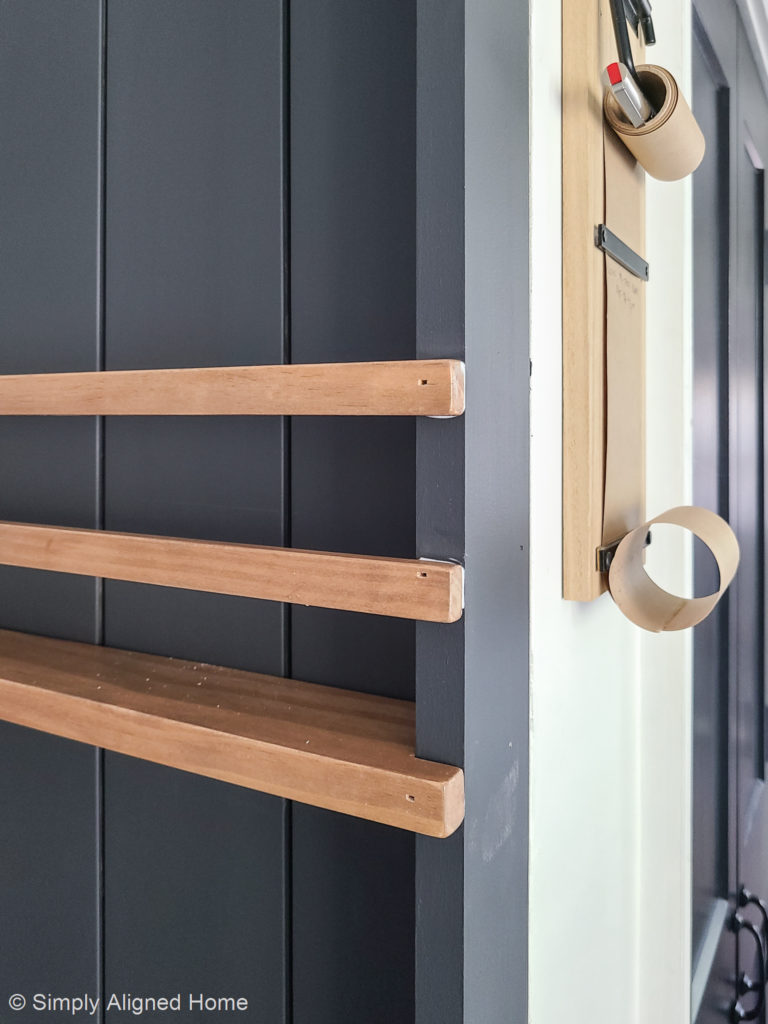
With the shiplap installed, I was able to add the last piece of vertical trim. I secured this piece of trim by nailing it into the side of the shiplap.
I planned on adding a shelf to the bottom of the wall, so I just needed to add a final piece of trim to the top. I measured the depth that the top piece of trim needed to be now that the shiplap was installed. I ripped my 1×3 to this dimension and nailed the trim to the ceiling.
Patch, Caulk and Paint Shiplap and Trim
Before I could install the shelves, I needed to finish off the shiplap and trim. I patched the nail holes with spackle and caulked all of the seams.
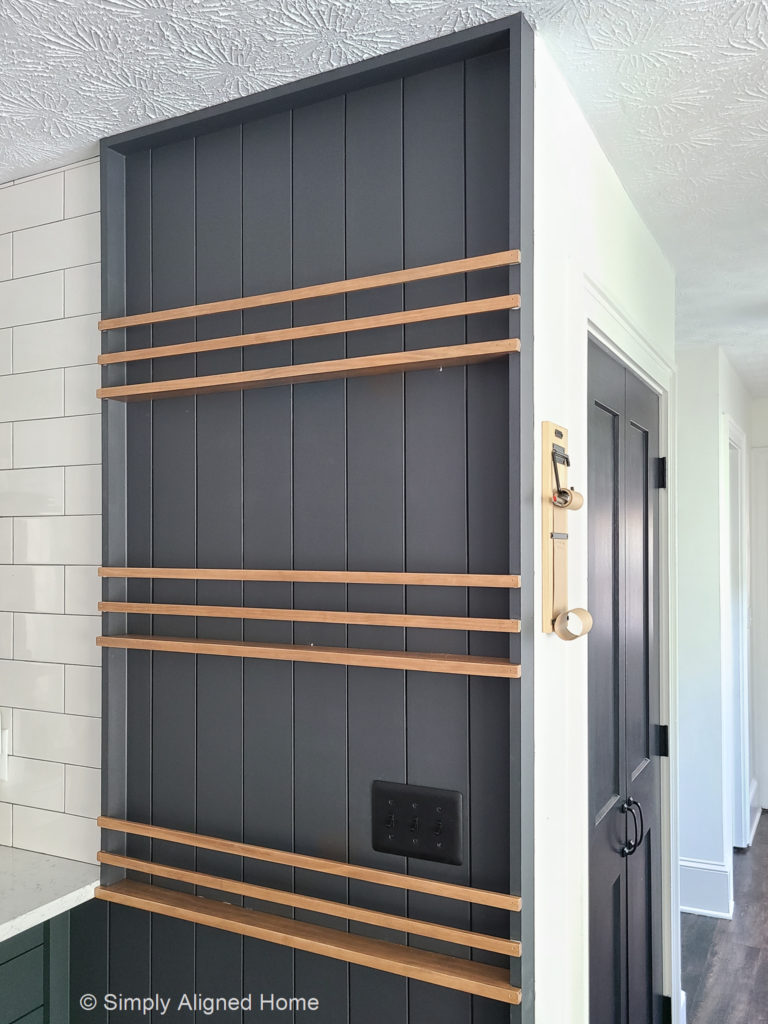
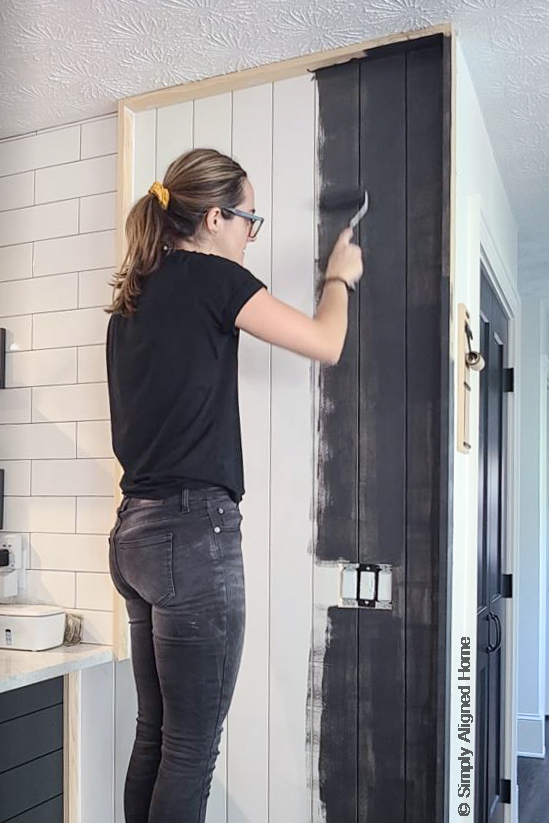
I finished off the shiplap wall with my favorite paint color…Sherwin-Williams Iron Ore! I went with a matte finish paint that is still wipeable. The matte finish will hide any imperfections, but it is still easy to clean.
Make and Install Shelves
For the shelves, I started with 1×3 select pine. I cut them the full width from the outside of one trim piece to the outside of the other. Using my jigsaw, I notched out the shelves where the outside trim pieces hit.
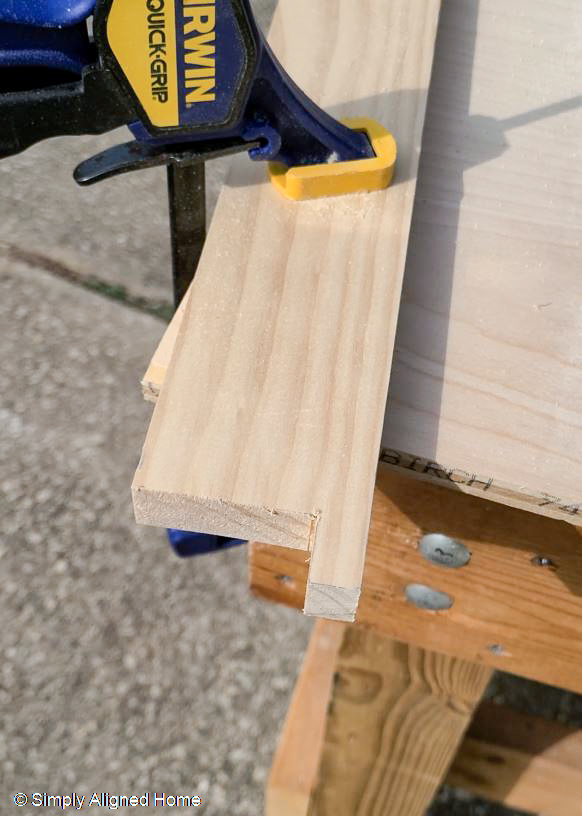
Once the trim pieces were cut and notched, I sanded them using my palm sander and 220 grit. I stained them with a water based stain in Early American and finished them off with three coats of a water based poly. I did a light sanding between coats to give it a nice, smooth finish.
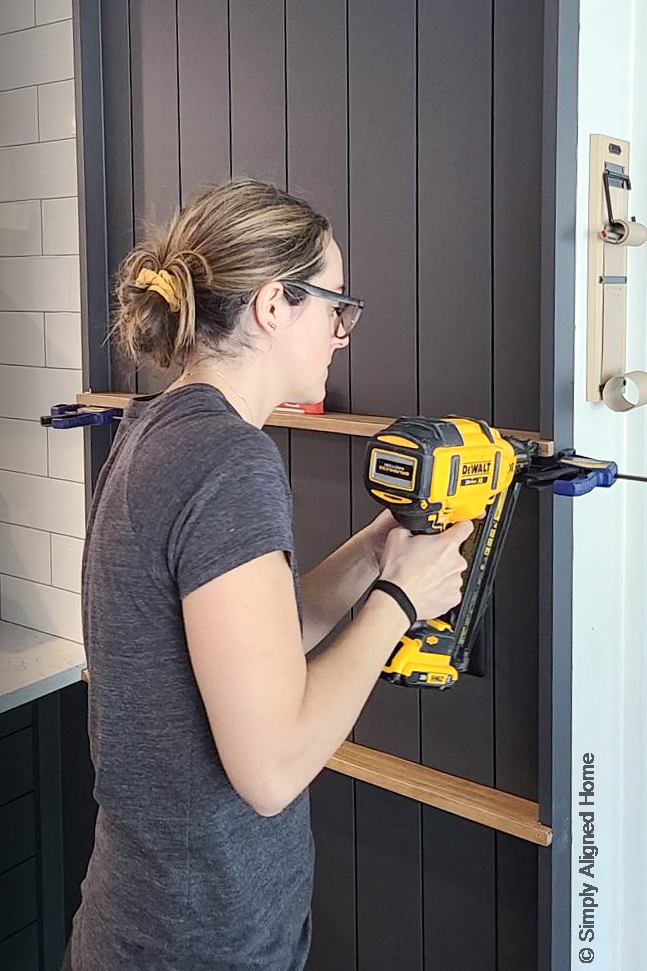
To install the shelves, I used both glue and finish nails. I used clamps to help me hold the shelves in place while I nailed them. I started by nailing the tabs of the shelves to the side trim and through the side trim into the side of the shelves. I then nailed through the shelves at an angle into the wall. For the lower shelves, I nailed the shelves from the underside. For the upper shelves, I nailed the shelves from the topside. The nails were not visible this way.

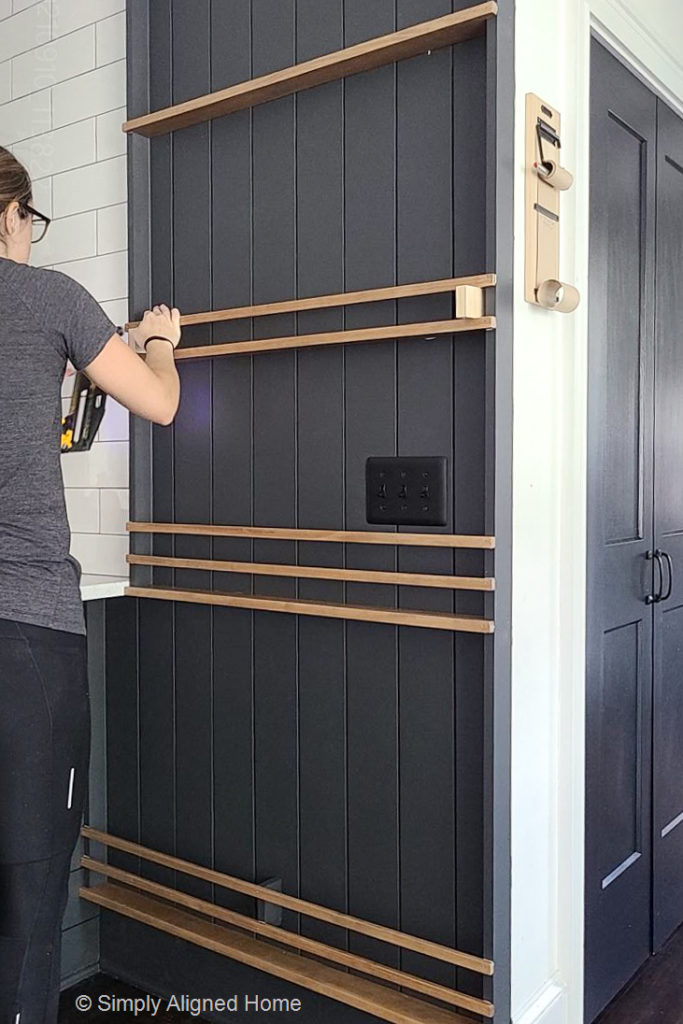
Make and Install Cross Bars
For the cross bars, I ripped a piece of 1×3 select pine into 3/8″ wide strips. I cut them the full width from the outside of one trim piece to the outside of the other. I made two cross bars per shelf.
Once the cross bars were cut, I sanded them using 220 grit. Like the shelves, I stained them with a water based stain in Early American and finished them off with three coats of a water based poly.
To install the cross bars, I put a small dab of glue where it would hit the side trim and nailed it to the trim. I used spacers to evenly space the cross bars 2″ from the shelves and each other.
Fill and Enjoy!
Don’t tell anyone, but I actually had to go buy cutting boards to fill my shiplap plate rack.. I also added a few serving platters, cook books and serving spoons.
To say I love this shiplap plate rack would be an understatement! I took a boring, unused wall and made it amazing!! I cannot help but smile when I walk into my kitchen and see this wall now!

If you love this project, be sure to check out some of my other DIY projects!

**Note: I am not a professional and do not claim to be an expert. Please be sure to always read instructions for all tools and products. Safety is very important and should be your top priority. Wear necessary protection when using tools (eye wear, hearing protection, gloves, etc.) and dust masks when sanding or cutting. Simply Aligned Home is not responsible for any injury or damage. All of my designs are not professionally designed and are for private use only.**

I was looking for built ins ideas for my spice rack and planed to paint it Iron Ore which is my signature color in my house. My island, stairs, front door…. What a coincidence!! Love the shelf!