
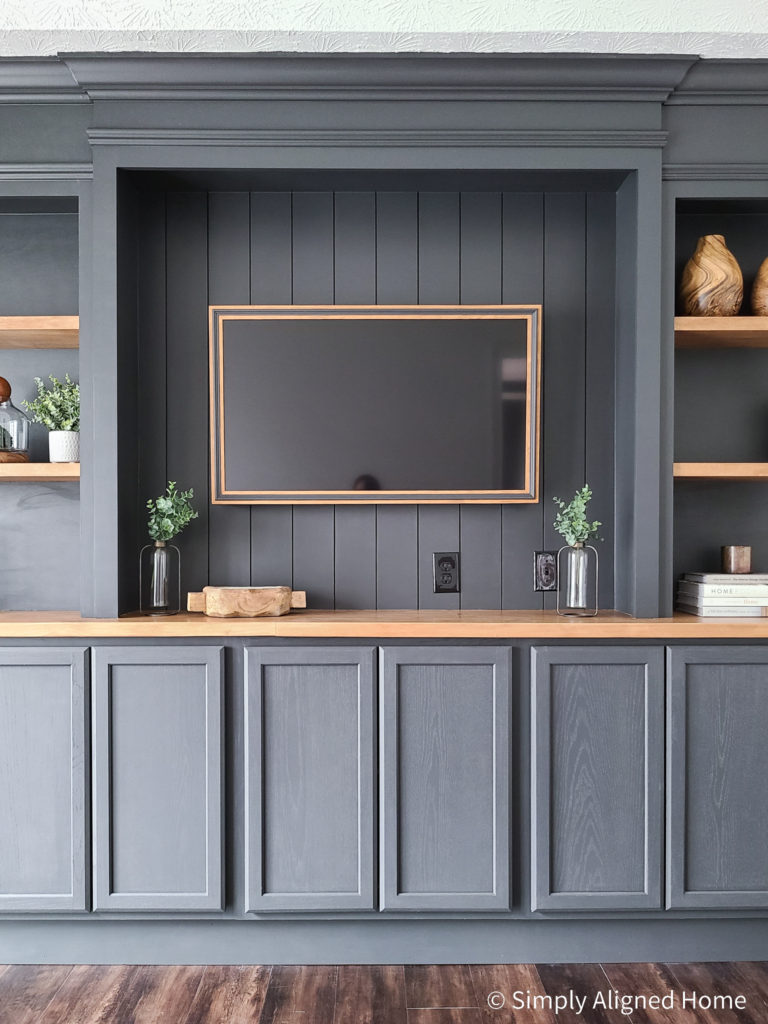
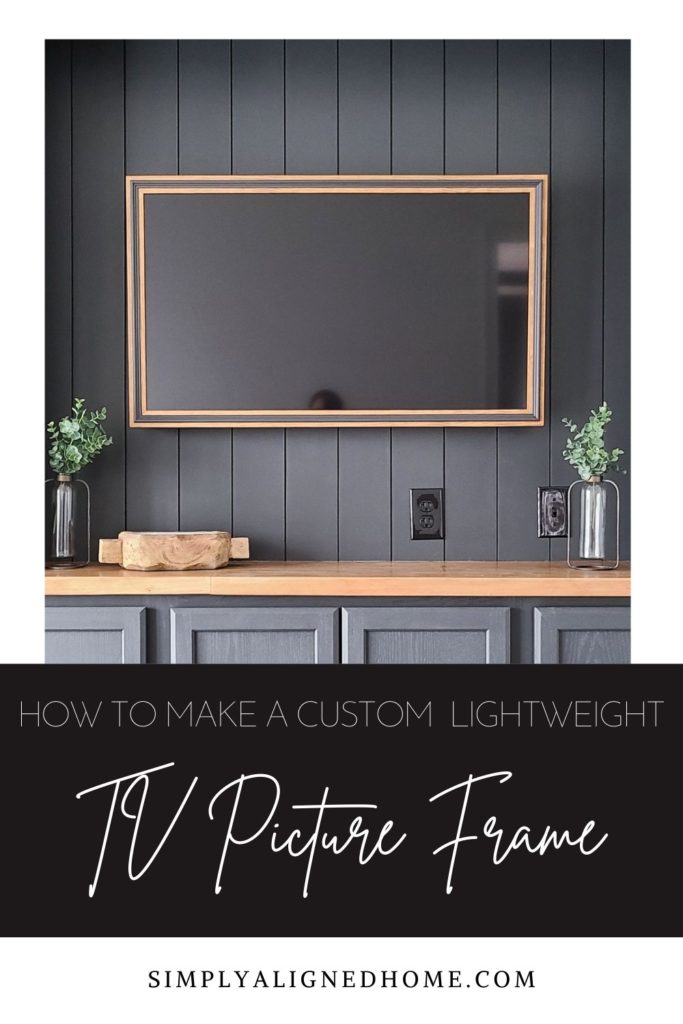
Don’t you just love the look of picture frame TVs?! I certainly do…but I don’t love the price tag.. Plus, I can’t justify replacing a TV that is in perfect working condition for one that looks better.
Cue the custom built frame for my existing TV!!

I have seen these before, but they all looked big and heavy. I wanted to build one that had a clean design and weighed next to nothing. Here’s how I made this sleek TV picture frame that is super lightweight!
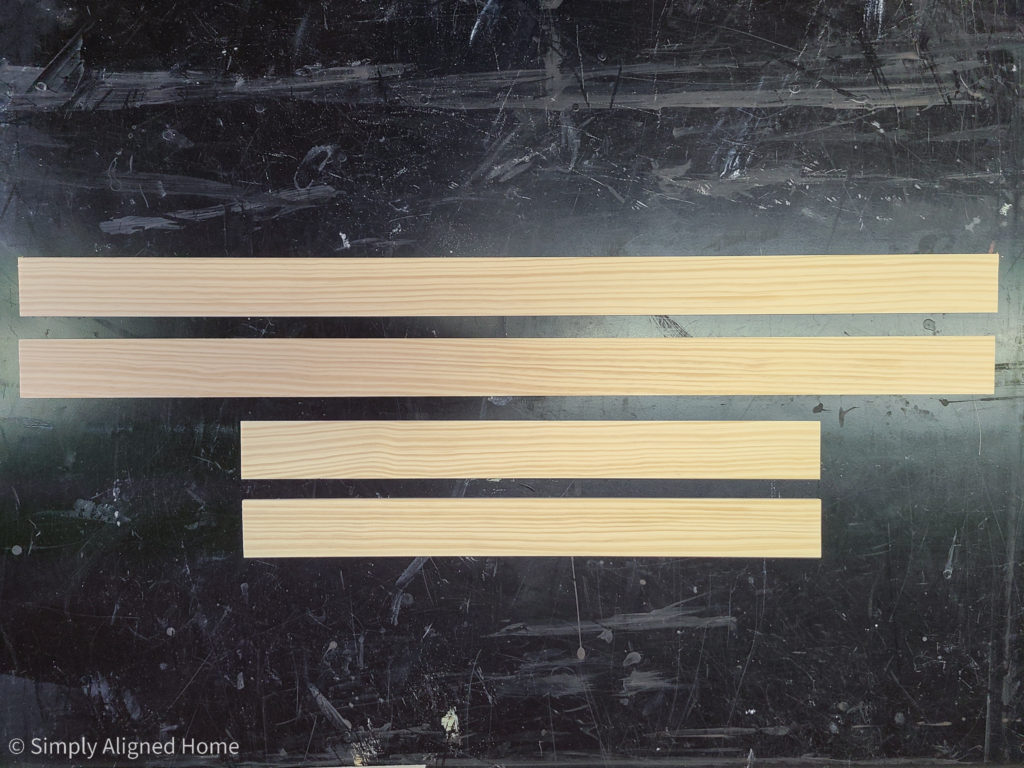
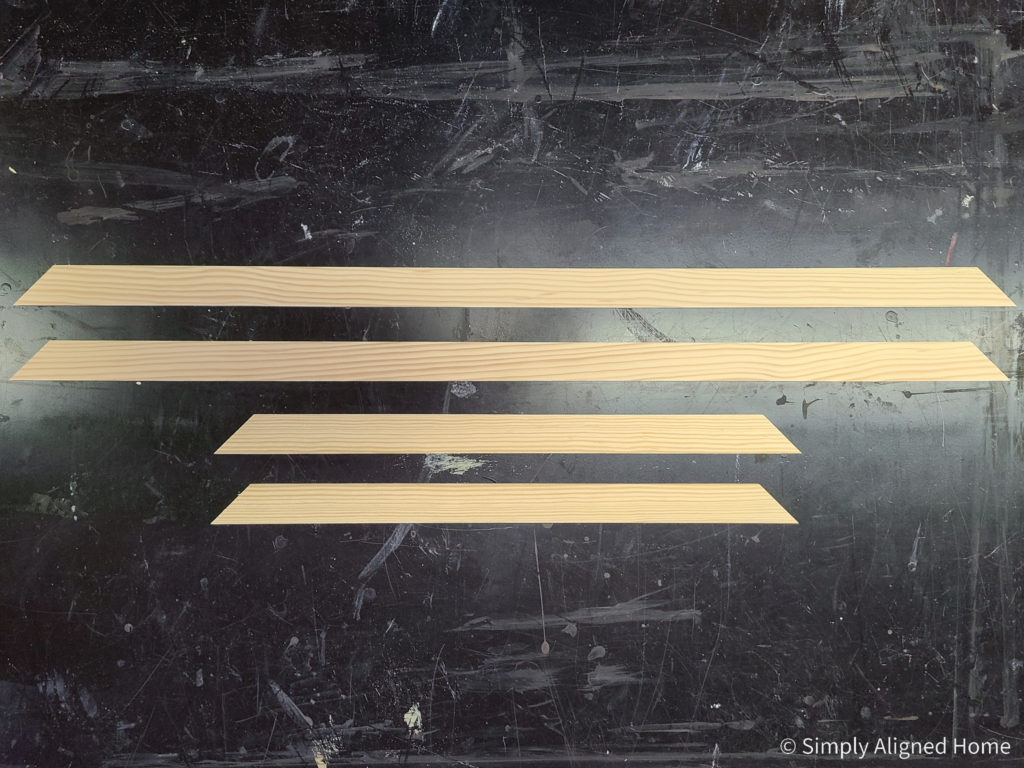
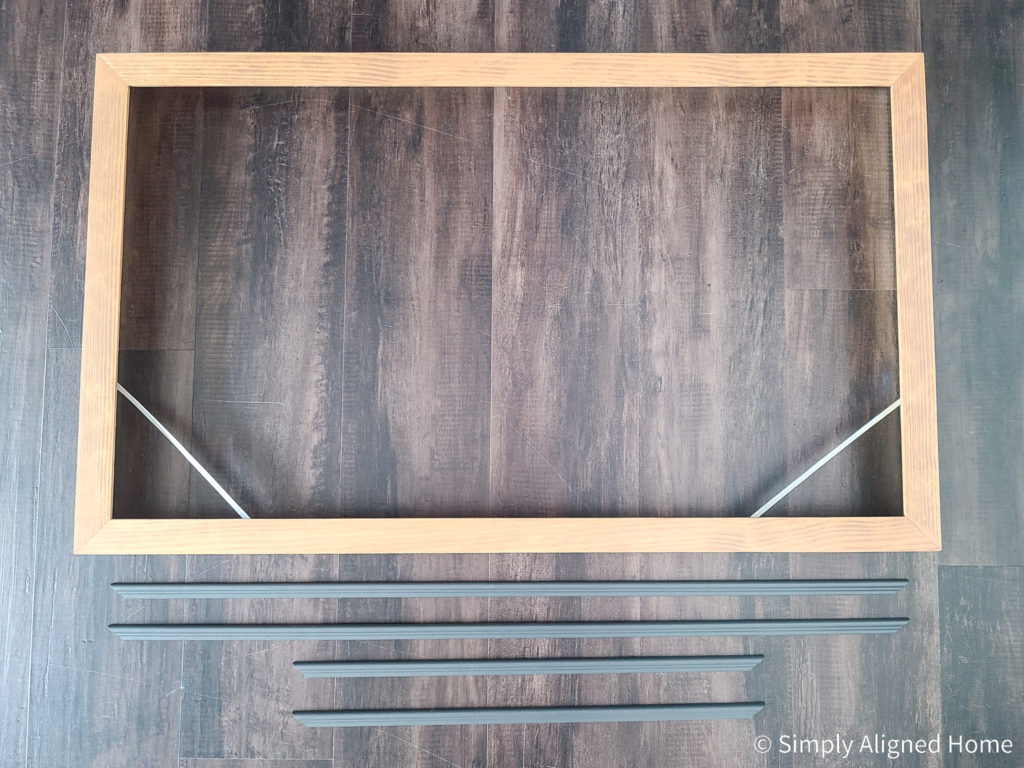
Make the Main Frame
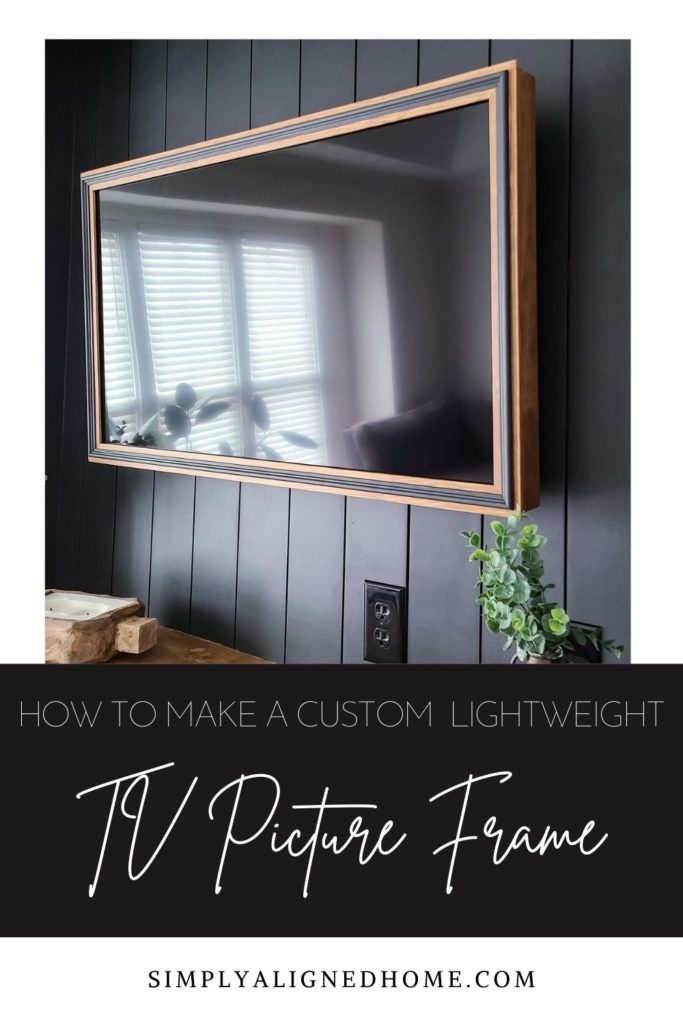
I started my making the main frame that would slide onto the TV. I wanted keep the frame lightweight, so I decided to use 2-1/2″ wood lattice moulding. The lattice moulding is roughly 1/4″ thick (nice and light) and still looks decent when it’s stained!
I cut two strips that were the width of the TV + 1/4″. This will allow me enough space to easily slide the frame on the TV.
I then cut two strips that were the height of the TV + 1/2″ + 1/4″. This accounts for the thickness of the top and bottom materials as well as the 1/4″ clearance. Hope that make sense..
**This post contains affiliate links to products that I recommend. If you purchase something through an affiliate link, I may receive a small percentage of the sale at no extra cost to you. I really appreciate your support.**
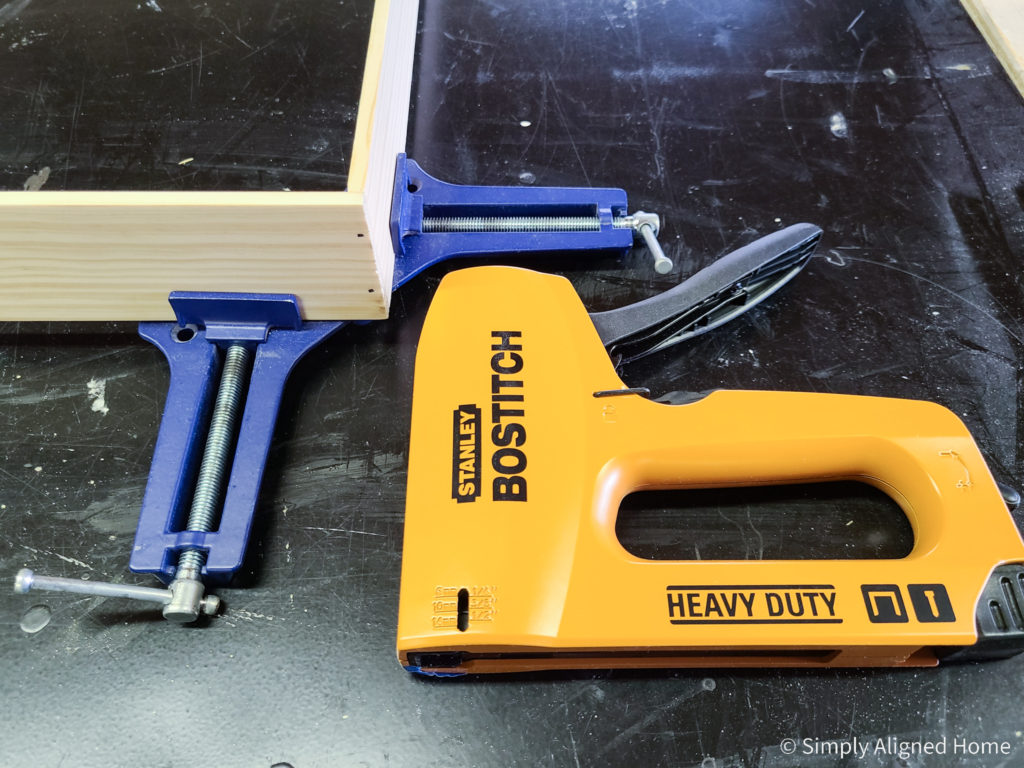
Using my handy corner clamps, I secured the side pieces to the top and bottom pieces with wood glue and 5/8″ brad nails. This little stapler is really handy!
Cut the Face Frame
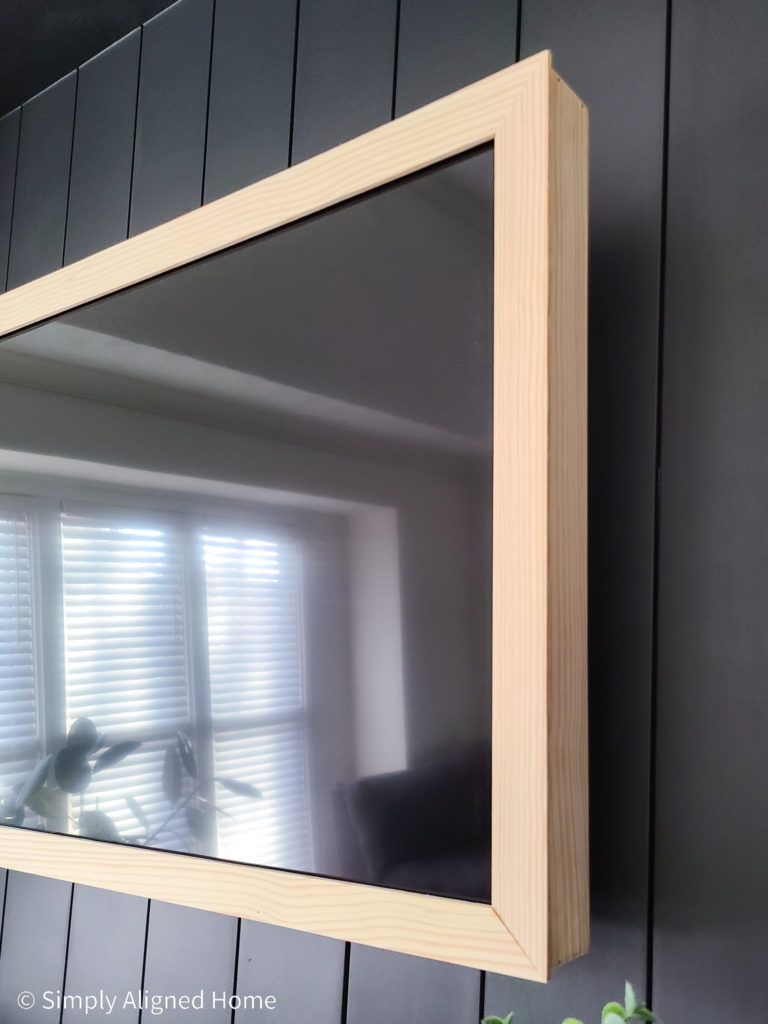
I decided to use 1-1/2″ wood lattice moulding for the face frame. The frame of my TV is roughly 1″ thick. I needed a piece of wood that I could attach to the main frame that would also cover the 1″ TV frame. If the frame on your TV is thicker than 1″, you may want to use 2-1/2″ wood lattice moulding for the face frame.
I mitered the corners for a nice clean finish. The inside dimensions for the face frame are the same as the inside dimensions of my TV frame.
Secure the Face Frame to the Main Frame
First, I used wood glue to assemble the face frame. I assembled it face down on a flat surface. I had a scrap piece of plywood that was the perfect flat surface!
I then applied a small bead of wood glue to the main frame and laid it down on the face frame, making sure it was centered. I used a few clamps to hold it all in place.
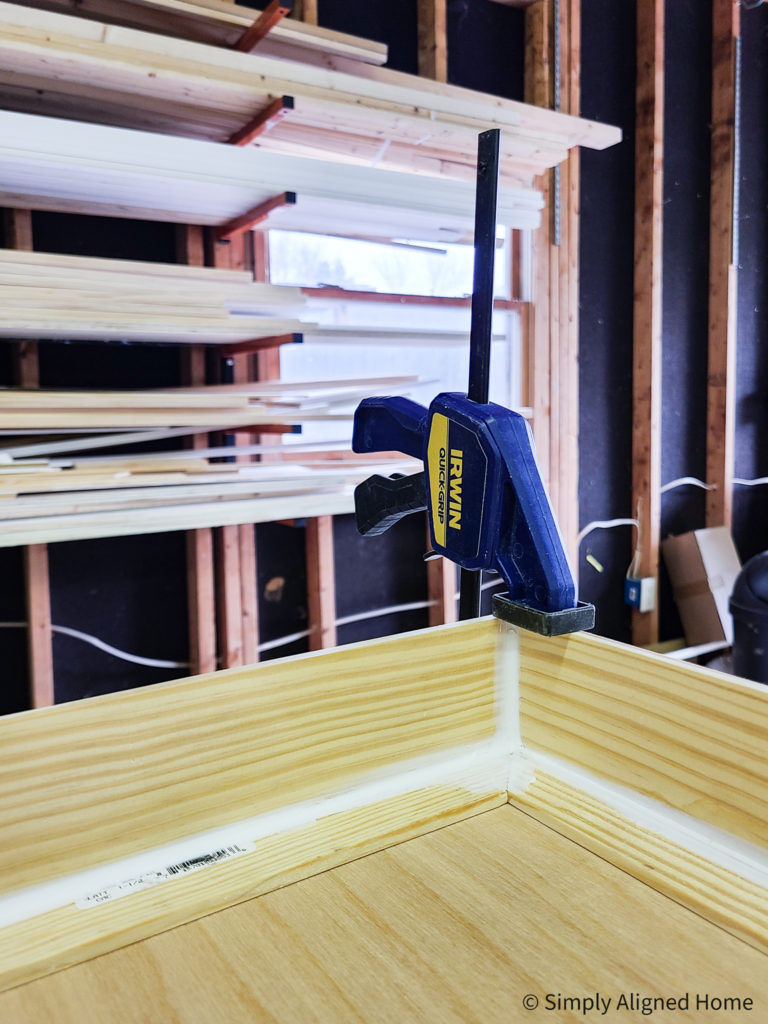
I was a little concerned that the wood glue wouldn’t hold it all together, so I applied construction adhesive around the inside of the frame.
Make Sure the Frame Fits on the TV
I am all for checking the fit of a build before the piece is complete! There’s nothing worse that going through all of the steps and making a pretty product, just to find out it doesn’t fit.
Now is a good time to test the fit of the frame and make adjustments as necessary. It should be able to easily slid on the TV while still covering the outer frame of the TV.
Add Anti-Slip Furniture Pads to Top of Frame
With the frame still on the TV, I was able to locate where the anti-slip pads needed to go. The pads are used to gently grip the top of the TV and keep the frame from skipping off.
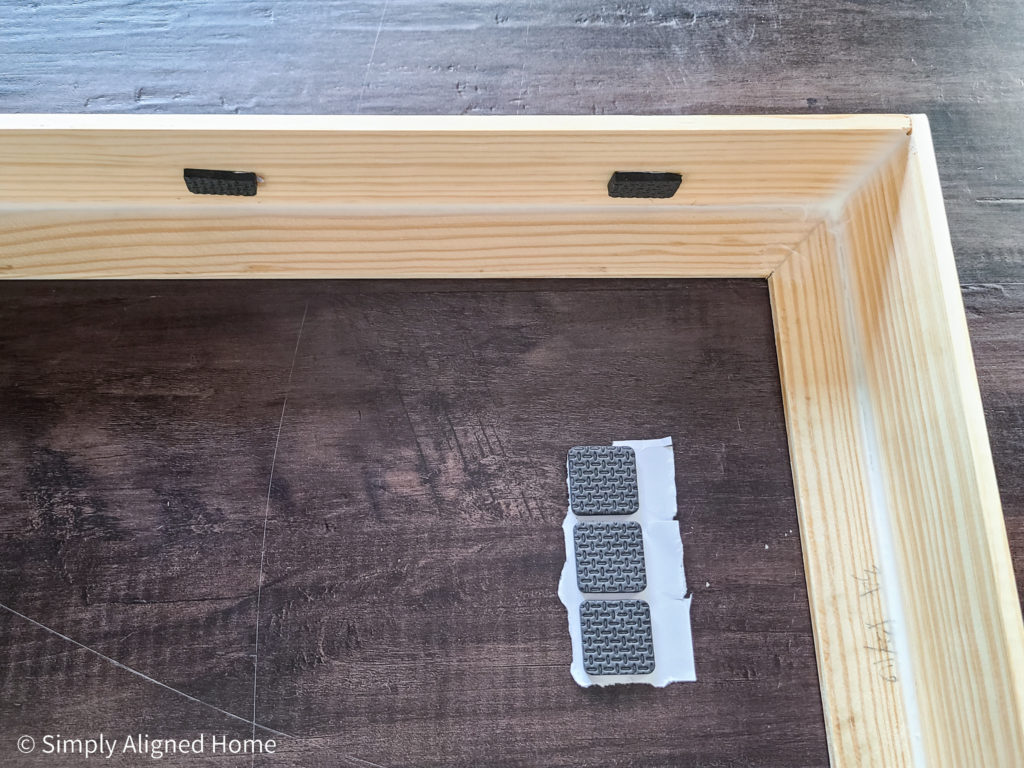
I cut a few pads in half and placed them in a line across the top piece of the main frame.
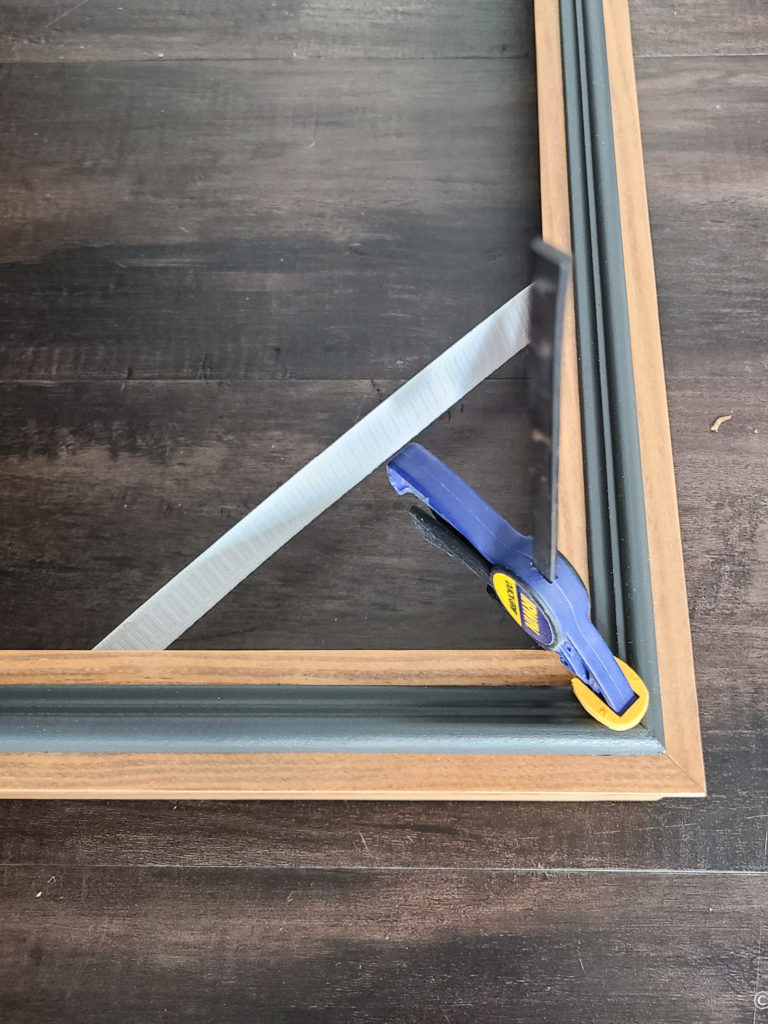
Attach Elastic to the Main Frame
In an attempt to keep the frame lightweight and easily removable, I decided to use elastic straps to keep it secured to the TV. I cut two elastic straps at a random length and super glued each end to the main frame.
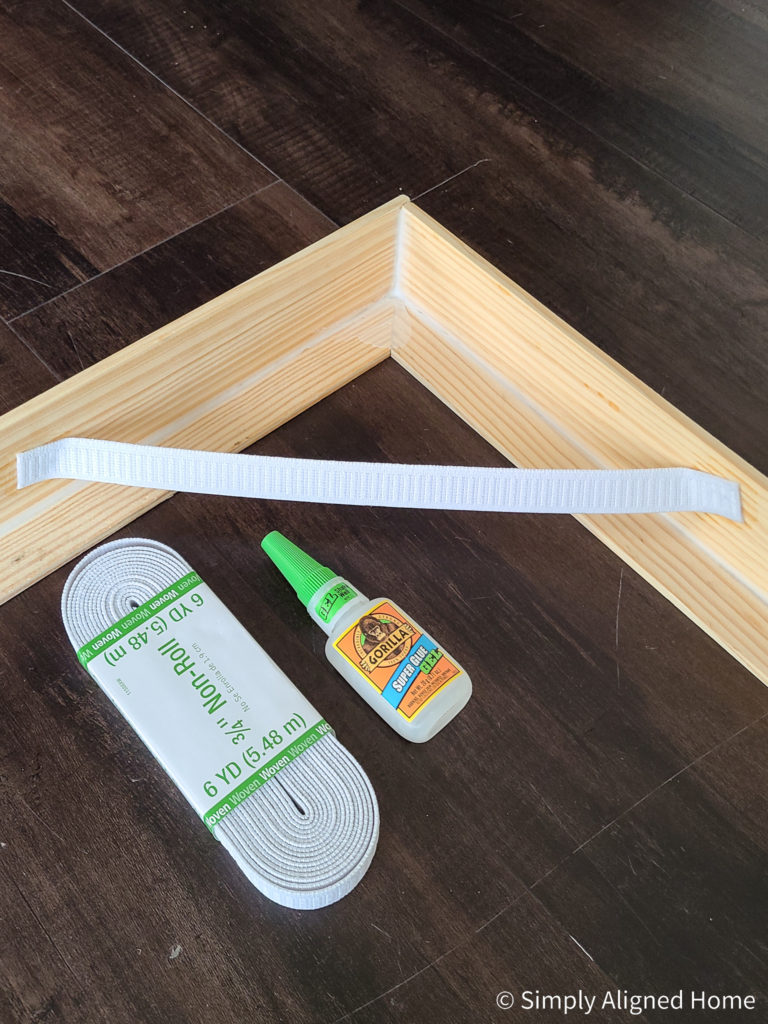
I used a gel super glue for this step. It’s really important to put pressure on the elastic strap once the glue is applied and to let the glue fully dry before pulling on the strap.
Once it was dry, I tested the frame one more time! I found it easiest to slide the frame up onto the bottom of the tv and then push the top of the frame into place. The elastic straps held the frame on really well!!
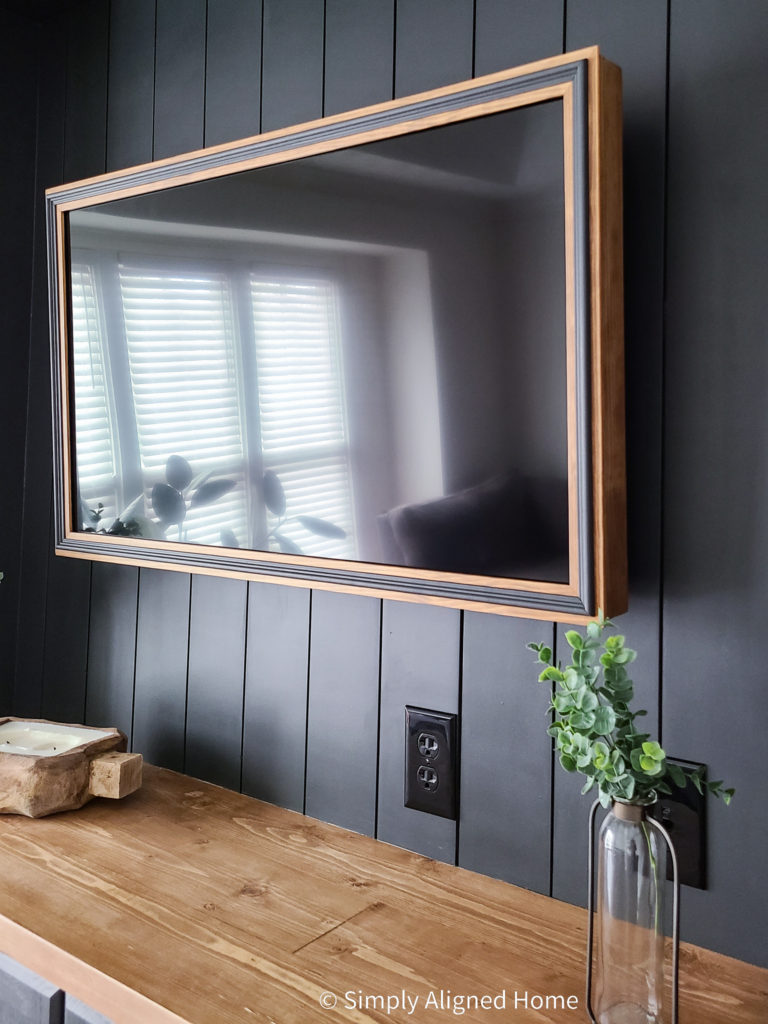
Stain and Seal the Frame
I wanted the TV picture frame to match the built-in unit that I recently installed. I thought that stained wood would be the perfect contrast against the dark paint.
I applied one coat of a water based stain in Early American. I finished it off with two coats of a water based polyurethane with a light sanding between coats.
Cut and Paint Decorative Trim
The stained wood frame was a little too plain for me…I wanted to add a little more character! I decided to add a strip of decorative trim to the center of the face frame.
I mitered the corners of the trim and painted them using my new favorite paint color…Sherwin-Williams Iron Ore!
Add Decorative Trim to the Frame
The final piece of the TV picture frame was to attach the decorative trim! I did this using Titebond’s Quick & Thick Multi-Surface Glue. I held it all in place with clamps until the glue dried.
Connect and Mount IR Extender
The TV picture frame will block the remote receiver. You can cut a hole in your picture frame for the receiver, or you can buy an IR extender. I opted for the IR extender. The extender plugs into the TV and can be mounted either on the underside of the picture frame or on the wall.
Hang the Picture Frame on the TV
There you have it…the perfect lightweight custom TV picture frame! It looks just as nice (if not nicer) than those fancy new picture frame TVs!
Here’s a little before and after of the TV in the custom built-in unit.
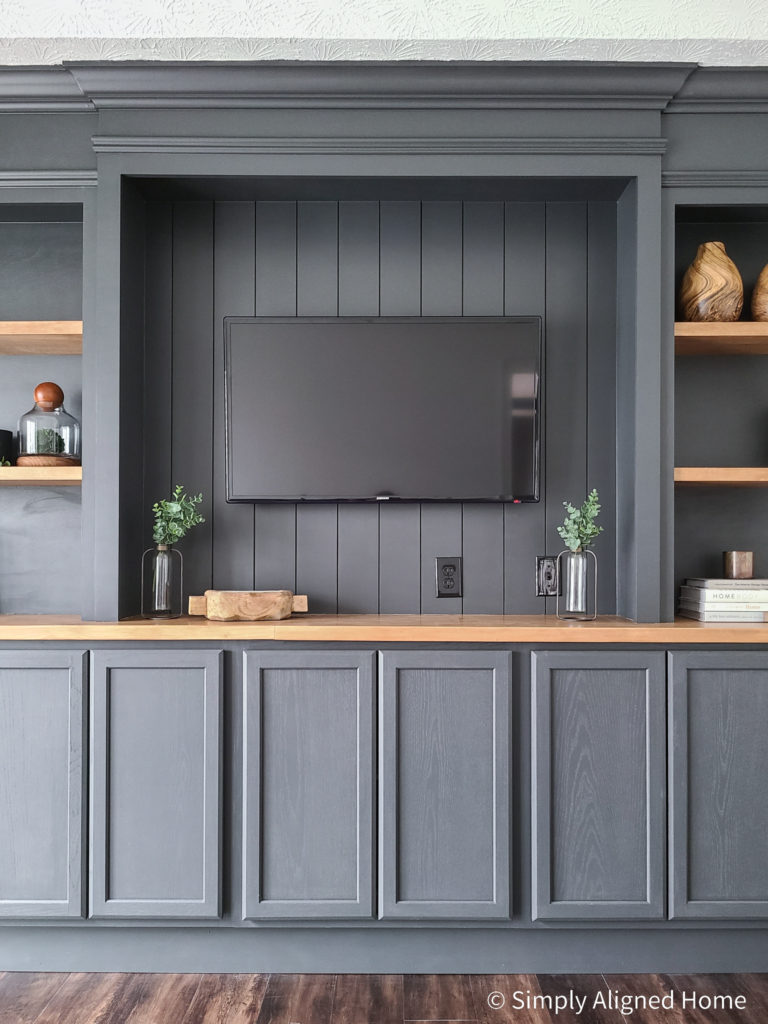
The TV picture frame was the perfect finishing touch! Excuse me while I go make one of these for every one of our TVs now..

So awesome to follow your blog after watching you grow from infancy to adult! So proud of all you have accomplished in your life so far and really look forward to following your blog as I also have a passion for home renovations!
Love you ❤️