
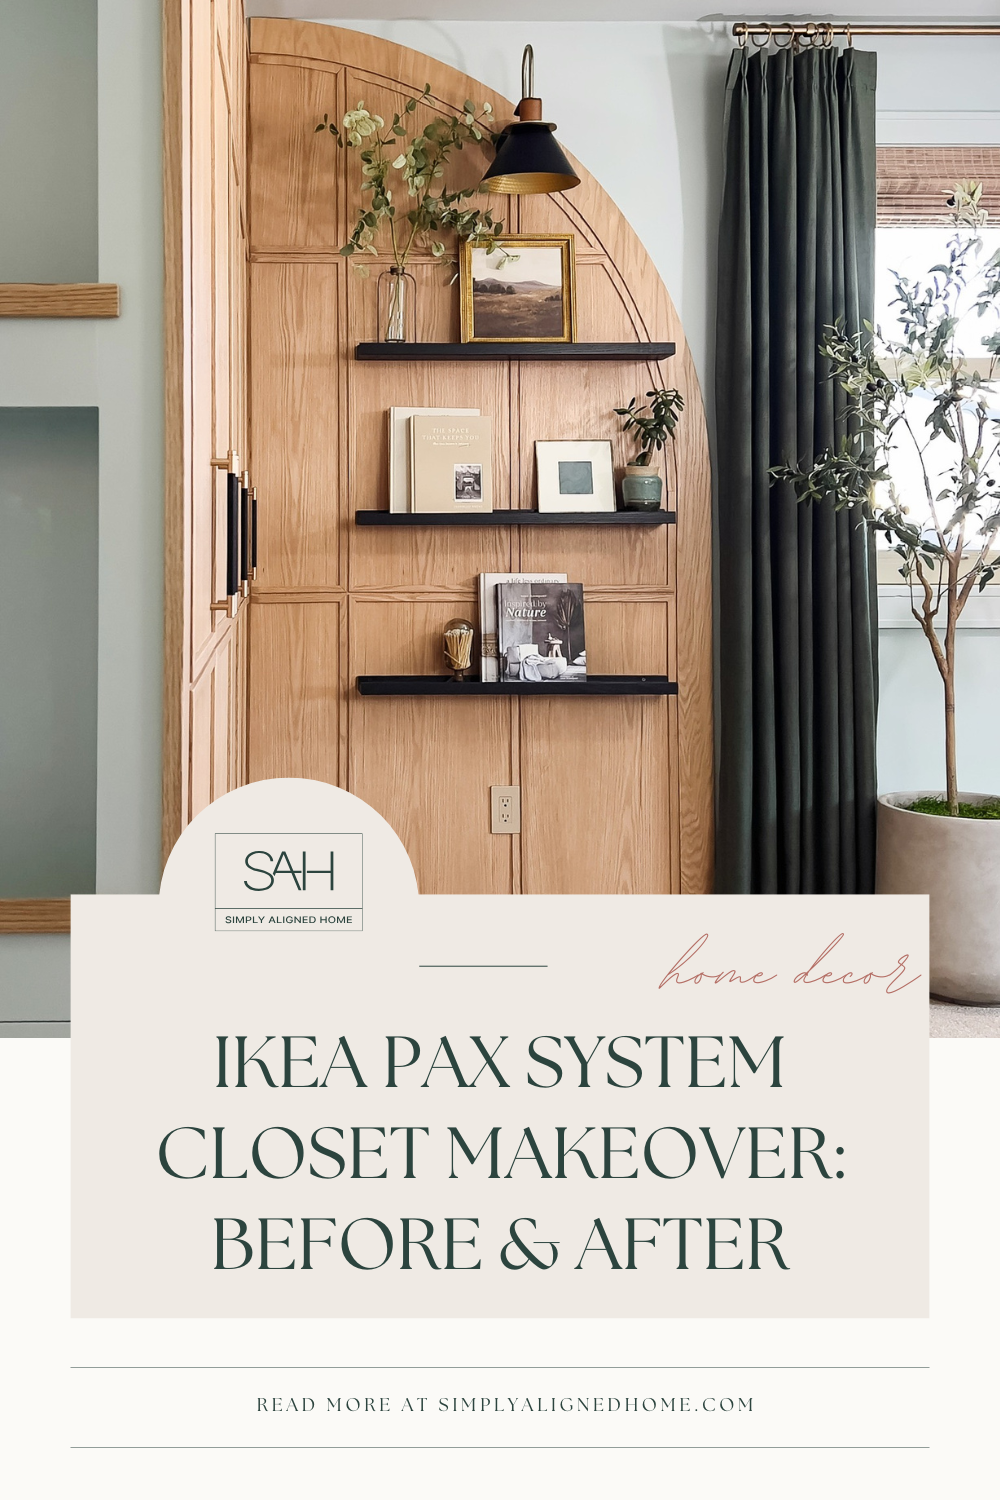
I just finished building my son a lofted queen bed and an adjustable book shelf for his room. Now, I’m giving his closet a full makeover! Does anyone else have that weird hidden space on either side of their closets? Those spaces are great for hide and seek, but not for closets. So, let’s get rid of it! For this makeover, I used the Ikea PAX closet system.
**This post contains affiliate links to products that I used or recommend. If you purchase something through an affiliate link, I may receive a small percentage of the sale at no extra cost to you. I really appreciate your support!**
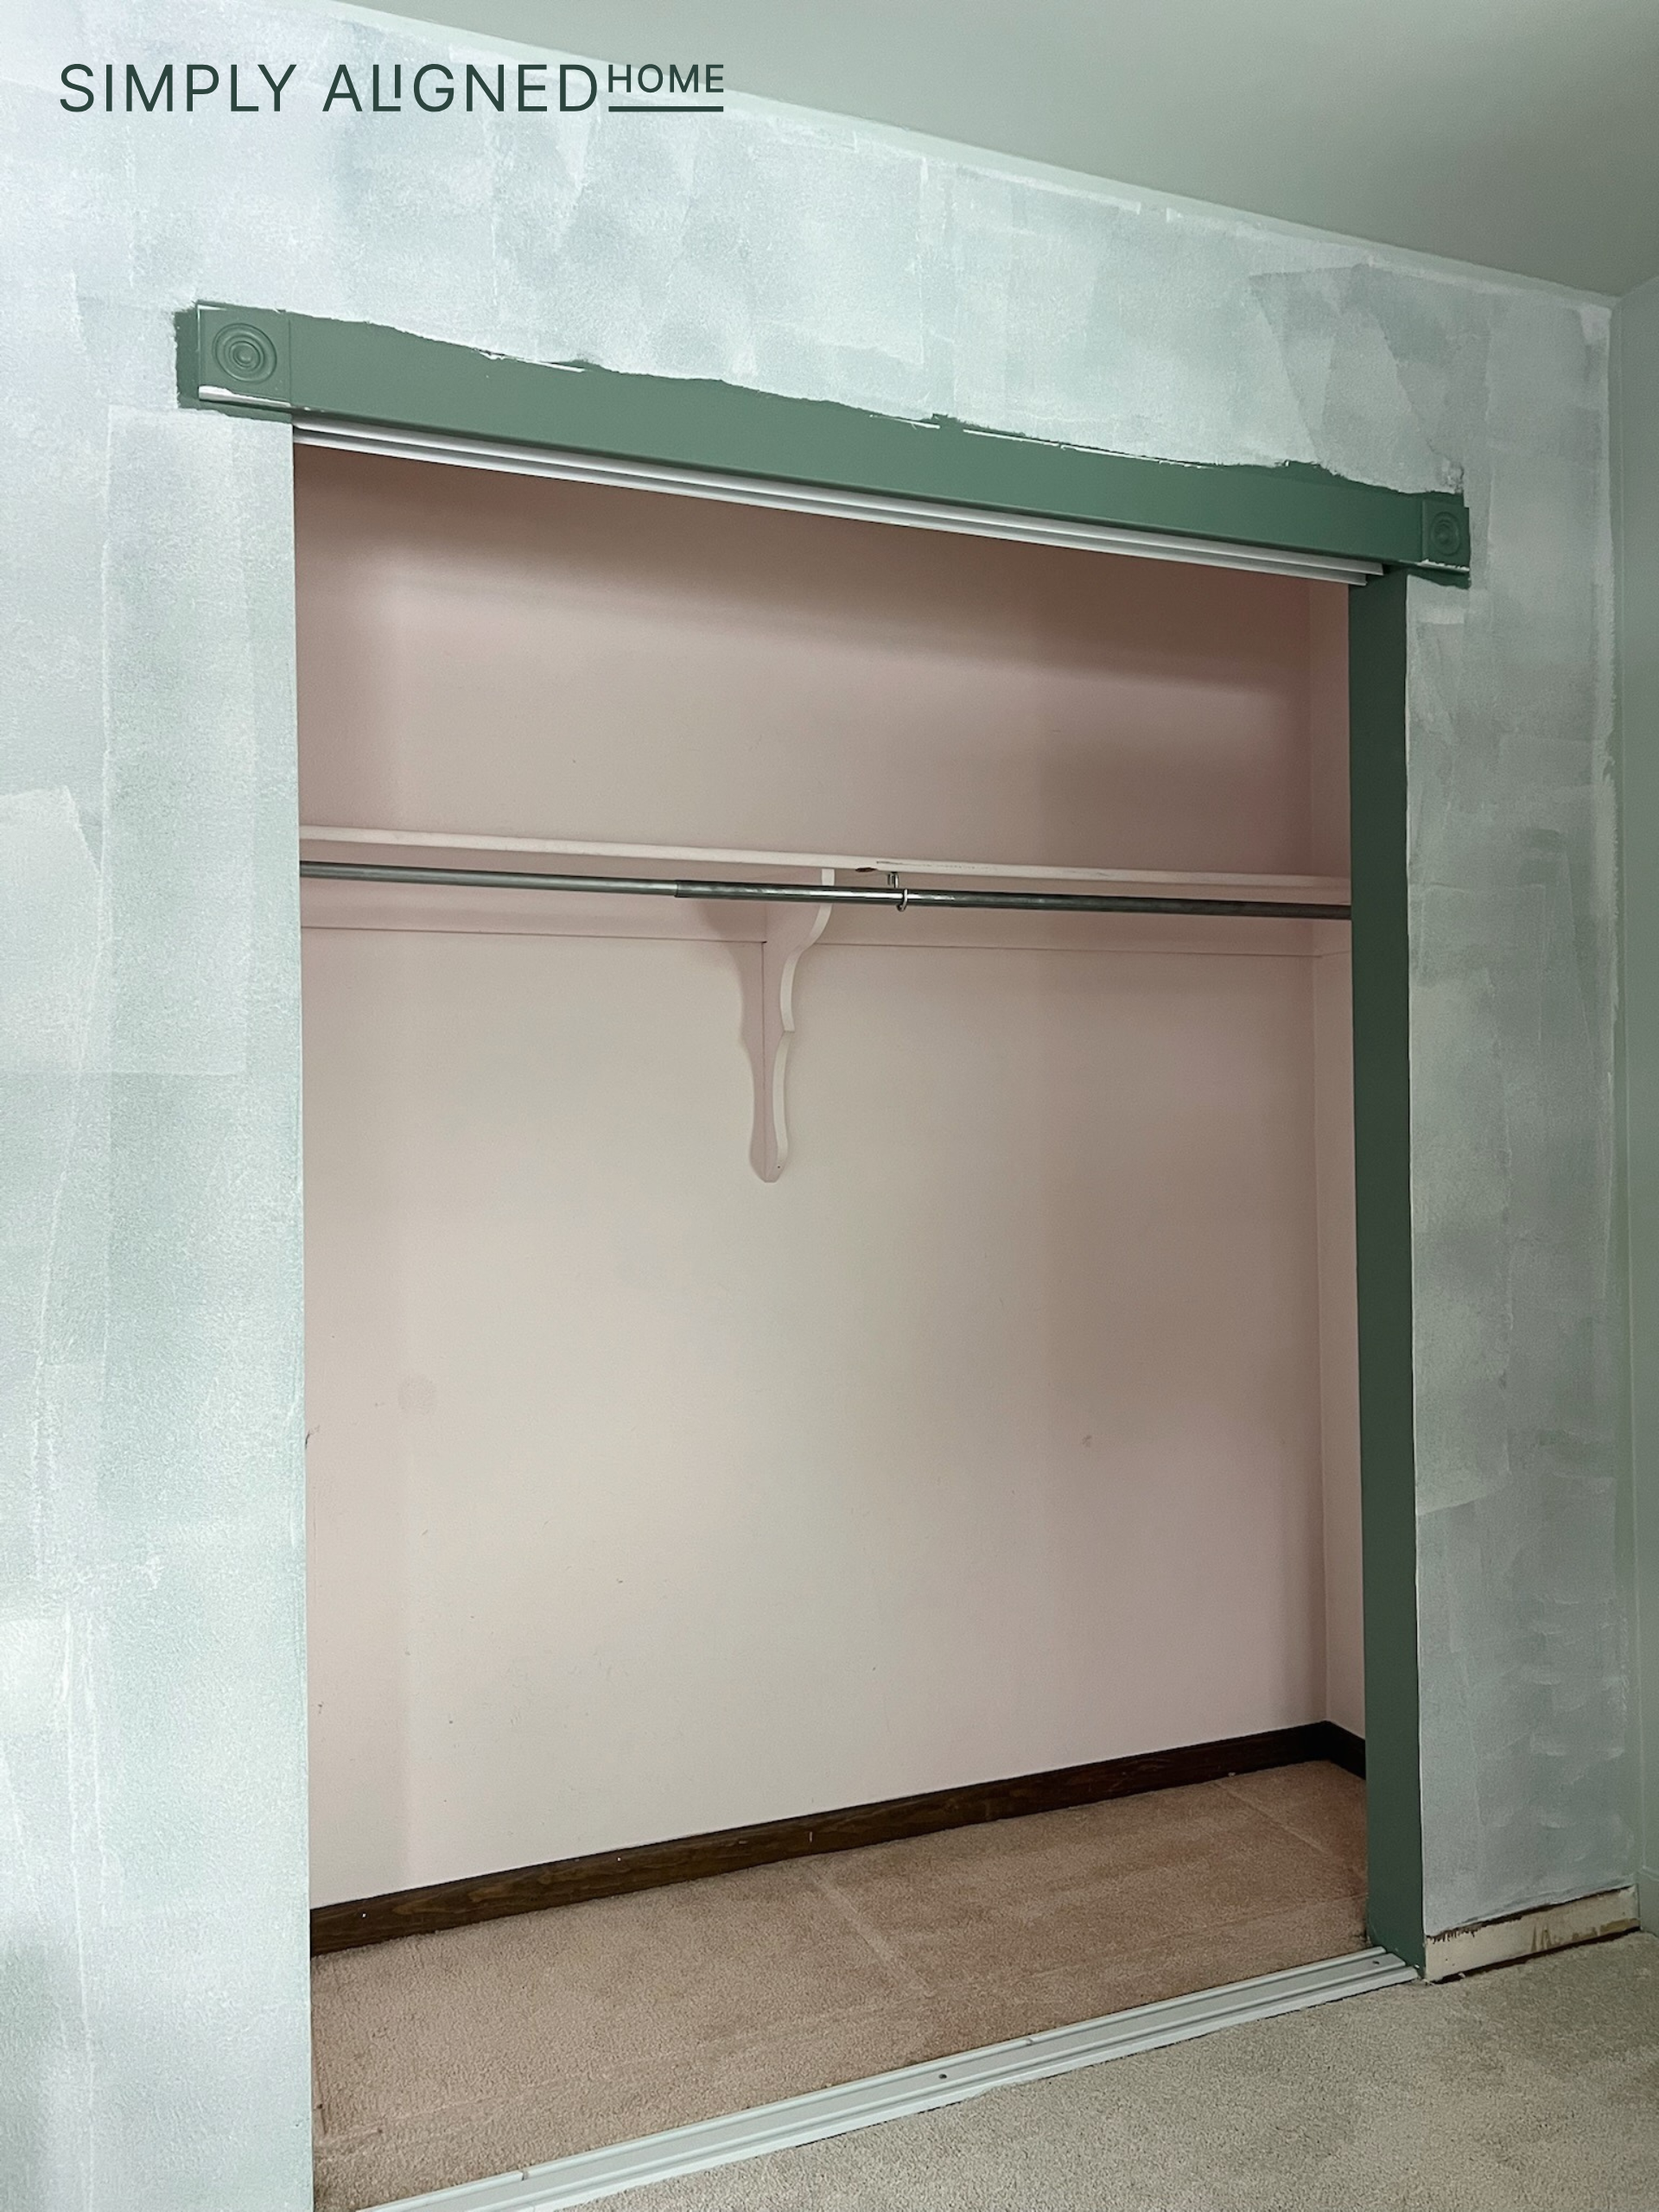
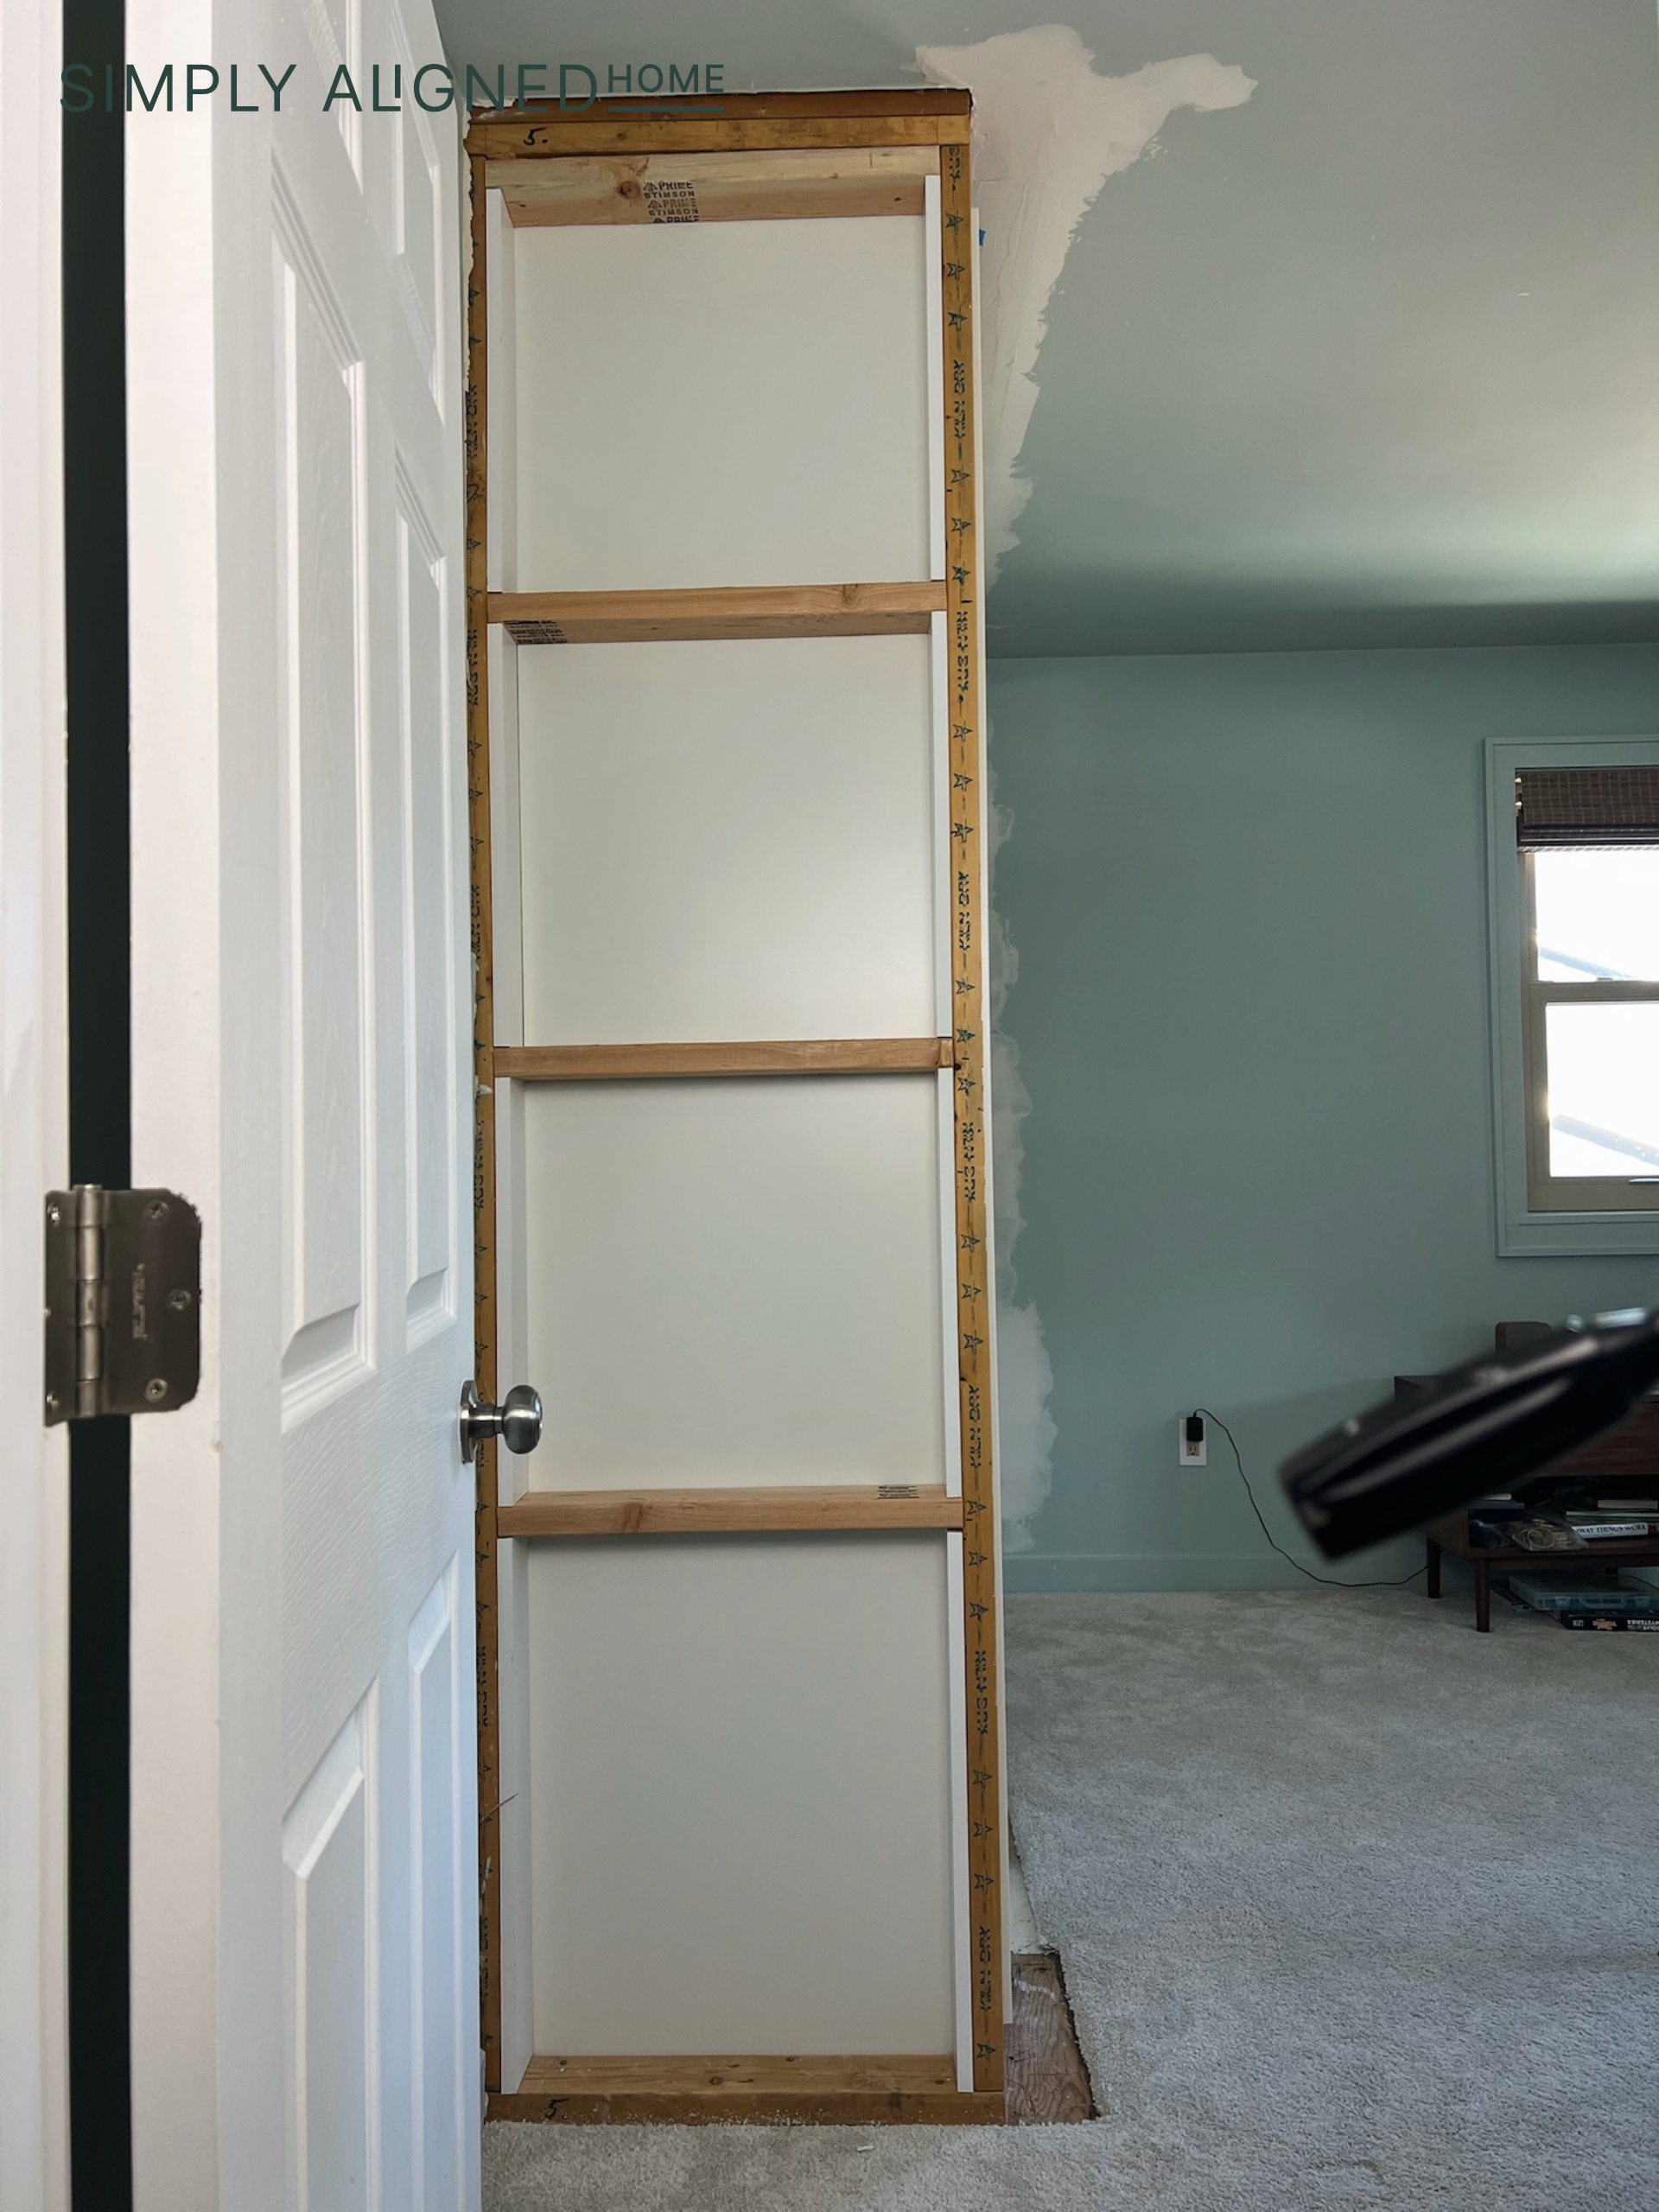
Here’s what his closet looked like originally before I got my hands on it and after I primed it.

To make this a little easier on myself, I decided to use the IKEA PAX system rather than completely build my son’s new closet from scratch (which I would usually do 😉). But, instead of installing them as is, I decided to add my own flare to it. Let’s do it!
Demo
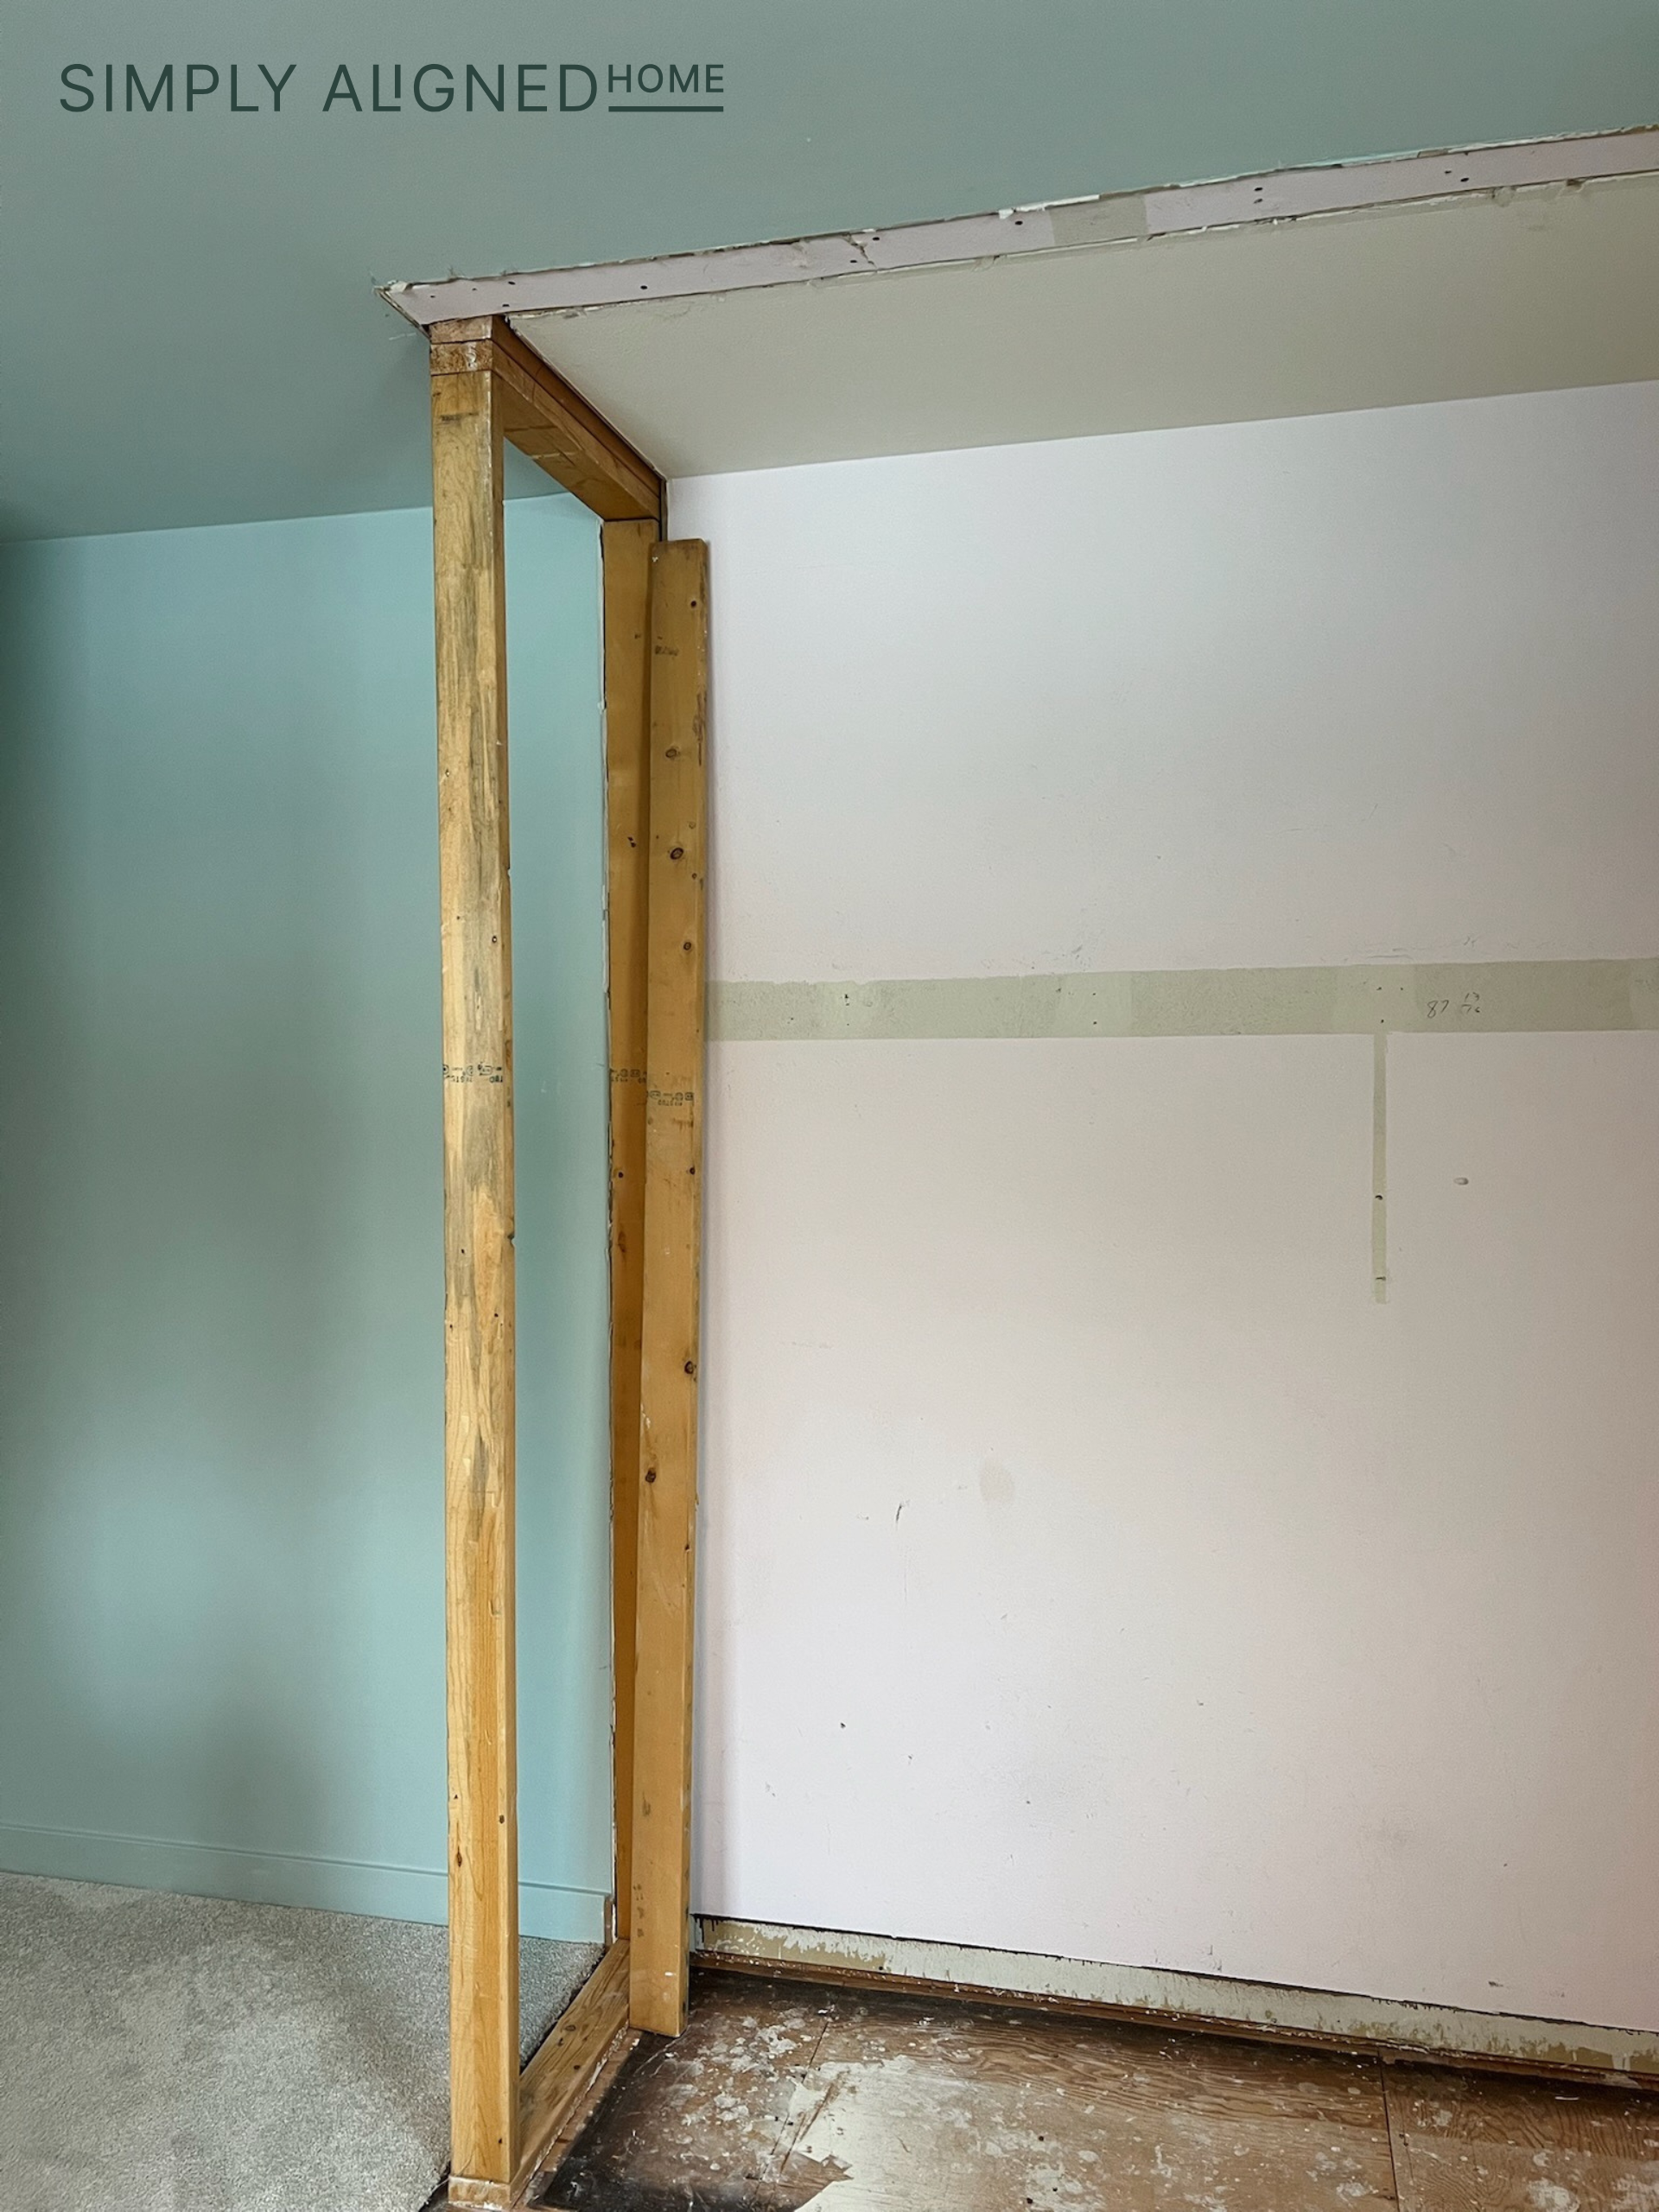
Demo is messy, but so fun! I used a mallet, a hammer, and my trim puller to remove the drywall surrounding this frame. I planned to take the PAX units to the ceiling, so I removed the framing as well. To cut the nails, I used my reciprocating saw.
Next, I removed the carpet in the closet space. To remove carpet, start by removing the trim. Then, pull up the carpet and rug pad. After that, carefully remove the tack strips and pull up all 1,000 staples from the floor (or however many you have 😉).
I ran into a dilemma. The closet space was 6″ deeper than the Ikea Pax units. I’ve always hated that you walk into this room and just see a wall. Would it be worth it to get an extra 6″ of space to make it feel a bit bigger when you walk in the room? The problem was the carpet. I didn’t have more of the carpet and I had no idea where it was from. I’d figure this problem out later, after I installed the units.
Pax Assembly and Installation
I needed to space the boxes off of the wall to be flush with that half wall. I used some of the 2×4’s I removed earlier and secured them to the wall with a level and a brad nailer. I placed the top 2×4 just slightly higher than the PAX units so that I could secure the units to the 2×4.
I assembled the first unit in place. The first one took forever, but the others went so much quicker once I got the hang of it! For this system, you assemble them in place and you need some flexibility to get the top piece in after it’s in place. However, I didn’t have any flexibility so I had to assemble the next one outside of its place and then install it.
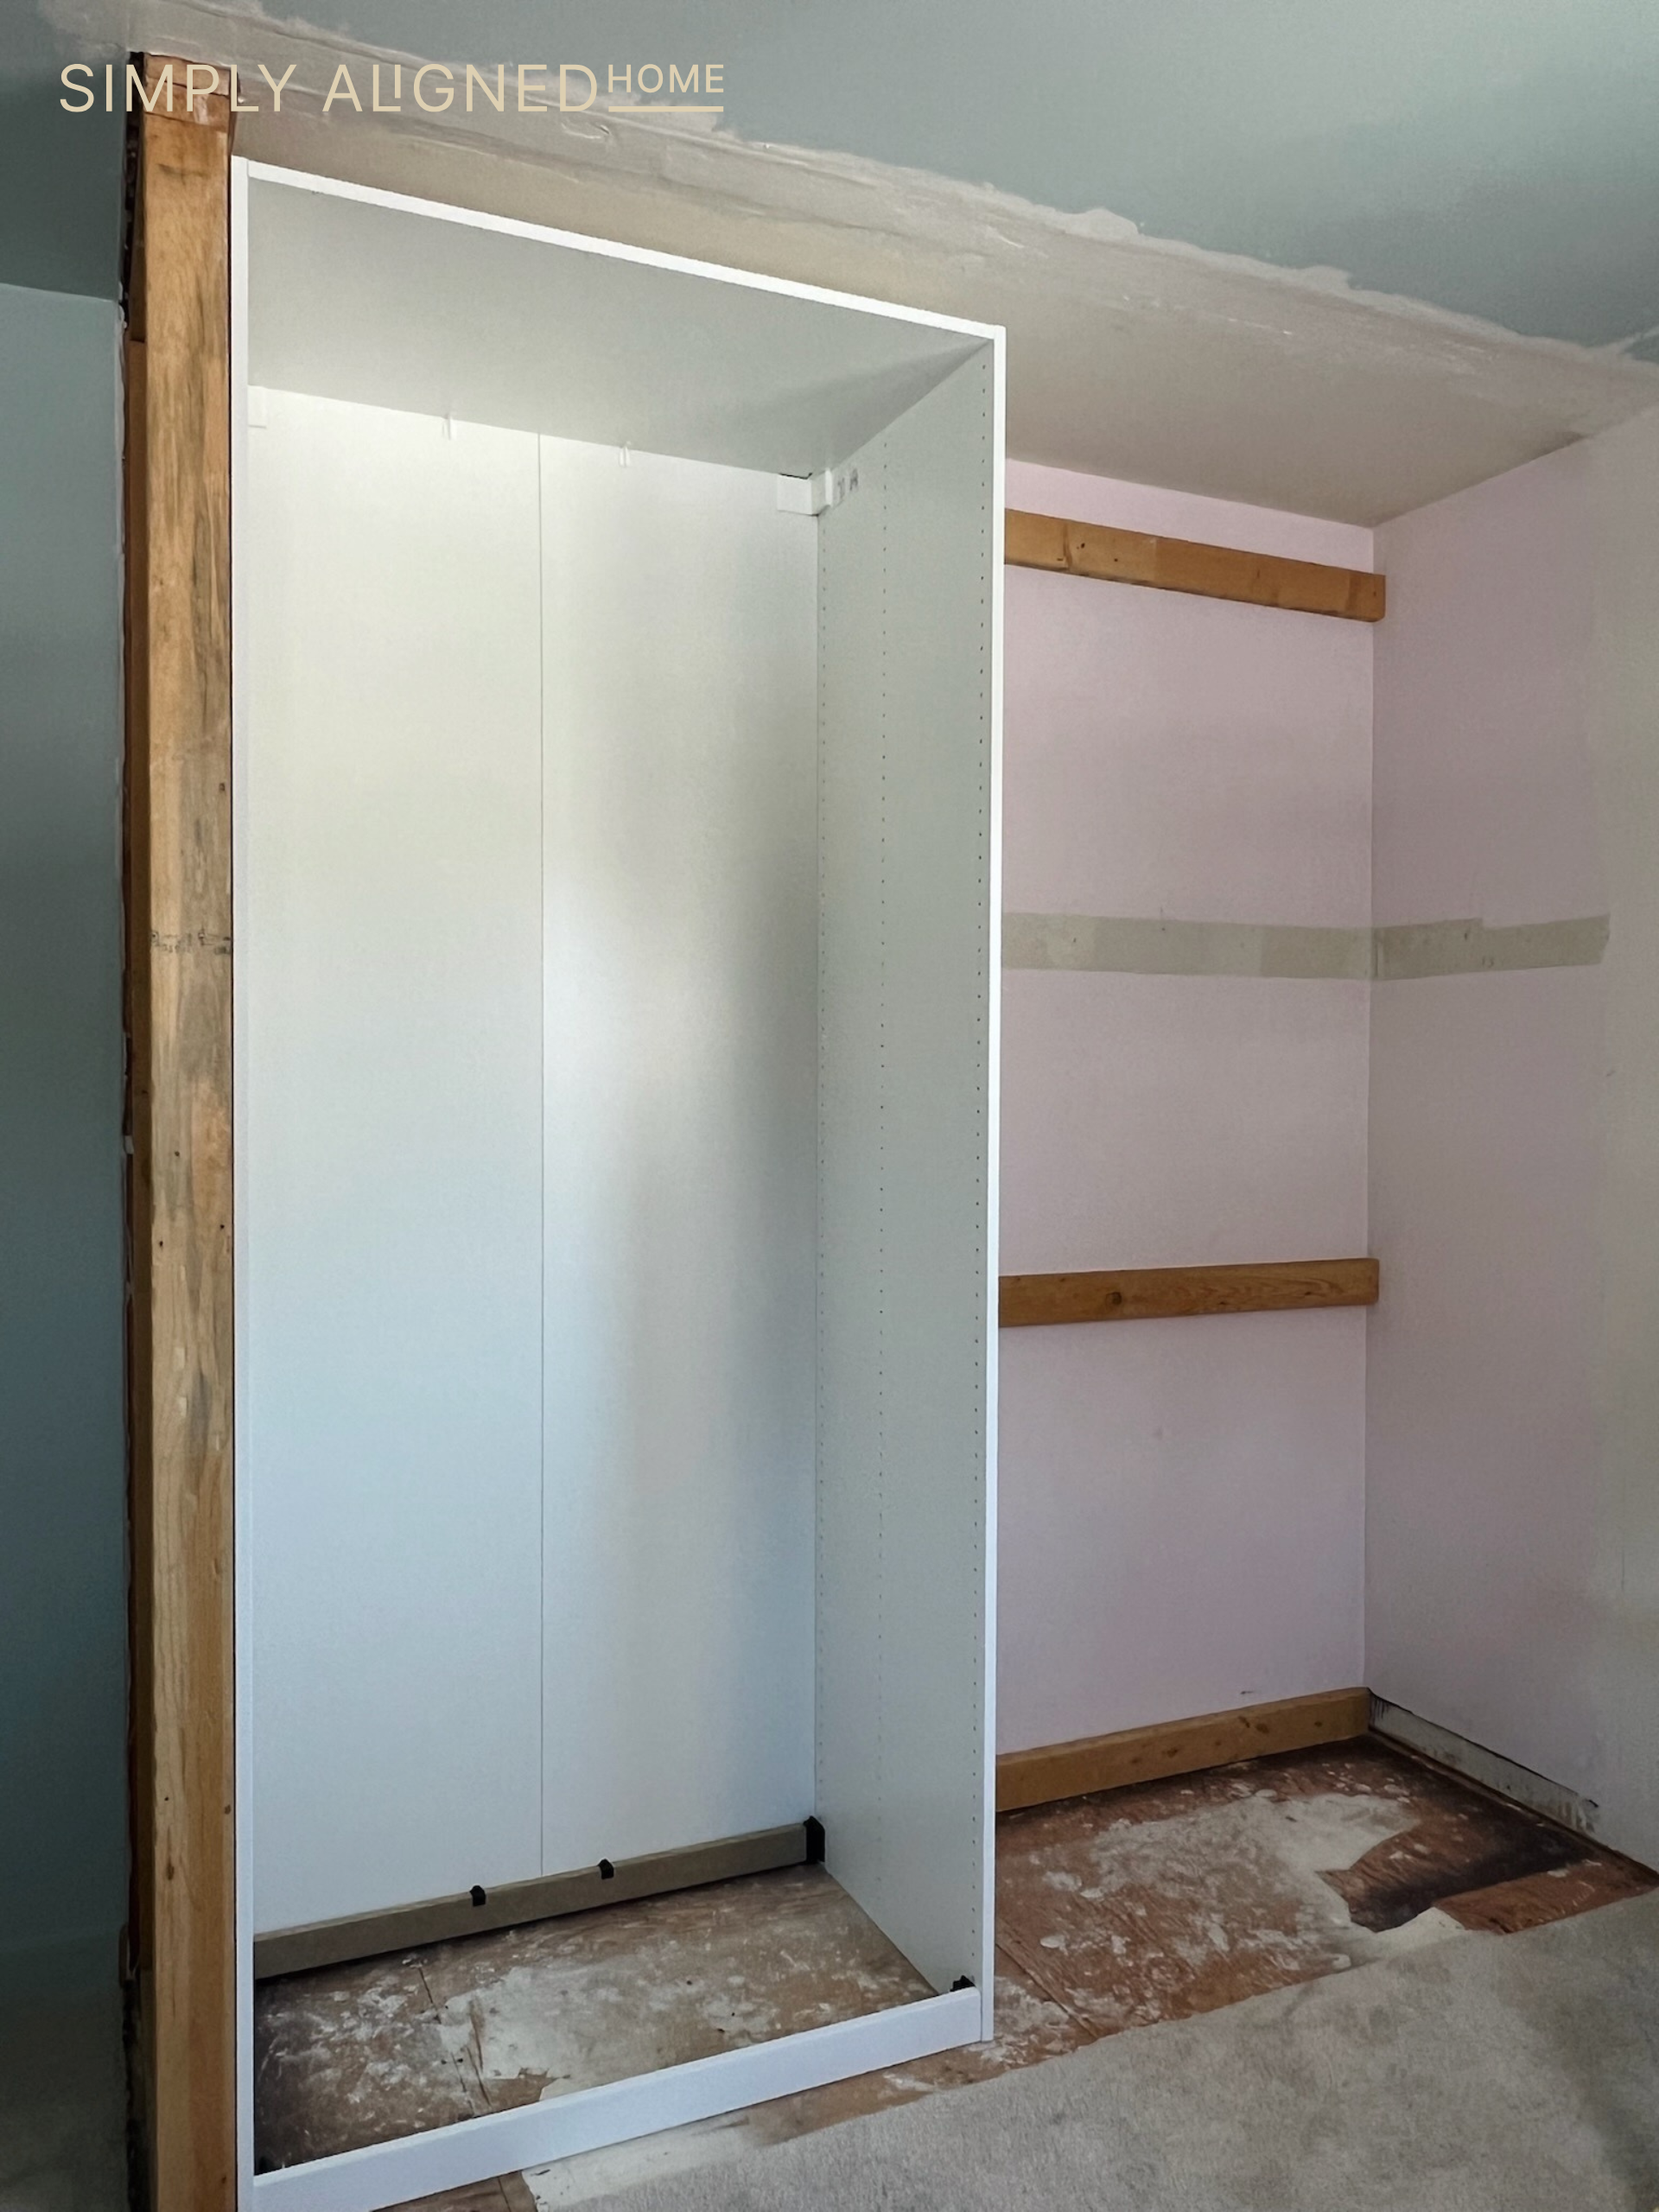
My only complaint about the new PAX units is that you have to secure them to the wall before they are fully assembled. Other than that, they are still the same quality! I had to fight with this center unit for about 10 minutes before I got it to fit. But, I got it to fit!
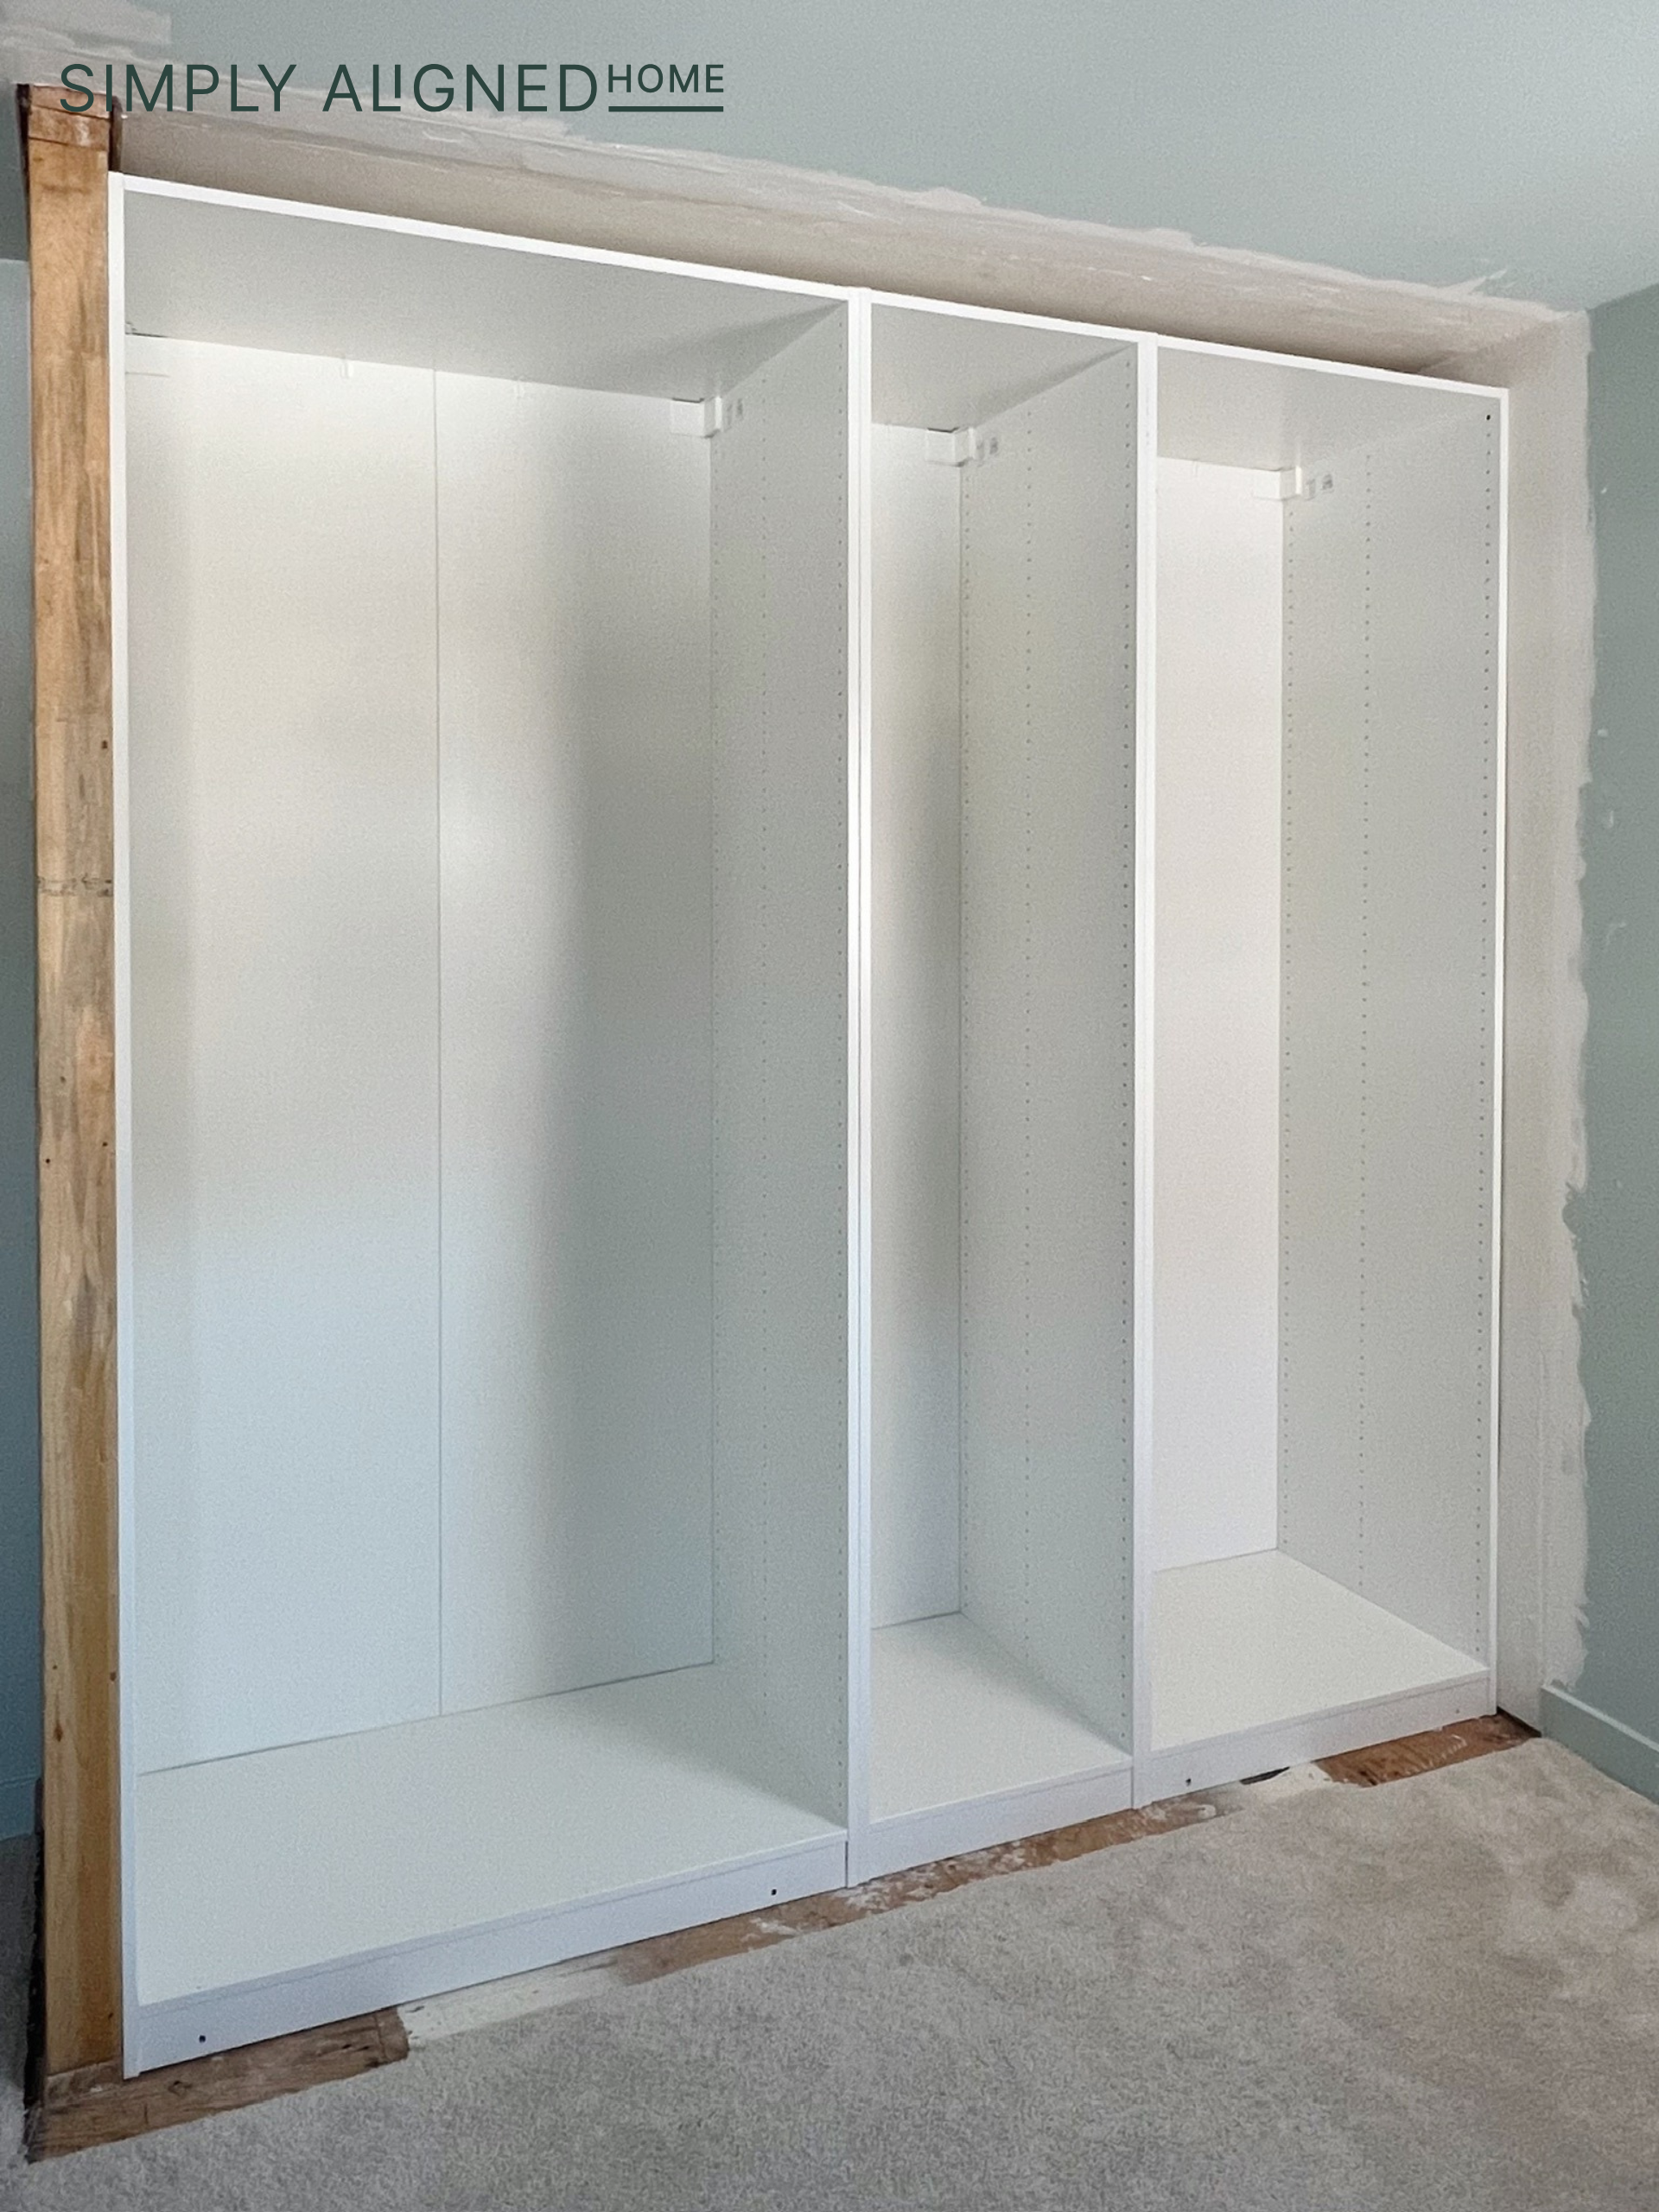
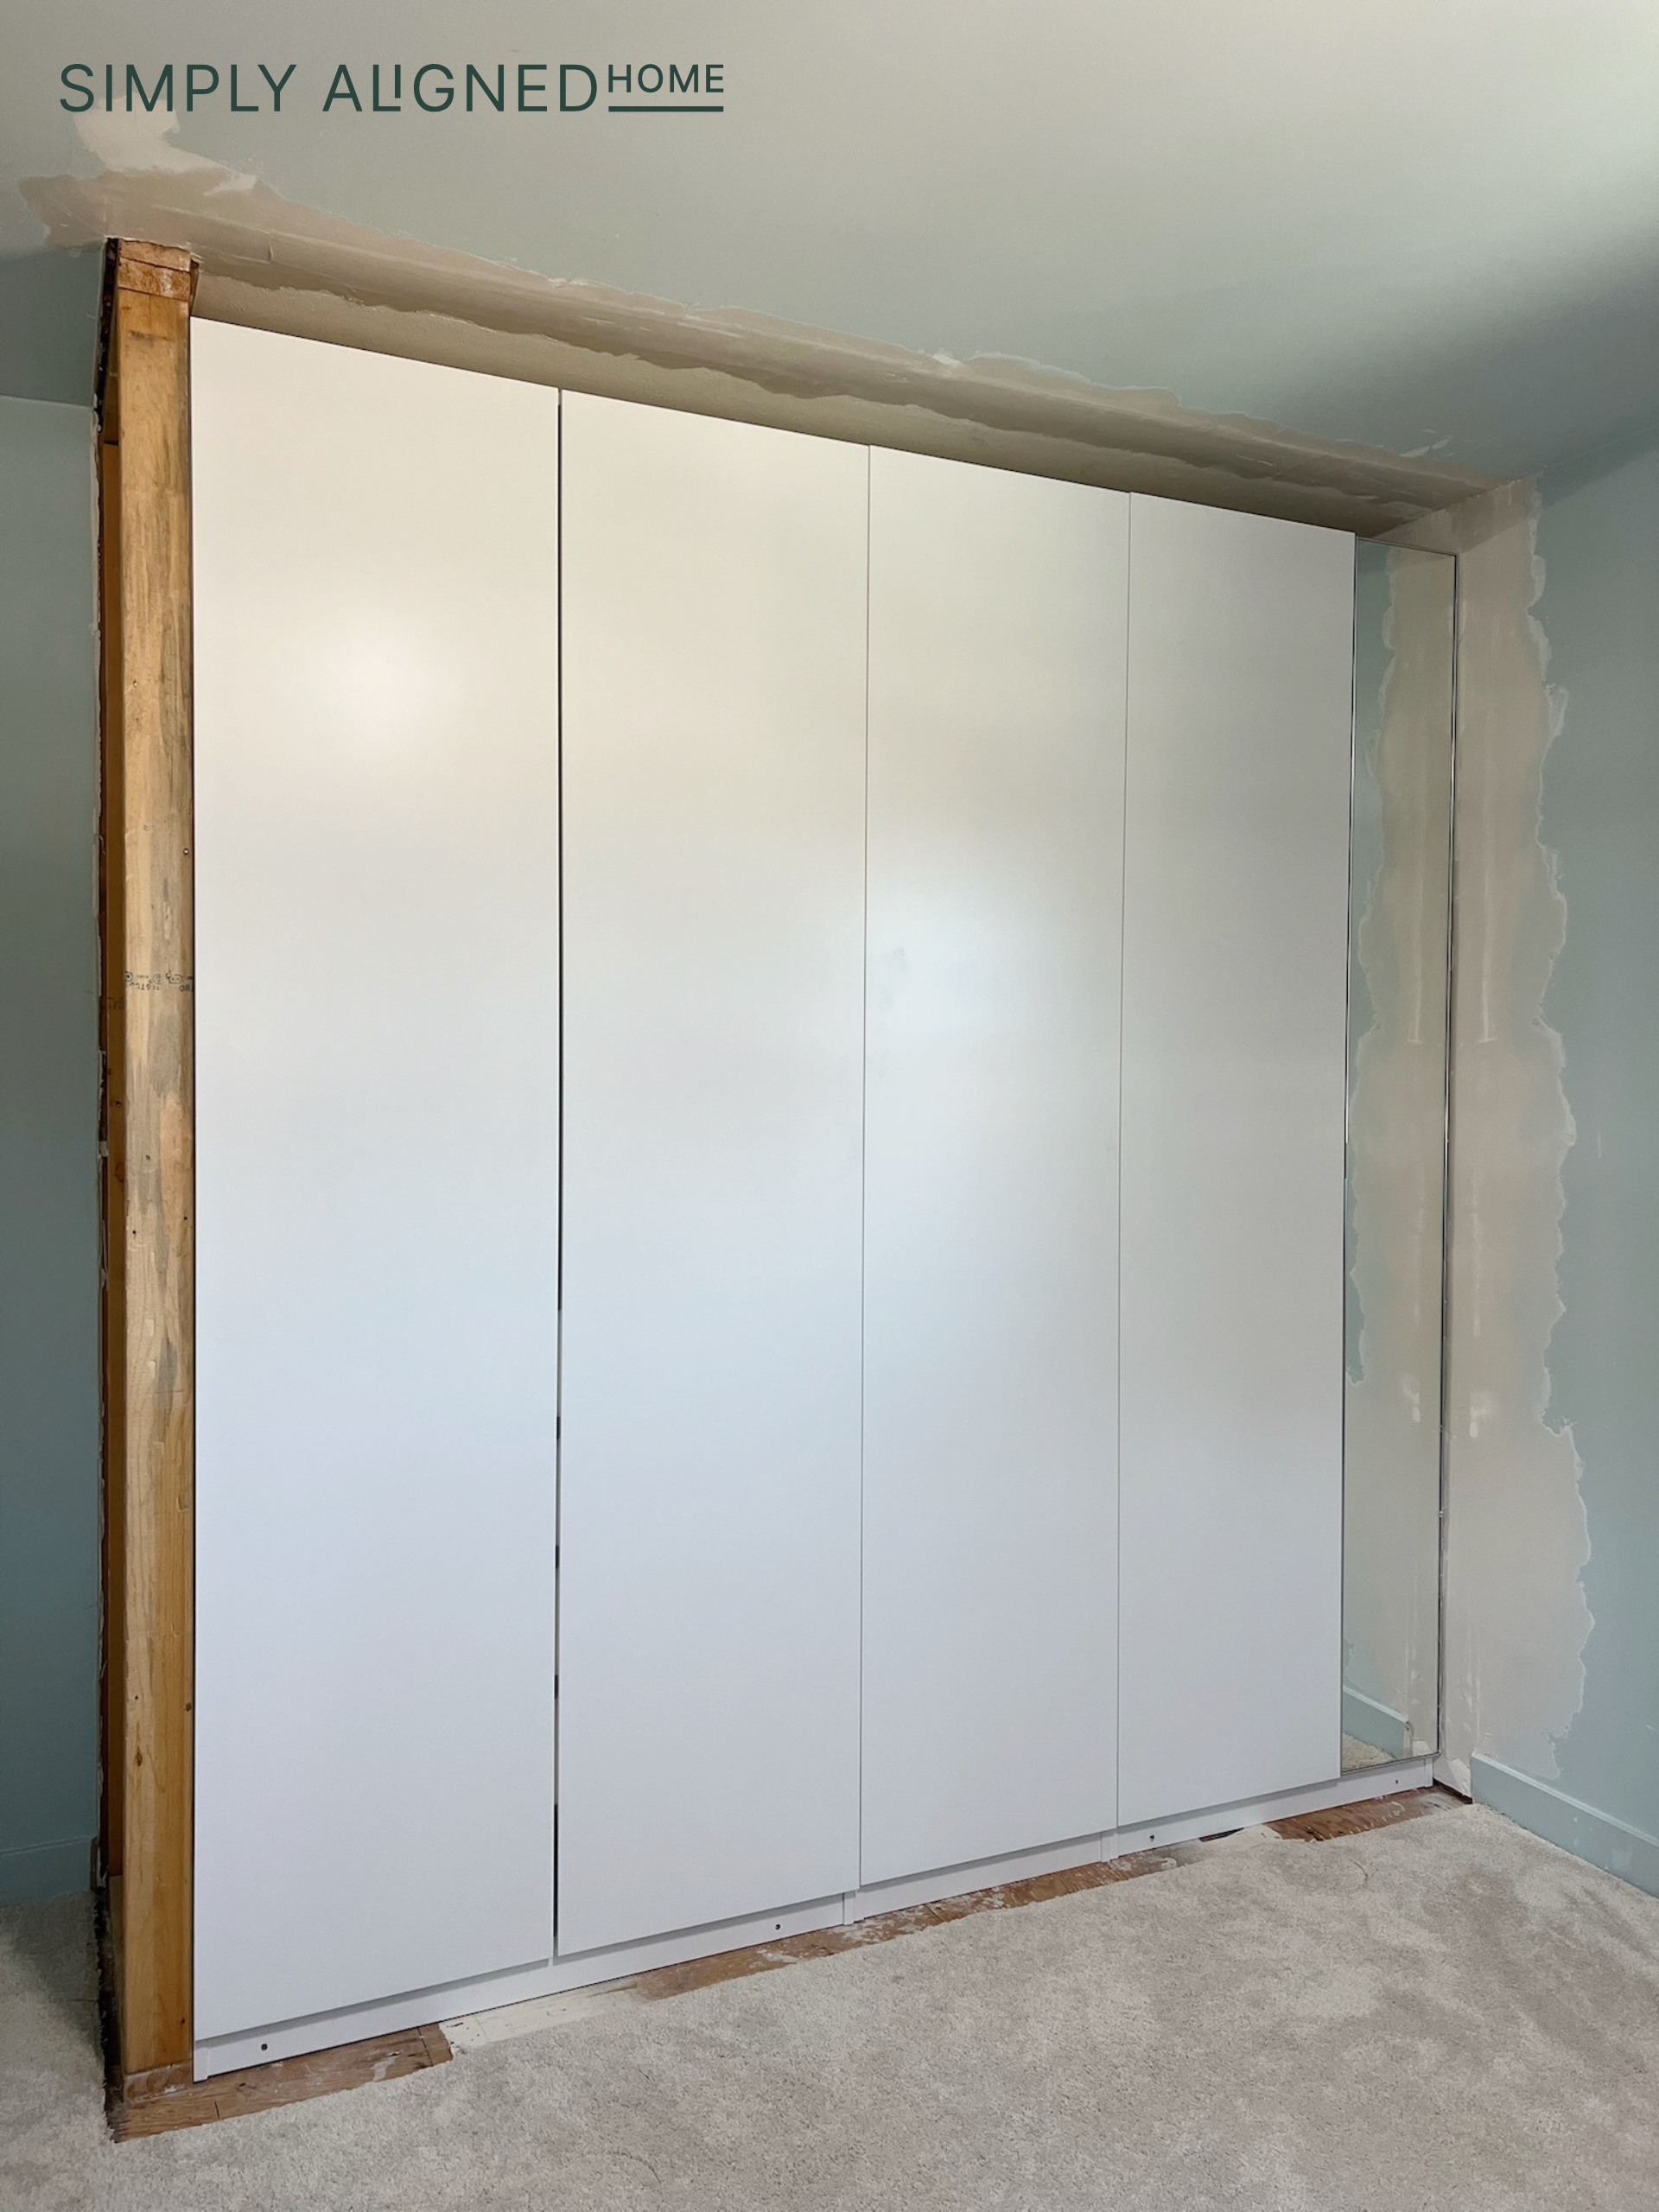
I like to secure the units to the floor with a 2×4. The plan was to add trim to the front so the screws would be invisible. Next, I installed all of the drawers and then the doors!
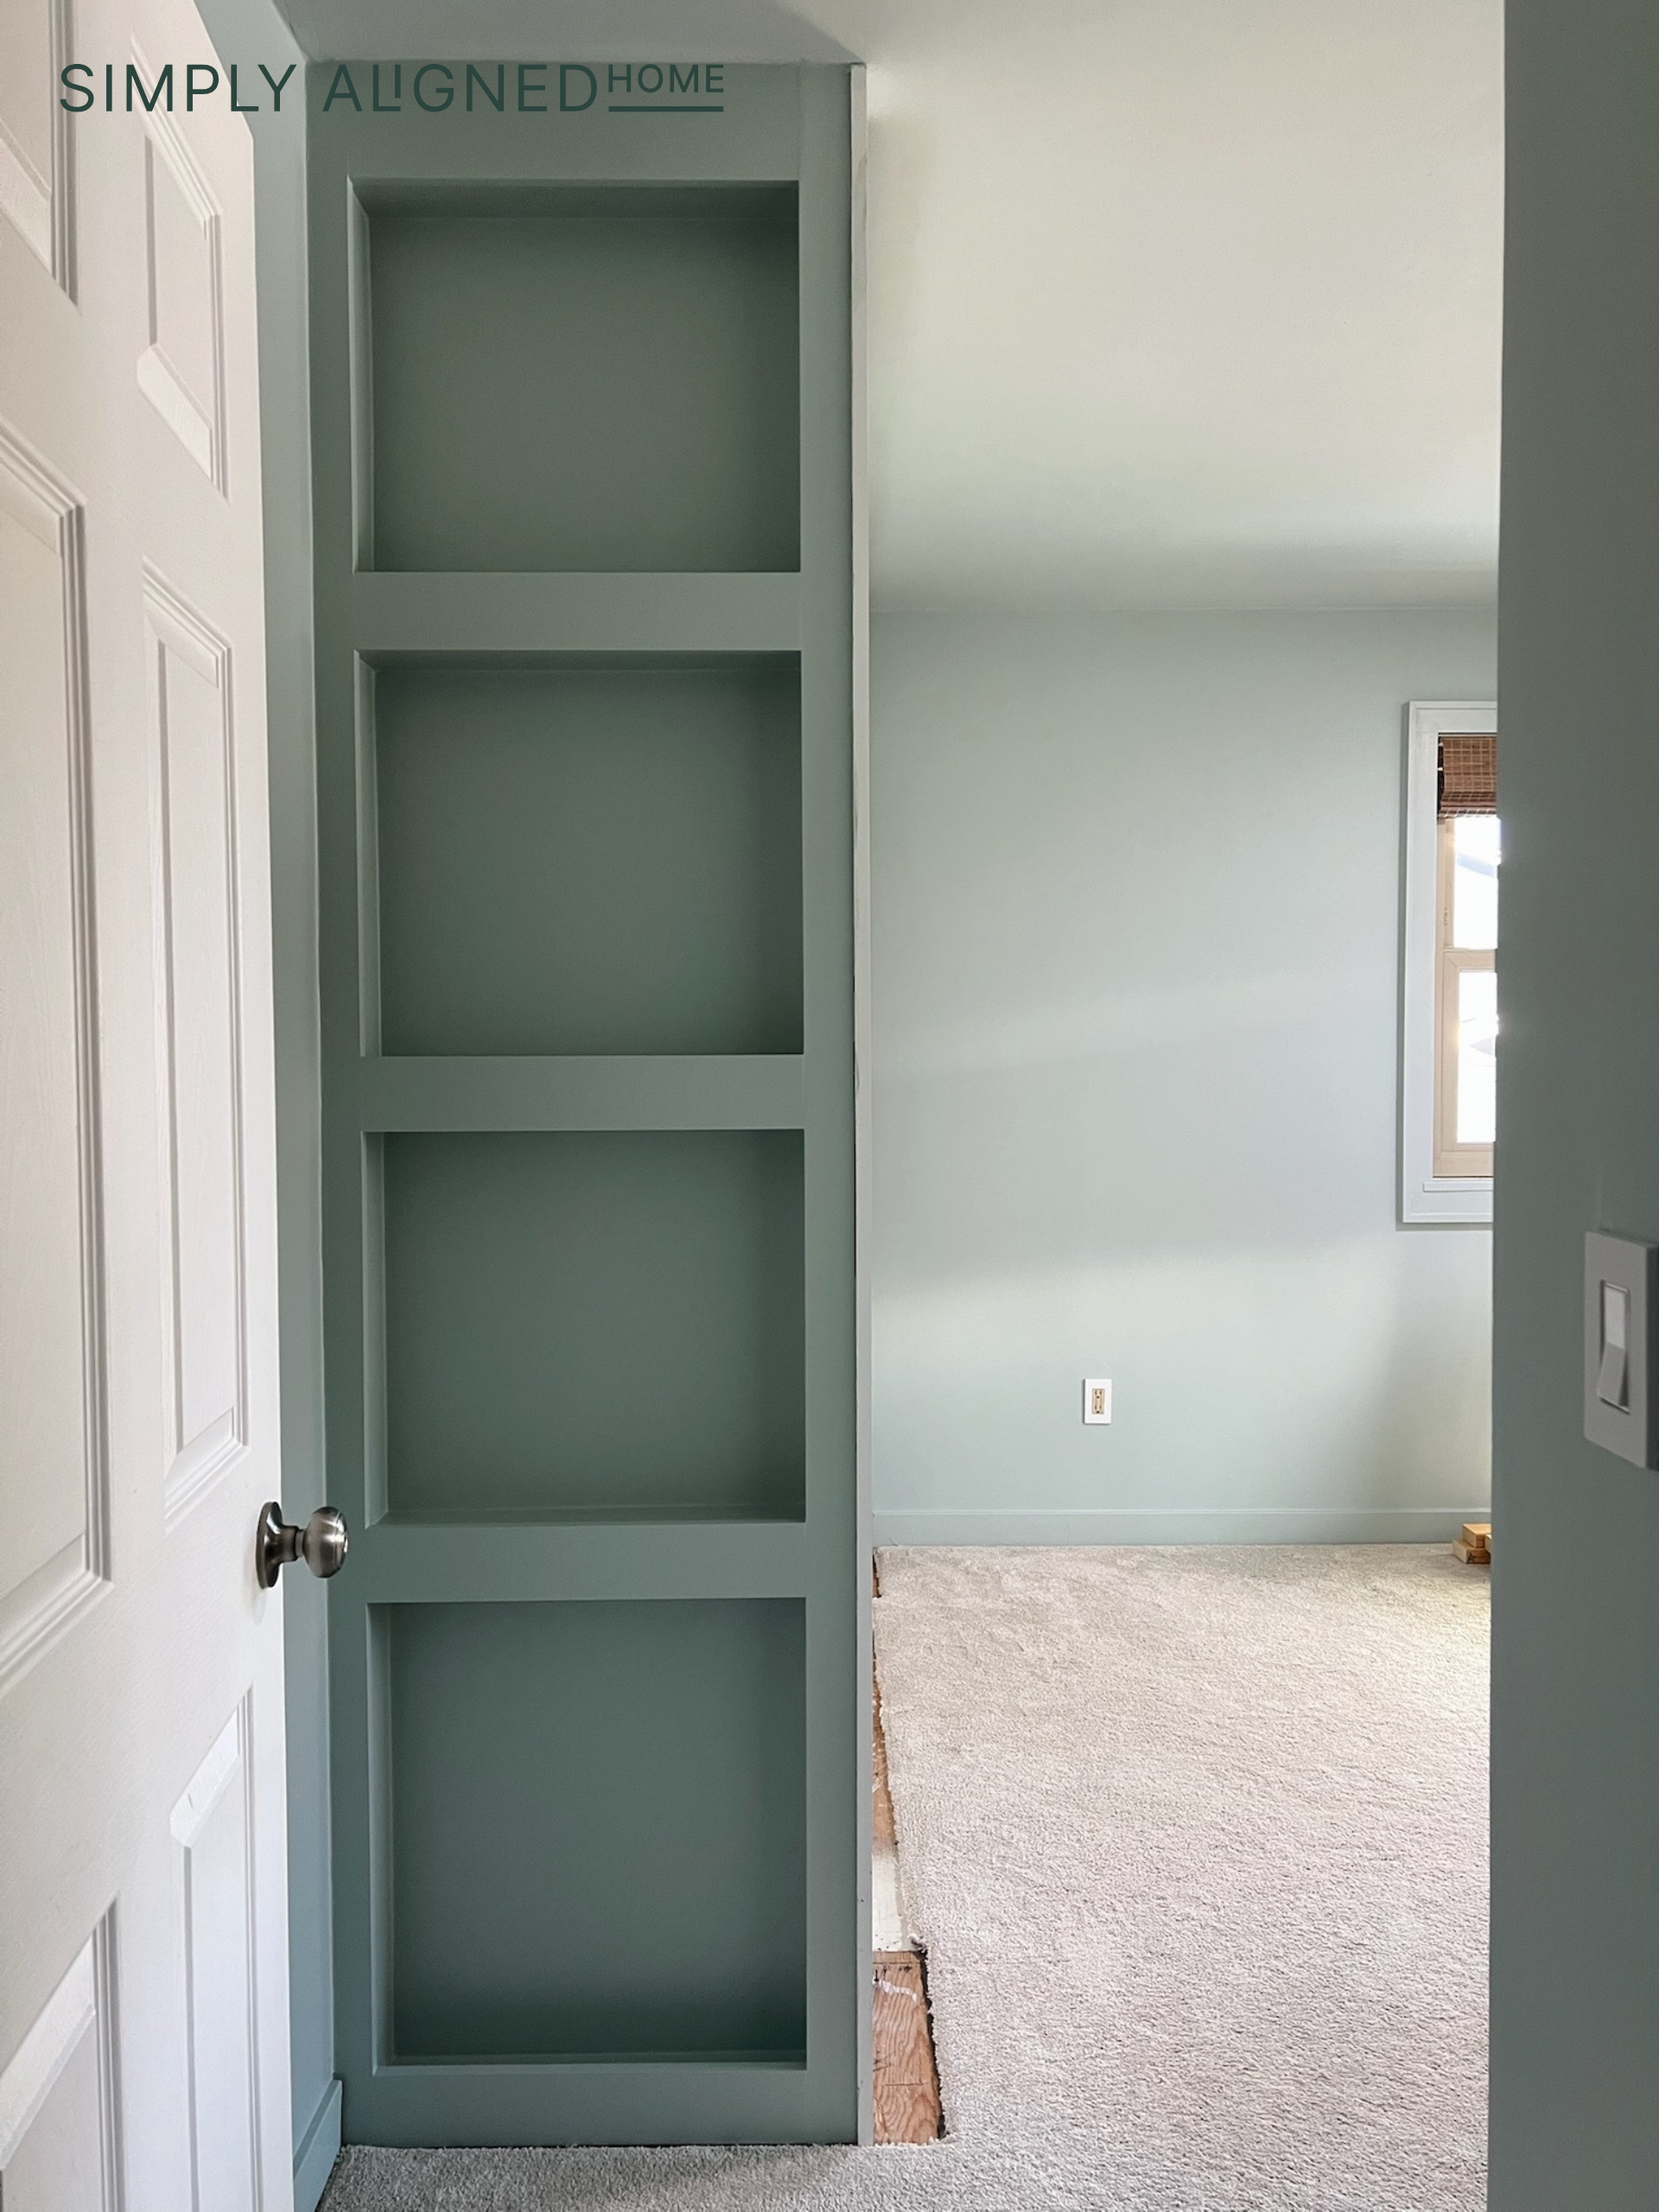
Building Shelves
I decided to build a little bookshelf on that outer wall you see when you walk in this room. For this, I used 2x4s for the shelves. Then I trimmed them out with 1×4 primed boards.
I added all of the vertical trim before I added the horizontal trim. After everything was secured, I filled the holes and sanded everything smooth. I applied two coats of Sherwin Williams Rainwashed to match the walls in the room.
Skim Coating & Painting
Before working on the doors, I had to finish the seam on the wall and ceiling where I removed the framing! I had to apply 4 coats of skim coating to really cover it up. Then, I sanded my work. I painted using the color that’s on the rest of this room – SW Rainwashed. I decided to use flat paint for the ceiling, satin on the walls, and semi-gloss for the trim and bookcase.
Closet Doors
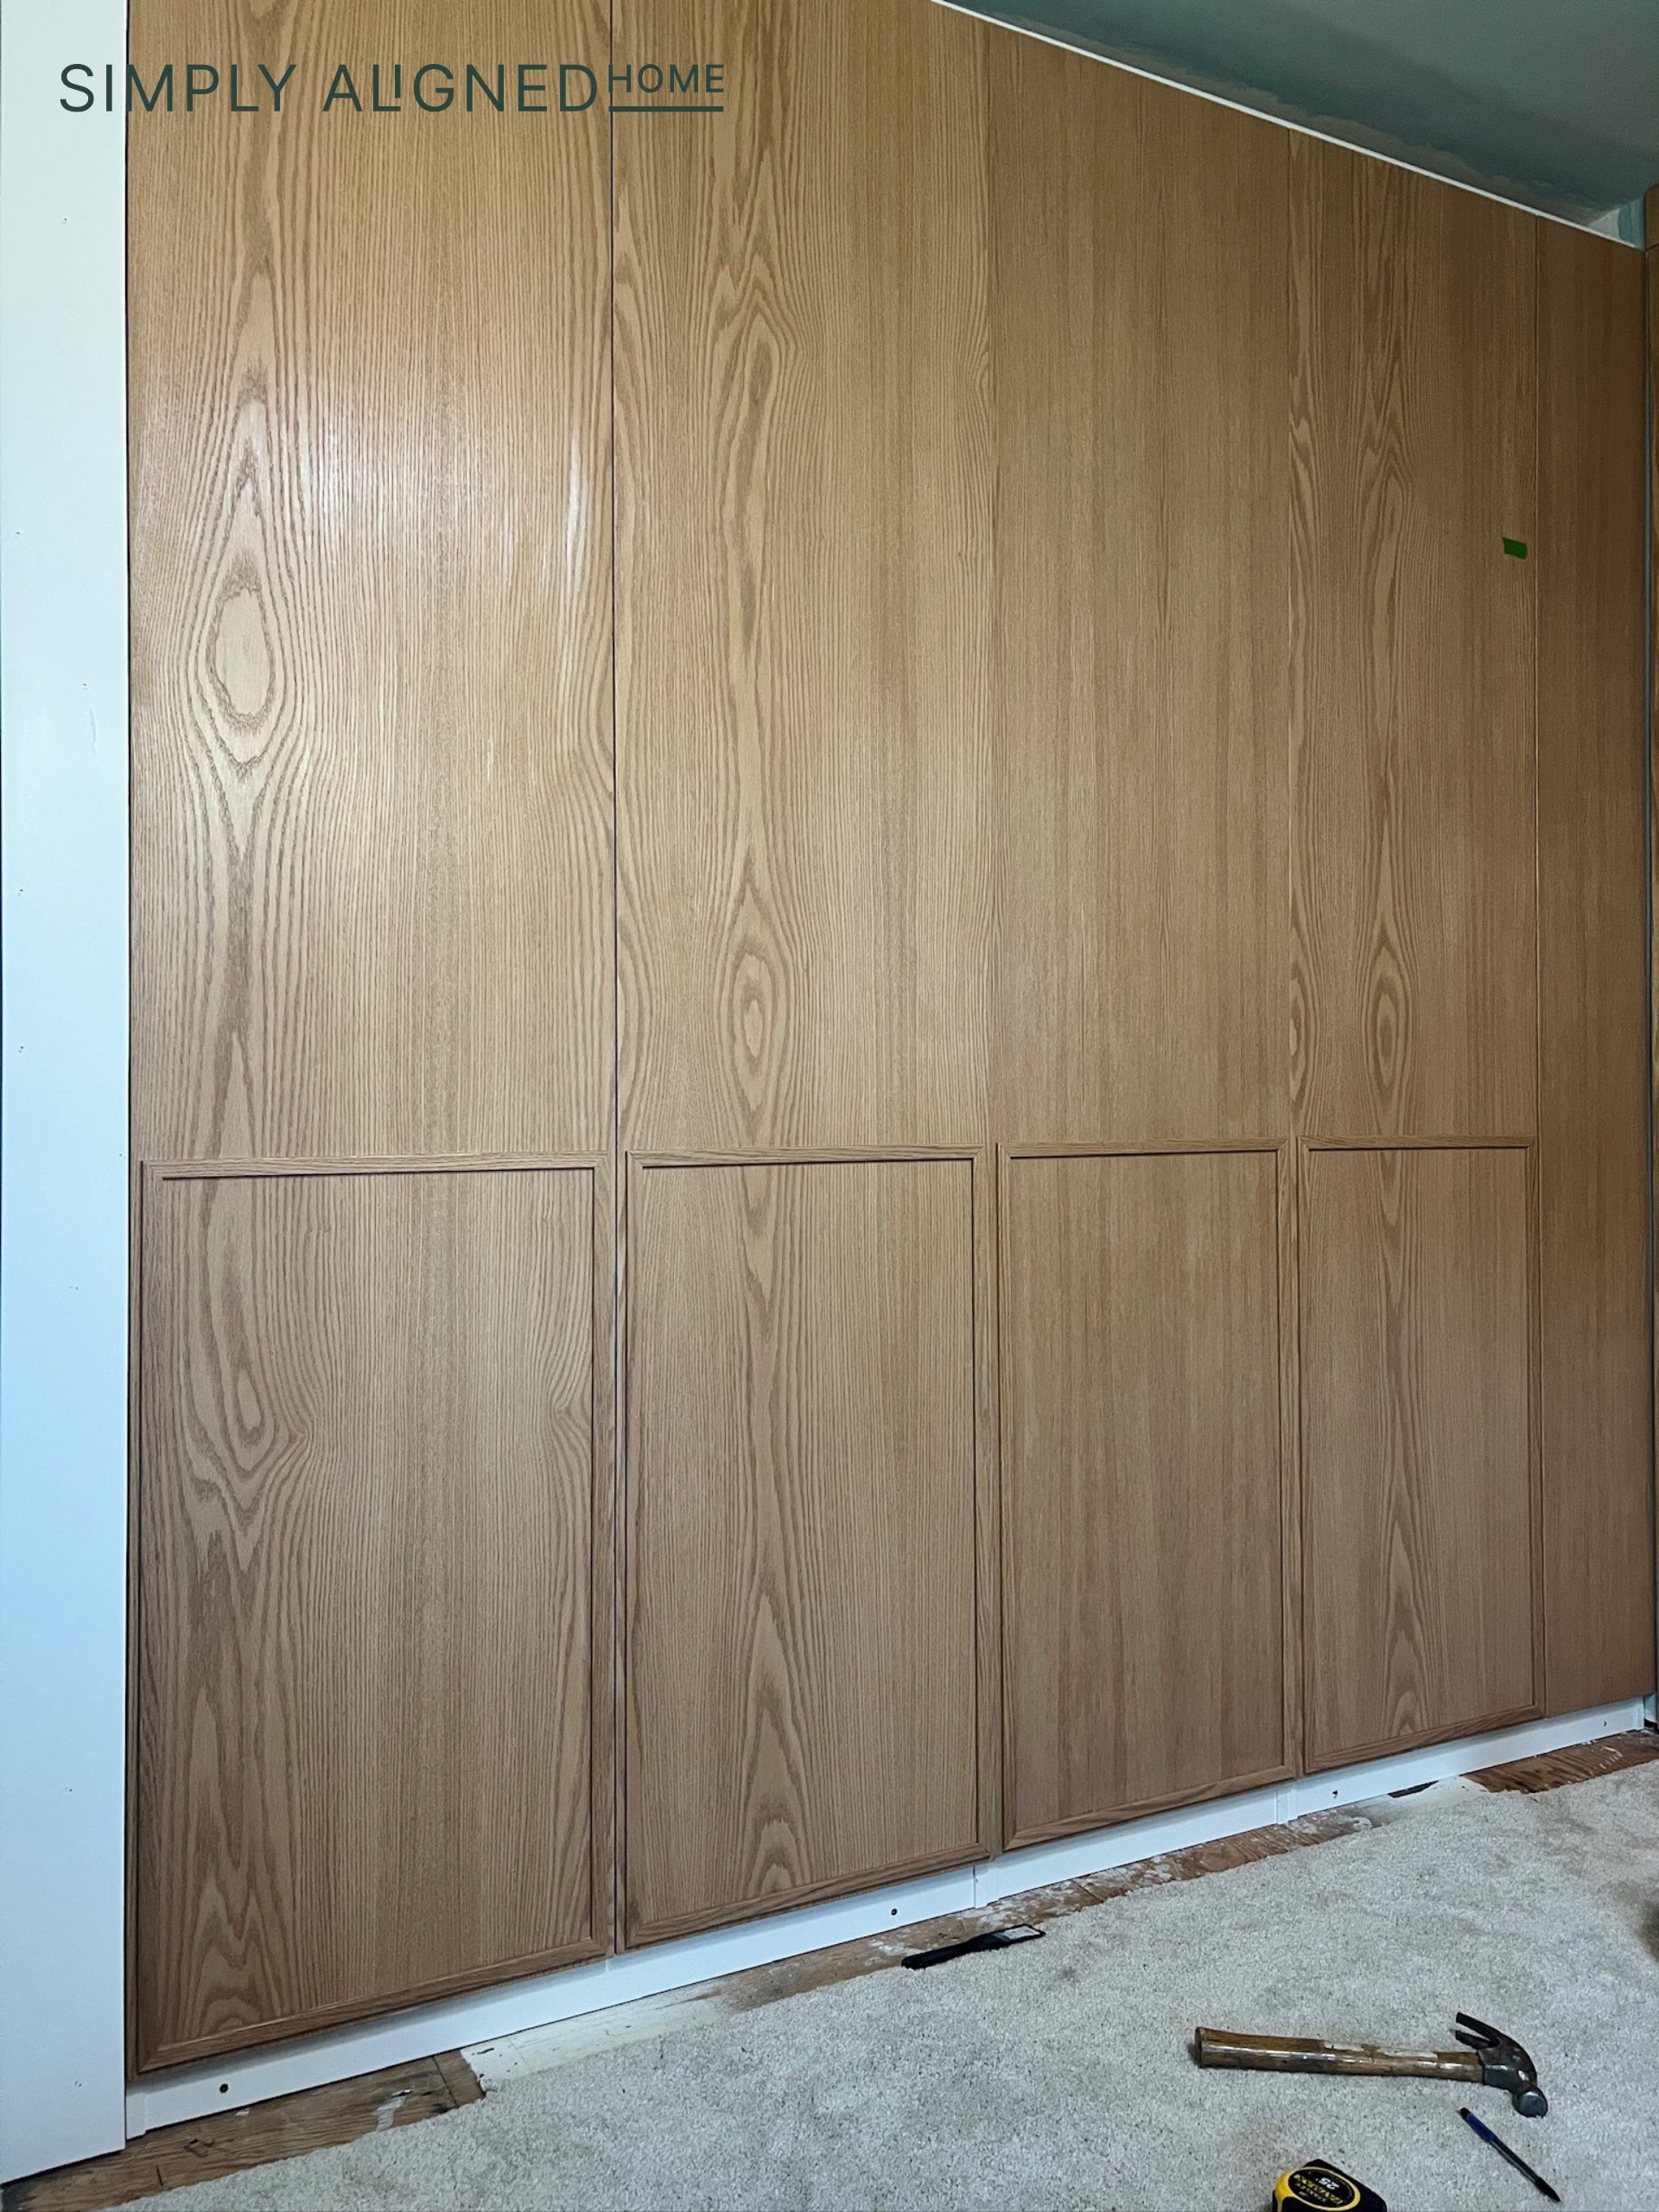
Time to work on the doors! My initial plan was to make the doors look like a slat wall. I bought this paneling but it was just too thick and I couldn’t get the seams to all line up.
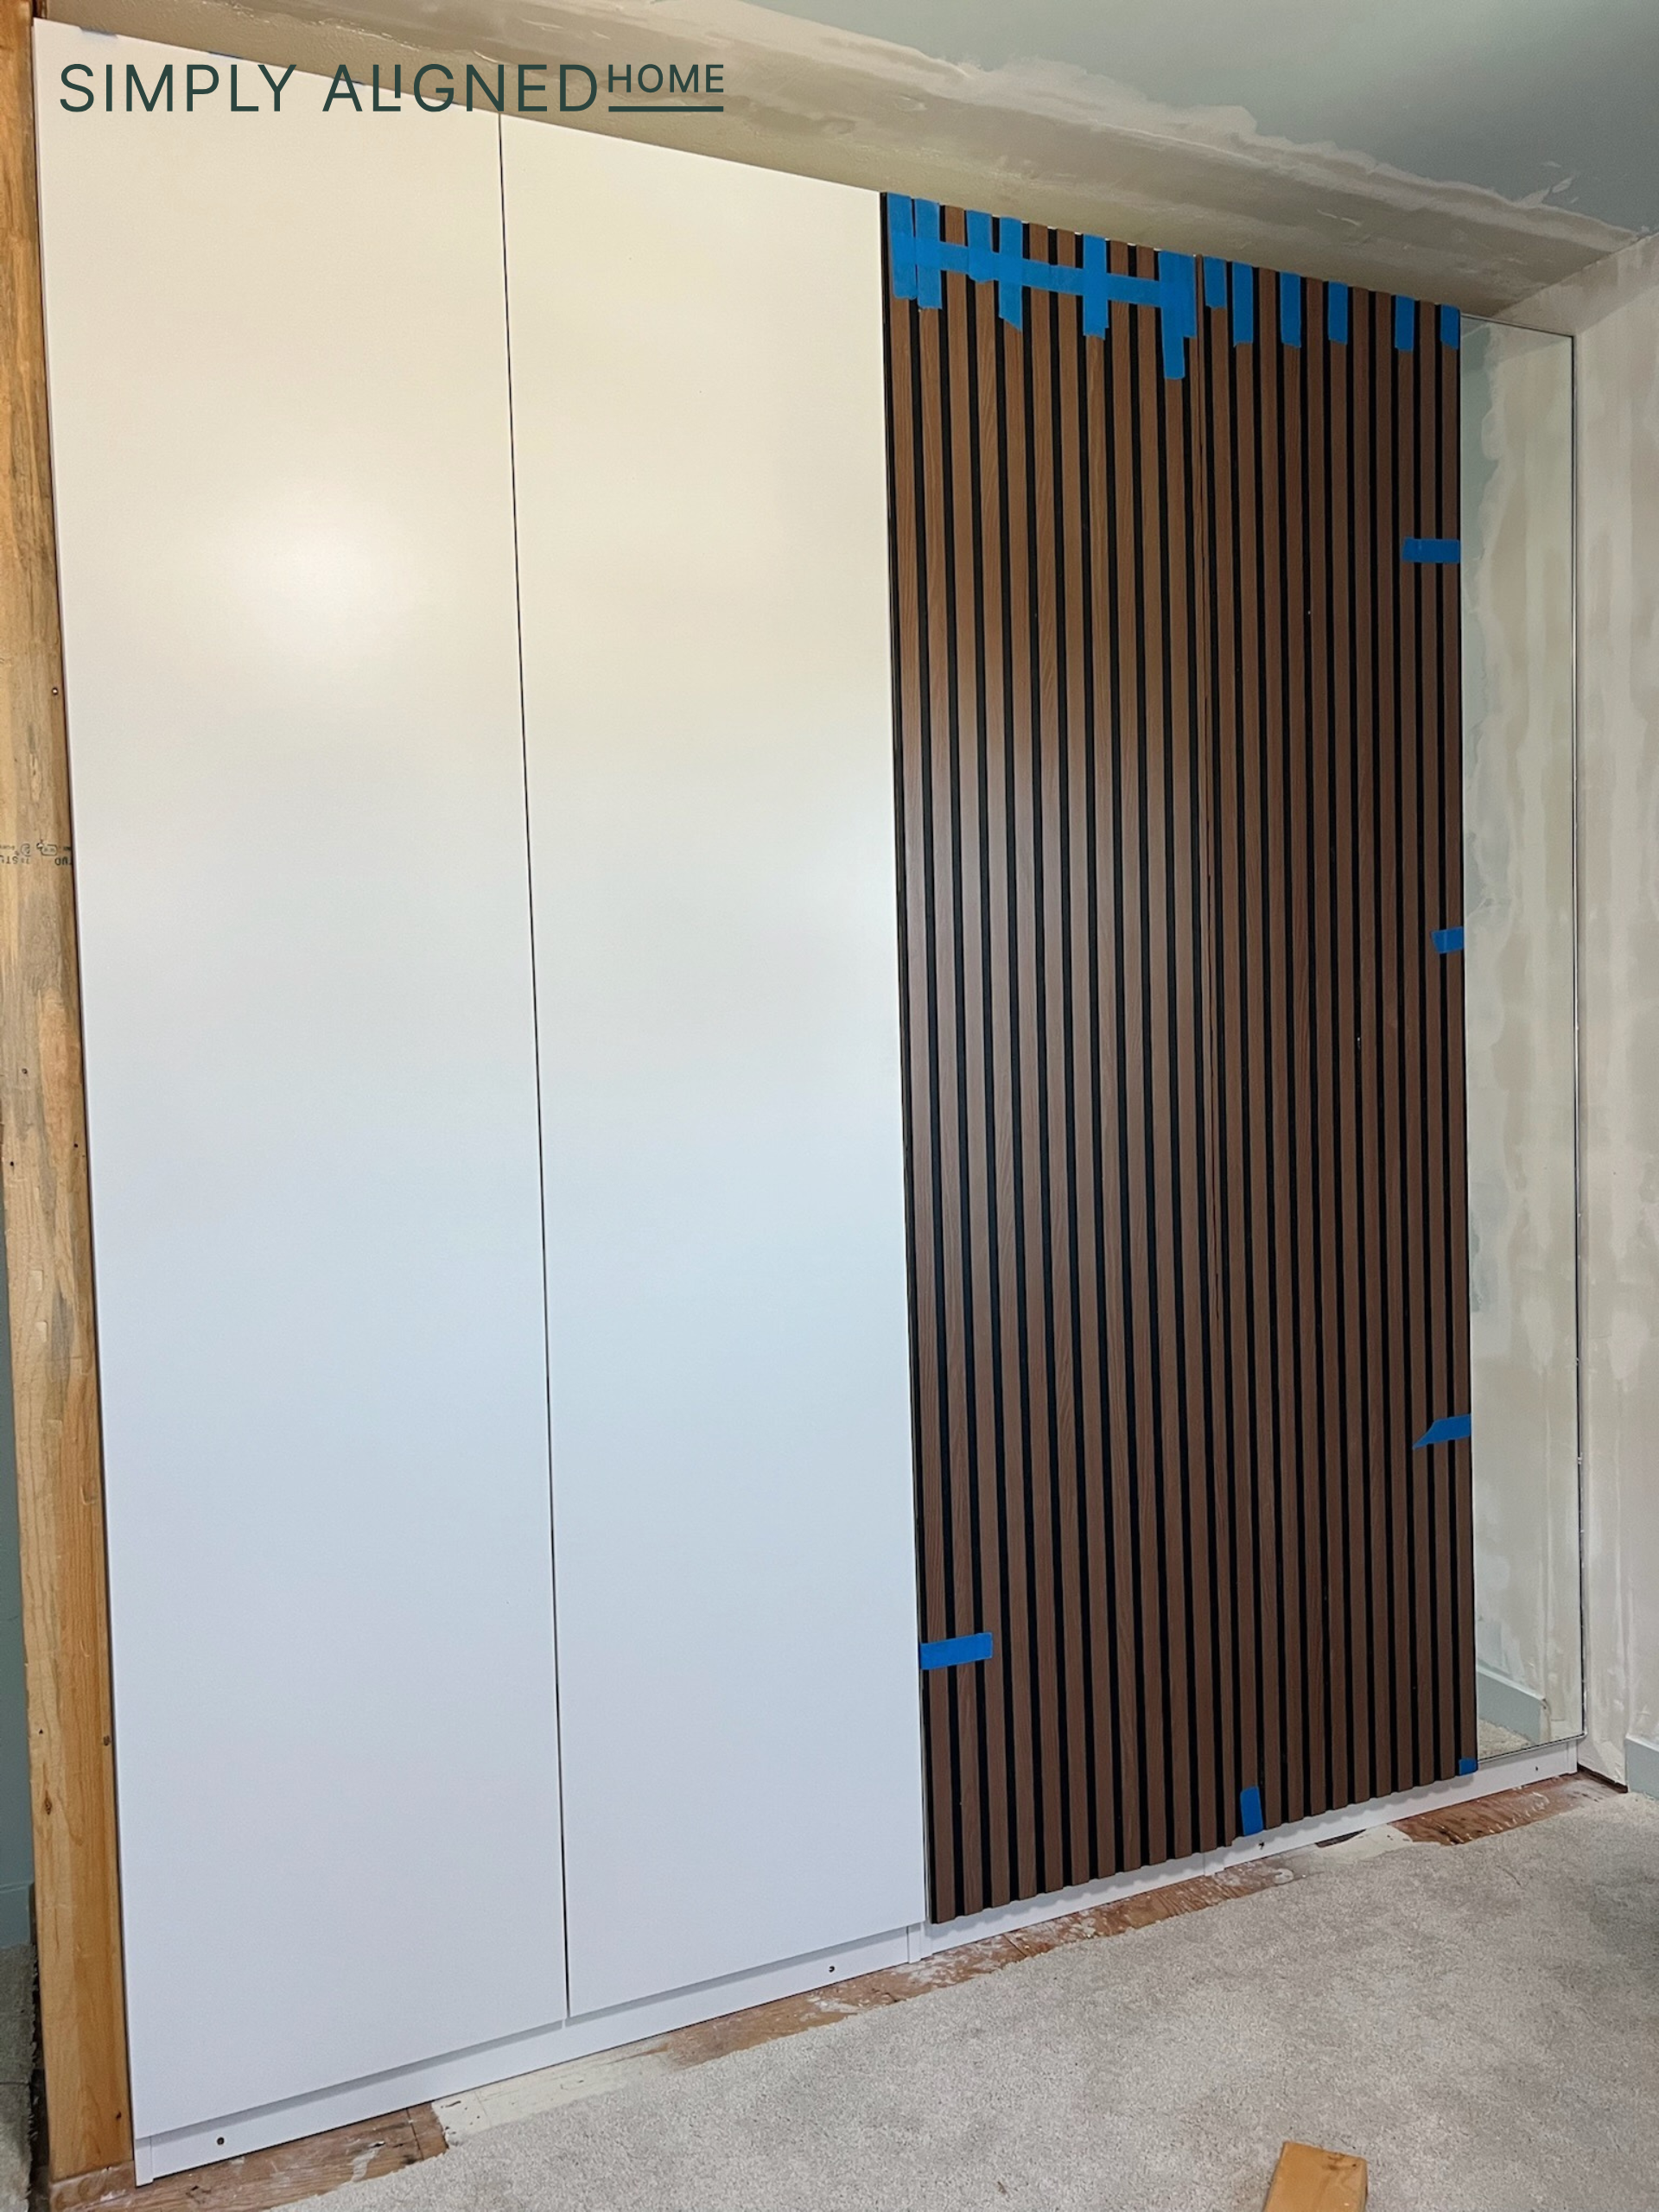
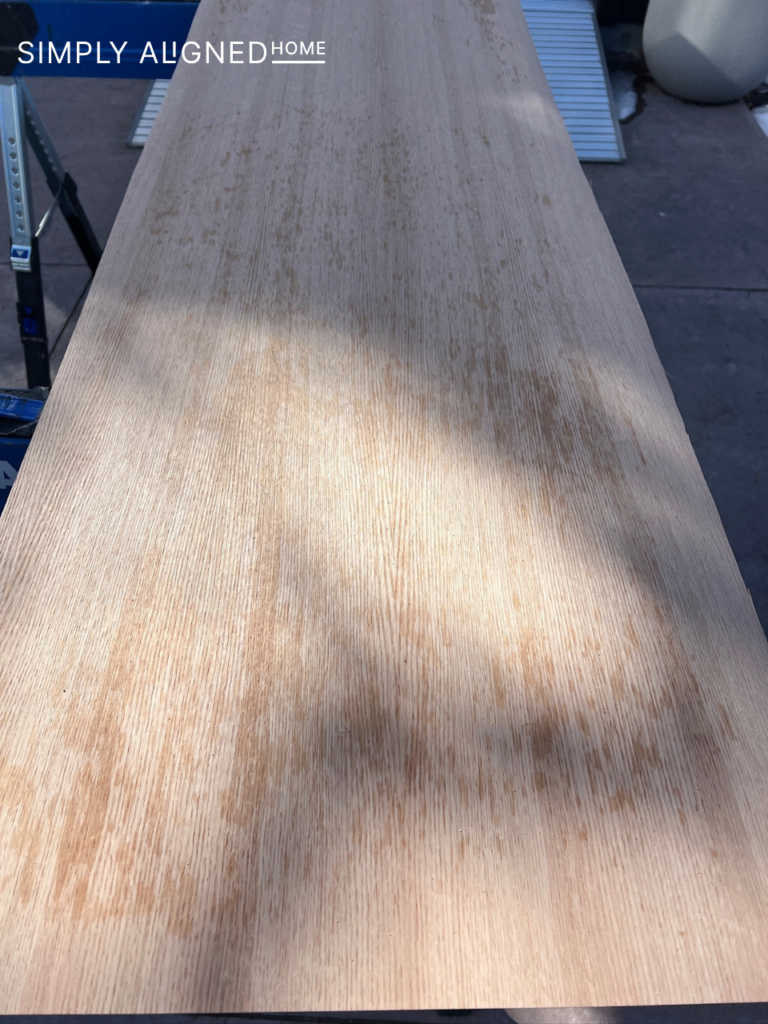
So, I changed my plan and decided to use a wood veneer! Fair warning….I had never used this material and had no idea what I was doing. And I made a HUGE mistake. 😳 I sanded the doors and then applied contact cement (per recommendation at purchase of the wood veneer).
I left the doors to cure in my shed for 24 hours. It was a fail. I put too much contact cement on and it seeped through the veneer. Luckily, I was able to save them with a little sanding!
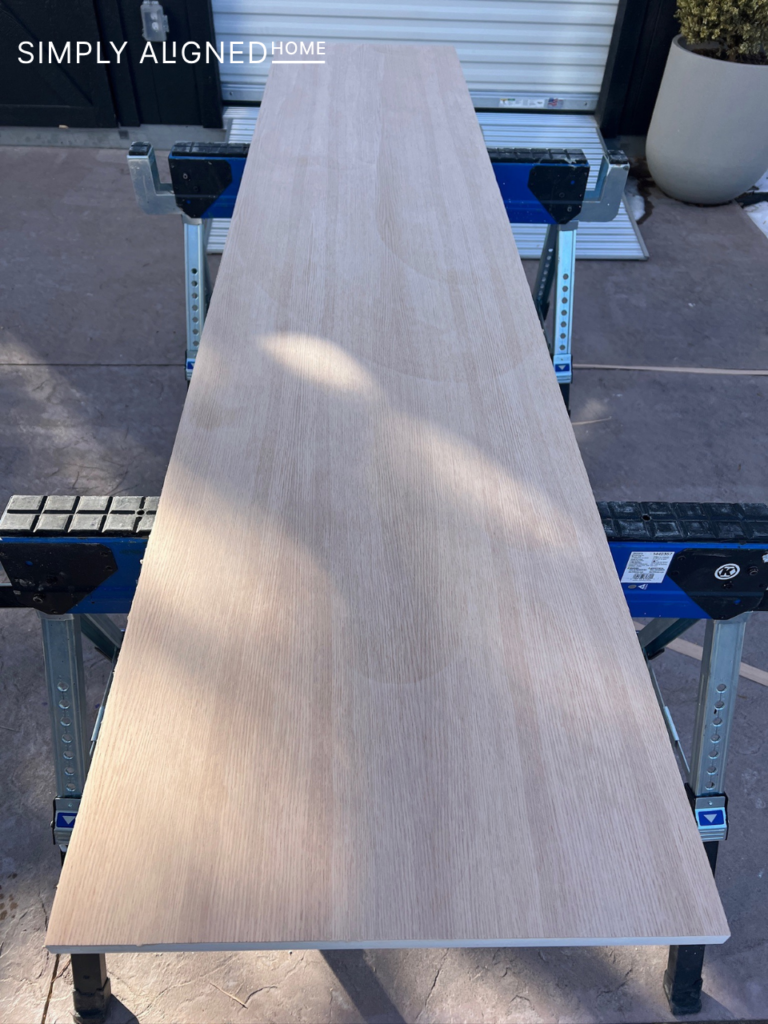
I added edge banding to the edges of the doors to make it look like they were solid wood. Once I was done with that, I applied one coat of stain and two coats of poly.
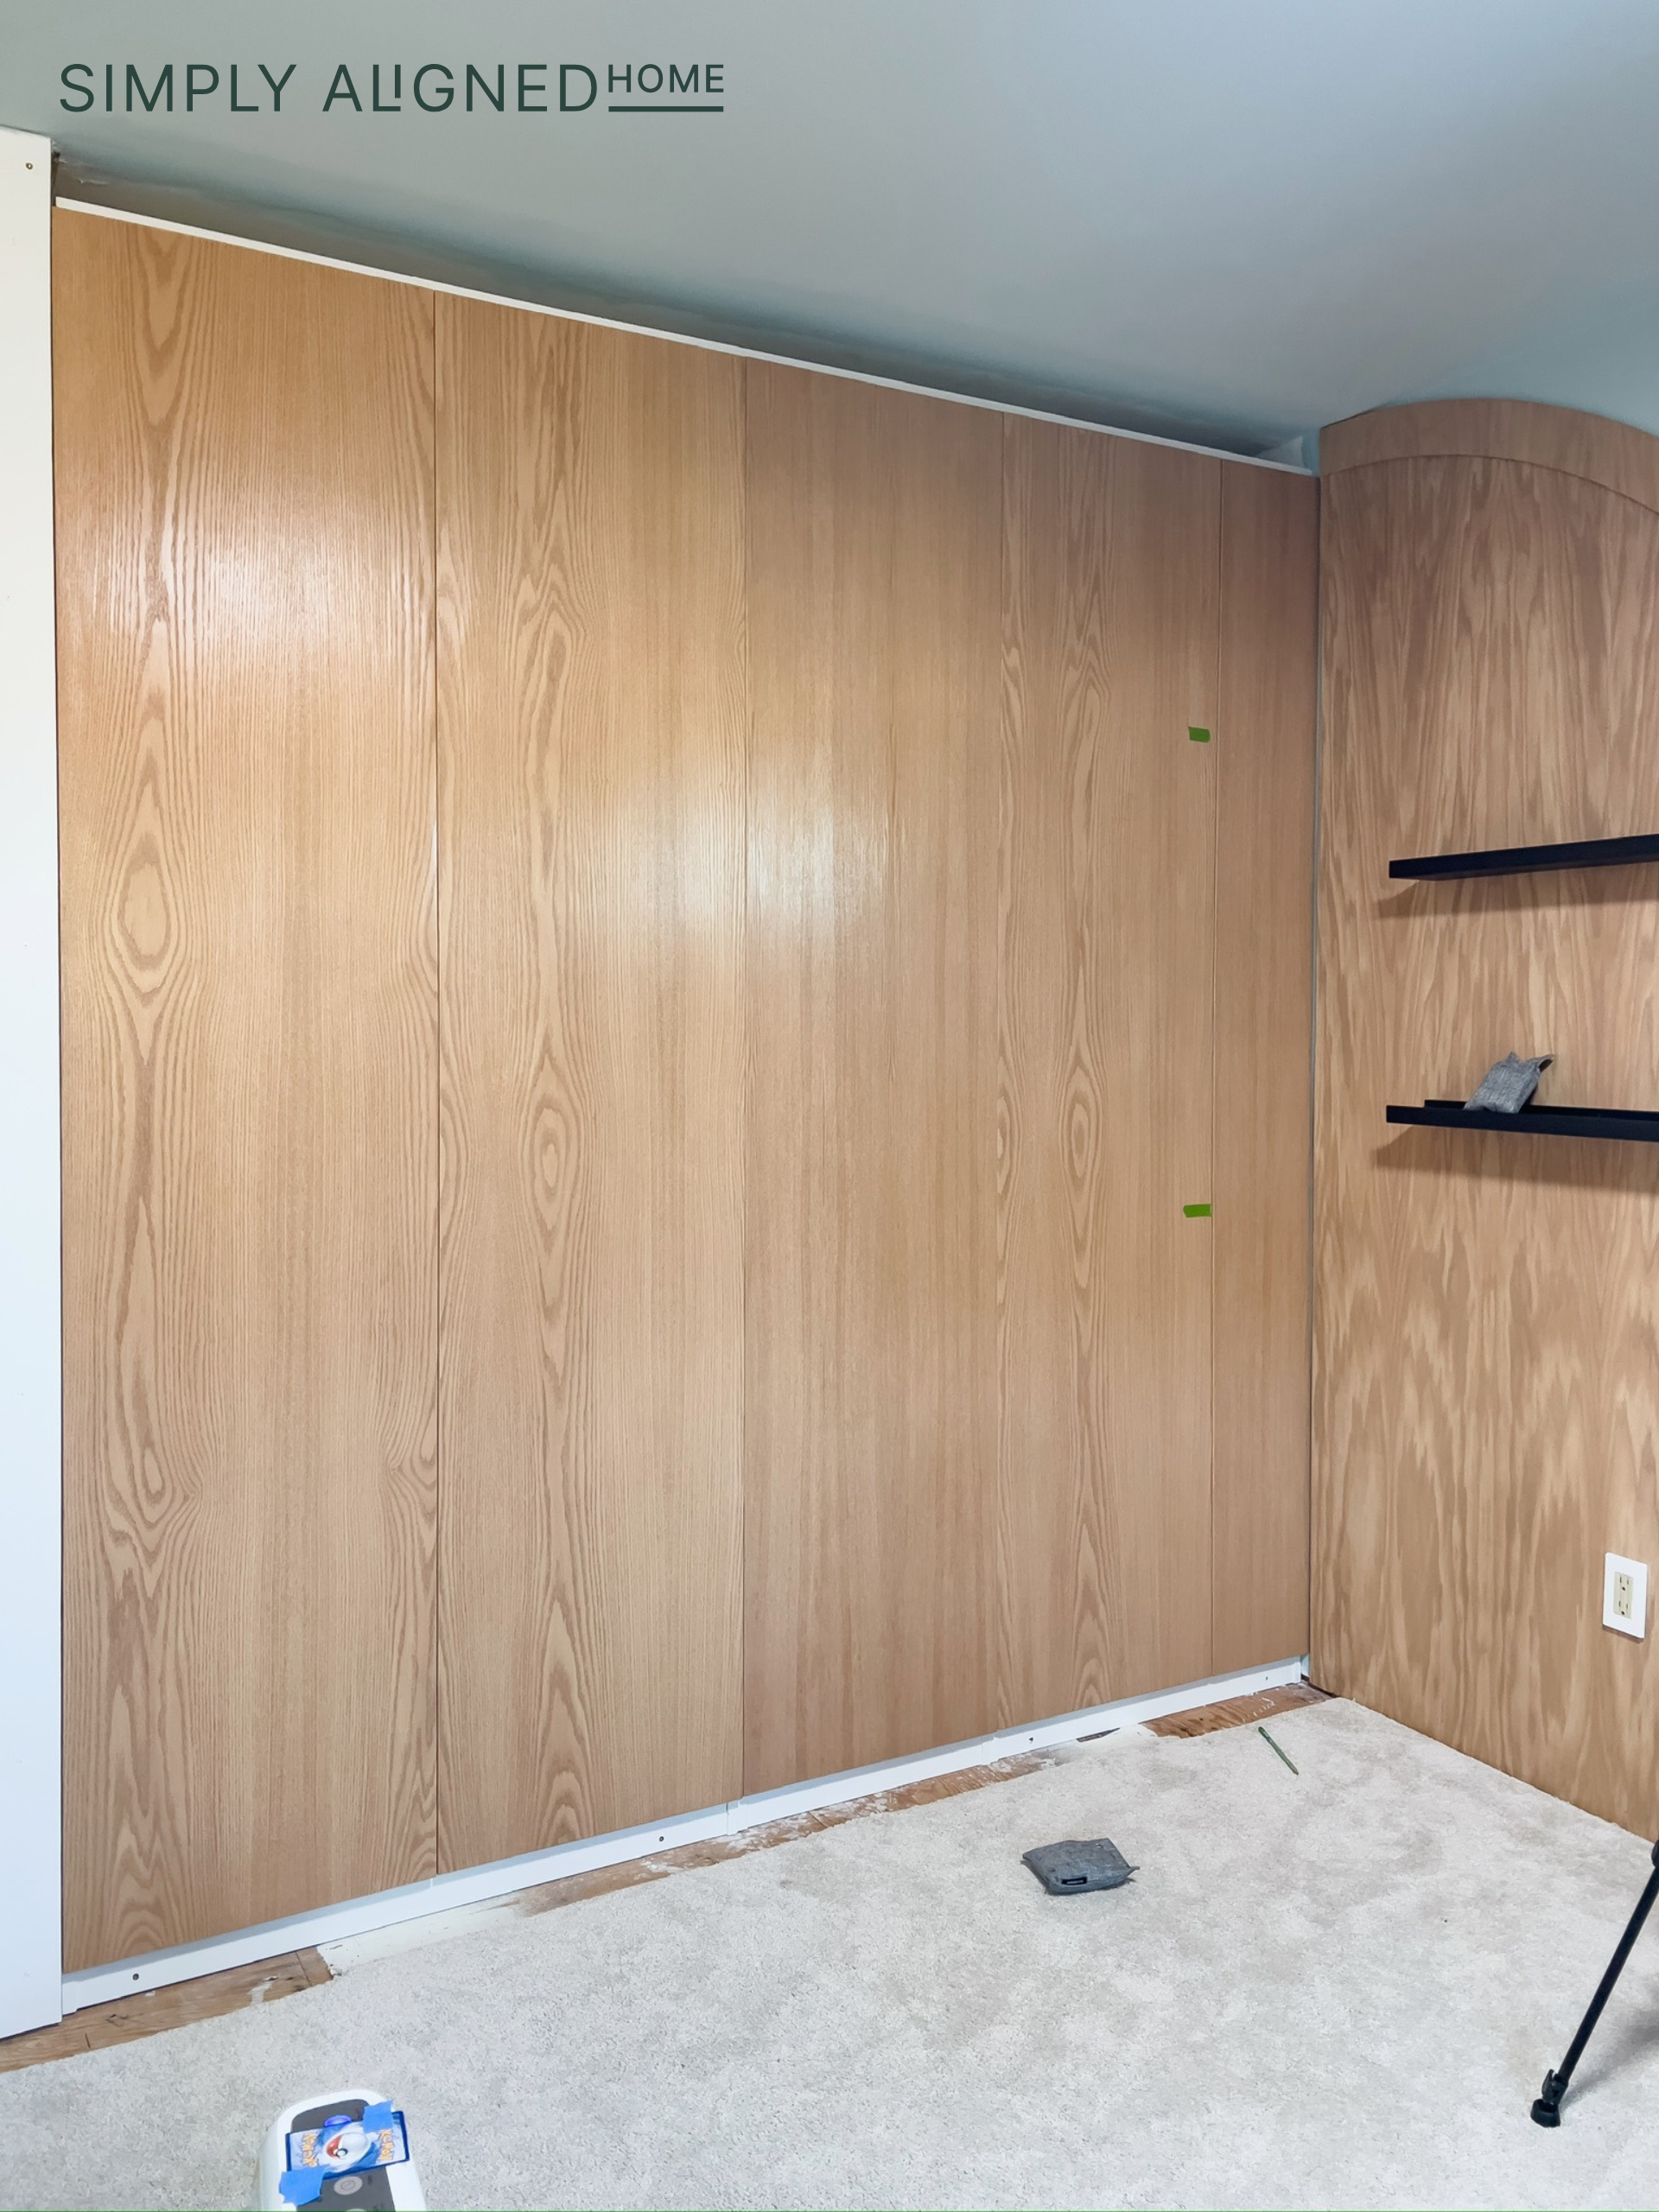
Next, I decided to dress up the closet doors with some trim. I used my miter box to cut my pieces. I stained and sealed the trim pieces before installing them. I like to use a plastic glove and an old baby sock for staining.
I used glue and pin nails to secure the trim. The pin nail holes were so small that I didn’t need to fill them! I loved the doors so much more with trim!
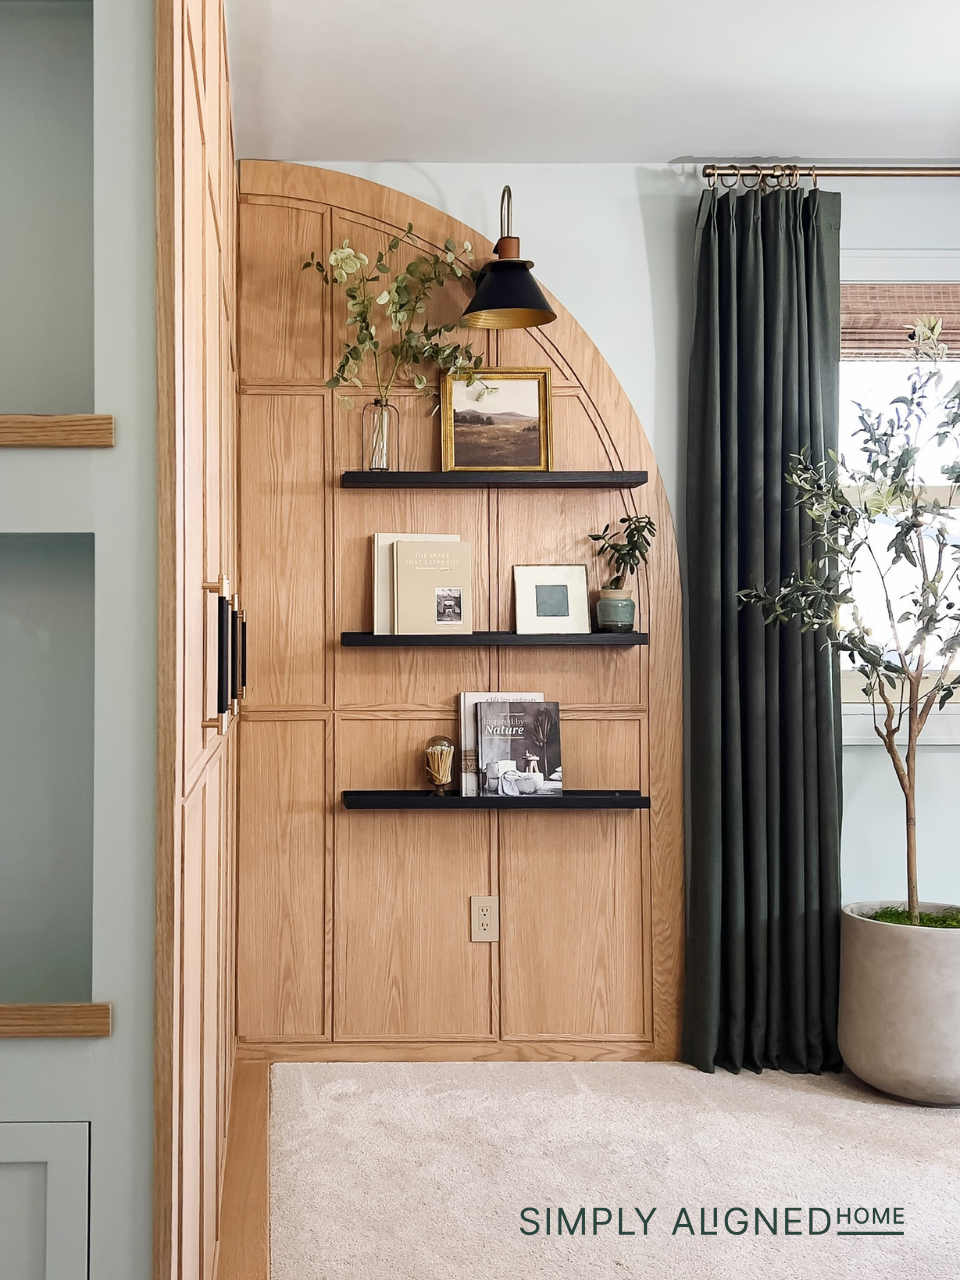
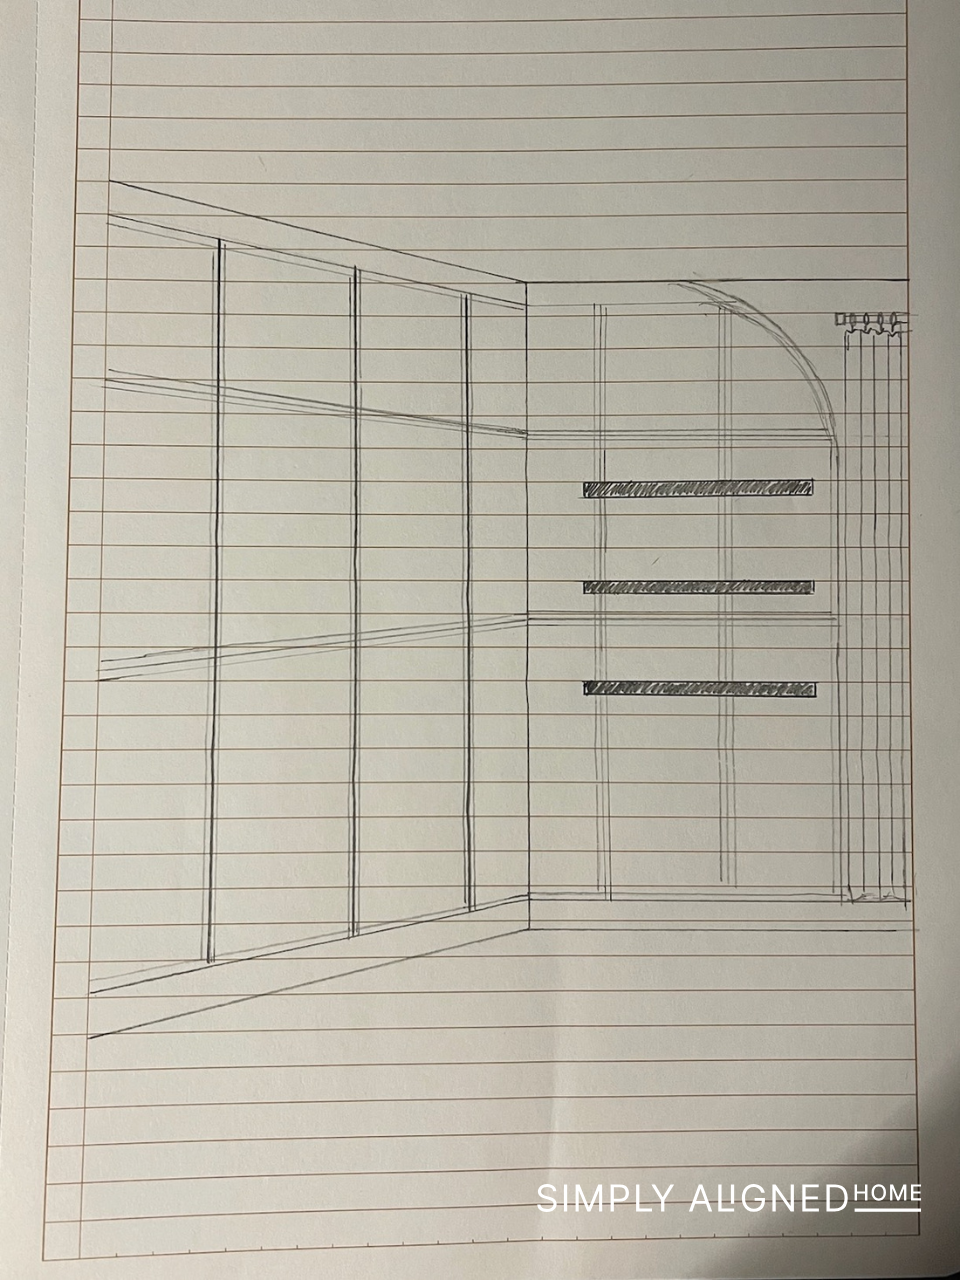
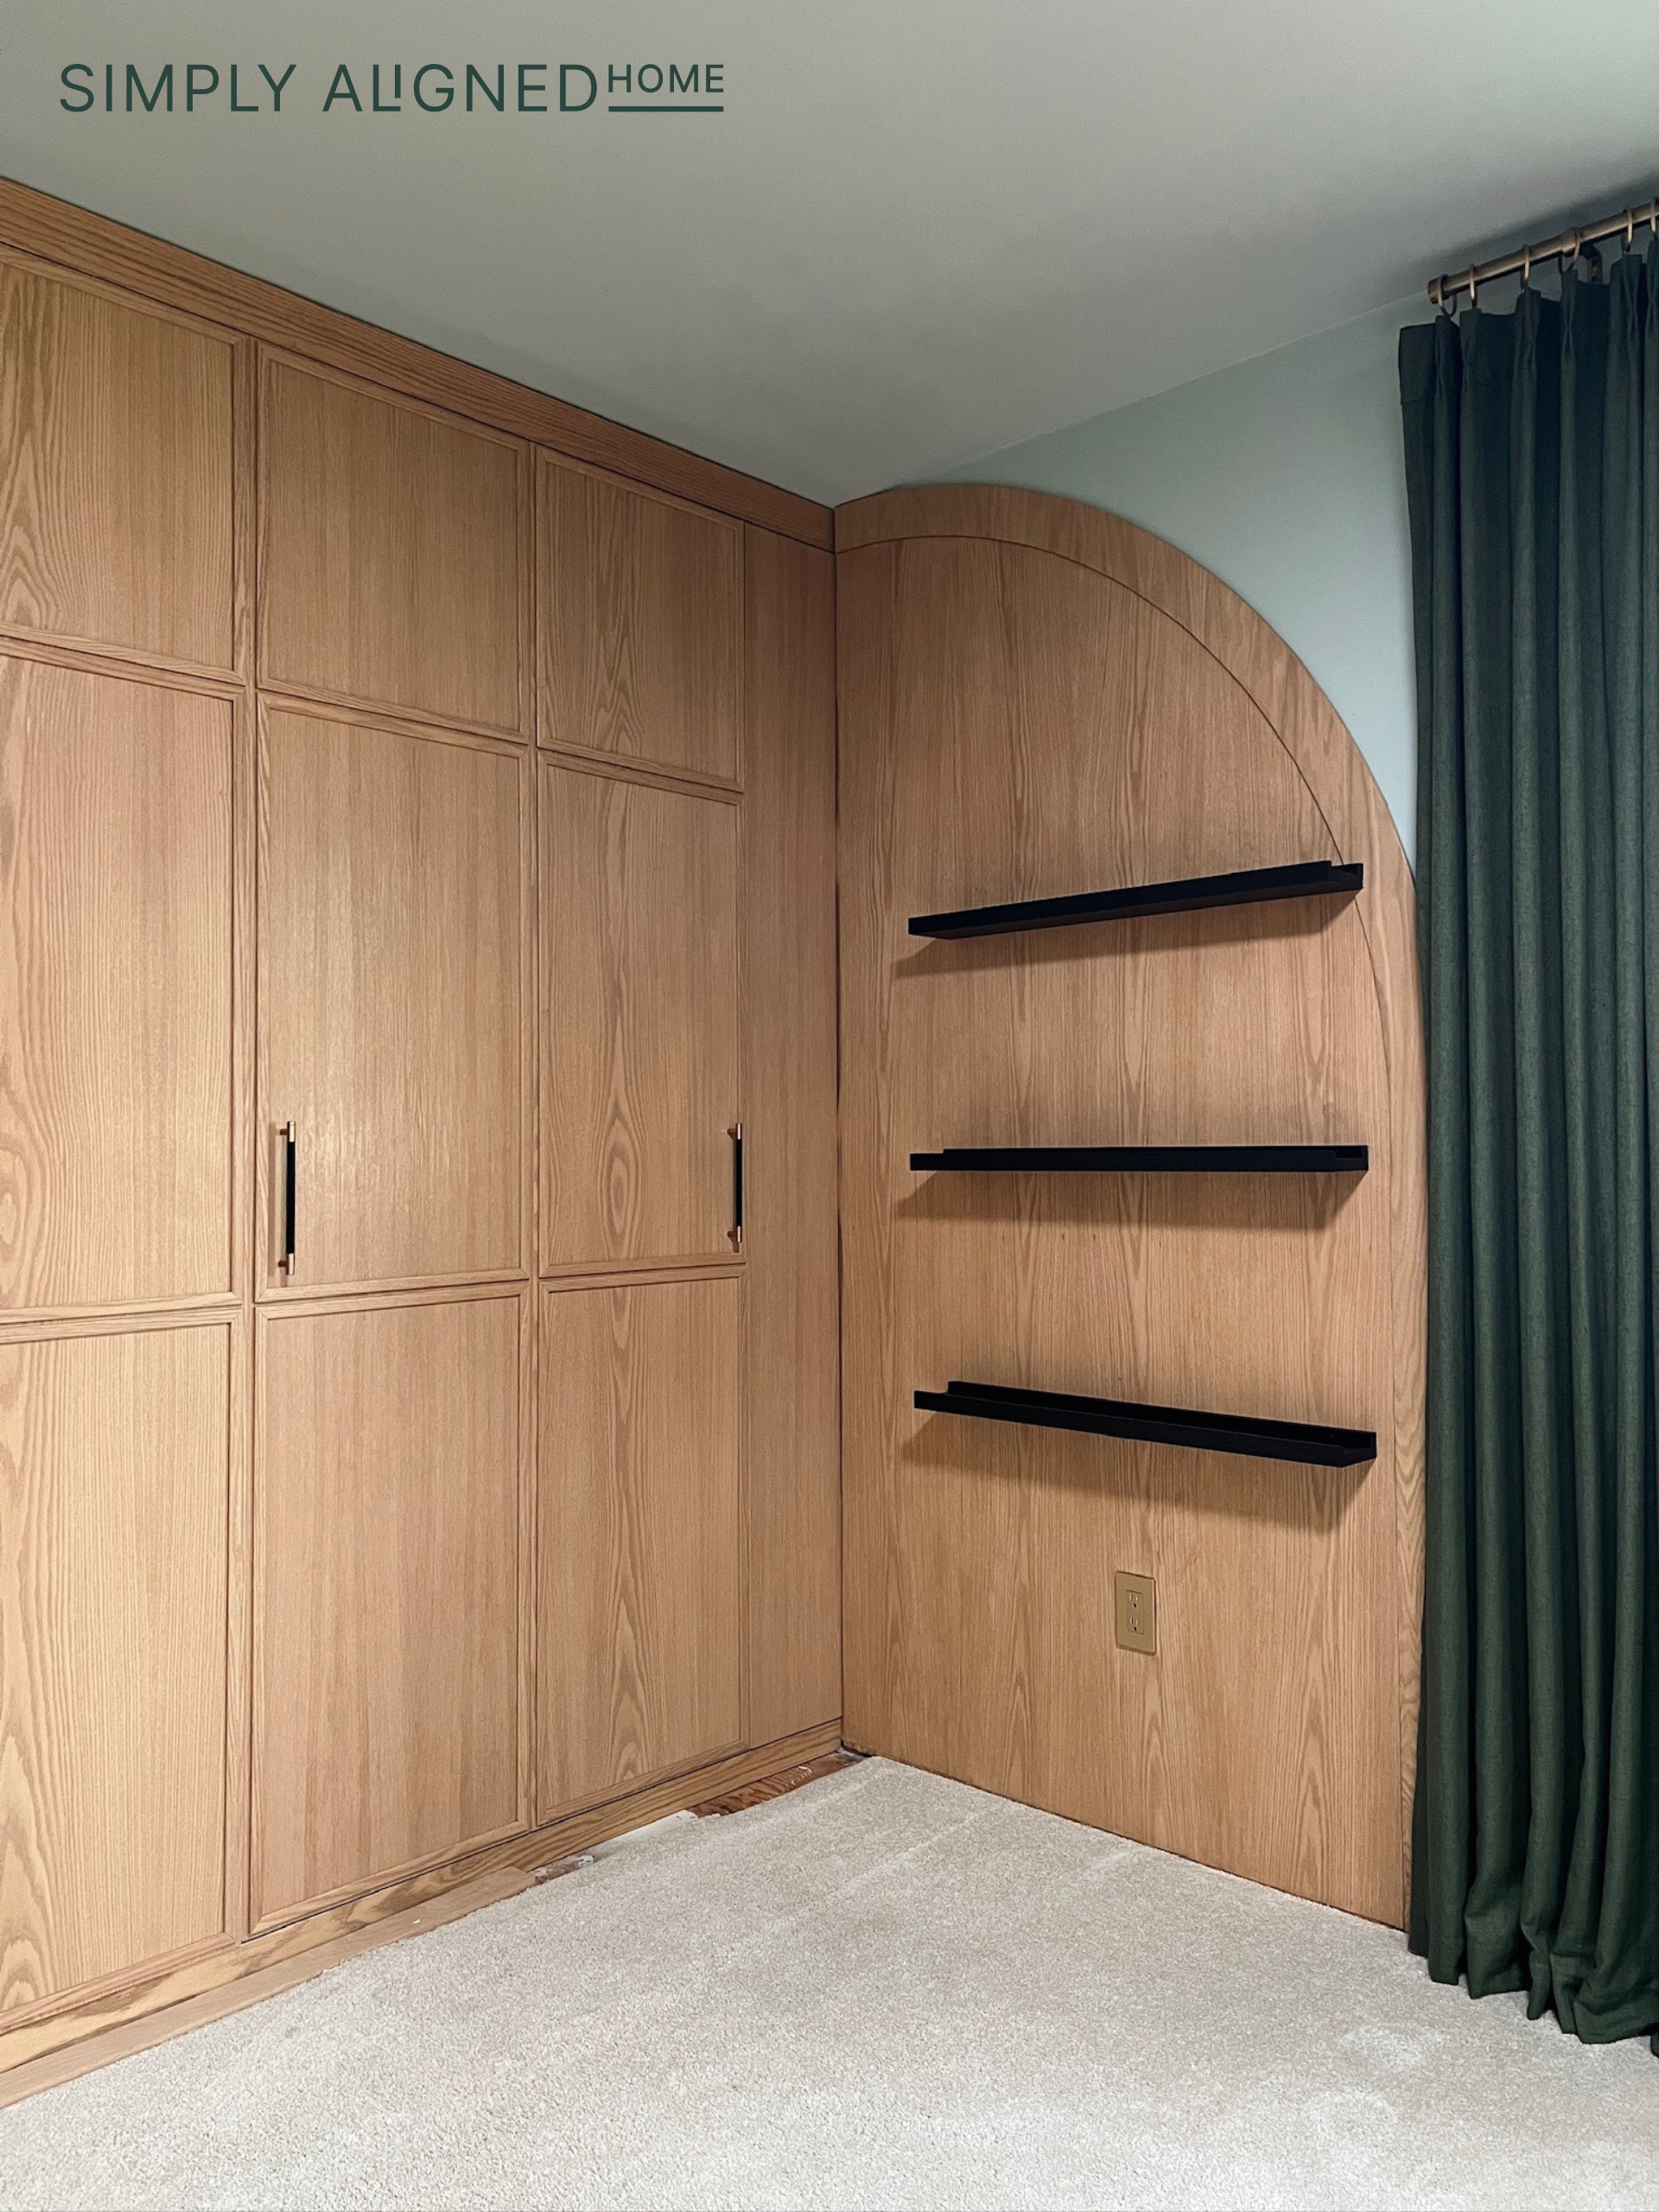
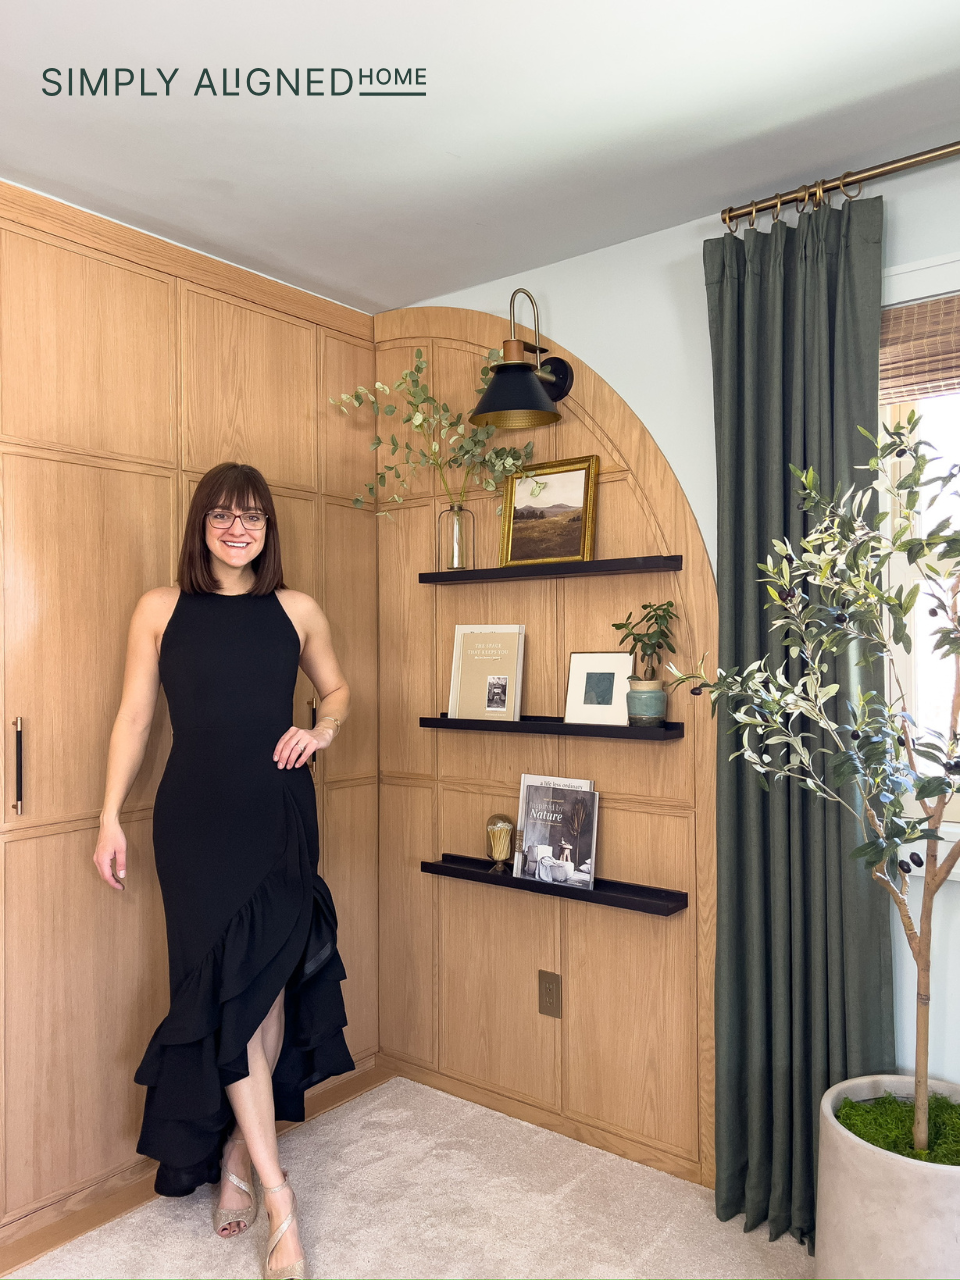
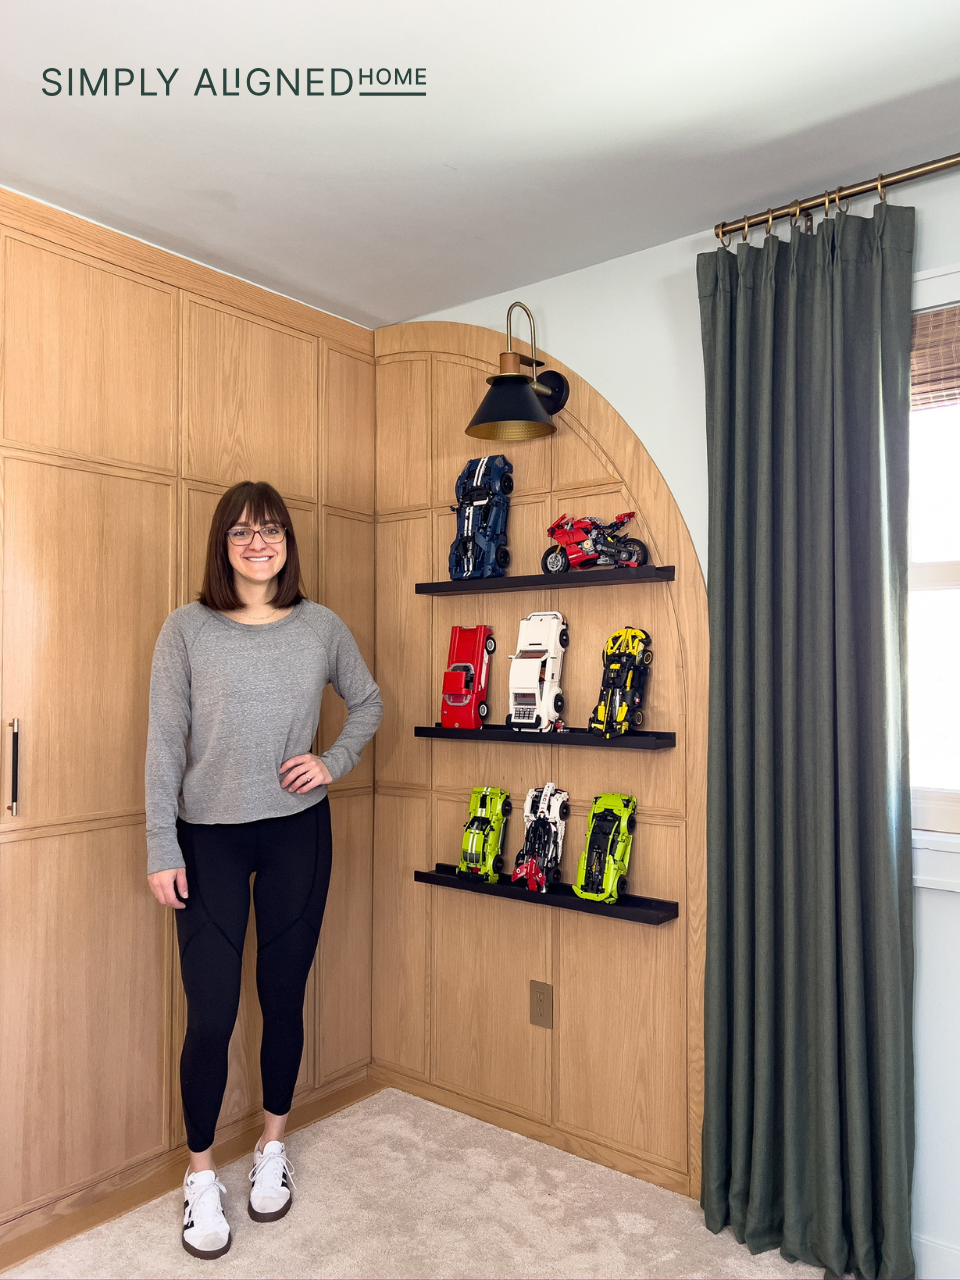
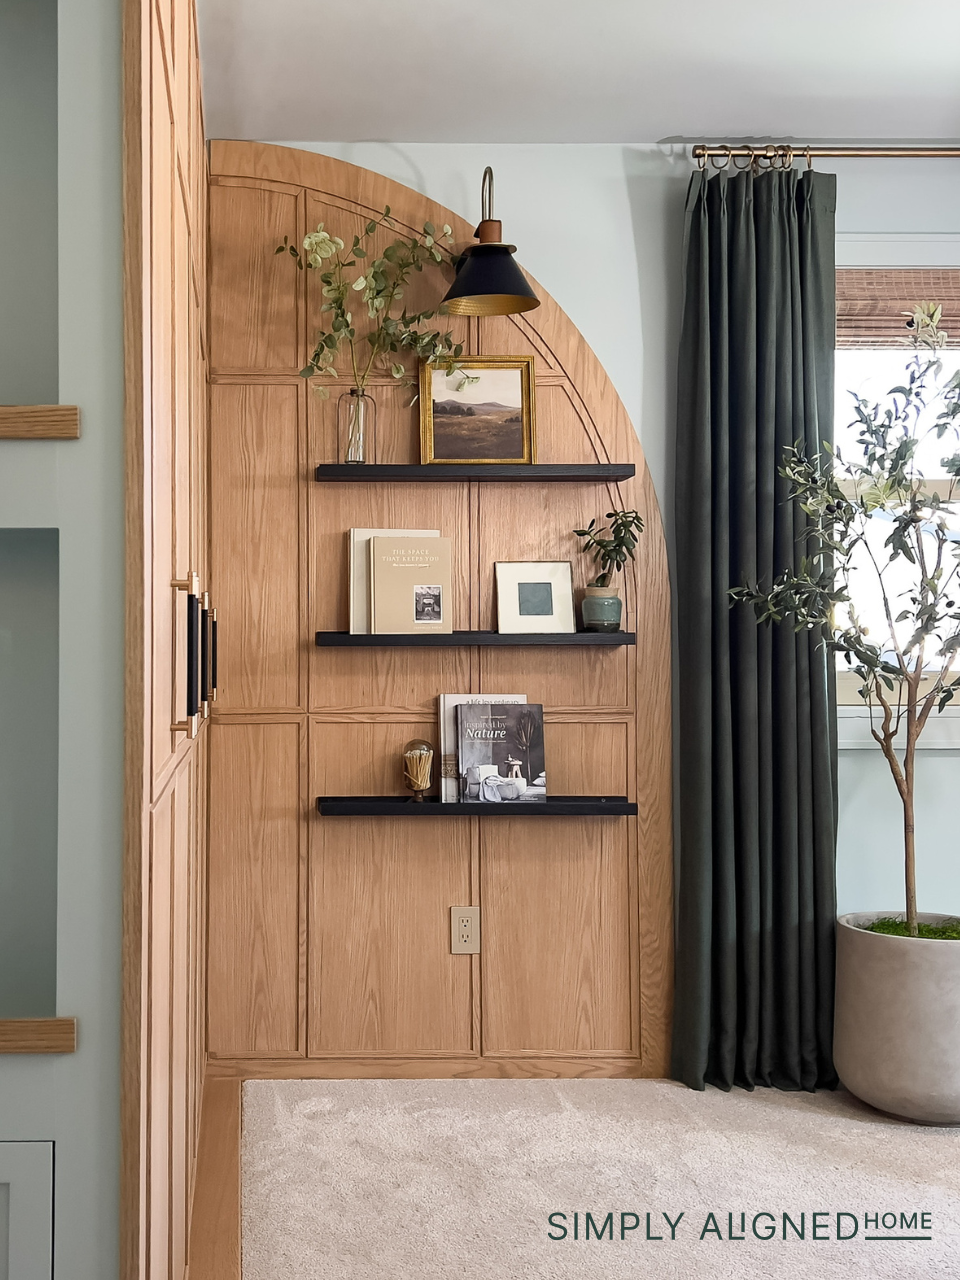
Wall Arch
I sketched out an idea for the first time and I was super excited about it! I designed an arch that would carry the closet design to the adjacent wall.
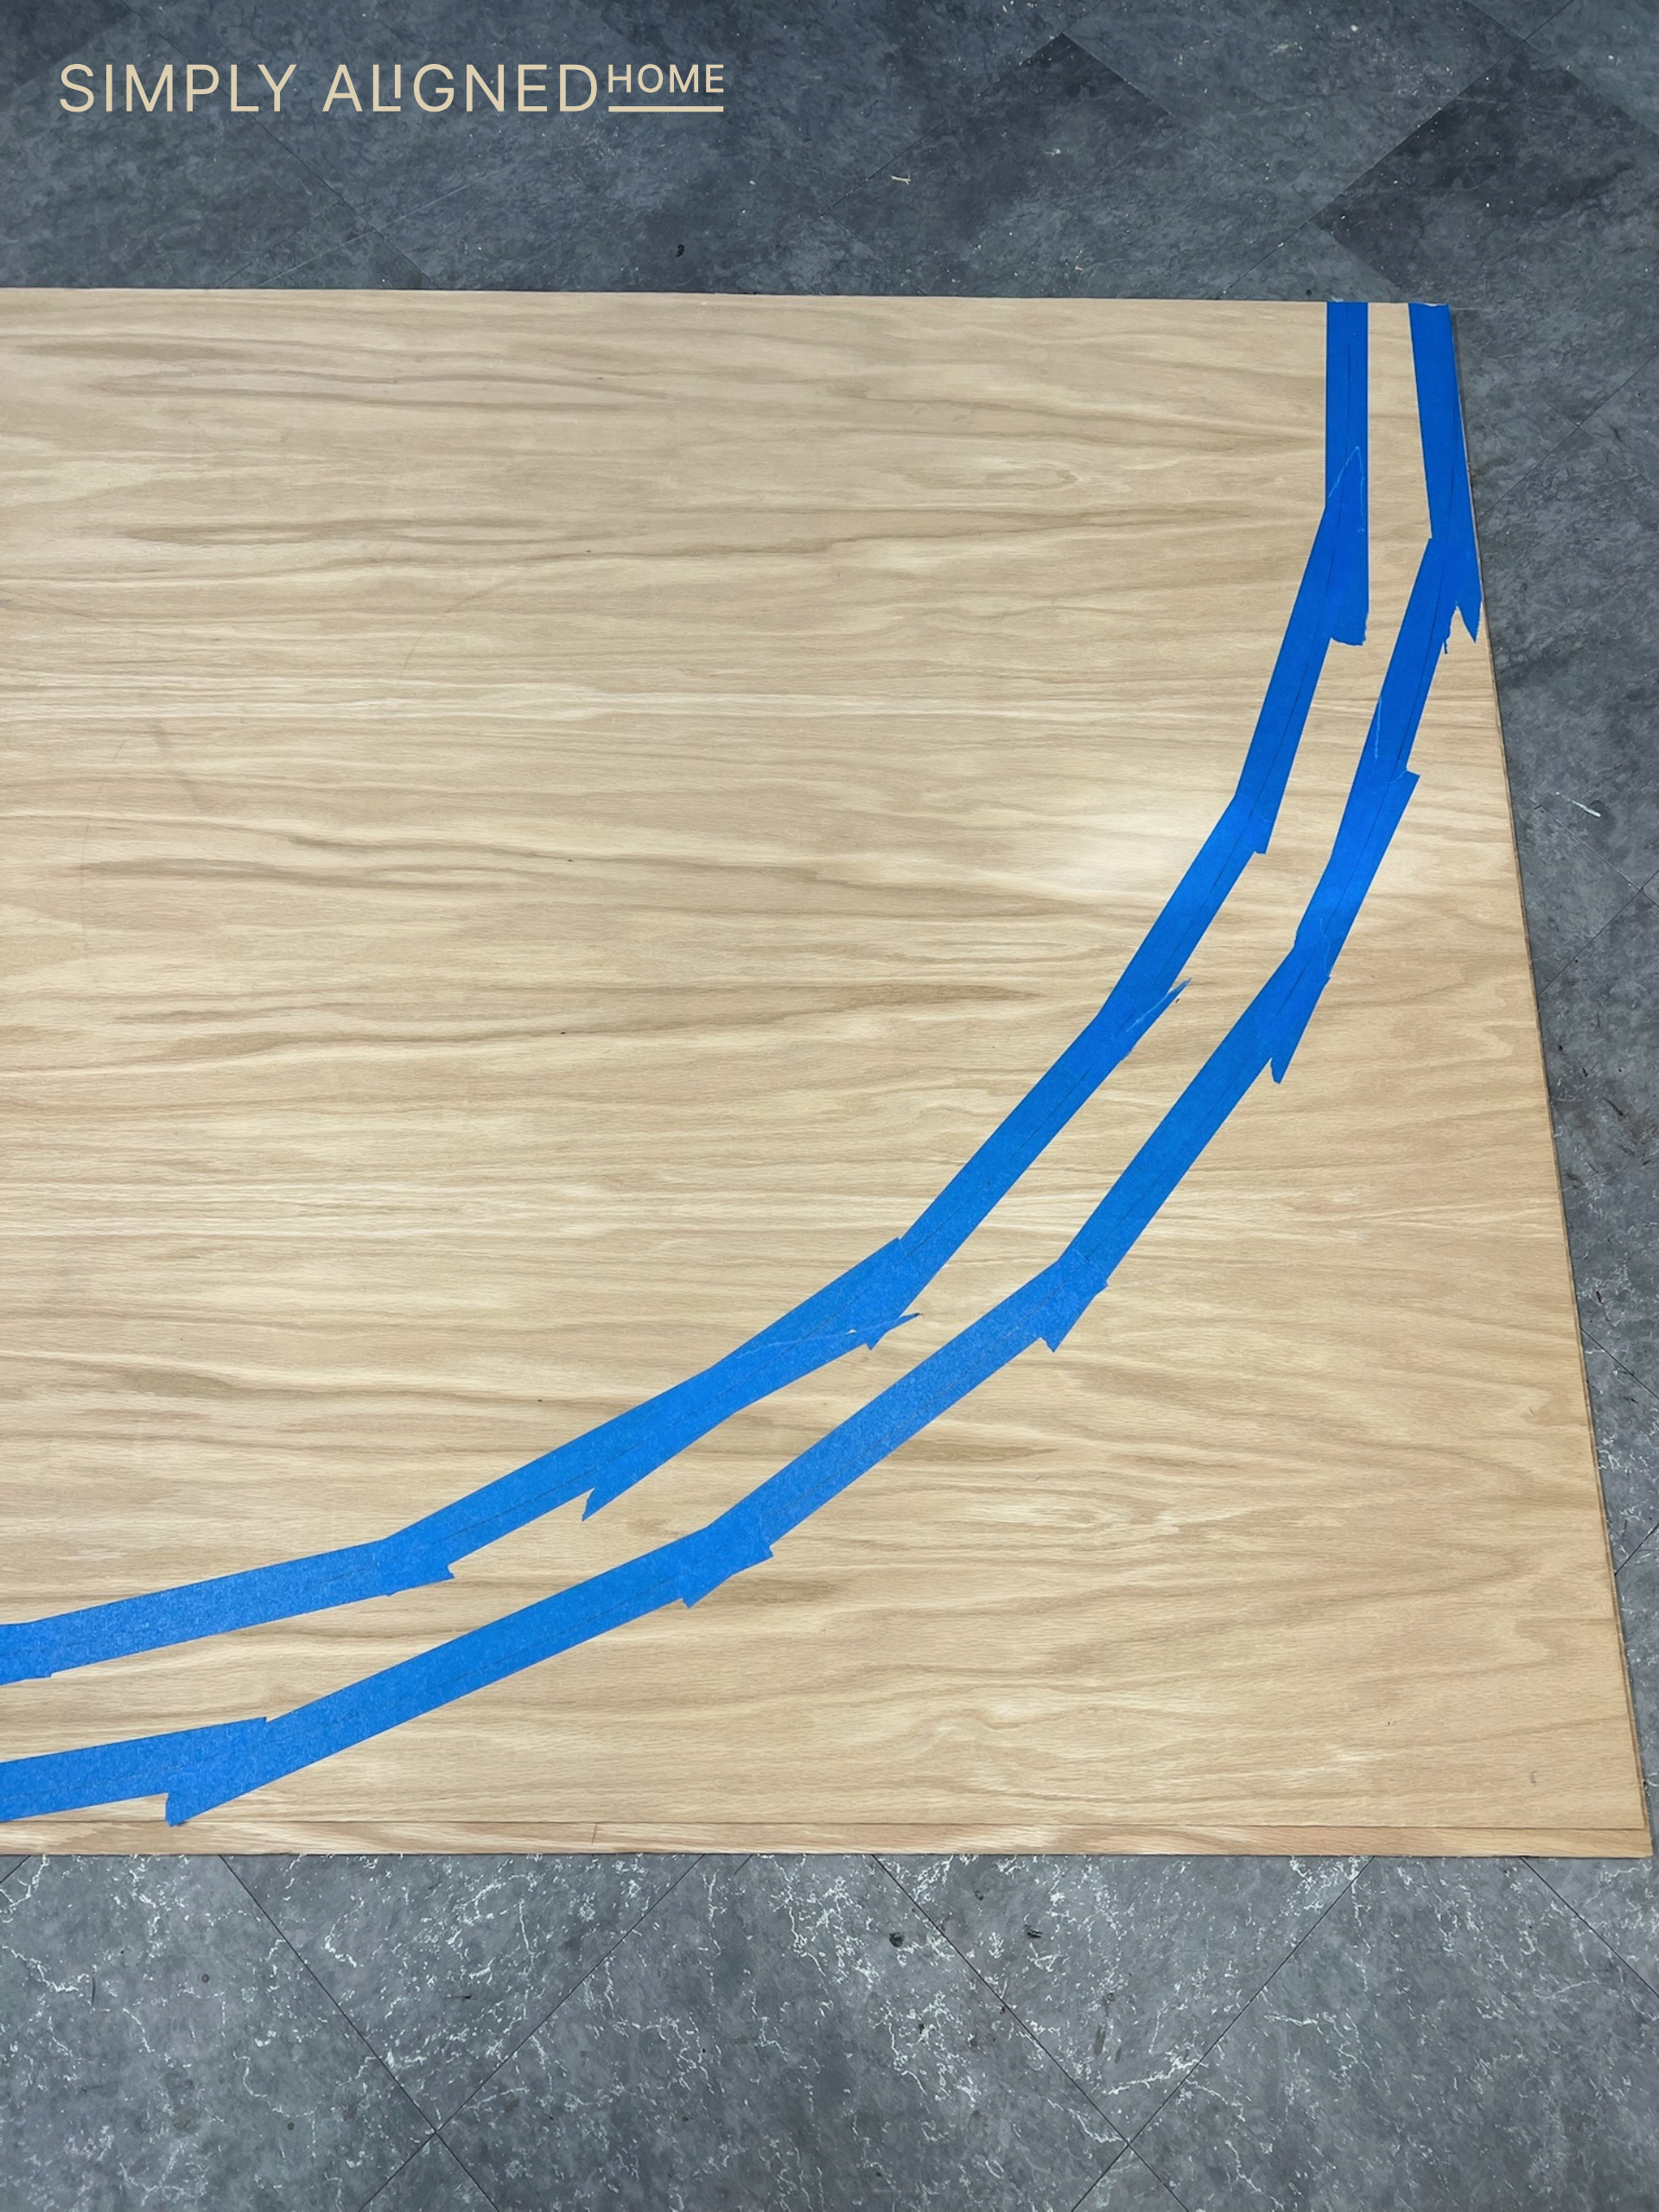
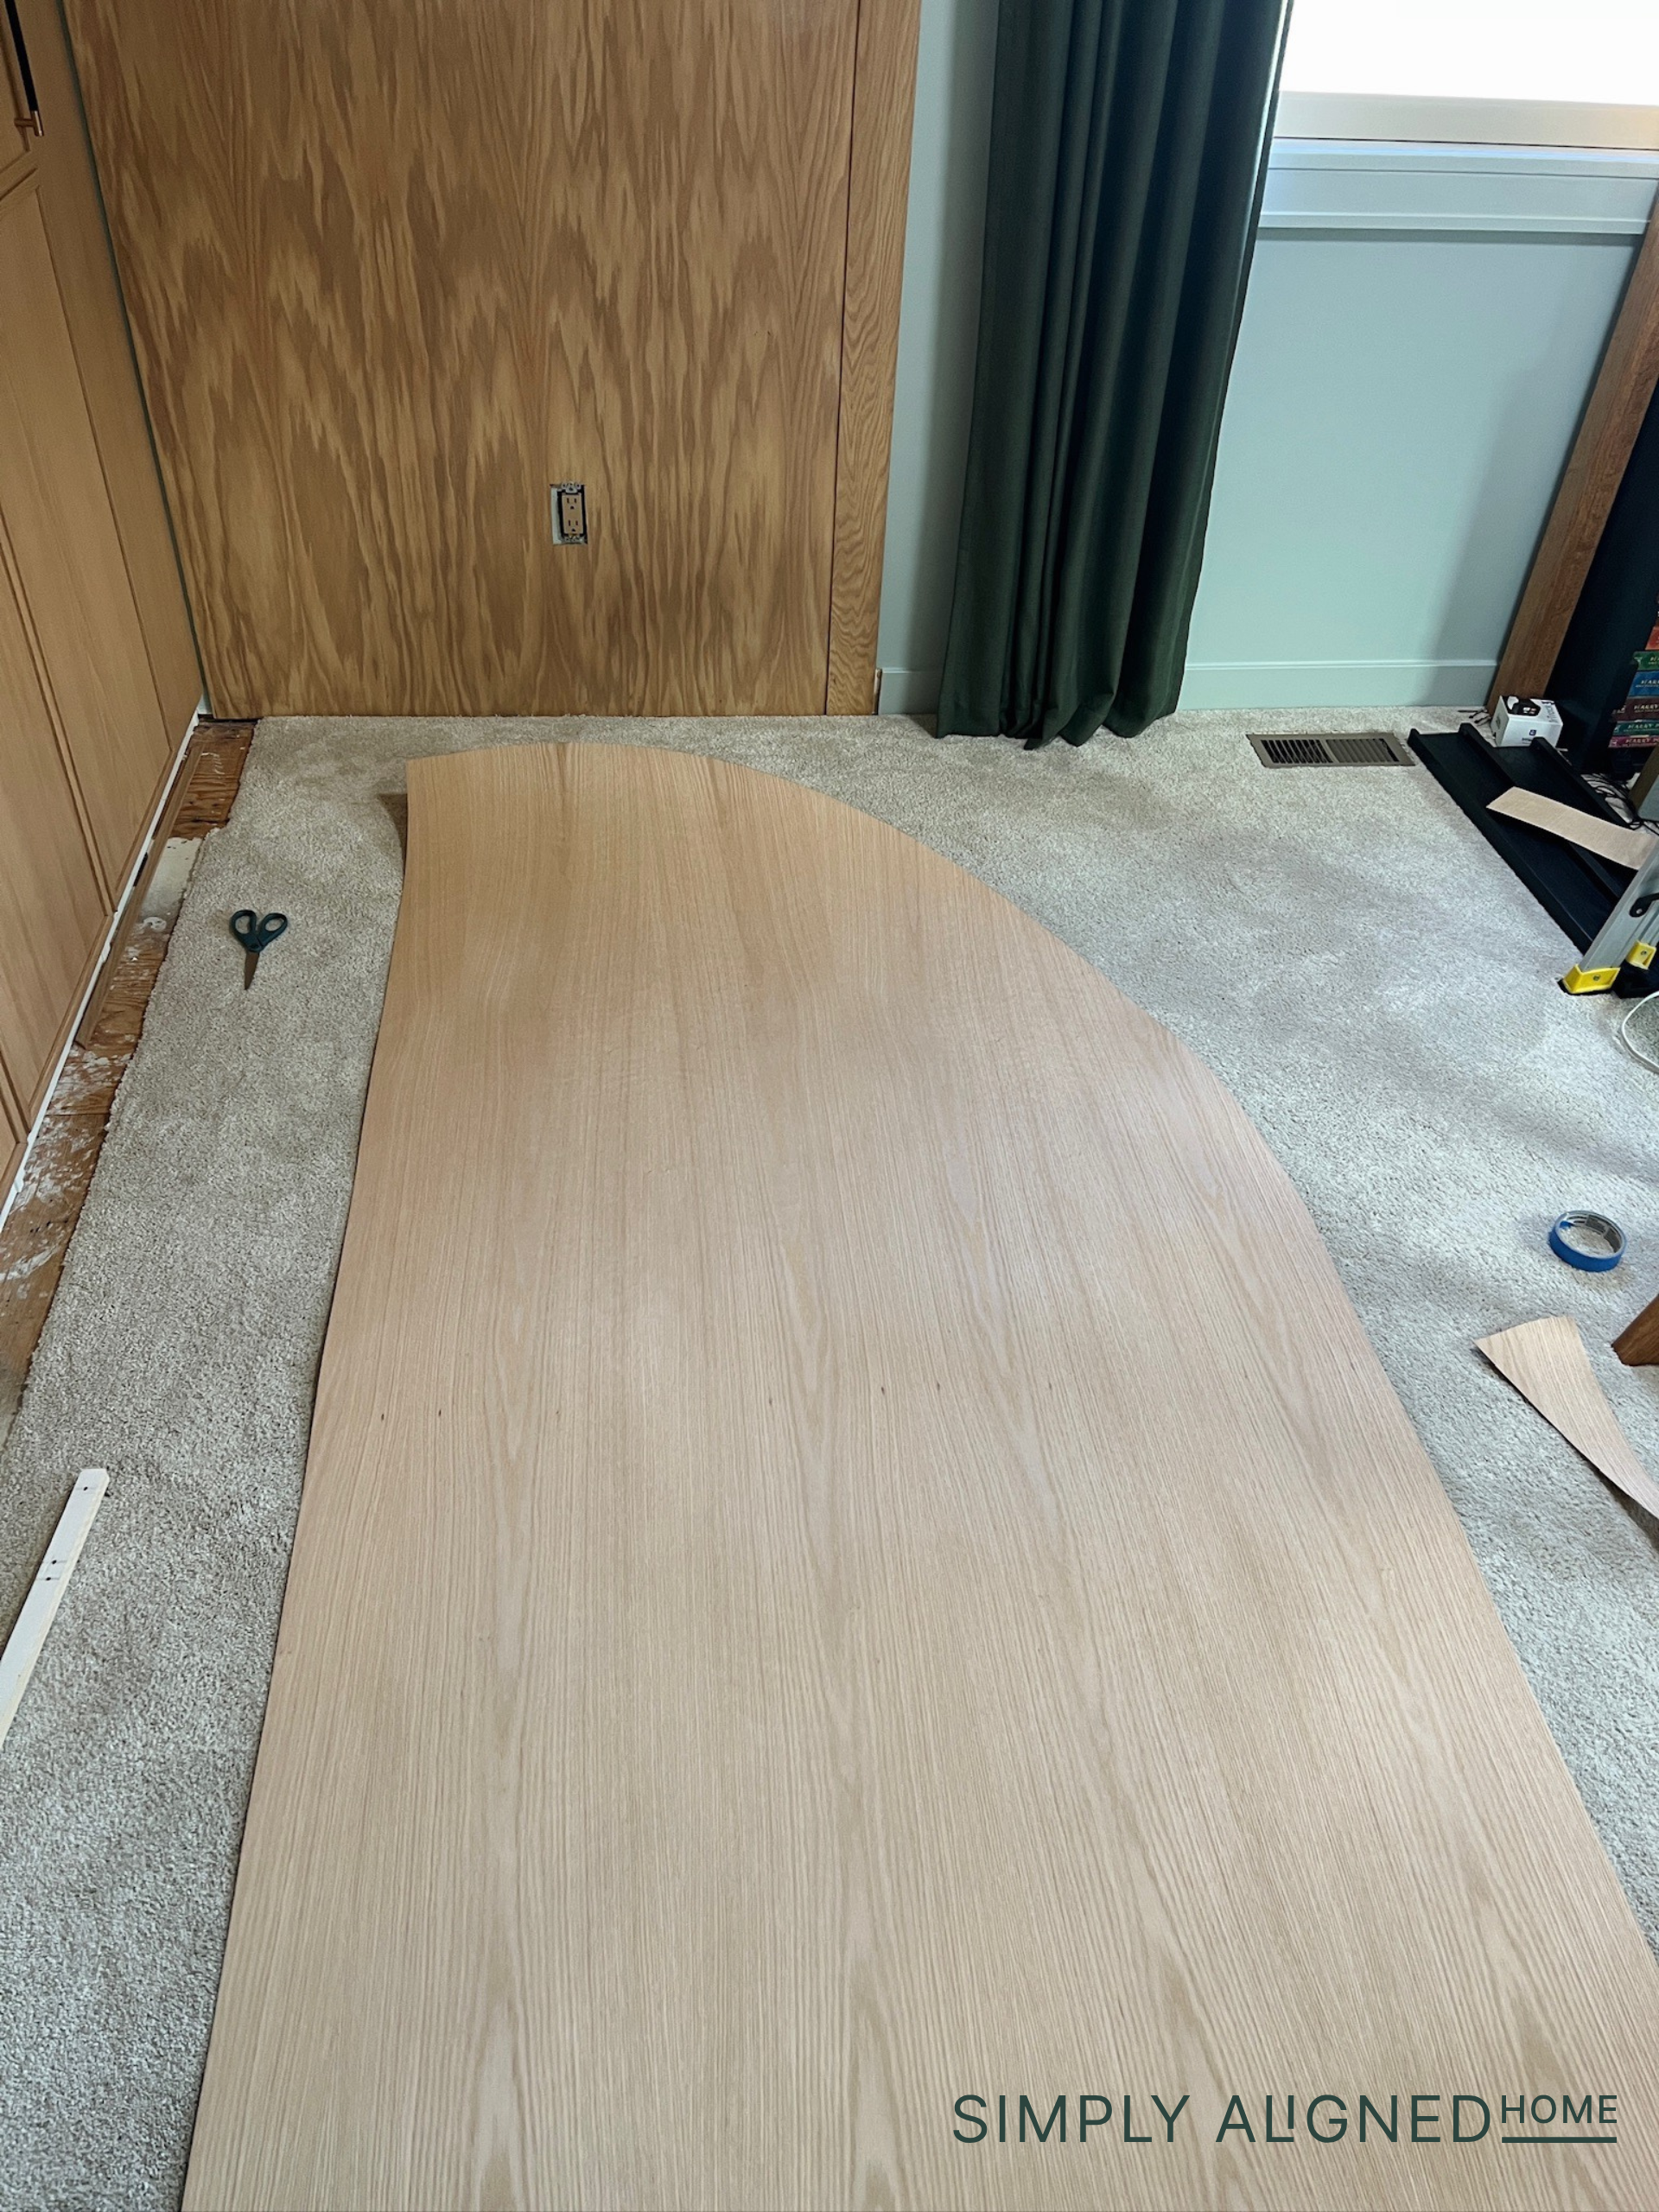
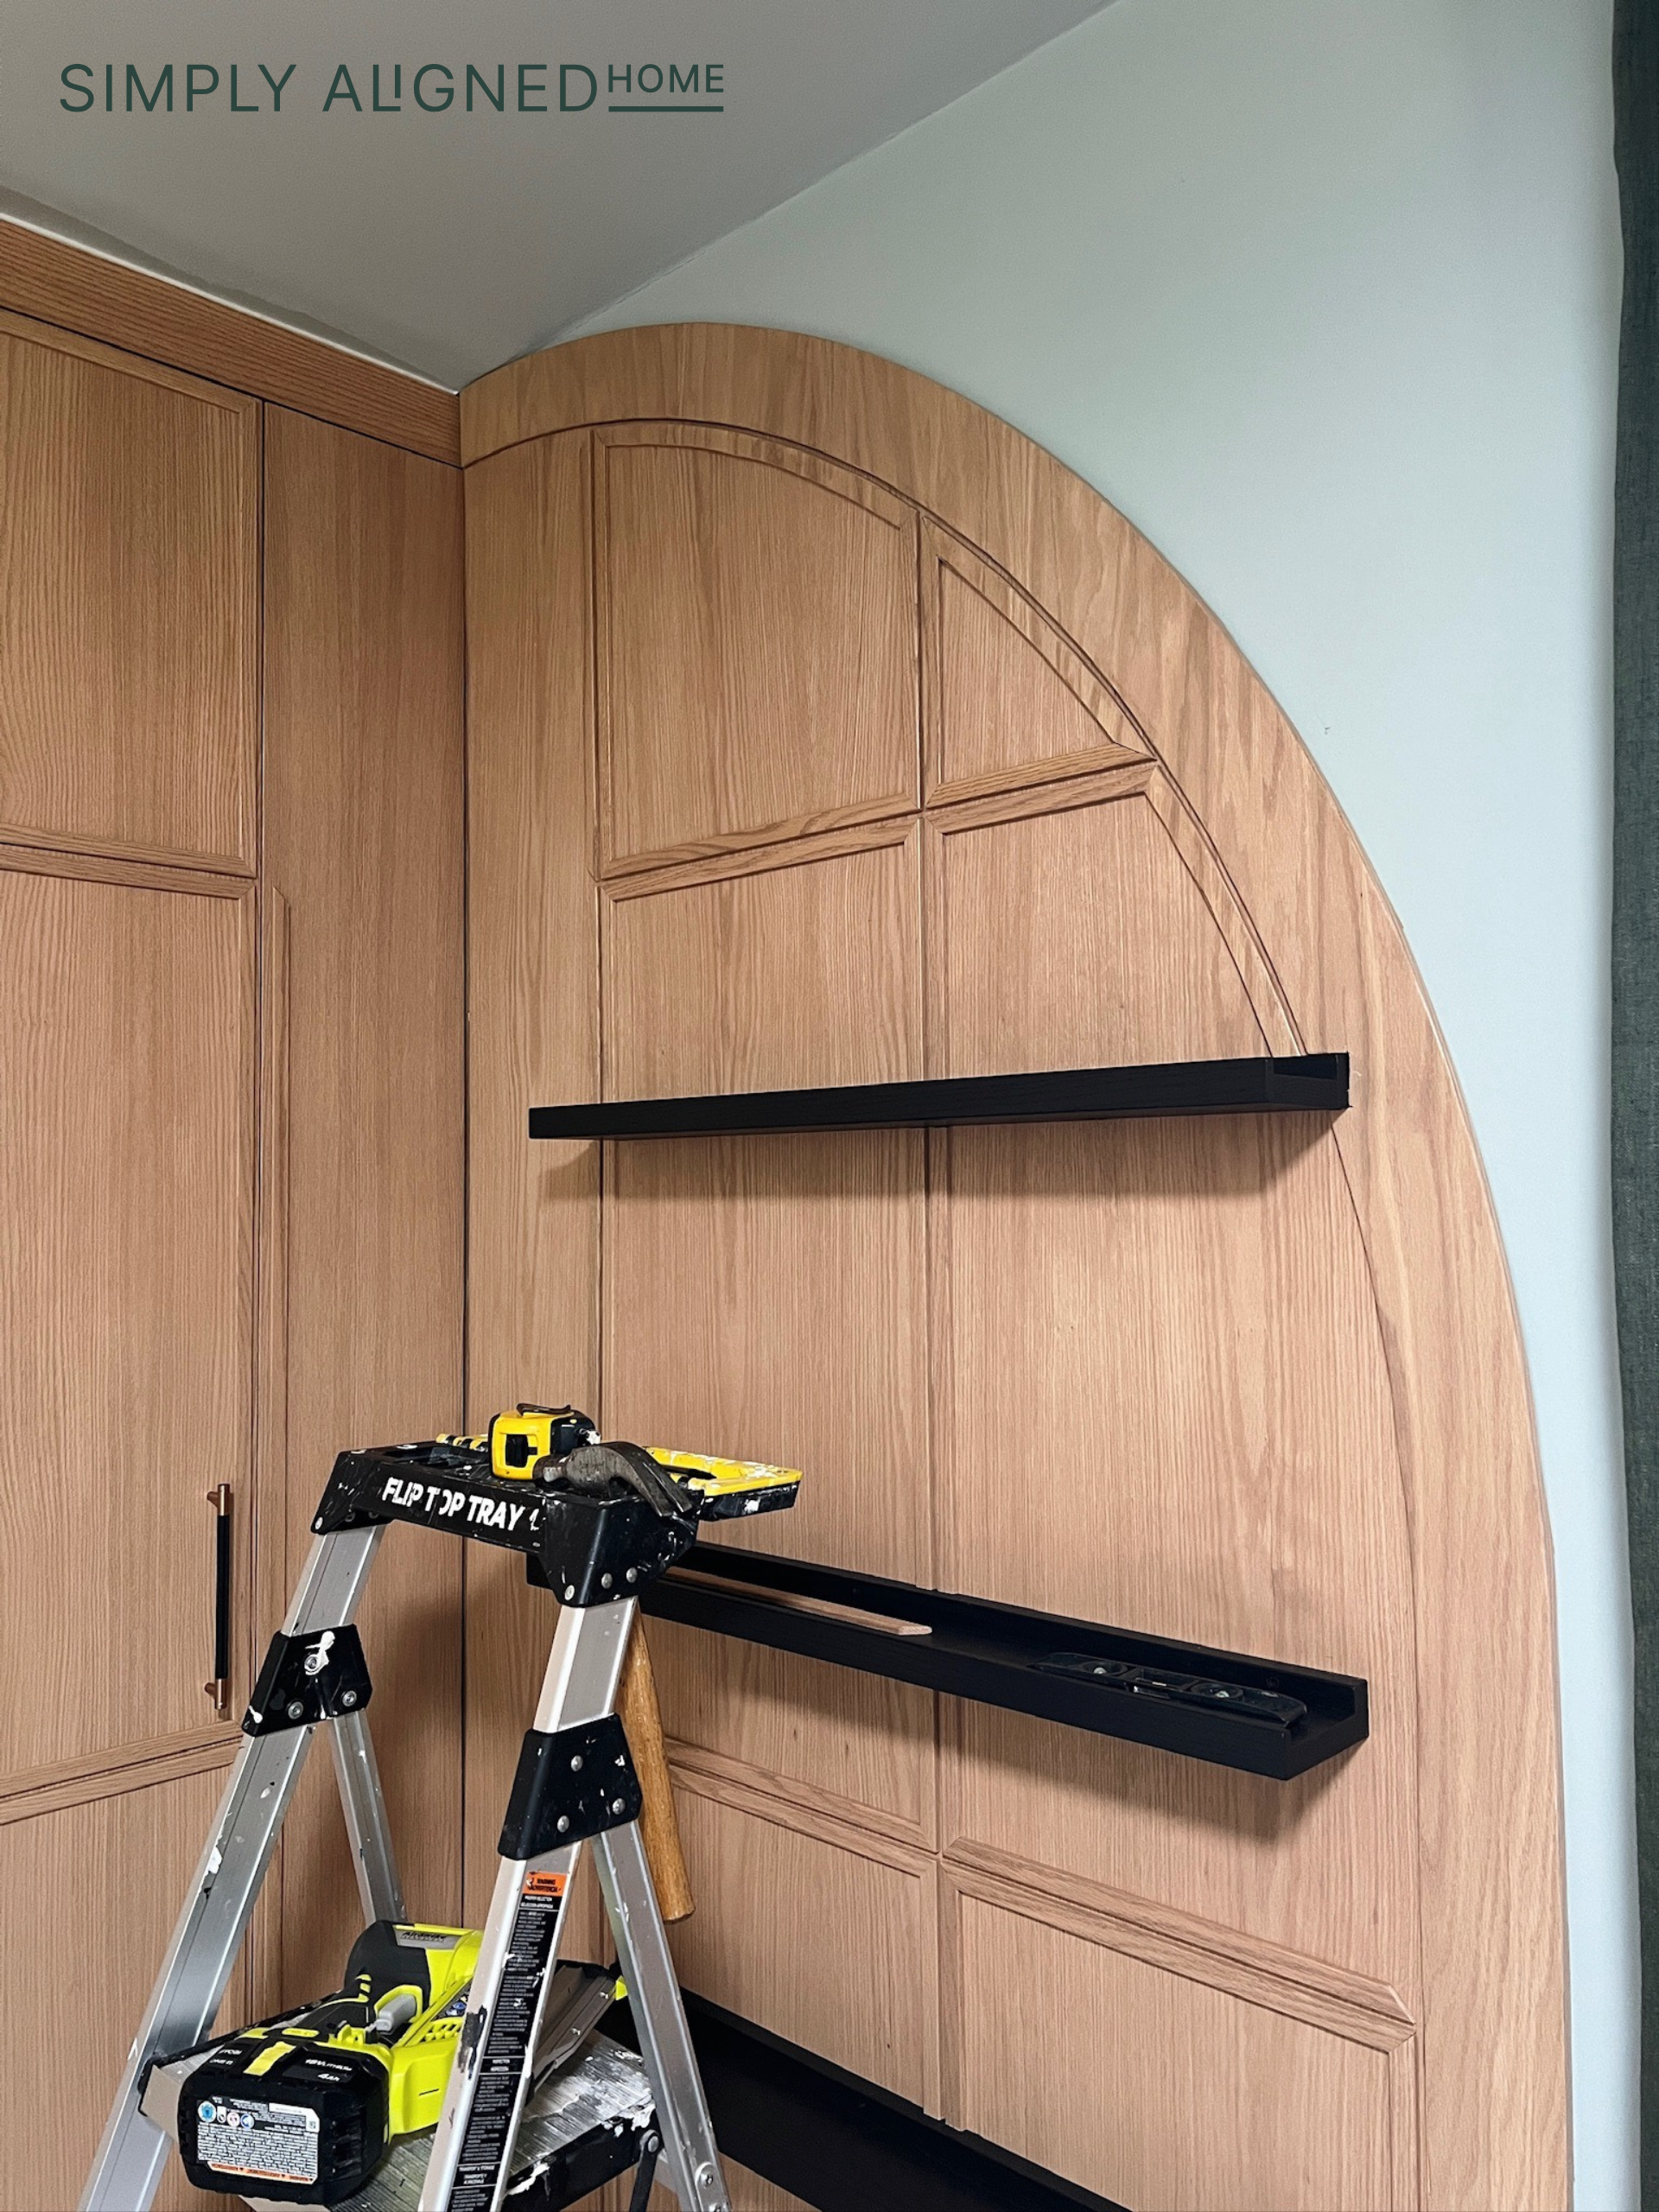
Someone recommended I cut the arch with a jigsaw, so that’s what I did! I made a nifty little arch arm to draw the arch. I marked out two arches so that I can cut the arch and then cut another piece of trim that would match the trim on top of the IKEA units. I used painters tape to minimize the tear out of the plywood.
After everything was cut, I glued the arch trim to the main arch with wood glue and clamps and it looked so good! I added edge banding to the arch and finished it off with stain and sealer. Once the sealer was dry, I installed the arch using brad nails. I bought floating shelves but didn’t love them. So, I made some picture ledges and painted them black.

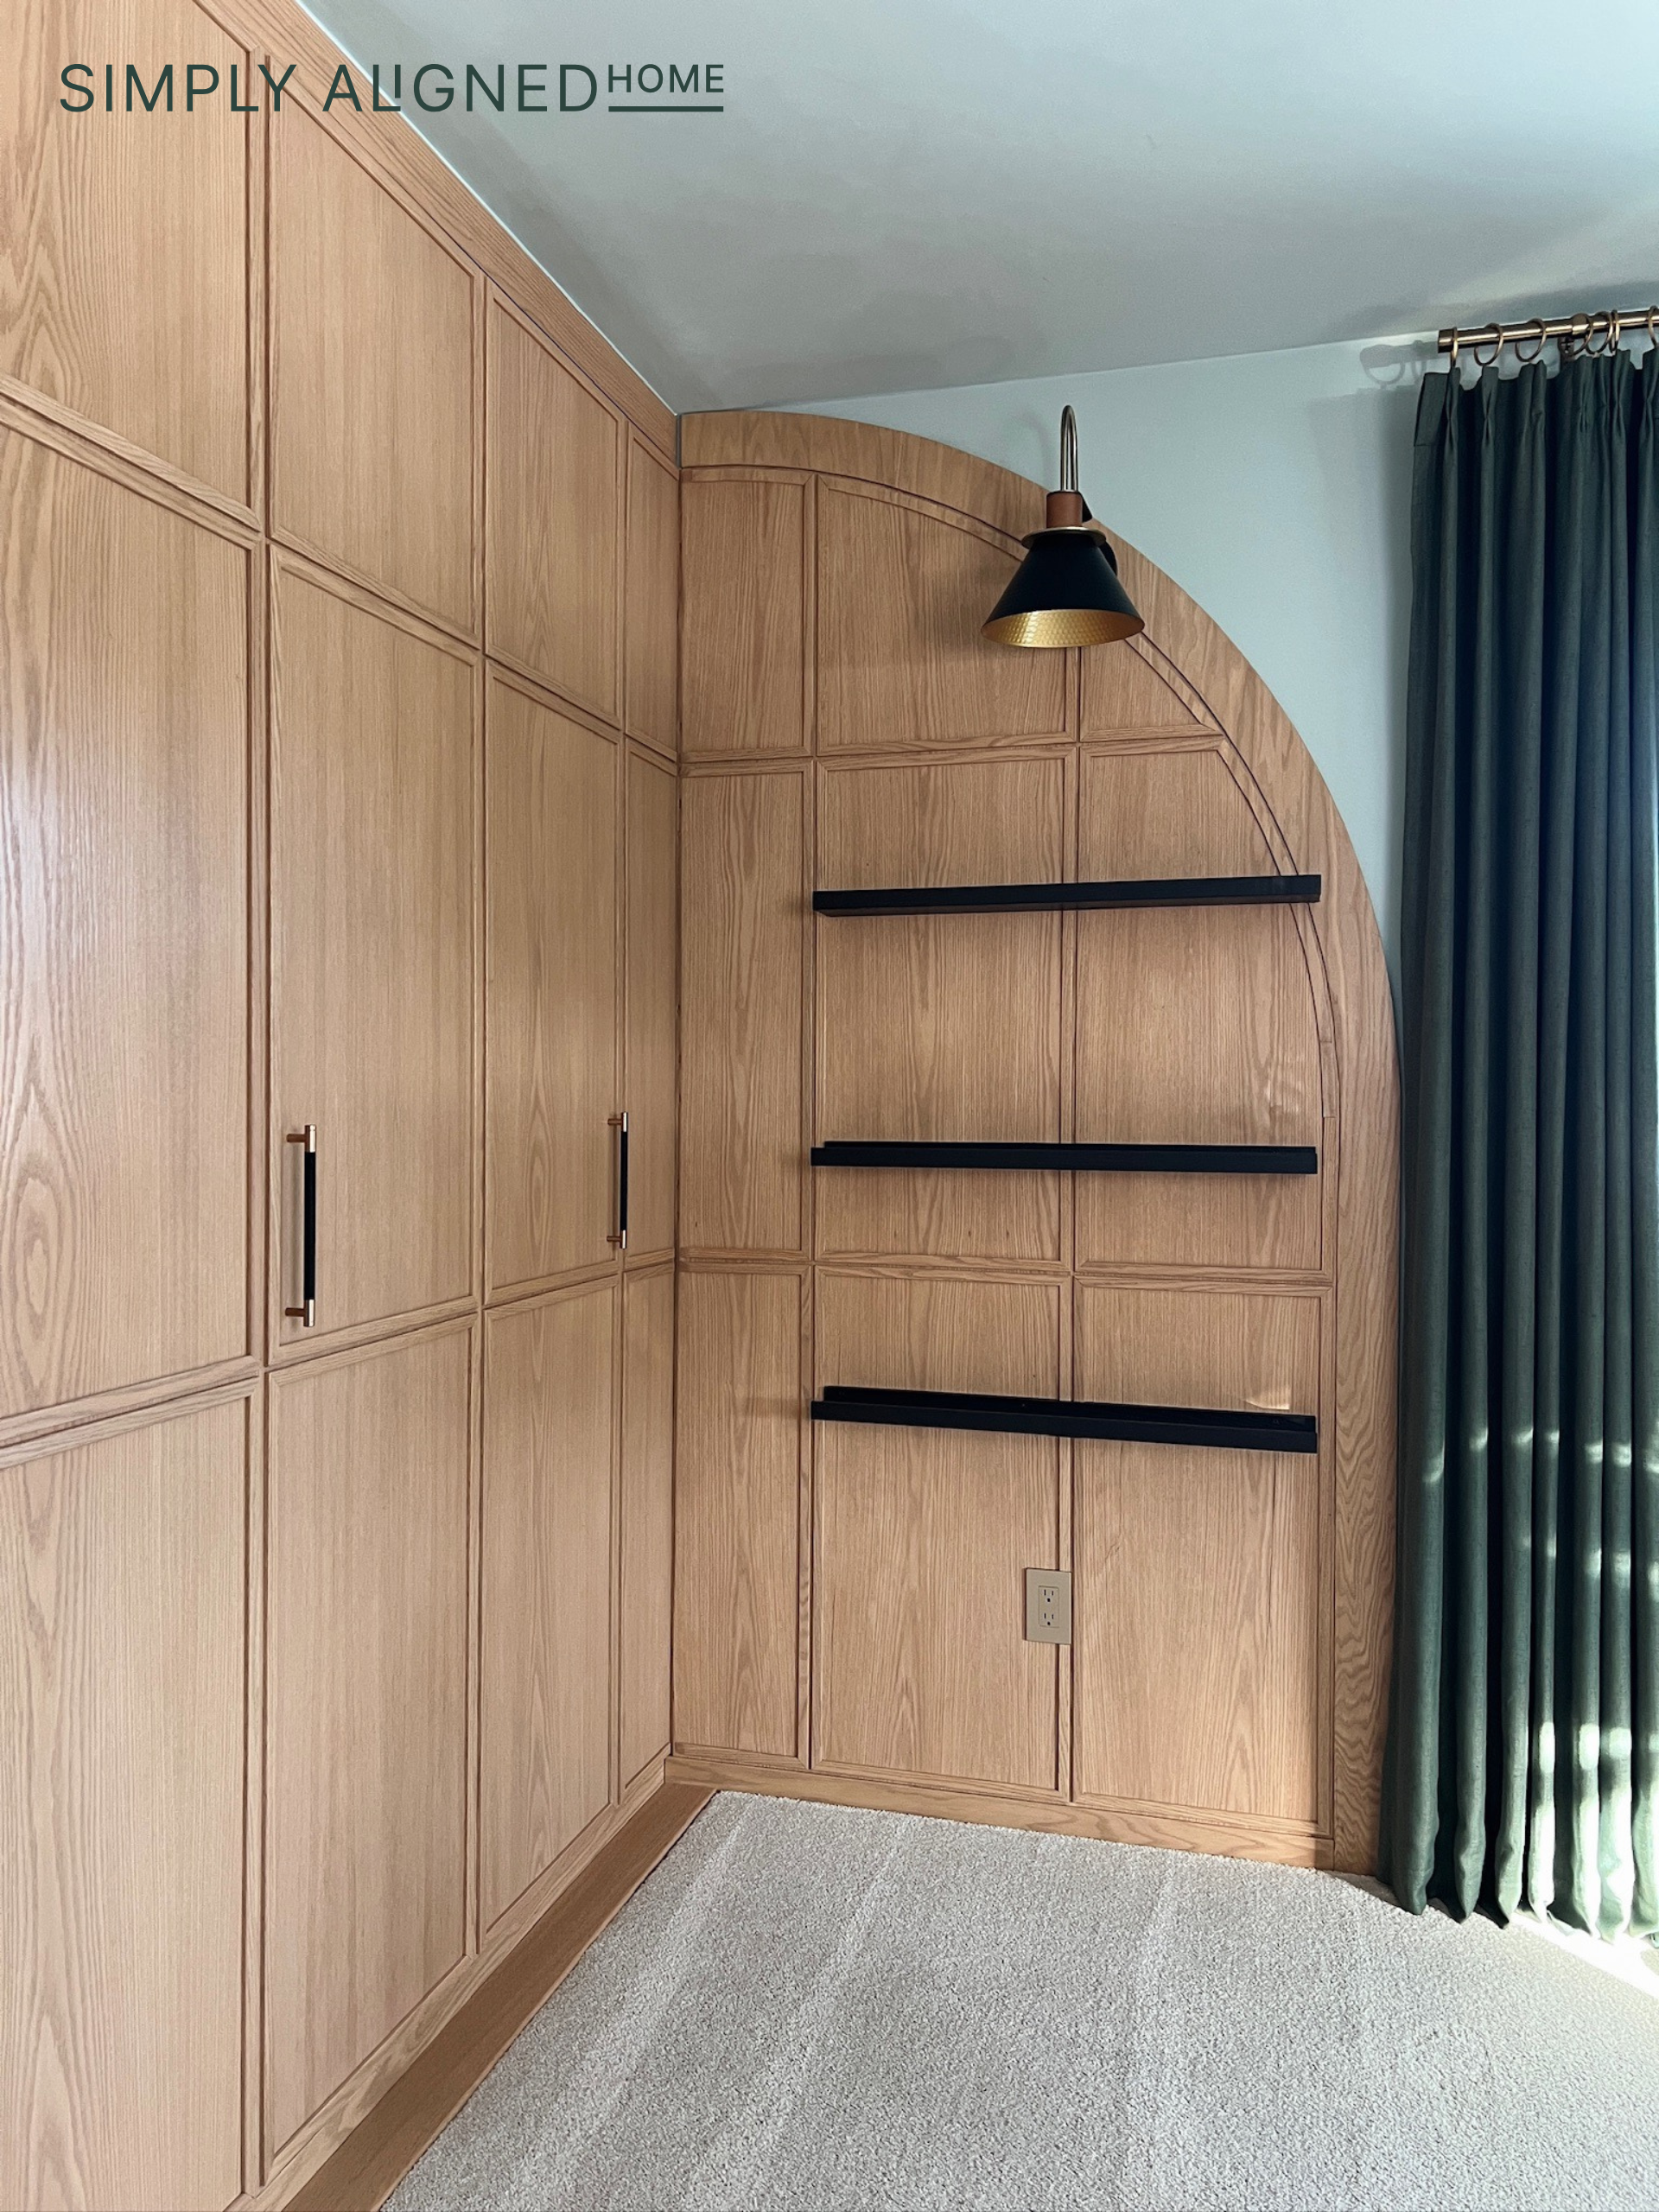
I actually ended up not loving the difference between the closet doors and the arch wood finish. The arch just seemed so harsh next to these nice doors. Luckily, I bought one extra sheet of veneer! I was so glad I had a second try at this. I found a veneer adhesive that was so much easier to use! I applied the veneer, well aware that a vertical application would be difficult because I couldn’t clamp it while the adhesive cured. It would have been much easier with a second set of hands or if I applied to veneer before installing the arch, but I made it work!
However, it was extremely bubbled. I stepped away for a bit and came up with a plan! To smooth it back out, I used an iron and cut little slits to get rid of the air bubbles so I could smooth it out. I used a putty knife to apply pressure and make it all smooth. I had to do this over the whole sheet of veneer, but it worked!
Hardware
I was torn between brass and black + brass pulls for these doors. My son ended up picking the black hardware and I absolutely love it with the black shelves on the arch!
Trim
Then, I added the third floating shelf and finished the arch off with trim to match the doors. The trim piece I made for the actual arch part was far from perfect, but it didn’t look bad once it was installed!
Lighting
I got this really cute black and gold wall sconce. I decided not to hardwire it, but instead use a rechargeable light bulb. This thing is awesome!
This project really gave me a run for my money, but I’m so happy with how it turned out!
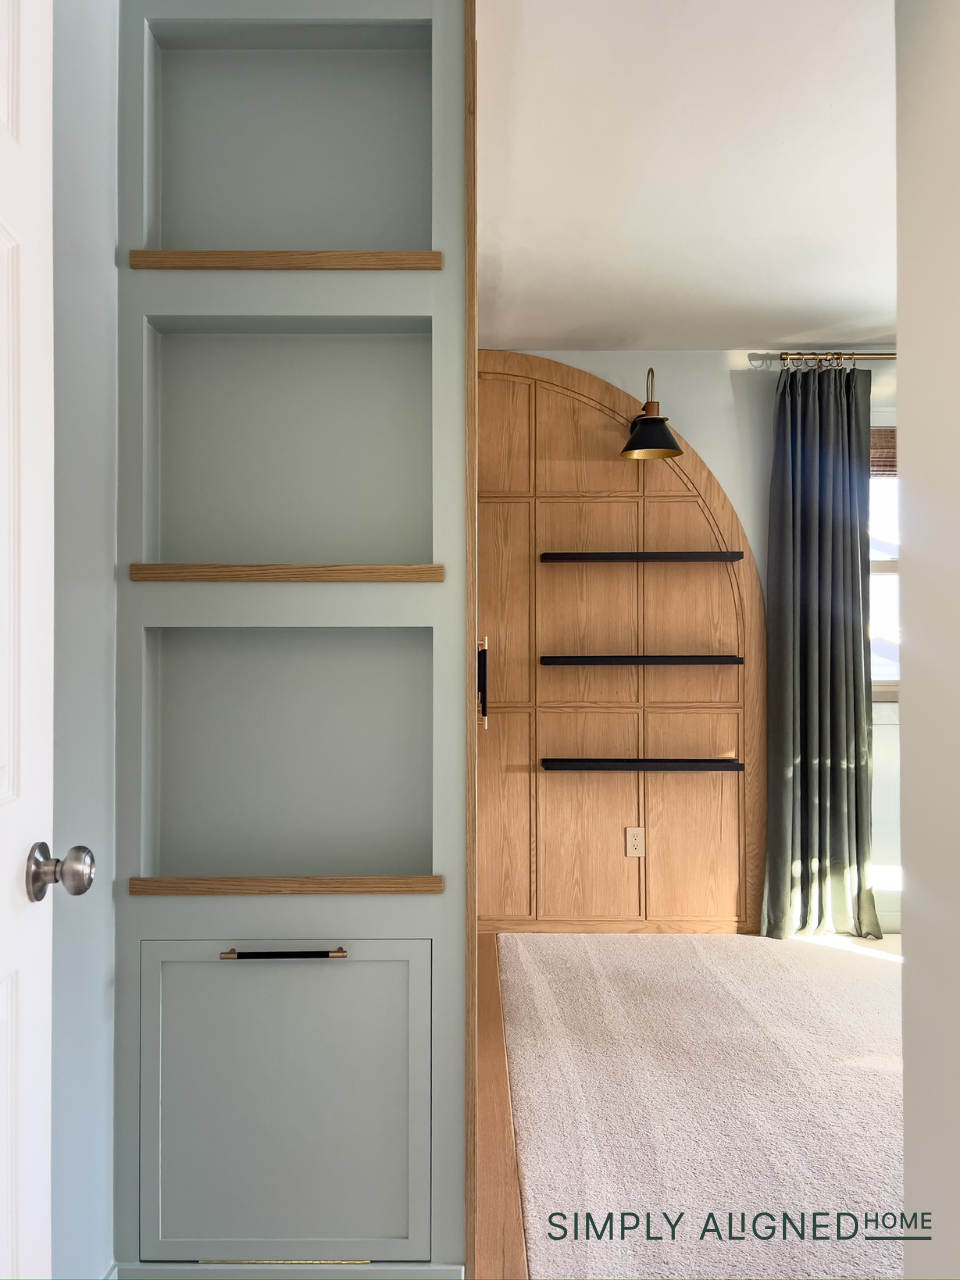
I have no chill so of course I couldn’t just install the IKEA PAX system as is…but I’m glad I took the extra time and gave it my own style! This arch would look great in a kids room or in a common space. You can dress it up or keep it casual.
Here’s all the decor I used:

**Note: I am not a professional and do not claim to be an expert. Please be sure to always read instructions for all tools and products. Safety is very important and should be your top priority. Wear necessary protection when using tools (eye wear, hearing protection, gloves, etc.) and dust masks when sanding or cutting. Simply Aligned Home is not responsible for any injury or damage. All of my designs are not professionally designed and are for private use only.**
Materials Used
Tools Used
So so impressive and creative! That arch wall is next level and adds so much interest! For the next blog post, we need to see how you organized inside the closet. And for the carpet, did you install a piece of trim on the floor? Did you just glue that down and then re-tack the carpet? Thanks!
Thank you so much! And good eye – I installed a piece of trim on the floor! When I did the demo, it left an empty space but I didn’t have any more of the carpet that was in here to match. So instead of trying to match the carpet, I installed a piece of matching trim instead.
Looks absolutely amazing!
Thank you so much!