
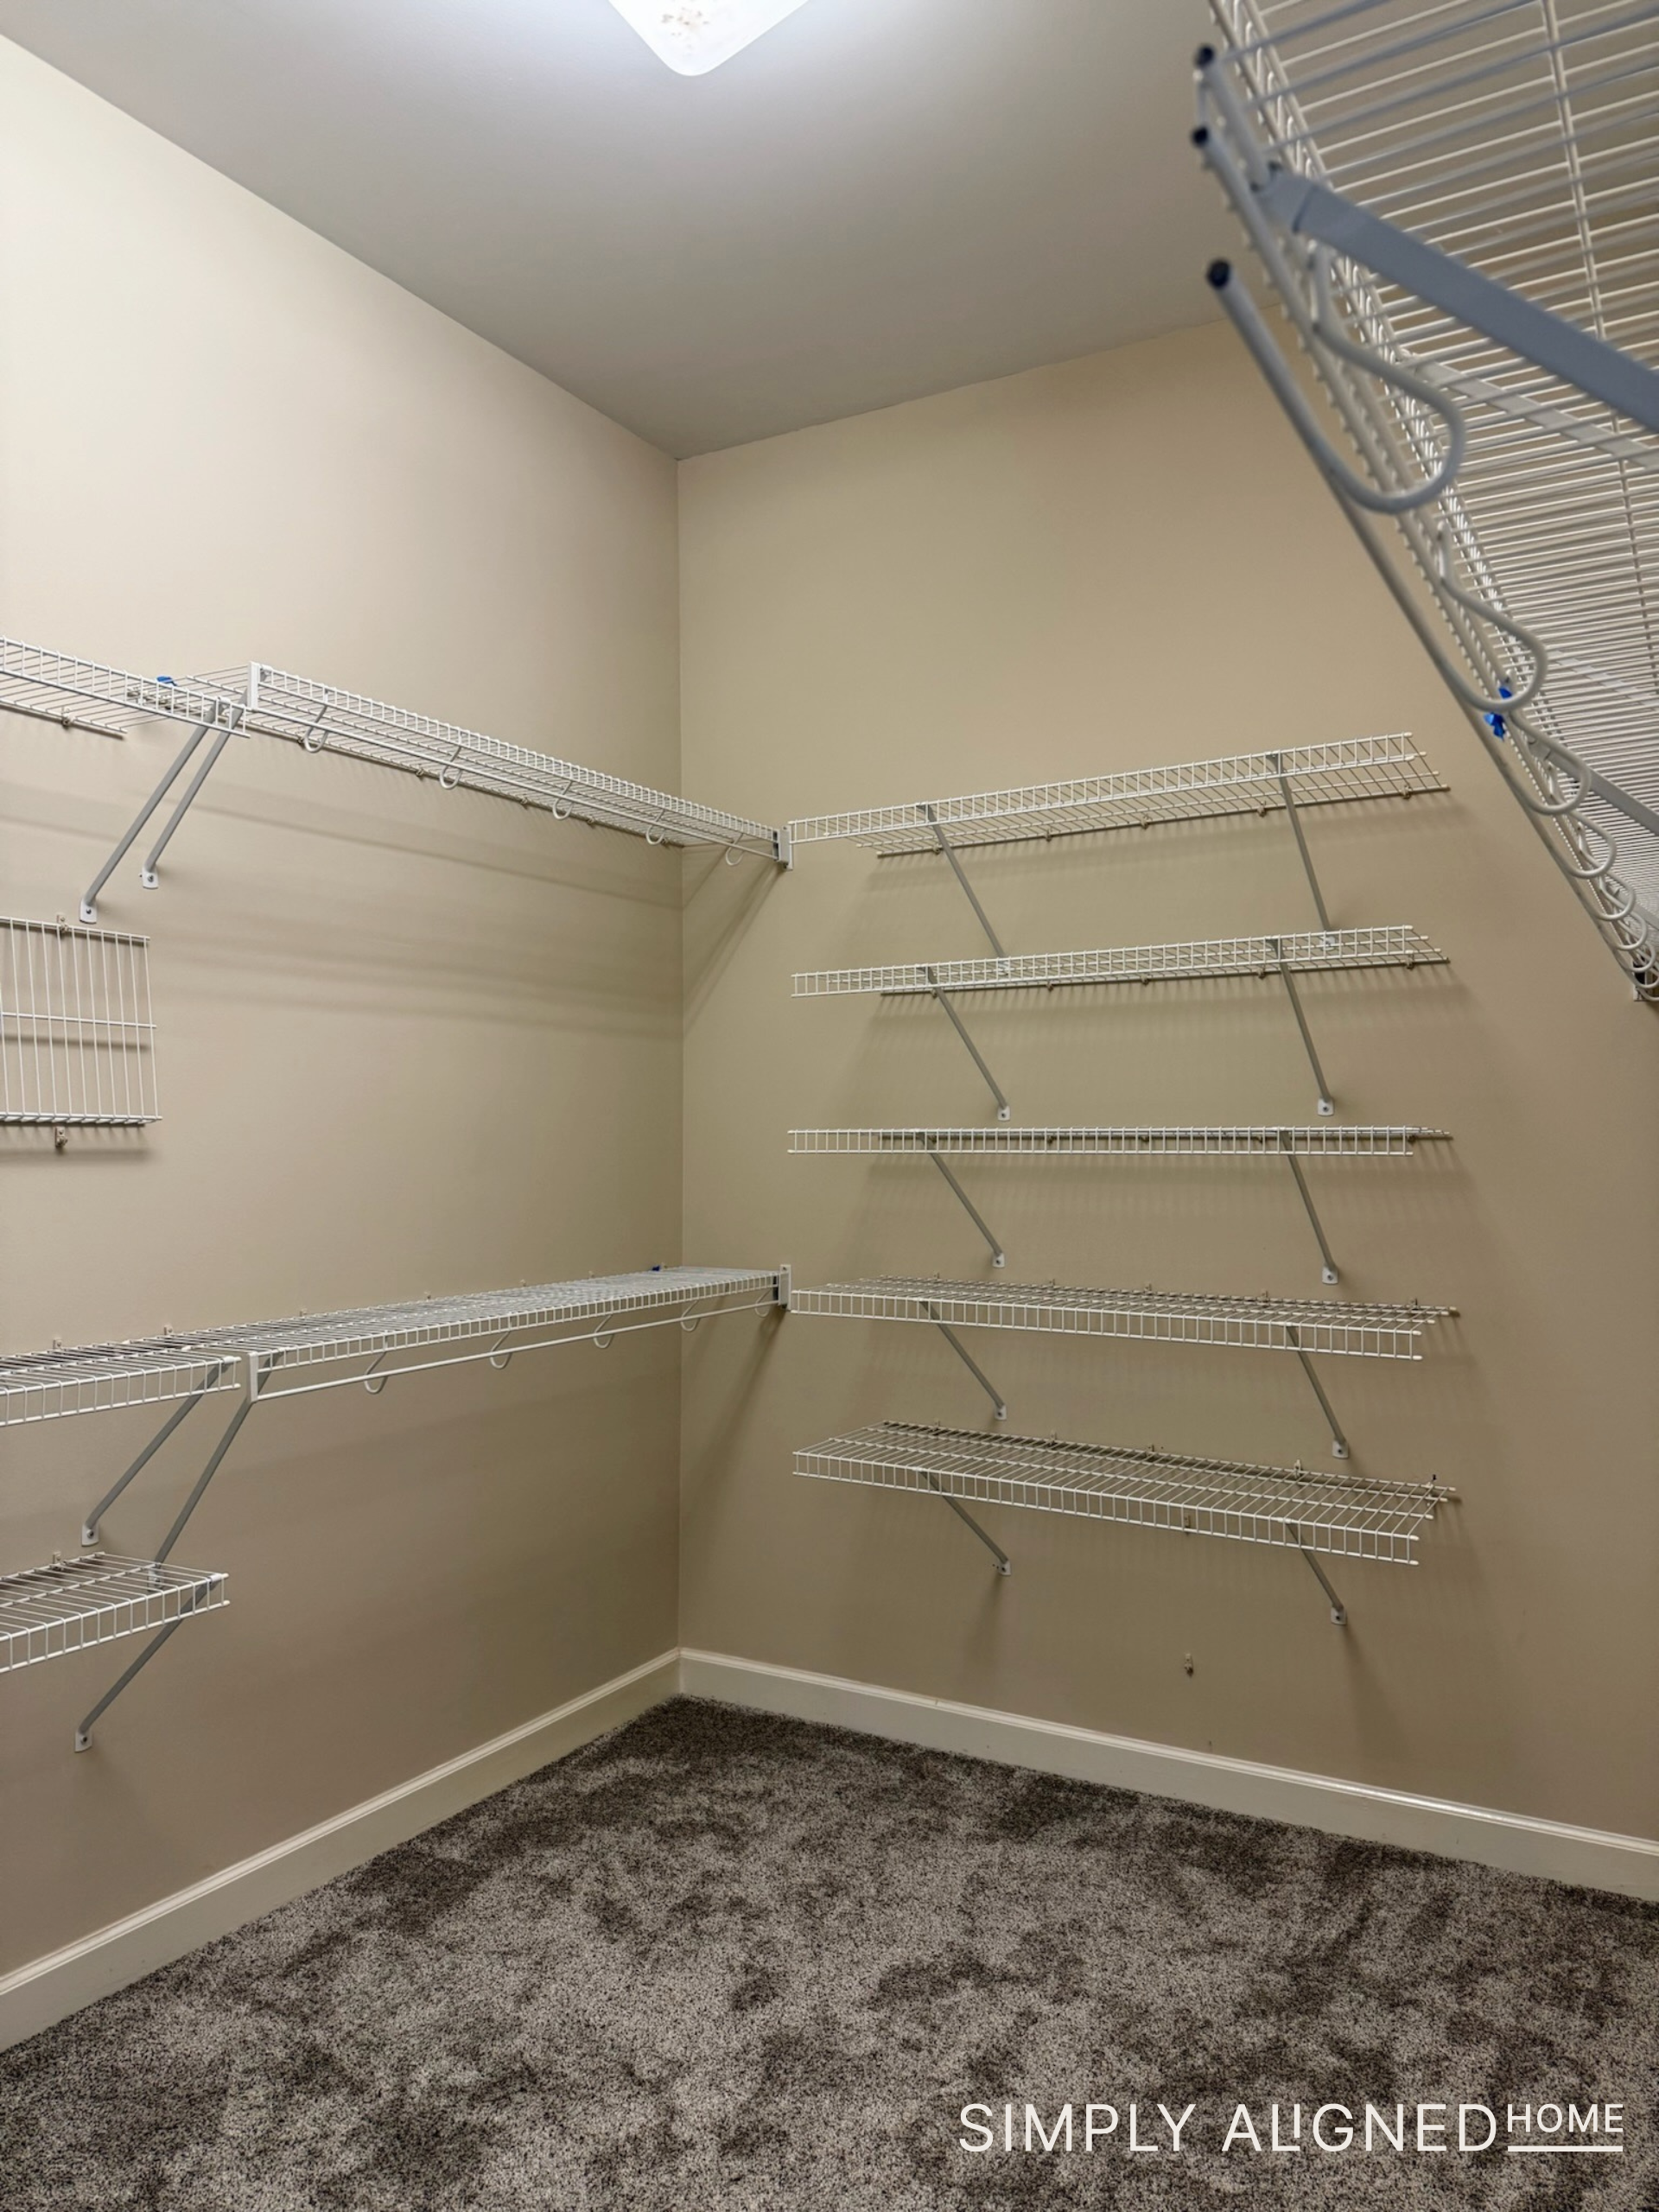
When we moved into our new house, I was excited to finally start organizing our things—but I wasn’t prepared for how frustrating the closets would be. I unpacked a few boxes and headed into our closet to hang things up, only to realize the wire shelving in there was incredibly unstable. I’ve never been a fan of wire shelving to begin with. With clothes piled up, they always feel like they can collapse at any moment!
So I decided to take everything out and start fresh.

**This post contains affiliate links to products that I used or recommend. If you purchase something through an affiliate link, I may receive a small percentage of the sale at no extra cost to you. I really appreciate your support!**
I’ve used the IKEA PAX system before and absolutely love it. Most recently, I used it in my son’s bedroom! For the price, it’s really hard to beat! Not only is it budget-friendly compared to custom closets, but it’s also incredibly versatile. I’ve priced out built-in closet systems in the past and they are significantly more expensive. Honestly, with the PAX units, I feel like you get more customization. You can make it work for your exact space and needs without the custom price tag.

Since I started sharing the process, I’ve gotten some great questions about the setup. I’m answering a few of them here in case you’re considering this project for your own home.
Why can’t you install built-ins on top of a floating floor?
Floating floors expand and contract with changes in temperature and humidity. If you install something heavy like cabinets or built-ins directly on top of them, it can prevent that movement. Over time, this can cause the flooring to buckle or separate under the weight. To avoid damaging your floors, it’s best to remove the floating floor under any built-ins and install them directly on the subfloor instead.

What’s your honest opinion on quality and longevity?
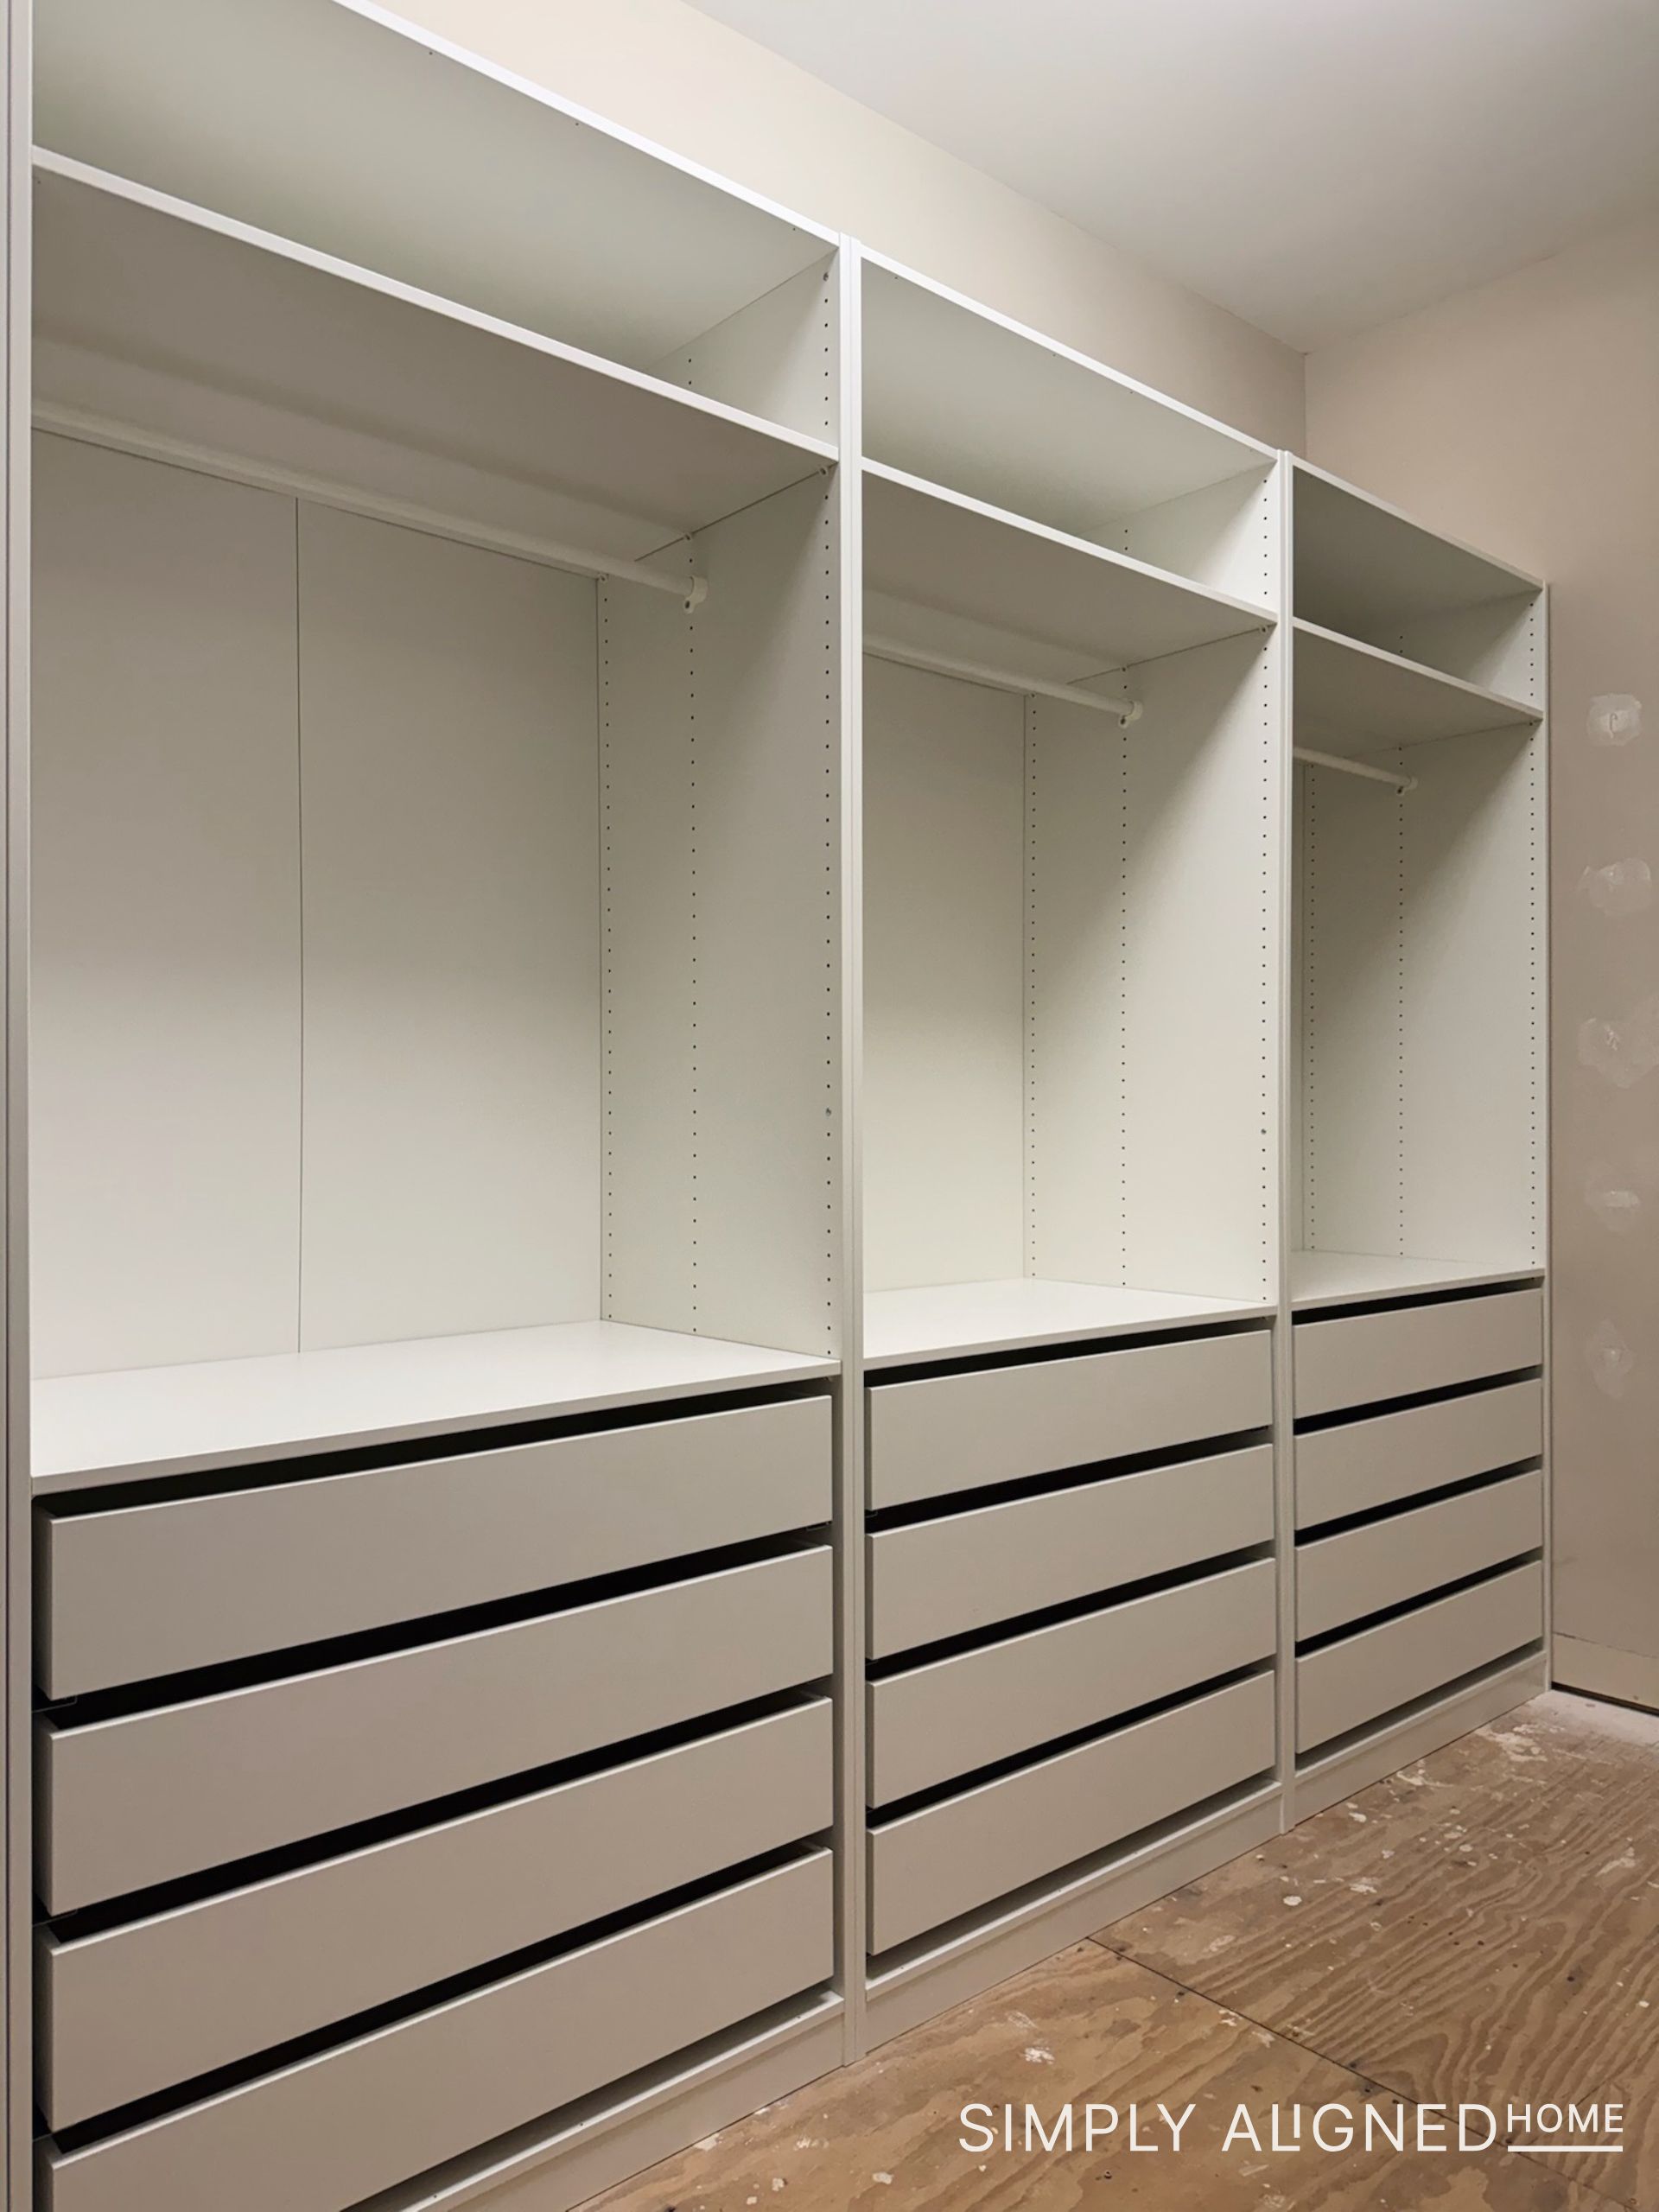
I’ve installed the IKEA PAX system in several different homes over the years, and I’ve also built custom cabinets and closets from scratch, so I’ve seen both sides. Honestly, I think the durability and longevity of the PAX units are impressive. They’re well-made, sturdy, and hold up really well over time when properly installed. For the price point, the quality is hard to beat. I wouldn’t keep coming back to them if I didn’t trust them to last.
Did you plan out the closet on the website?
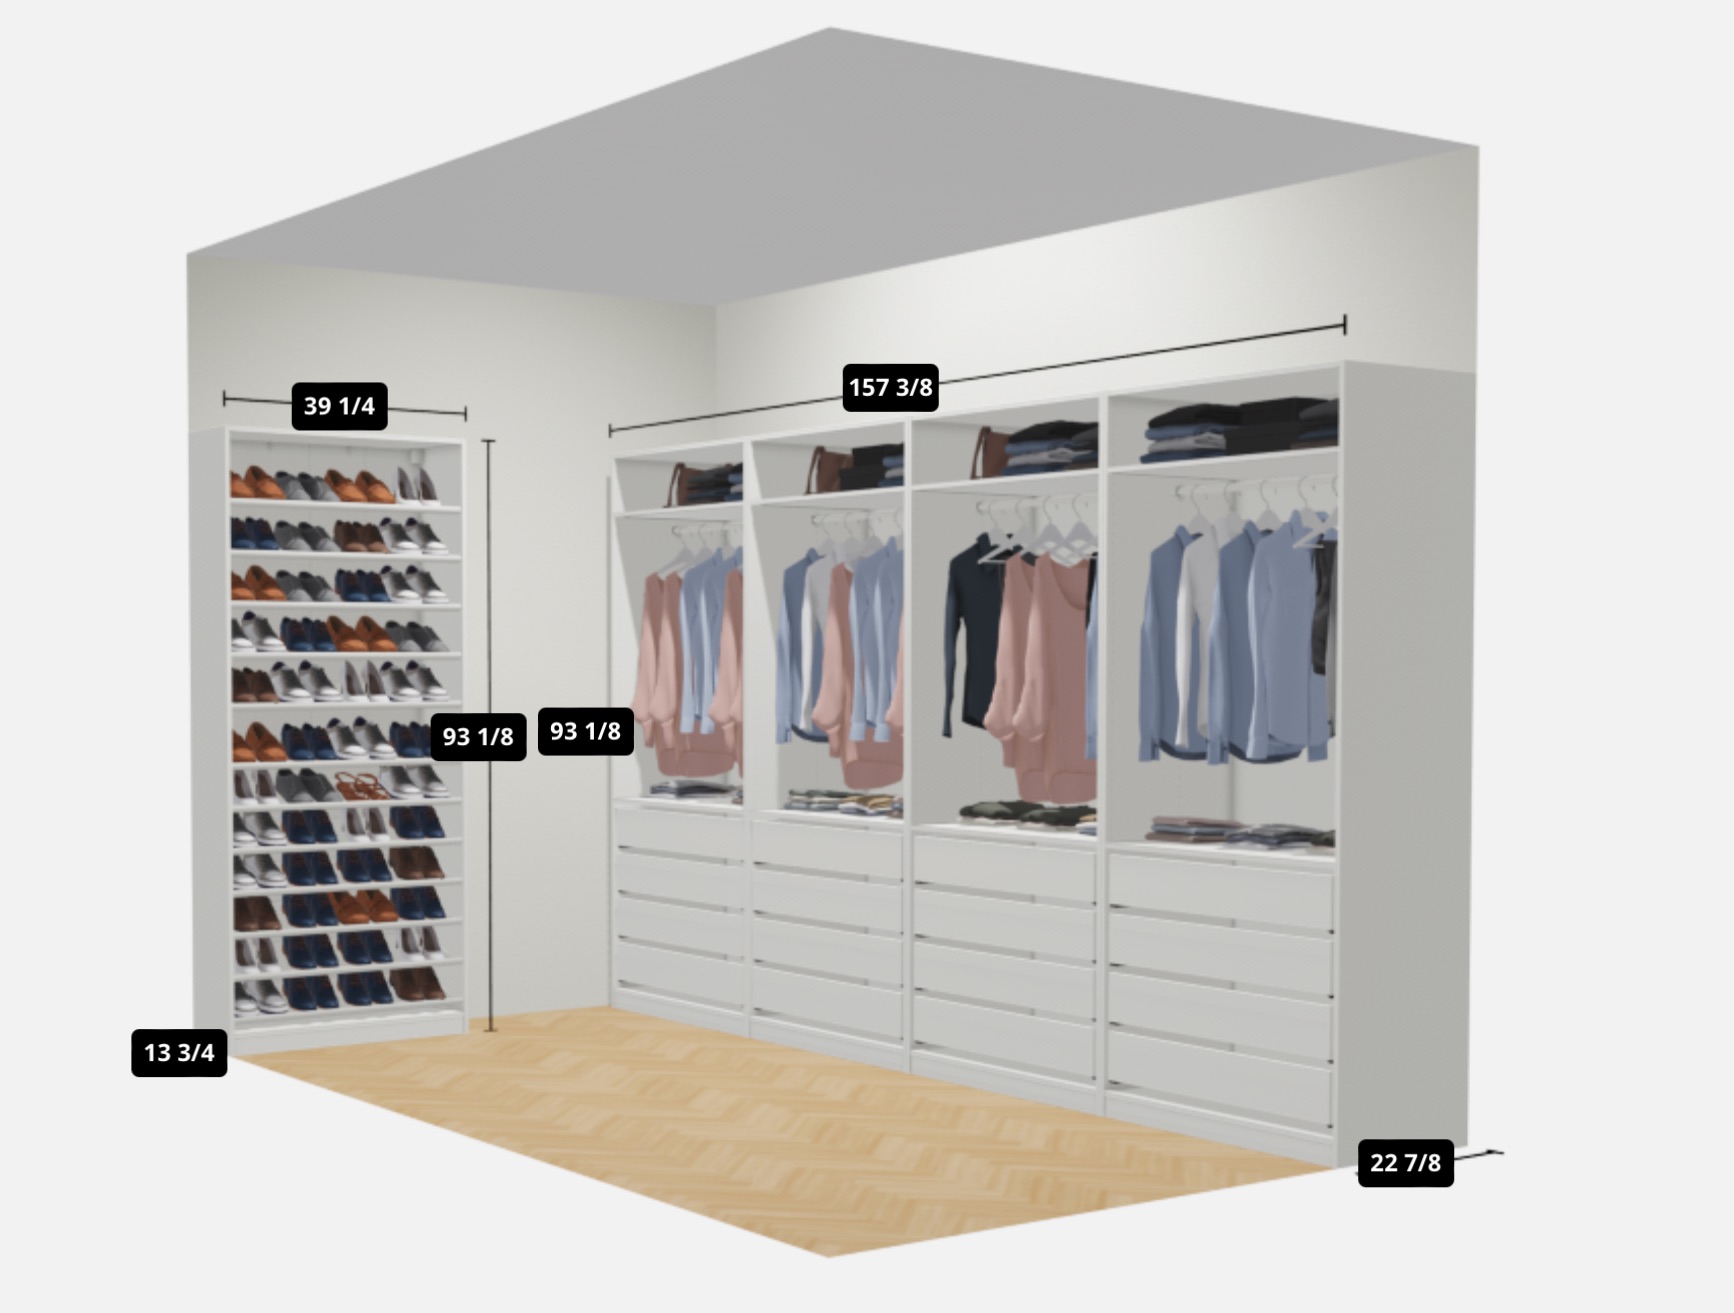
Yes! One of the best things about the IKEA PAX system is how easy it is to design everything online. Once you choose the PAX system on IKEA’s website, you can enter your room dimensions and start building your layout from there. Each unit has pre-set configurations you can choose from, like drawers, shelves, or hanging space. That way, you don’t have to start from scratch. It’s super user-friendly, and as you go, it shows you exactly how everything will look and what the total cost will be. It’s a great way to plan and visualize the entire space before buying anything.
How do you measure to order the closet?
The IKEA PAX system comes in set frame sizes. You can’t customize the dimensions of the units themselves, but you can fully customize the interior. When you’re measuring your space, you’ll want to start by getting the overall wall dimensions and then see which combination of PAX frames will fit best.
In my closet, I was lucky that the units fit almost perfectly! I only had about 2 inches of extra space at the end. If you have more space to work with, you can evenly distribute the units across the wall by adding spacers. Then simply cover those gaps with trim. I’ve done this by placing vertical spacer blocks (like 2x4s) between the units. The spacers make it easy to attach the trim which helps create a seamless, built-in look.
Can you list all tools needed to set it up?
The PAX system is surprisingly easy to install, and you really don’t need many tools for the basic assembly. For the main build, I used a drill, an impact driver, a flathead screwdriver, a hammer, a tape measure, and a level.
I also chose to remove the baseboards and carpet in my closet so the units could sit flush against the wall—if you plan to do the same, you’ll also need a utility knife and a trim puller to take out the baseboards cleanly. But if you’re just assembling and installing the units without modifying your walls or floors, the first set of tools is all you need.
Tools:
Can you talk about the rail you used to attach the PAX to the wall?
The newer design of the IKEA PAX system includes a metal rail that makes installation much easier. You start by attaching the rail to the wall, and then you assemble the PAX unit in place and secure it directly to that rail. The rail runs across the top of the unit and helps keep everything level and properly anchored. IKEA includes all the necessary hardware for installing it and I found the process to be really straightforward. It’s a smart update that definitely simplifies the install.

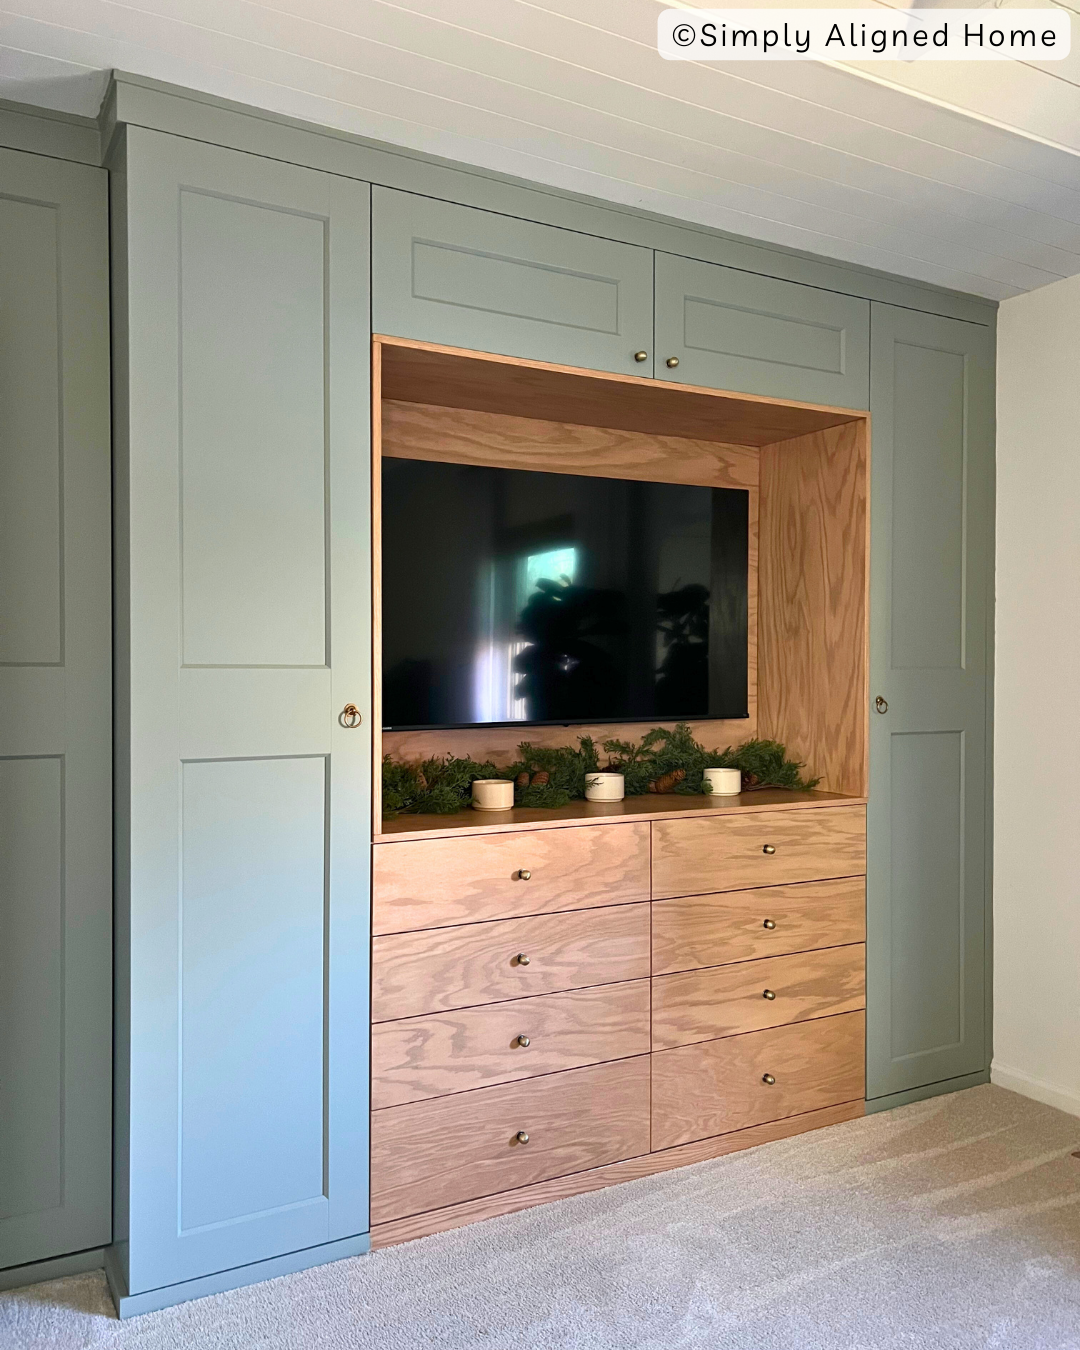
I’ll be sharing more as I finish this space, but I hope this helps if you’re on the fence about upgrading your own closet. The PAX system really does give you that custom look and function without the price.
Let me know if you have more questions you’d like me to answer, I’m happy to help!

**Note: I am not a professional and do not claim to be an expert. Please be sure to always read instructions for all tools and products. Safety is very important and should be your top priority. Wear necessary protection when using tools (eye wear, hearing protection, gloves, etc.) and dust masks when sanding or cutting. Simply Aligned Home is not responsible for any injury or damage. All of my designs are not professionally designed and are for private use only.**
