In this blog post, we will get into the step-by-step process of revamping our bedroom space with IKEA Pax units.
I am back at it again with another amazing IKEA Pax System hack! For those of you joining me for the first time, I really enjoy transforming IKEA furniture into unique, customized pieces that perfectly suit our home.
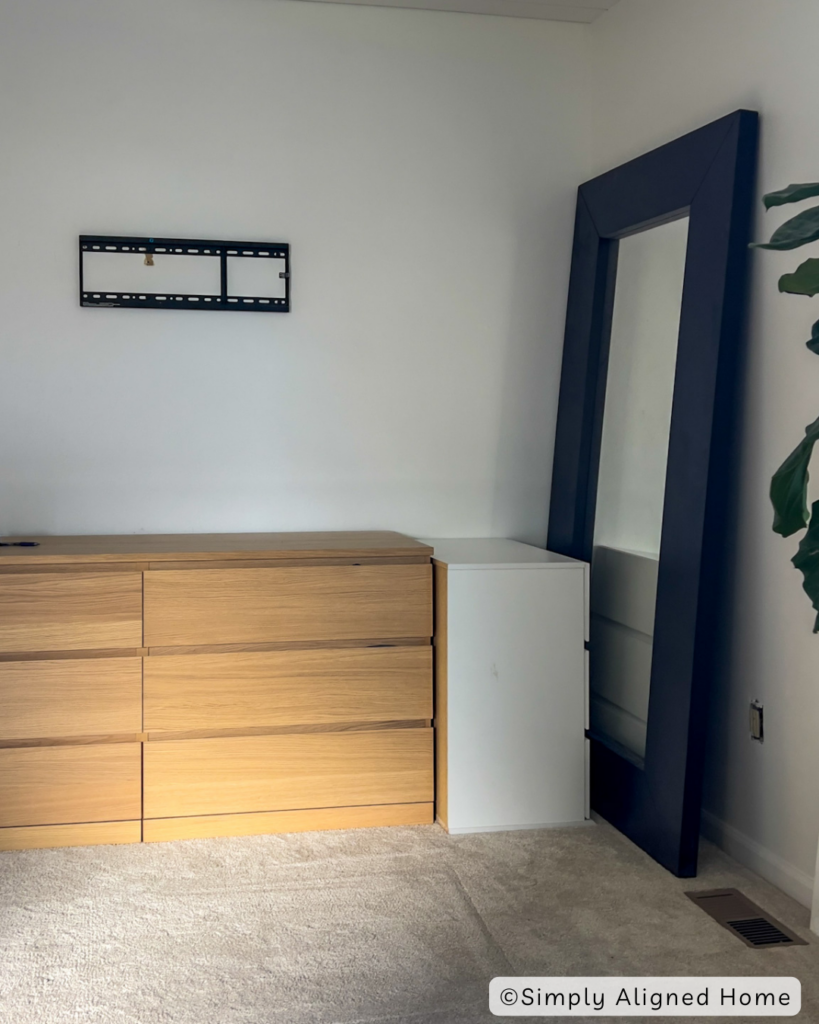
Recently, we have been transforming our primary bedroom into the bedroom we have always dreamed of! If you need to catch up you watch this reel on our ceiling transformation. And check out our new dog bed build and DIY joint compound art I made for the space!
Now, let’s tackle the challenge of expanding our storage options. With a pressing need for additional closet space and limited space available, I had to get creative.
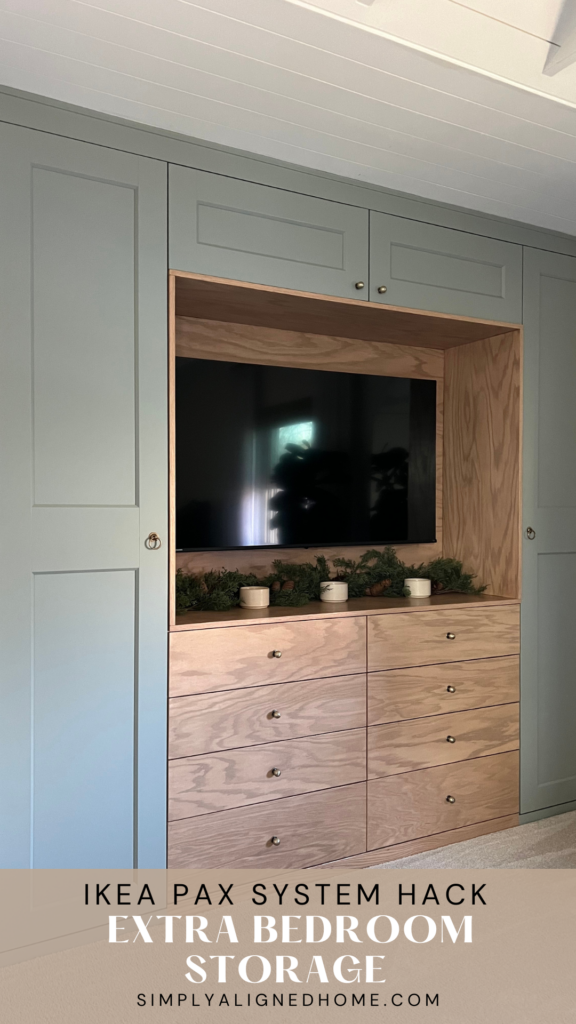
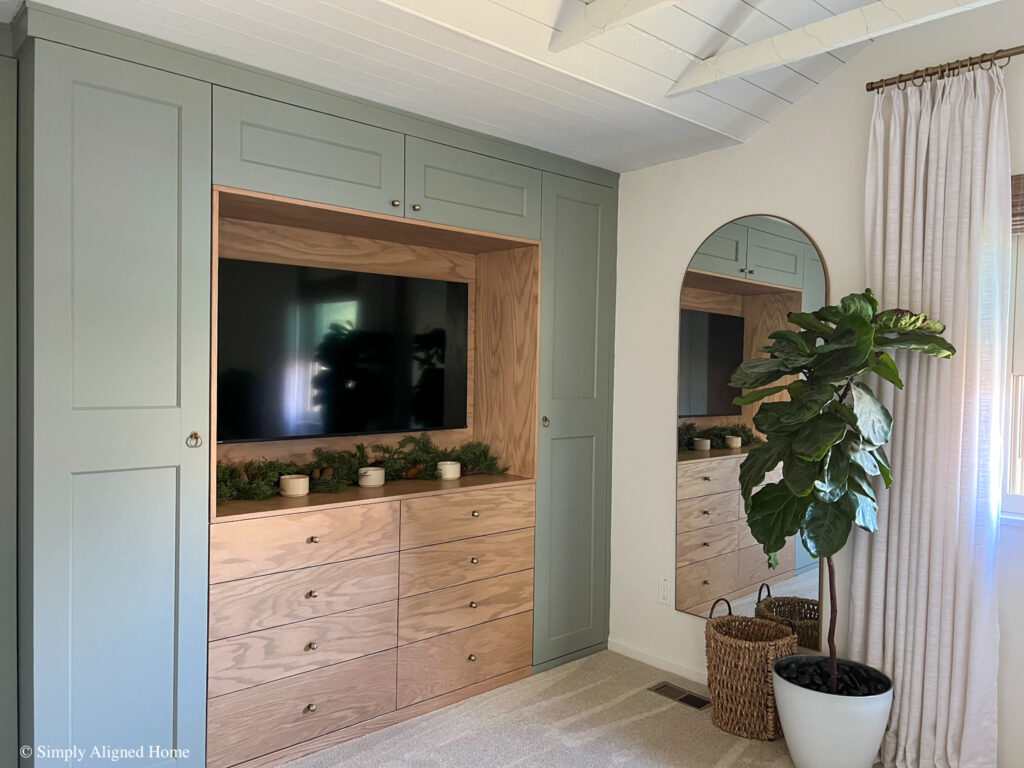
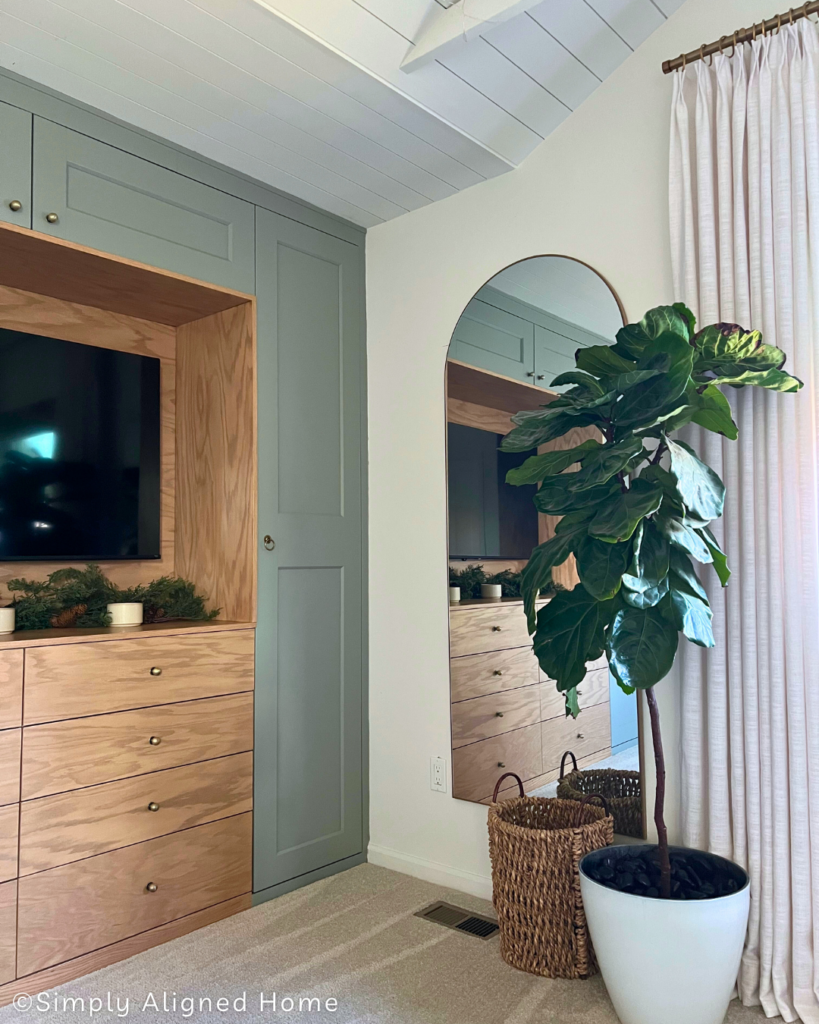
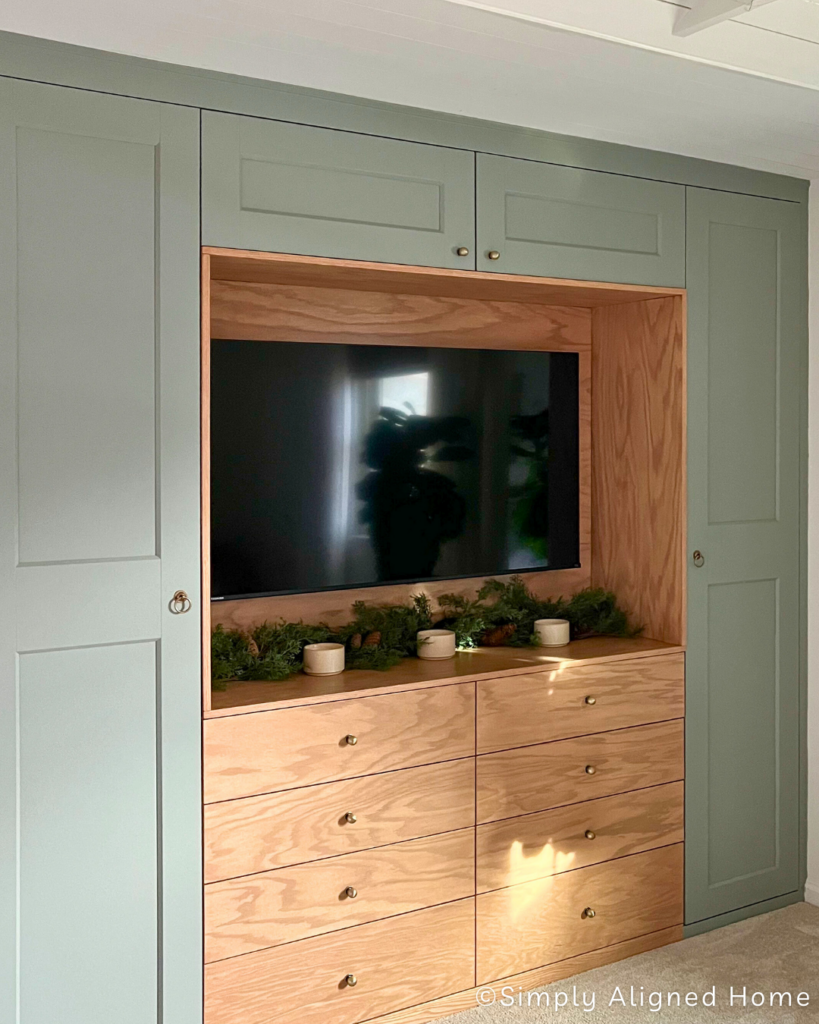
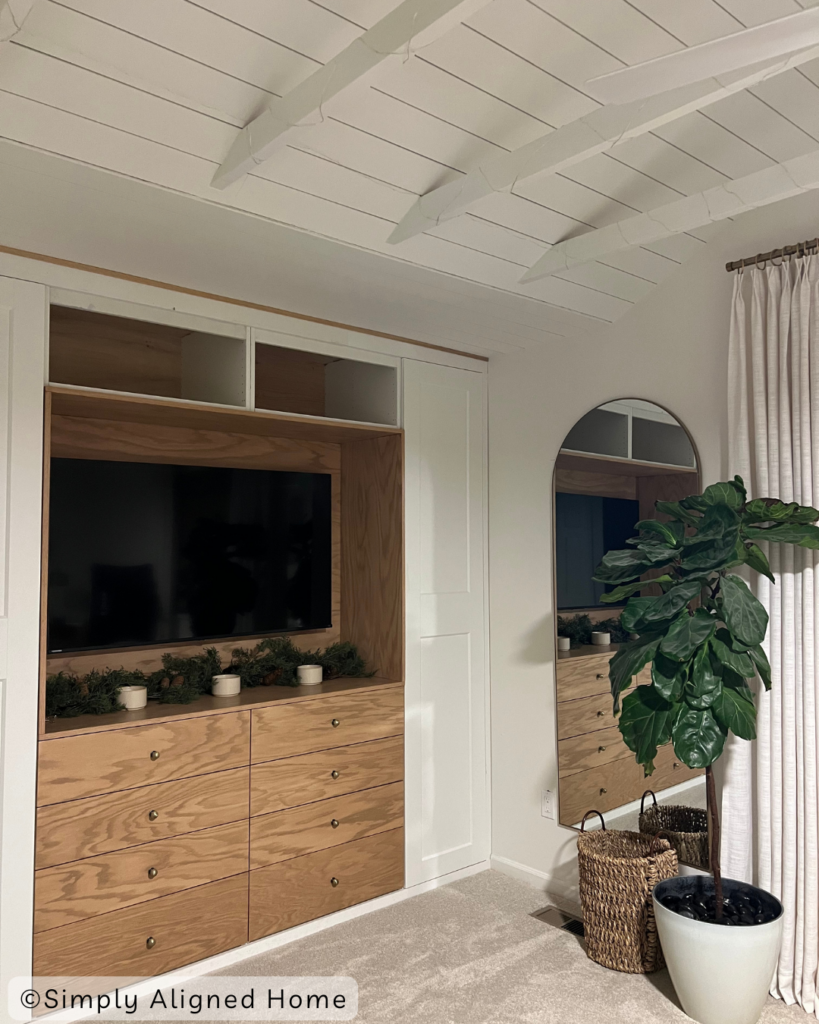
The solution? A built-in unit serving both as a closet and a TV entertainment center!
**This post contains affiliate links to products that I used or recommend. If you purchase something through an affiliate link, I may receive a small percentage of the sale at no extra cost to you. I really appreciate your support!**
DIY Bedroom Storage Using IKEA Pax Units
Assemble Pax Units And Space Preparation
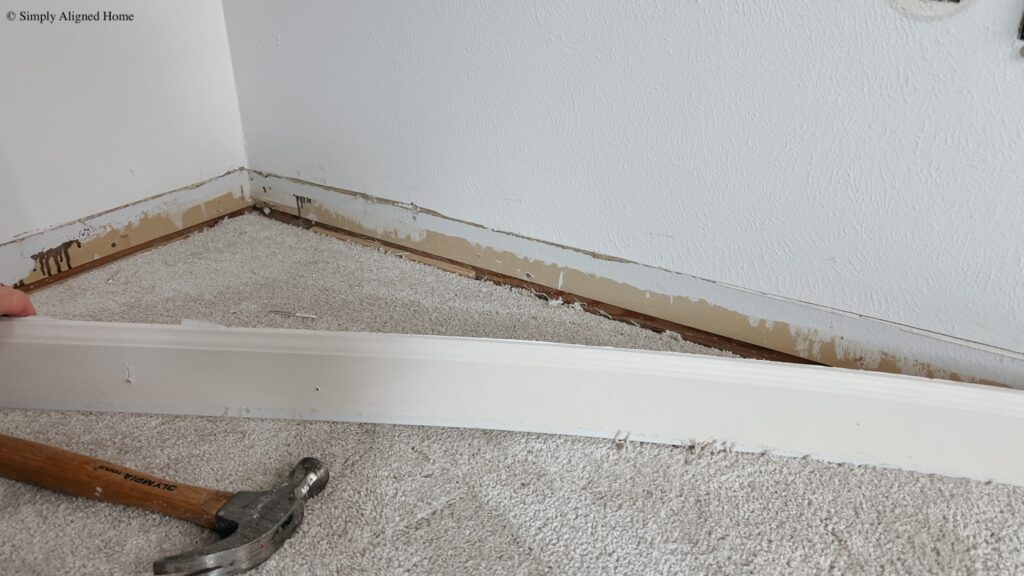
First step was to assemble all the IKEA Pax units. Once all the units were put together, the next task was to prepare the space for installation. I began by removing the baseboards with my trim puller from the back wall, and then trimmed the side baseboard to match the width of the units.
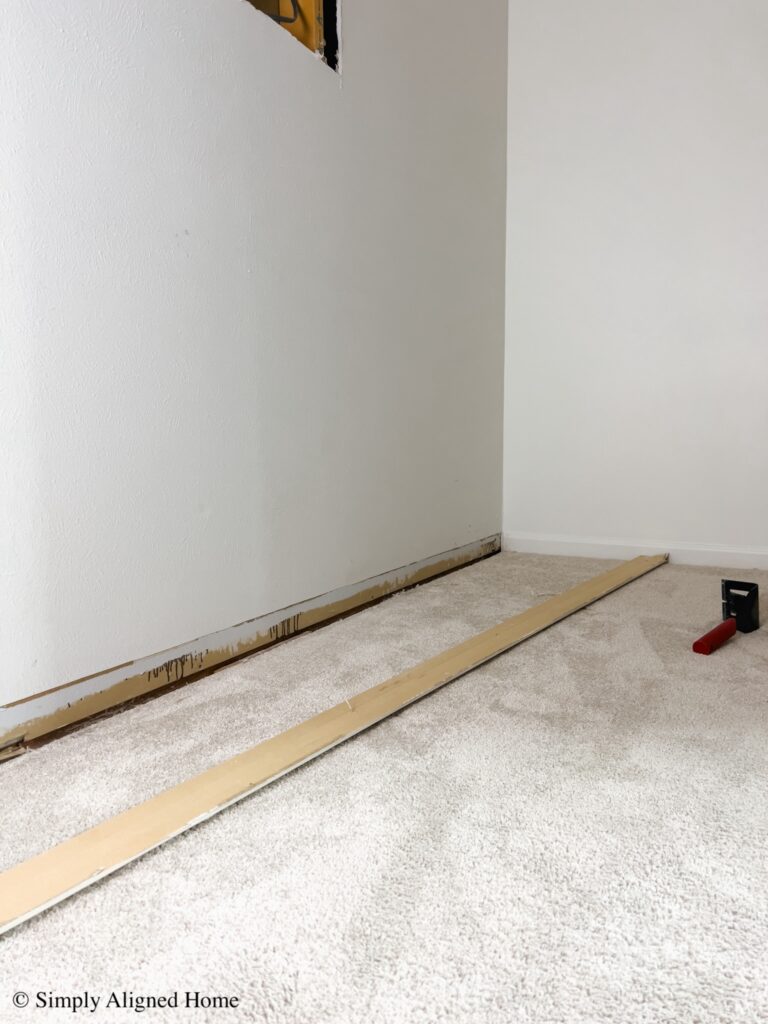
Moving on, I trimmed the carpet to align with the depth of the units. Employing a utility knife and a straight edge, I carefully cut both the carpet and the rug pad. Next, I secured the rug pad to the subfloor by stapling it and repurposed the old tack strip by installing it in front of the unit.
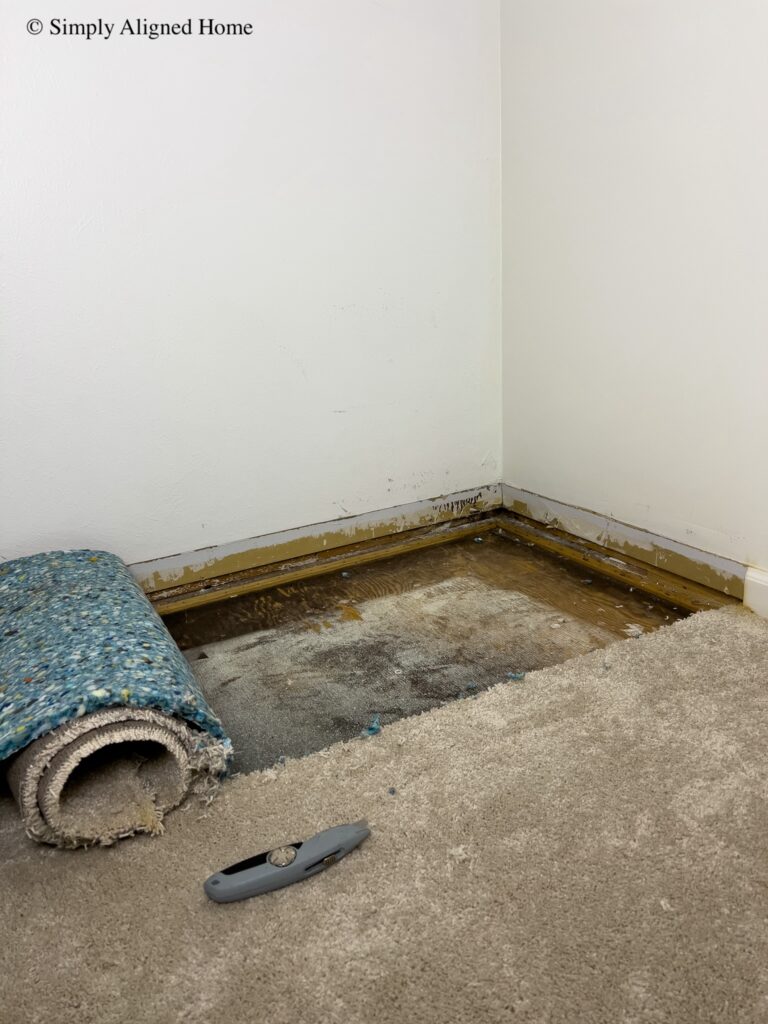
Finally, I pulled the carpet taut, pressed it onto the tack strip, and it looked brand new!
Install IKEA Pax System
Before bringing the units into the room and installing them I added a few 2×4 supports to the side wall, ceiling and floor. These will be used to secure both the units and future trim in place.
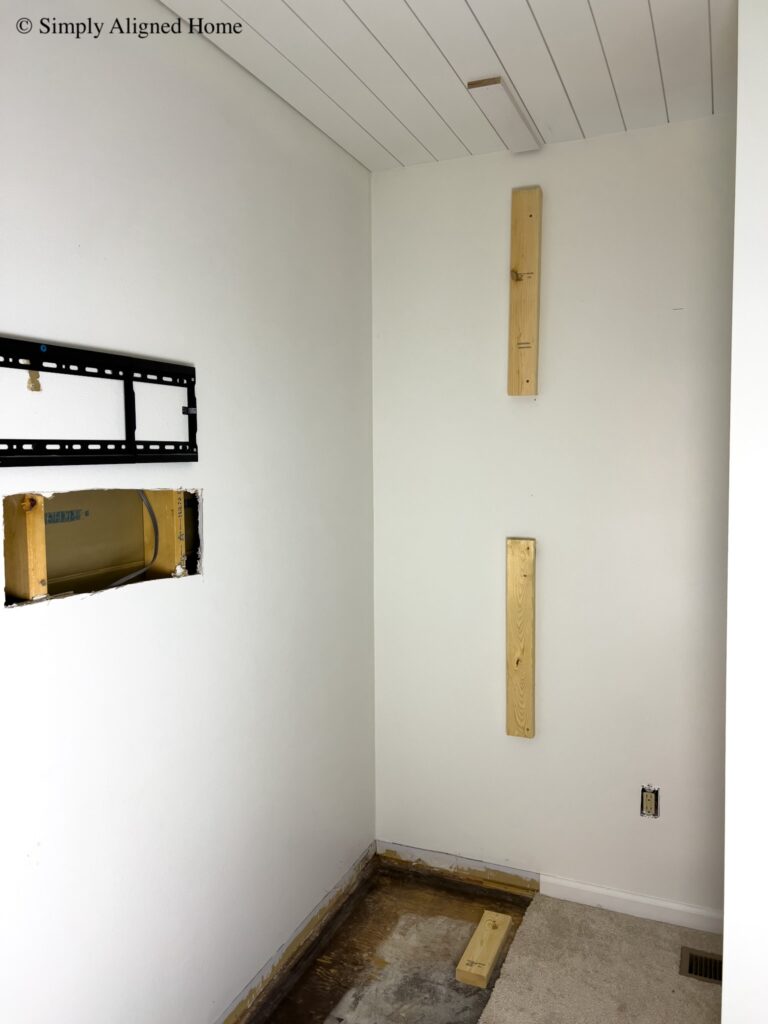
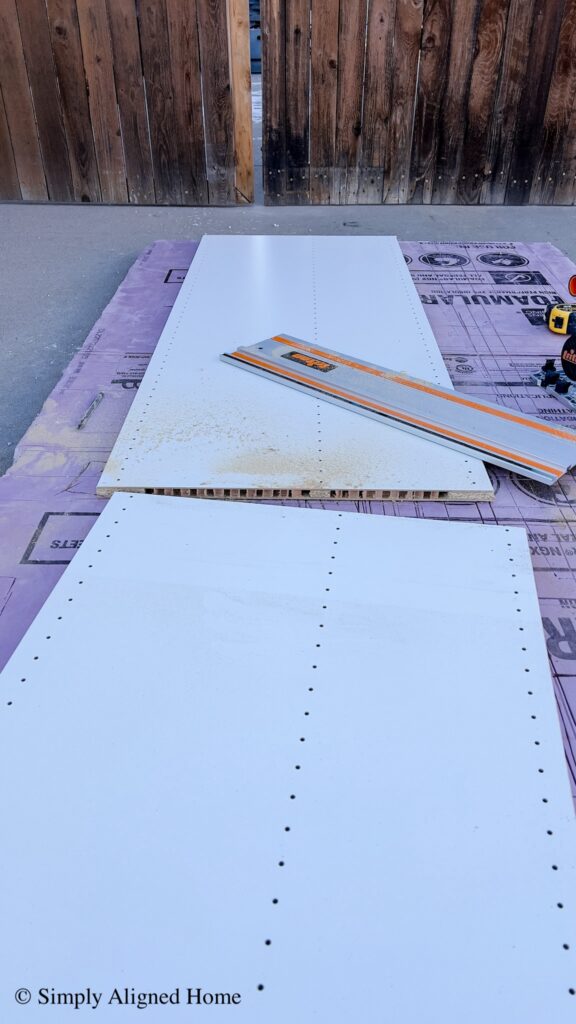
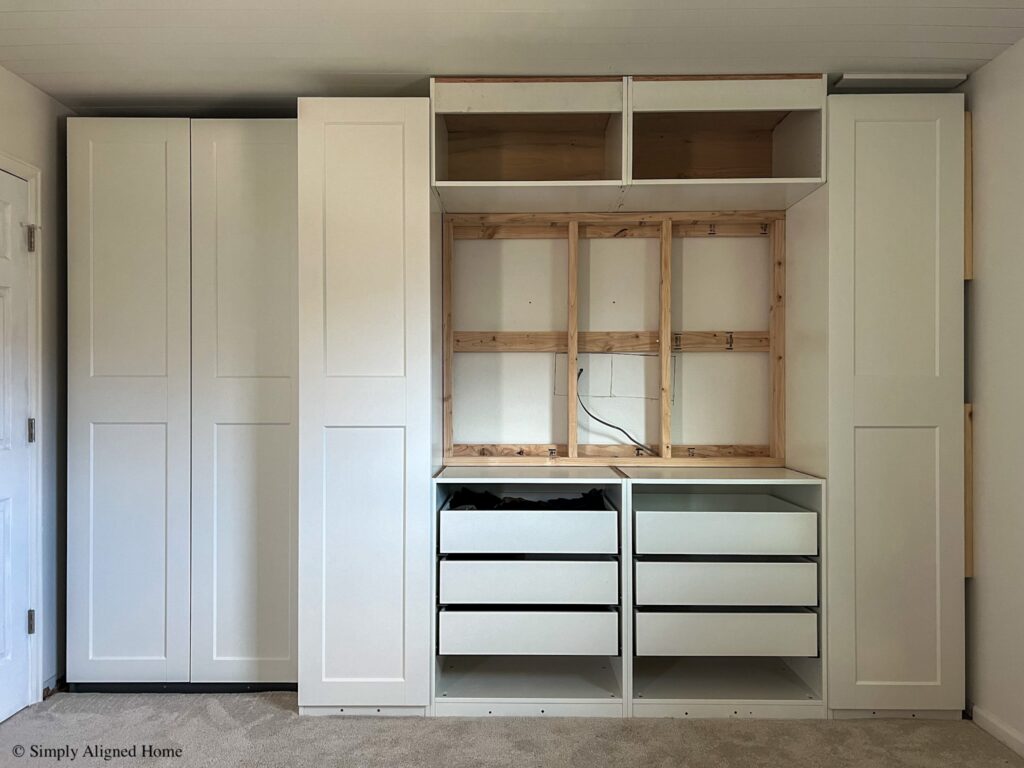
After I got the first unit in place and secured, I did some brainstorming and attempted to alter two of the Pax units! I needed them to be shorter so I could have a space for my TV above it. I ended up cutting the back piece and side panels with my track saw and then assembled them together per the instructions.
To secure these two units together I repeated what I did with my first unit. I added a couple 2x4s to the subfloor, got them level and attached with construction screws. Then came in with more screws to secure them sided by side.

The next cabinet to go in was a full length Pax unit and then a more shallow unit. I wanted my built-in to be the full length of the wall but our bedroom door has to be able to open. So I chose a shallower Pax unit to install behind the door to still utilize that space. This will unit will be used for shoe storage.
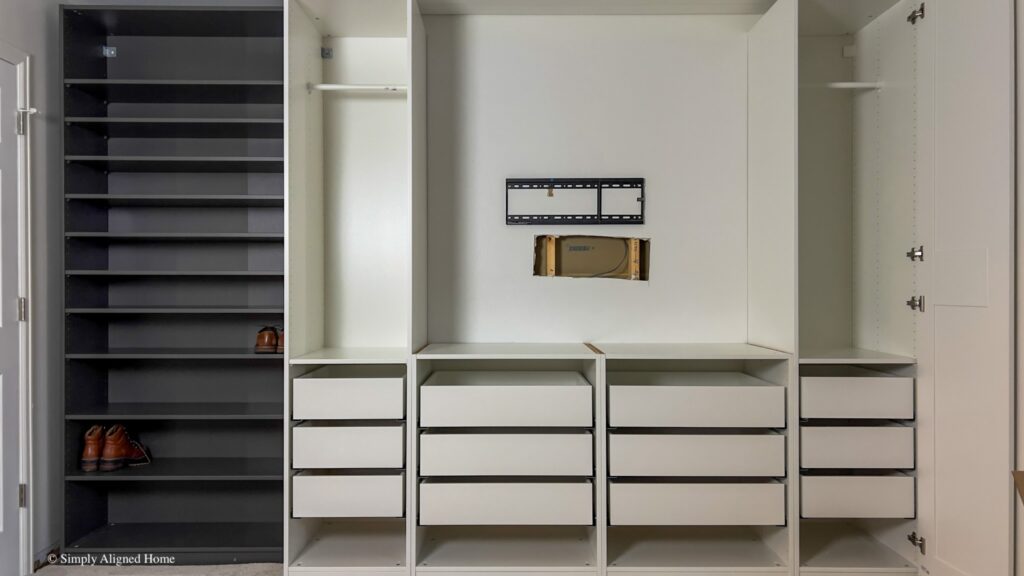
After everything was installed, it was time to add the doors to the full sized units that I didn’t have to modify!
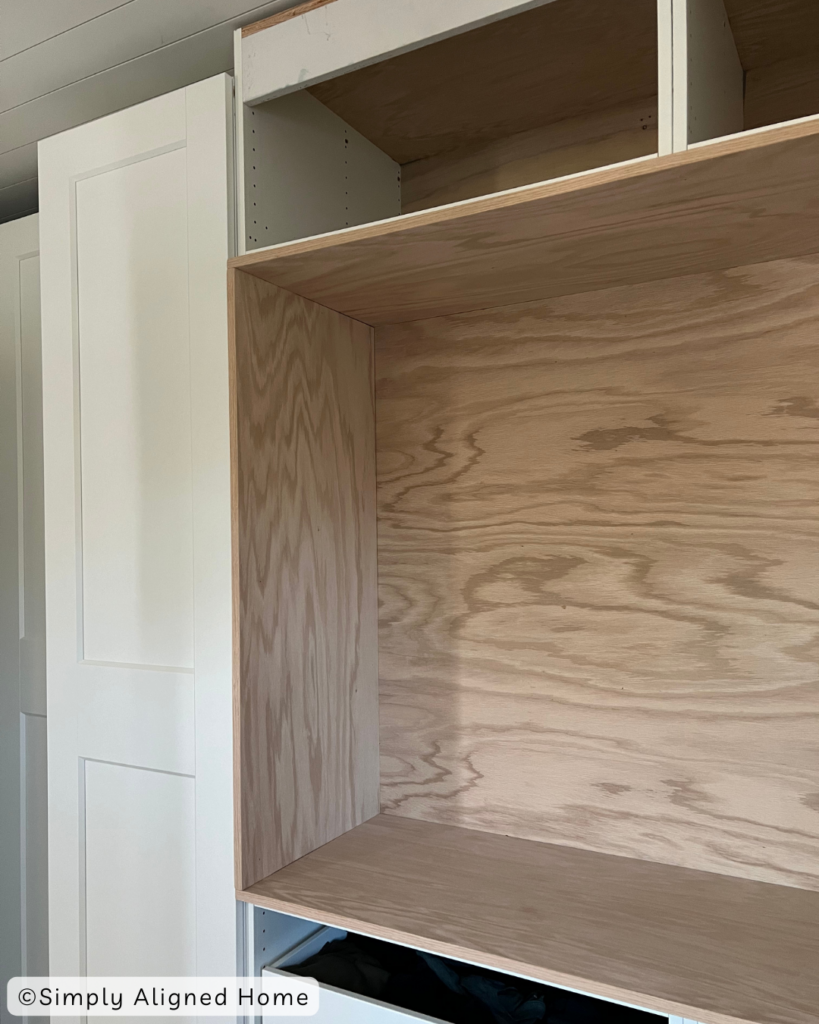
Add TV Bump Out
After all the bigger units were installed it was time to work on the TV area. I wanted to create a bump out for our TV so it didn’t sit back so far. I took 2x4s and built a frame that the tv will mount too. Then I secured it to the studs with screws.
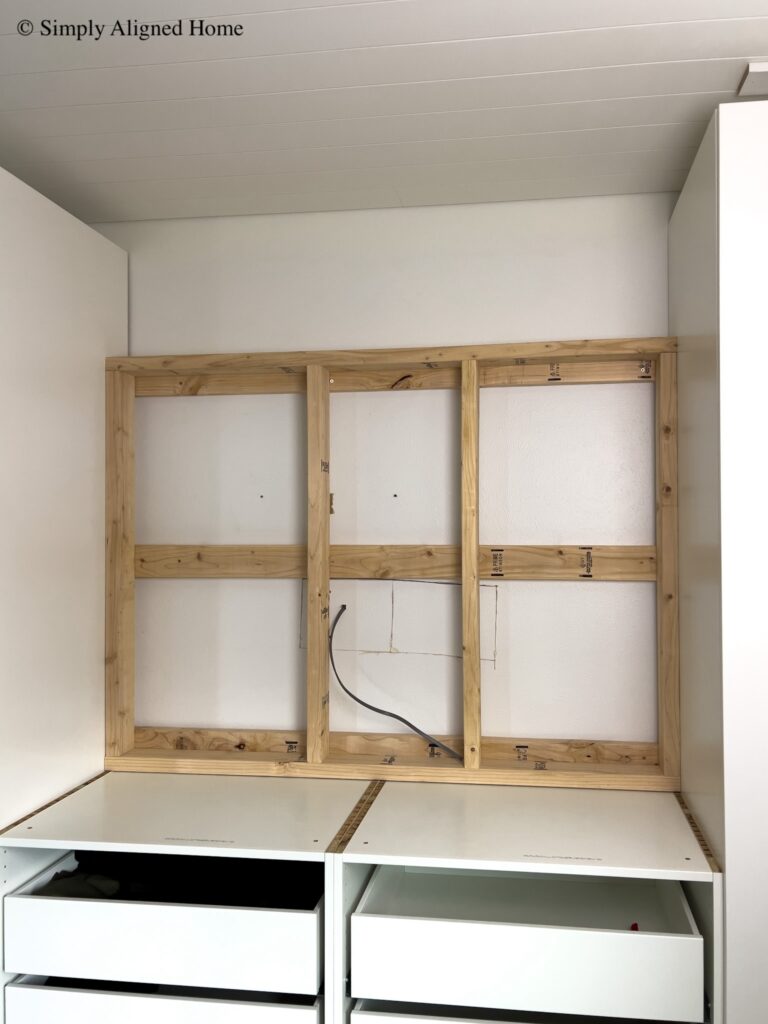
Once installed it was time to construct the top boxes! To construct the top units I used leftover pieces from the Pax systems that I trimmed down, and some plywood for the tops. After much struggle I was able to get them in place and secure them to each other and the back wall studs. I should have made them slightly smaller than the opening so that they fit easier.
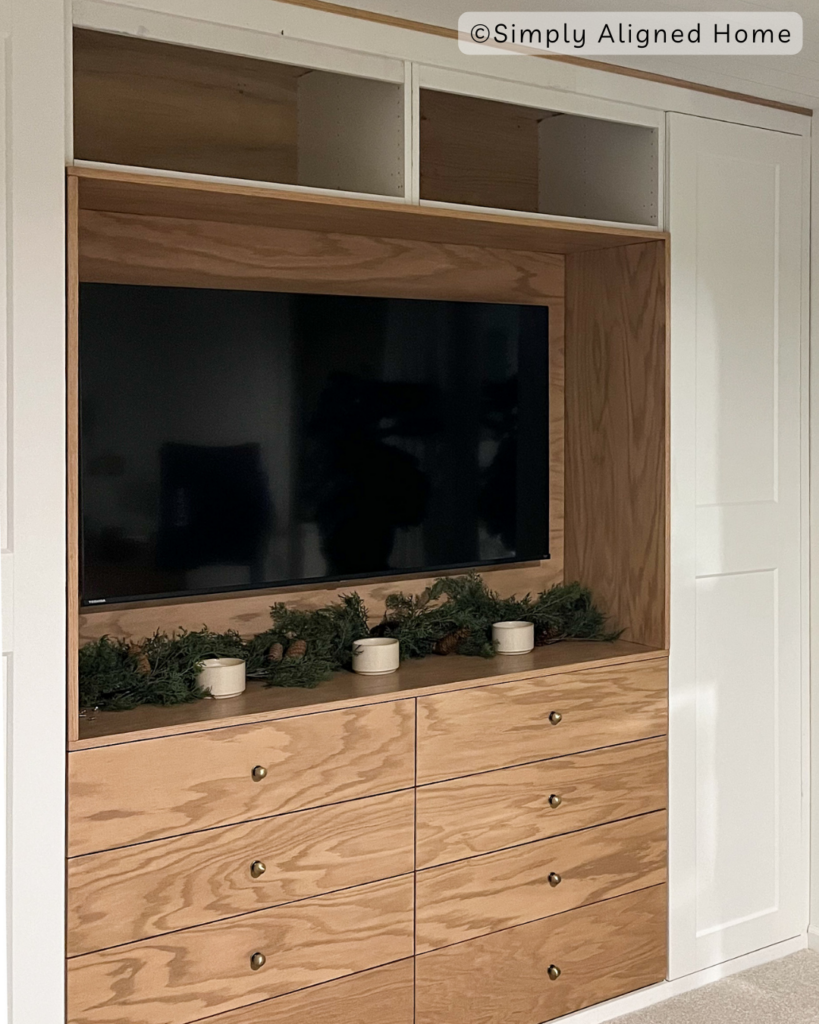
Trim Out Tv Area
For the TV cut out I chose to use red oak plywood for my trim option. I framed out the box with the red oak and secured it to the IKEA units with construction adhesive and brad nails. To make the plywood look like one solid piece of wood I wrapped the ends in edge banding. For more detail on that process I have a full post that explains everything HERE!
Once the tv cut out was trimmed in, I added a few support pieces to the ceiling and top of the units for the trim to be installed. That way the whole build had a more built-in look with the trim going up to the ceiling.
Make Doors And Drawer Fronts For Upper and Lower Units
To make the drawer fronts for the bottom of the unit, I used red oak plywood. I didn’t add any detail to the drawer fronts but I did edge band all the way around the drawer to give it the illusion of a solid piece of wood.
To finish out the drawer fronts and the TV bump out I stained all the red oak in my favorite stain combo, and used these knobs on the drawers in brass!
At the base of the built-in structure, specifically beneath the drawers, I used a single piece of red oak to meticulously trim and finish the lower section.
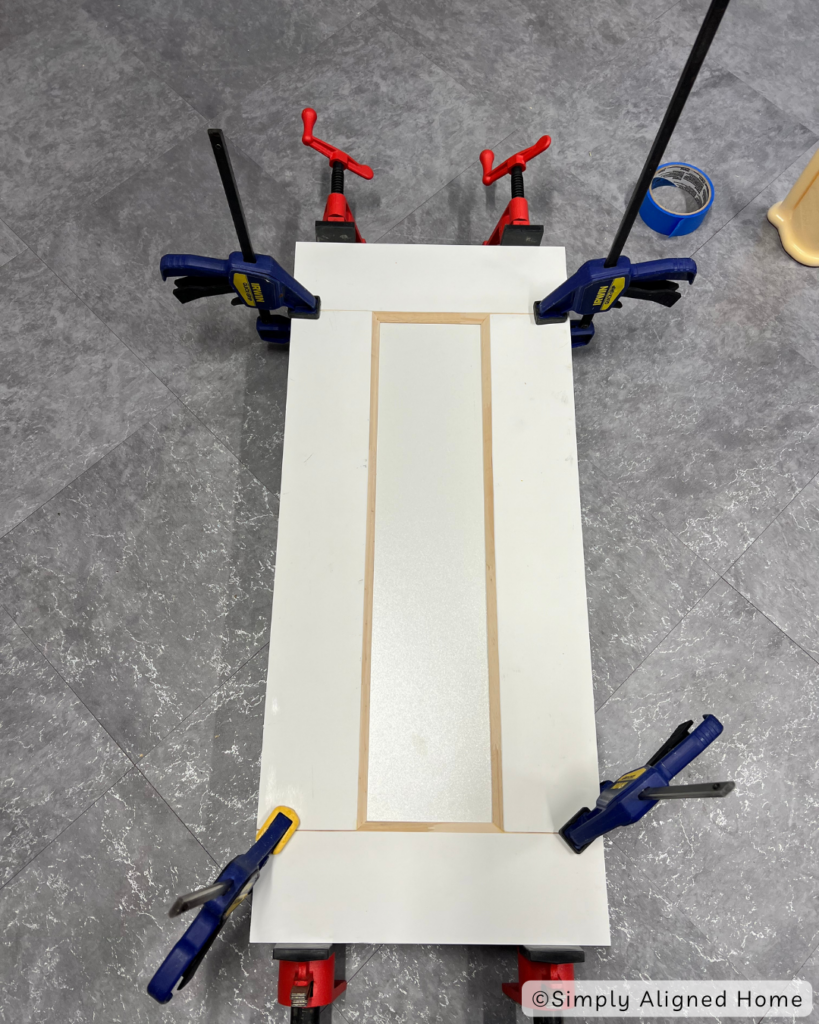
As for the small upper doors, I made them from scratch! My goal was to make them as close as possible to the IKEA doors so that they match. I will have a whole separate post touching on the assembly of those doors so I can go into more detail.
Until then you can watch my story highlight called “IKEA Built-in” to see some video of me building those.
How To Paint IKEA Pax Units
At this point I was so excited that the DIY doors turned out exceptionally well! The built-in was finally coming to life and turning into everything I had envisioned it would be. When it came to a color to paint I chose to use the color Pigeon by Farrow and Ball.
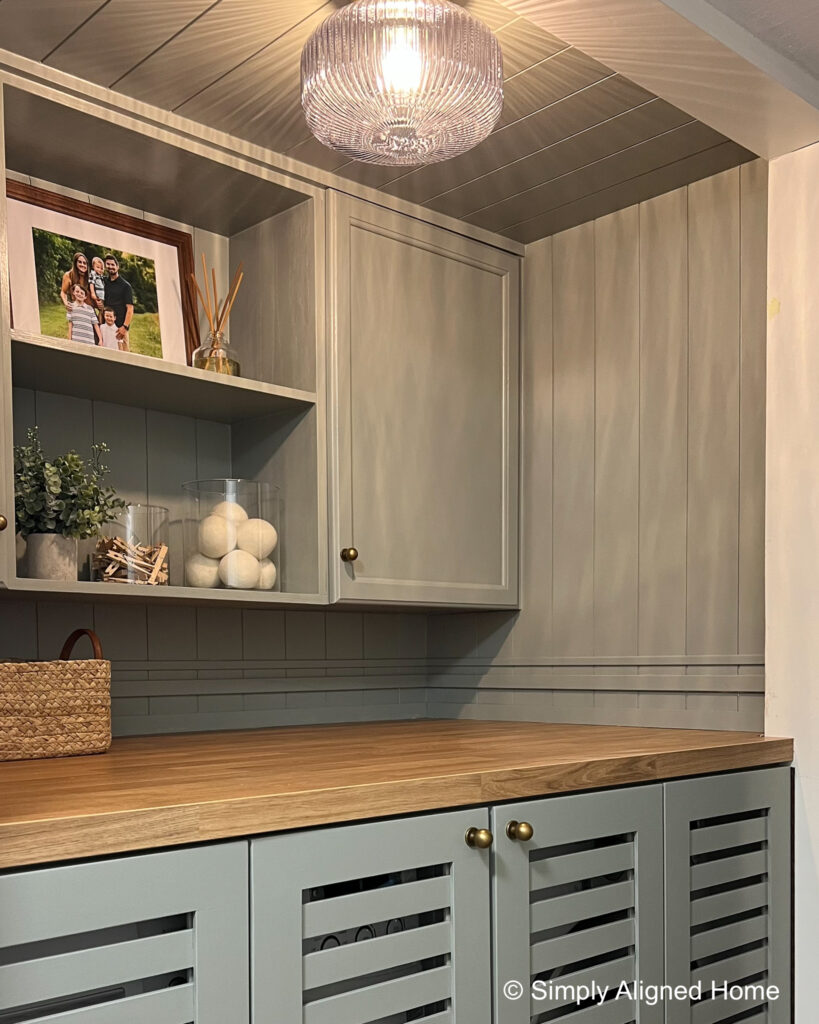
My laundry room that I made over in 2023 was painted Pigeon and it’s my favorite.
First step in painting IKEA furniture is using a good primer. Not just that, but you need to lightly sand the surface first before putting any paint on the furniture. Using a 220 grit sanding block, lightly sand over any surface you plan to paint.
After completing the sanding process, grab a damp cloth or a tack cloth to thoroughly wipe away any dust. The next step involves applying primer, and my go-to choice for painting IKEA furniture is Zinsser B-I-N Shellac-Base Oil Primer. It has excellent adhesion and durability!
Keep in mind that this primer has a distinct odor and can potentially damage any roller you use, so choose a roller you’re willing to part with after use.
Before painting with your final color lightly sand again with your 220 sanding block and wipe clean. Now, you can paint with whatever color you like! I prefer to paint cabinet doors using a cabinet enamel for added durability.
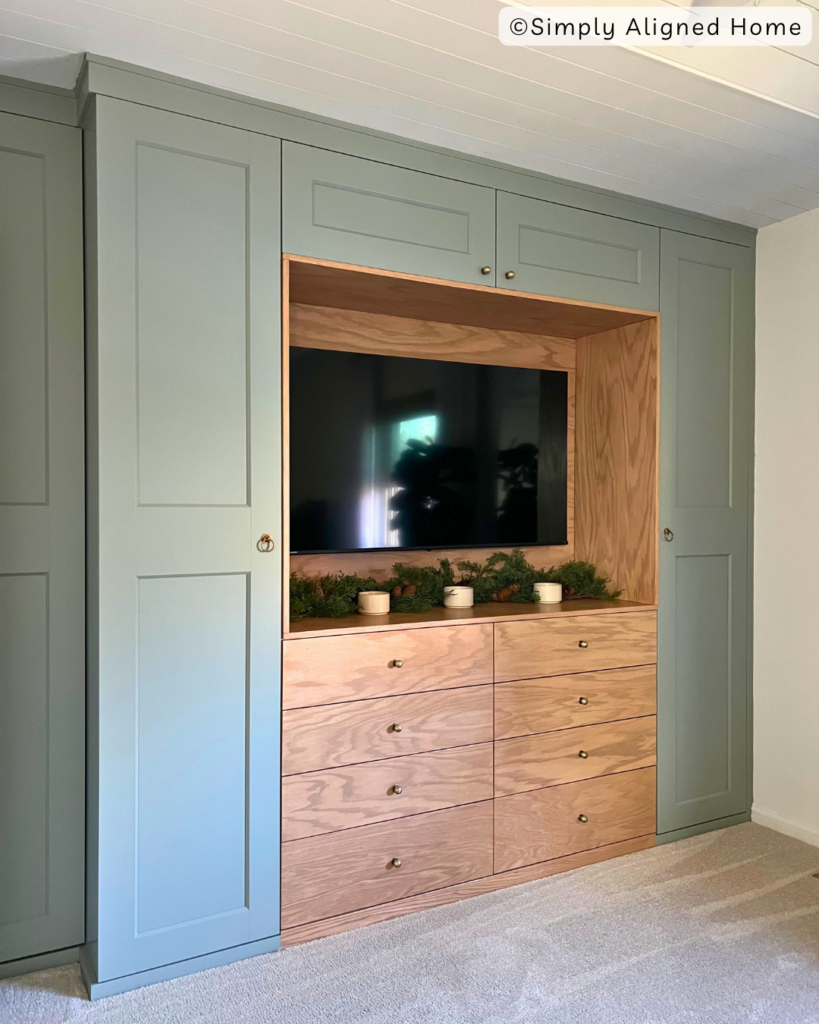
I am in love and so happy that it turned out like I had envisioned! At first, I was a little nervous making the custom doors, but I was up for the challenge and it payed off! If you want to see the final reveal video you can go HERE to see it on my Instagram.

**Note: I am not a professional and do not claim to be an expert. Please be sure to always read instructions for all tools and products. Safety is very important and should be your top priority. Wear necessary protection when using tools (eye wear, hearing protection, gloves, etc.) and dust masks when sanding or cutting. Simply Aligned Home is not responsible for any injury or damage. All of my designs are not professionally designed and are for private use only.**
Materials Used
- Staples
- IKEA Pax System
- Screws
- 2x4s
- 3/4″ Red Oak Plywood
- Construction Adhesive
- Brad Nails
- Red Oak Edge Banding
- Zinsser B-I-N Shellac Oil Primer
- 220 Sanding Block
- Tack Cloth
Tools Used
- Hammer
- Trim Puller
- Stapler
- Utility Knife
- Level
- Multi Tool
- Track Saw
- Impact Driver And Drill
- Stud Finder
- Brad Nailer
- Household Iron
- Router
- Pipe Clamps
- Quick Clamps
- Paint Pail
- Paint Roller
- Paint Brush
Finishing Details