In this article, I will demonstrate a fast and simple method for concealing plywood edges with edge banding!
I often receive numerous inquiries from people seeking help on the application of edge banding to plywood. This is a process that I have used in many of my projects. I’m excited to share my insights on how to effectively apply this method to enhance the look and durability of plywood edges in various projects.
Join me as I go through the step-by-step process, on how to achieve fast results!
**This post contains affiliate links to products that I used or recommend. If you purchase something through an affiliate link, I may receive a small percentage of the sale at no extra cost to you. I really appreciate your support!**
What is Edge Banding?
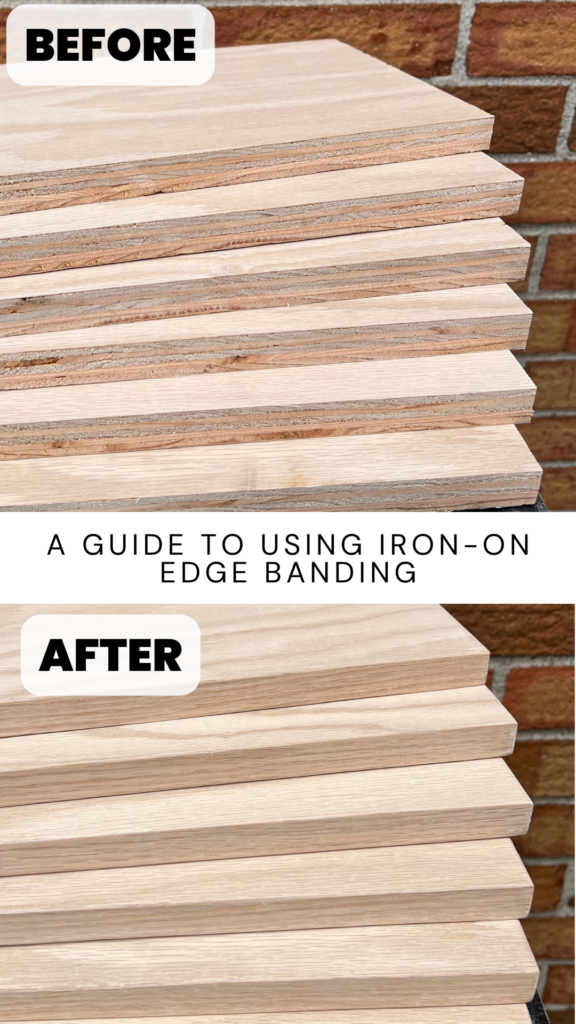
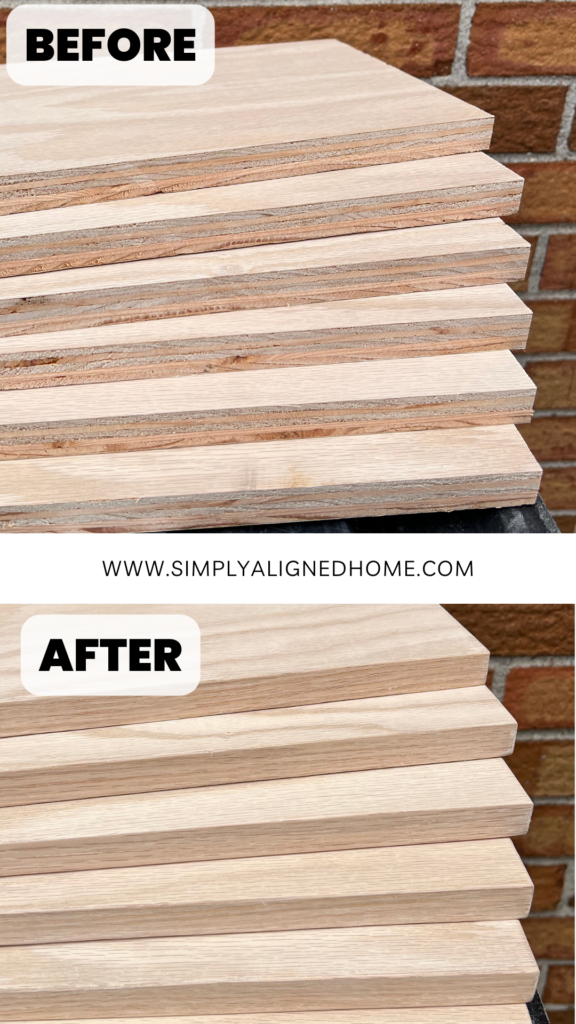
Edge banding is a thin strip of solid wood veneer, designed to cover and conceal the exposed edges of various sheet materials, such as plywood, particleboard, or MDF.
Its primary purpose is to enhance the appearance and durability of plywood edges, providing a seamless and finished look. Beyond its aesthetic benefits, edge banding also helps protect the edges from moisture, chipping, and wear.
Edge banding has a thin layer of glue on the backside of the banding. Once the glue is heated up it adheres to the plywood edges.
How To Apply Edge Banding To Plywood
Measure And Cut Banding
To begin the edge banding process, start by measuring the length of the plywood exposed edge. Once you have the exact measurement, proceed to trim the edge banding material to match, but add an additional inch to each side to allow for an overhang.
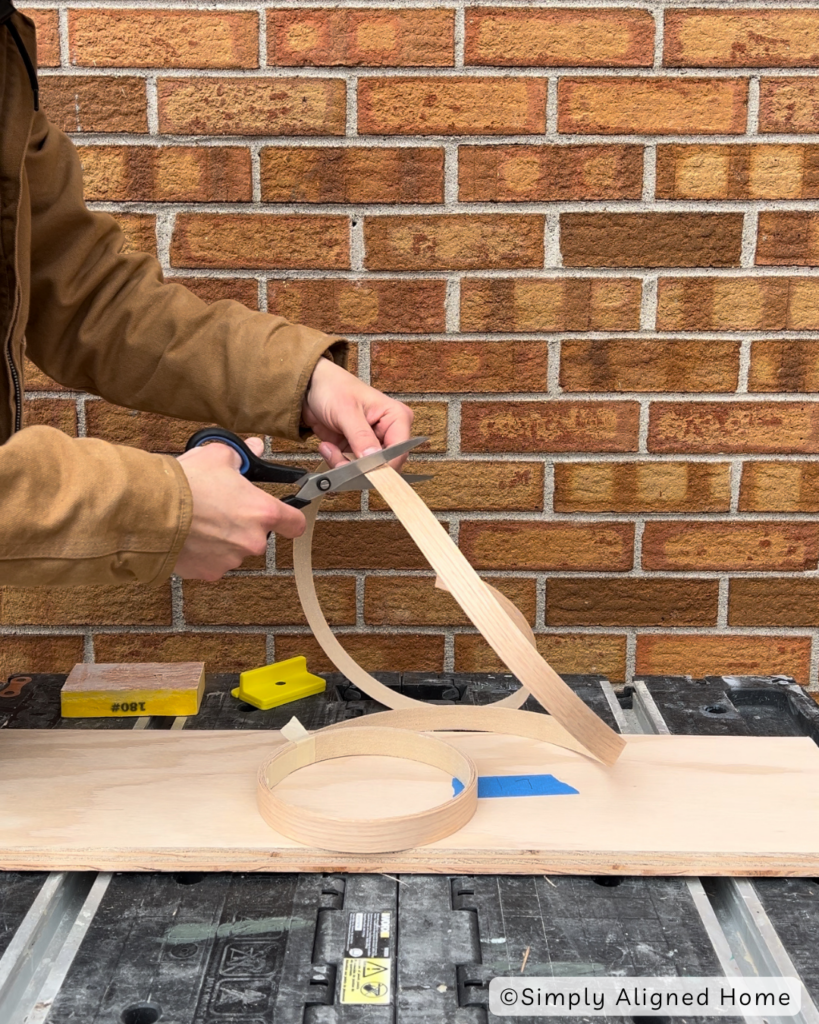
The slight overhang on both ends will be trimmed later in the process to ensure a clean and polished result.
Apply Heat To Attach Banding To Plywood
Before attaching the edge banding to your plywood ensure that the edges of the plywood are clean and free from any dust or debris. Sand the edges if necessary to create a smooth surface for better adhesion.
It’s crucial to preheat your iron to the recommended temperature specified for the edge banding material in use. Once the iron is appropriately heated, position the edge banding strip over the plywood edge. Make sure to leave about an inch overhang on each side.
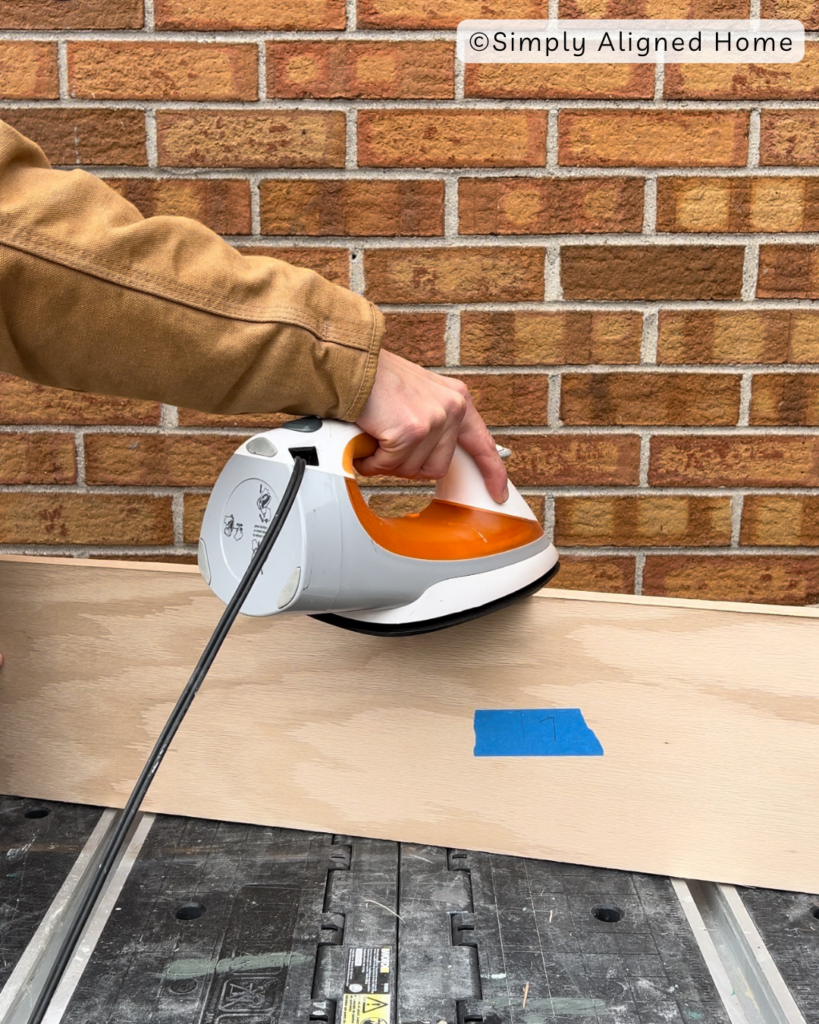
There are two placement options for the edge banding. You can align it along the edge of the plywood, requiring trimming only at the bottom in the end. Or you can position the banding in the center of the plywood edge, making it where you will need to trim on both edges. I prefer to center the banding so that I can trim both edges.
Slowly run the hot iron over the edge banding, applying even pressure. This activates the adhesive, bonding the edge banding to the plywood. I typically run the iron over the banding a few times to make sure that everything is flat and sticking to the plywood.
To ensure that the edge banding has fully adhered, I will apply pressure along the length of the edge banding using a foam roller or rag.
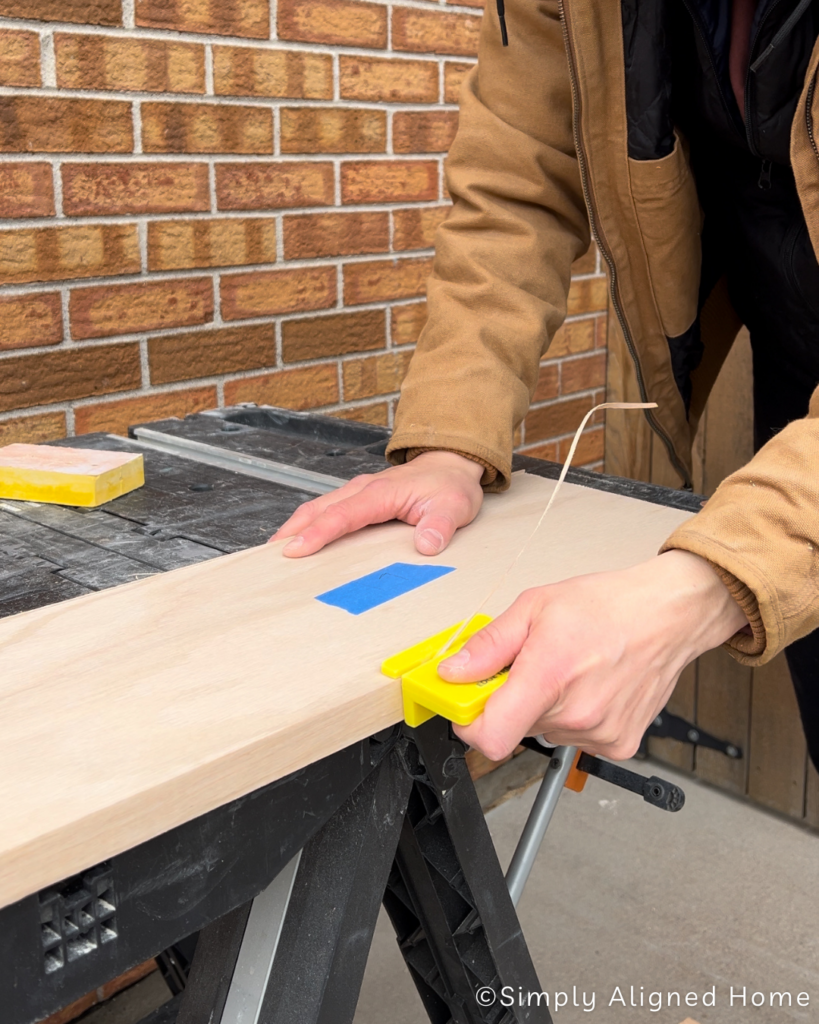
Trim And Sand Edge Banding
Once the banding is securely attached and the adhesive has cooled, I take the extra banding from the ends off. You can do this two ways, one way is to just snap it off with your fingers or you can use a pair of scissors to just cut it off.
After the edge banding is the correct length, I use a utility knife or an edge band trimmer to carefully trim the excess material flush with the plywood surface. If you chose to use a utility knife hold the knife at a slight angle for a clean cut.
Other than a utility knife the easiest way is using a tool called a edge band trimmer. They come in a few different styles but this is the one I have personally used. Just sit it flush with your plywood and run it along the edge to trim any access banding.
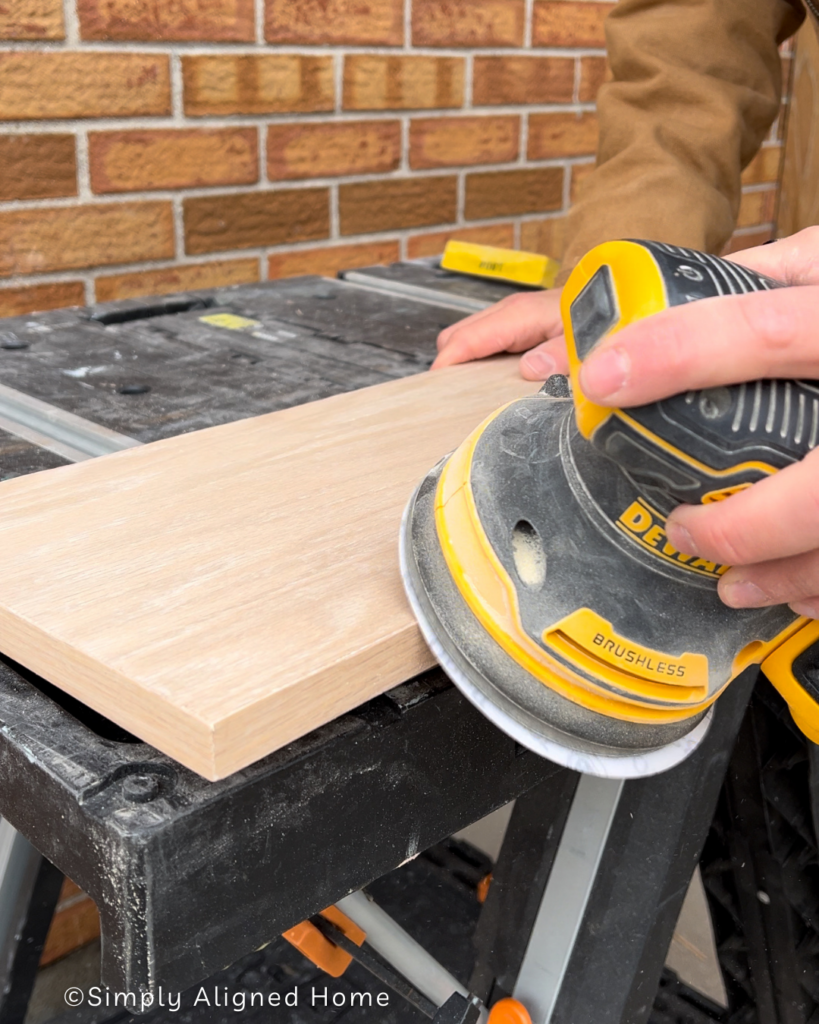
Last step, is to sand all the edges to make them smooth. You can use a sand block, a piece of sandpaper or a palm sander. Just go along the edges and the ends of the plywood to get rid of any splinters and rough edges.
Tips When Working With Edge Banding
- Pay attention to alignment during application to ensure a neat and consistent look.
- Be cautious with the heat application, as excessive heat can damage or burn certain edge banding materials.
- Practice on a scrap piece of plywood if you’re new to using edge banding to get a feel for the process.
- After applying the edge banding, use a roller or a block of wood to press it firmly onto the plywood. This helps ensure strong adhesion and a flush fit.
Will Edge Banding Stain The Same Color As The Wood?
The ability of edge banding to stain the same color as the wood depends on the material you choose. If you have red oak plywood you want to aim to use red oak edge banding. That way they are the same type of wood and should take the stain the same.
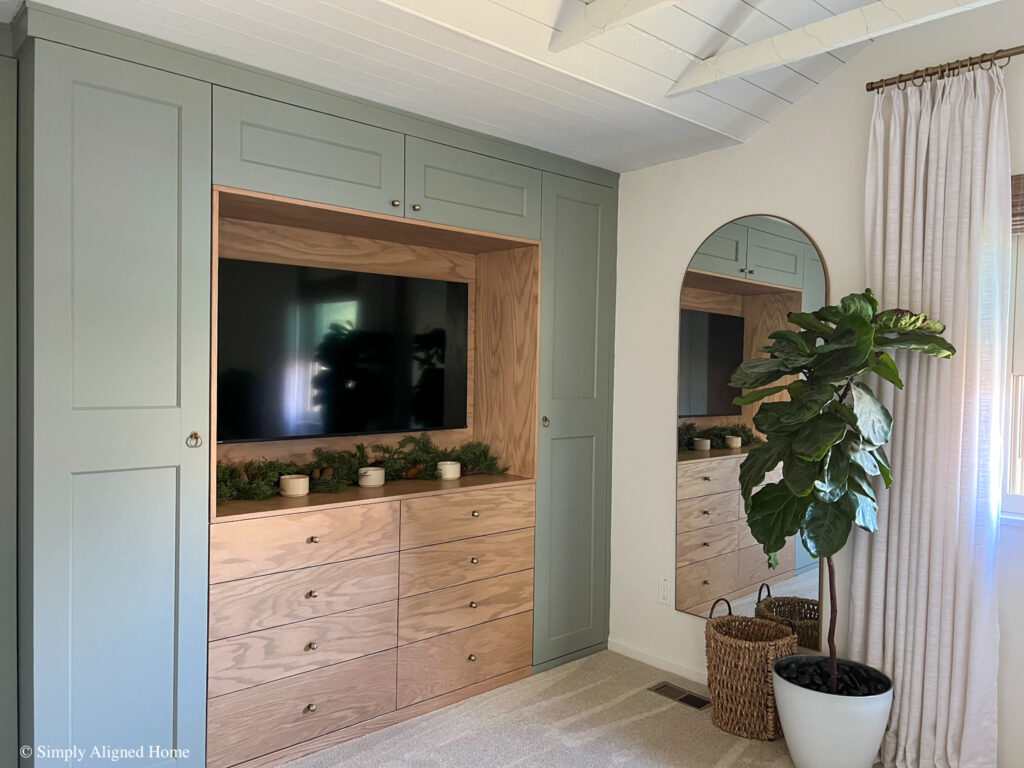
What Are Some Projects You Can Use Edge Banding For?
I am no stranger to using edge banding. I have used it on so many projects, that I consistently have a roll in the shop at all times!
Here are a few of my favorite projects that I have used banding on:
- DIY IKEA Pax Closet Hack Featuring Custom Slatted Doors
- IKEA HACK: SHIPLAP BUILT-IN BESTA UNIT
- How To Make An IKEA Pax System Look Built In

**Note: I am not a professional and do not claim to be an expert. Please be sure to always read instructions for all tools and products. Safety is very important and should be your top priority. Wear necessary protection when using tools (eye wear, hearing protection, gloves, etc.) and dust masks when sanding or cutting. Simply Aligned Home is not responsible for any injury or damage. All of my designs are not professionally designed and are for private use only.**
Materials Used
- Edge Banding
- Sandpaper or Sanding Sponge
Tools Used
- Iron
- Scissors
- Edge Banding Trimmer Or Utility Knife
- Palm Sander