
Who doesn’t love affordable furniture that looks expensive?! Furniture can really be expensive…so why not purchase something affordable and make it amazing! The best part is that you can make it fit your style. I think that’s the biggest allure of IKEA “hacks” for me…being able to make any piece of simple furniture fit my home and style.
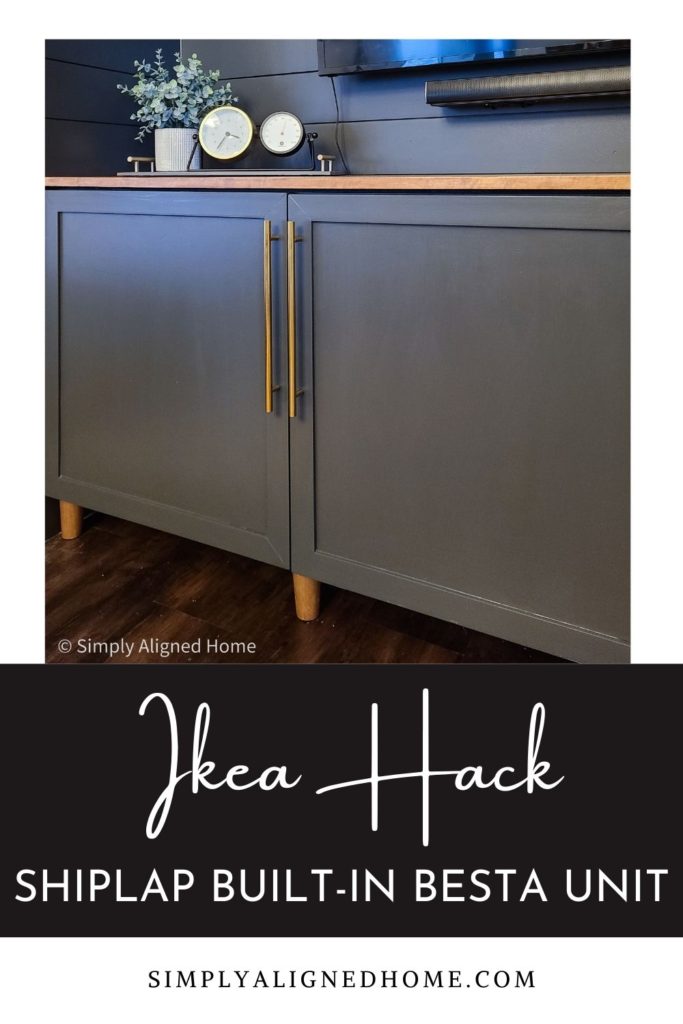
One of my first solo builds was this shiplap built-in unit. I loved the fact that it was a statement piece with purpose. I chose to use an IKEA Besta unit based on the size and how much junk stuff it was able to hold (you’ll get a little glimpse into this when I show you how I painted the frame..).
I always intended to customize the Besta unit by adding trim to the door faces to make them shaker style. However, as with most of my projects, they looked fine how they were and I was ready to move on to the next project.
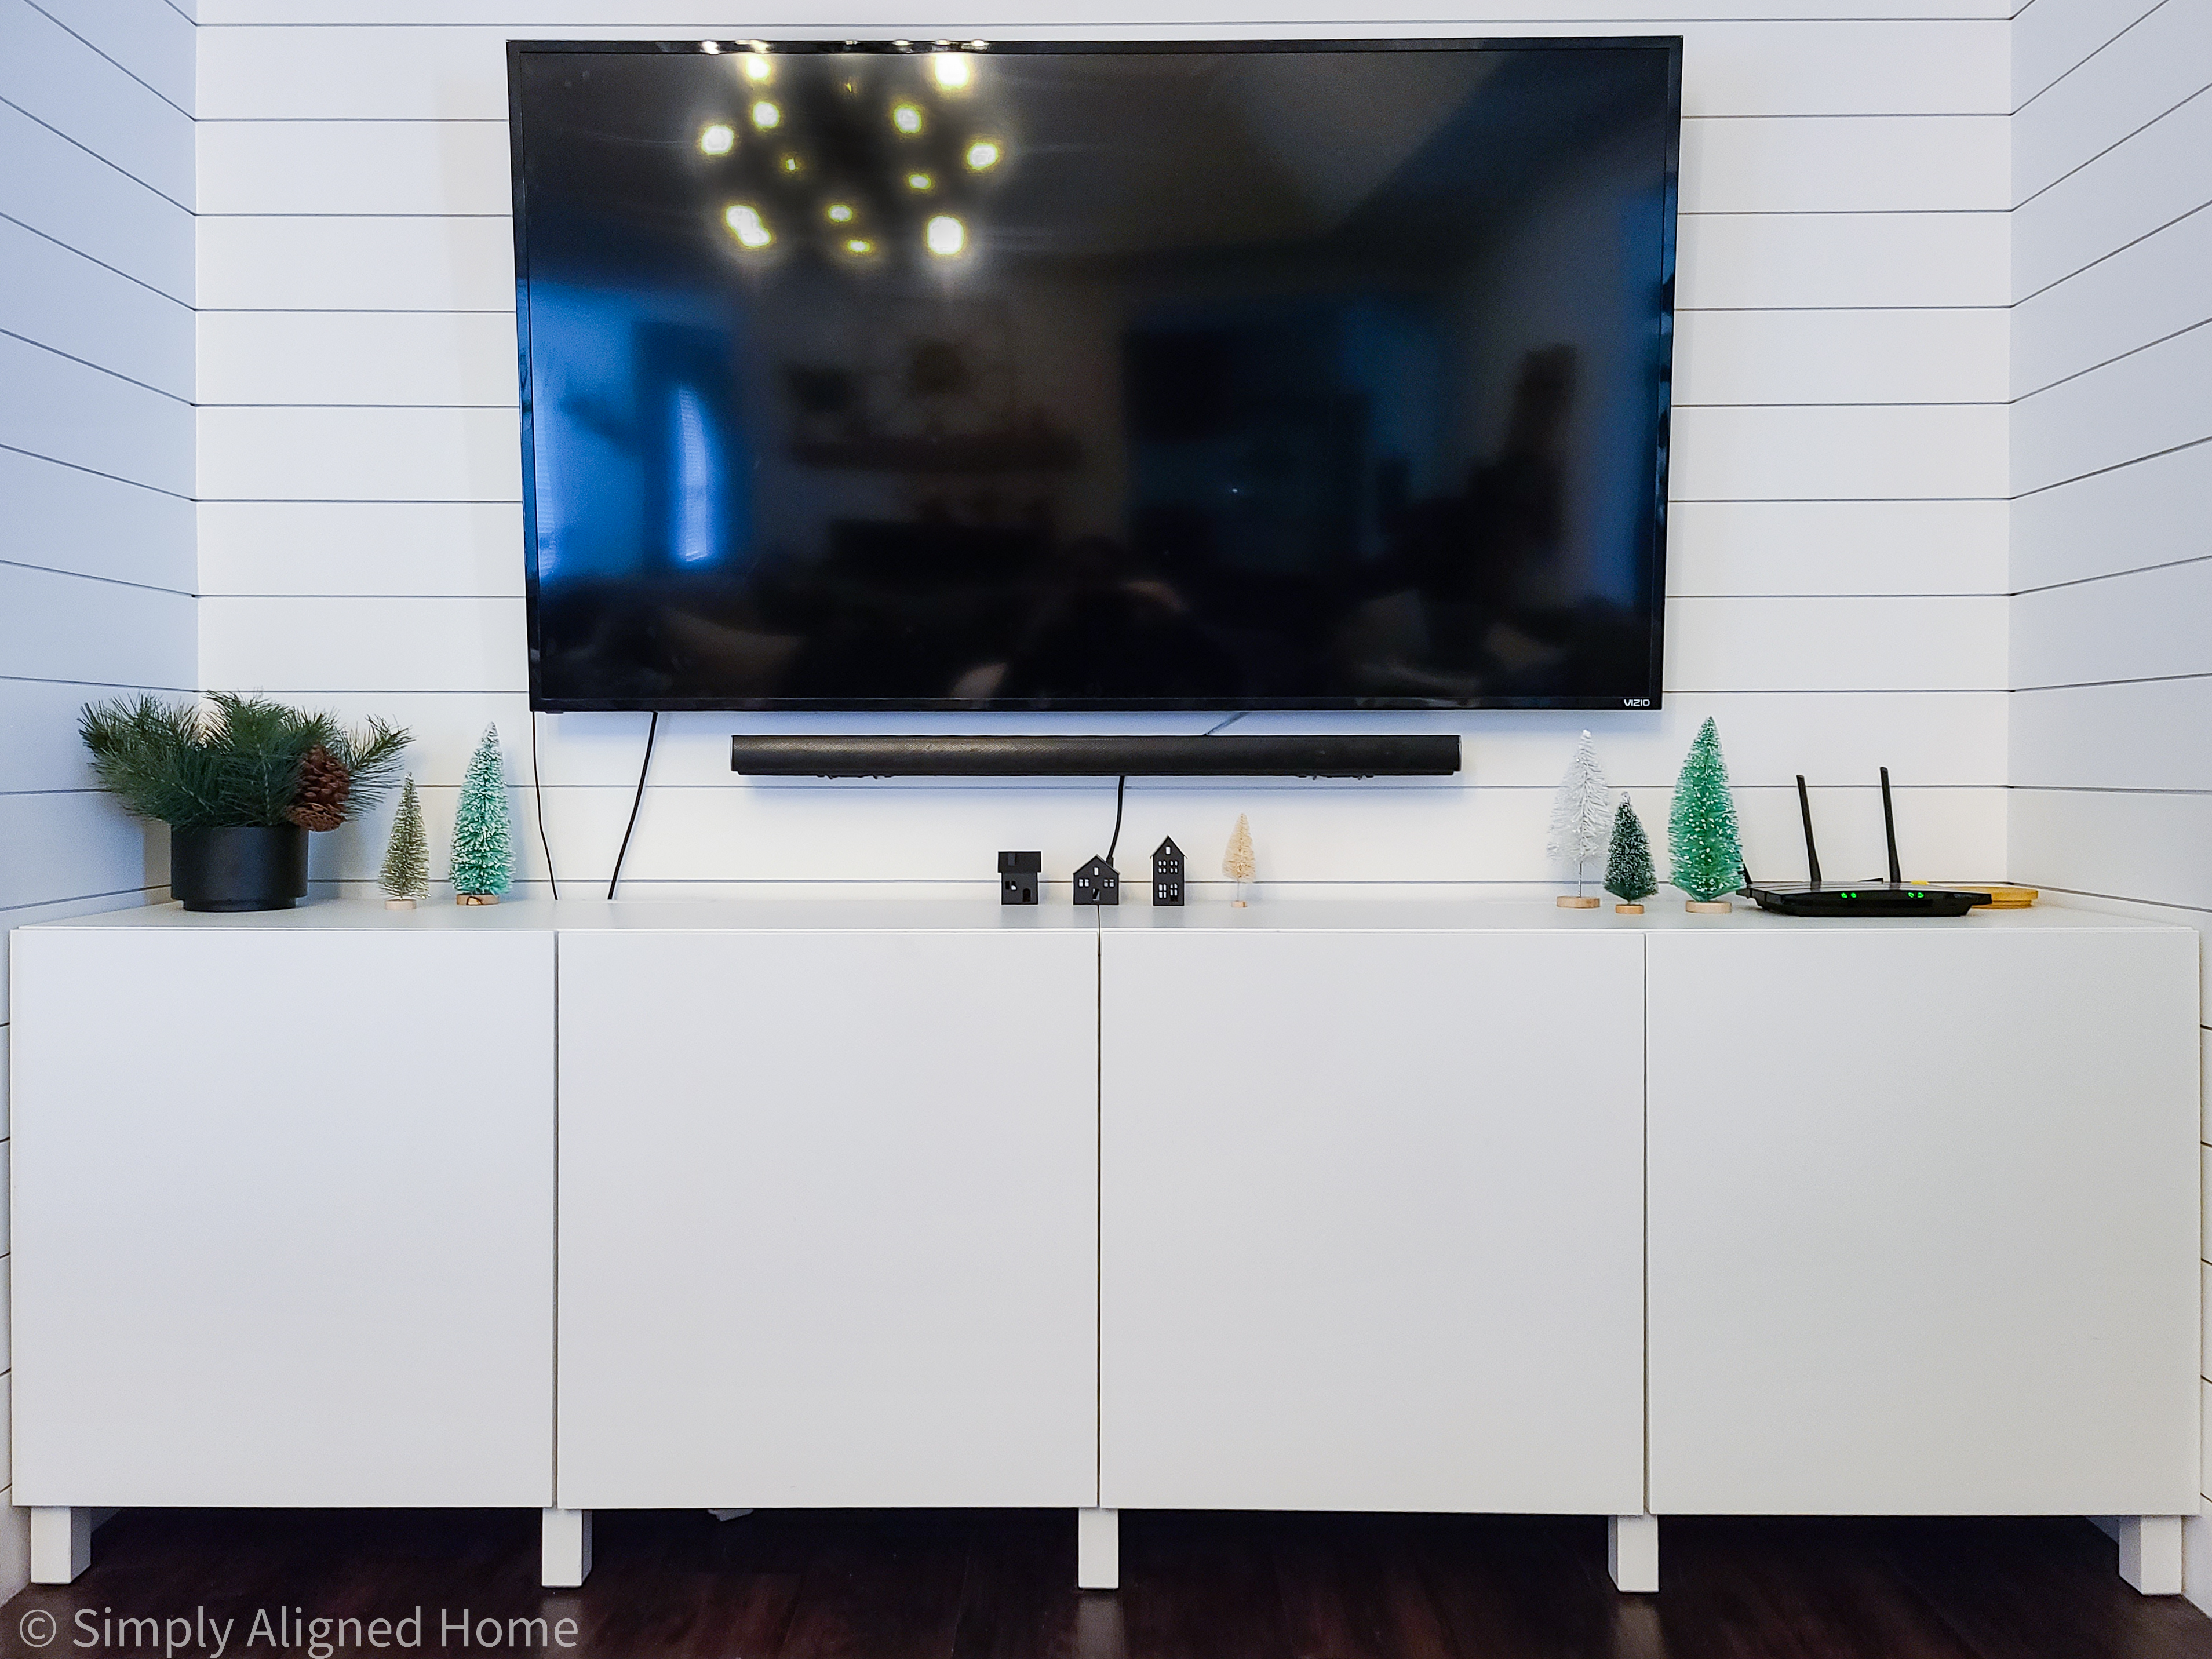
Although I really liked how the white shiplap built-ins looked, I never really loved them. They felt a little stark to me in a large white room. I finally decided it was time to add a little character and warmth! I started with the IKEA Besta unit.
**This post contains affiliate links to products that I recommend. If you purchase something through an affiliate link, I may receive a small percentage of the sale at no extra cost to you. I really appreciate your support.**
Add Trim
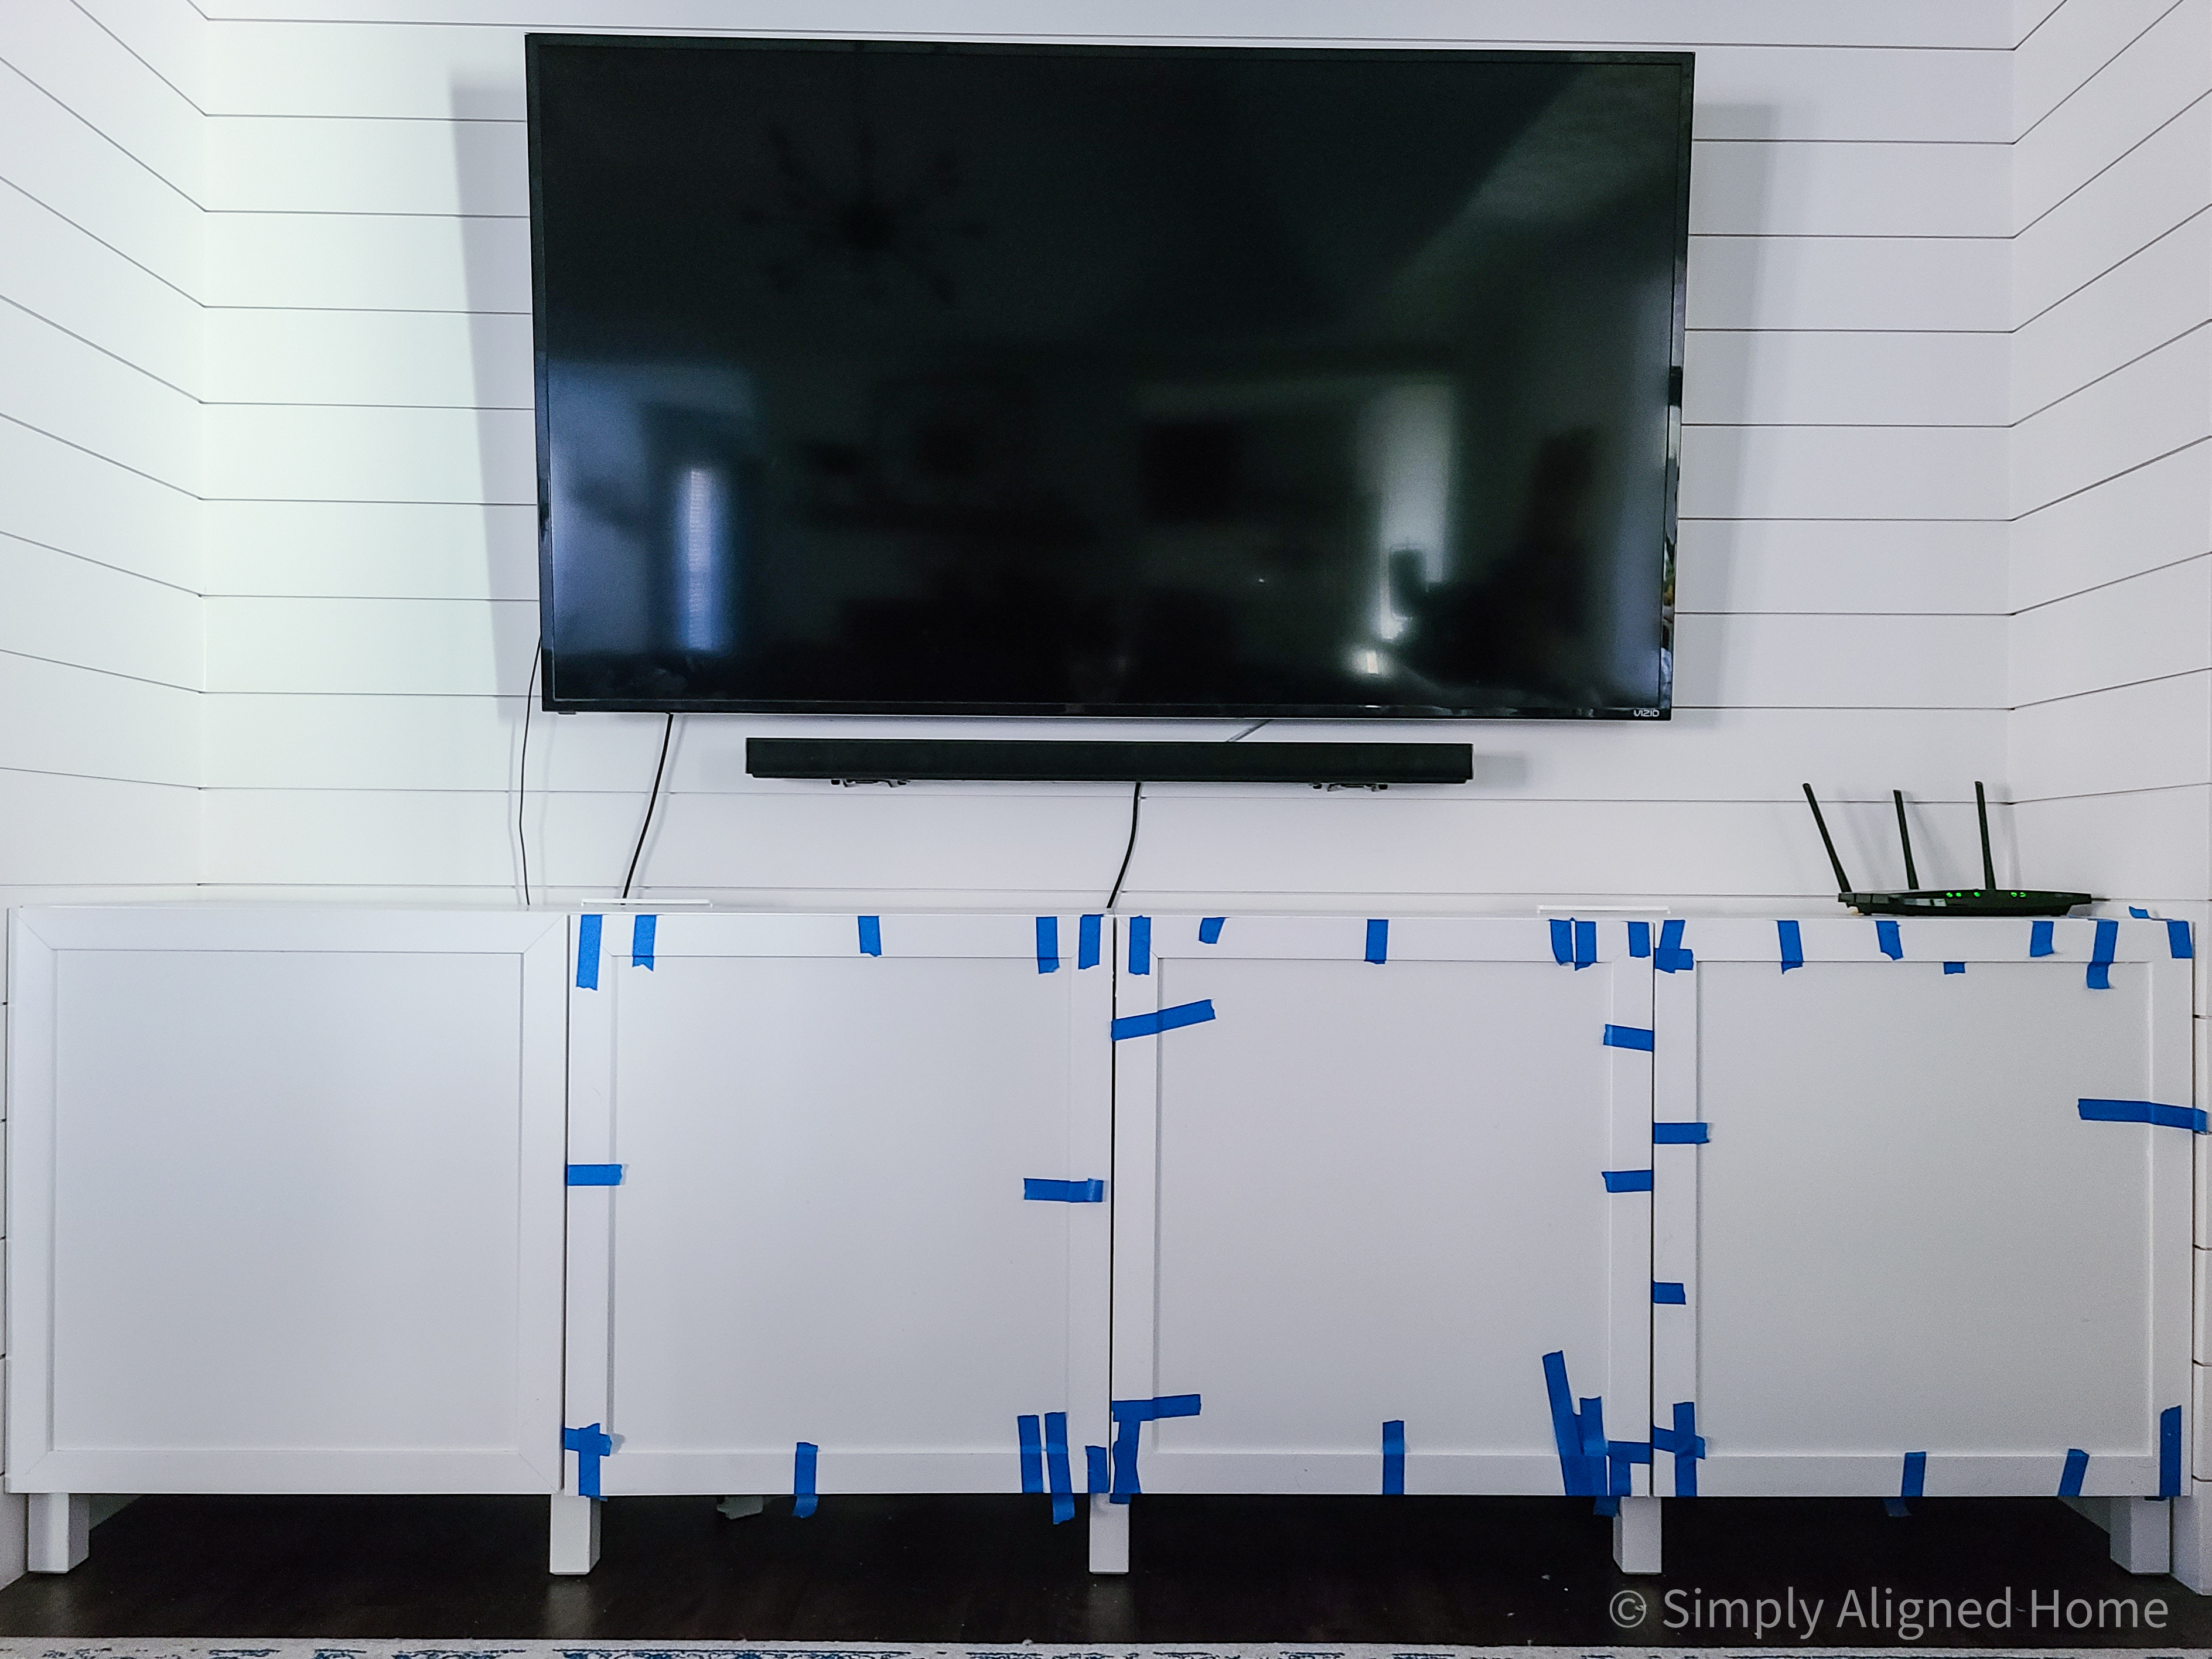
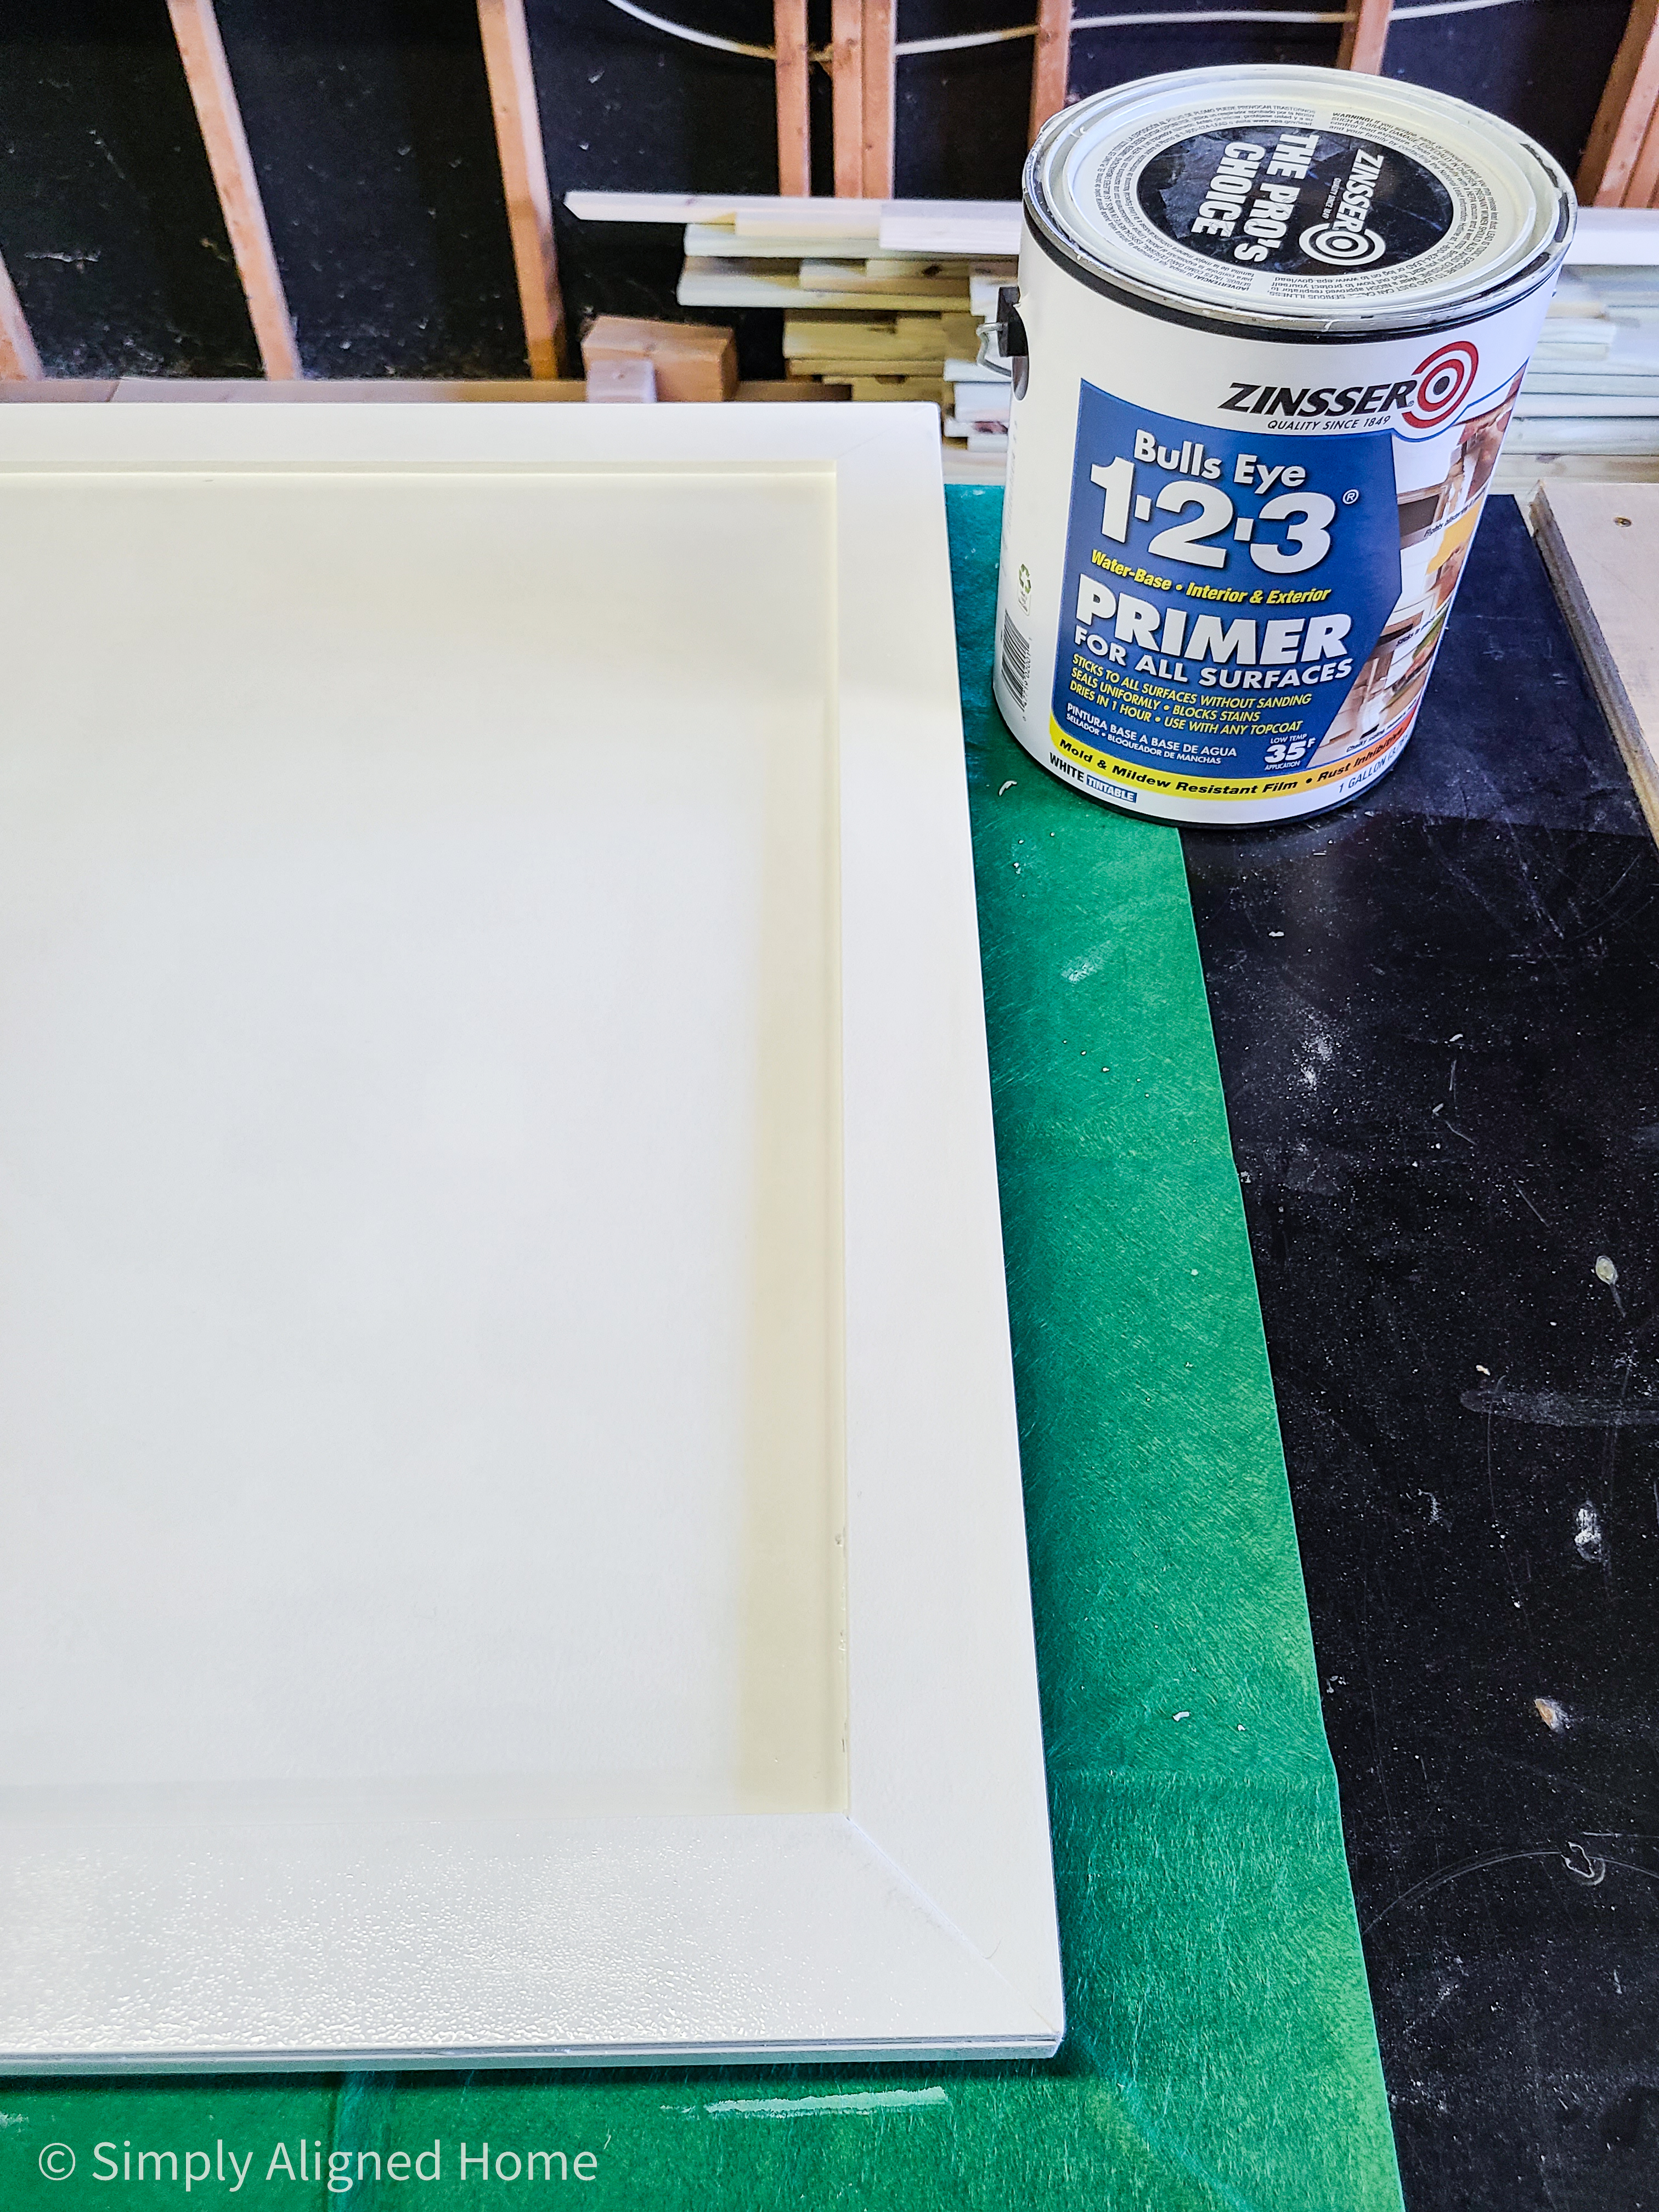
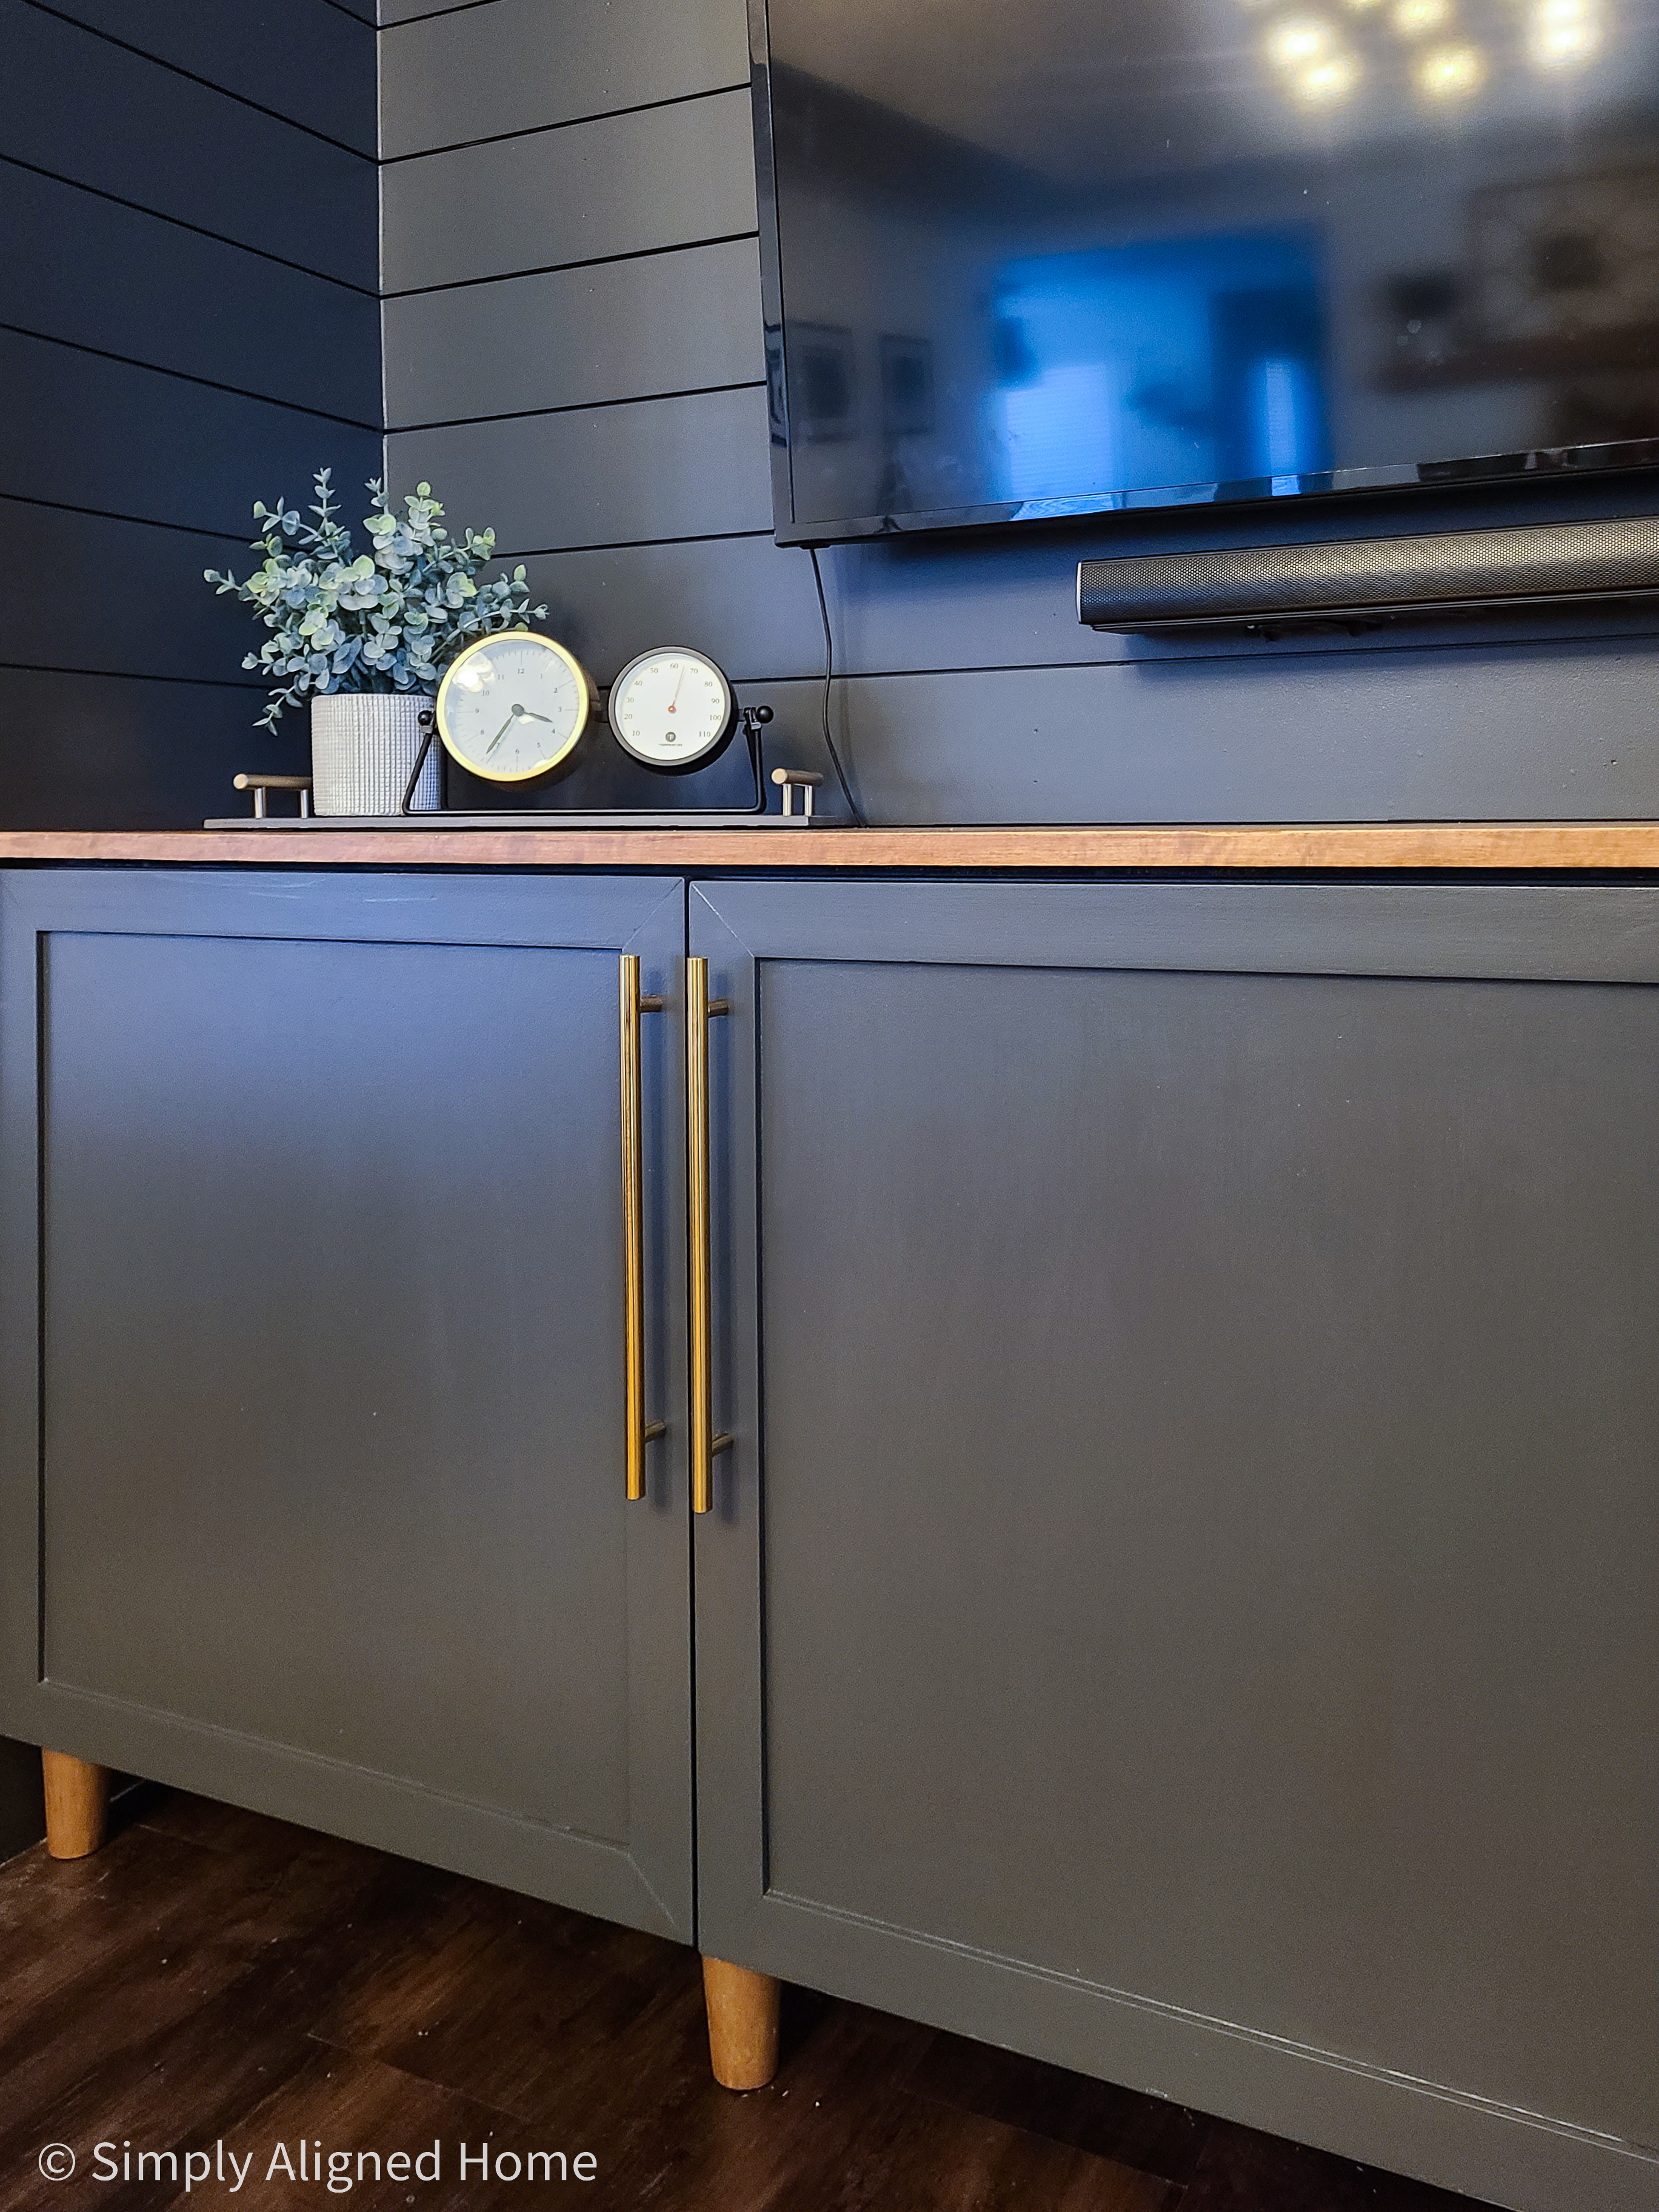
The first step to transforming the IKEA Besta unit was to add the trim I always intended to add. I had originally purchased a PVC trim for this, so that is what I used. (I will go ahead and tell you that I recommend you use wood trim instead.)
I mitered the corners of the trim for a clean look. I secured the trim to the door using a multi-surface glue.
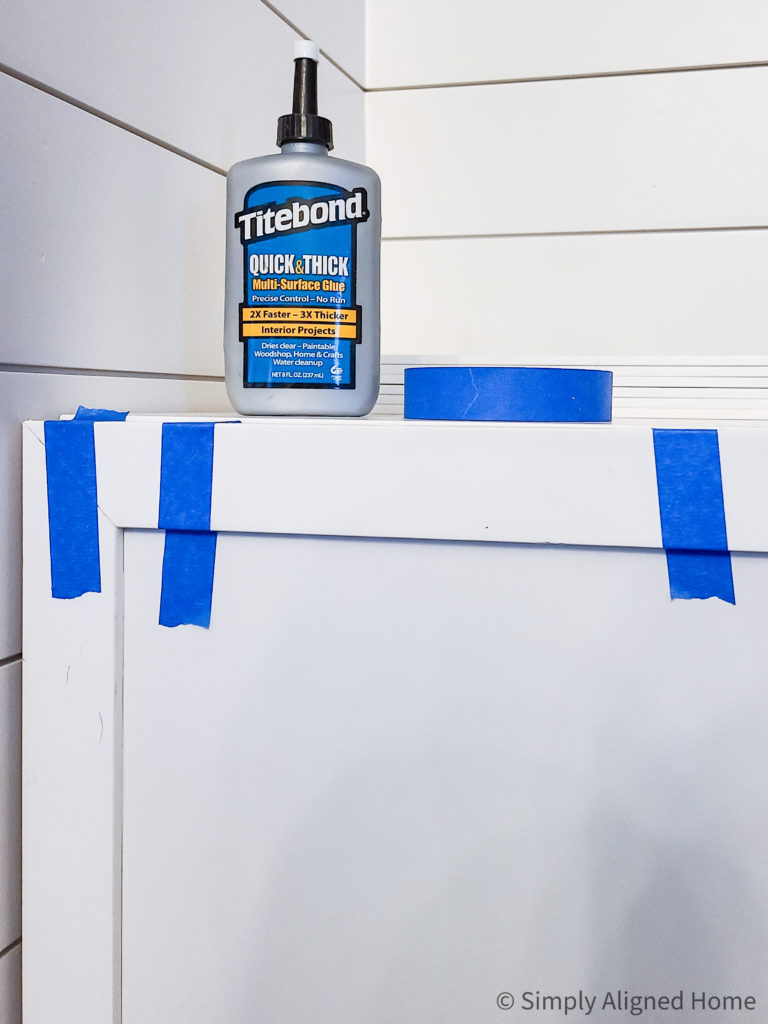
I held the trim in place with painter’s tape until the glue dried.
Prime + Paint
The only surfaces I decided to paint were the face frame of the unit and the doors. I started by taking the doors and hardware off. Once they were off, I was able to do a light sanding before I applied a coat of primer.
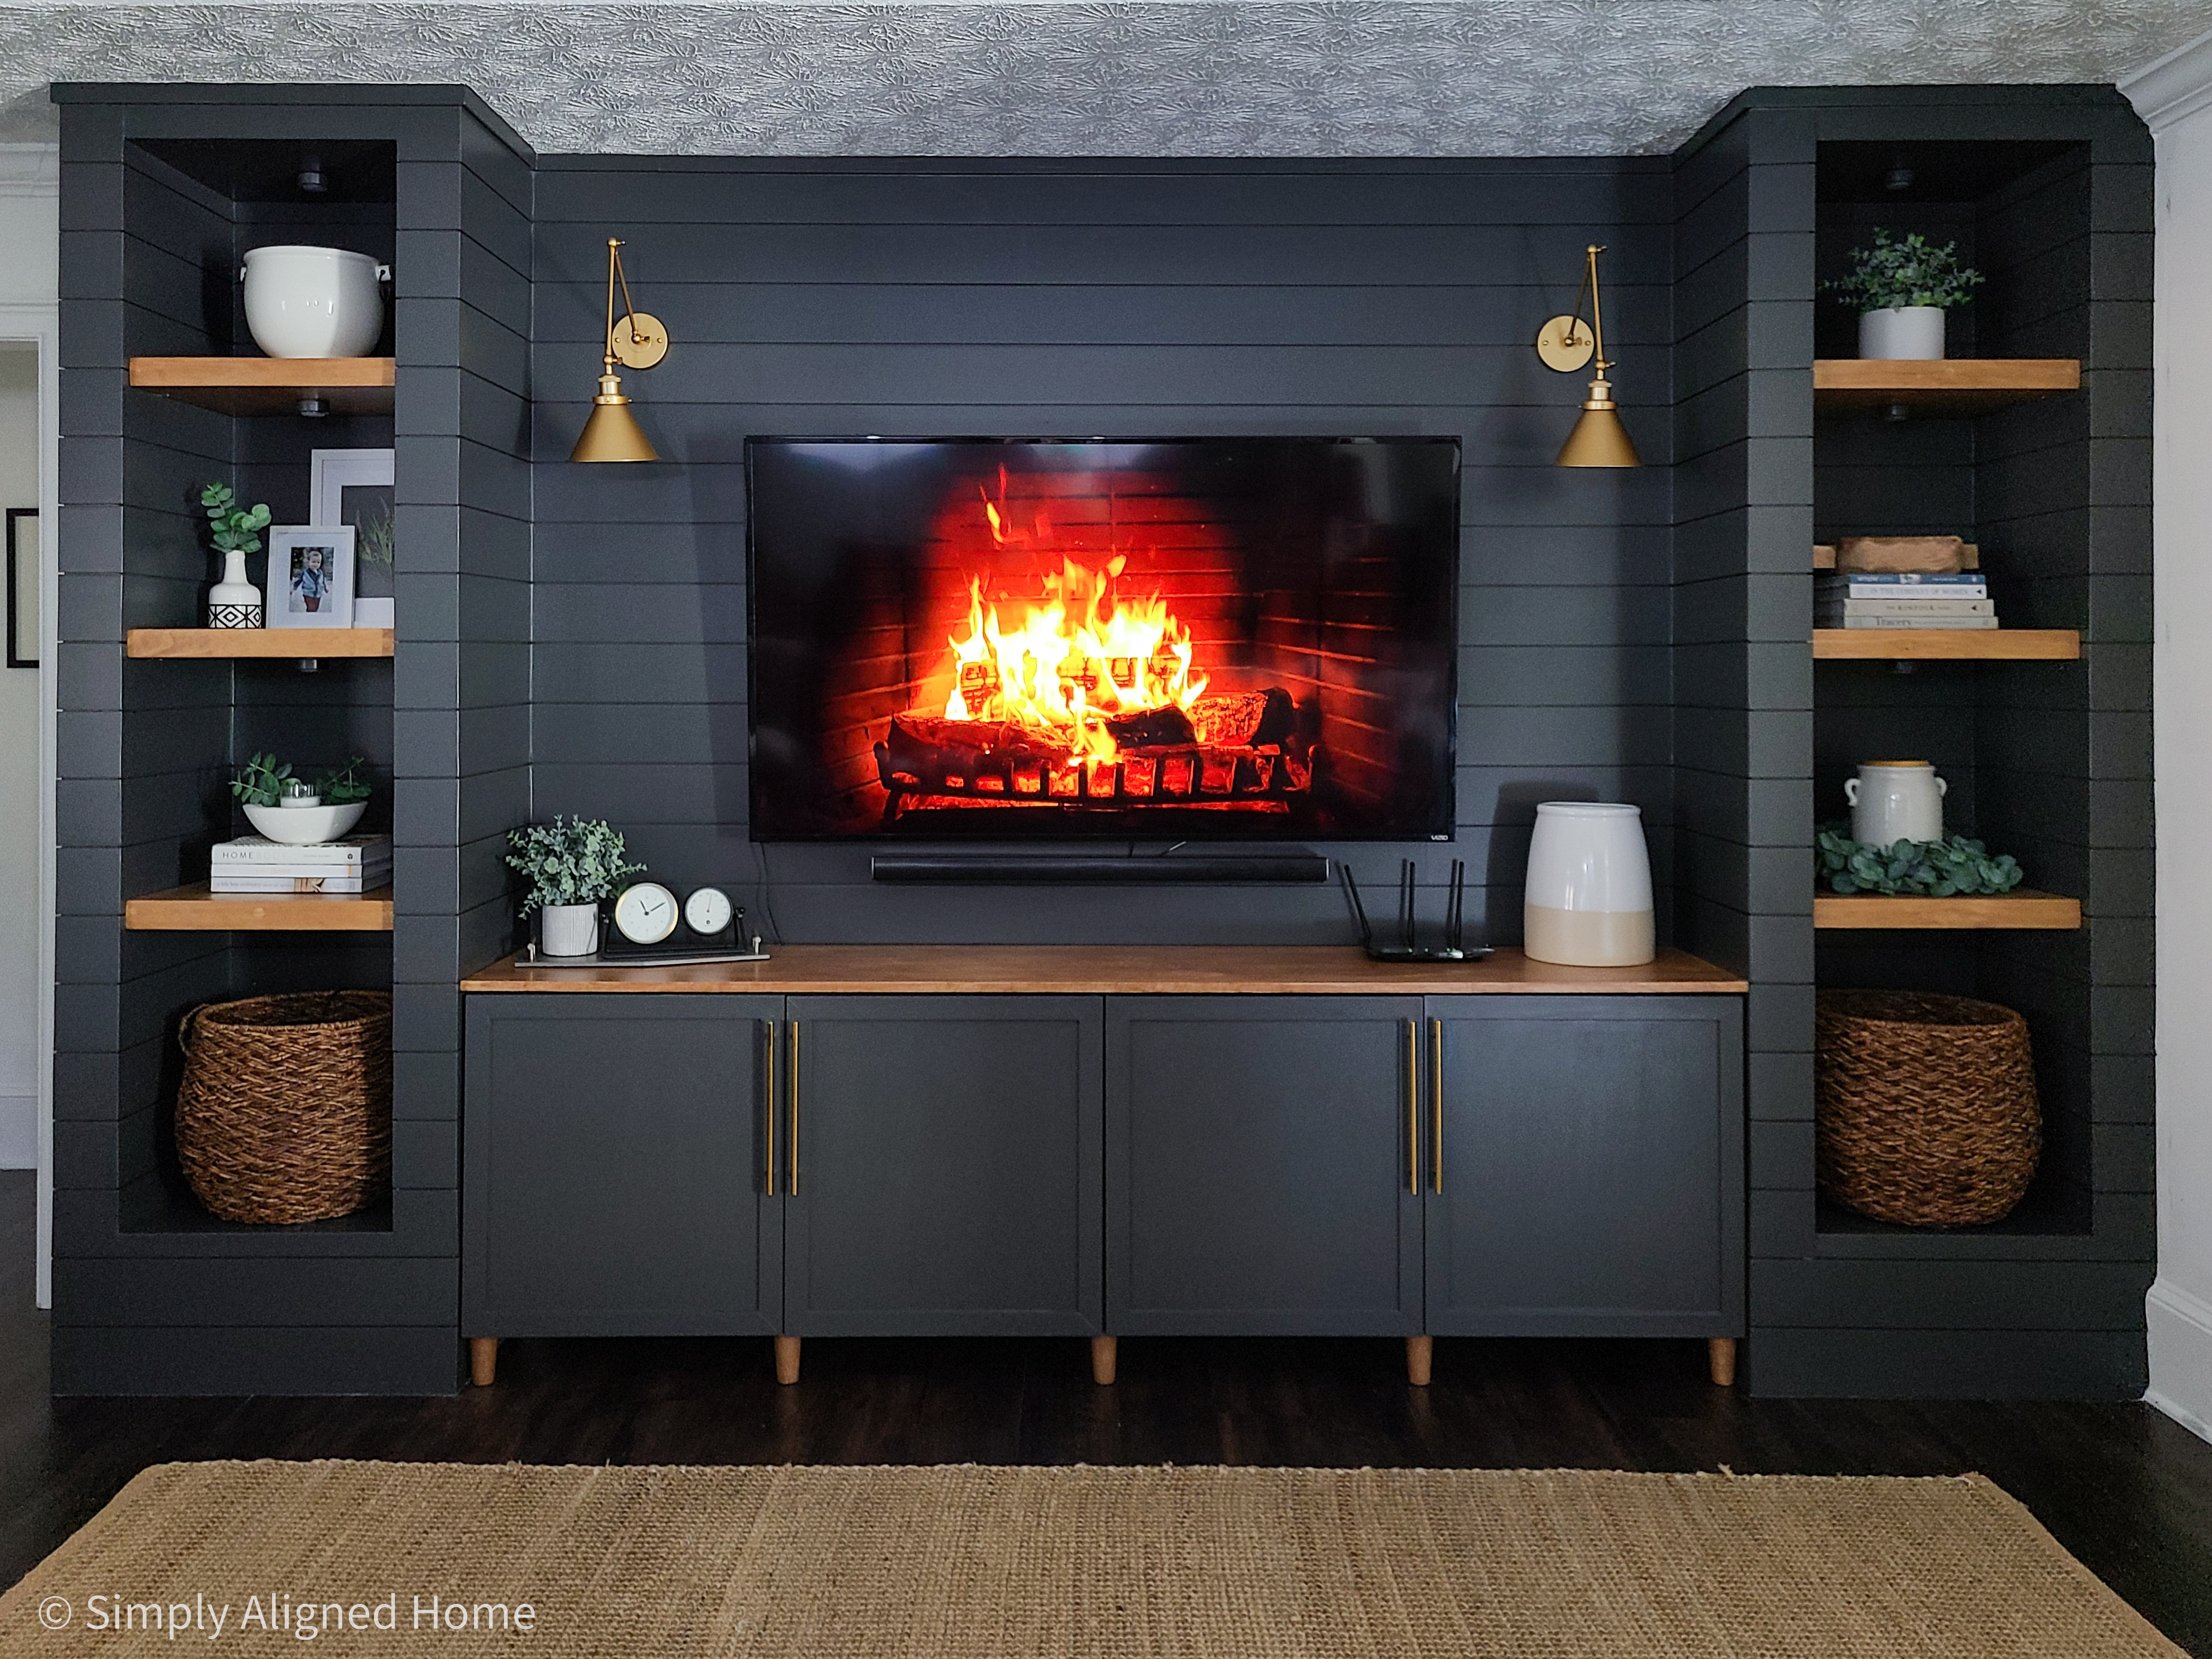
Once everything had a coat of primer, I began adding color…Sherwin Williams Iron Ore! This may just be my new favorite paint color!!
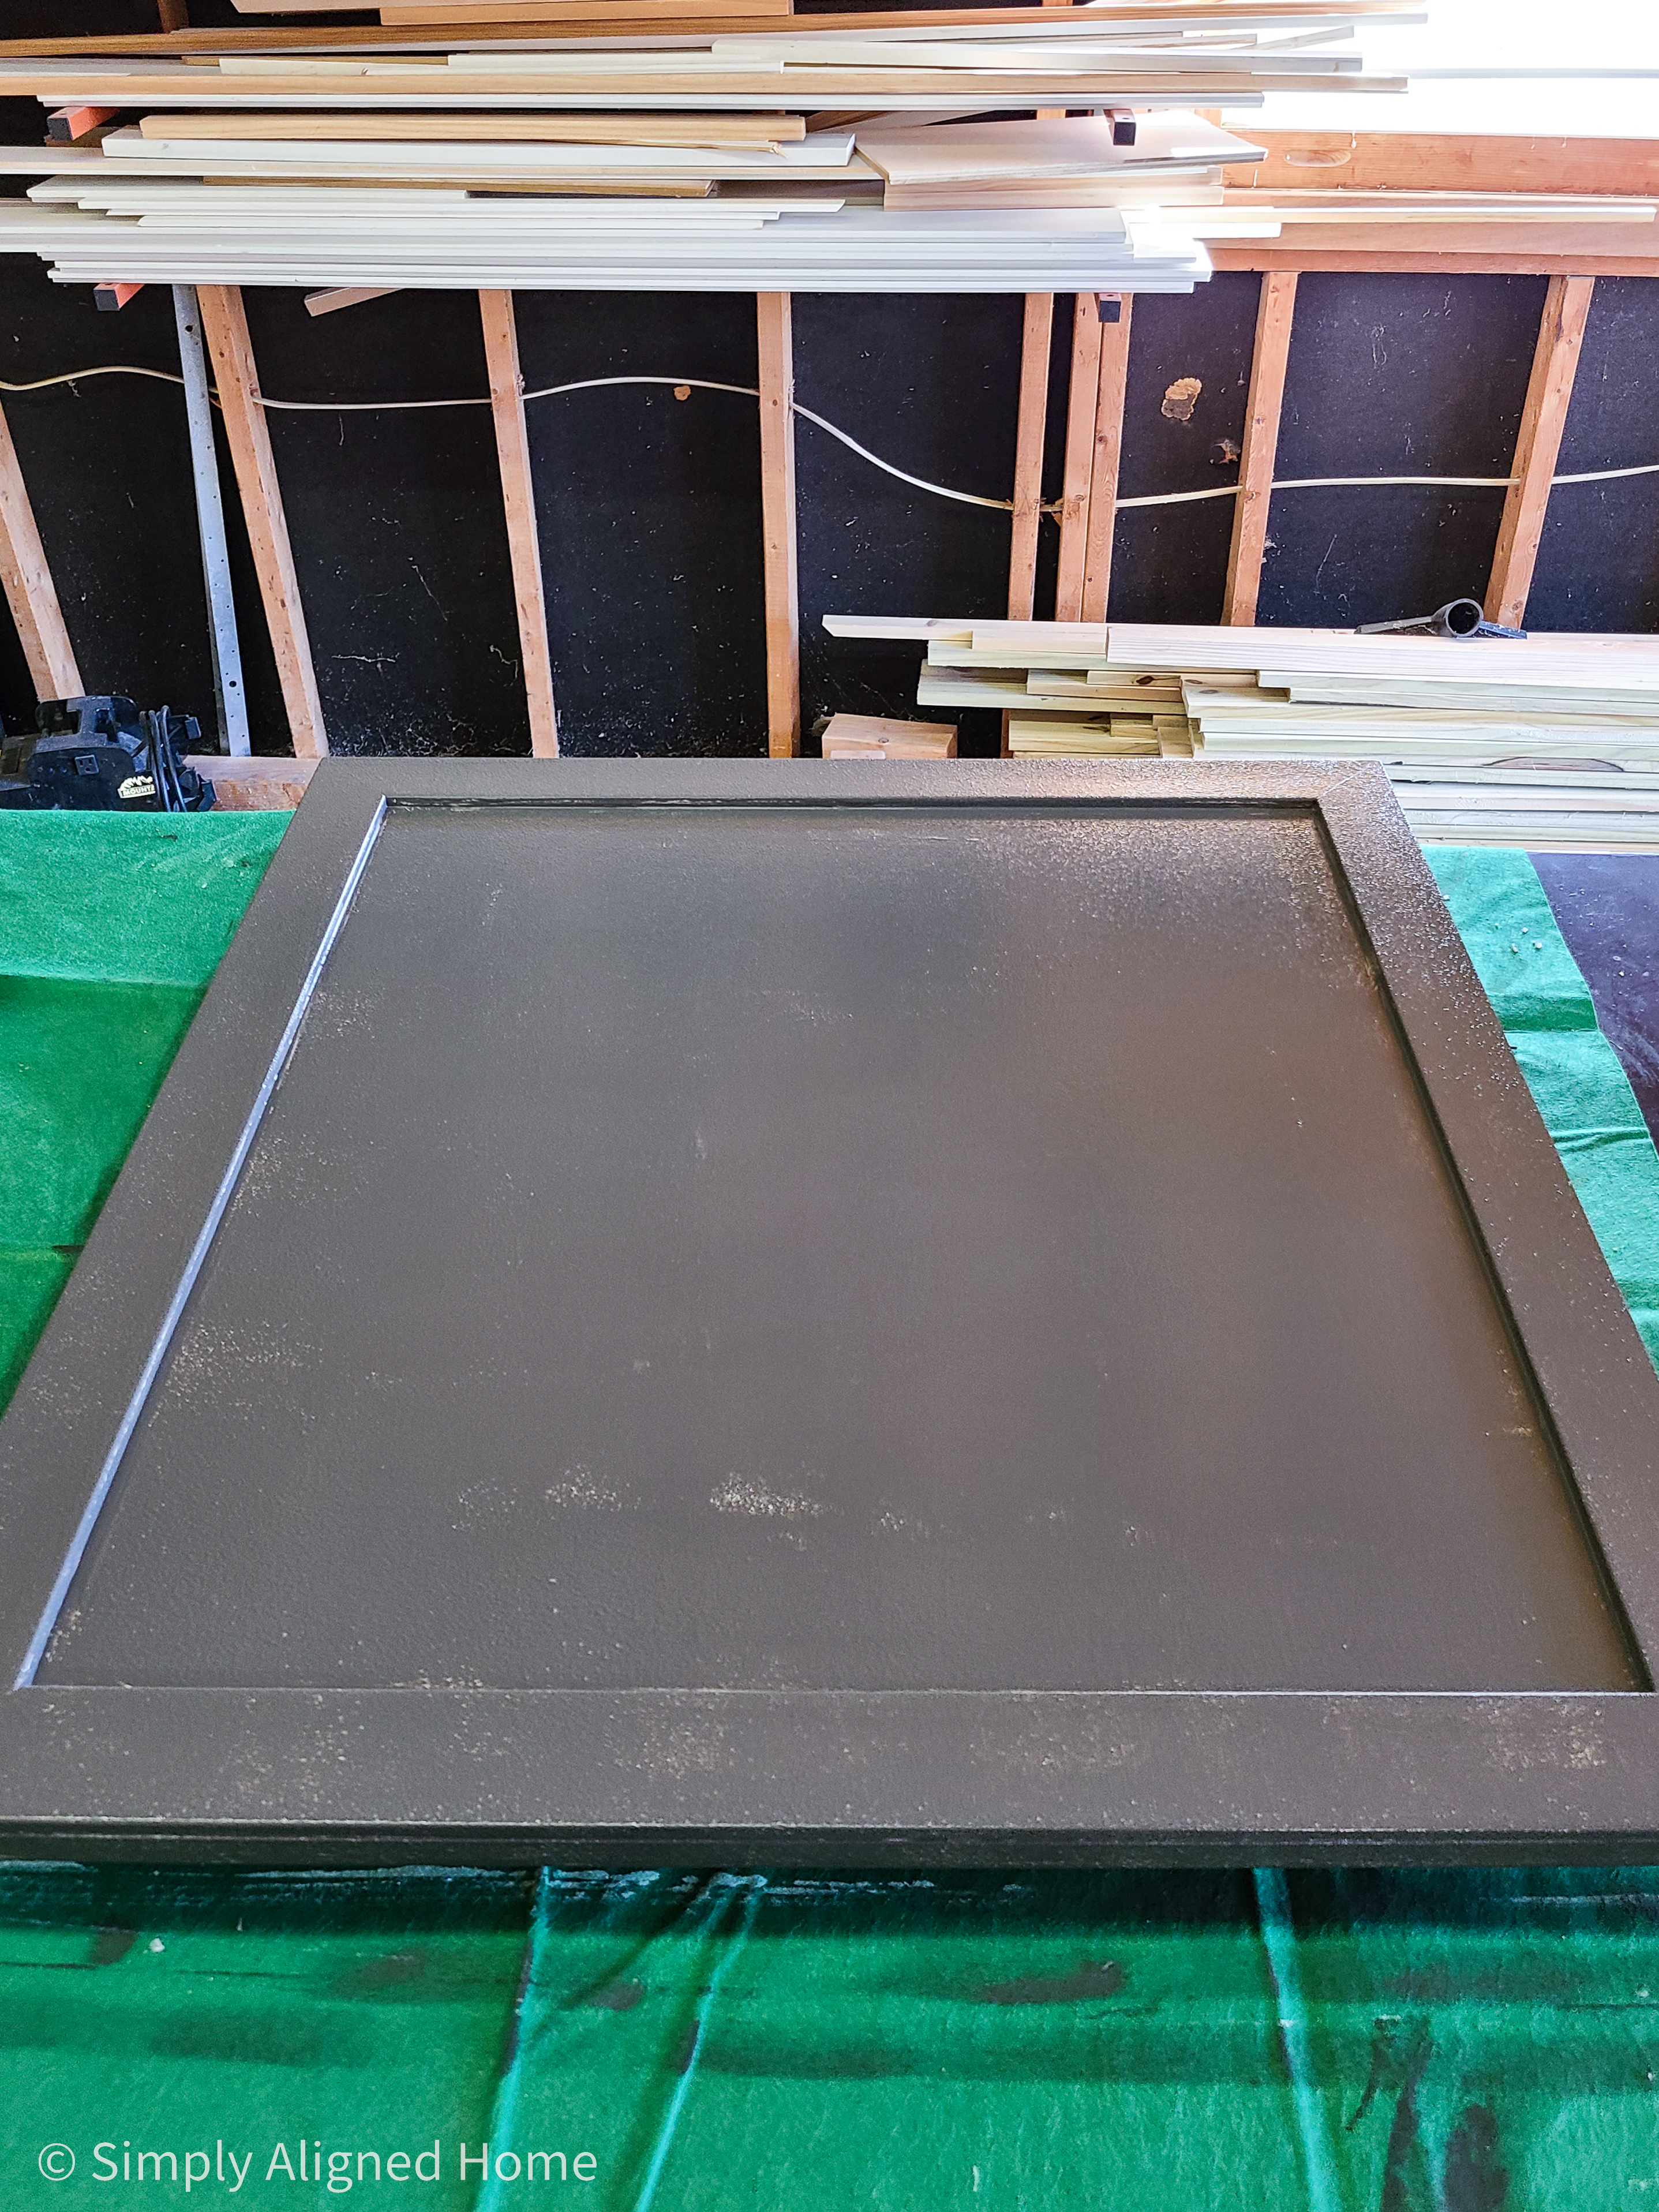
It took two coats to fully cover all of the surfaces. I used both a foam roller and high quality brush to paint everything.
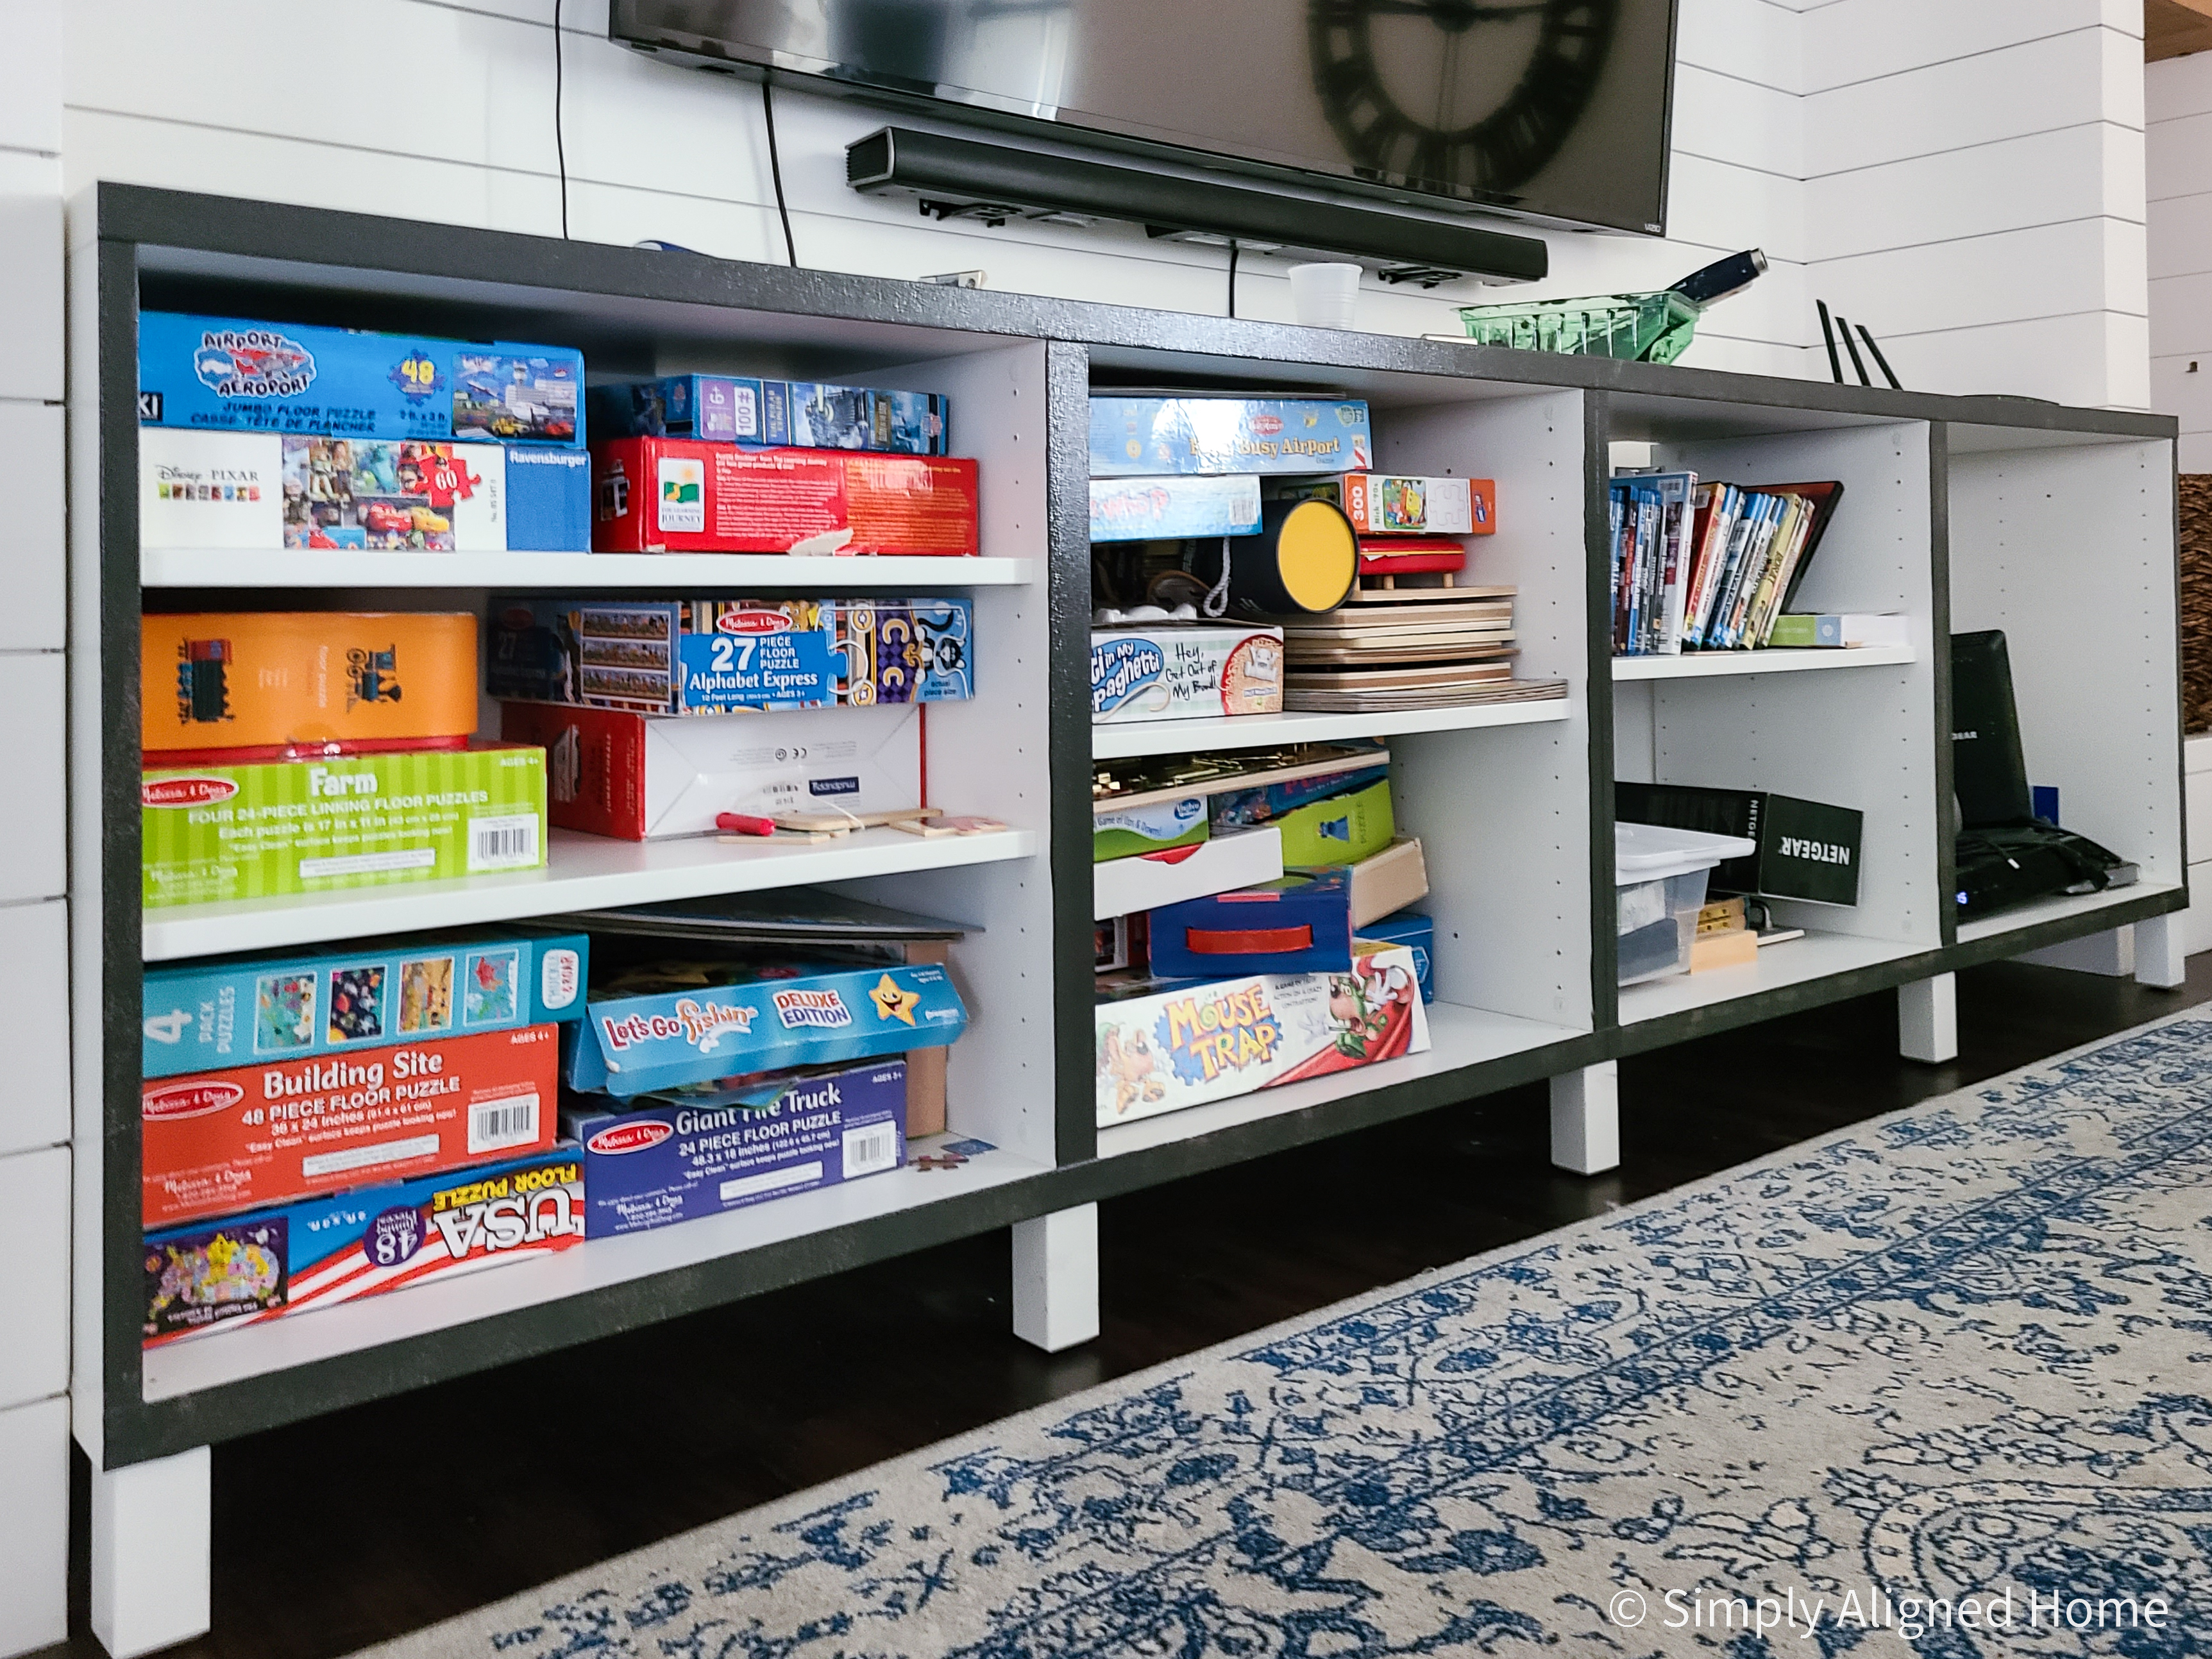
And there’s all of the “stuff” I was talking about…
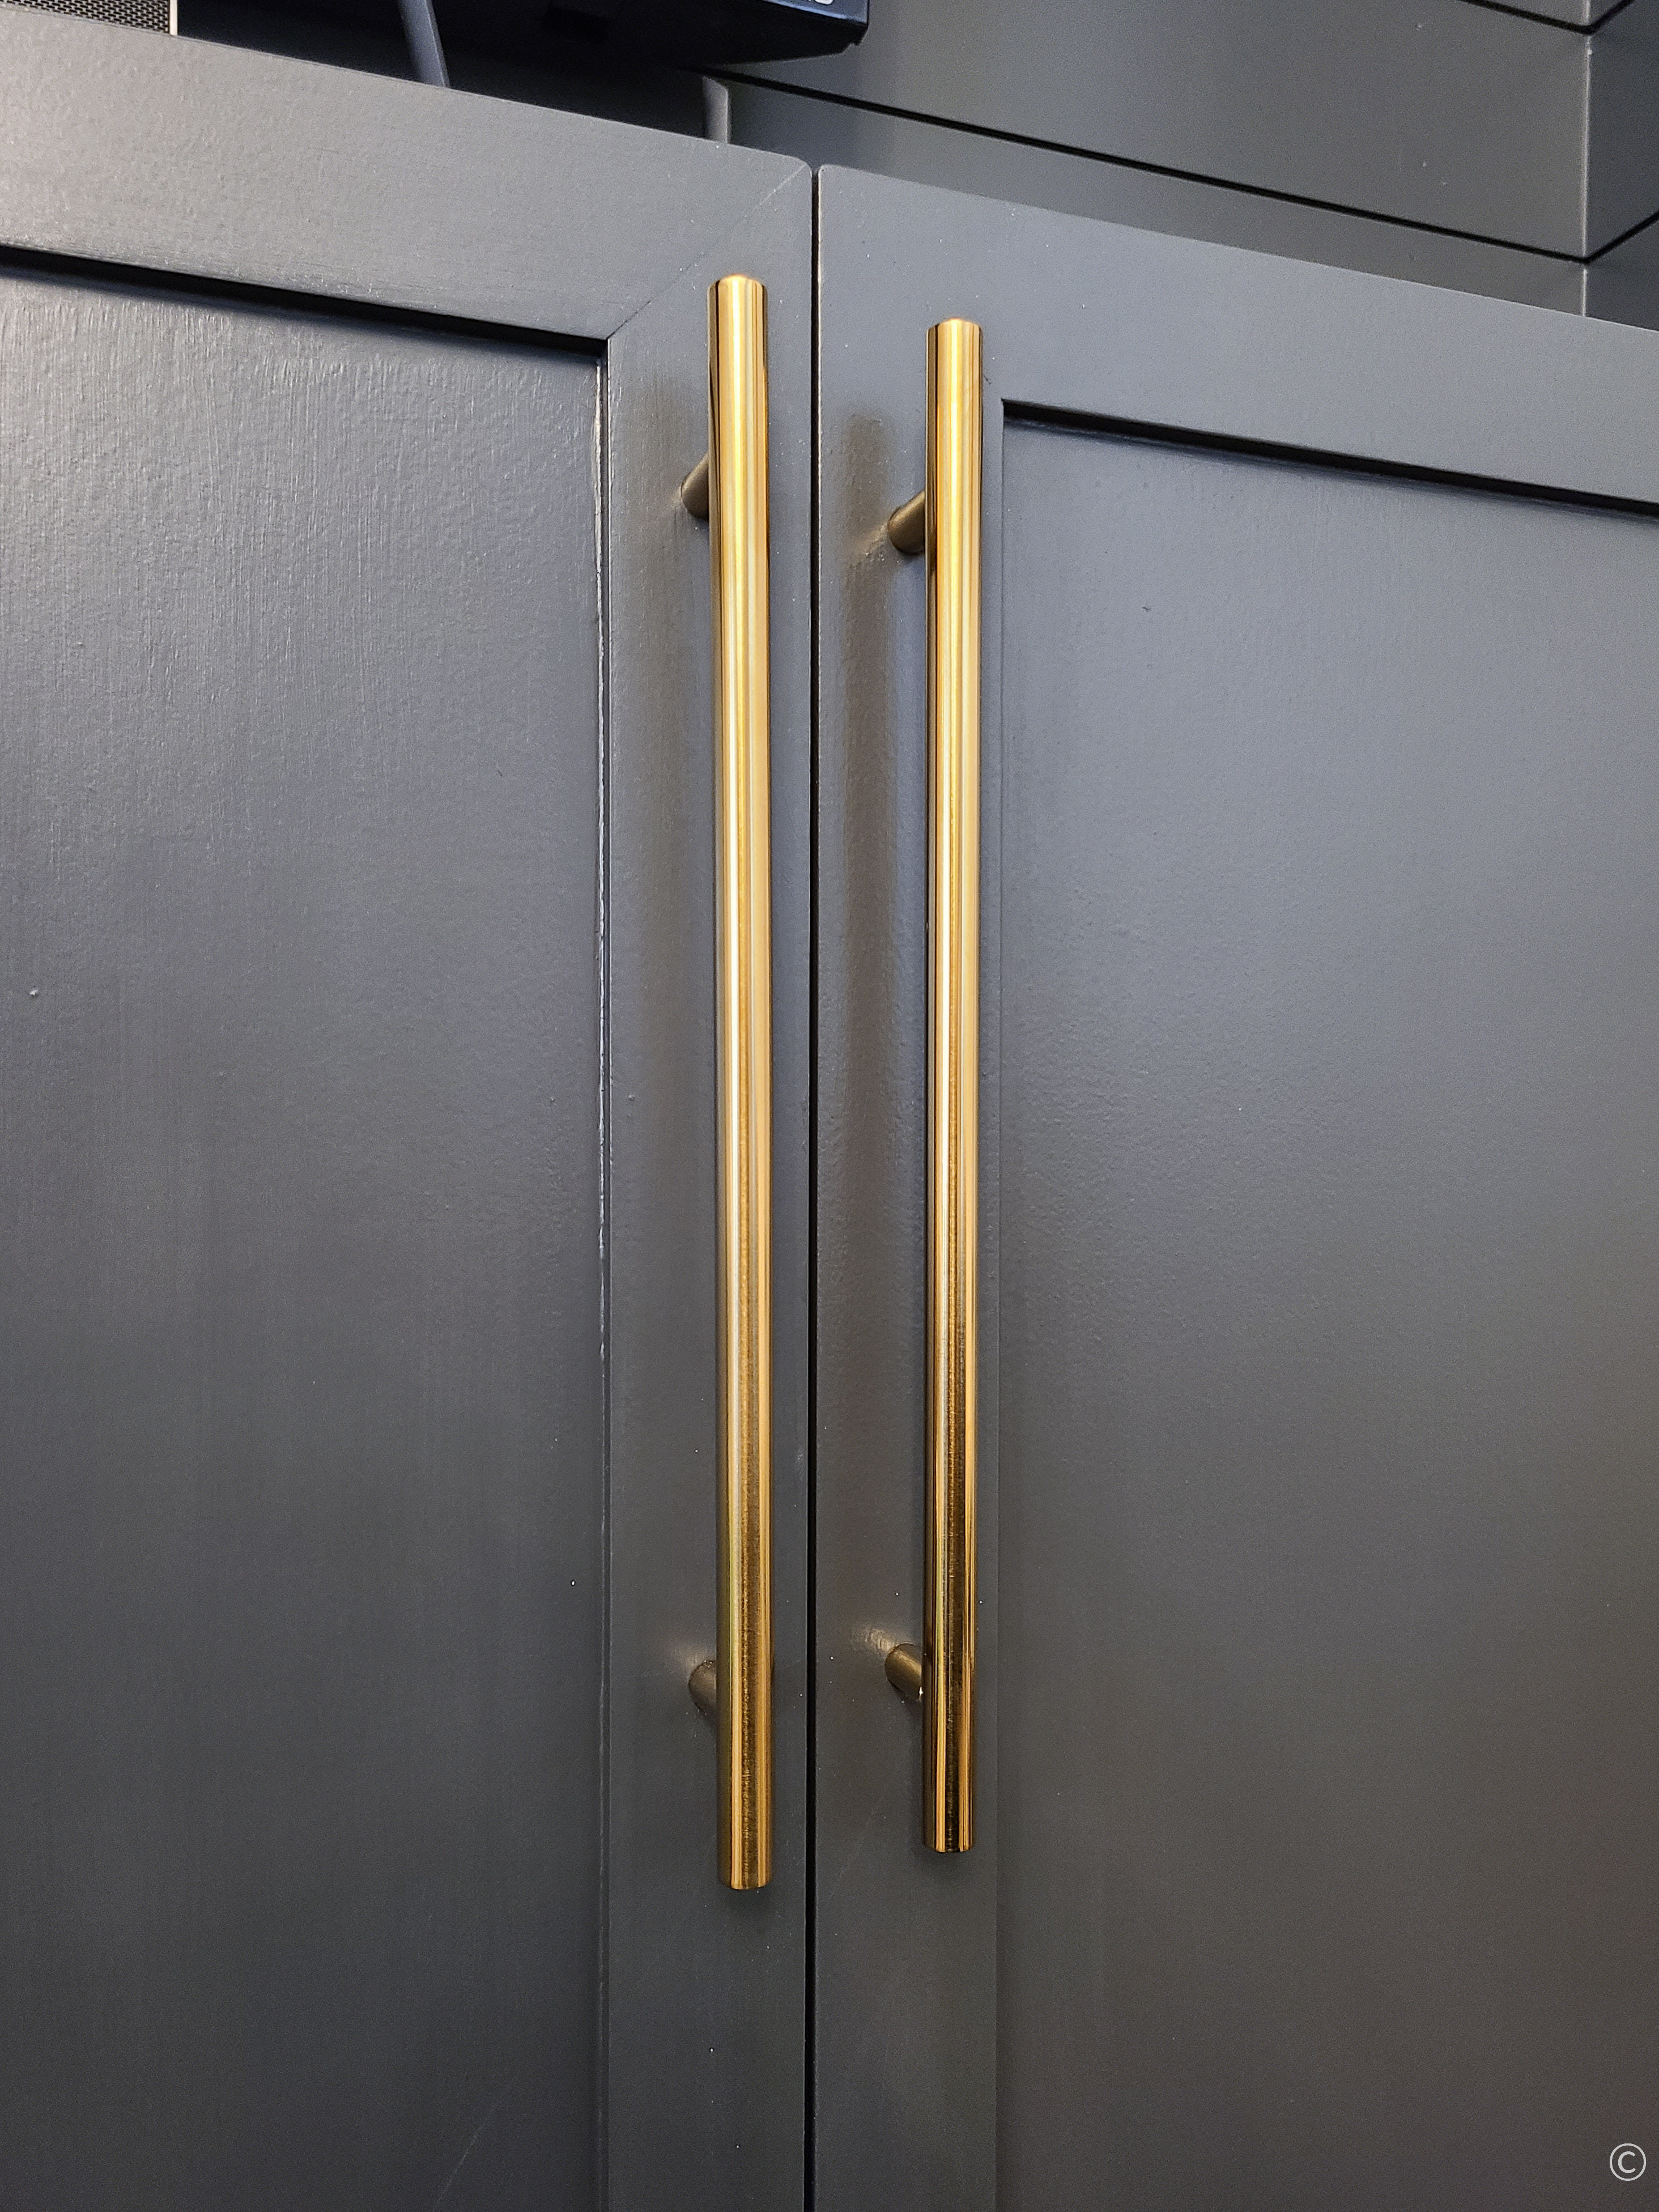
Add Some Hardware
Adding hardware doesn’t have to be expensive, but it does make a big impact! My go-to hardware that is super affordable is Goldenwarm on Amazon. I added these large golden pulls. They really popped against the Iron Ore paint!
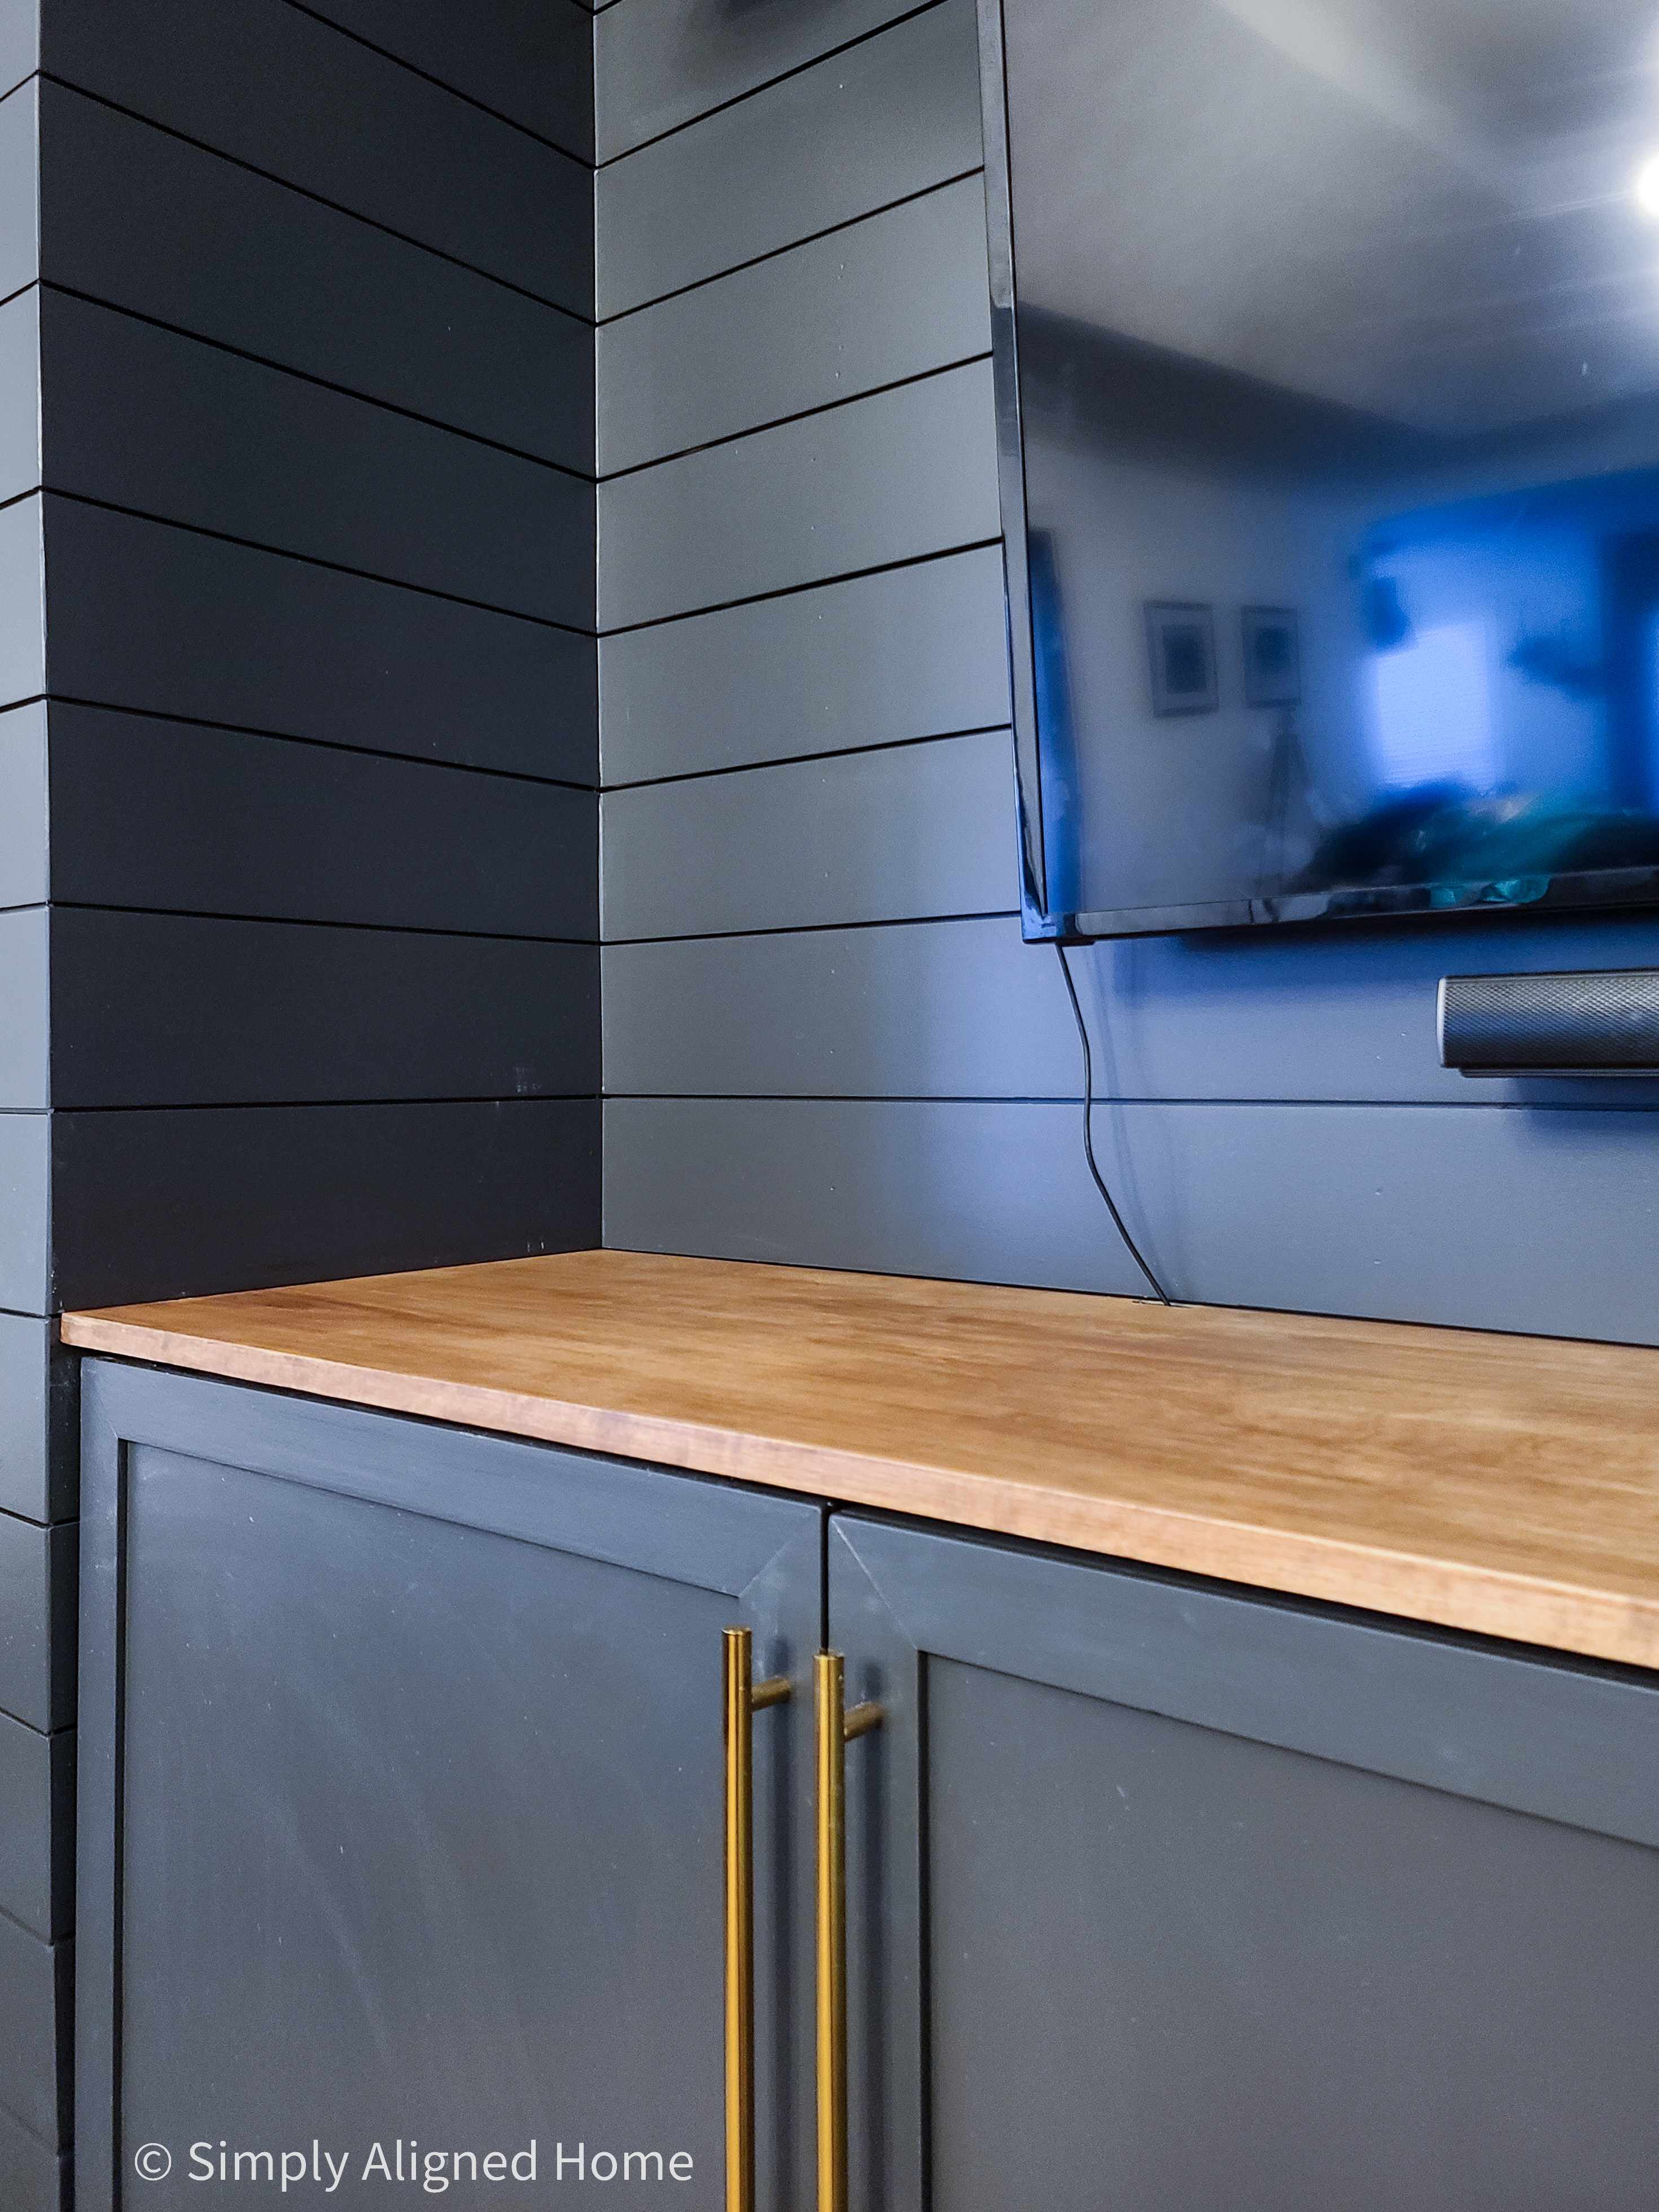
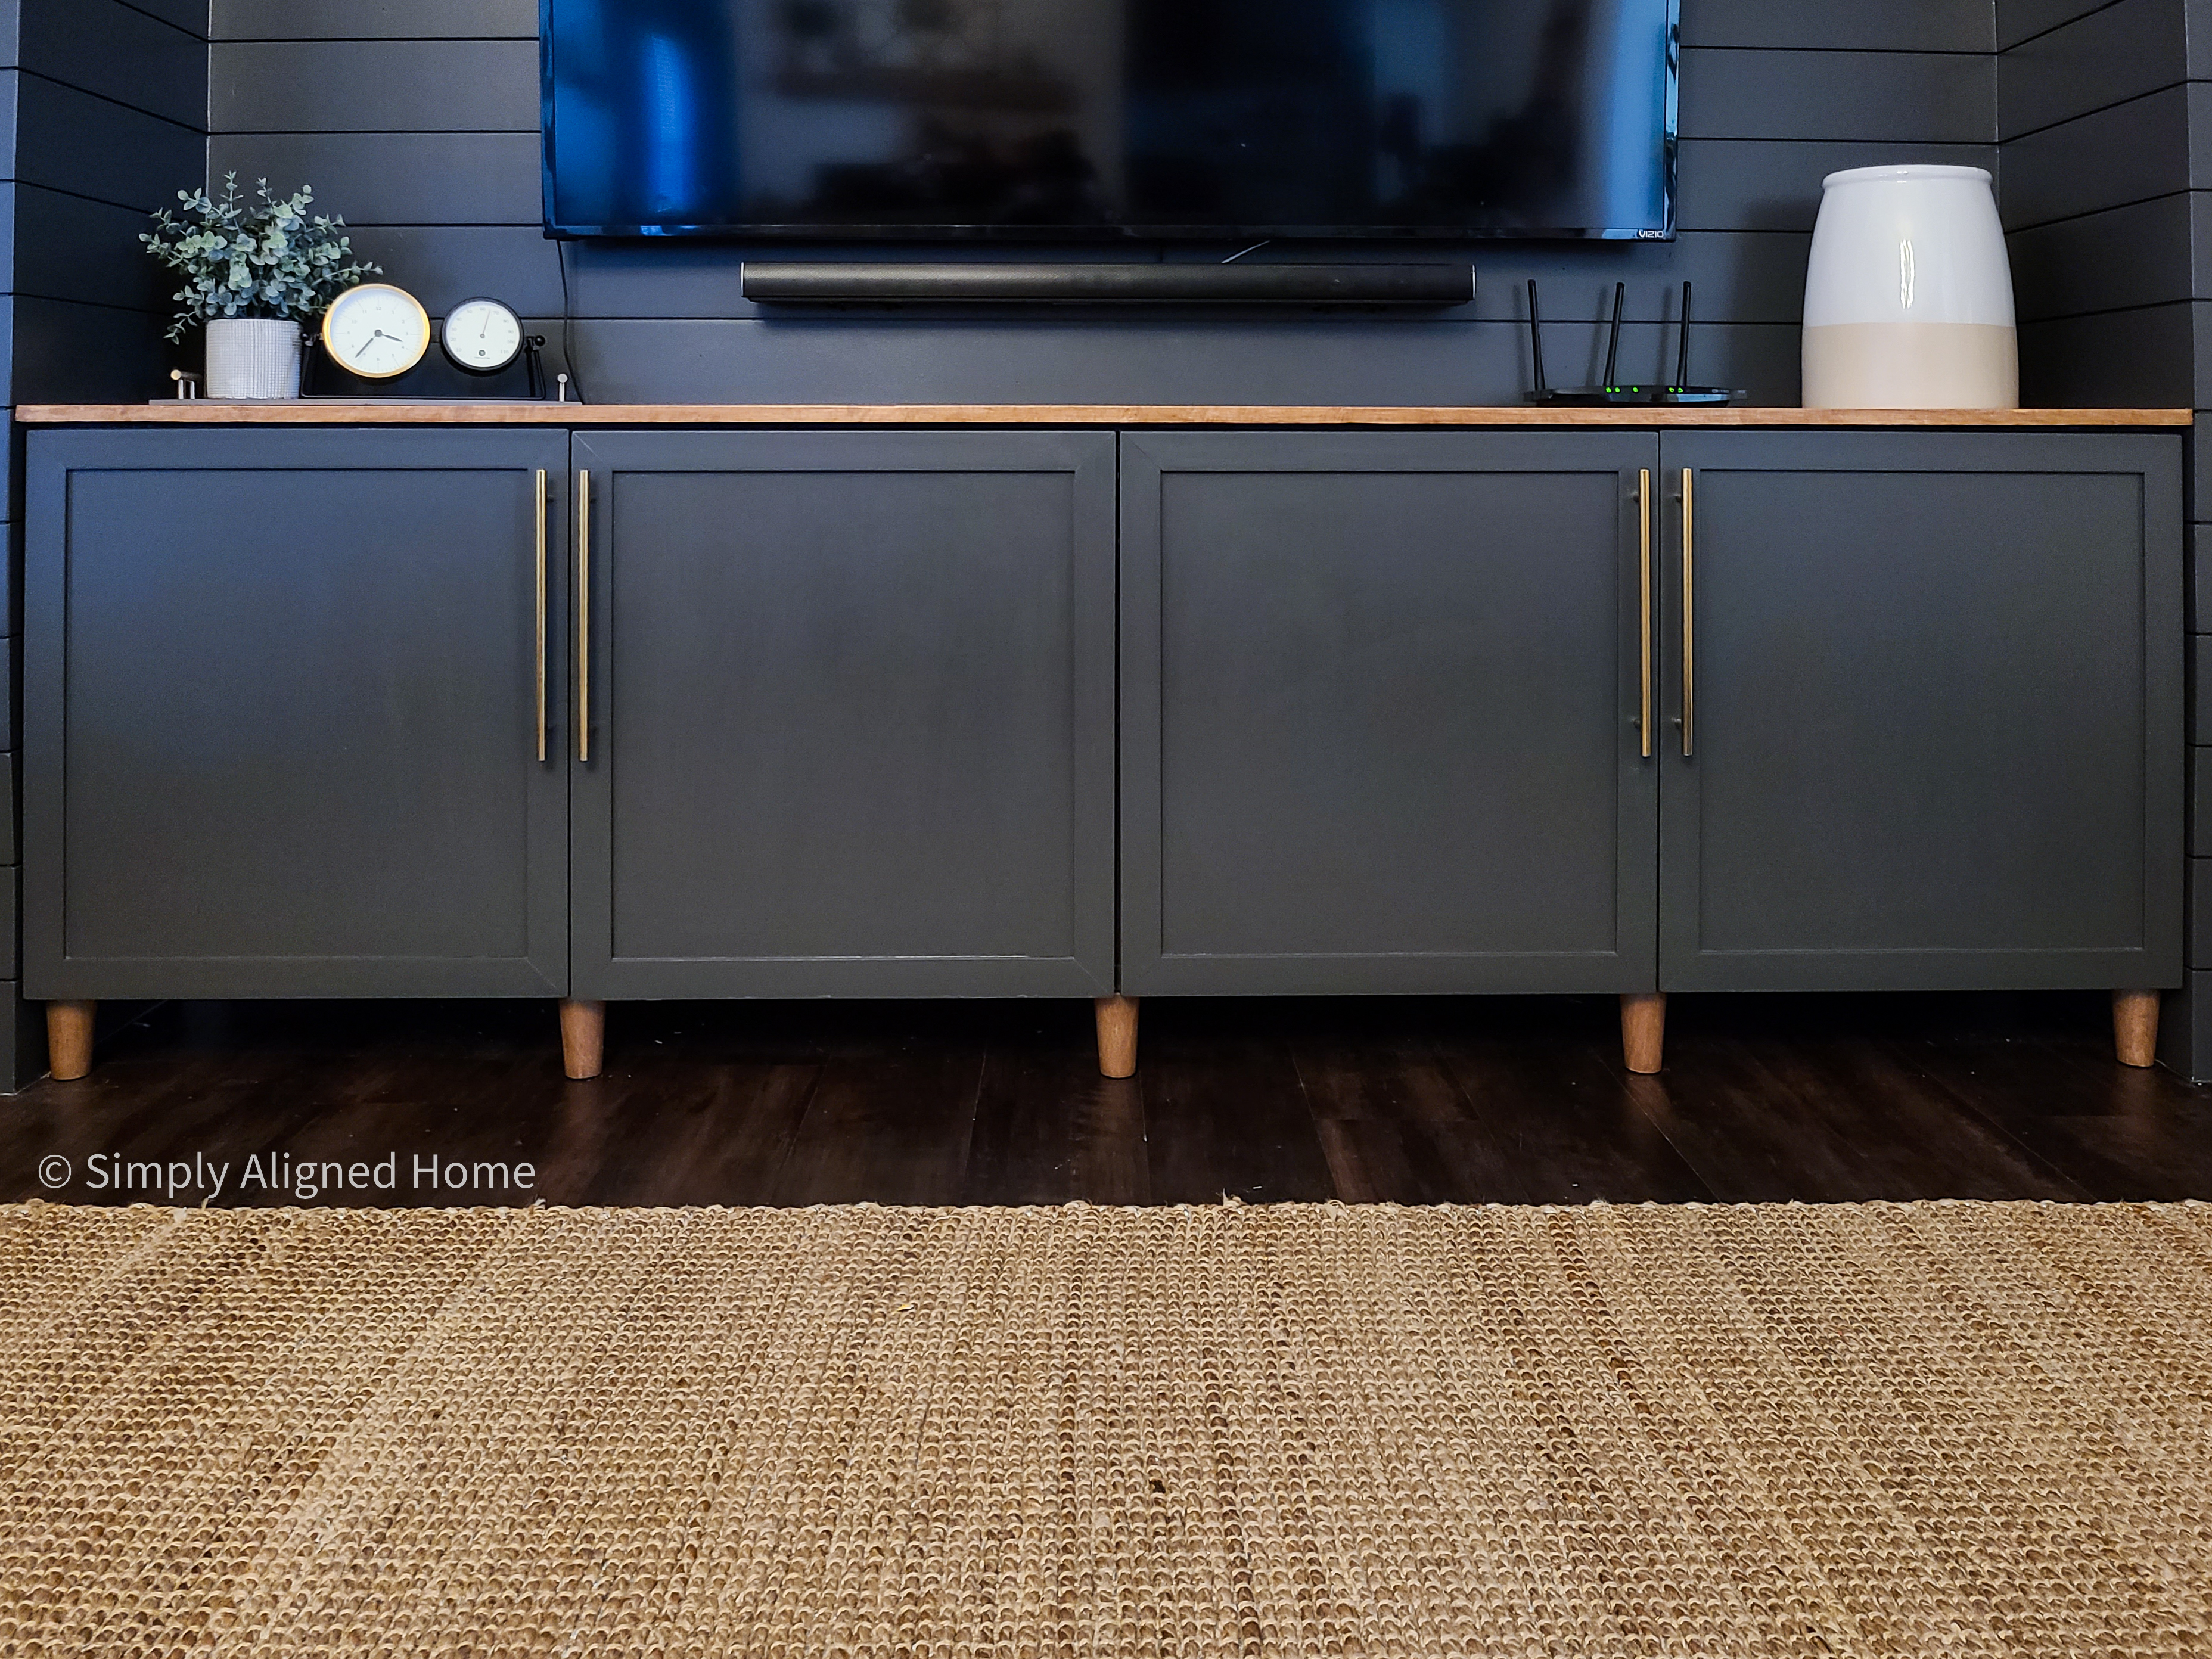
Add a Wood Top
I wanted the top of the Besta unit to stand out against the unit and shiplap. I decided to add a little warmth with a wooden top. Believe it or not, I decided to use plywood for the top. I went with a hardwood plywood and it looked amazing!
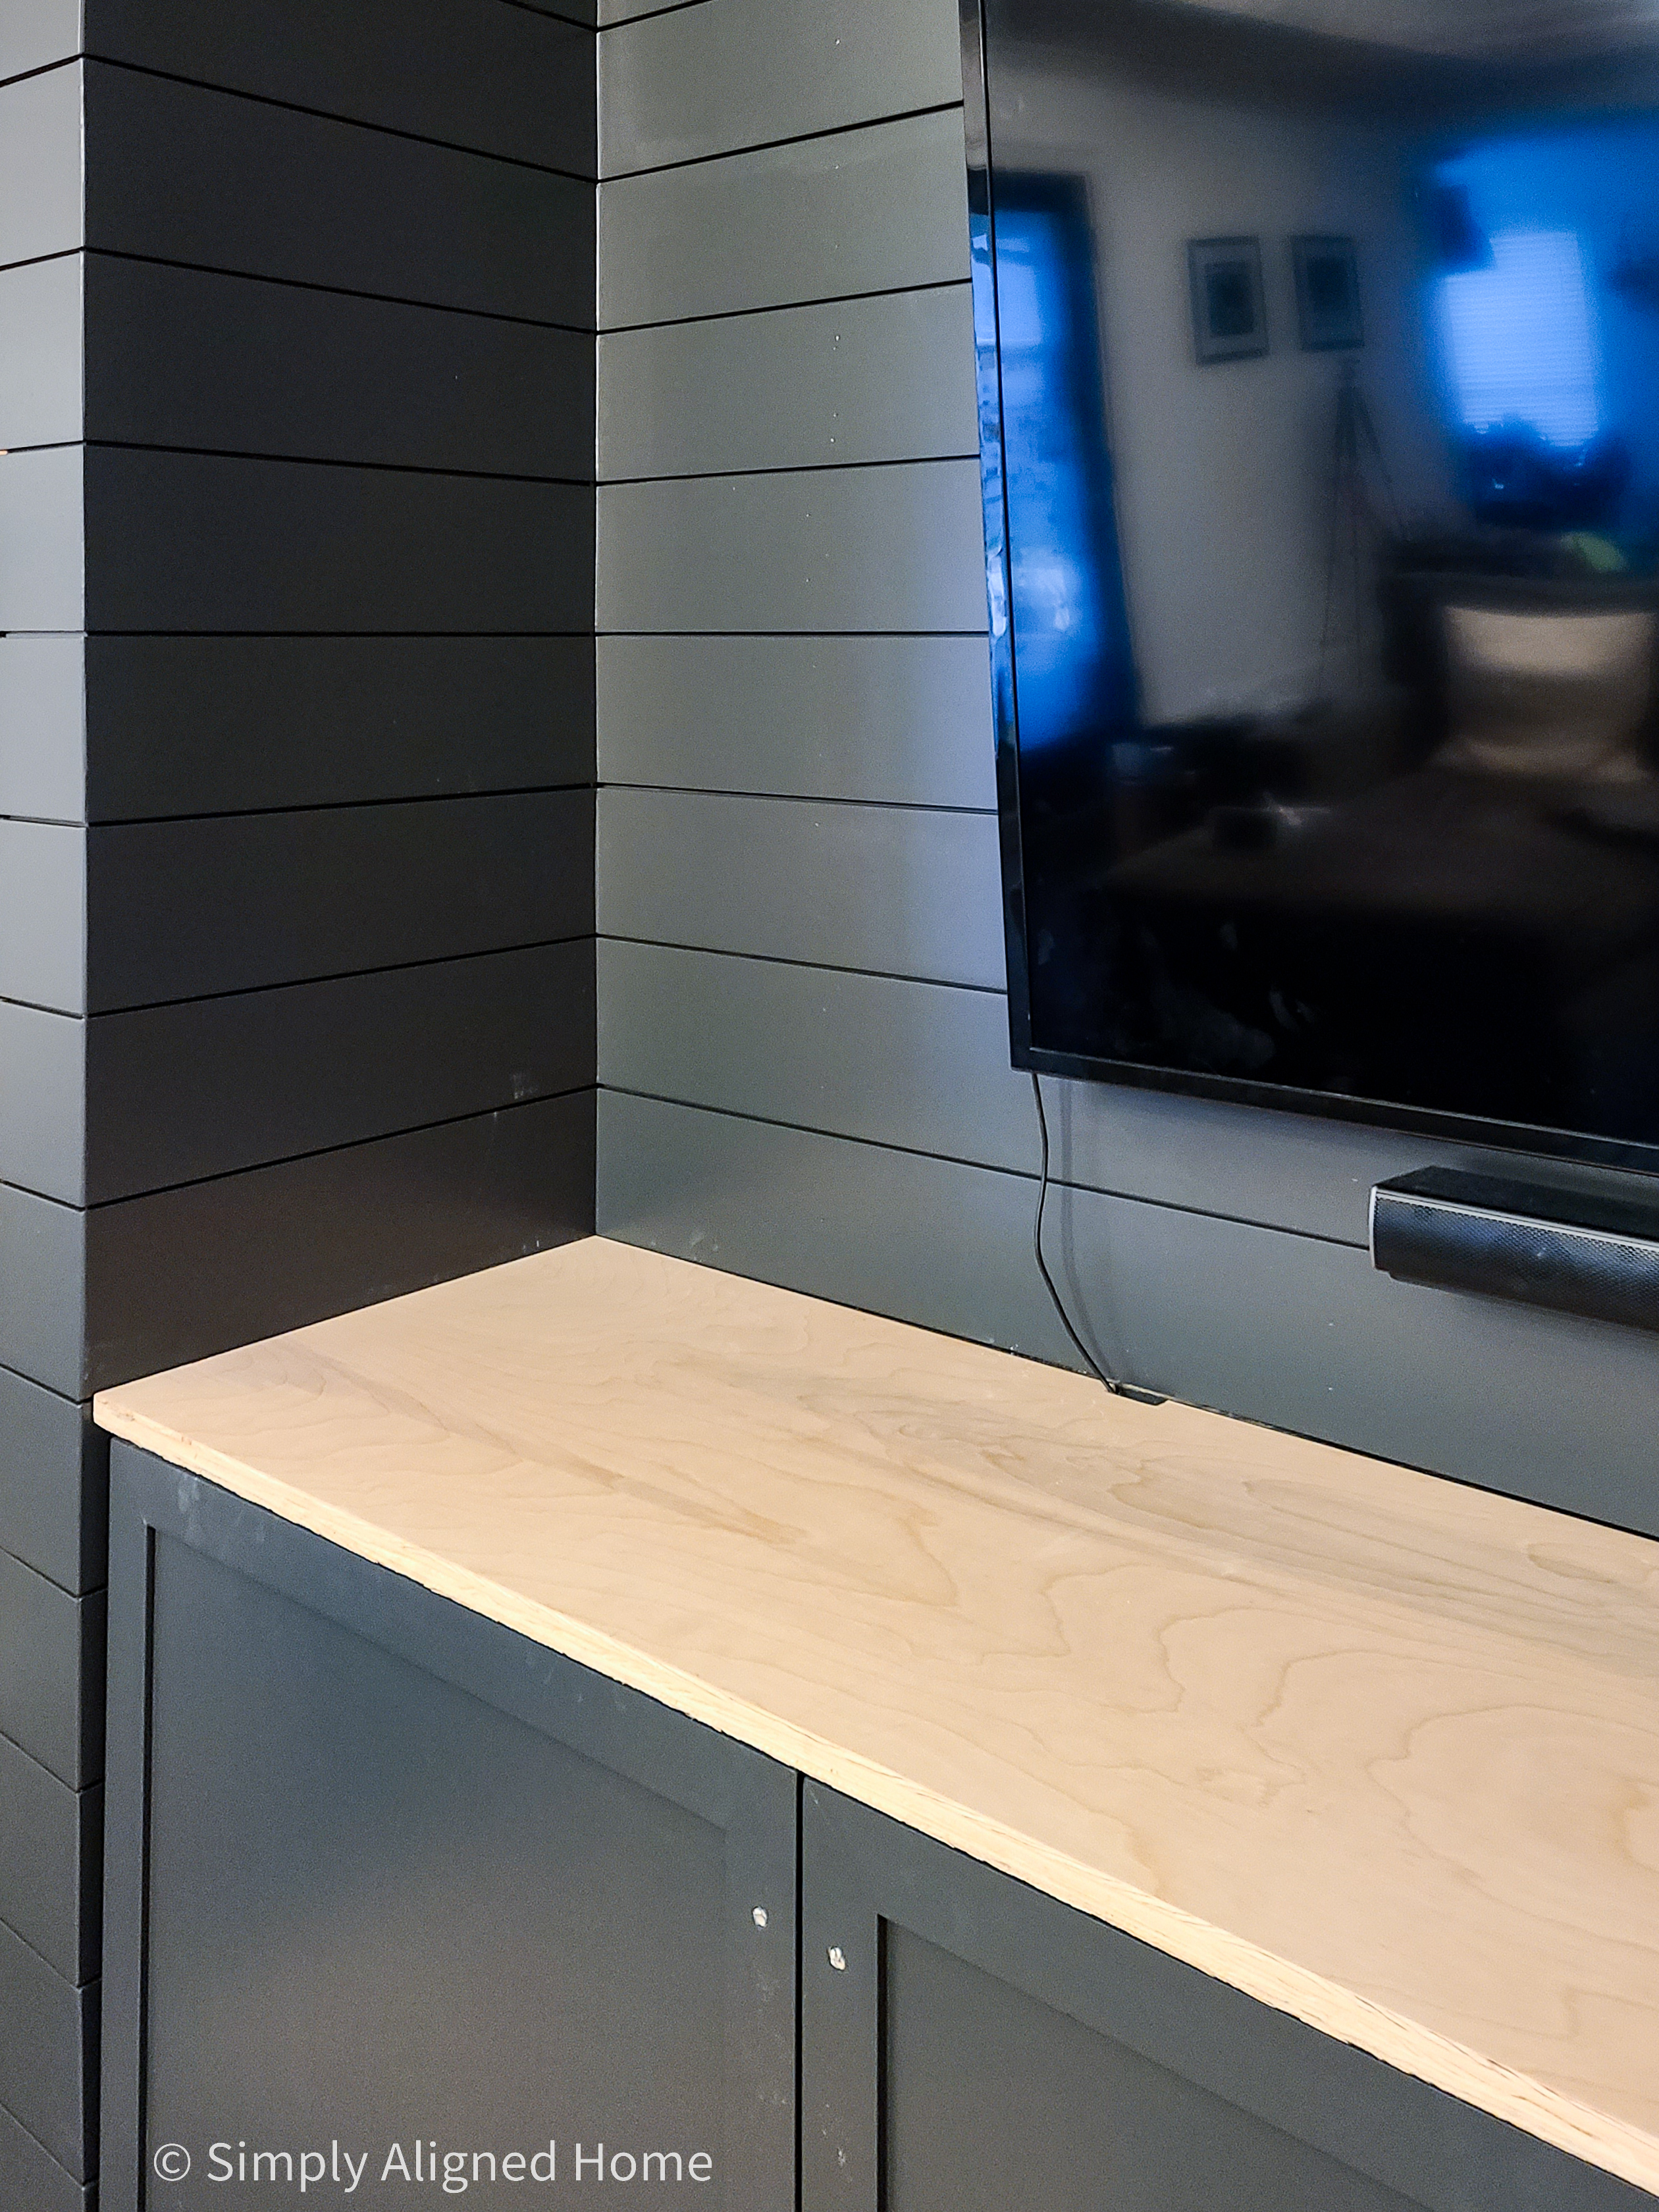
Once the plywood top was installed, I secured it to the unit by screwing up into the bottom of the plywood from inside of the Besta unit. The screws will never be seen and it will help keep the top in place.
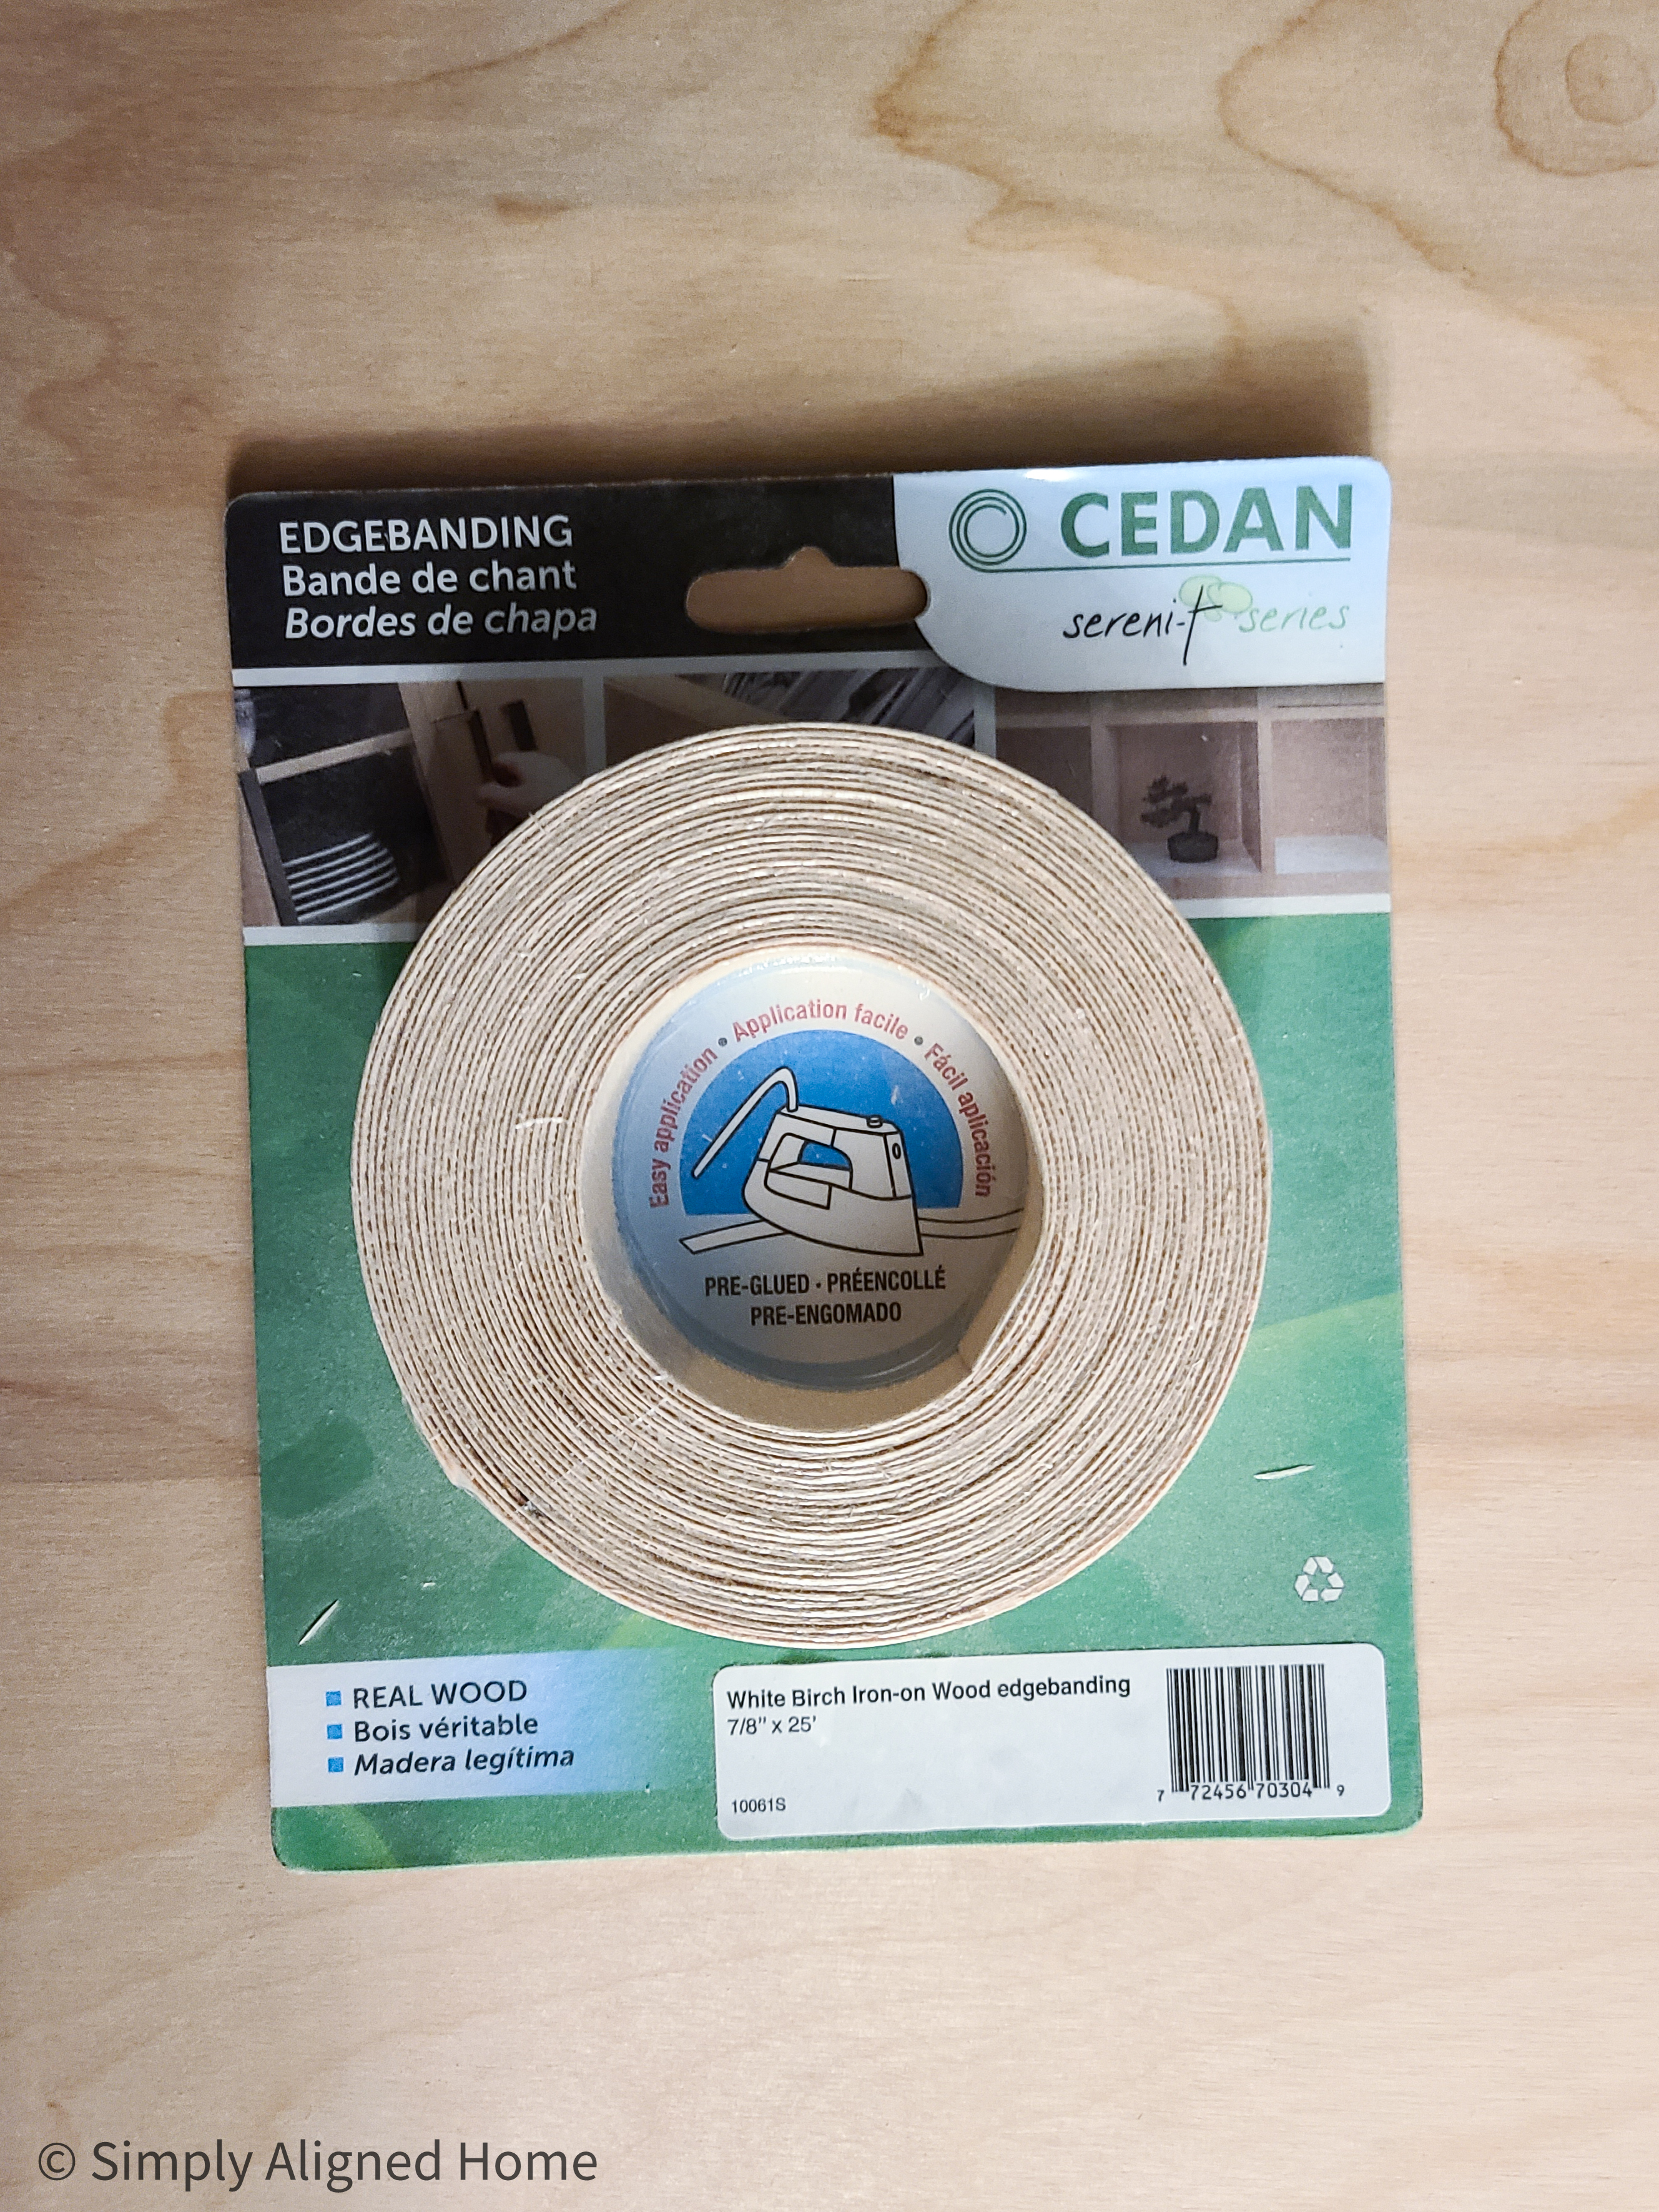
To finish off the front edge of the plywood, I added edge banding. Edge banding is stainable, so it will look like a solid piece of wood.
I stained the plywood top using a water based stain in Early American. I finished it off with two coats of polyurethane.
Replace the Feet
I could have simply painted the existing feet to match the frame of the Besta unit, but what’s the fun in that?! Instead, I bought a set of (what I thought) was unfinished midcentury modern feet. They came with a sealer on them, so I sanded the finish off.
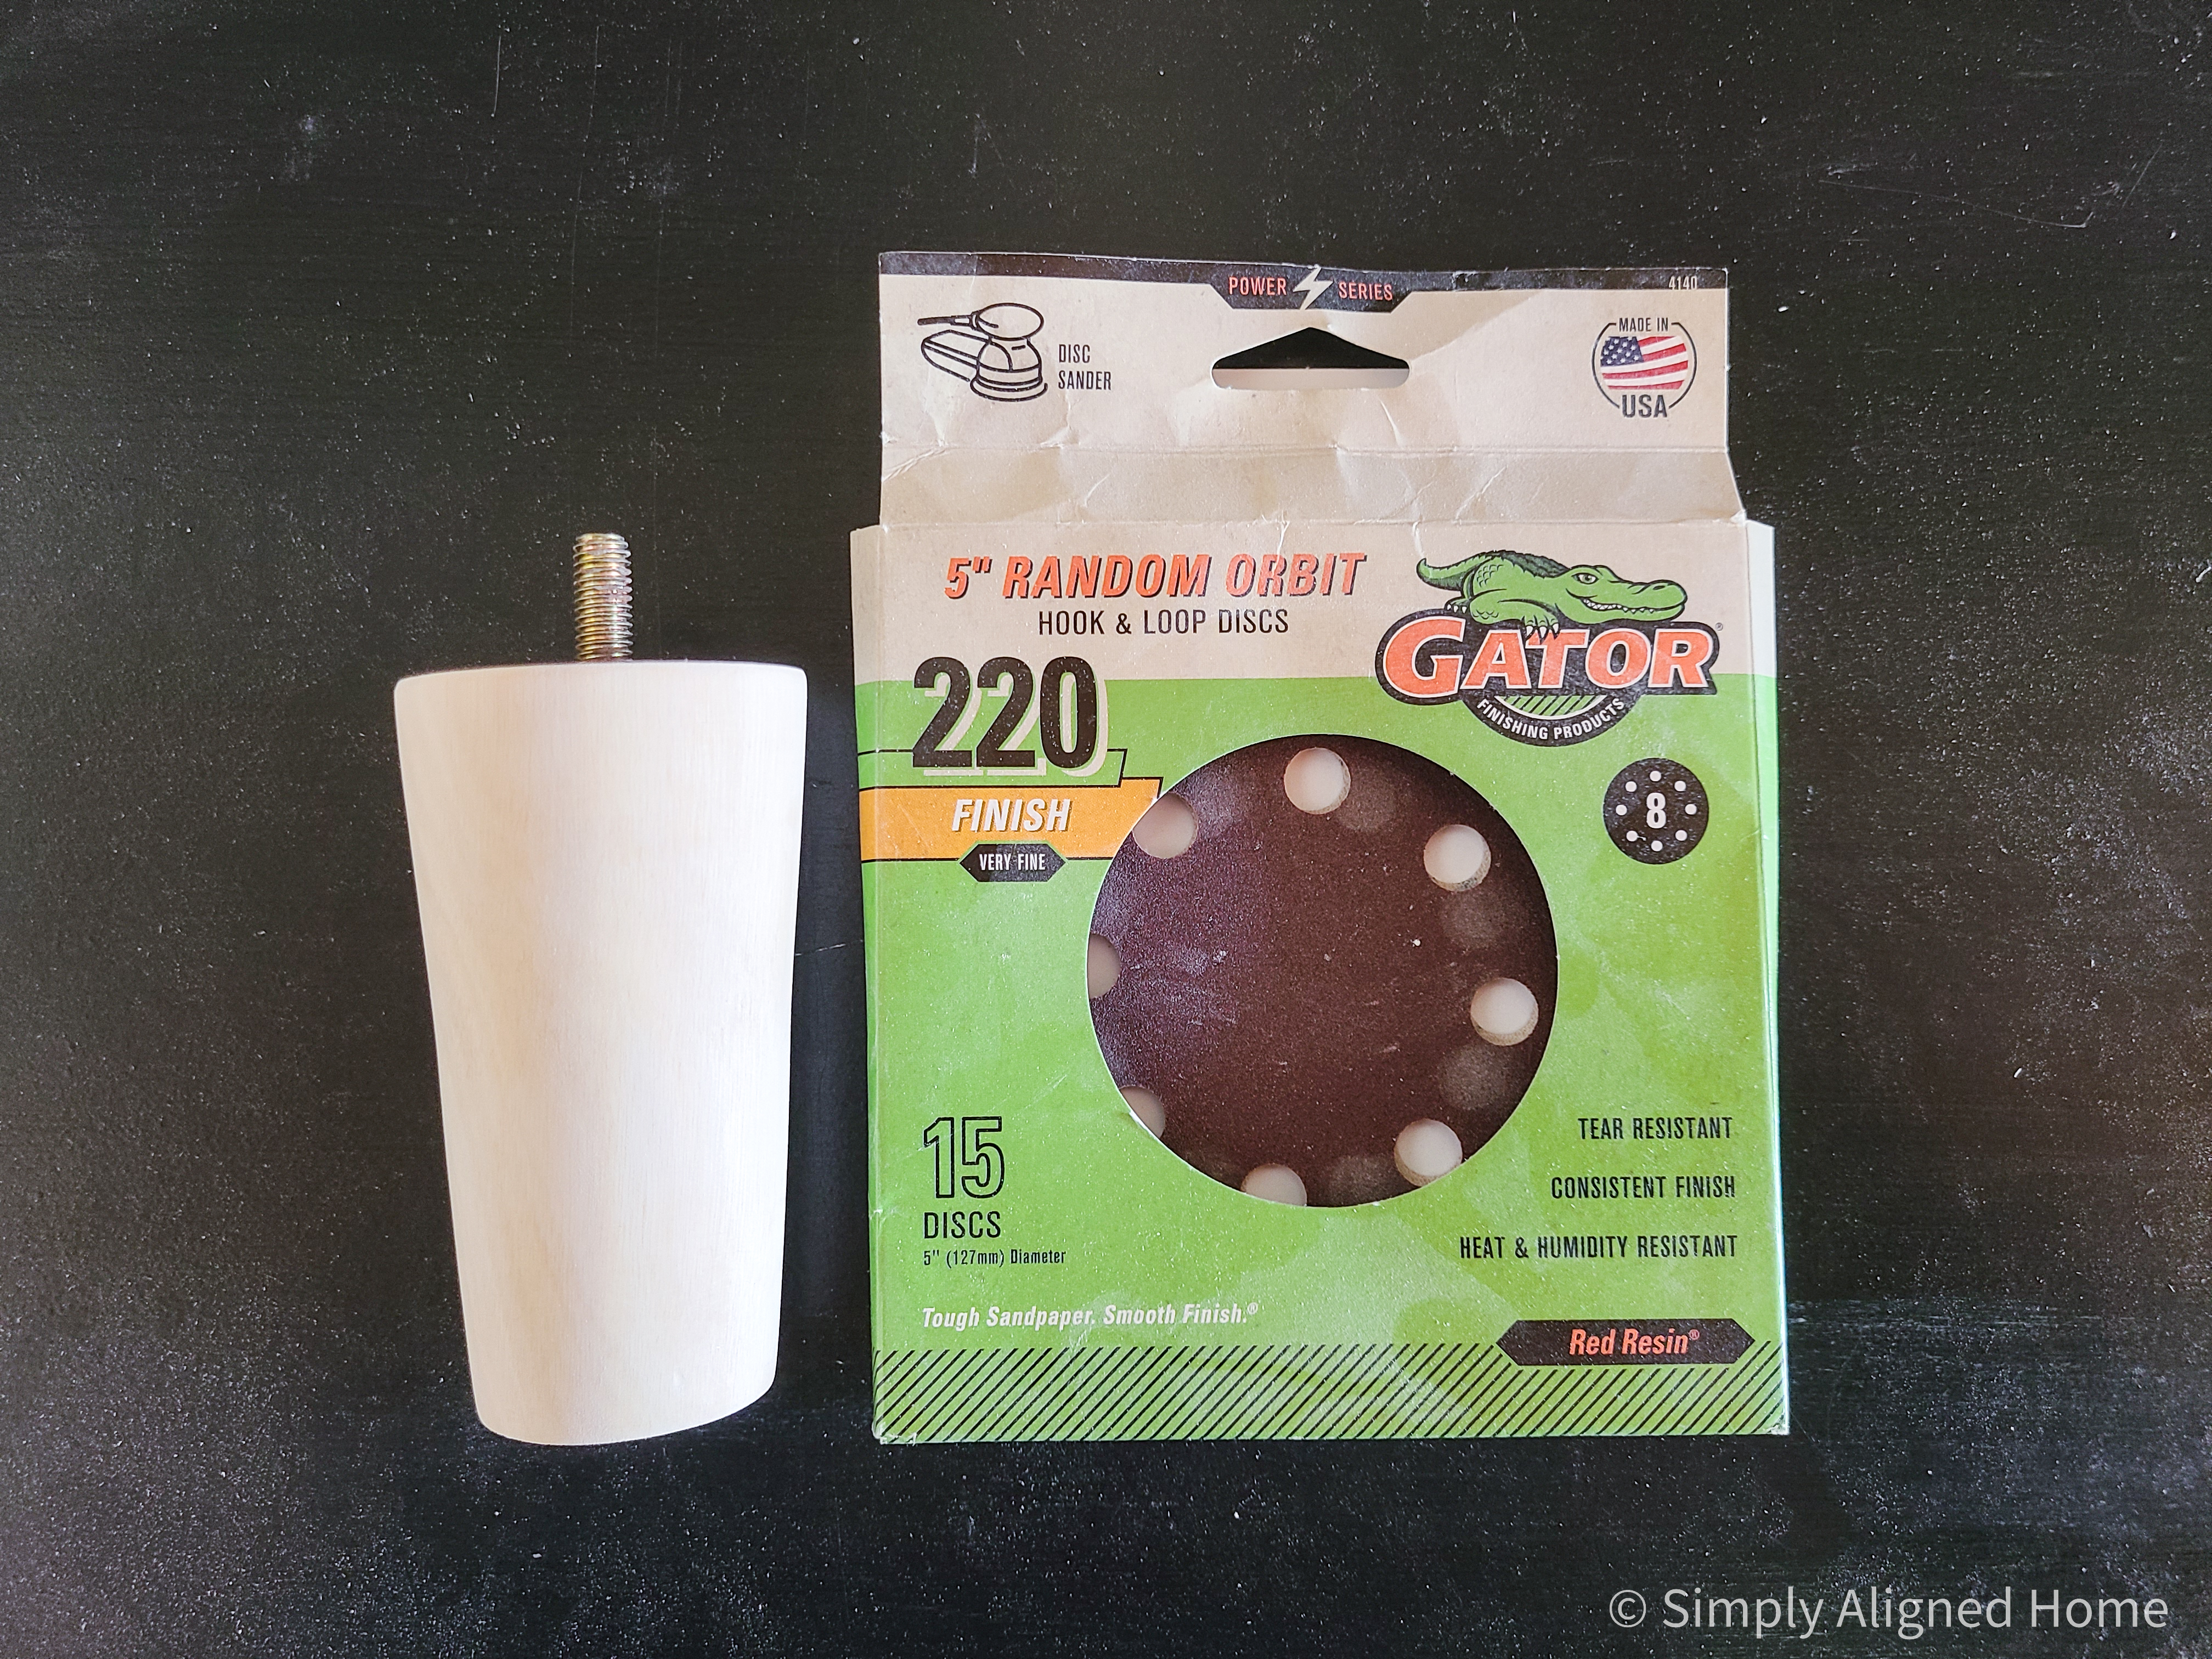
Once the original finish was fully removed, I stained them with the Early American stain and resealed them with polyurethane.
I then replace the original feet with the new feet! (I only replaced the five feet on the front of the unit because the back feet are not visible.)
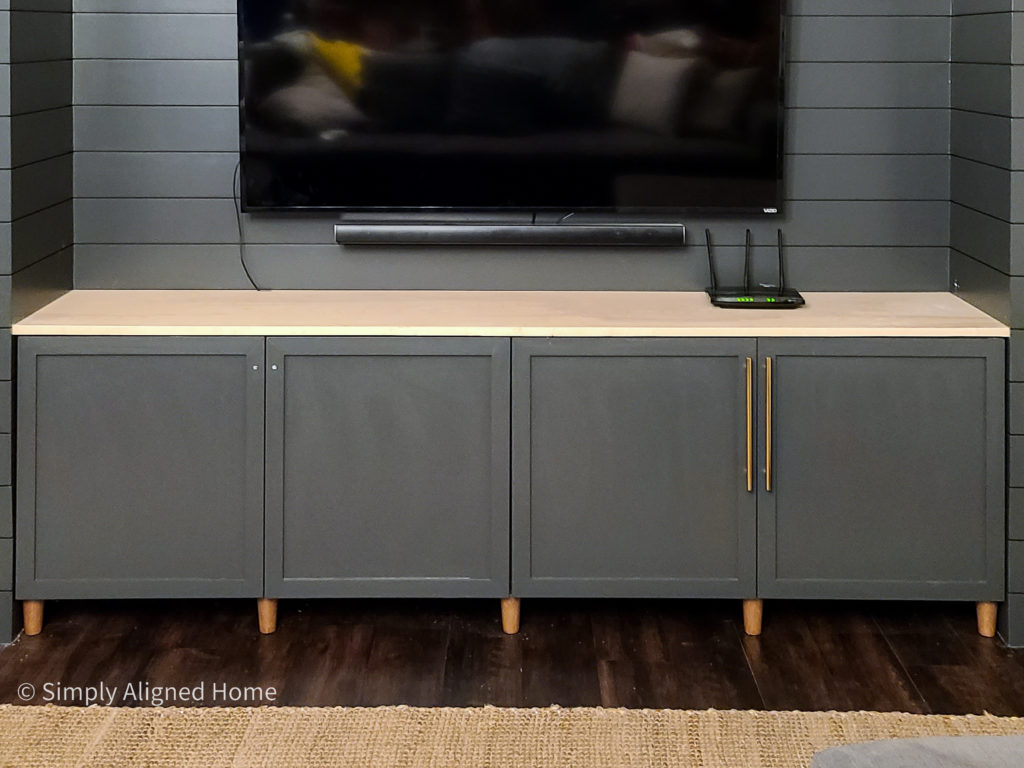
The new and improved IKEA Besta unit looks nothing like the original white unit…that was the goal!!
This IKEA hack added both warmth and character to this space.
I’ll be sharing how I transformed this entire shiplap built-in soon! It was a quick and easy project that made a big impact!

Hello!! Do you have measurements for your shelves drawn out at all you’d share ? Making the exact same layout and would love to use yours as a guide !