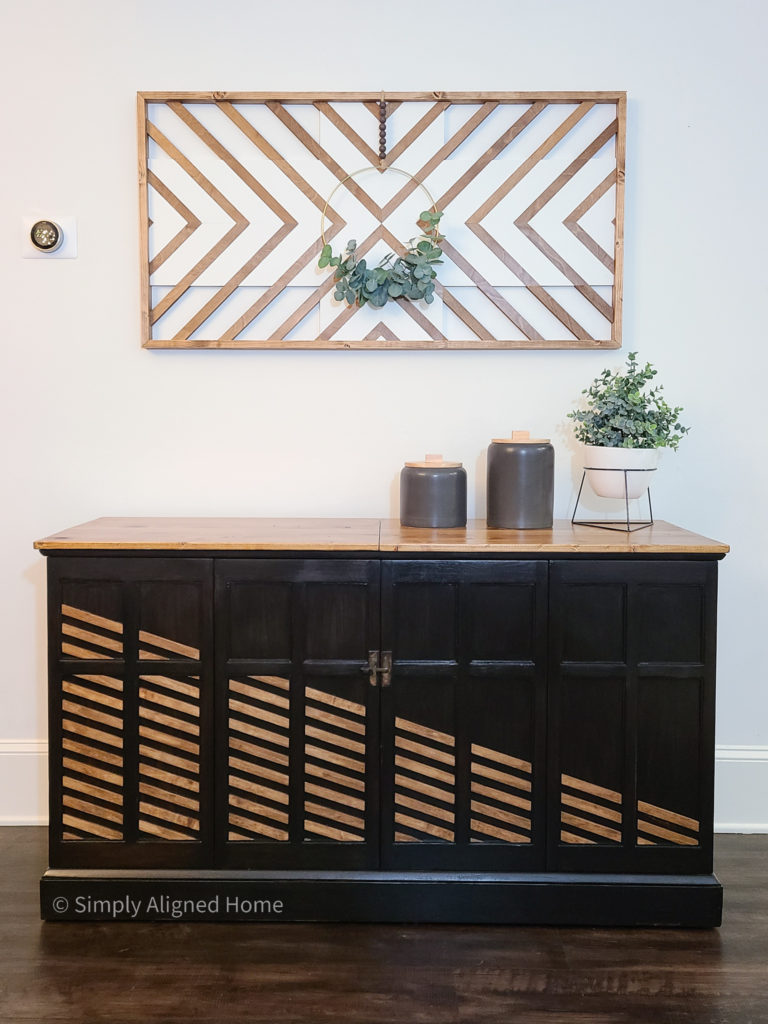
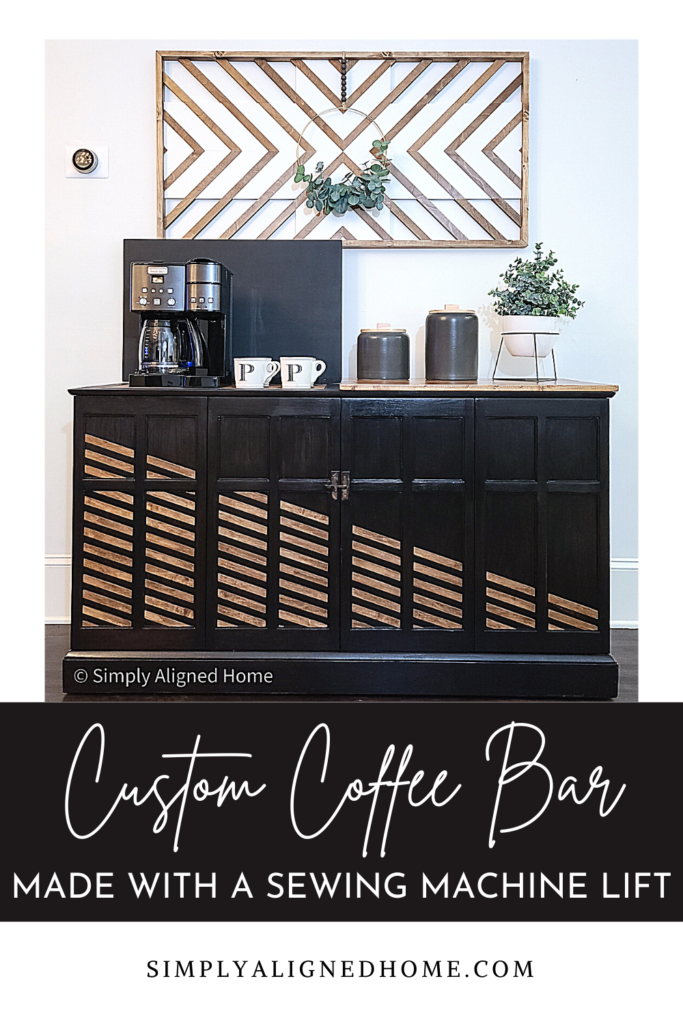
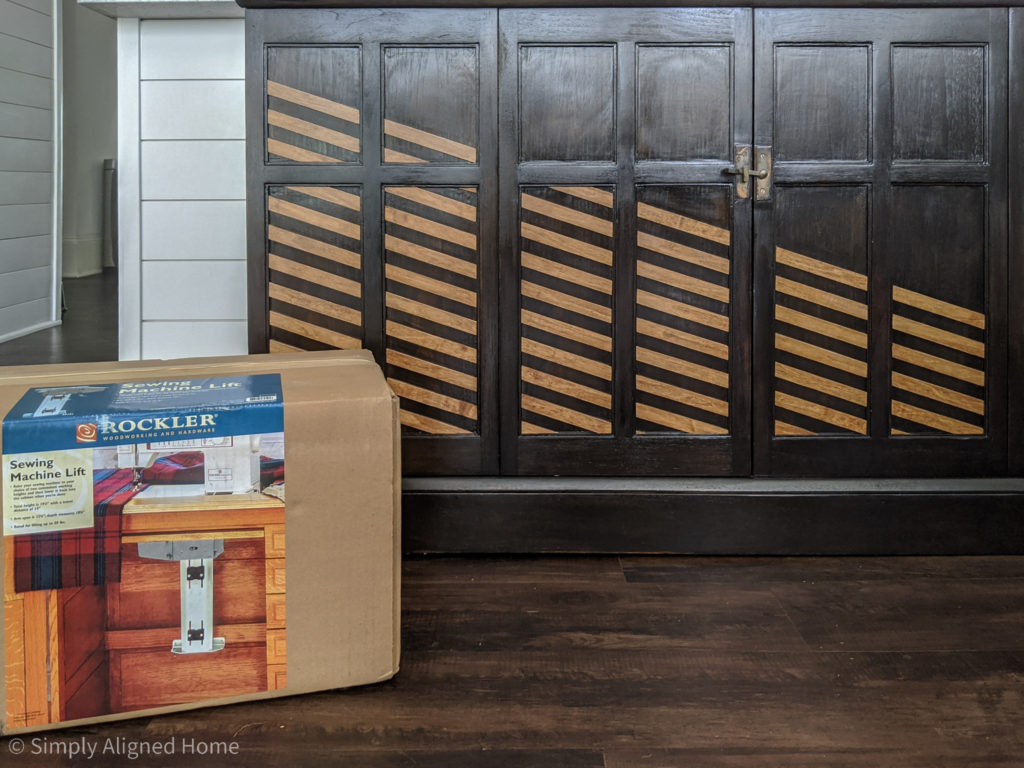
Ever have a crazy idea that would be so practical if it actually worked?! That’s how this coffee bar all started! I entered the Furniture Flip Challenge hosted by The Builders Challenge and Do It Yourself Magazine with an old chest and a crazy idea. The exterior transformation of the chest was a long and drawn out process that will have to wait for another time.. As for the inside…that’s where the magic happened!
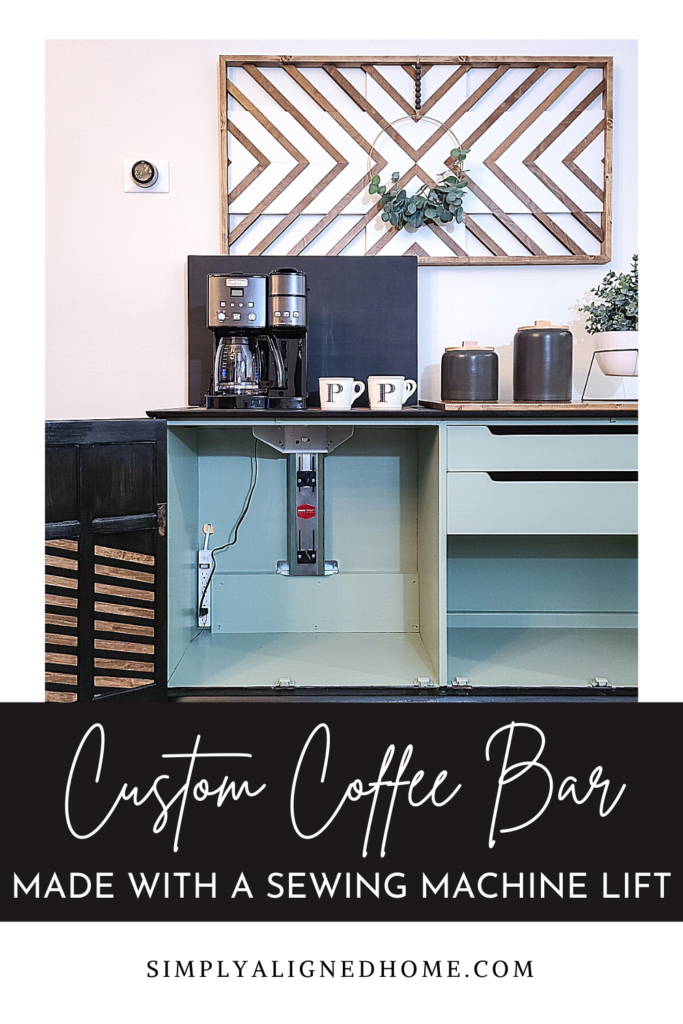
I did quite a bit of research and brainstorming to figure out how my plan was going to actually work. I wanted to store my coffee maker inside of the chest with the ability to quickly and easily raise and lower it. Most of the options would raise and lower it, but would not safely store it in the raised position.
I finally discovered this sewing machine lift mechanism from Rockler! Rockler was kind enough to provide the sewing machine lift mechanism for this project.
Here is how I customized the chest to make my custom coffee bar!
**This post contains affiliate links to products that I recommend. If you purchase something through an affiliate link, I may receive a small percentage of the sale at no extra cost to you. I really appreciate your support.**
Modify the Back Panel
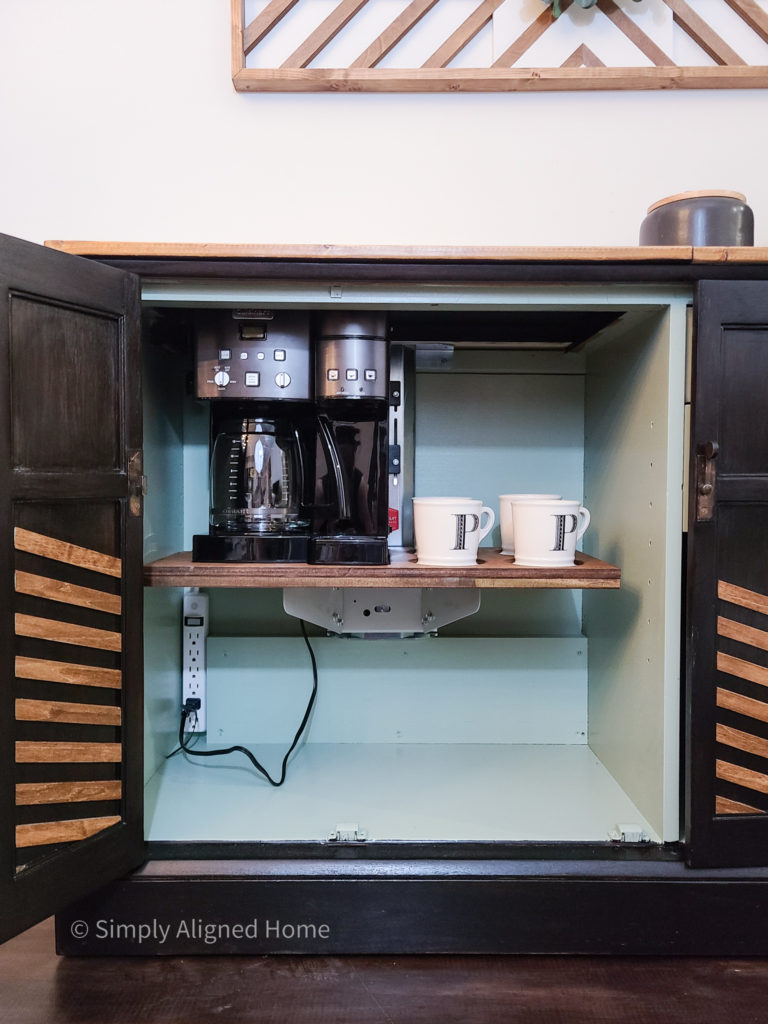
The back panel of this chest was made of a thin plywood. The sewing machine lift required 3/4″ wood or plywood for mounting. I cut a piece of 3/4″ plywood to mount inside of the chest. I secured it using construction adhesive and screws and painted it to match the inside.
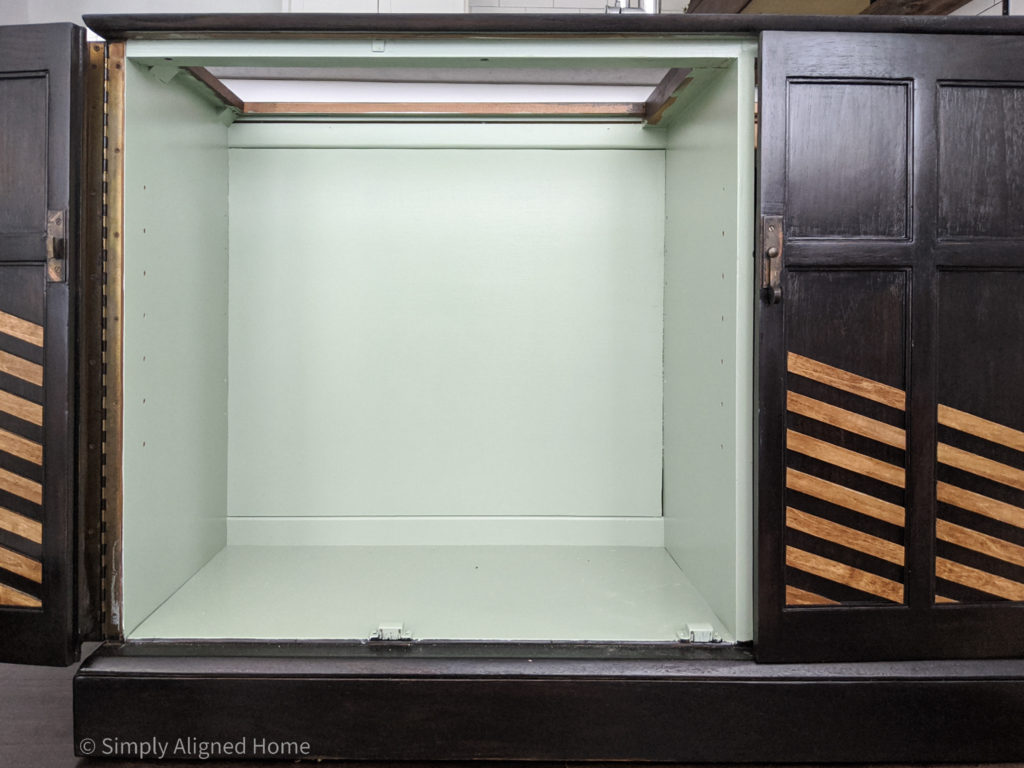
I was afraid that the back panel wouldn’t be able to support the 3/4″ plywood, so I secured a piece of 1/2″ plywood on the back of the chest. I made it long enough to secure to the top and bottom frames and also screwed it to the 3/4″ plywood.
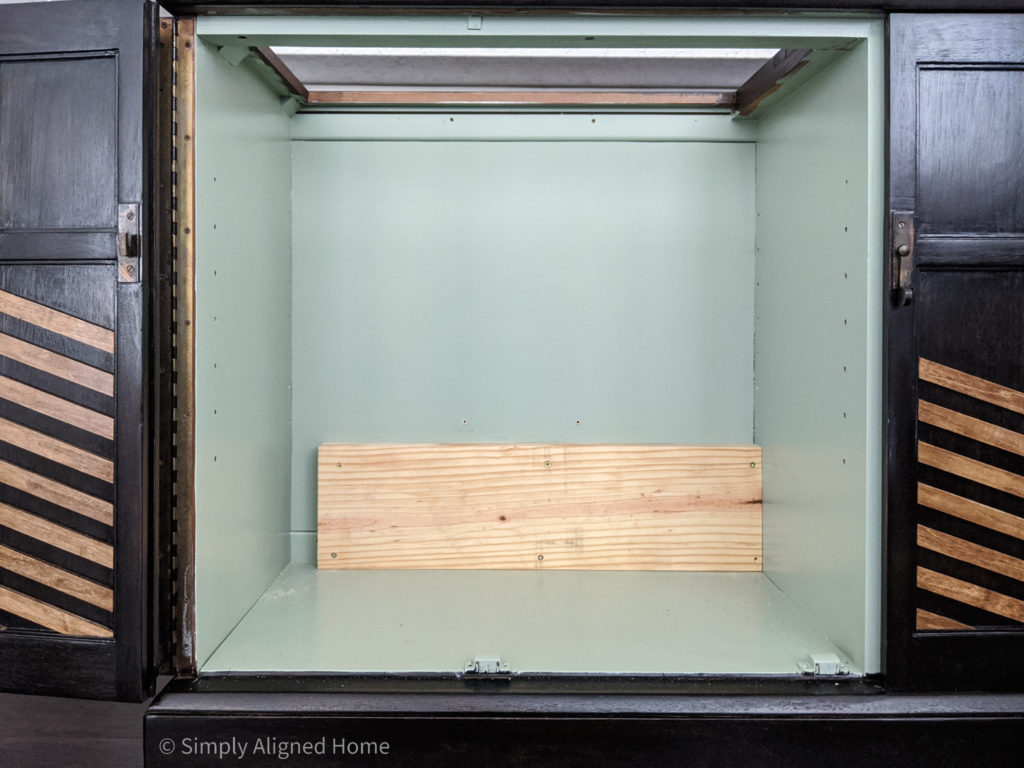
Install a Bottom Support for the Lift
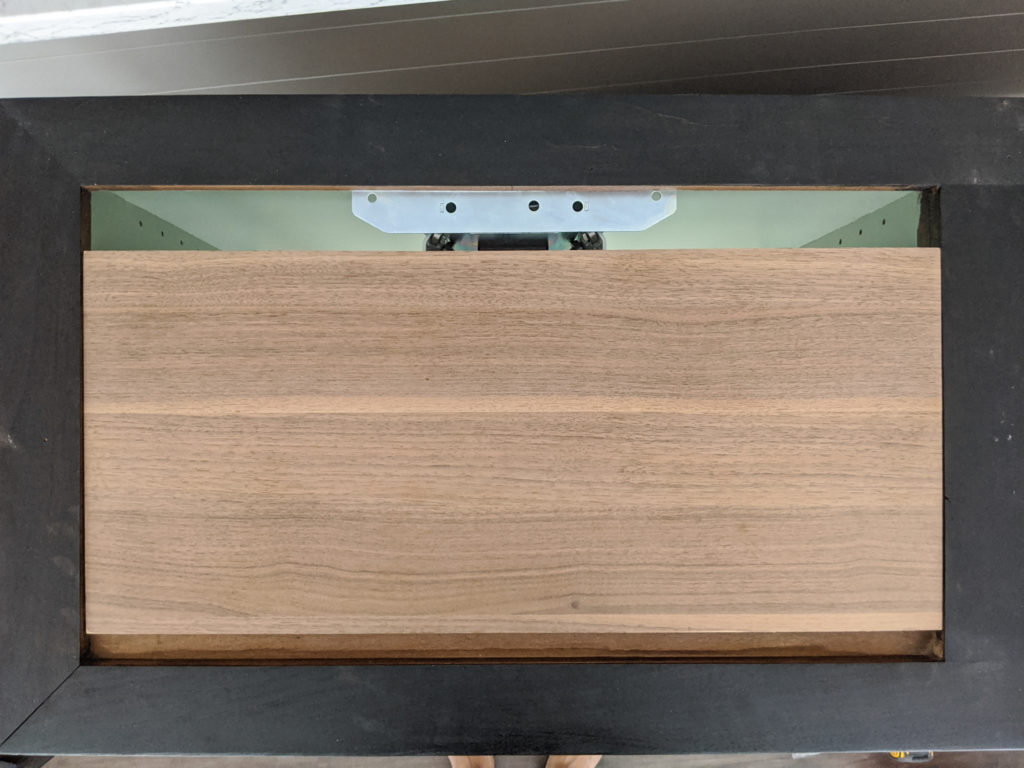
Instead of relying solely on the back of the chest to support the lift, I decided to add a piece of wood for the lift to sit on. I did this using a piece of 2x lumber. I determined where I wanted the lift to sit vertically and ripped the piece of 2x to the correct size using a table saw. I used construction screws to secure it to the 3/4″ plywood that I already installed.
The chest was now ready for the sewing machine lift!
Install the Sewing Machine Lift
This was quite possibly the quickest and easiest part of the entire project! The sewing machine lift simply required six screws for the installation. I set the sewing machine lift on the piece of lumber and secured it to the 3/4″ plywood and piece of lumber with screws.
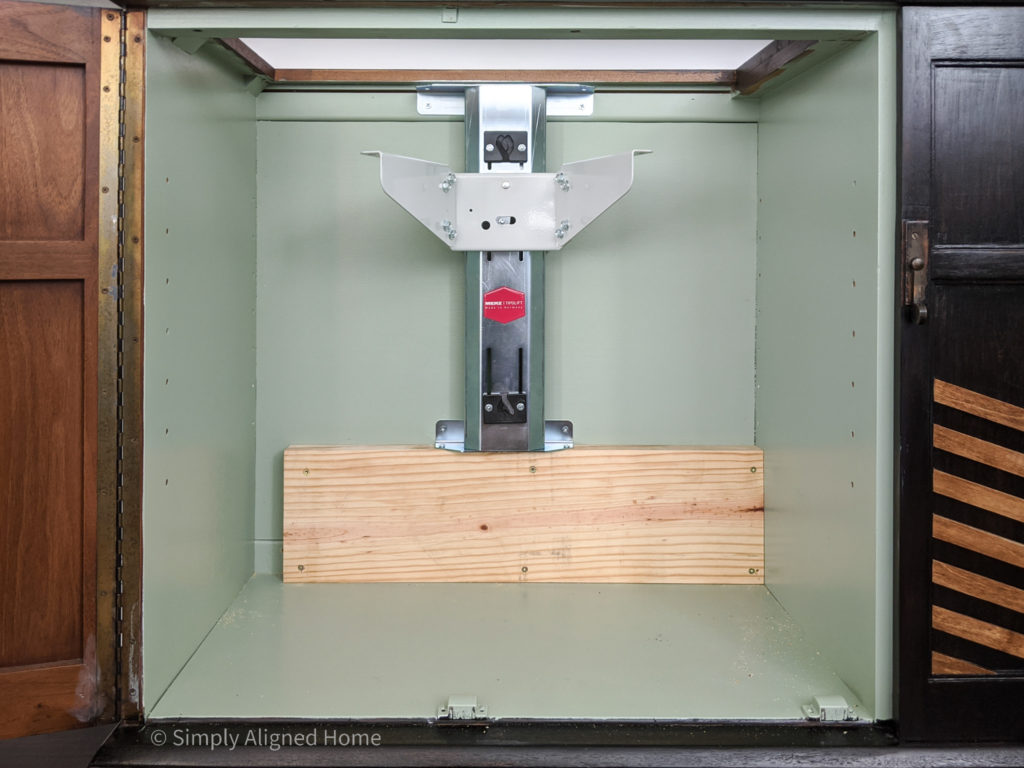
That was it…the lift was installed!!
Find a Coffee Maker that will Fit
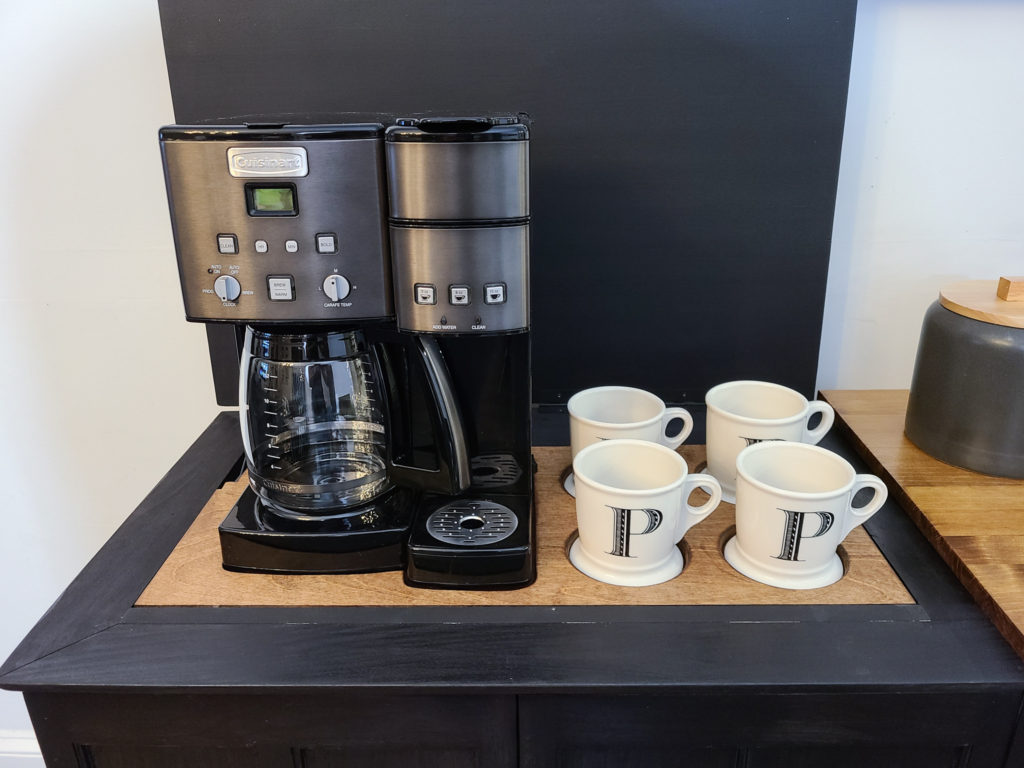
The sewing machine lift does have height limitations. It is designed to work for most sewing machines, which are a little shorter than most coffee makers. I was also dealing with the size of the opening in the chest. After a little searching, I found that the Cuisinart Combo coffee maker was both short and narrow enough for my coffee bar.
Make a Mounting Plate
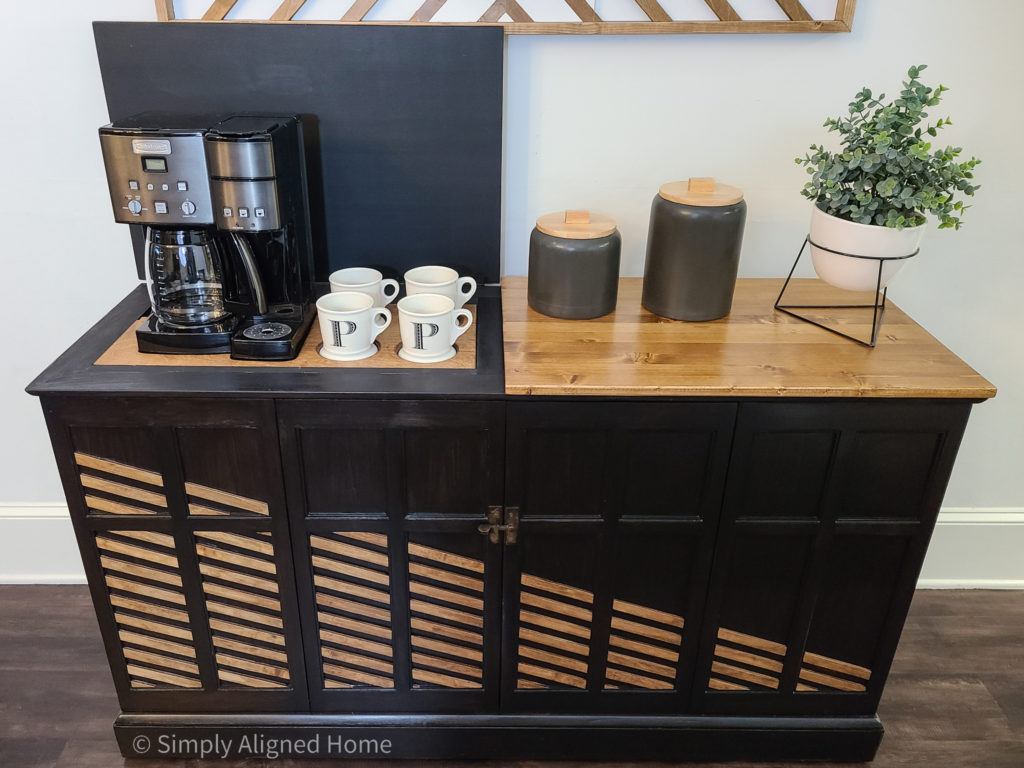
I decided to cut a shelf from the chest to use as the support for the coffee maker. In order for it to work, I needed to cut it small enough to fit in the top opening of the chest without interfering with the lift or frame (I later modified it to miss the hinges as well).
I could have easily left the mounting plate as a plain piece of wood…but I took it a step further. Using a piece of 1/2″ plywood, I made a custom plate for my coffee maker and mugs. I used a large hole saw to cut four holes for mugs. I then used my jigsaw to cut out a spot for the coffee maker and a notch for the power cord.
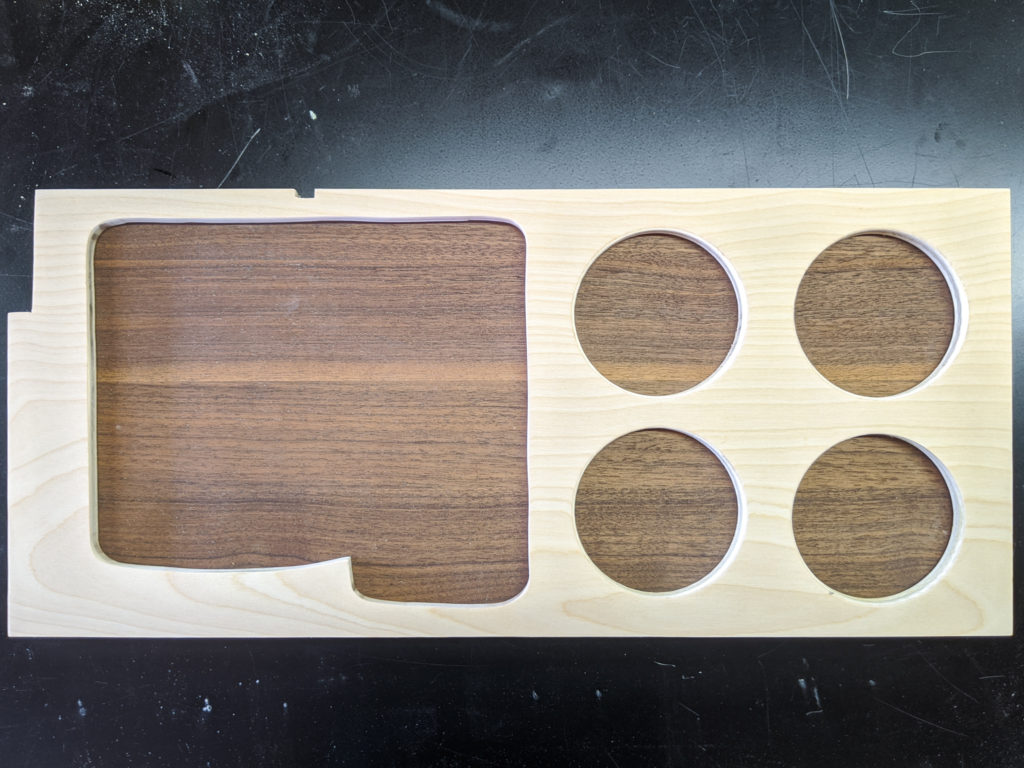
I glued the cutout piece to the shelf and stained and sealed it.
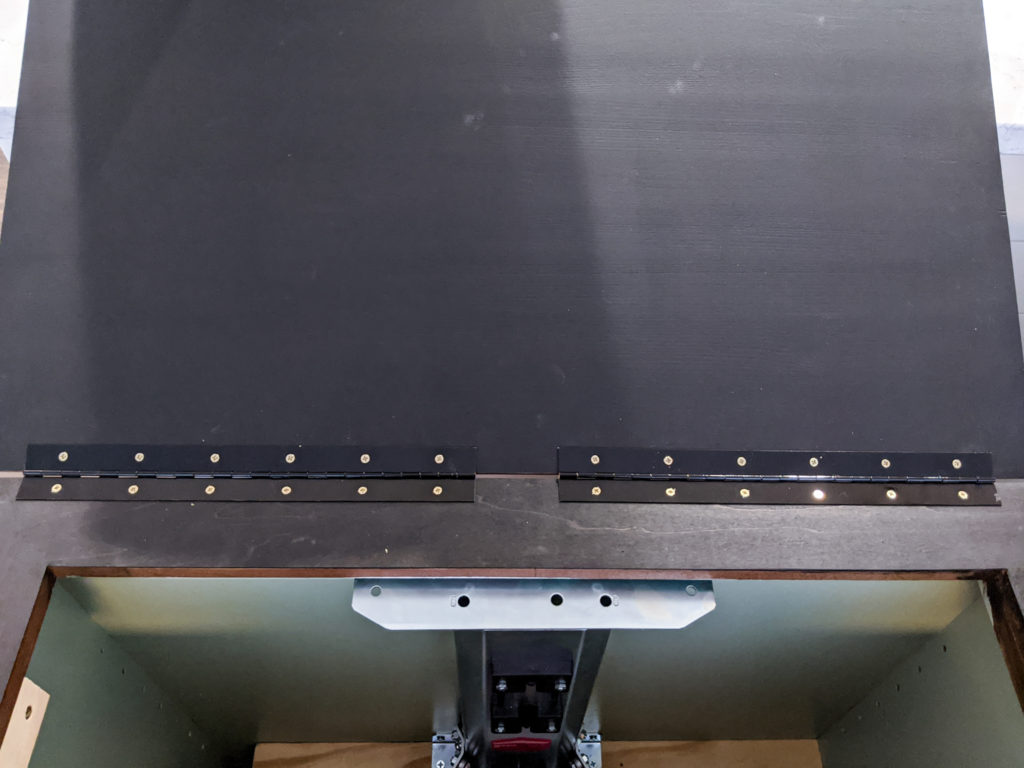
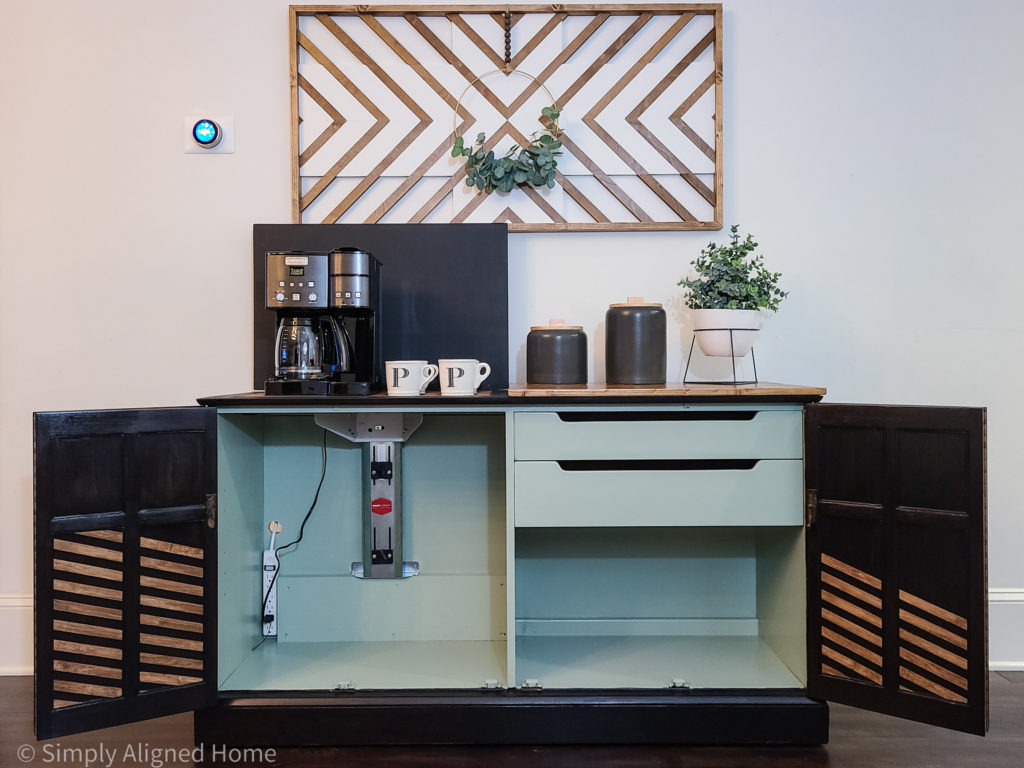
Add Hinges to the Top
I made the top of the chest out of two pieces. The piece on the right side would be fixed, while the left side would be hinged. I secured the left side using two 12″ piano hinges that I spray painted black.
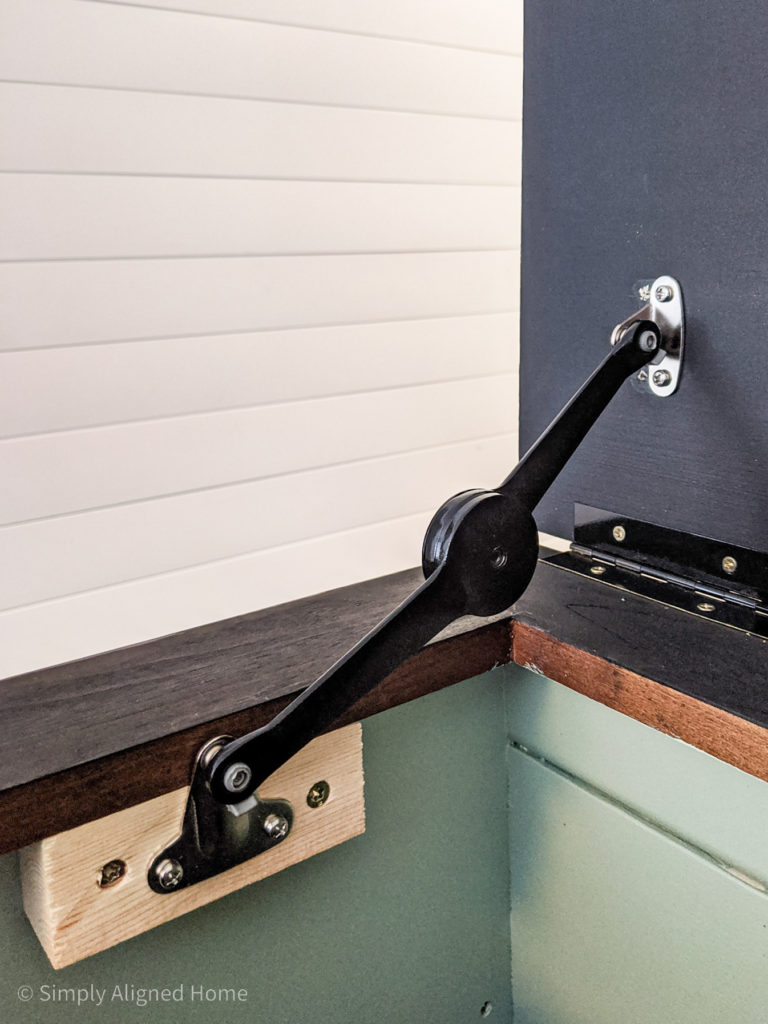
In order to keep the top open when in use, I installed a lid support hinge (that I also spray painted black). I added a block of wood where the lid support hinge needed to be installed in order to keep the lid at a 90 degree angle.
Add Trim + Paint
With everything installed, it was time to add the finishing touches! I added trim to the top where there were gaps around the rising shelf. I painted them black to match the cabinet frame and sealed everything with polyurethane.
Even with the coffee maker in the stored position, there was still plenty of room in the chest!
This crazy idea actually came to fruition and was quite easy to make! I can now enjoy my coffee and store it too!!