In this article I will be sharing a quick and simple DIY textured wall art anyone can build! You don’t always need elaborate projects to make a statement. Sometimes, a simple project is therapeutic for the soul.
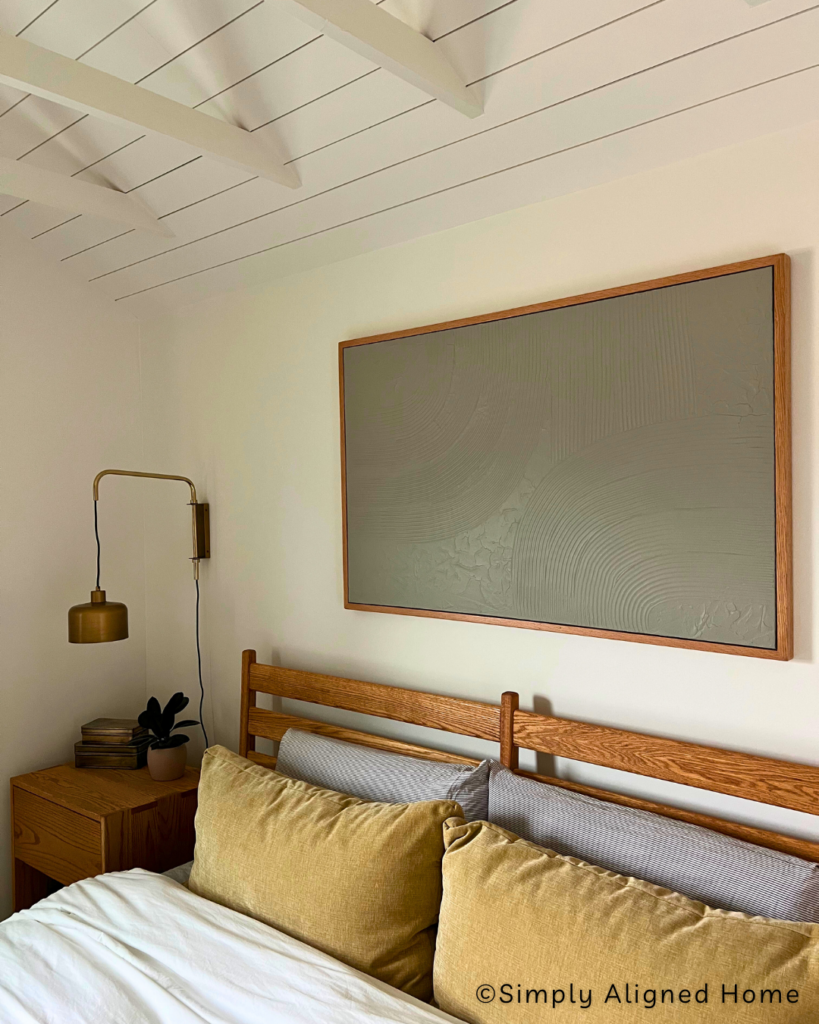
If you follow me over on Instagram you would have seen that recently I shared that my contractor opened up our bedroom ceiling. Now, we have a beautiful vaulted shiplap ceiling!
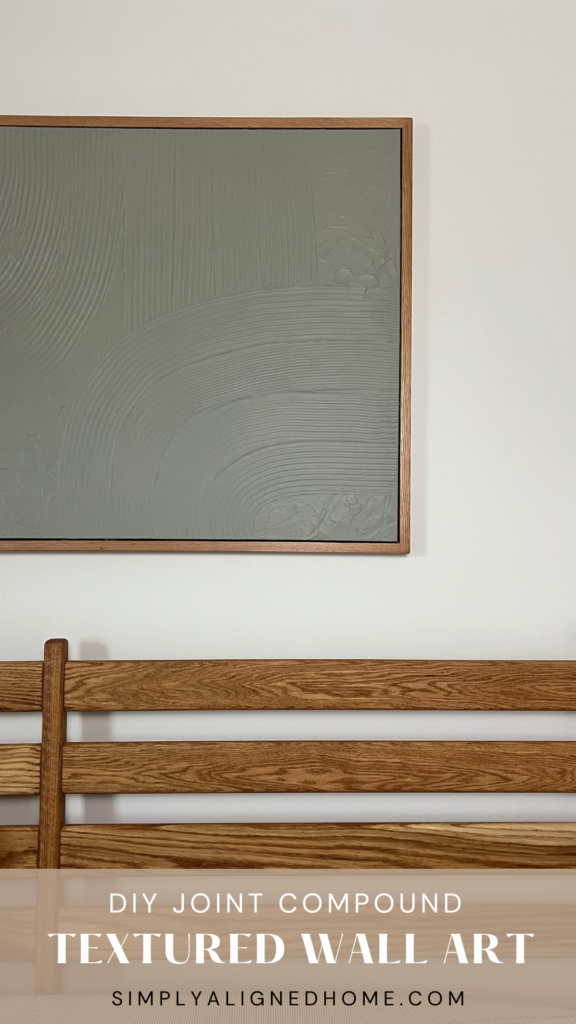
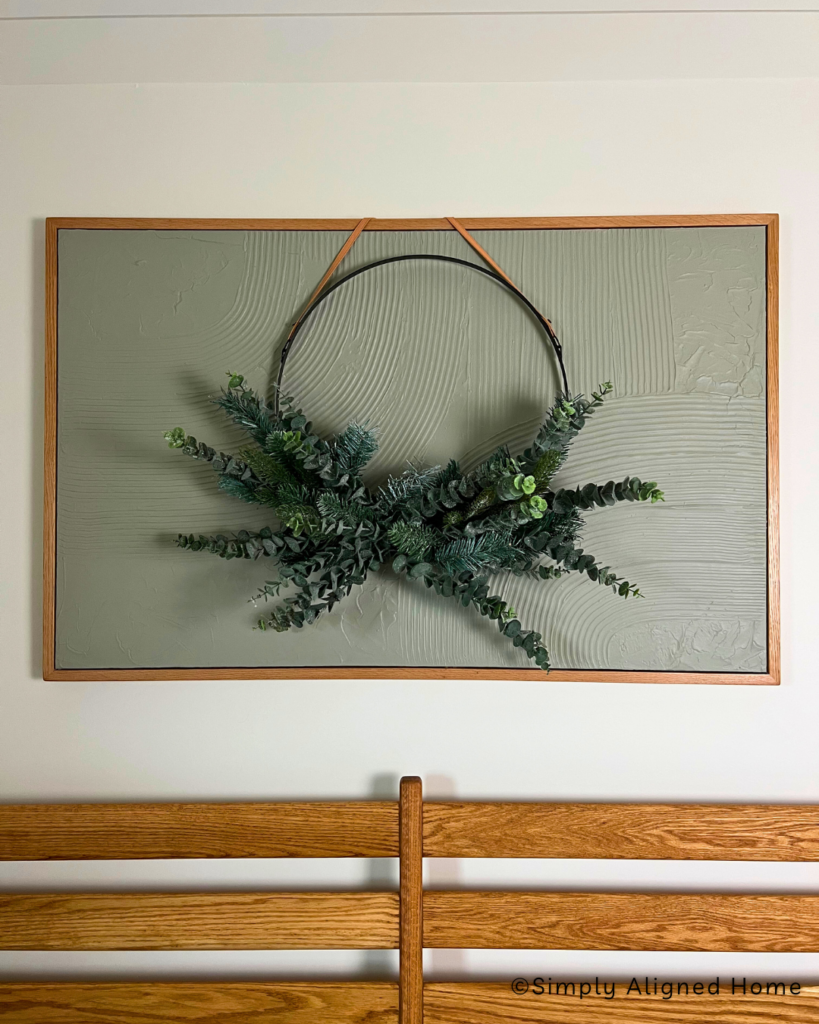
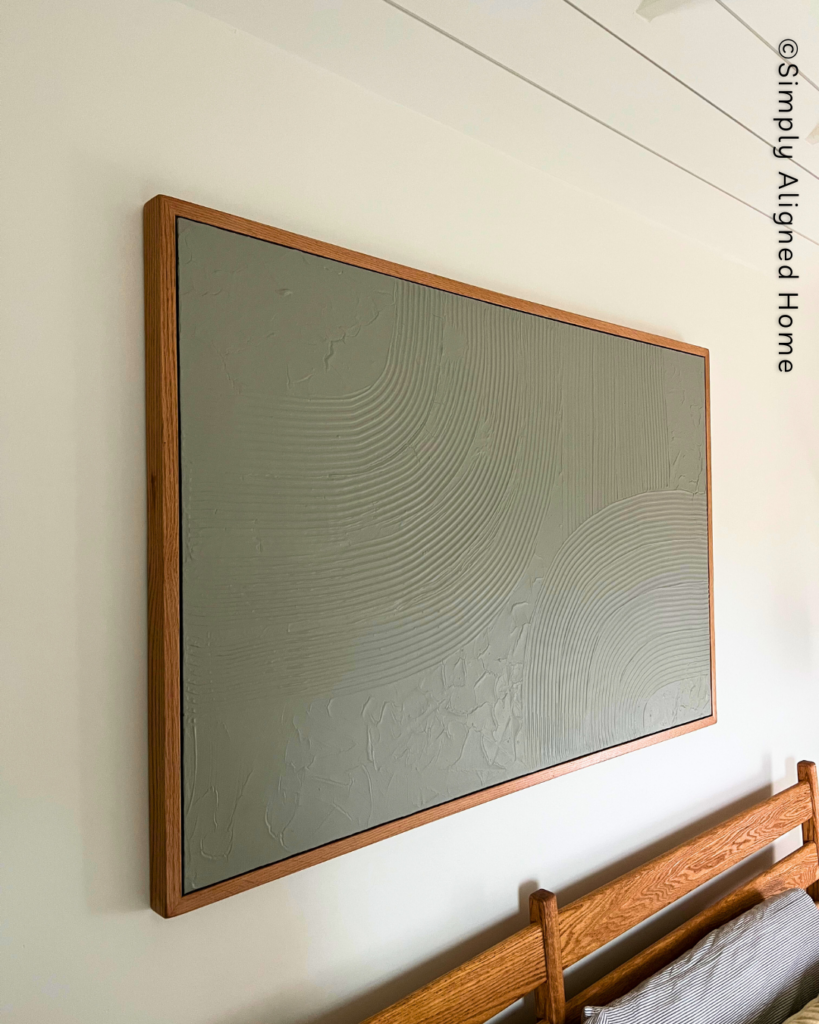
As we postpone the bedroom floor renovation until after the holidays, I opted to craft a piece of art for above the bed. Using only joint compound, paint, and a canvas, I successfully fashioned an art piece that I am so in love with.
How To Make Textured Canvas Art
Step One: Mix Drywall Mud With Paint
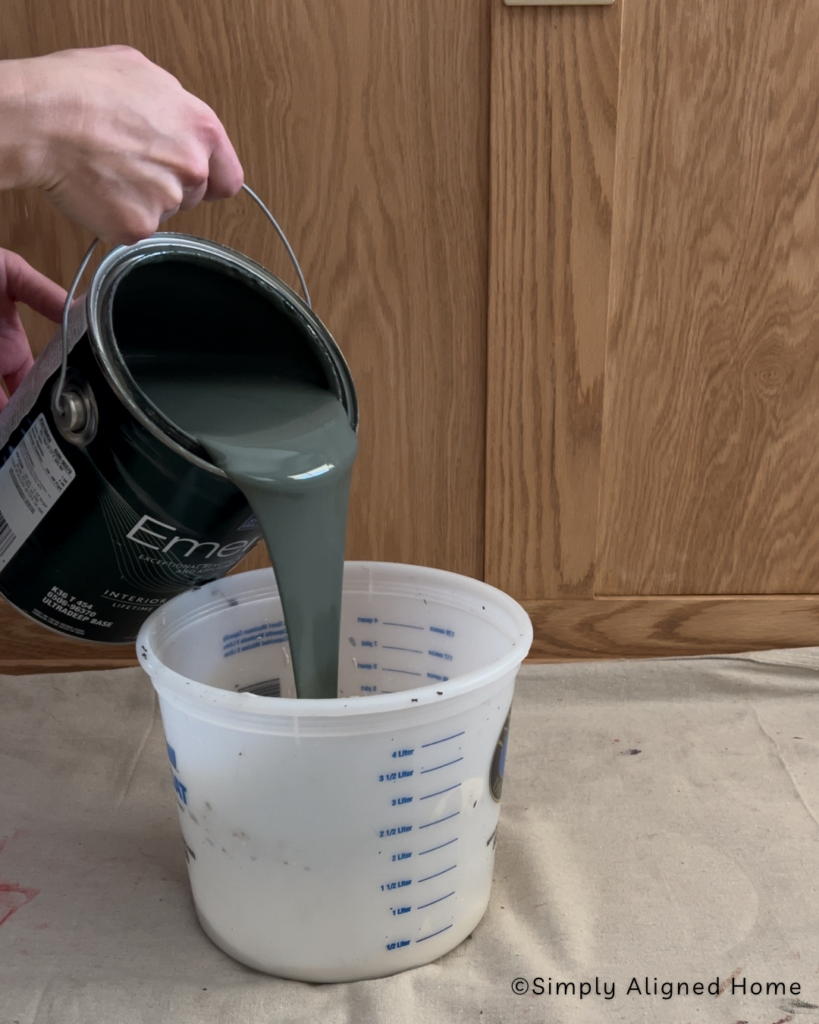
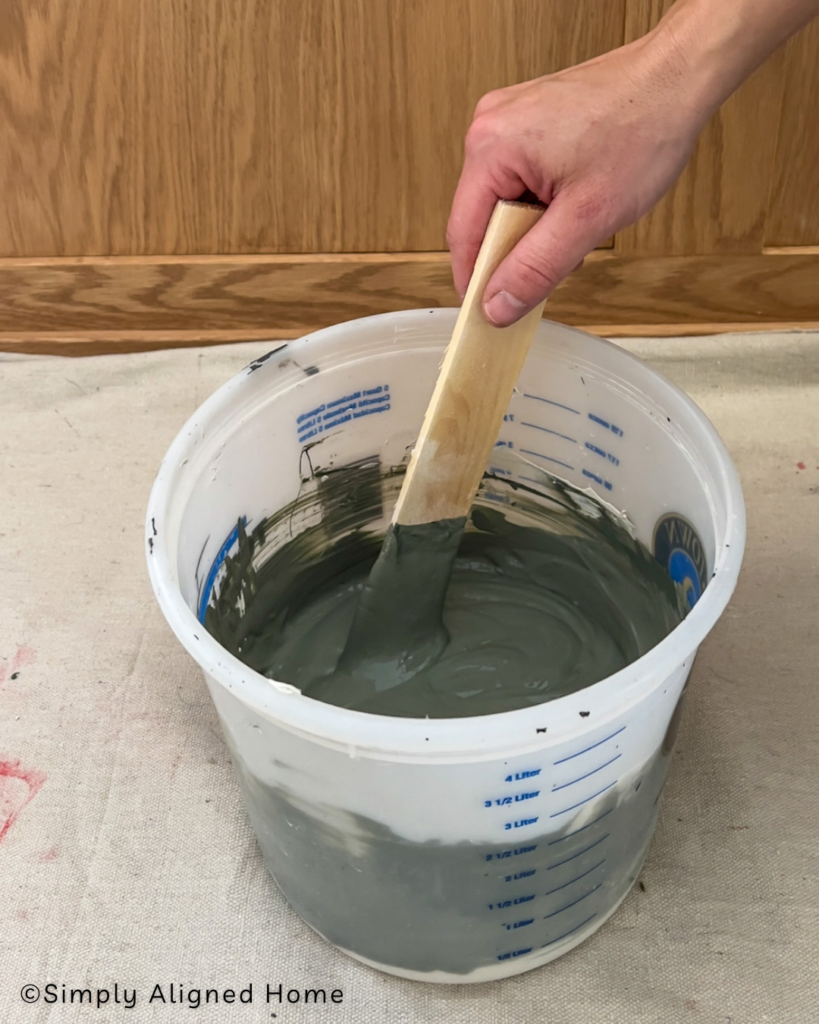
To get started you will want to have some sort of container so you can mix up your joint compound. I used these paint mix cups you can buy at the hardware store. When mixing up your joint compound make sure you water it down, if the drywall mud is to heavy then it will sag the canvas and be hard to work with.
You will eyeball this next part to your liking. Add water, joint compound and your choice of paint (I used Oil Cloth in a matte finish) to your mixing container. Stir until you have a nice yogurt consistency. If you find that it’s to soupy looking just throw a little bit more of joint compound in to thicken it up.

Step Two: Add Joint Compound To Your Canvas
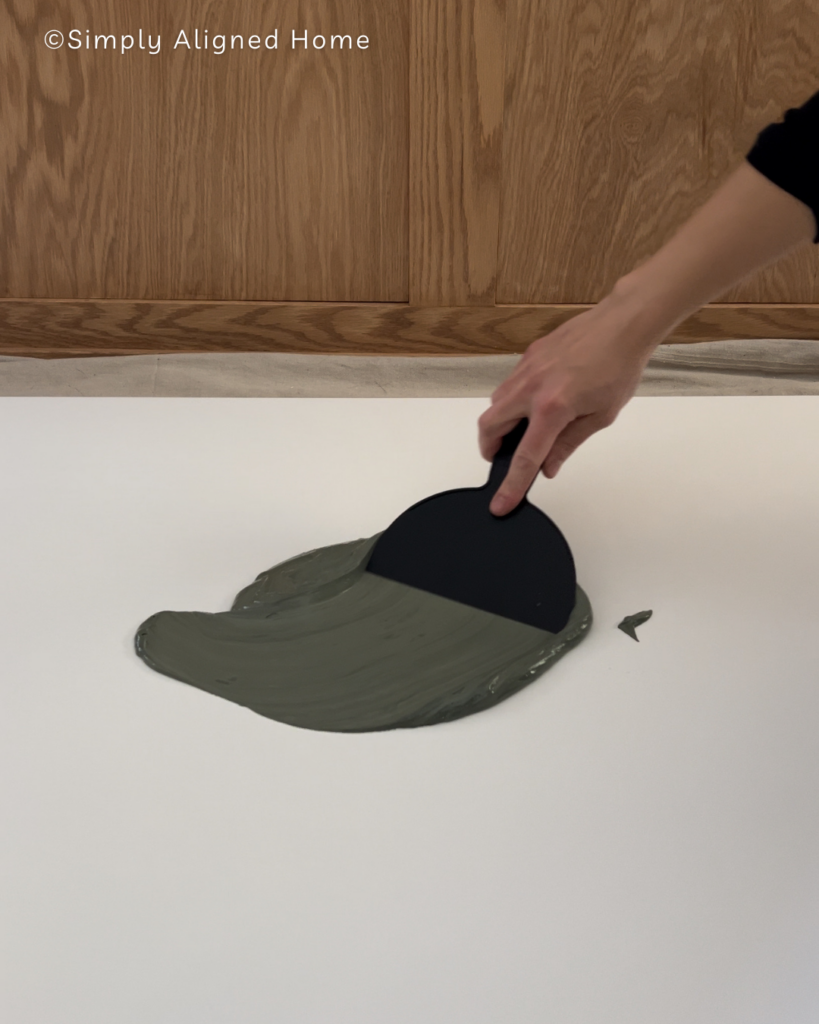
Now, for the fun part! This is where you get to be creative. I opted to use a canvas that was 30×48. You can use any size or even a old piece of artwork you no longer love! If you do that I would advise you prime the canvas first.
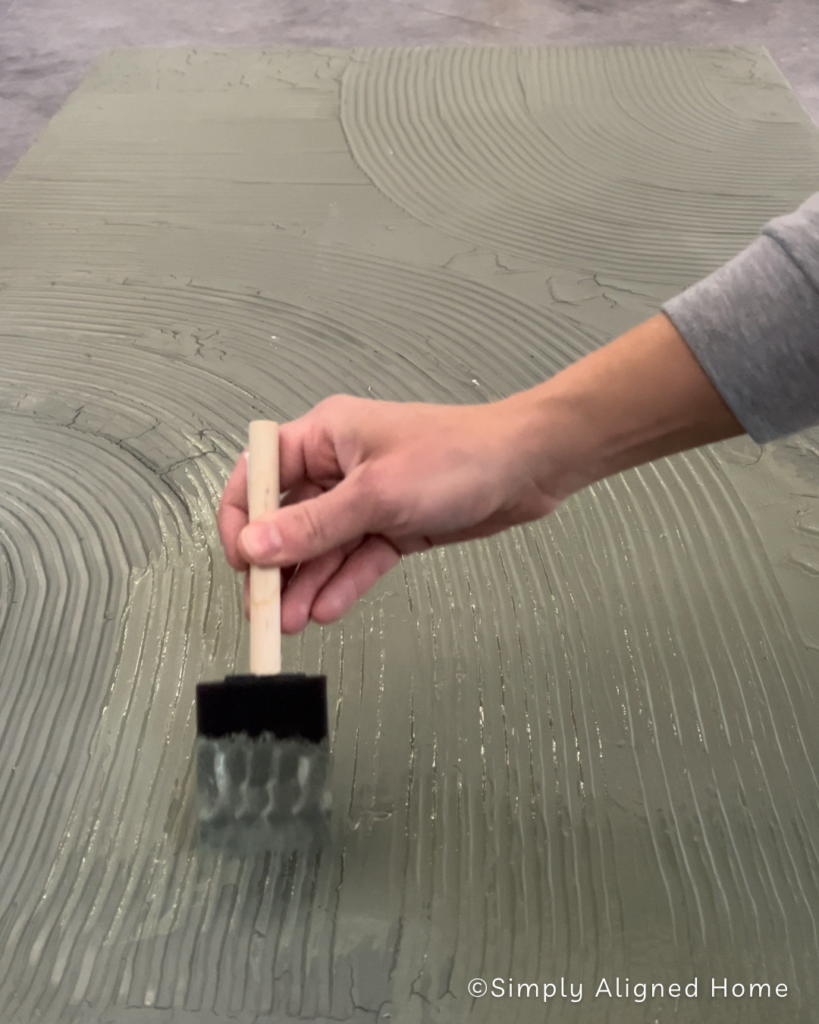
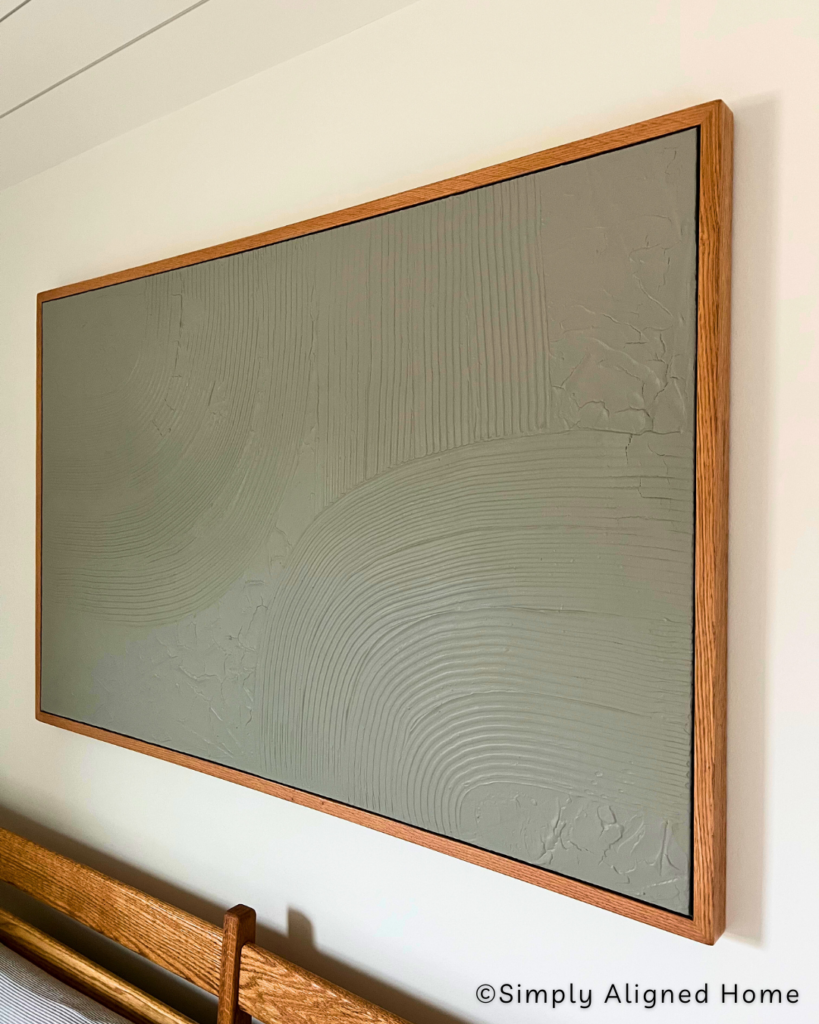
When I made my art piece, I just went at it with my putty knife. I started pushing the joint compound mixture all over the canvas making sure that the whole canvas was covered.
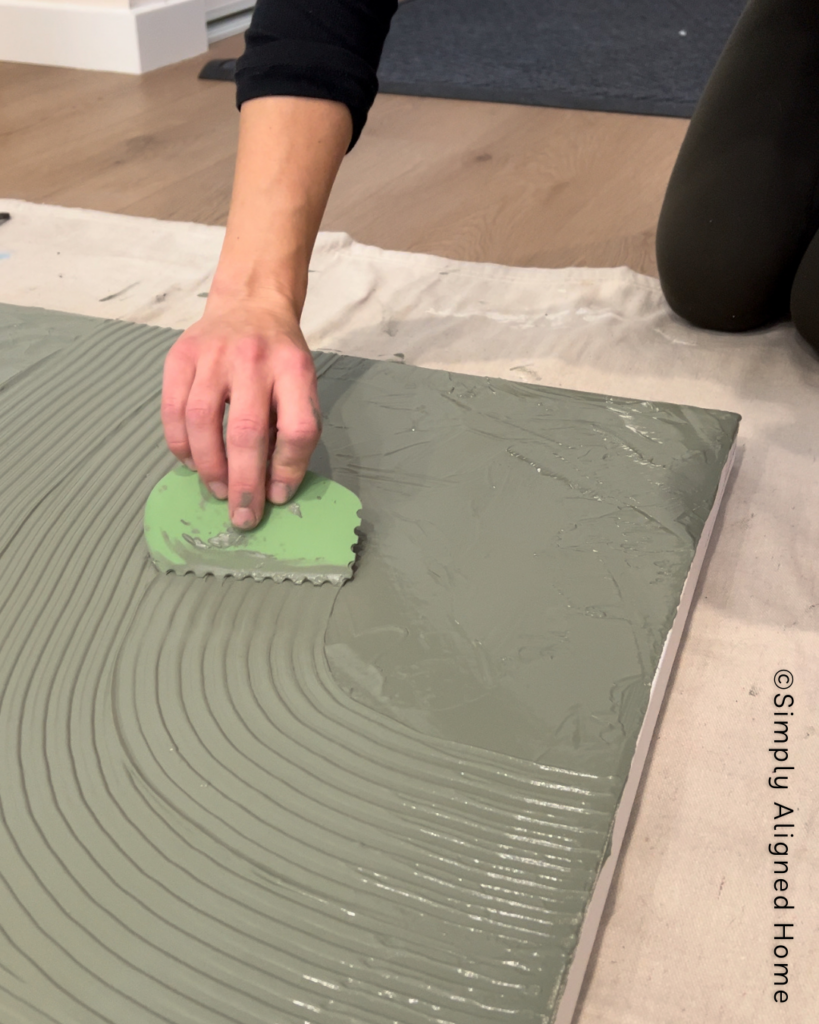
Keep in mind it’s not going to be perfect and that’s the fun part of this project. To get different textures you can use all sorts of different tools. I used a tool that had little grooves on the end to create fun little lines. I have also seen people use a tiling trowel to create bigger lines.
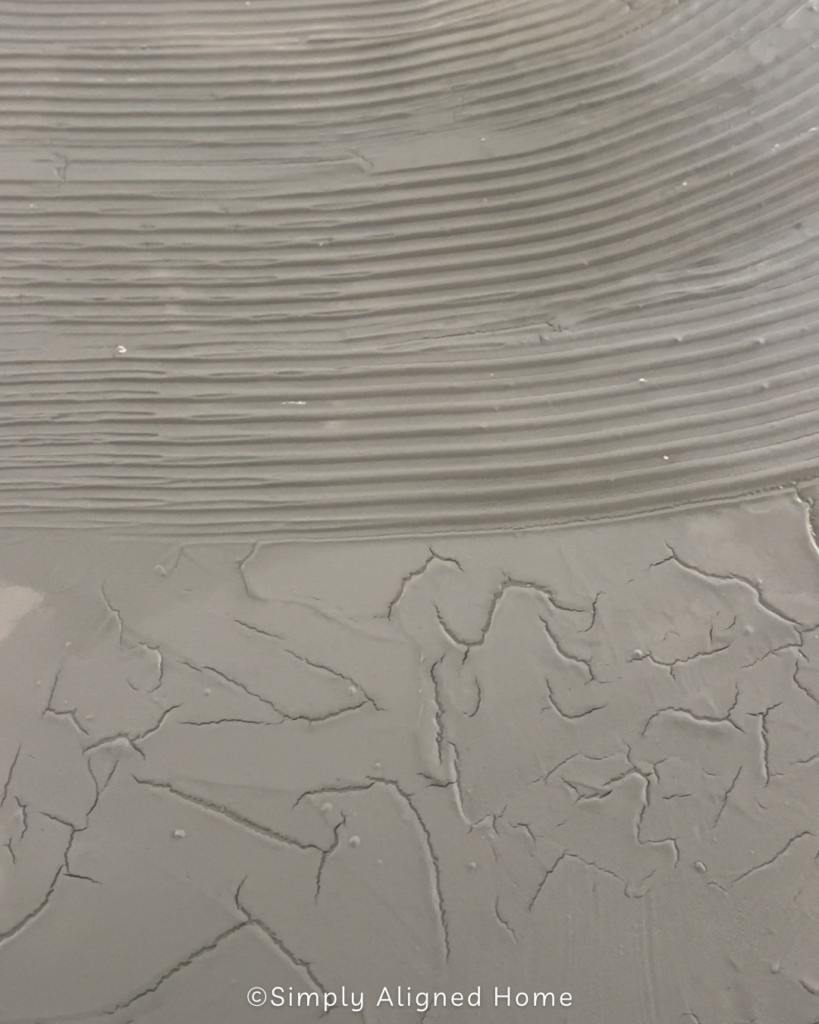
When I was done adding all the joint compound I took my art piece outside to dry. If you decide to allow your art piece to dry outside be aware that there is the possibility it could dry to quickly. This happened to my art piece and created tiny cracks all of the art piece.
I decided to keep it, I actually like how it added some texture and character. After the drywall mud had dried, I applied a swift coat of paint to enhance the overall look. When the joint compound initially dried outside there was some white speckling that I wanted to touch up.
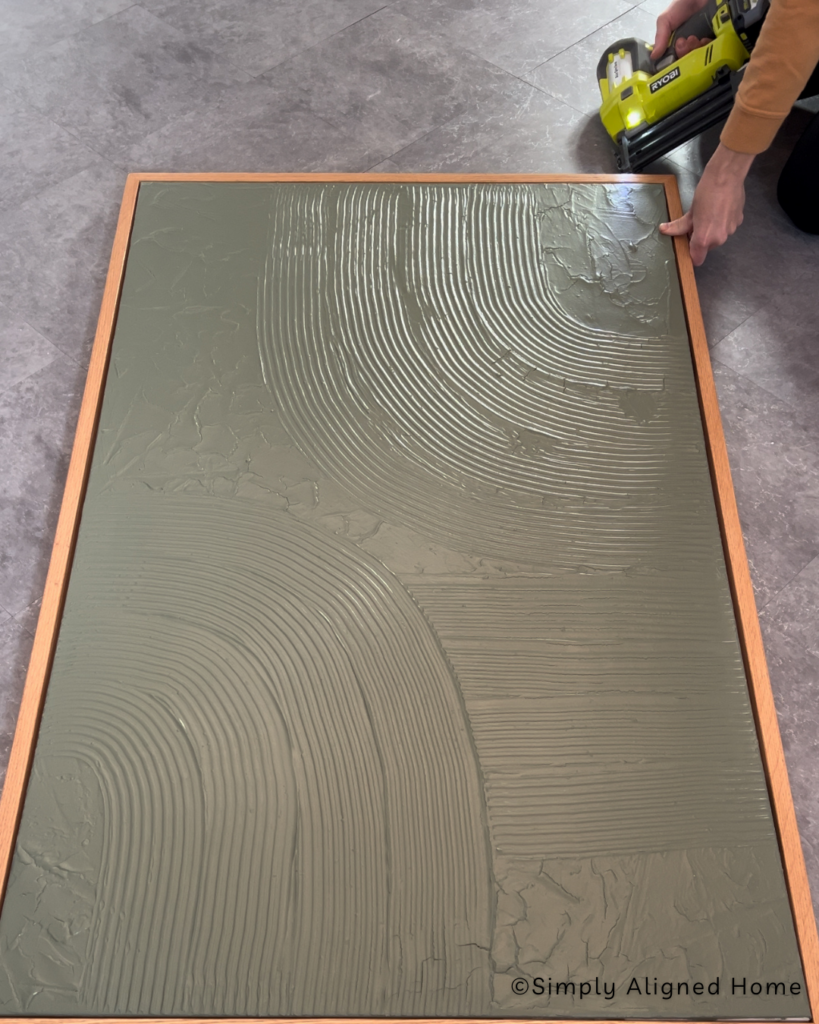
Step Three: How To Make A Floating Frame
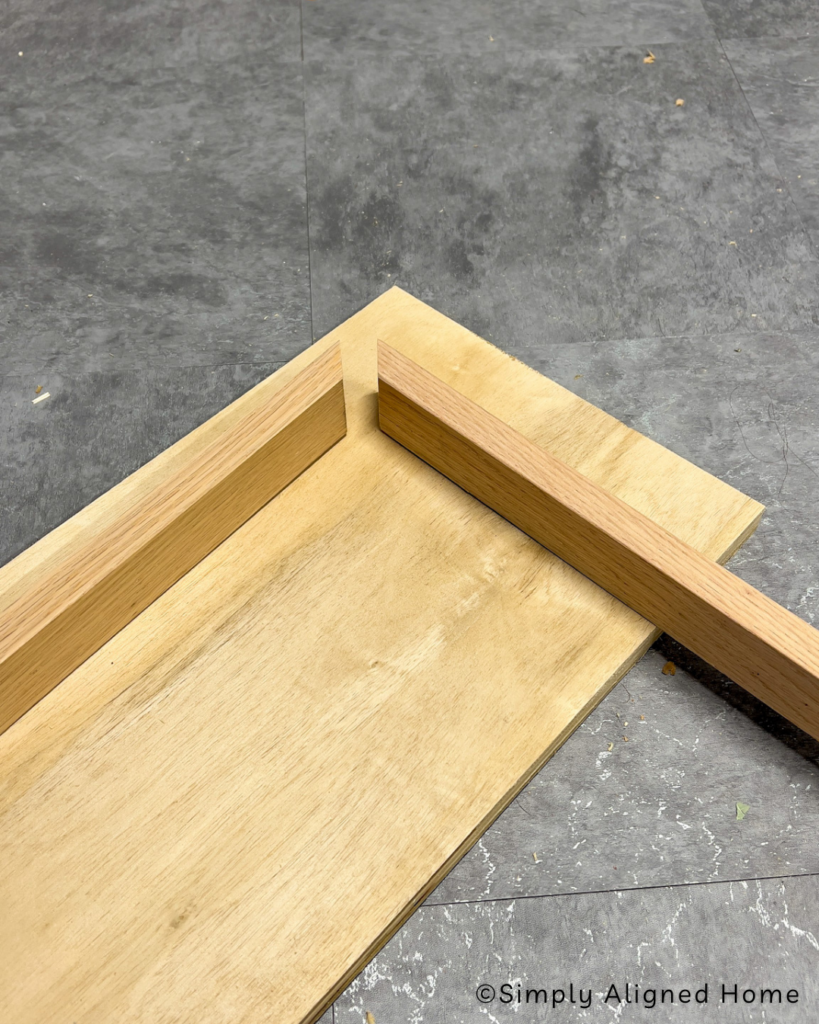
Lastly, to make the art piece more custom I used 1×2 oak boards to create a frame. I chose to miter the corners for a more custom look. To attach the pieces of oak together, I used wood glue and brad nails to secure them.
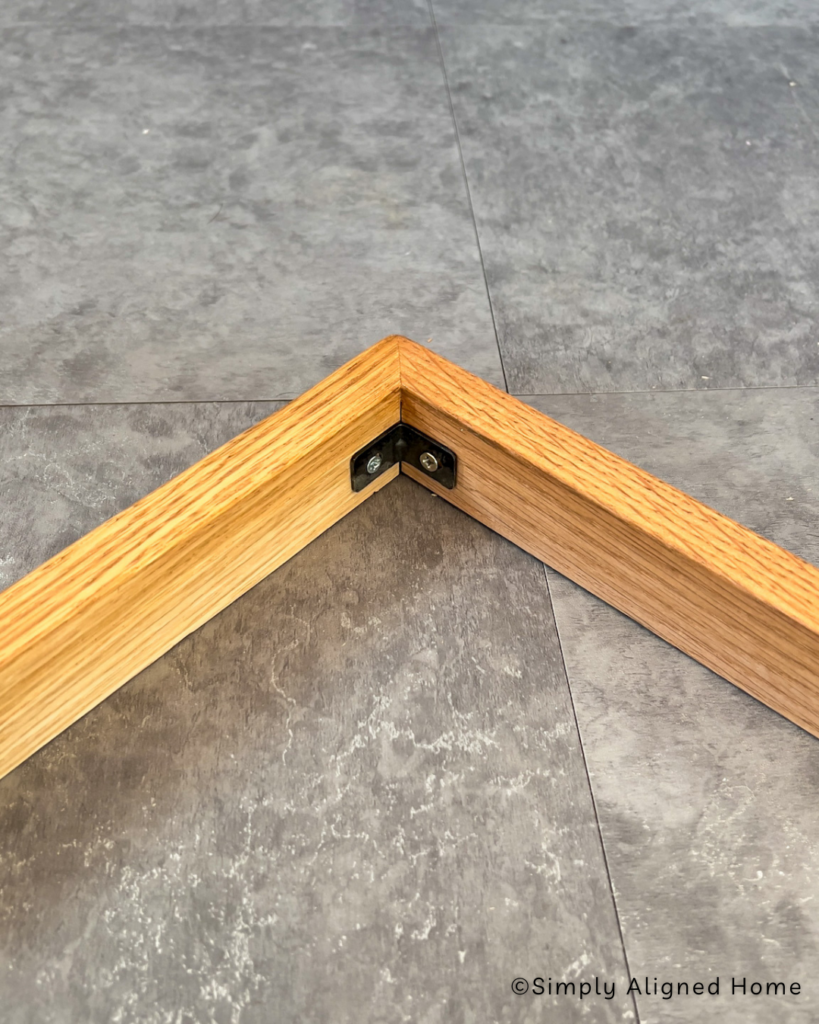
For added support and to space the frame off of the canvas a little bit I used 4 small sized L brackets. I installed them in all four inside corners with screws.
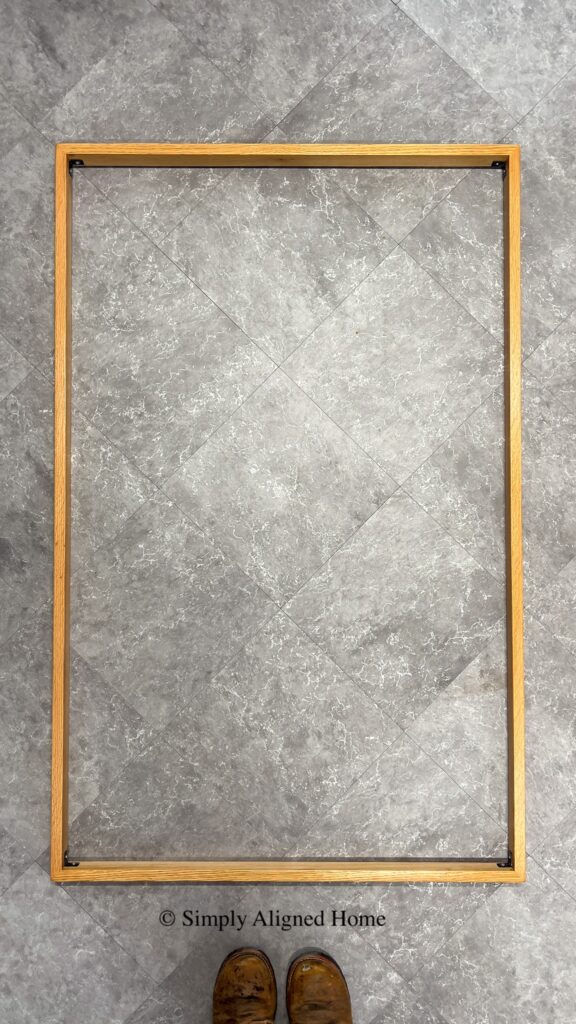
To secure the frame to the canvas I used my brad nailer to nail them together. With some scrap pieces of wood I made tiny little shims and spaced them in between the frame and canvas in some areas to ensure that there was an even spacing all the way around.
Can you believe it?! That’s all it took to create this easy joint compound art. I think it looks amazing in our new space and had so much fun doing a simple project. If you end up making one of these art pieces send your photo over on Instagram, I would love to see what you created!

**Note: I am not a professional and do not claim to be an expert. Please be sure to always read instructions for all tools and products. Safety is very important and should be your top priority. Wear necessary protection when using tools (eye wear, hearing protection, gloves, etc.) and dust masks when sanding or cutting. Simply Aligned Home is not responsible for any injury or damage. All of my designs are not professionally designed and are for private use only.**
Materials Used
- All Purpose Joint Compound
- Any Size Canvas
- Paint Of Your Choice- I used Oil Cloth in a matte finish.
- Oak 1×2’s
- (4) L Brackets
- Brad Nails
- Wood Glue
Tools Used
- Putty Knife
- Small Container
- Paint Brush
- Brad Nailer
- Texturizing Tool