
Are you looking to tackle clutter and maximize space in your home with a practical and customizable solution? In this article, I guide you through building your own DIY tote storage rack!
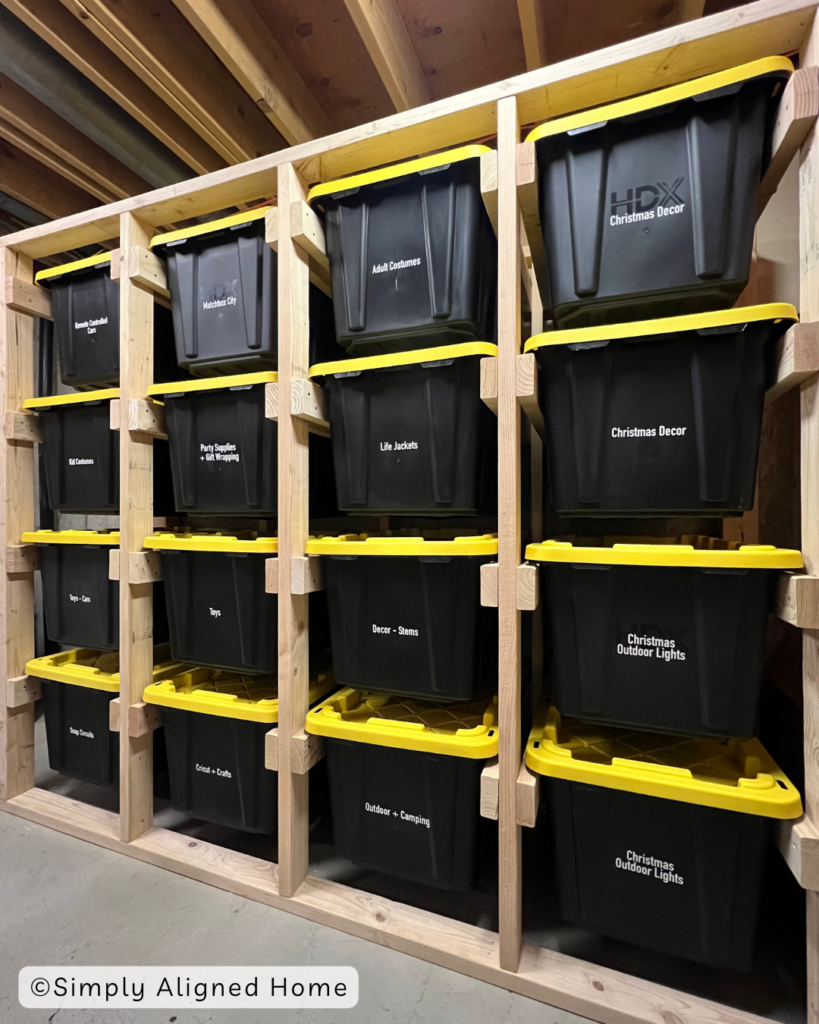
In the unfinished section of our basement, we had a space solely dedicated to storage. It was indeed past due for a transformation to make the room more functional and efficient. I had recently seen the black and yellow bins at Home Depot and how people have used them in junction with a DIY shelf.
I loved the simplicity of the shelf and how easy it was to get the bins in and out. Better yet…they weren’t stacked on one another!
Now, let me guide you through creating your very own tote storage rack!
**This post contains affiliate links to products that I used or recommend. If you purchase something through an affiliate link, I may receive a small percentage of the sale at no extra cost to you. I really appreciate your support!**
Tote Storage Rack Building Plans
This guide offers a snapshot of constructing the rack and outlining the essential steps. For comprehensive details, including precise dimensions, a shopping list, and a cut list, I’ve meticulously crafted a complete set of building plans!
Click the button above or click here to access the woodworking plans- Tote Storage Rack Building Plans!
How To Build A Tote Storage Rack
Preparing Materials
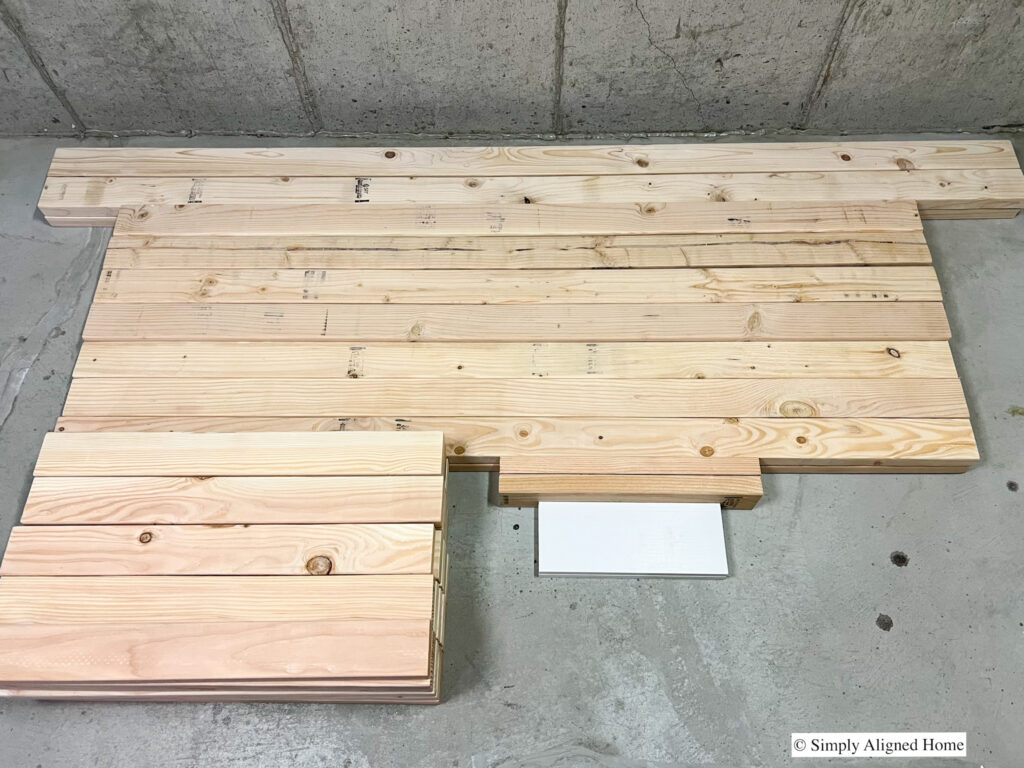
Before you start assembling, cut all the pieces to size and give them a light sanding for smooth edges. Begin by cutting the vertical supports, then horizontal top and bottom pieces, and lastly horizontal supports.
For a more efficient process when cutting the horizontal rails, set up your stop on your miter saw so you don’t have to measure over and over. If your saw setup lacks a built-in stop, you can use a clamp to secure a spare piece of wood to your workbench to serve this purpose.
RELATED POST: Check out the Ultimate Guide To 5 Essential Power Saws For Woodworking if you’re curious what saws I recommend having readily available!
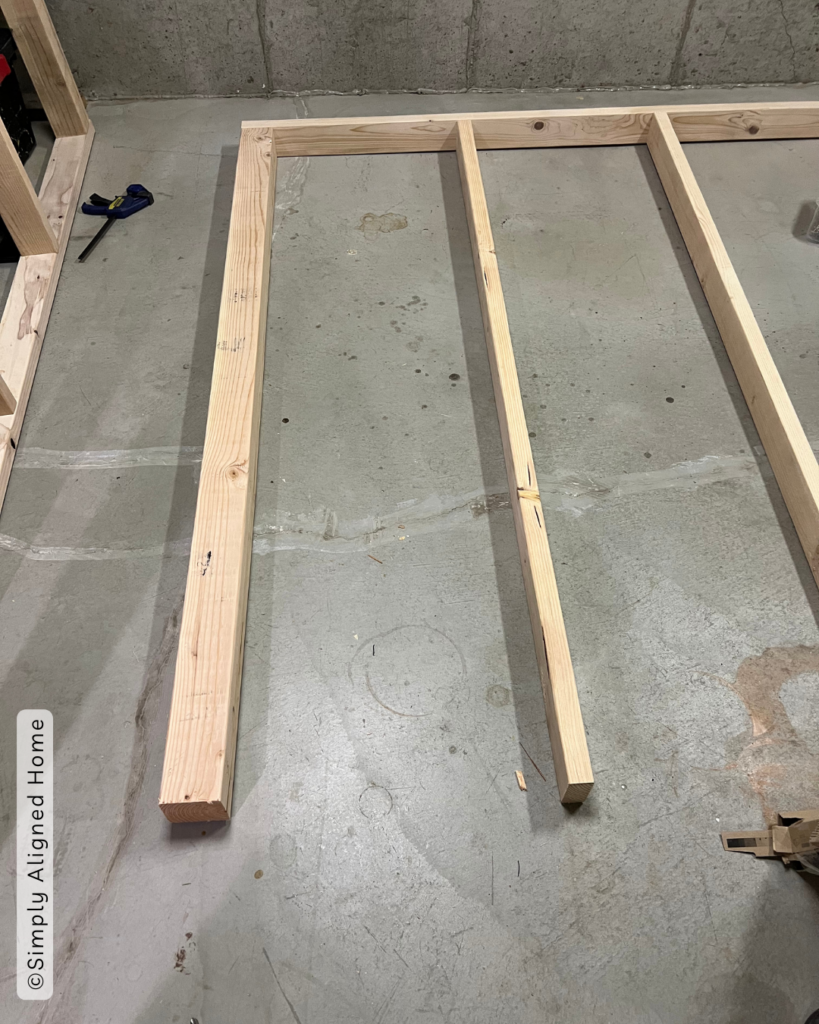
Assemble Front & Back Frames
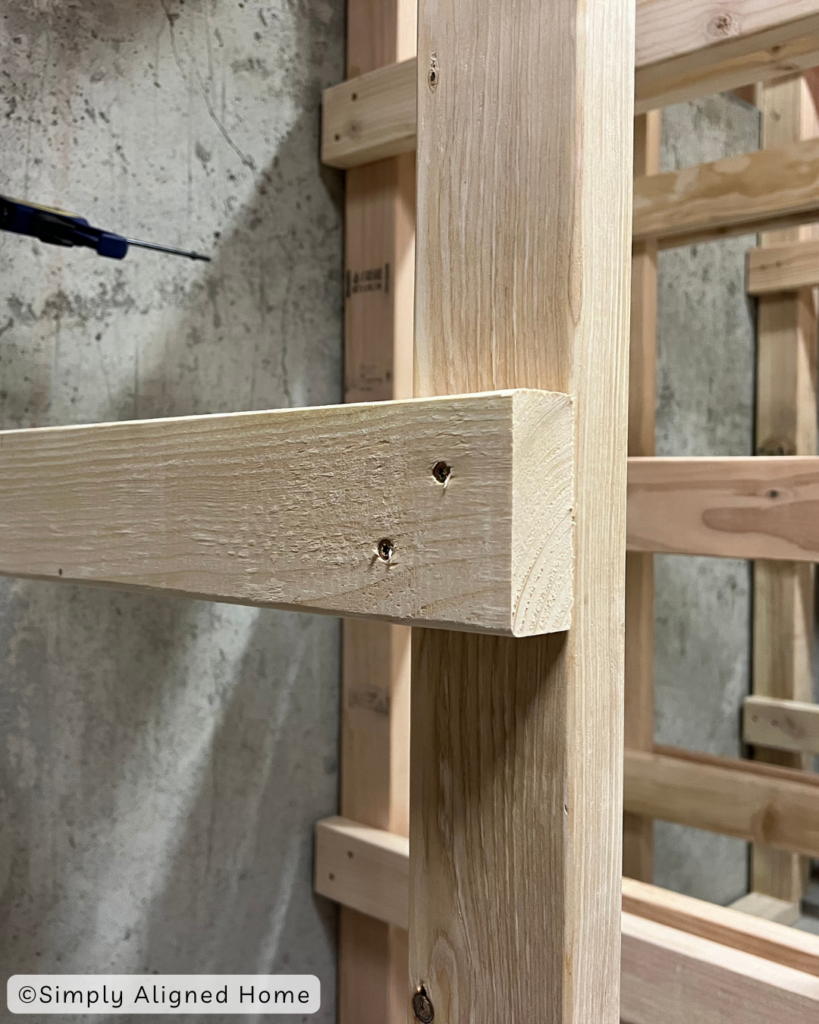
To start constructing your tote storage rack you will want to assemble the back and front frame. You will do this by taking your 4×4 vertical pieces and securing them to your horizontal 2×4 pieces. Once those are screwed together with your construction screws take your vertical 2×4 pieces and space them evenly apart to create your front and back frame.
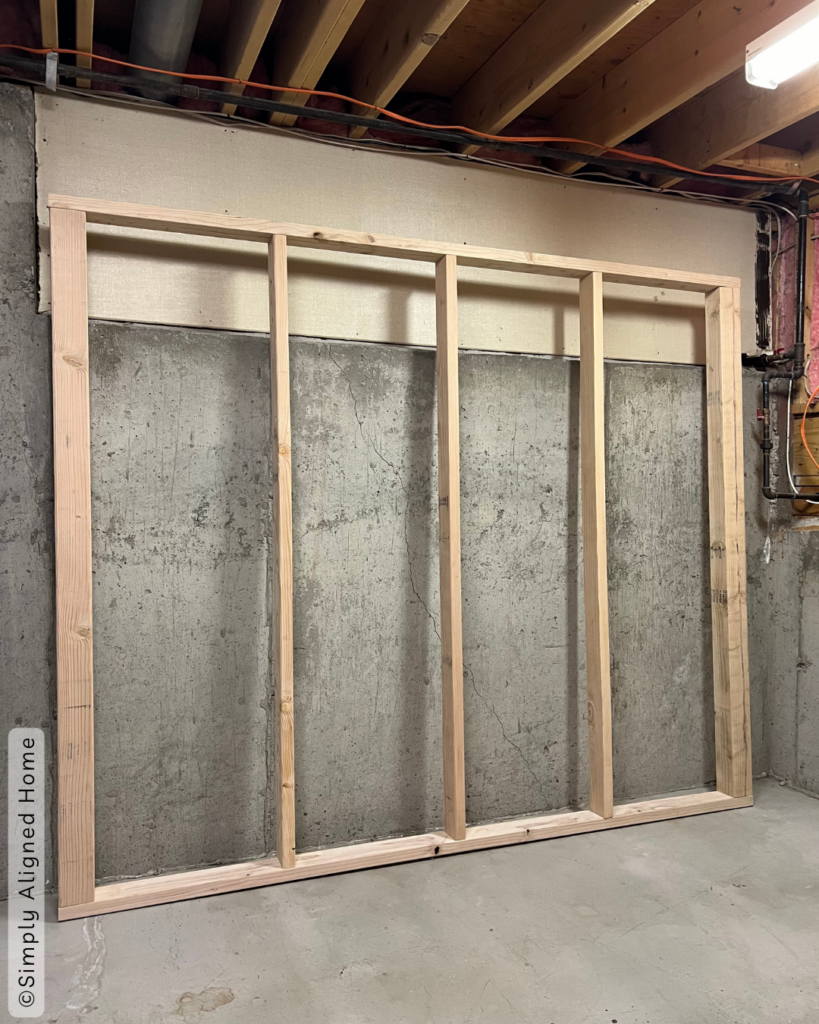
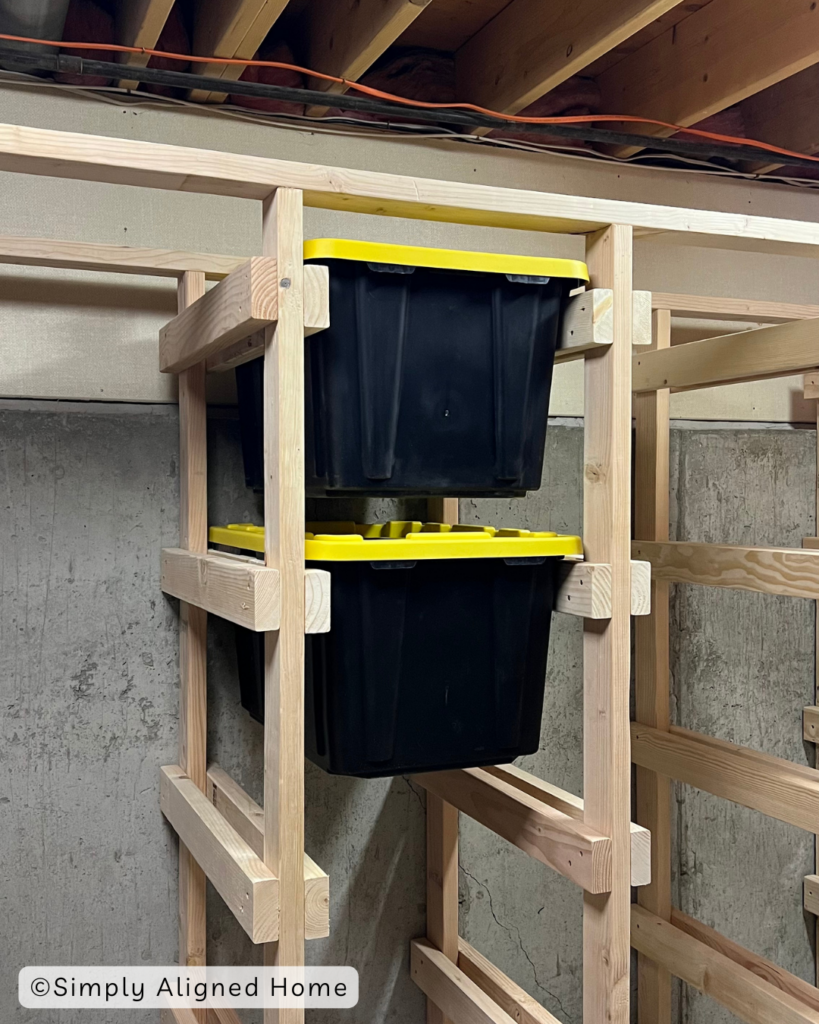
Installing The Horizontal Slides
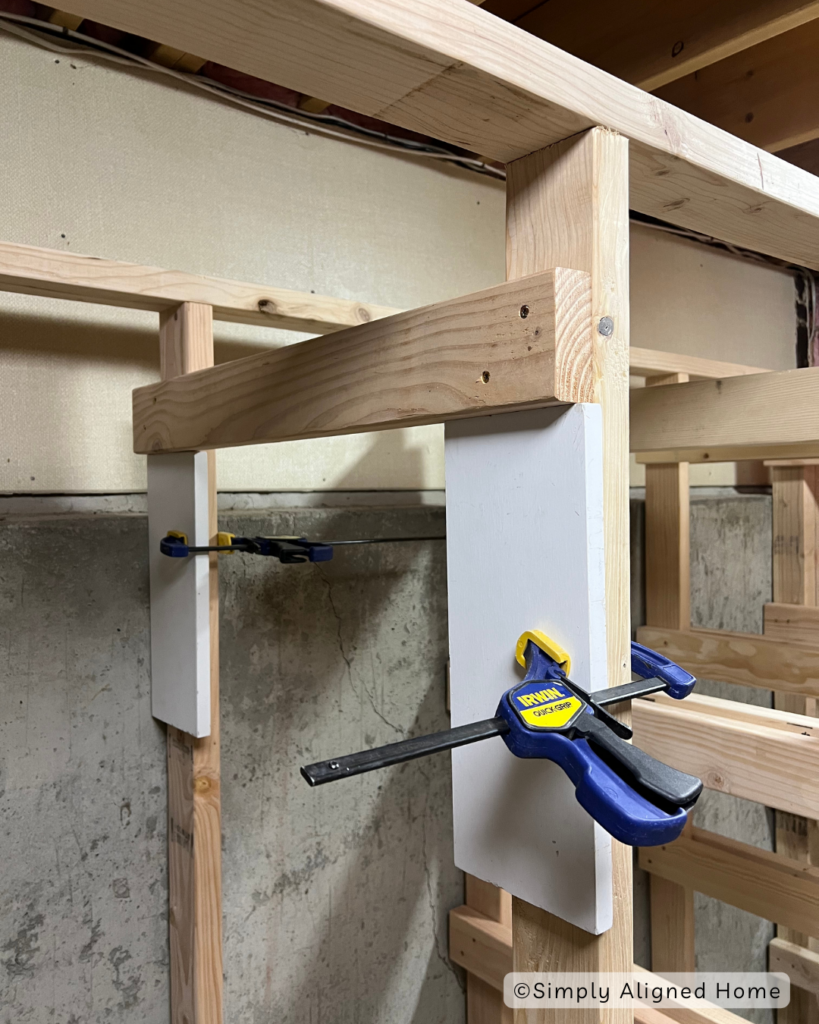
Stand your two vertical frames up and place them the correct distance from each other. Start by installing your first horizontal slide in your first row. Measure down from your top board and make a mark at your desired length.
To make install easier clamp your horizontal slide to both of the vertical members to secure it with some screws. When securing the horizontal slides, stagger the location of the construction screws to reduce the possibility of the wood splitting.
For the next set of slides take a scrap piece of wood that is the correct length for the spacing of the totes and some clamps, and use this as your horizontal spacer! By doing this, it saves you time having to measure in between each section.
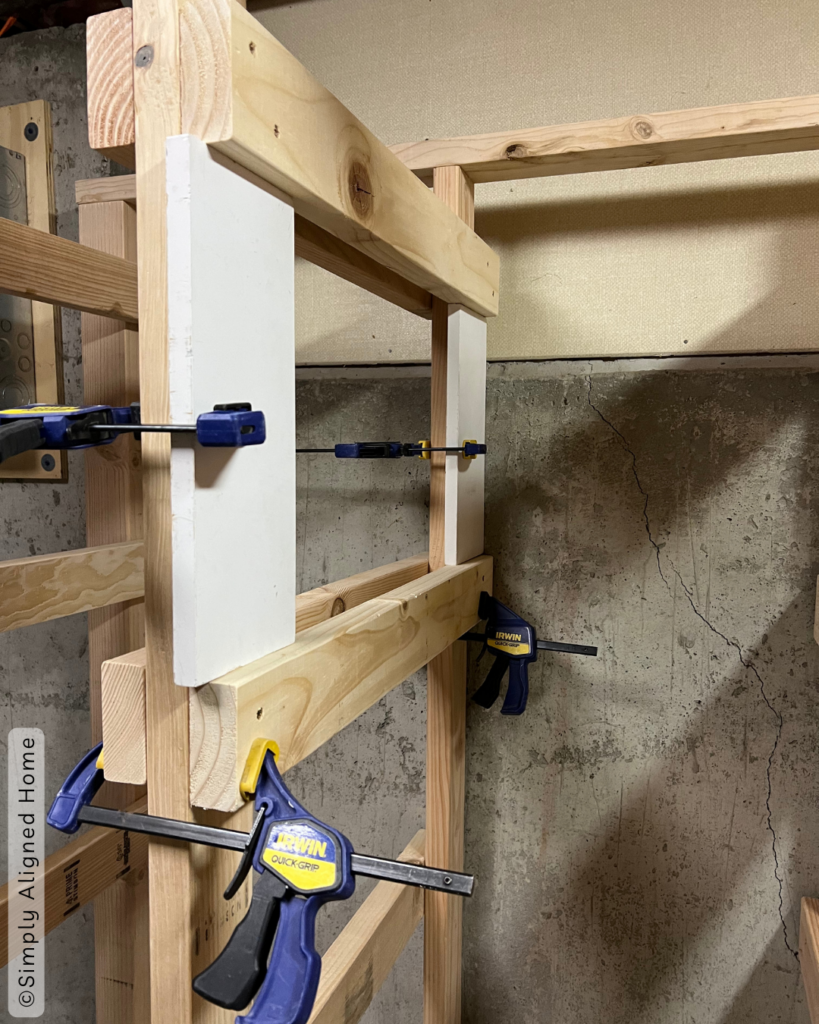
When you clamp your spacer you will just need to install the next horizontal member below it. Keep doing this over and over until the unit is built!
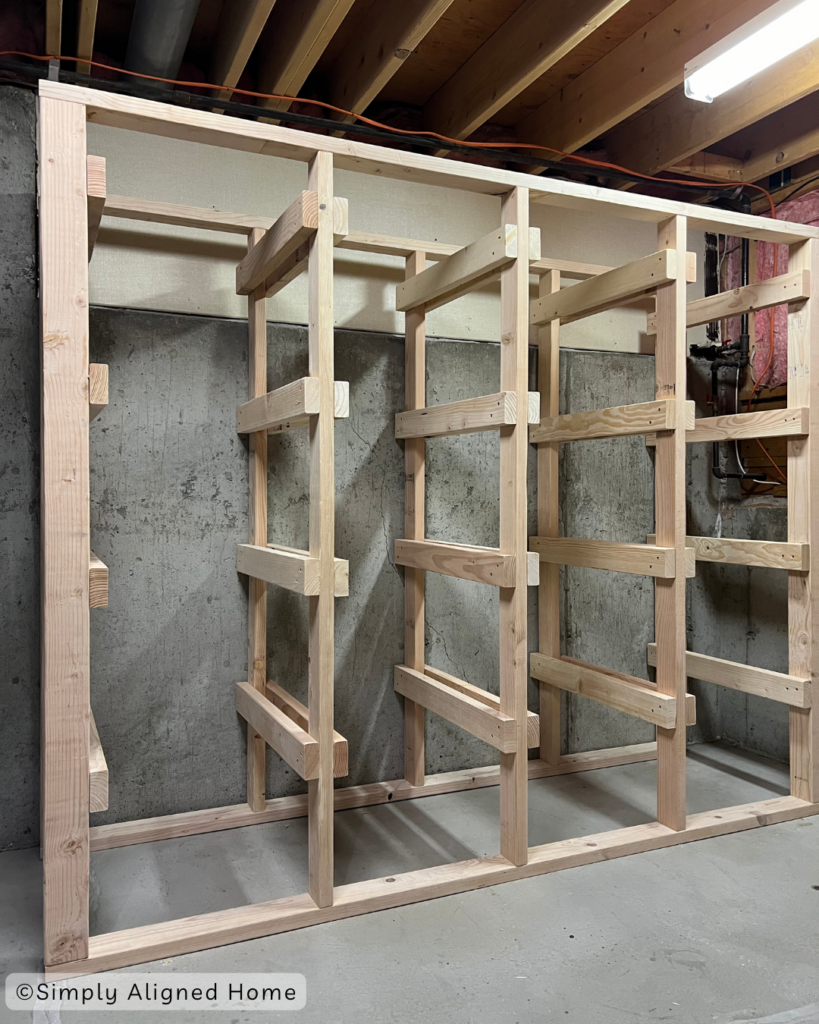
Secure The Tote Storage Frame To The Studs
Although the tote storage frame might seem stable and unlikely to topple, anchoring it to the wall studs is crucial for guaranteed safety. Attach the upper corners of the frame to the wall studs with two metal L brackets, making sure the frame is firmly secured before placing any storage bins in it.

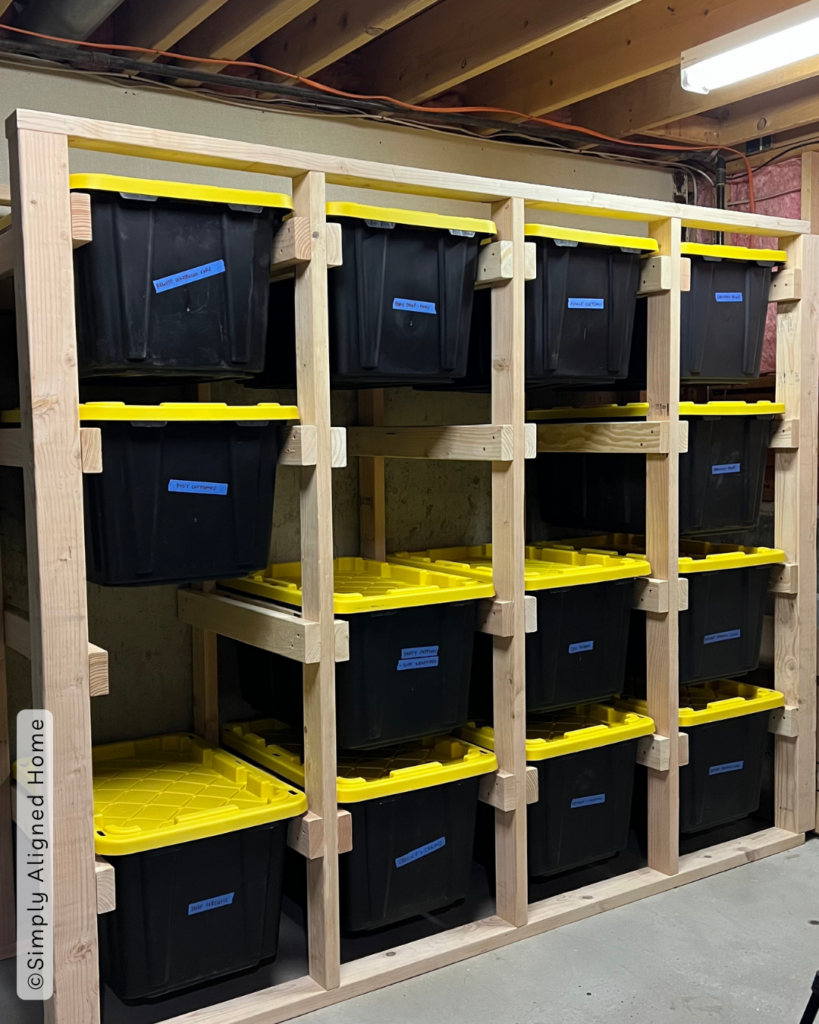
Load Storage Totes & Label Them
Now that your storage rack is finished you can slide your totes right in! It’s important to avoid overfilling the totes to prevent them from bending or distorting under the weight of their contents. With the frame’s spacing, the bins are meant to slide in and out effortlessly.
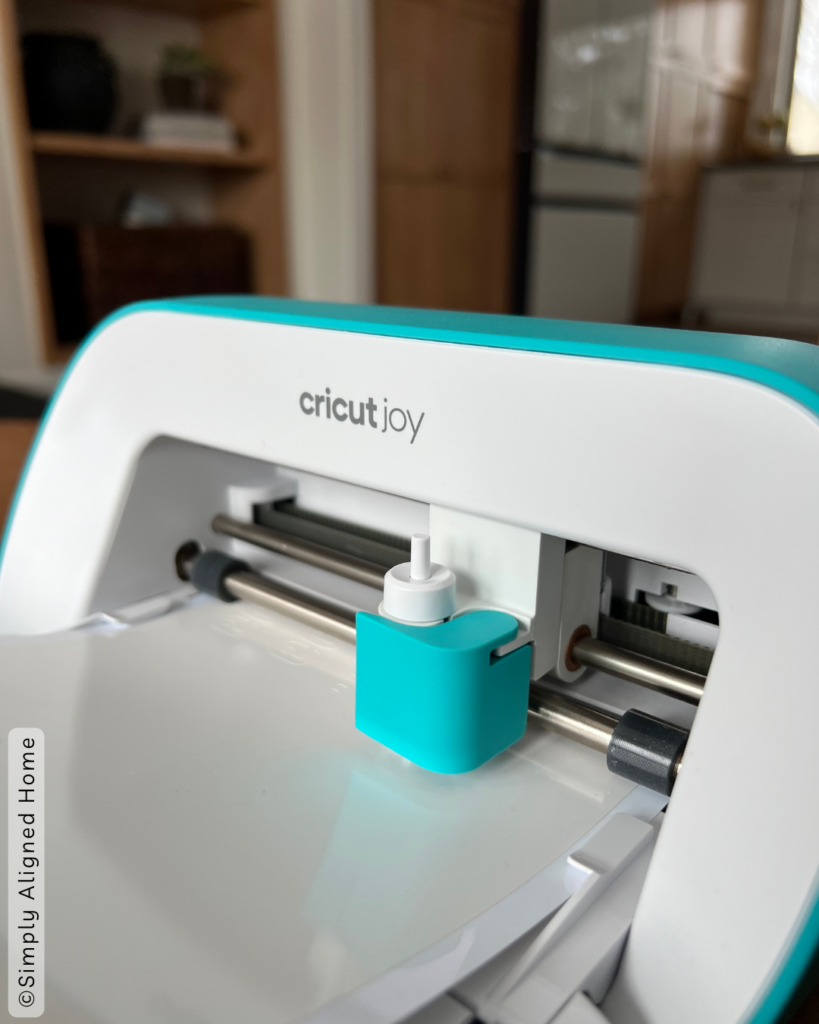
For labeling you can use a cricut like I did or can use a QR code system. You just take a picture of the QR code on the inside and it will tell you everything that is inside. Pretty neat if you ask me!
Now that you have the know-how, transforming your storage space with a DIY tote rack is within reach. Embrace the satisfaction of a well-organized space that not only looks great but is also a testament to your handywork!
Happy building, and here’s to a clutter-free, beautifully organized home!

**Note: I am not a professional and do not claim to be an expert. Please be sure to always read instructions for all tools and products. Safety is very important and should be your top priority. Wear necessary protection when using tools (eye wear, hearing protection, gloves, etc.) and dust masks when sanding or cutting. Simply Aligned Home is not responsible for any injury or damage. All of my designs are not professionally designed and are for private use only.**
Materials Used
- 2×4’s
- 4×4’s
- 2-1/2″ Construction Screws
- 3-1/2″ Construction Screws
- Sandpaper
- Metal L Brackets
- HDX 27 Gallon Storage Totes
- QR Code Stickers
- Cricut Joy
- Cricut Smart Vinyl
- Cricut Weeding Tools
Tools Used
- Measuring Tape
- Miter Saw or Circular Saw
- Impact Driver & Drill
- Orbital Sander
- Clamps
- Level
