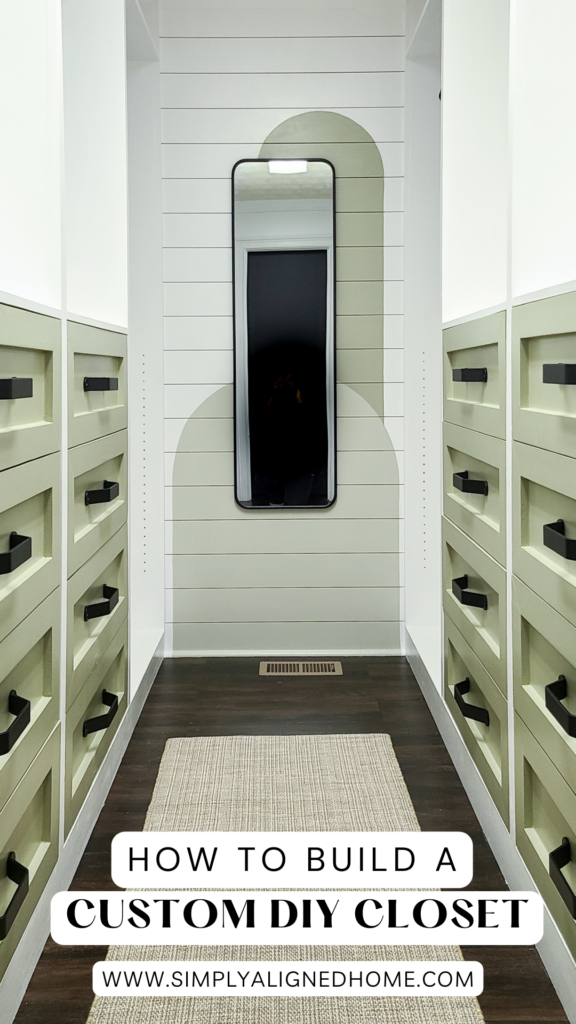
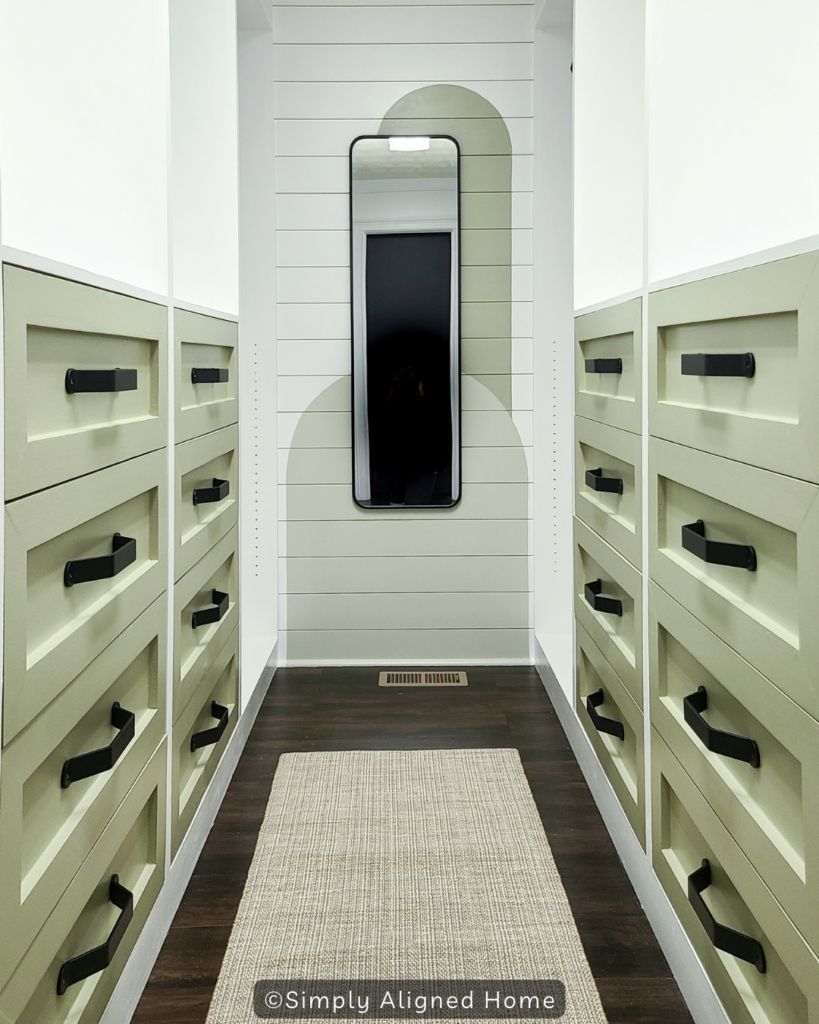
Transform your storage space with this easy-to-follow guide part 2 on creating a custom DIY closet.
This is a part 2 series of how to build a custom closet. If you missed part 1 you can read that here: HOW TO BUILD A CUSTOM DIY CLOSET – PART I. Let’s jump in and finish this closet up!
**This post contains affiliate links to products that I used or recommend. If you purchase something through an affiliate link, I may receive a small percentage of the sale at no extra cost to you. I really appreciate your support!**
Add Trim To Closet Units
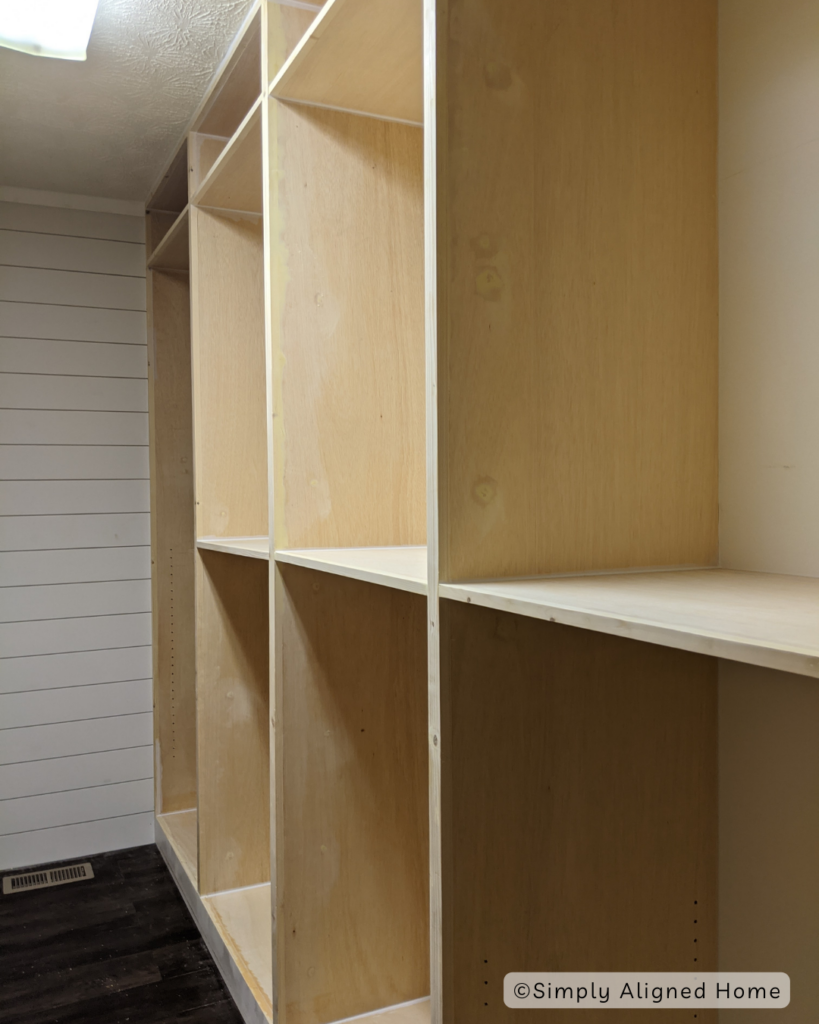
The best way to make a built-in look professional and complete is with trim! I made boxes for the closet from 3/4″ plywood. In order to give the plywood a polished look, I needed to add trim to all of the raw plywood edges.
Here is the first item that I would do differently! For the face frame (trim on the front of the plywood), I made it to the exact width of the plywood that I wanted to cover. Where two boxes met, the width was 1-1/2″. I therefore used a 1×2 to trim the vertical members. The shelves in the middle of the units were just a single piece of plywood, so I ripped a 1×2 in half to match the 3/4″ width. This made for a really rough finish.
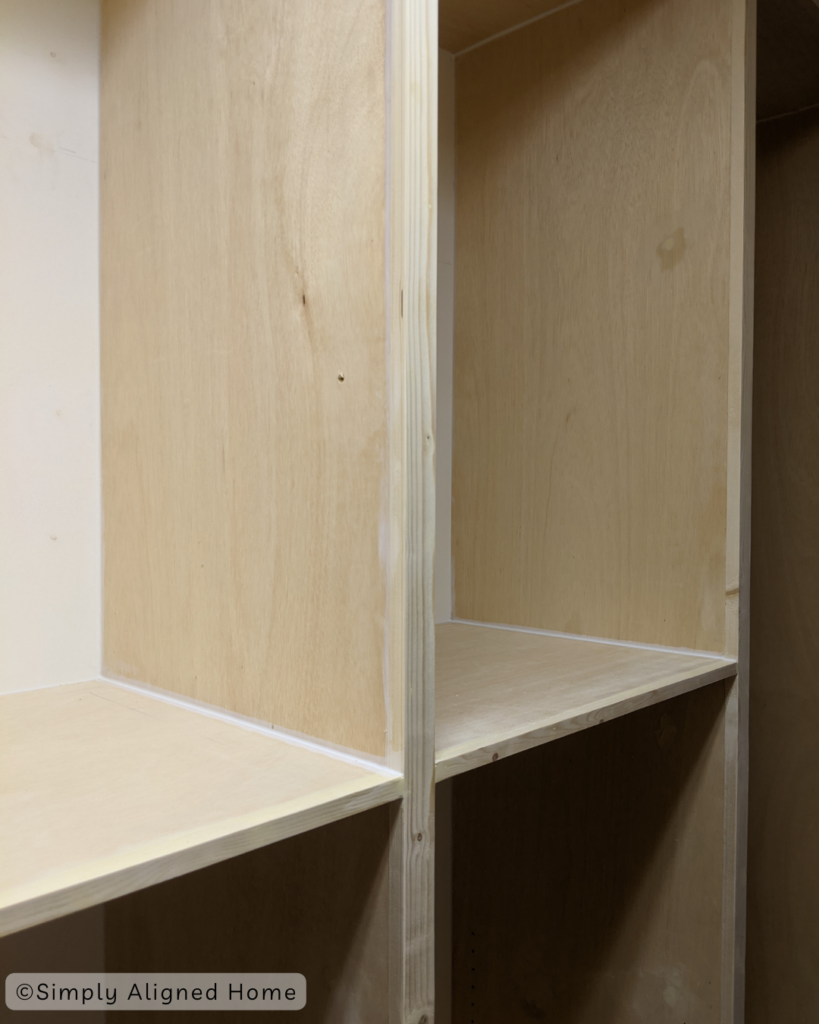
Over the years, I have learned that to achieve the best finish with trim, you have to have a slight overhang. It is hard to achieve a nice finish when you try to perfectly align the trim. For example, for the vertical trim where the width of the unit is 1-1/2″, I should have made the face frame trim 1-3/4″ at a minimum. This would give me an 1/8″ overhang on both sides of the trim and a much cleaner finish.
How To Build Closet Drawers & Install Them
Determine Your Dimensions
Determining your dimensions is a crucial step of building and installing closet drawers! Getting the correct measurements will ensure that the drawers fit perfectly within the allocated space and function correctly.
Start by measuring the interior width, depth, and height of your closet space where you plan to install the drawers. Consider the thickness of the wood you will be using and the clearance needed for drawer slides. Use these measurements to plan the size of each drawer.
For our particular closet, my drawers were 28″ wide and 19″ deep.
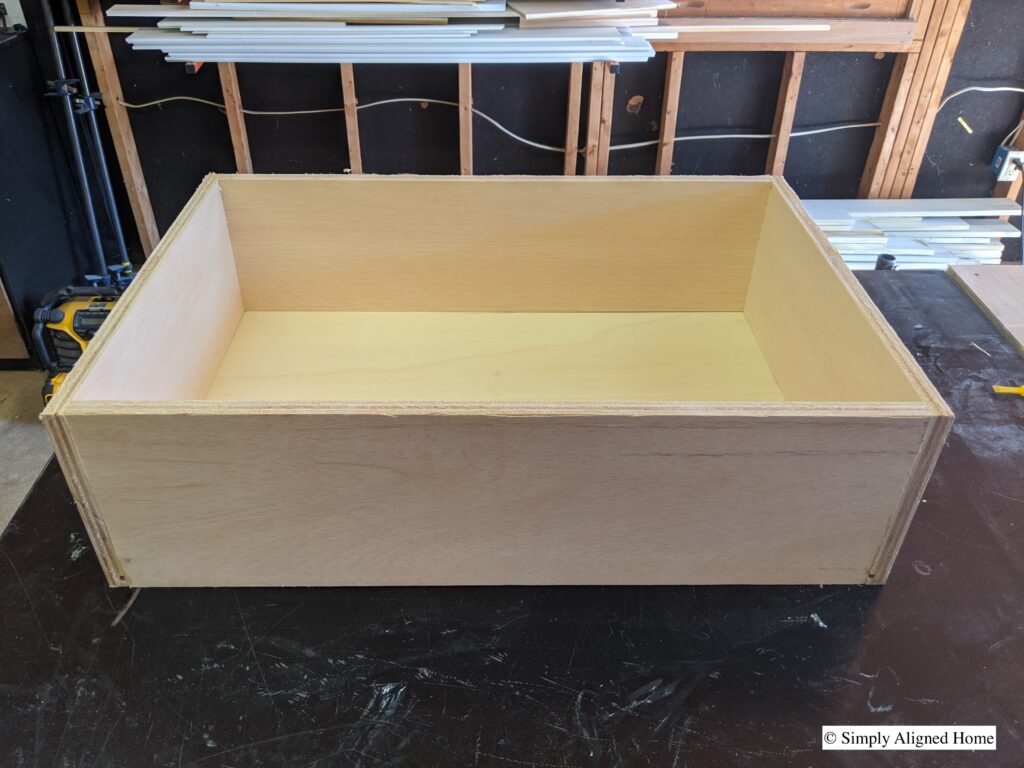
Cut & Assemble Drawer Boxes
Once you’ve determined the dimensions for your closet drawers, the next step is to cut and assemble the drawer boxes. Using your measurements, cut the front, back, sides, and bottom panels for each drawer from your plywood.
I used 3/4″ plywood for all four sides and 1/4″ plywood for the bottom of the drawer.
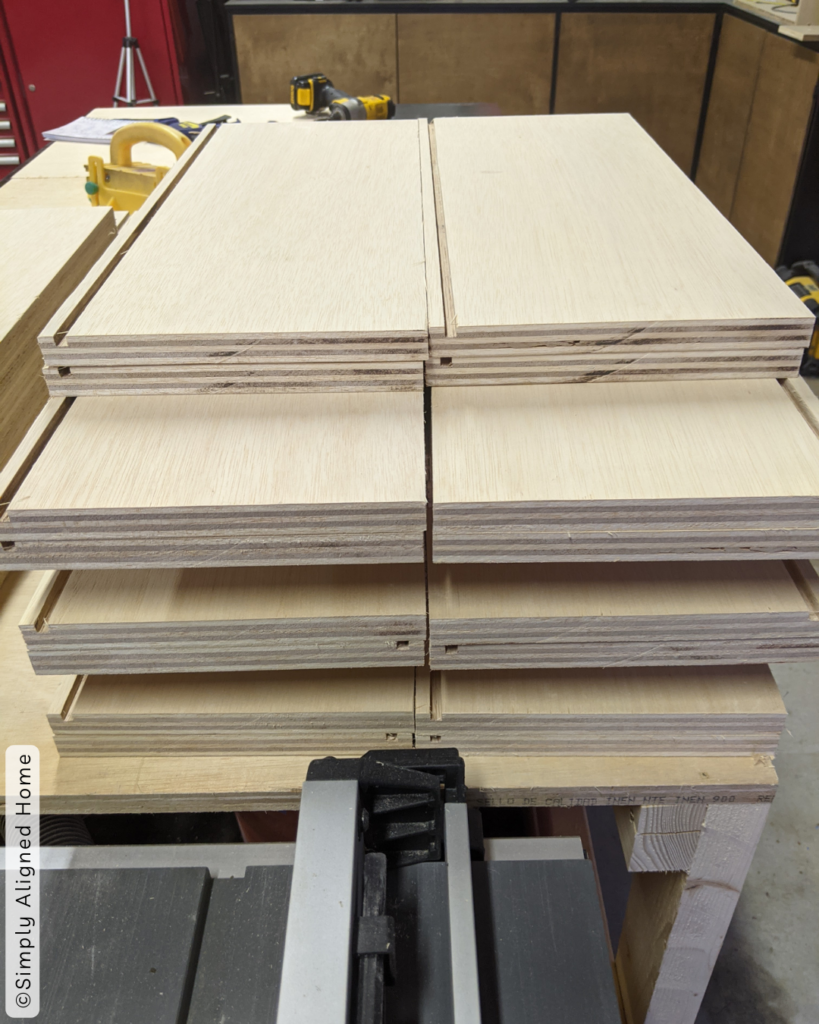
Don’t forget to take your four sides and use your table saw to cut a small groove along the bottom of the board. This groove will make it easy to slide the 1/4 plywood board into the sides so you can assemble it! I cut mine somewhere between 1/4″ and 3/8″ deep.
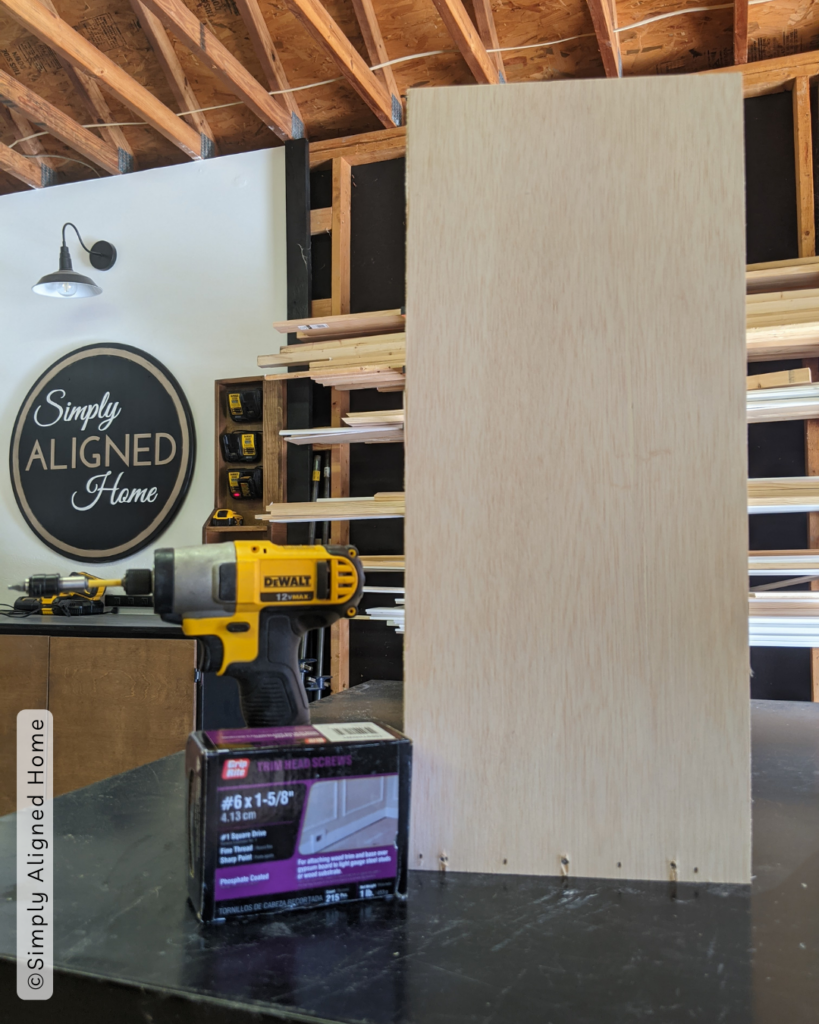
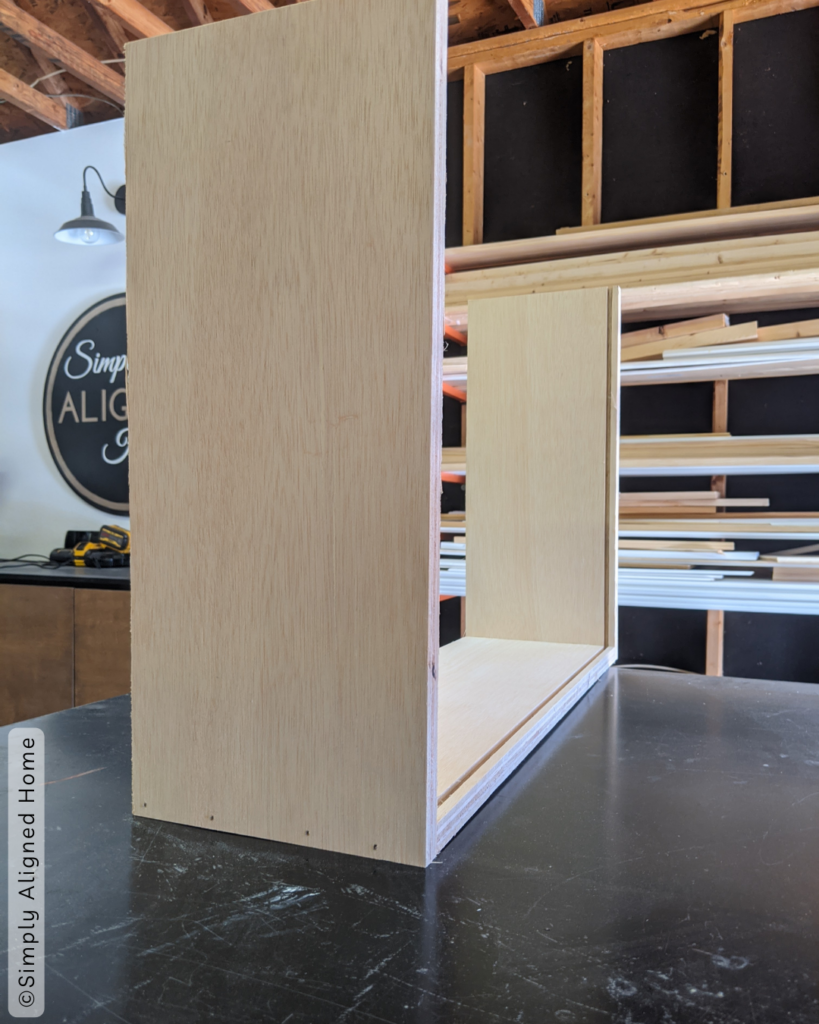
When assembling, start by joining the sides and back panel with finish screws and wood glue. Then apply wood glue along the groove you cut in the 3/4″ panels and insert your 1/4″ bottom panel. Add your last piece and secure with wood glue and finish screws!
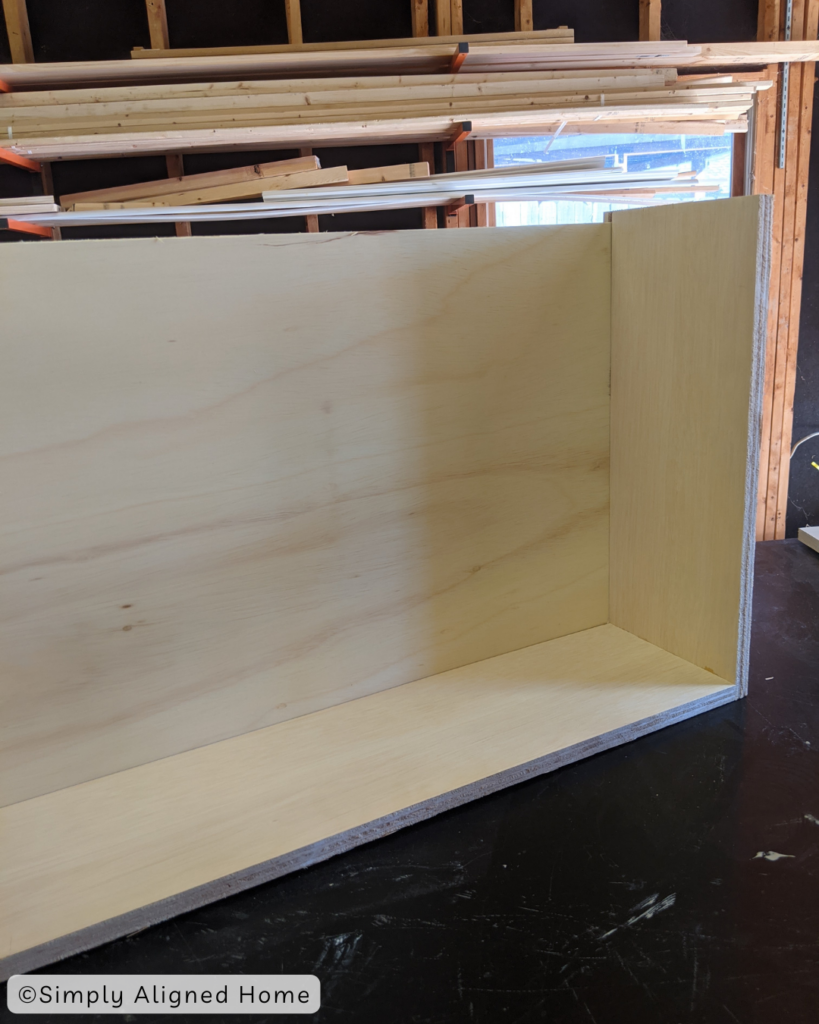
Lastly, make sure the drawer box is square and the corners are tight for a sturdy and functional drawer.
Add Drawer Slides & Install Drawers
After the drawer boxes are assembled, the next step involves adding drawer slides and installing the drawers into your closet. Carefully measure and mark the positions for the slides on both the drawer boxes and the closet interior, ensuring they are level and aligned.
Attach the slides to the drawers and the closet structure, following the manufacturer’s instructions for placement and screwing them securely. When installing the drawers, make sure they slide in and out smoothly and adjust the slides if necessary for a perfect fit.
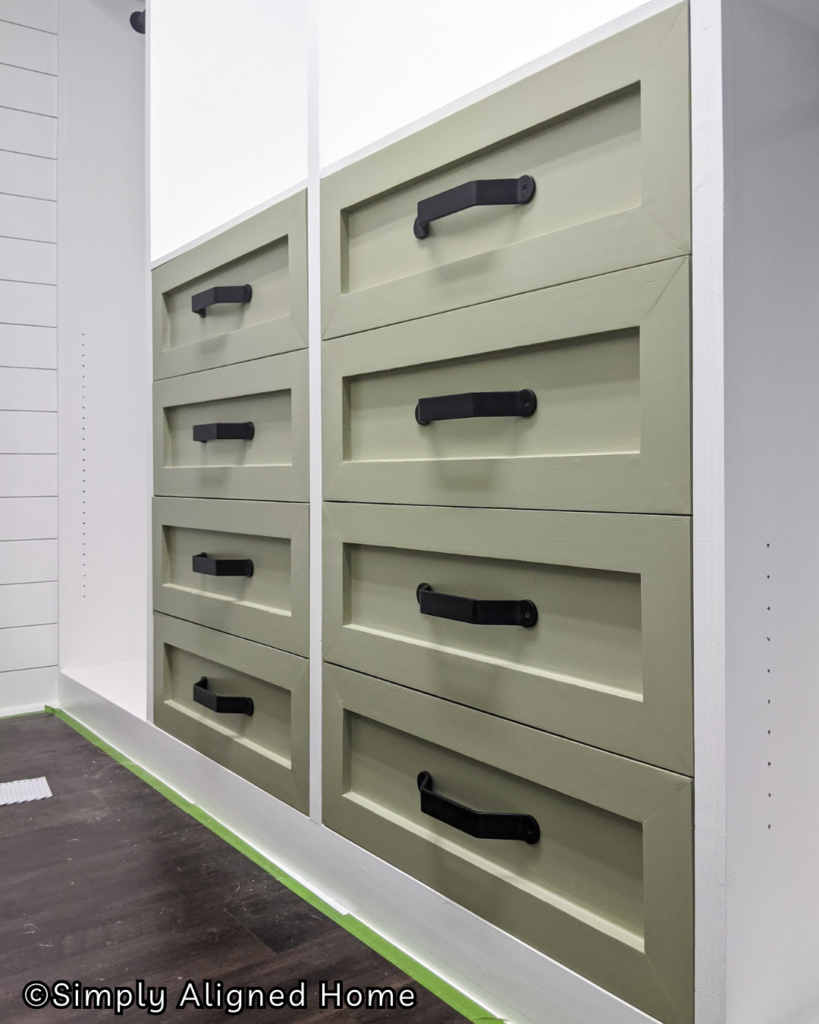
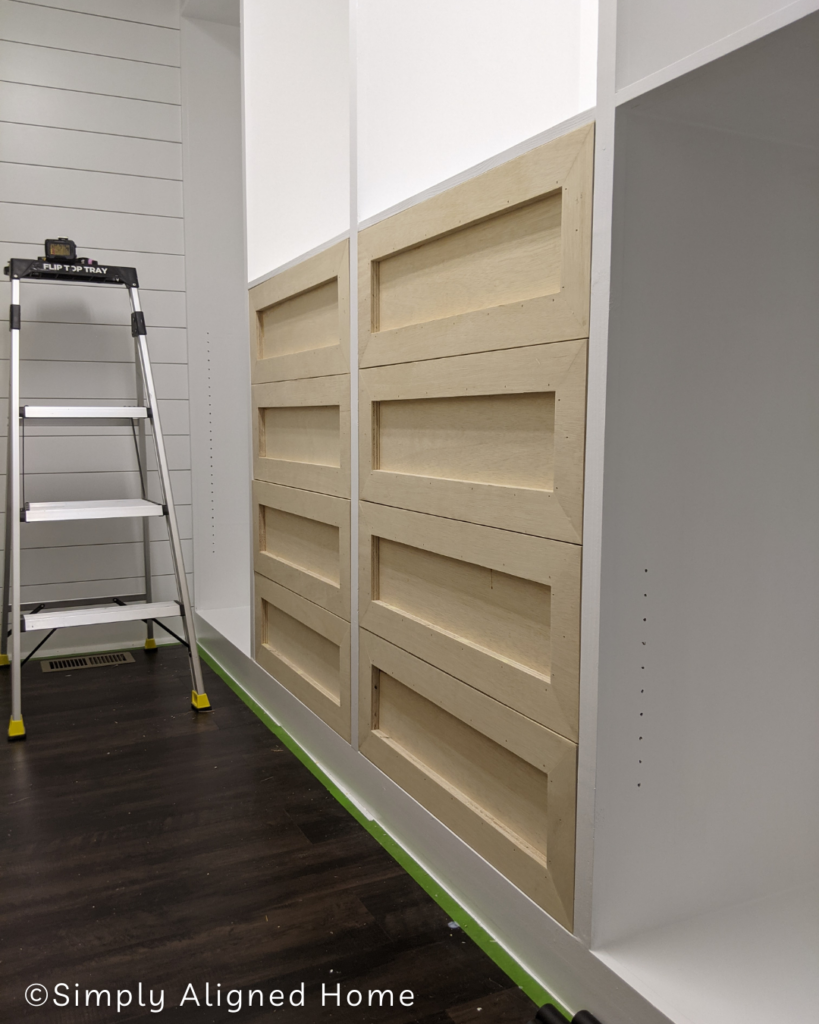
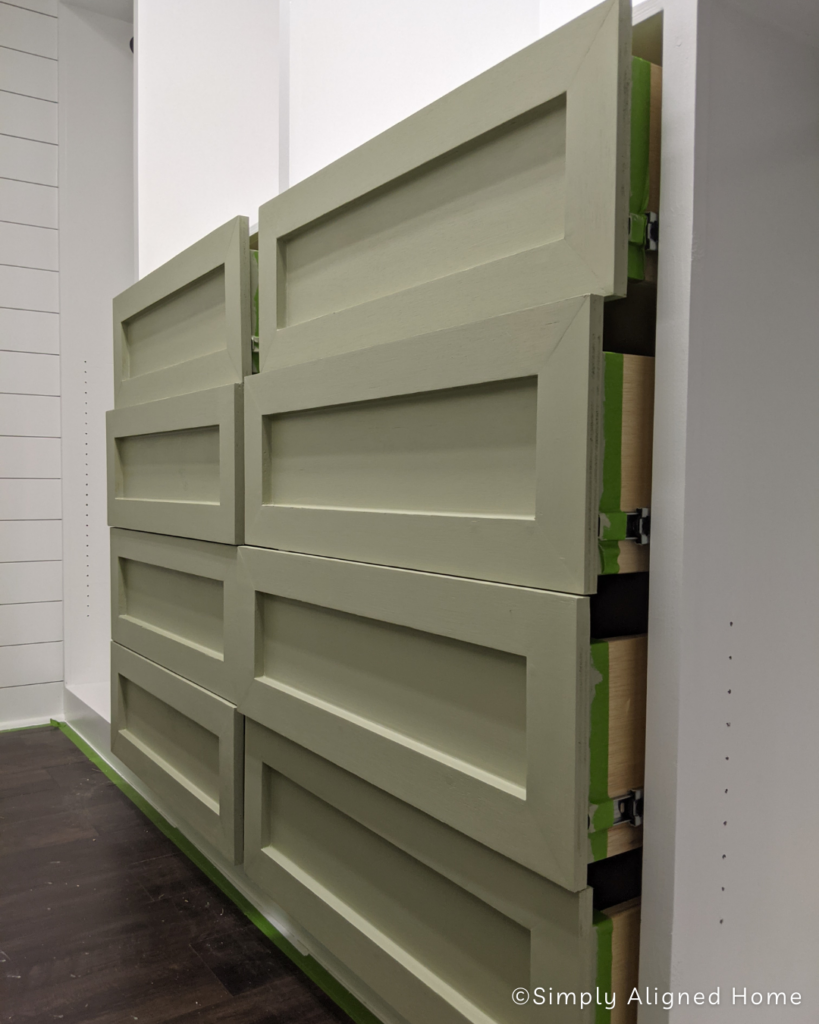
How To Make Drawer Faces & Install Them
There are so many different style drawer faces. I made shaker style drawer faces for my closet out of plywood. While the drawer faces turned out fine, this is another area where I could have significantly improved the quality of my build. I will share how to easily make shaker drawer faces.
Cut & Assemble Drawer Faces
Cutting and assembling the drawer faces is an essential step in giving your closet drawers a finished and professional look. Start by selecting a material that complements your closet’s style of the room.
Measure the front of each drawer box and add the desired overlap to all sides to determine the size of each drawer face. The overlap is how much your wood will hang over the edge of the drawer box. This overlap will cover the gaps between the drawer box and the closet frame, creating a seamless appearance. I like to allow for a 1/8″ space between the drawer faces and the closet frame.
Cut the drawer faces to size, ensuring each piece is precisely measured and cut for a perfect fit. Then sand the edges and surfaces for a smooth finish. To assemble your drawer faces you will use wood glue, finish nails and corner clamps to hold them together.
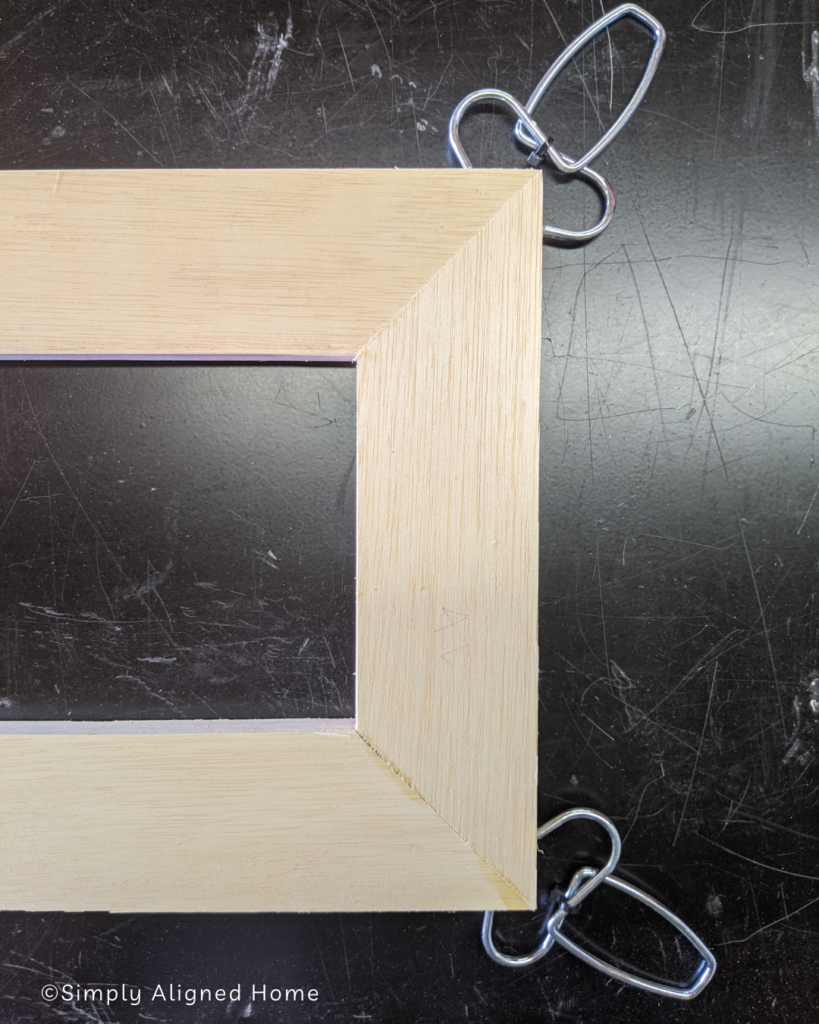
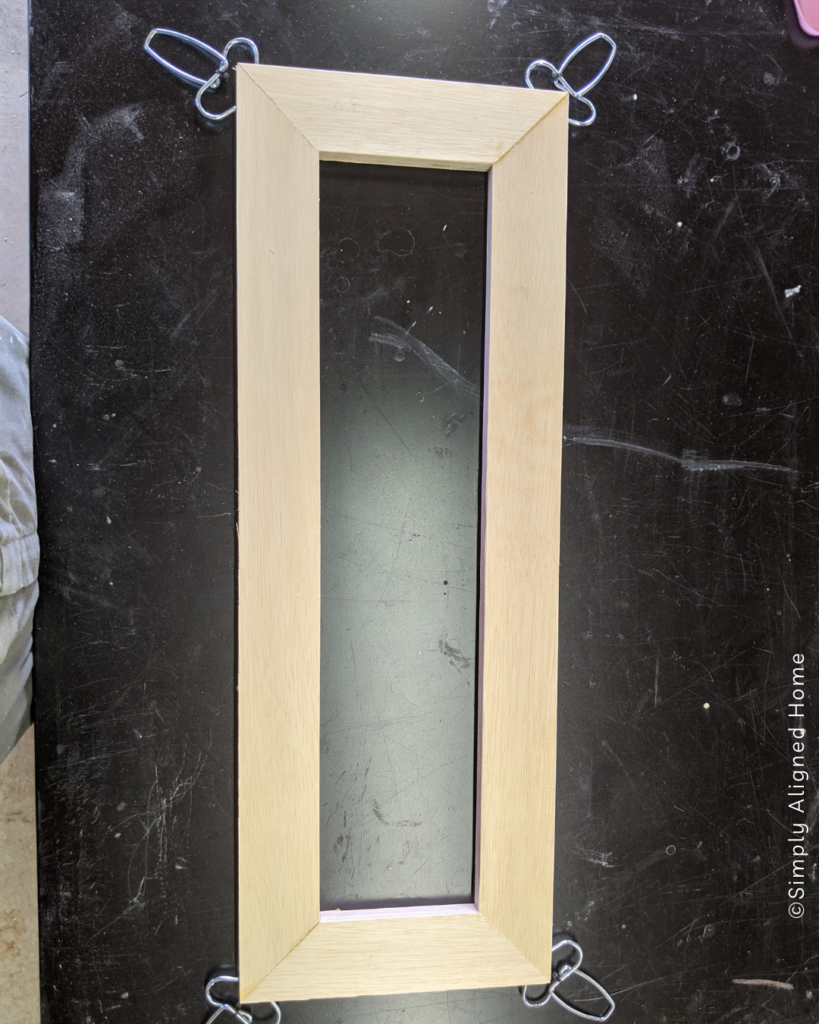
Once, they are together take some wood filler and apply it to all the seams and sand when dry.
Install Drawer Faces
Installing drawer faces is the final touch in creating custom closet drawers! Begin by lining up the drawer face to the front of the assembled drawer box, ensuring an even gap around all sides. Once satisfied with the alignment, take your brad nailer and secure the drawer face to your drawer box.
Lastly, apply wood filler to all the nail holes and sand when dried. When it’s smooth and free of any dust you can apply a primer and then your first coat of paint!
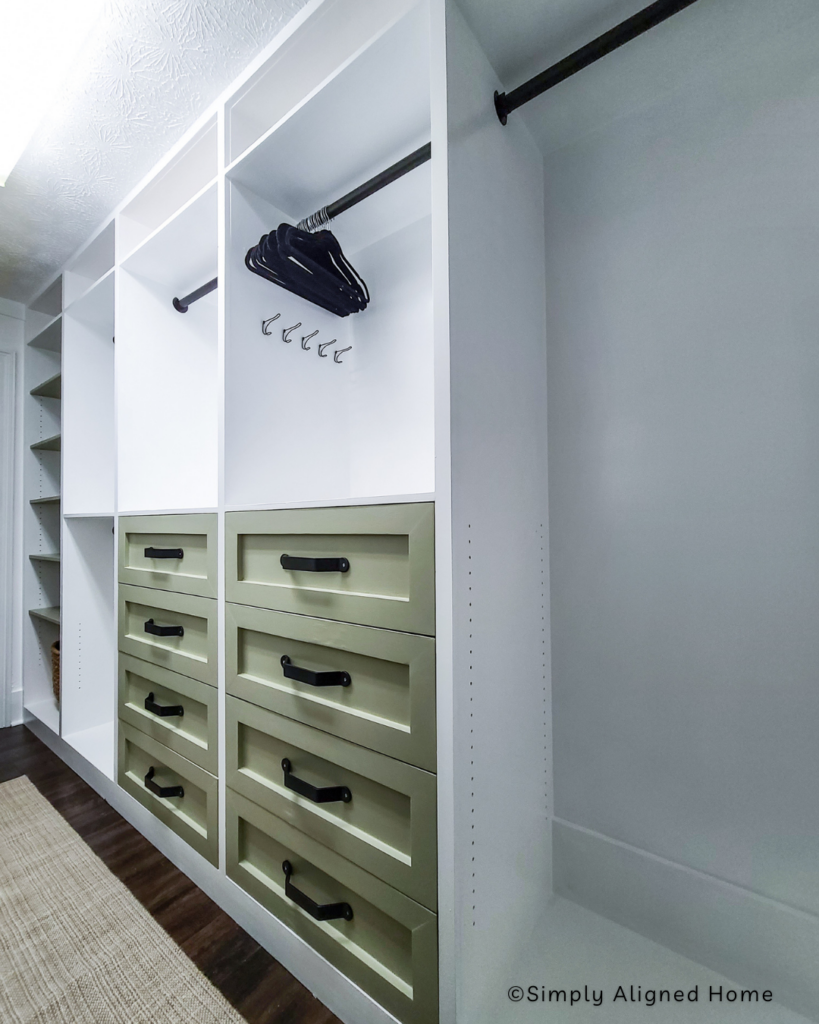
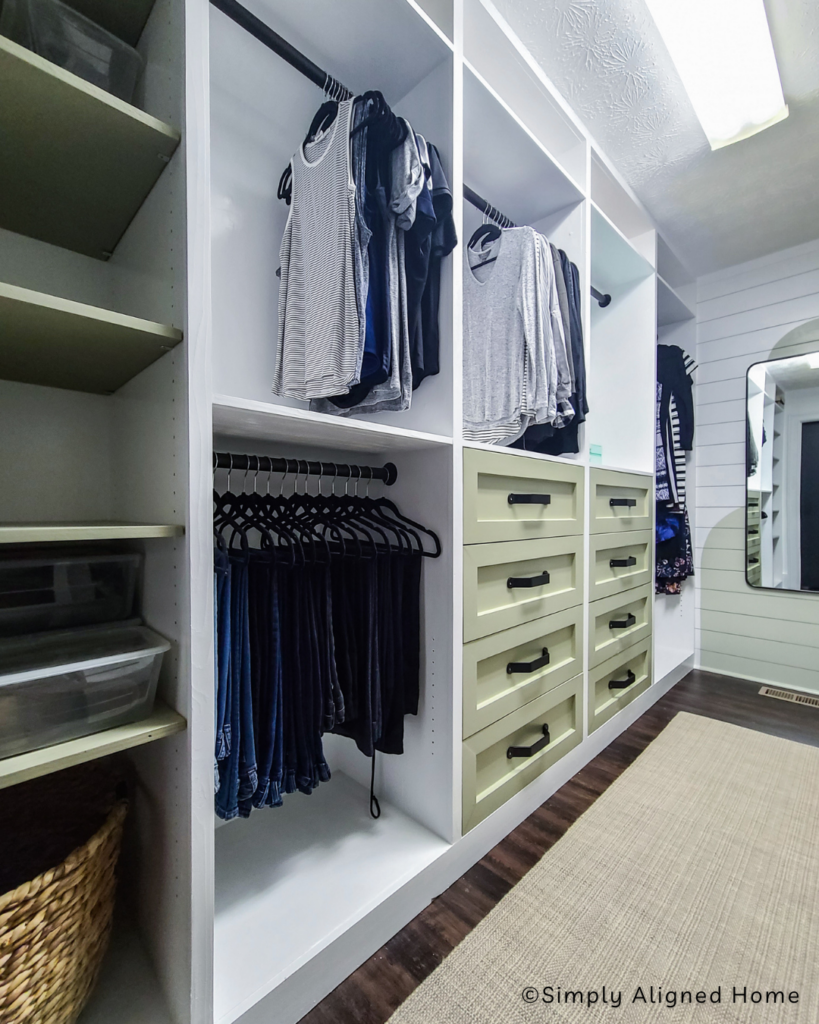
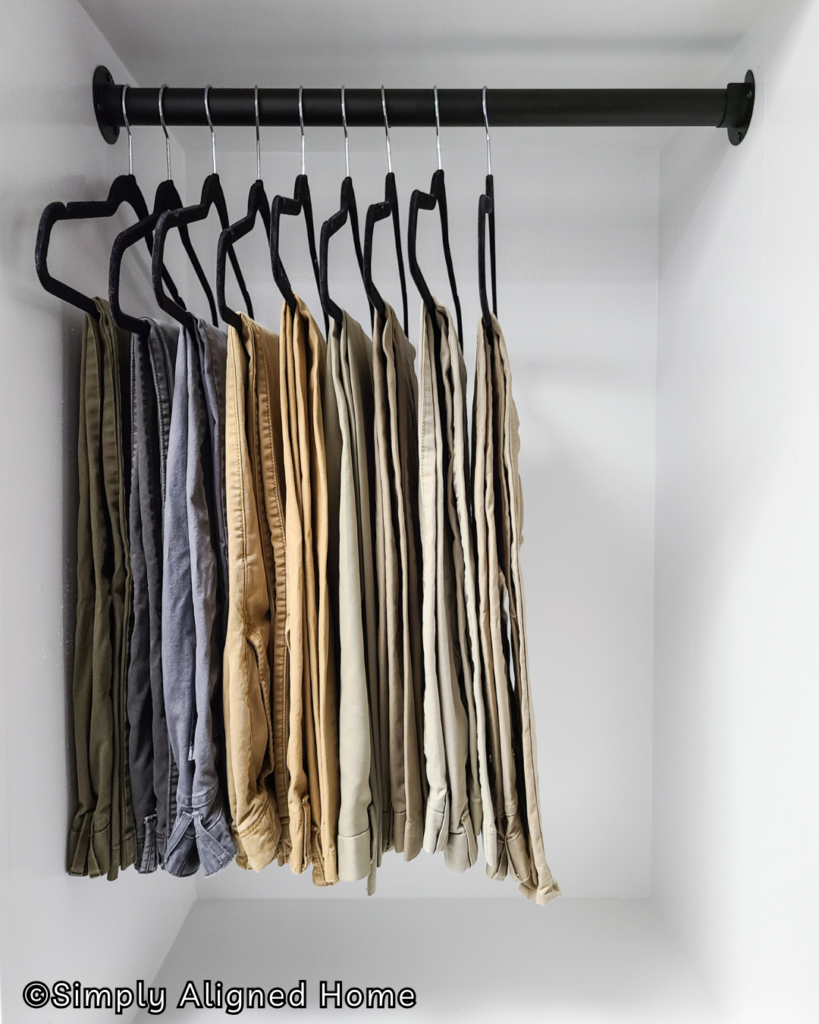
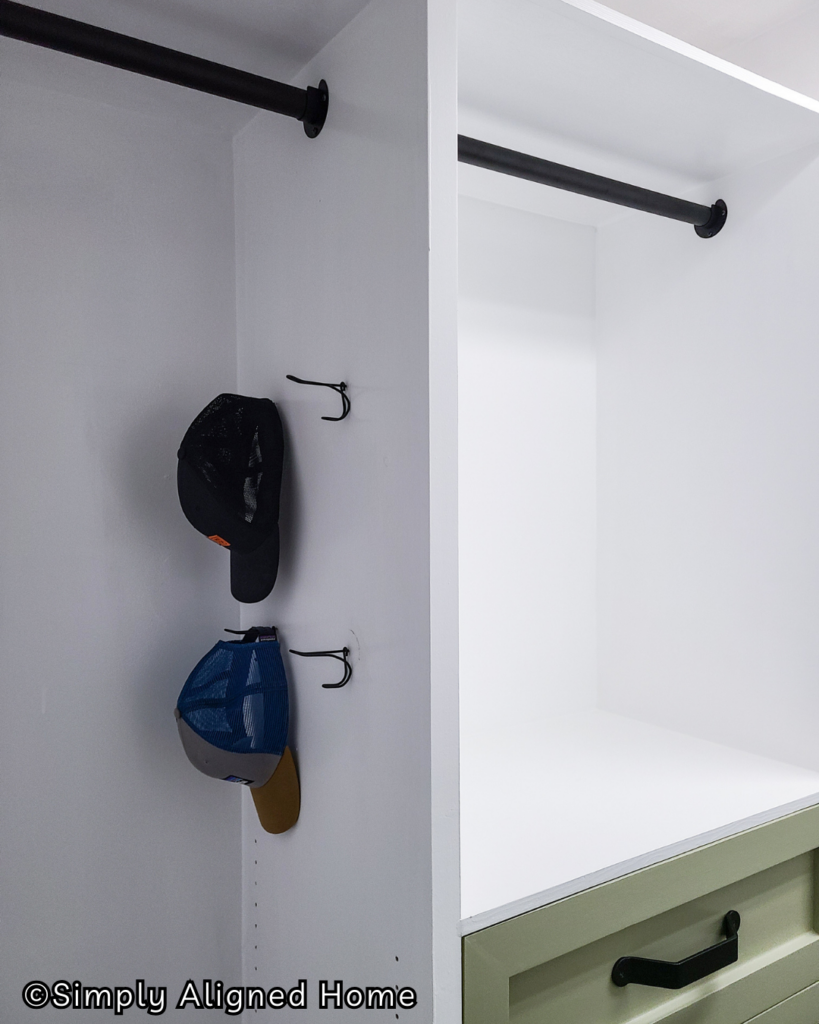
Install Hanging Rods
For the hanging rods I used National Hardware rods and heavy duty hangers. The rod came in a 8 FT length and I had my husband trim them down to size for each bay our closet.
Now you should have a fully custom DIY closet that you built all yourself! Building and installing your own closet is a rewarding project. Send me a picture over on Instagram when your finished, I want to see!


**Note: I am not a professional and do not claim to be an expert. Please be sure to always read instructions for all tools and products. Safety is very important and should be your top priority. Wear necessary protection when using tools (eye wear, hearing protection, gloves, etc.) and dust masks when sanding or cutting. Simply Aligned Home is not responsible for any injury or damage. All of my designs are not professionally designed and are for private use only.**
Materials Used
- Brad Nails
- Wood Glue
- Wood Filler
- 3/4″ Plywood
- 1/4″ Plywood
- 1×2’s
- National Hardware Rods
- National Hardware Heavy Duty Hangers
- Drawer Slides
- Sandpaper
- Construction Screws
- Pulls
Tools Used
- Miter Saw
- Table Saw
- Brad Nailer
- Corner Clamps
- Orbital Sander
- Impact Driver and Drill
- Measuring Tape