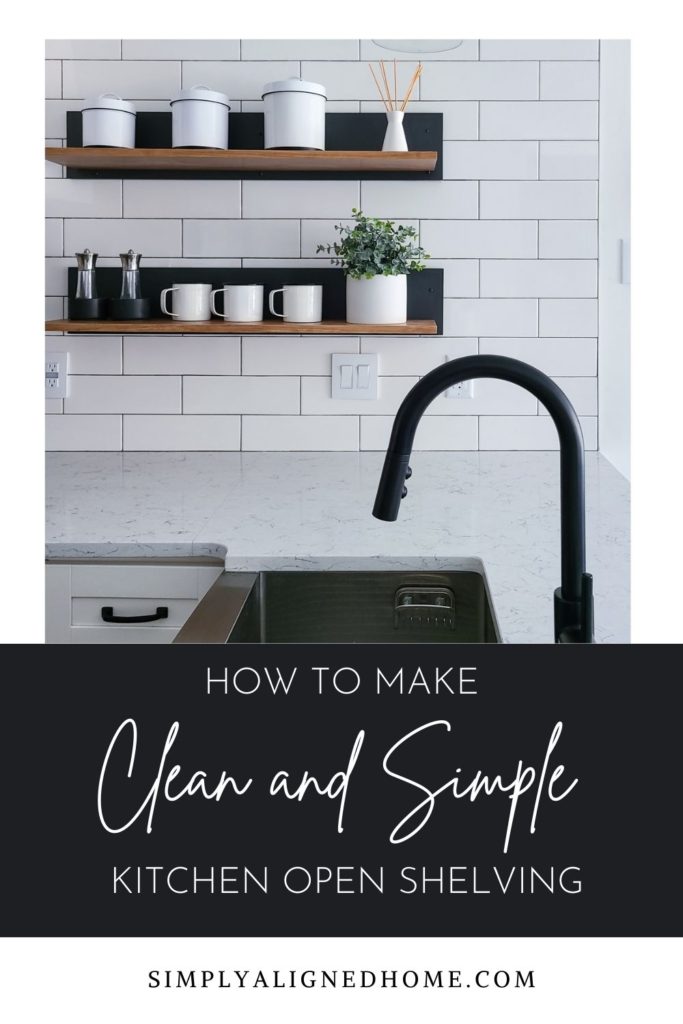
Let me start by saying I am not a huge fan of open shelving. I feel like it significantly takes away from storage and it tends to look very cluttered. Unfortunately, a complete kitchen renovation is not in the cards, so I had to come up with a unique solution to replace the existing floating shelves. I’m going to share how I made clean and simple open shelving to transform the look of our kitchen!
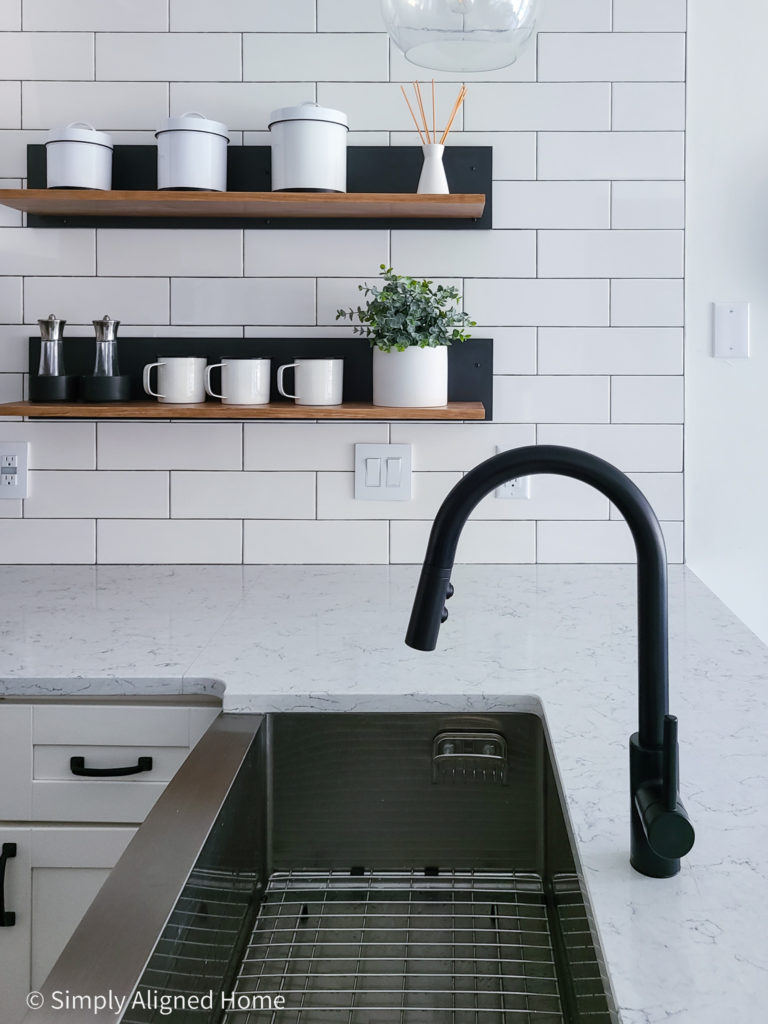
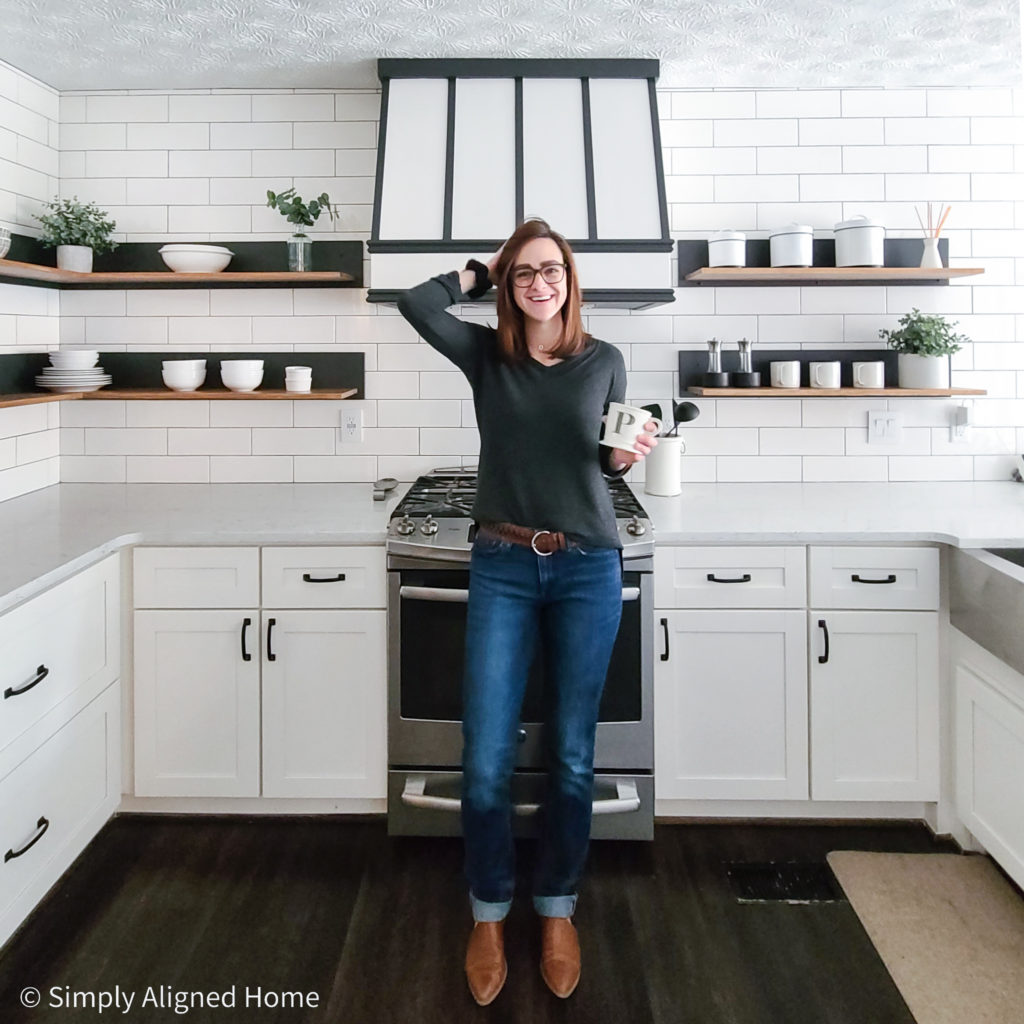
The main wall in our kitchen is tiled from the countertop to the ceiling. The previous owners installed a total of six floating shelves on the tile wall. They opted to use metal L brackets and reclaimed wood for the shelving. They secured the brackets to the wall by drilling through the tile and either securing them to the studs or using anchors.
I personally did not love the L brackets that were used for the installation. I wanted a cleaner look, but was limited in my options based on the location of the holes drilled in the tile (I was not about to replace any of the tiles). My goal was to make shelves without brackets…cue the clean and simple kitchen floating shelves!
Determine Shelving Sizes
The size of my shelves were dictated by the location of the existing shelving holes. I needed to use the existing holes to support the shelves, so this determined the length of the shelves as well as the height of the back panel.
I ultimately decided to used 1×8 select pine for the back of the shelves. I chose to use 1×10 select pine for the shelf itself because it was close to the depth of our existing shelves.
Cut the Wood
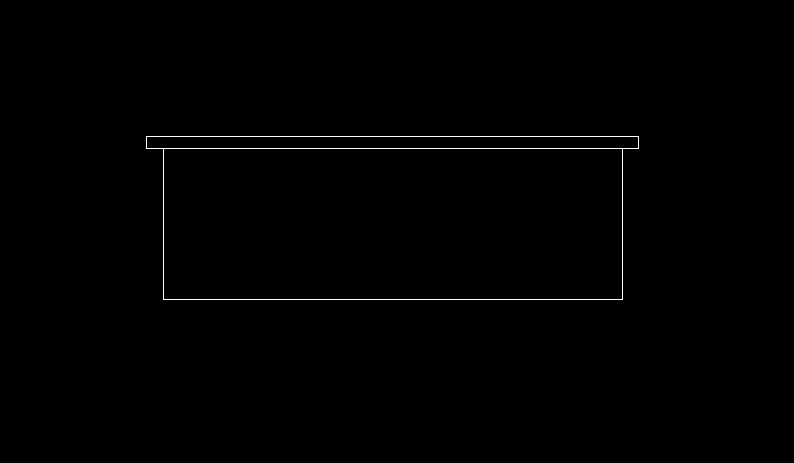
I wanted to the shelf to be inset from the back panel 1″ on each end, so I cut the shelf 2″ shorter than the back panel for the straight shelves. I thought it might be easier to understand the dimensions if I provided a drawing of the shelves…I’m a very visual person.
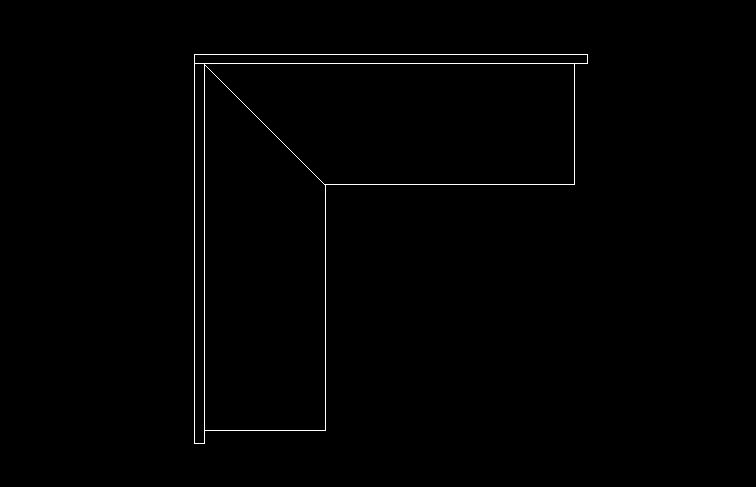
Design of the Straight Shelves
This is a drawing of the straight shelves looking from the top down. I first determined the size of the back panels. I cut the shelves 2″ shorter than the back panels. This allowed me to inset the shelf 1″ on each side.
Design of Corner Shelves
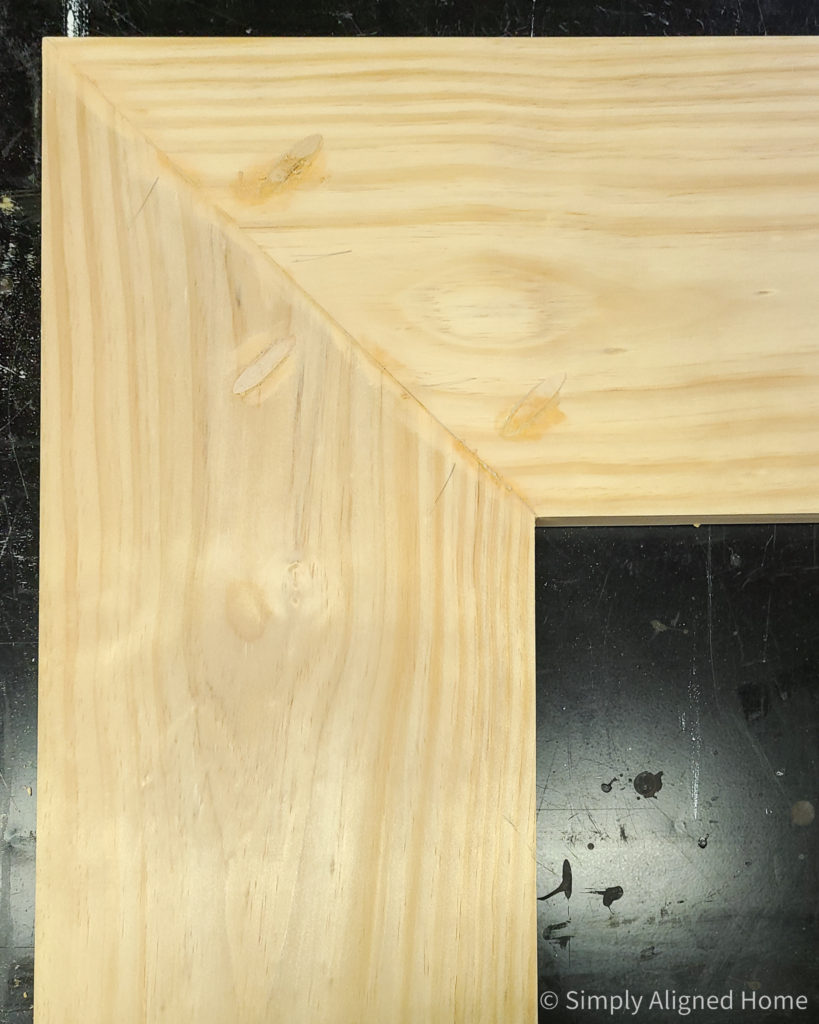
The design of the corner shelves was obviously a little more complex than the straight shelves. I started by cutting the back pieces of the corner shelves. I attached the two pieces together with a butt joint.
I then determined the length of the shelf pieces. These were inset 1″ from each end and were joined together with a 45 degree cut.
Assemble Corner Shelves
Before I attached the shelf pieces to the back panels, I assembled the corner shelves. I did this using wood glue and pocket screws. For the lower shelf, I put the pocket screw holes on the underside of the shelf. For the upper shelf, I made the pocket screw holes on the top of the shelf. This would make the pocket screws a little less visible when standing at the counter.
Once the shelves were assembled, I plugged the pocket screw holes.
Secure the Shelves to the Back Panels
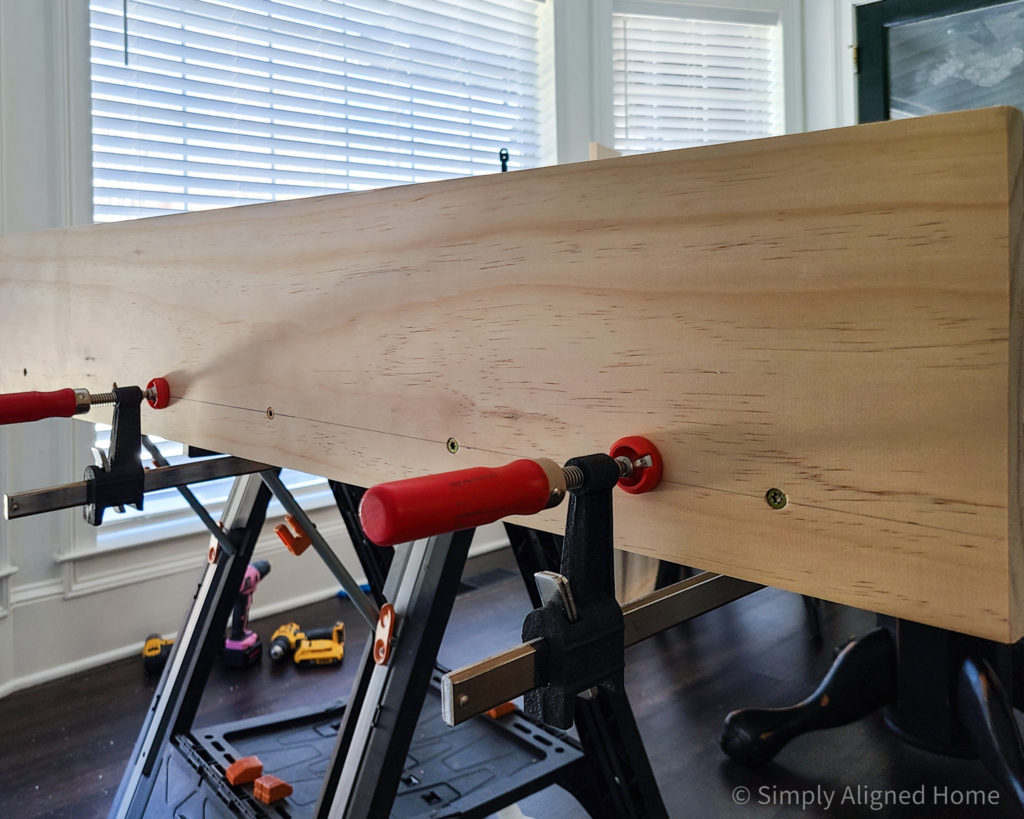
The final step of building the floating shelves was to assemble the shelf piece to the back panel. I did this using wood glue and 2-1/2″ long construction screws.
I applied wood glue to the shelf and clamped it to the back panel. I made sure that there was a 1″ space on each end as well as across the bottom. If applied properly and left to dry for the proper amount of time, the wood glue joint will be stronger than the wood itself.

Once it was all clamped together, I drilled pilot holes through the back panel and into the shelf. I then screwed the 2-1/2″ construction screw into the shelf. The construction screws are mainly used to keep the wood secure while the wood glue dries.
Hang the Floating Shelves
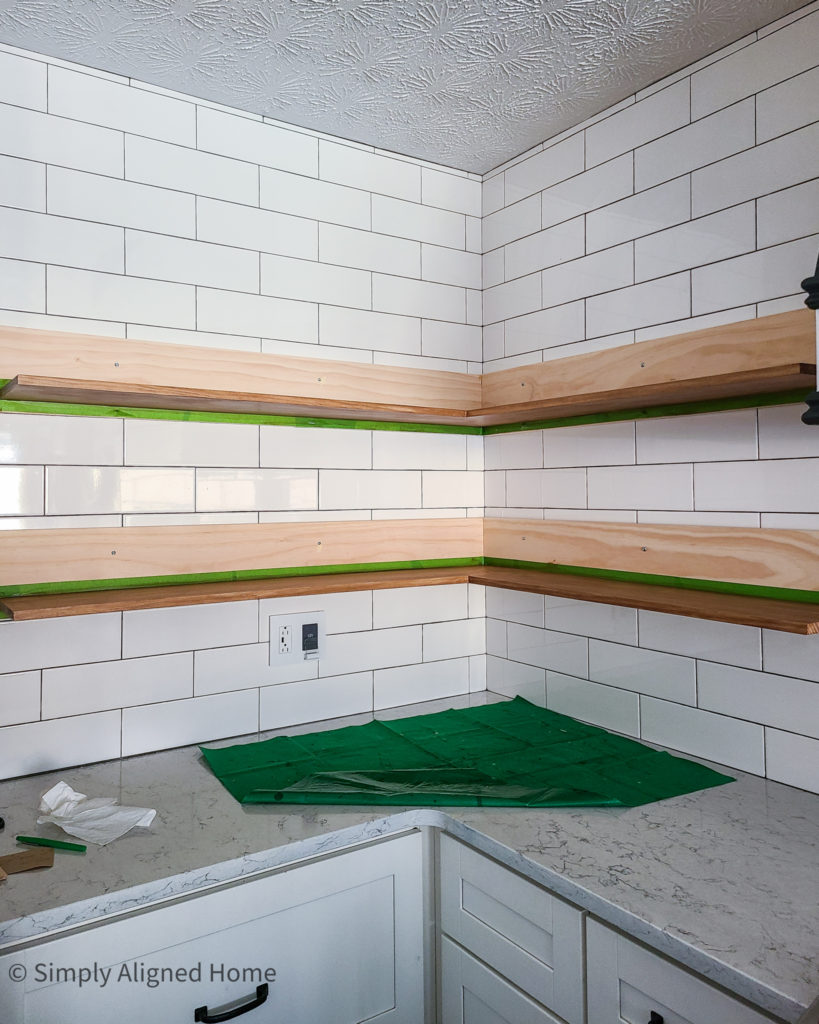
I can be impatient when working on projects and really wanted to see how the shelving looked, so I installed it before I finished the shelves. It would probably be best to stain/paint the shelves before installing them..
Part of the reason why I wanted to replace the existing floating shelves was to get rid of the mounting brackets. I decided to just screw straight through the back panel to hang them. I located where the existing holes were in the tile and drilled hole through the back panel to match.
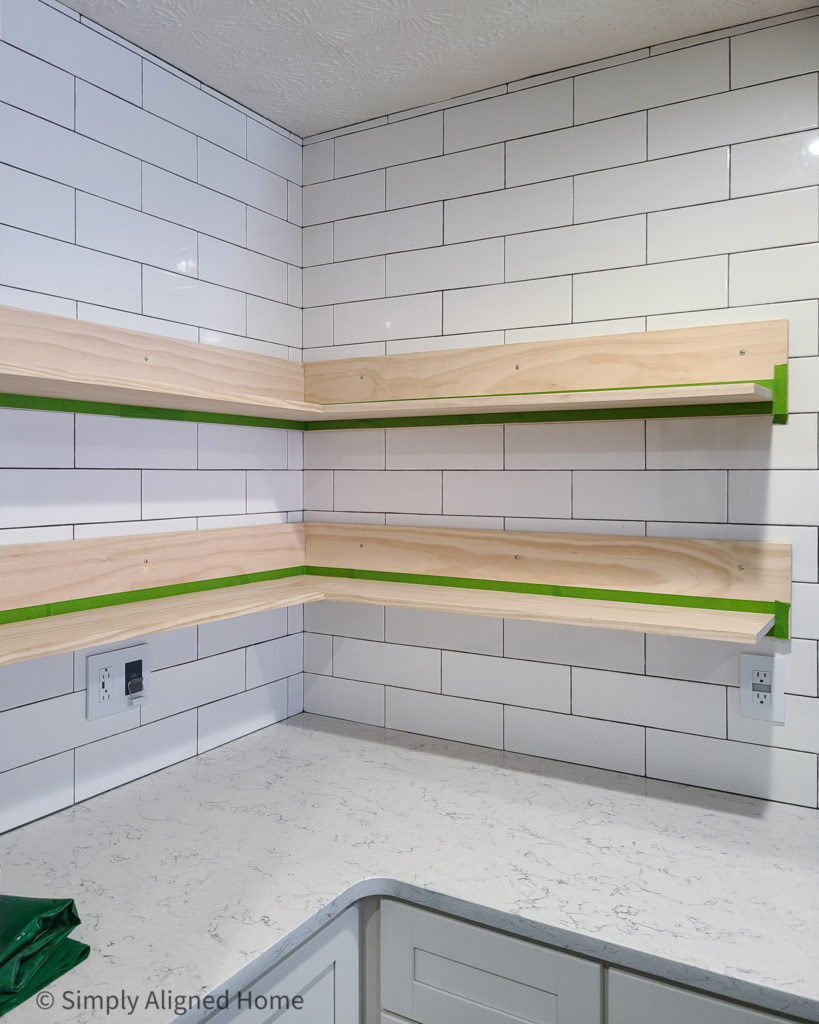
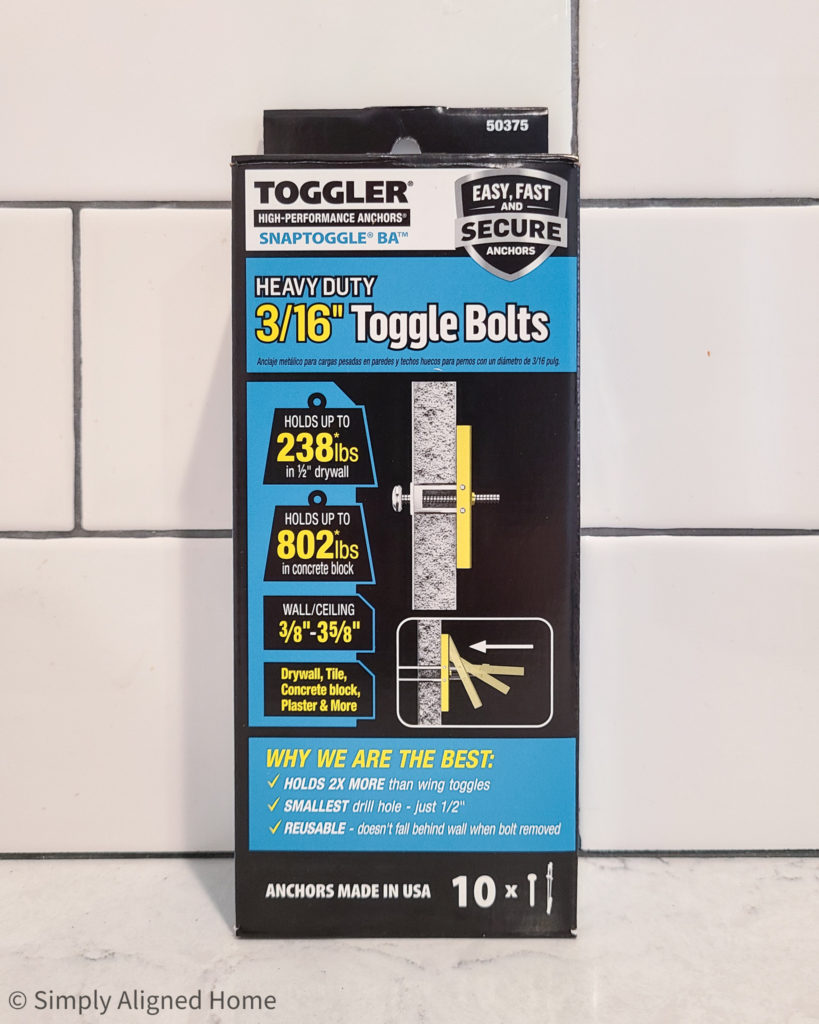
While it is best practice to secure shelving to the studs, several of the existing holes were not near studs. I screwed straight into the studs where I could and used toggle bolts for the other holes.
Stain and seal the Shelves
I liked the look of a stain/paint contrast, so I decided to stain the shelves and paint the back panels. My favorite stain right now is a water based stain in Early American. I applied two coats of stain before sealing them with a water based polyurethane.
Paint the Back Panels
Early American is my favorite stain right now…and Sherwin-Williams Iron Ore is my favorite paint. So it only made sense to use Iron Ore!
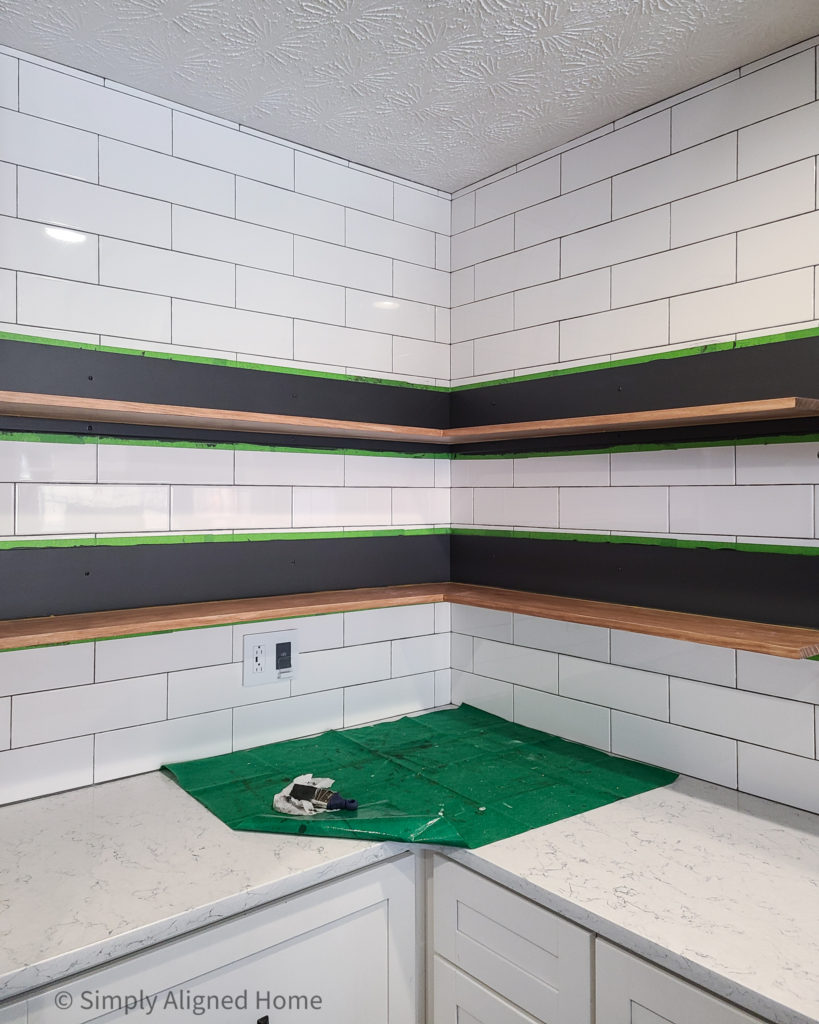
I applied two coats of Sherwin-Williams Iron Ore in a satin finish to the back panels of all the shelves. I also painted over the screw heads so that they blended in with the back panels.
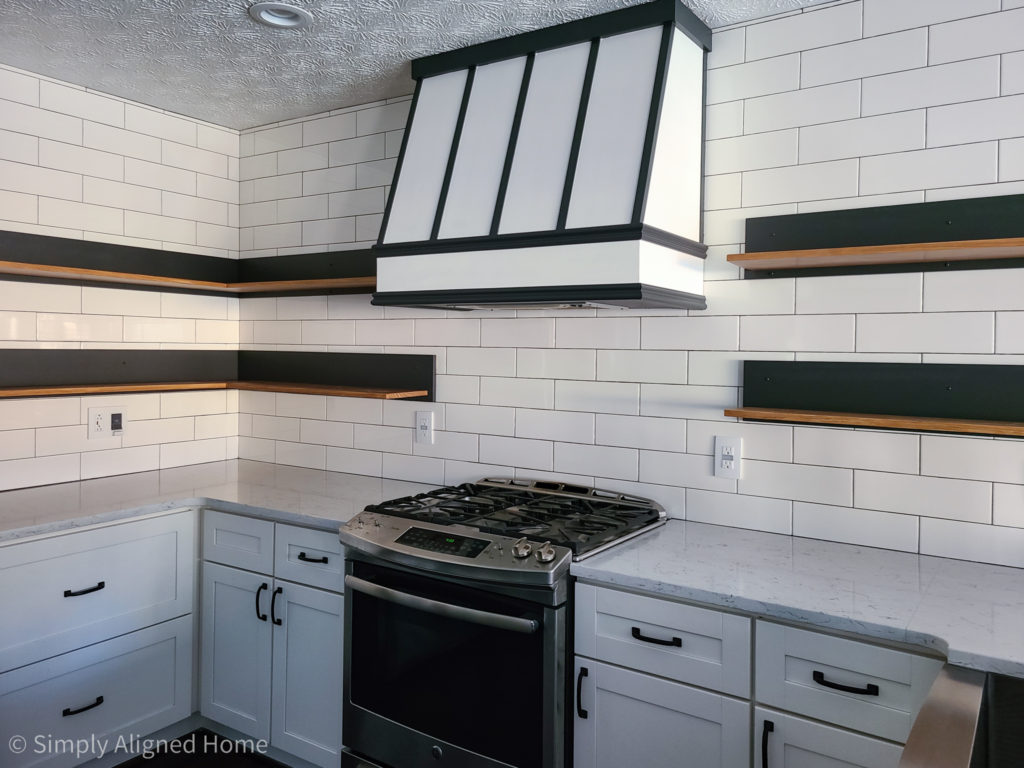
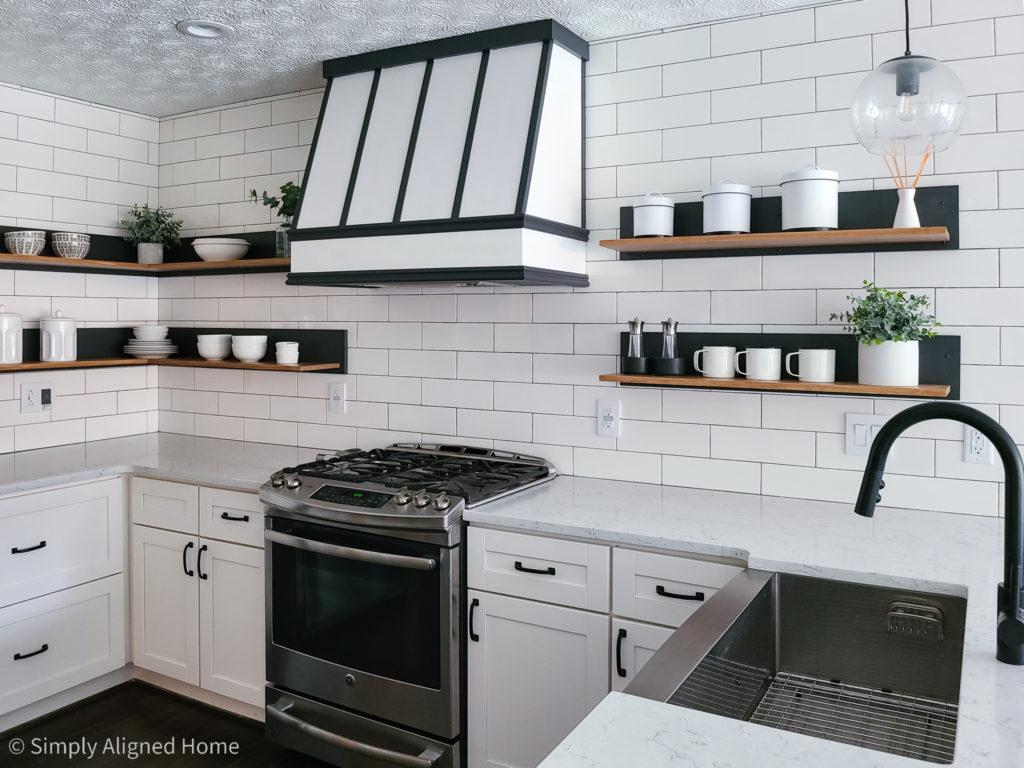
These shelves really elevated the look of my kitchen! The old shelves felt cheap and rustic…the new ones are modern and sleek!
If you’re looking for a way to replace your existing floating shelves with exposed mounting hardware…this is a great option!

**Note: I am not a professional and do not claim to be an expert. Please be sure to always read instructions for all tools and products. Safety is very important and should be your top priority. Wear necessary protection when using tools (eye wear, hearing protection, gloves, etc.) and dust masks when sanding or cutting. Simply Aligned Home is not responsible for any injury or damage. All of my designs are not professionally designed and are for private use only.**