This post is sponsored by Woodgrain, but all views and opinions shared in this post are my own.
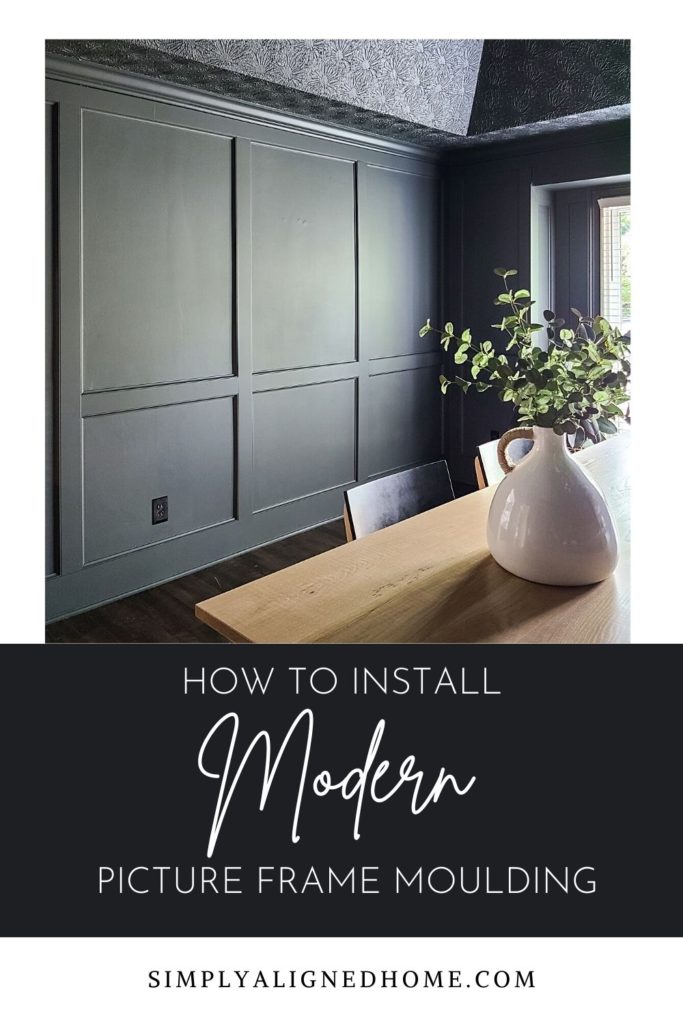
Sometimes a fresh coat of paint just isn’t enough to bring out the beauty of a space. I recently renovated my office/dining room and painted the walls and ceiling Iron Ore. While it really changed the look of the room, I wanted it to feel more elegant. Bring on the modern picture frame moulding!
This was a very easy project that had a big impact! Here’s how I installed my modern picture frame moulding.
Design
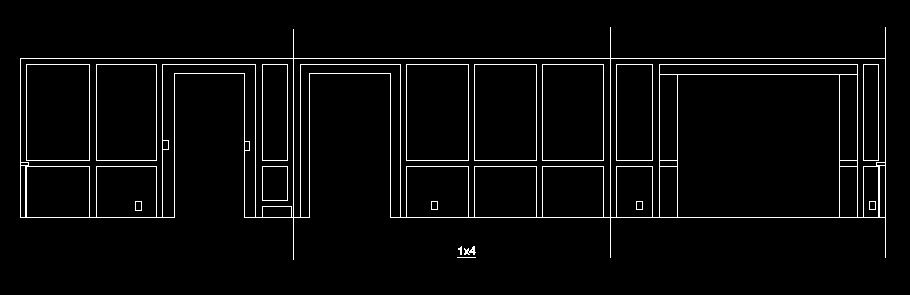
Planning and preparation can make a huge difference in any renovation project! If you come up with a plan and design before you even begin working on a project, it can make a project go so much smoother. I started by drawing out the three walls where I would be installing the trim. When I’m designing any accent wall, I like to avoid any outlets or switches, if possible. I make sure to include all of these on my initial drawing.

Before I worked on the design, I selected the materials for the moulding. I decided to use both 1×4 and Cove Mould from the Woodgrain Finished Elegance collection. I want a clean and modern design, which is why I selected the Cove Mould.
Let me just say that this is the first time I’ve used trim from the Woodgrain Finished Elegance collection and I am so impressed! The trim is coated (not painted) on all sides and is supposed to be more durable. If you do want to keep your trim white, you don’t even have to paint it! I don’t think I’ve ever worked with a nicer trim!
Once I selected my trim, I was able to lay it all out in my drawing. I tested a few different trim thicknesses in my drawing, which is why this one is labeled 1×4. This enabled me to visualize my overall layout and select the trim that I liked the best!
Accent wall design is a service that I currently offer. Please feel free to reach out if you need help with a design!
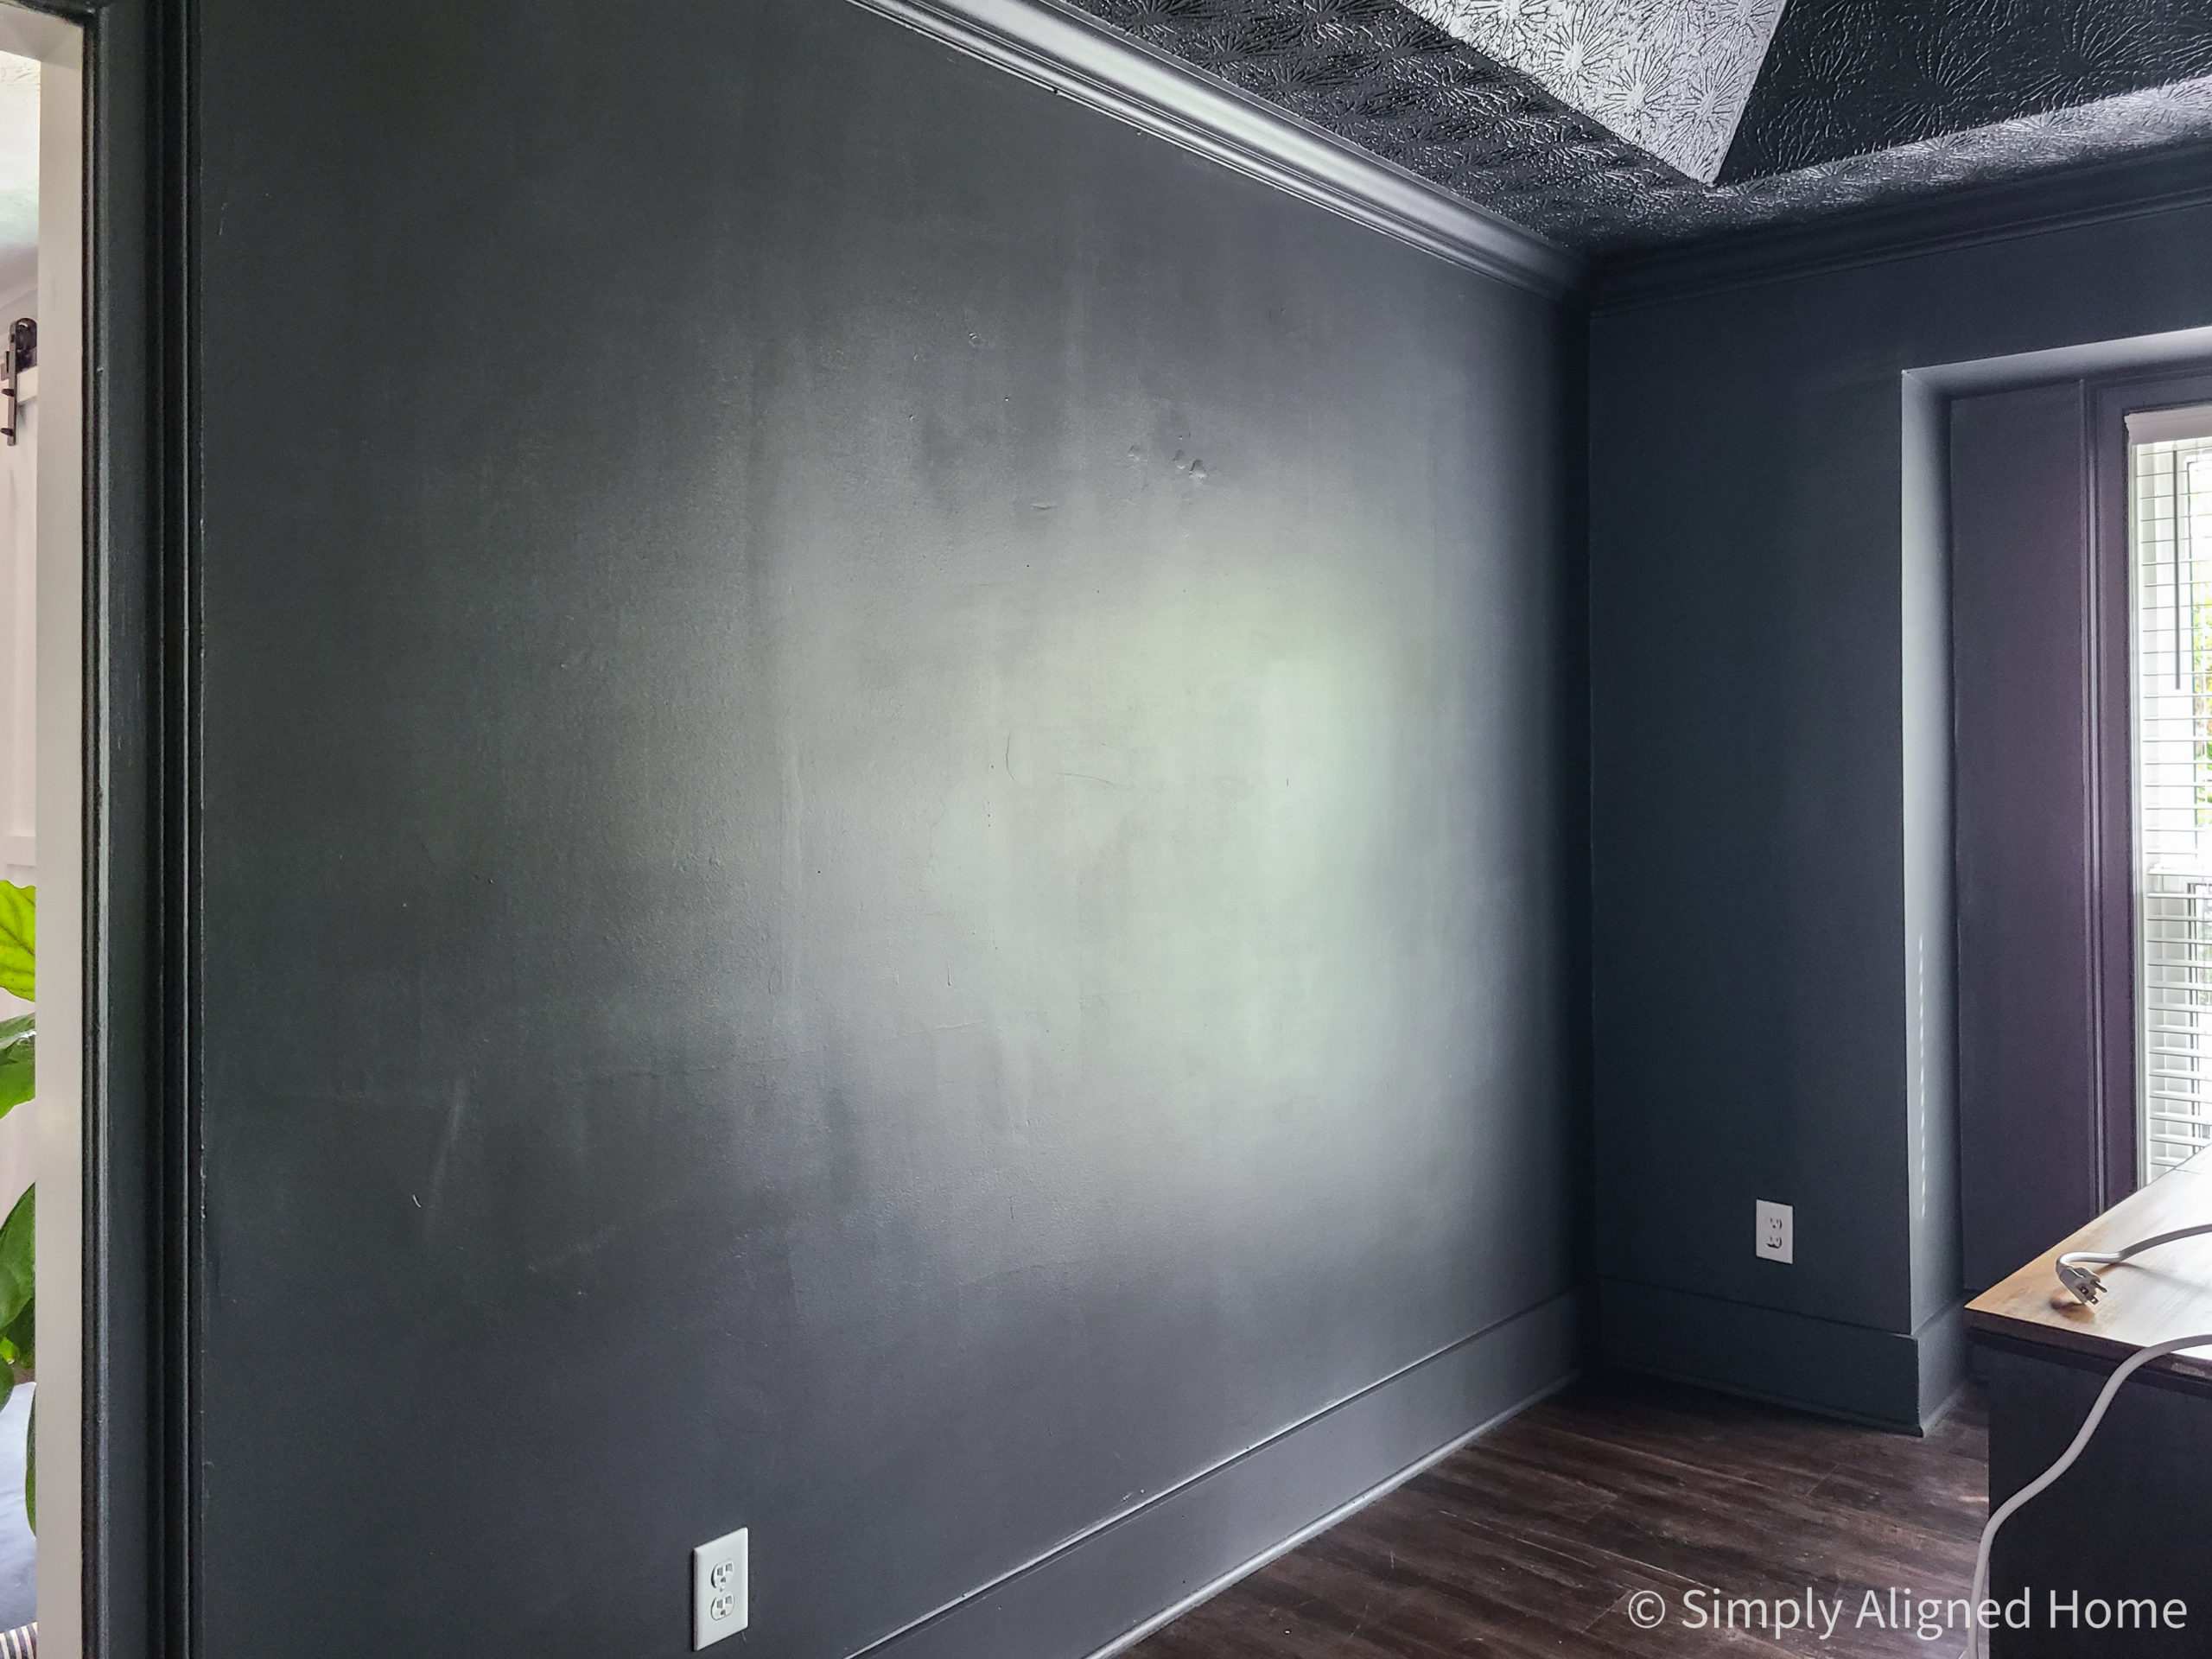
Paint the Wall
I personally like to begin any accent wall with a fresh coat of paint. If you decide in the future that you want to remove the moulding, it’s easiest to repaint the wall if you don’t have white stripes on a black wall from where the trim was installed. I did two coats of Iron Ore, although one would have been sufficient.
Install the 1×4 Trim
You may have seen picture frame moulding installed without the 1×4 trim. Some people choose to just install the decorative trim of the picture frame moulding. The 1×4 trim makes it feel more substantial and professional, in my opinion.
I started by installing the top 1×4 piece. I chose to leave the crown moulding in place for a few reasons. One, it’s original to the house and is a really nice wood trim. I know that if I try to remove it, I will most likely damage it. Two, I wanted to leave it in place in the off chance that I might want to remove this trim in the future. Three, it looks just fine with the crown moulding in place and the 1×4 butted up to it.
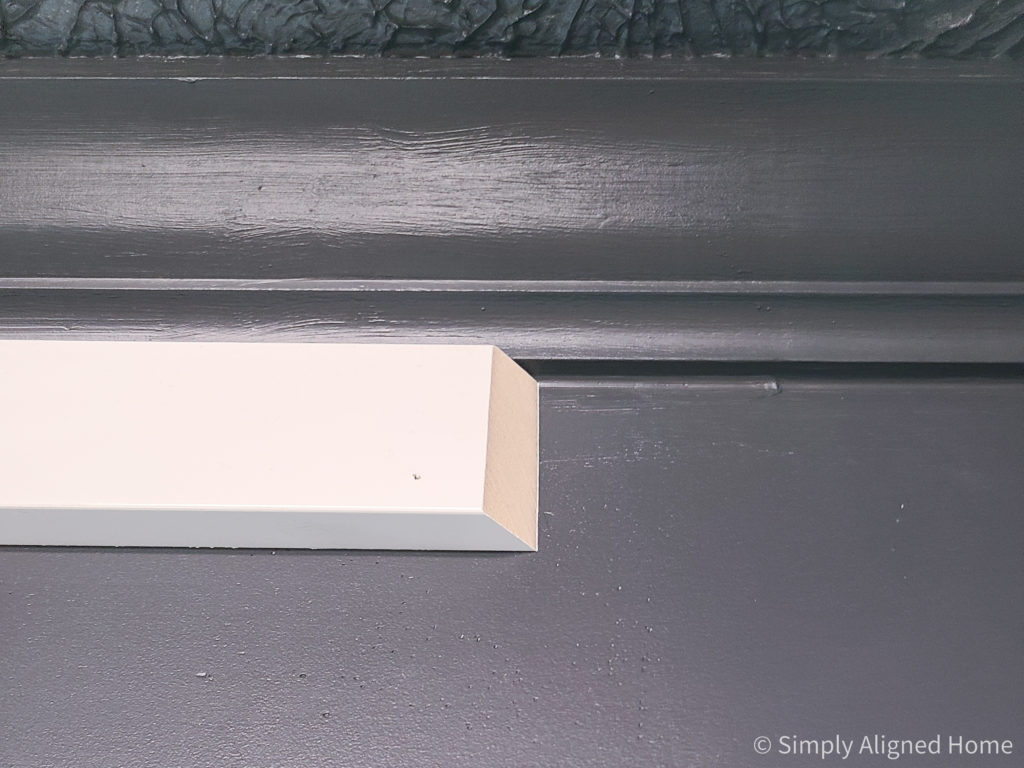
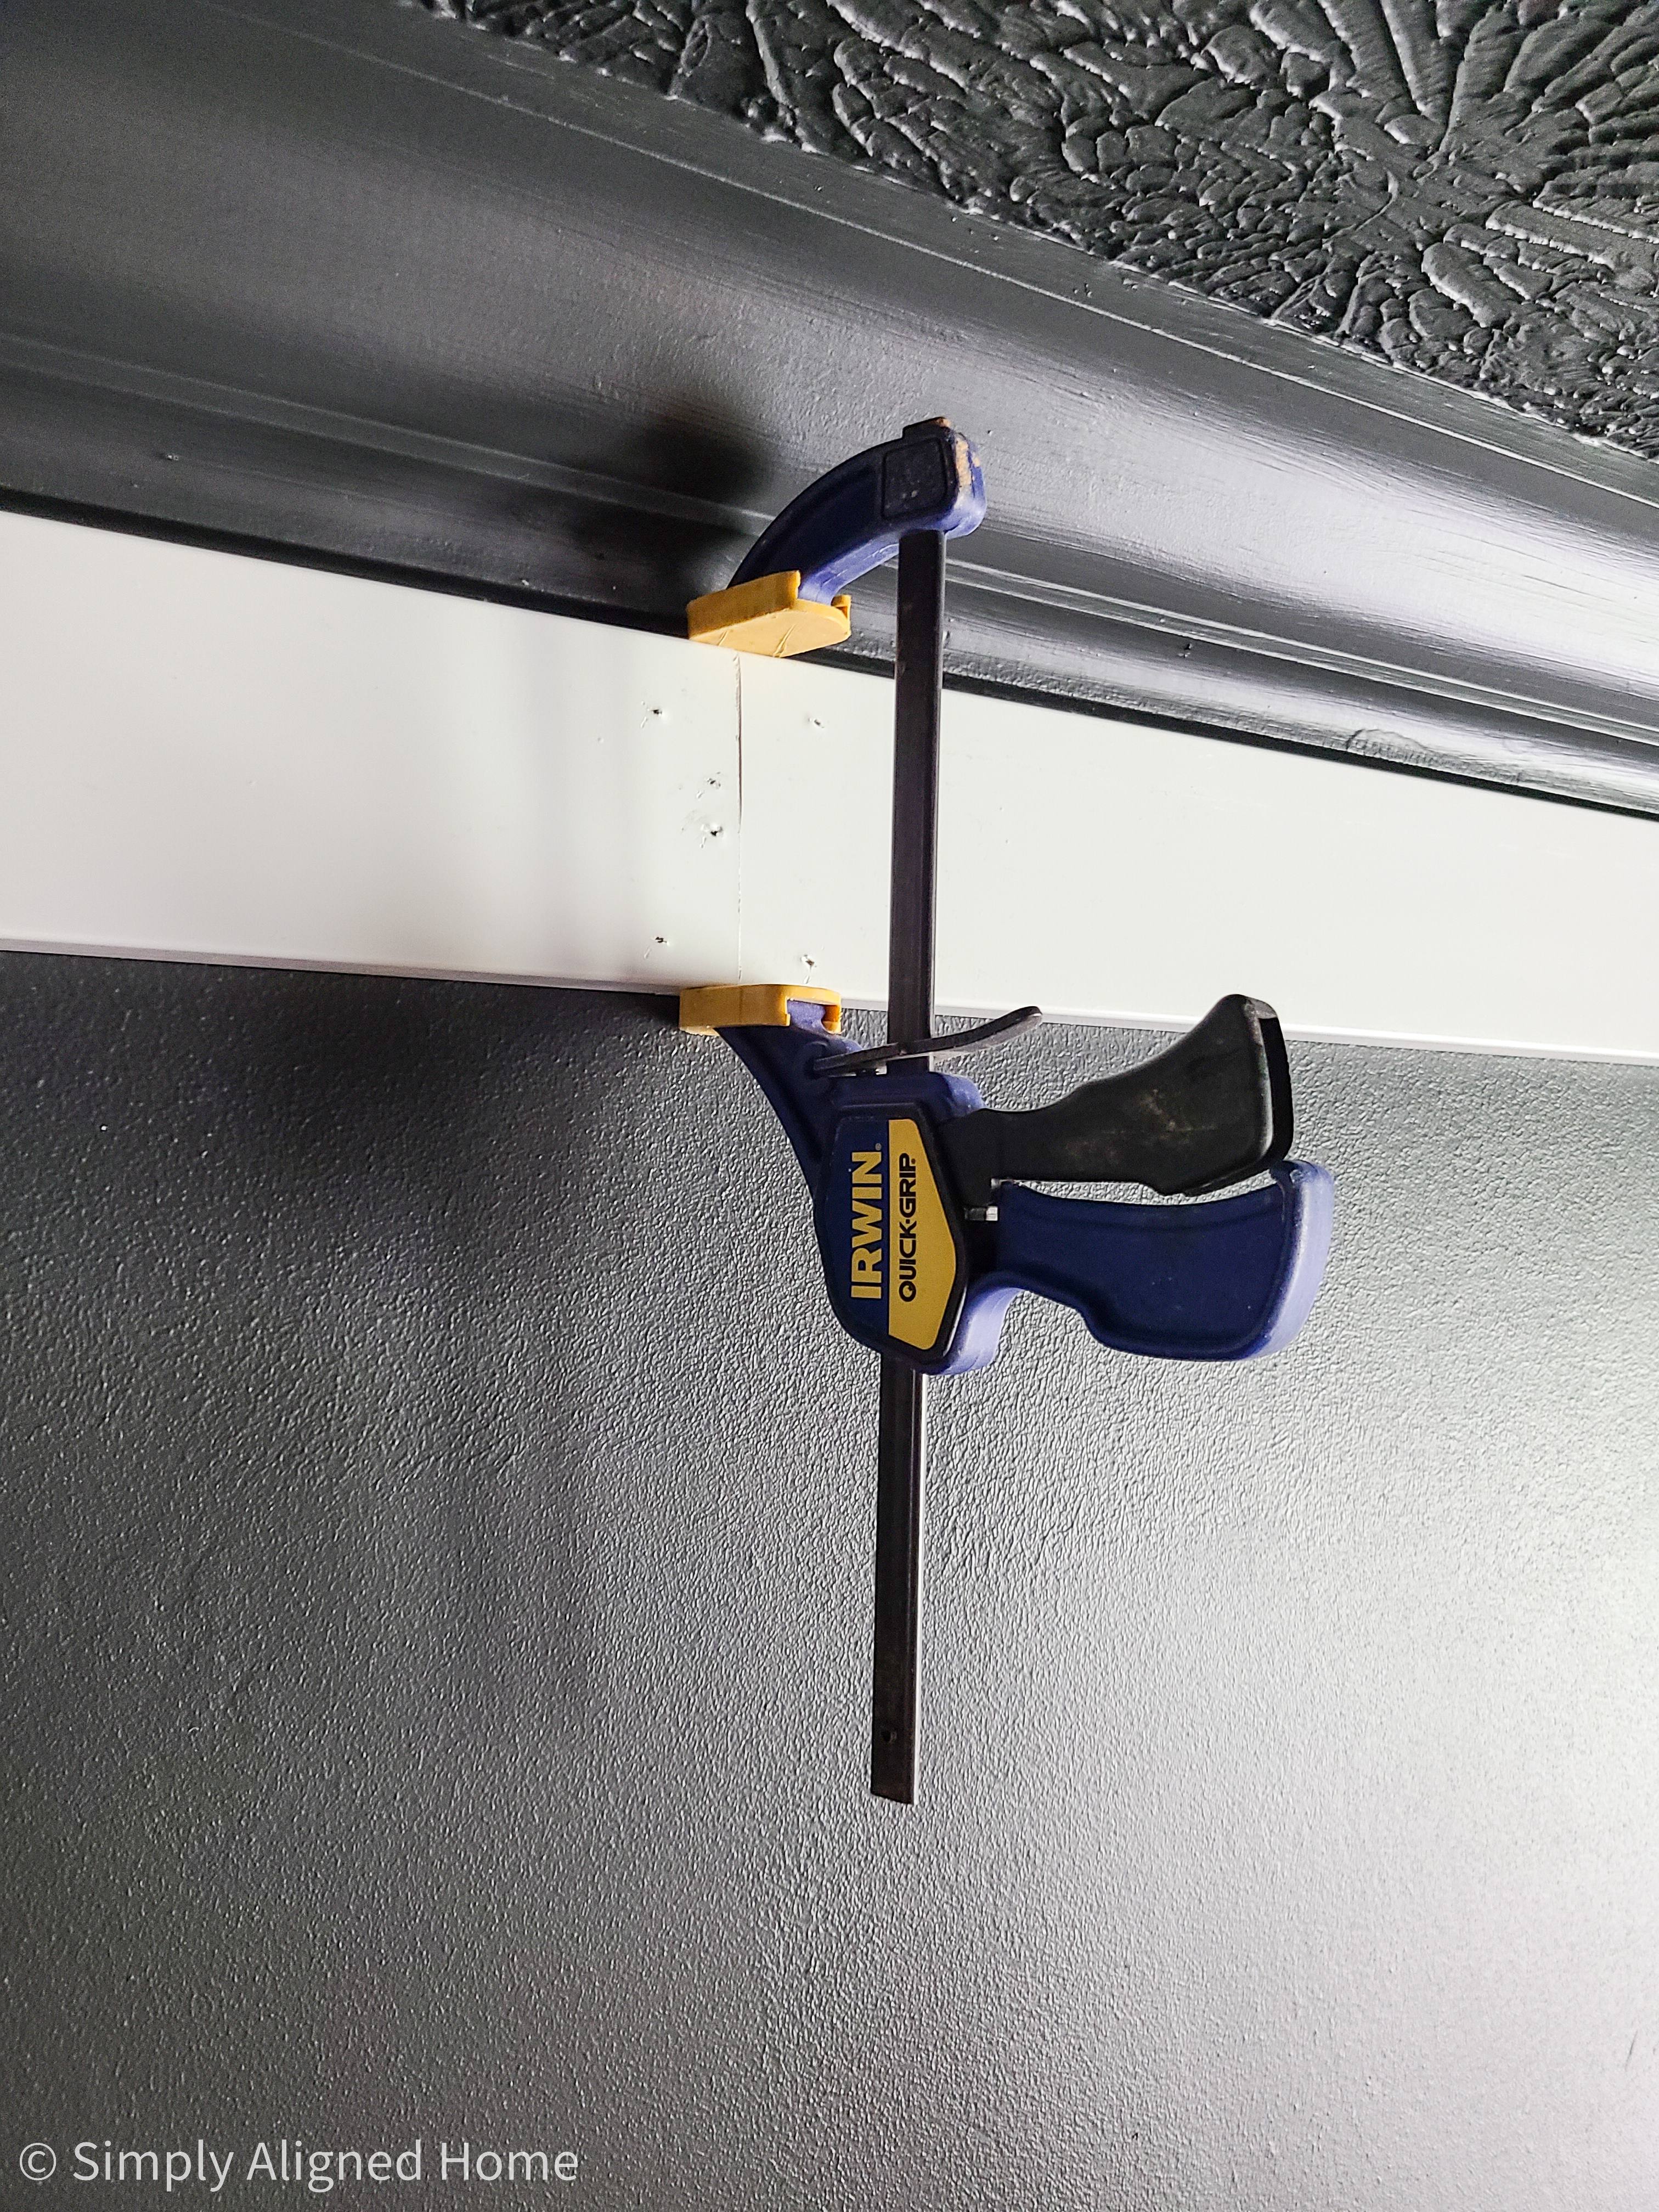
Since my walls are longer than 8′ long, and I’m using 8′ long trim, I had to use two pieces of trim for the top members. In order to make it look more seamless, I joined the two pieces with a miter cut. I align the two boards using a clamp to get a nice, clean seam.
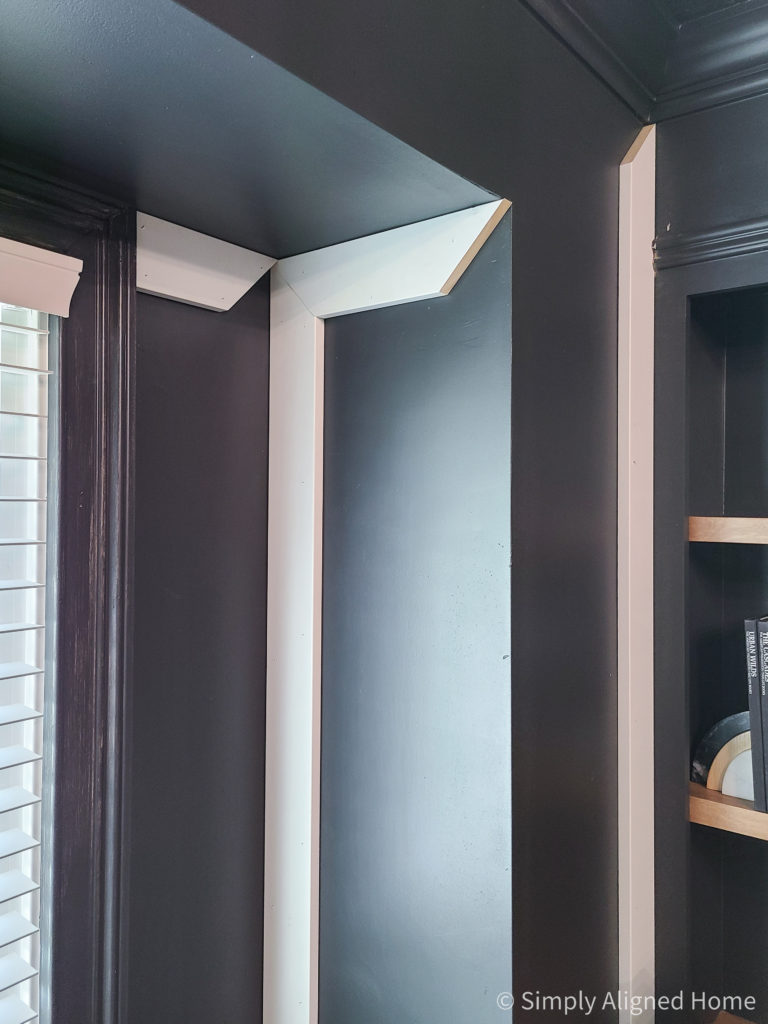
For all of my corner joints, I decided to do 45 degree cuts for a more seamless look.
I decided to just use 1-1/2″ brad nails to install the 1×4 trim…no construction adhesive. I shot the nails in at alternating angles (right then left) to help hold the trim in place.
Once I had the outside trim, I was able to measure for the additional vertical pieces. Even though I had a design with measurements, walls are not perfectly straight or square. I wanted to ensure that my gaps between trim were minimal, so I verified my measurements before cutting the vertical pieces.
With the vertical 1×4’s in place, I then measured and cut the horizontal pieces. The location of the horizontal pieces of trim was based on the height of my built-in countertop. I wanted the 1×4 to be centered on the countertop. I notched out the 1×4 to fit around the countertop using my jigsaw.
Install the Cove Mould
Time to add the decorative part of the picture frame moulding! Call me crazy, but this was my favorite part..
In order to make as few trips to the saw as possible, I made a nice little drawing with all of my dimensions. I numbered each box and measured the inside of each one.
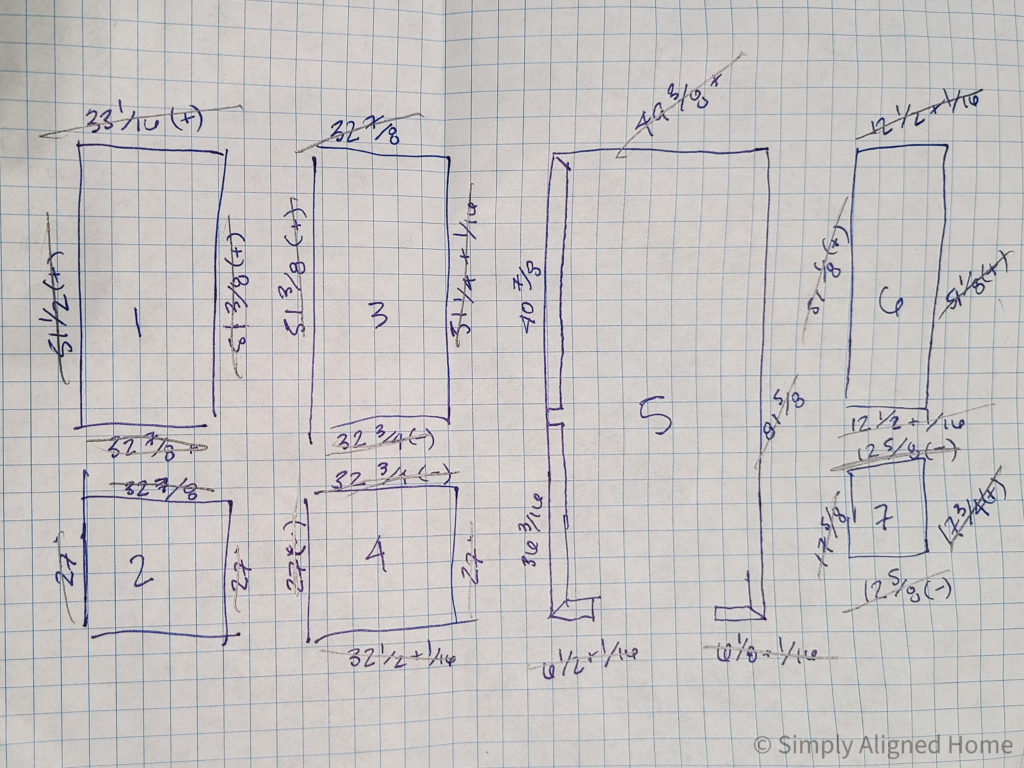
All of my cuts were made on a 45 degree angle. As I cut each piece, I labeled them with the box number and the location of the piece (left, right, top and bottom).

Since the cove mould is a much smaller trim than the 1×4, I used 1″ brad nails to install it.
Patch the Nail Holes and Caulk the Seams
I started by patching the nail holes and seams on the face of the 1×4 trim with spackle. I apply slightly more than necessary to fill the holes so that I can sand it flush once it dries.
Once I was done patching the nail holes, I caulked the seams where the cove mould touched the wall and any corner seams.
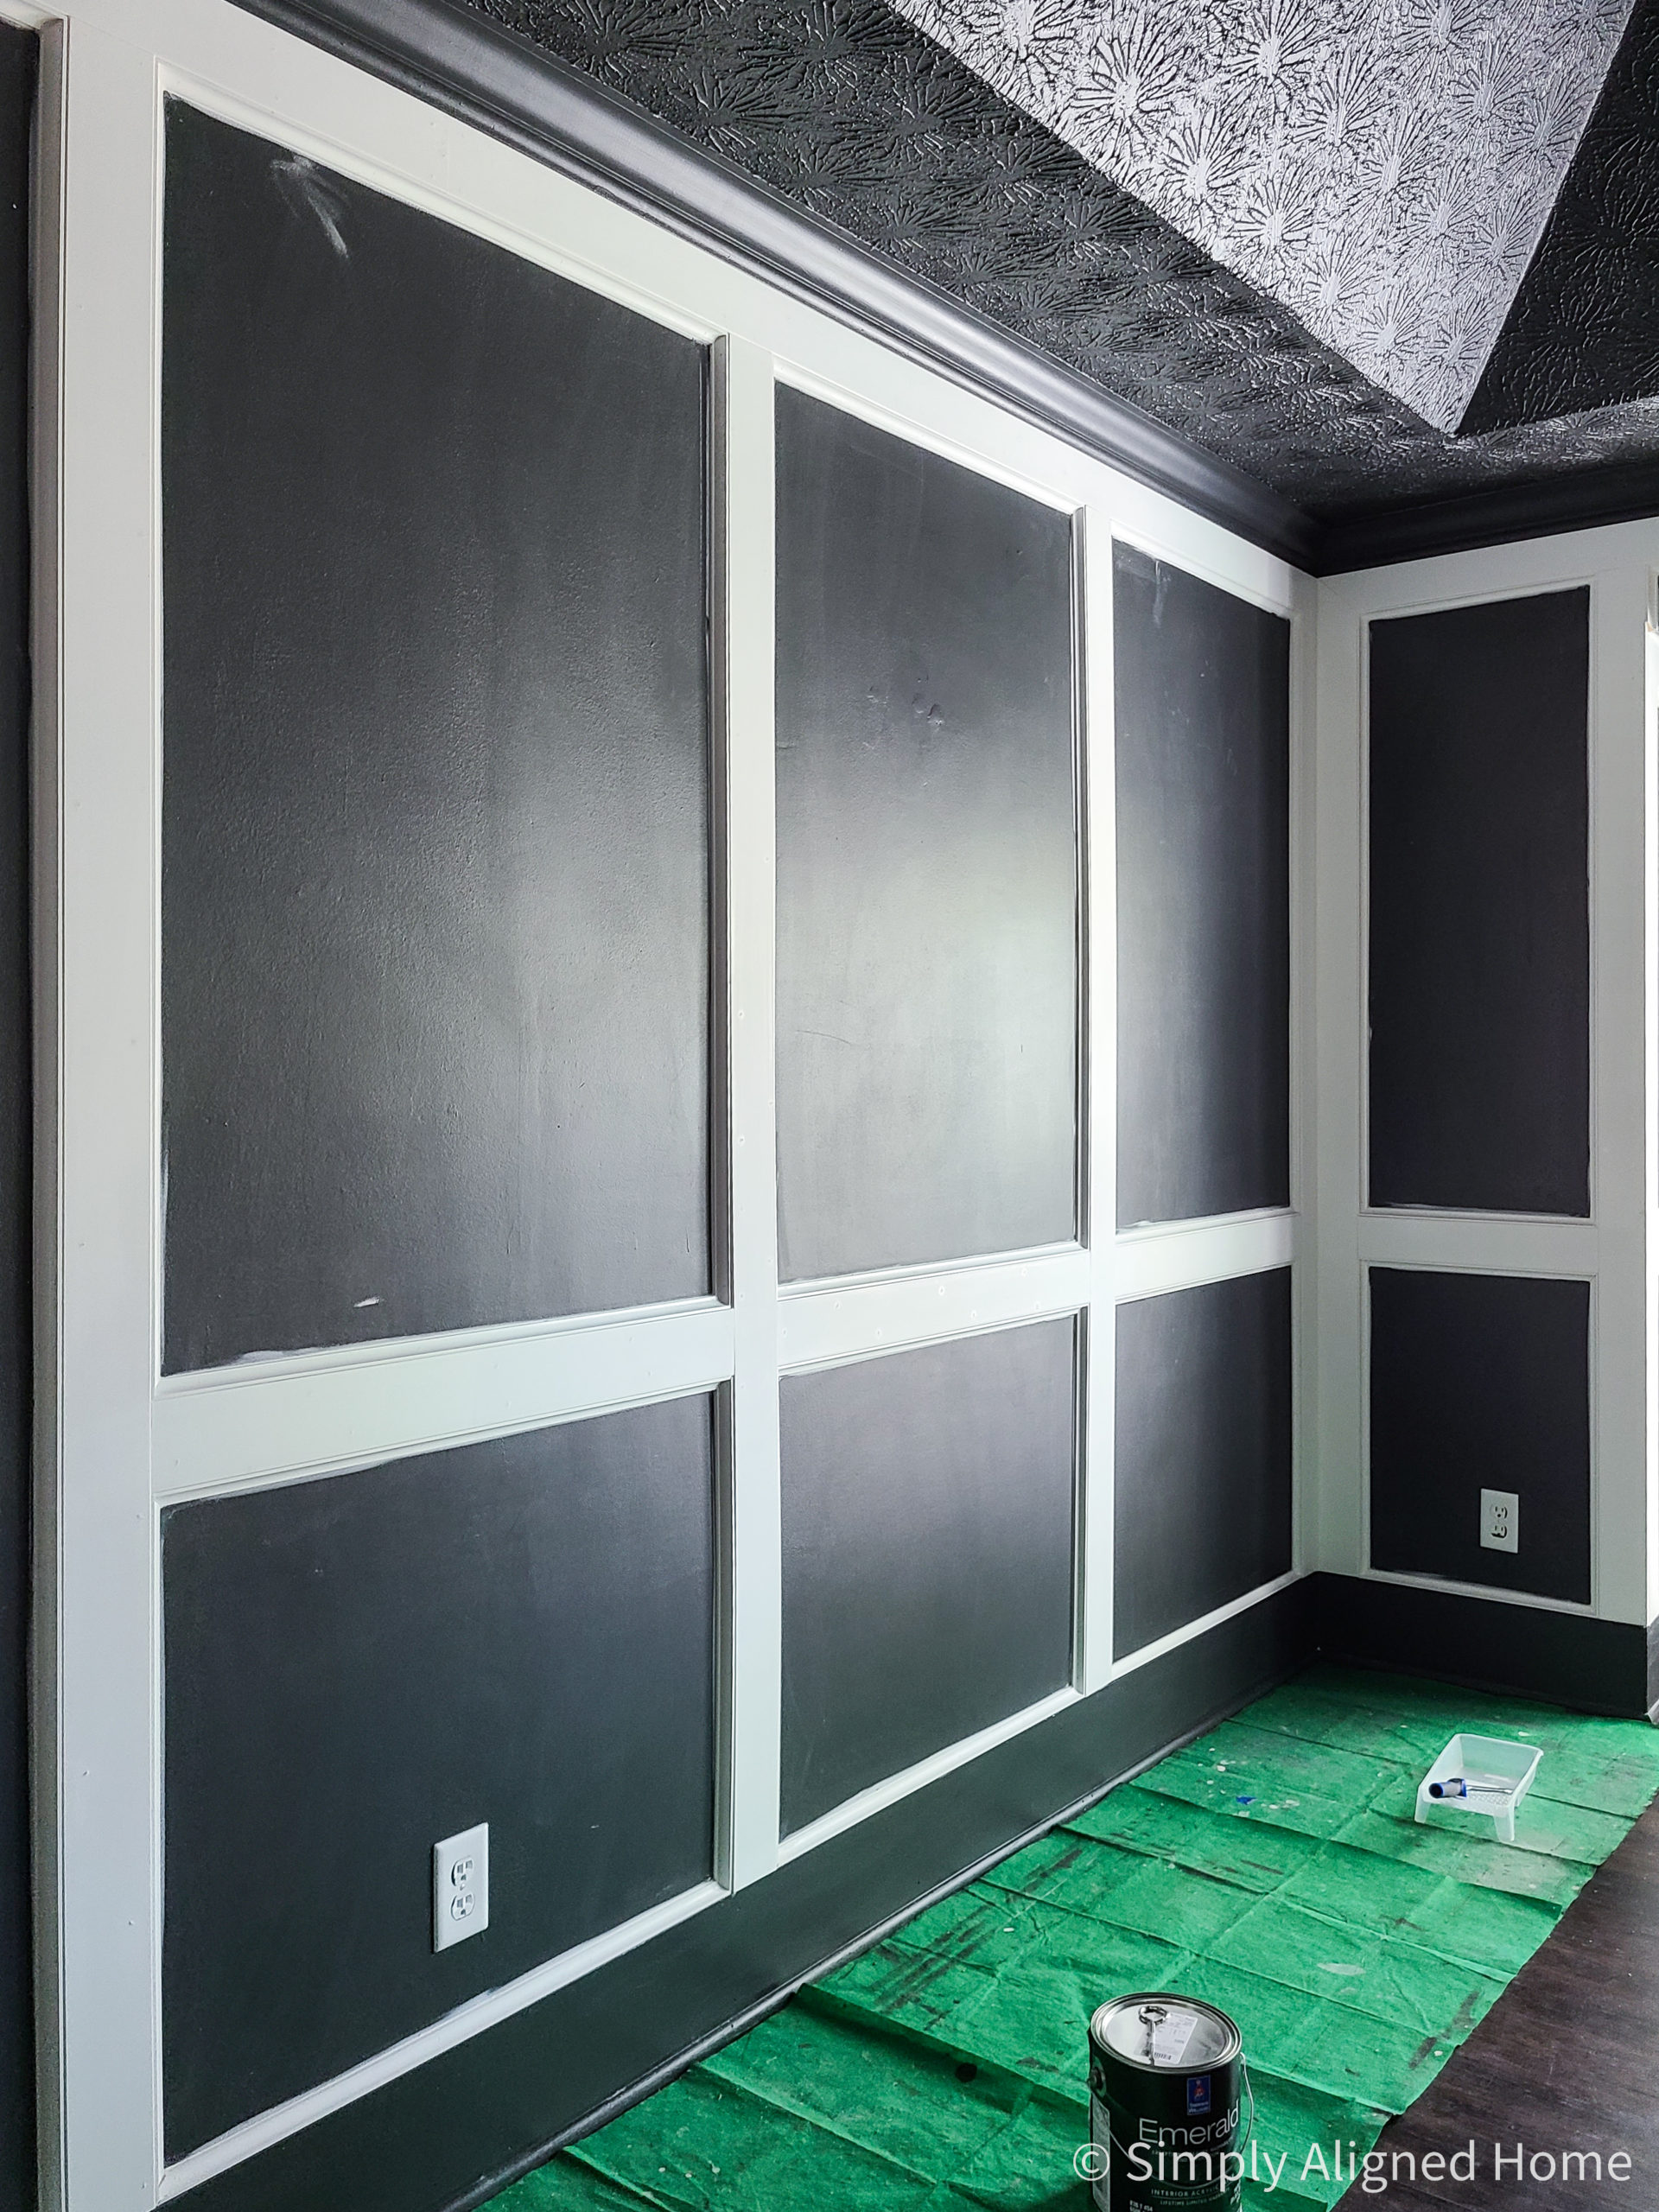
Paint the Trim
Since I already painted the wall, I technically only need to paint the trim at this point. It is necessary to prime all of the patches before I paint. If you don’t prime, the paint sheen will be different on any spots that were patched.
I initially painted my walls using a satin sheen. Unfortunately, I have many imperfections on my walls and the satin sheen highlighted those imperfections. I decided to switch to a matte finish to better hide the imperfections. Flat paint is the best for hiding imperfections, but it is not wipeable like matte paint.
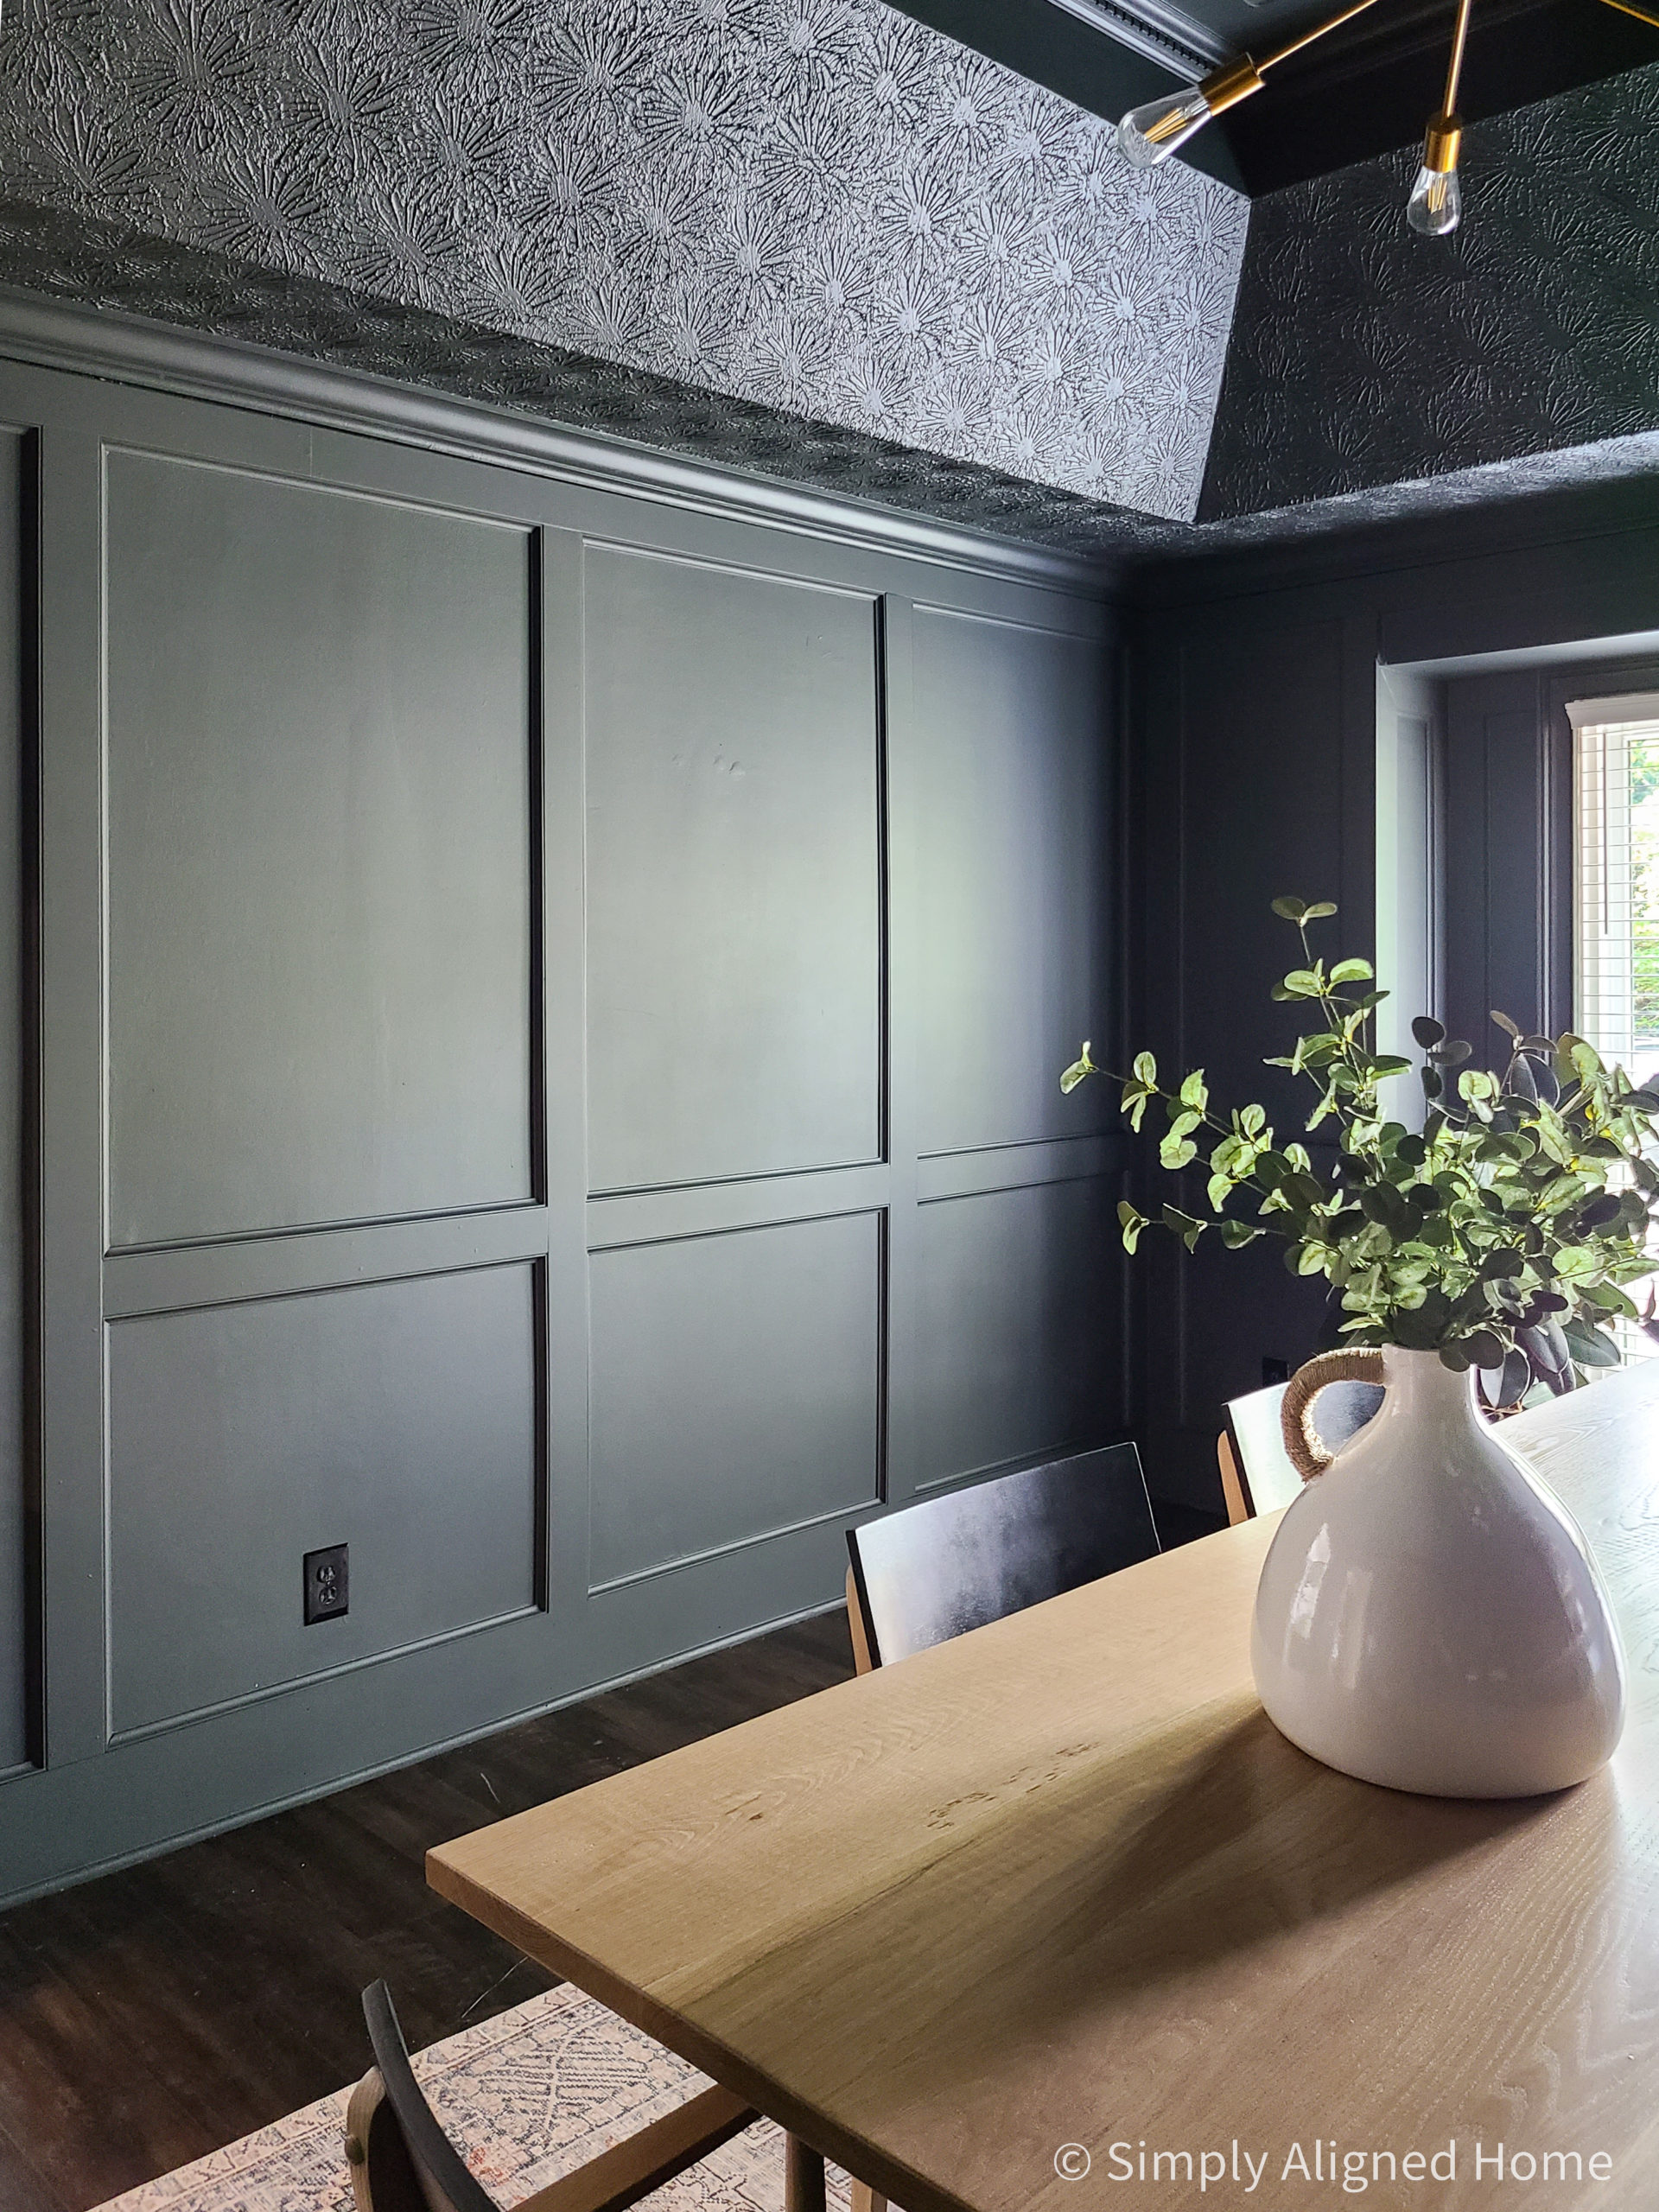
I applied two coats of paint to the trim and exposed walls using a 1″ angled brush and small roller.
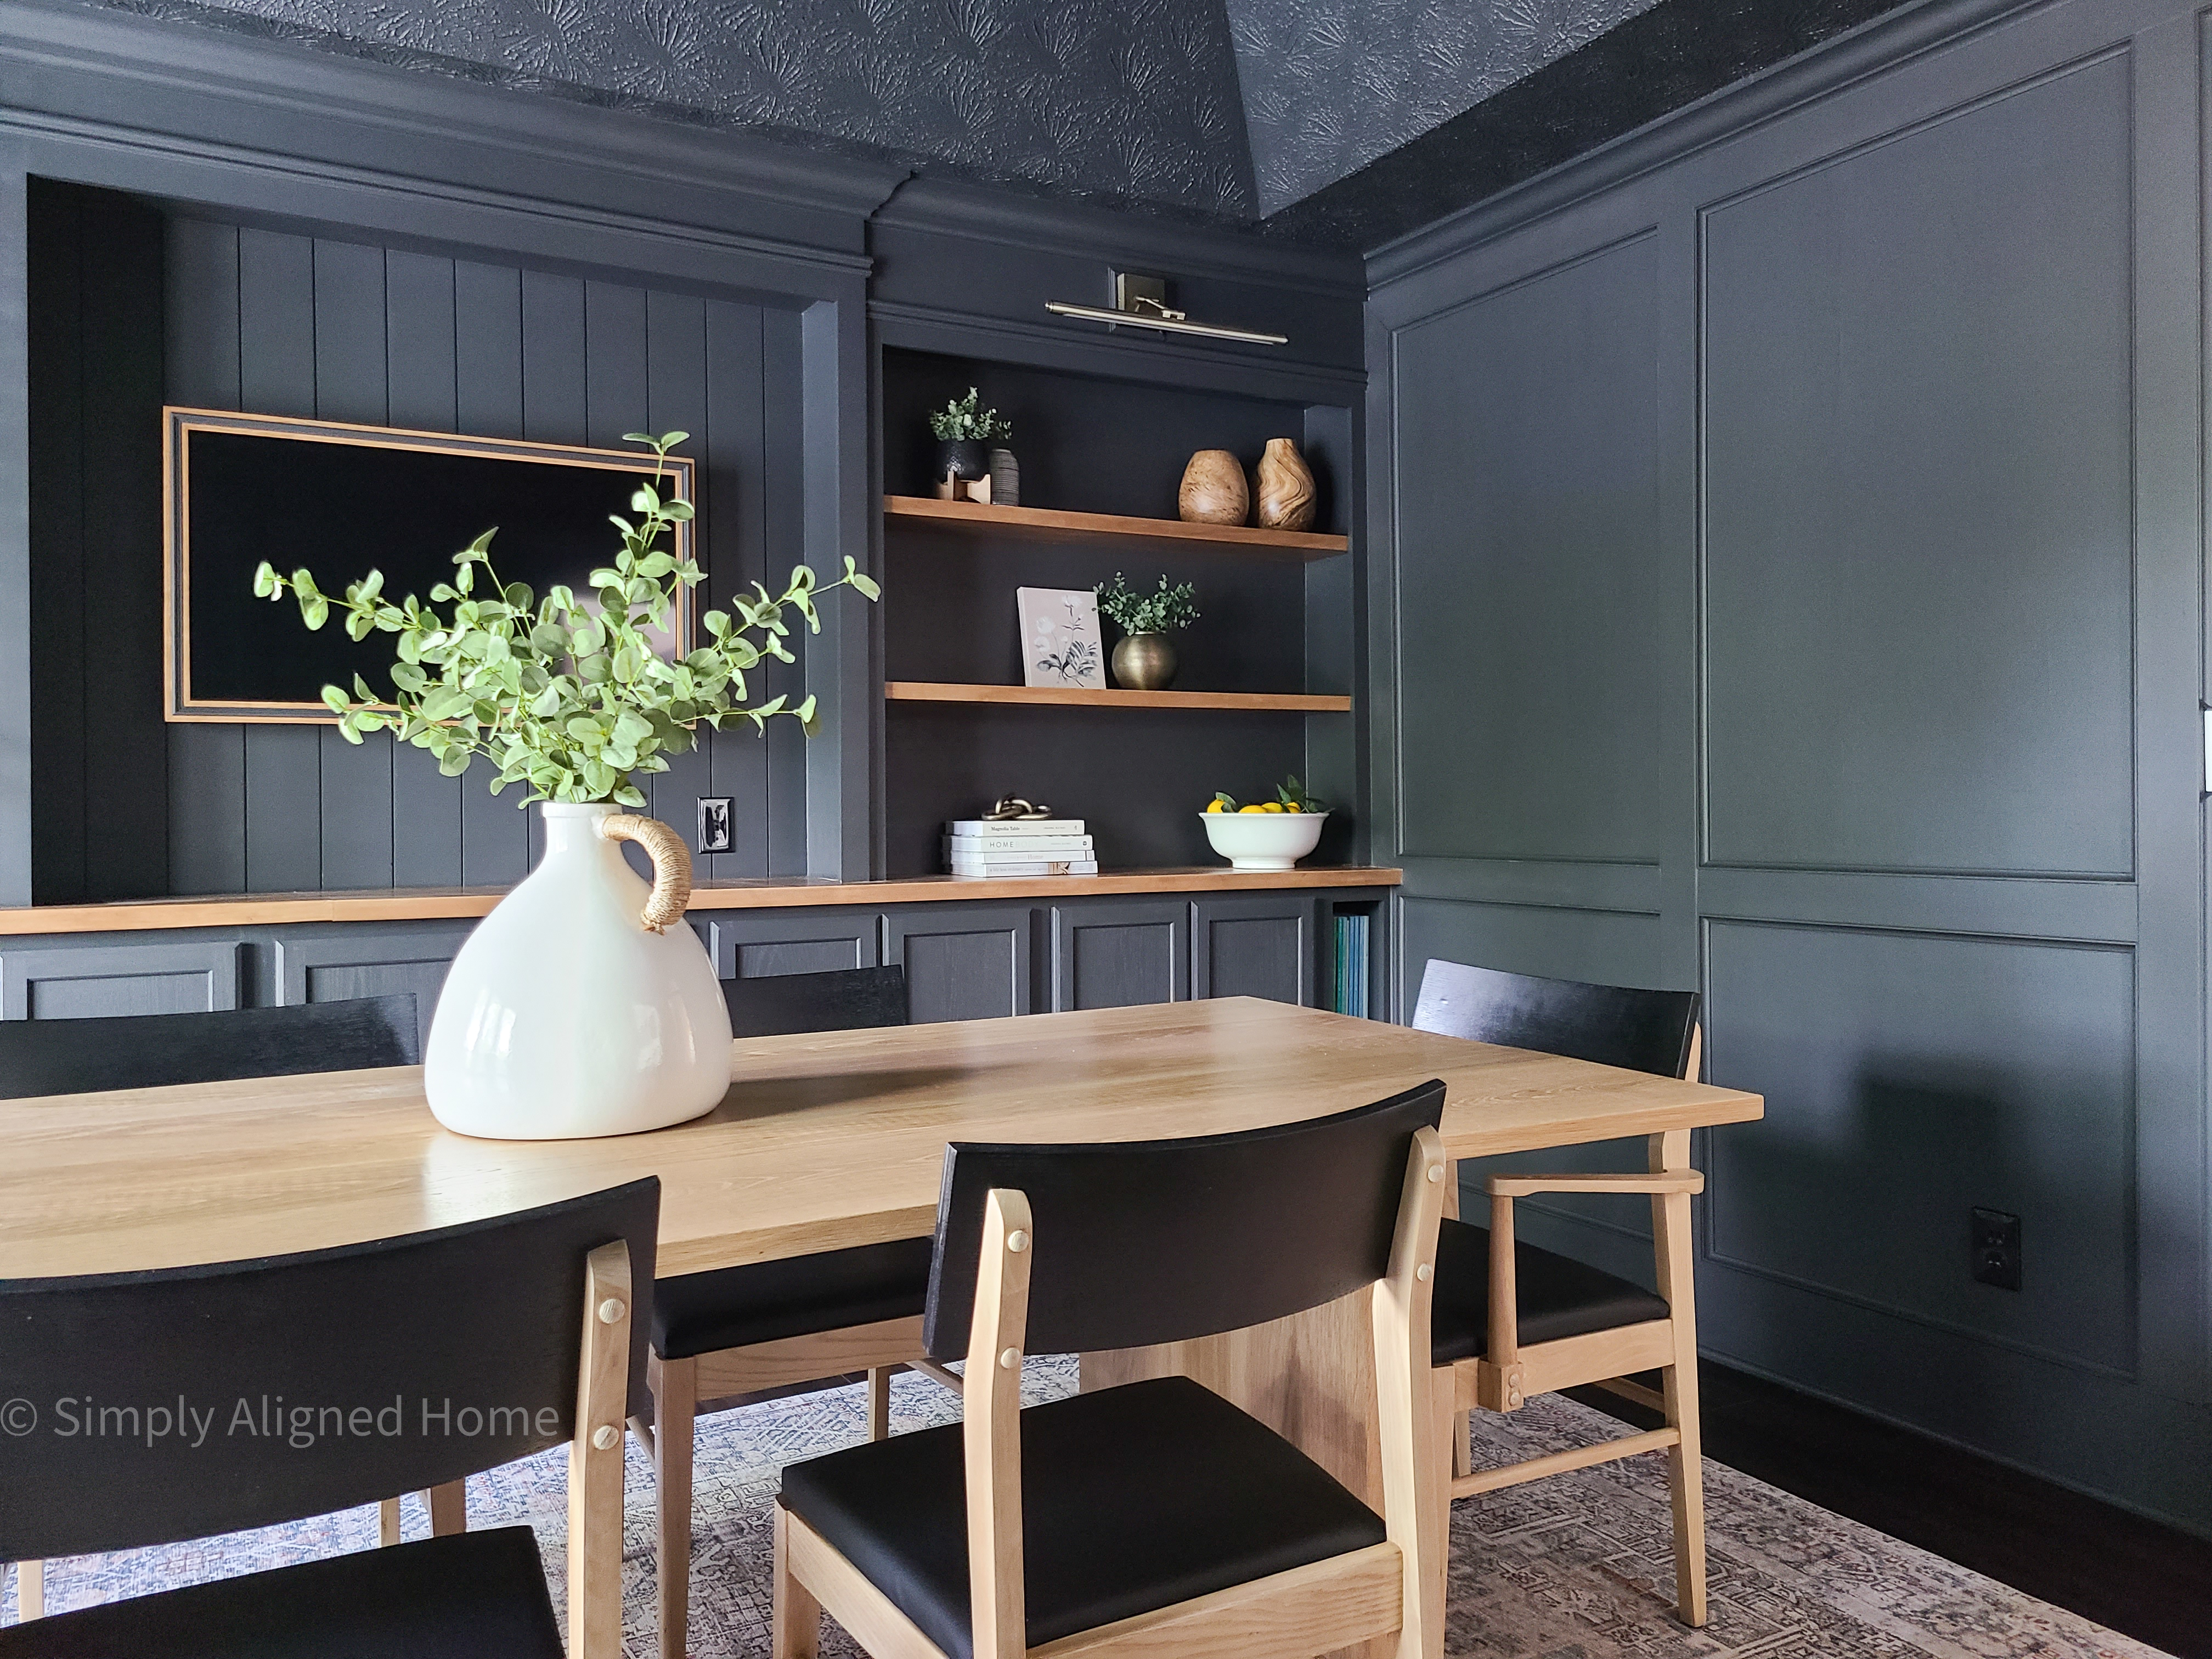
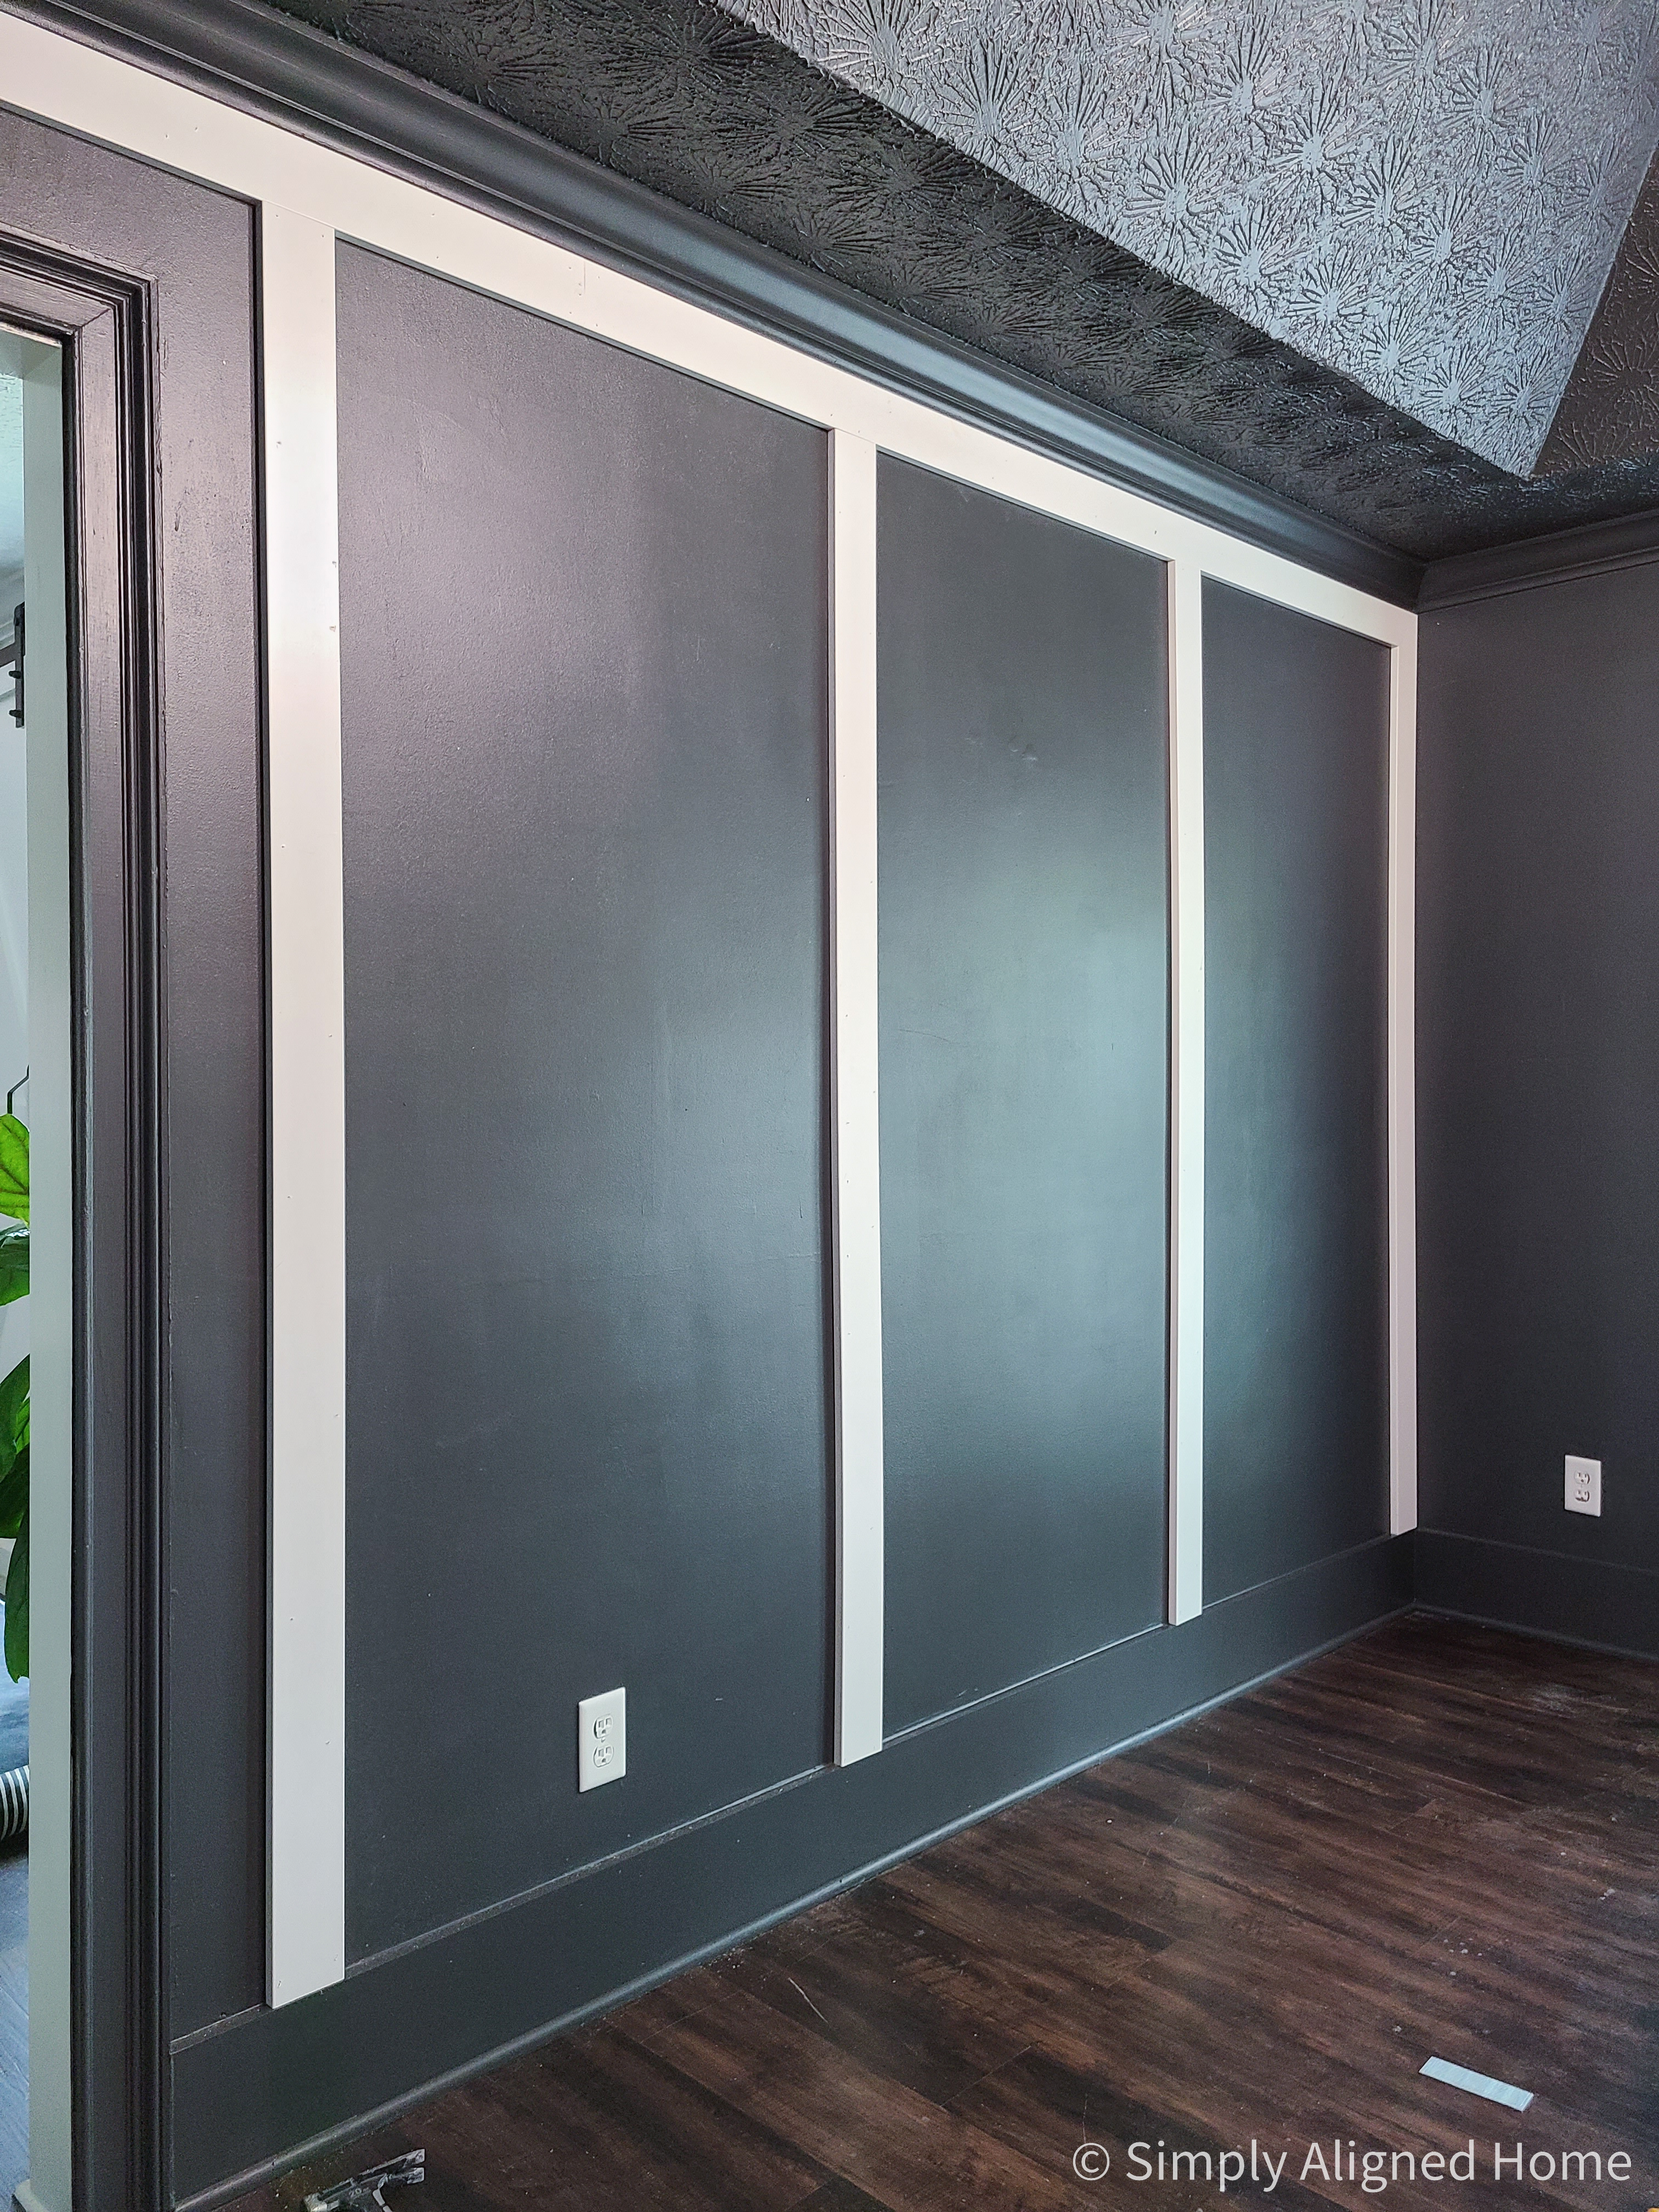
The finished product was stunning! It took the walls from plain and simple to elegant and beautiful. The dining room/office finally looks complete!!
For your next trim project, be sure to check out Woodgrain‘s Finished Elegance collection…you won’t be disappointed!