Who doesn’t have one of these storage units hiding in their home?! We have at least five of them…and they are all safely stored in closets. Let’s be honest, they aren’t the most attractive thing..

Here’s how I took this boring white storage unit and turned it into a decent piece of furniture!
Add a New Back Panel
The unit had four alternating back panels. I’m not a fan of toys falling out of storage units, so that was the first change. I removed the small back panels and replaced it with two large pieces of 1/4″ plywood. The only reason I made the back panel out of two pieces is because that’s what I had on hand!

As a mom of three rambunctious little boys, safety is key! I secure all of our large furniture to the wall…especially in the kids’ rooms. I notched out the back panel in two spots to be able to secure the unit to the wall.

Wrap the Storage Unit with Wood
I first wanted to add a little warmth to the storage unit. Nothing says warmth to me like stained wood! I decided to use 3/4″ birch plywood for this project. I love the way that birch plywood stains and it’s really affordable!
I started by ripping the plywood into strips that were about 3/4″ wider than the storage unit. This will not only cover the 1/4″ back panel, but add a 1/2″ lip to the front of the unit.

In order to make the wood as seamless as possible, I mitered the corners of the plywood. I secured it to the Ikea cube storage unit with construction screws and brad nails. On the corners where the wood joined together, I used wood glue. I held the wood in place using band clamps until the adhesives dried.

Prep the Wood for Stain
Before I could stain the plywood, I needed to fill the seams. I used stainable wood filler on the corners and nail holes.

Once it dried, I sanded it with 220 grit sandpaper. One thing I’ve learned is that even though it says the wood filler is stainable, it never really stains well. If you don’t sand it down well, it will be very obvious where the wood filler was applied.
As with all stains projects, I applied a pre-stain wood conditioner.
Sand the Feet
One of the biggest changes for the cube storage unit will be adding feet to raise it off of the floor. I bought a set of very affordable feet for the unit, which I thought were unfinished…but they had sealer on them.
Using my orbital sander, I was able to sand the feet to remove the finish.
Stain the Wood and Feet
I’ve been a little obsessed with water based stain lately! It is so easy to use, doesn’t smell nearly as bad as oil based stains and dries in an hour…can’t beat that! The only issue is that since it is fast drying, you only have so long to remove the excess before it dries. I usually only apply as much as I want with a cloth and apply additional coats to darken it up.
My favorite color right now is Early American. I recently used it on my shiplap built-ins and can’t get enough of it…so naturally, I decided to use it on this project as well!
I stained both the wood wrapped around the cube storage unit and the feet. I applied two coats to get a nice, rich color.

Paint the Face Frame
I wanted to add a little more character to the unit, so I decided to paint the face frame. I opted for Sherwin-Williams Iron Ore…which is what I used to transform my shiplap built-ins.

Using a craft brush, I applied two coats of paint to the face frame.
Seal the Wood and Feet
Once the stain was dry, I applied two coats of a water based polyurethane. I did a very light sanding using 220 grit sandpaper between coats.
Attach the Feet
The feet that I purchased came with metal mounting plates. I first screwed the mounting plates to the feet. I then attached the feet to the bottom of the wood wrapped Ikea cube storage unit. These were very easy to install and added so much character!

Iron the Storage Bins
Normally, I would not use rope or fabric storage bins. They don’t usually hold their shape and the rope bins I purchased arrived with large creases. However, I plan on using this storage unit in my nursery and don’t want to worry about my son pulling hard, heavy bins out of the storage unit.
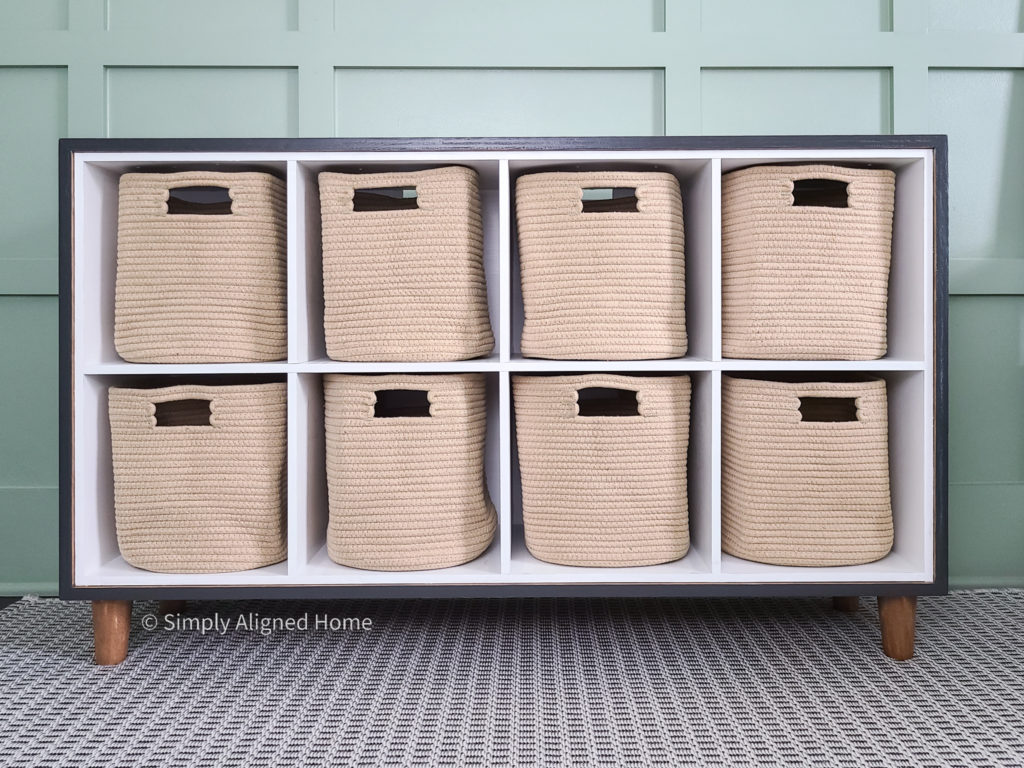
Luckily, I was able to iron the bins to remove the creases. They looked much better once they were ironed!
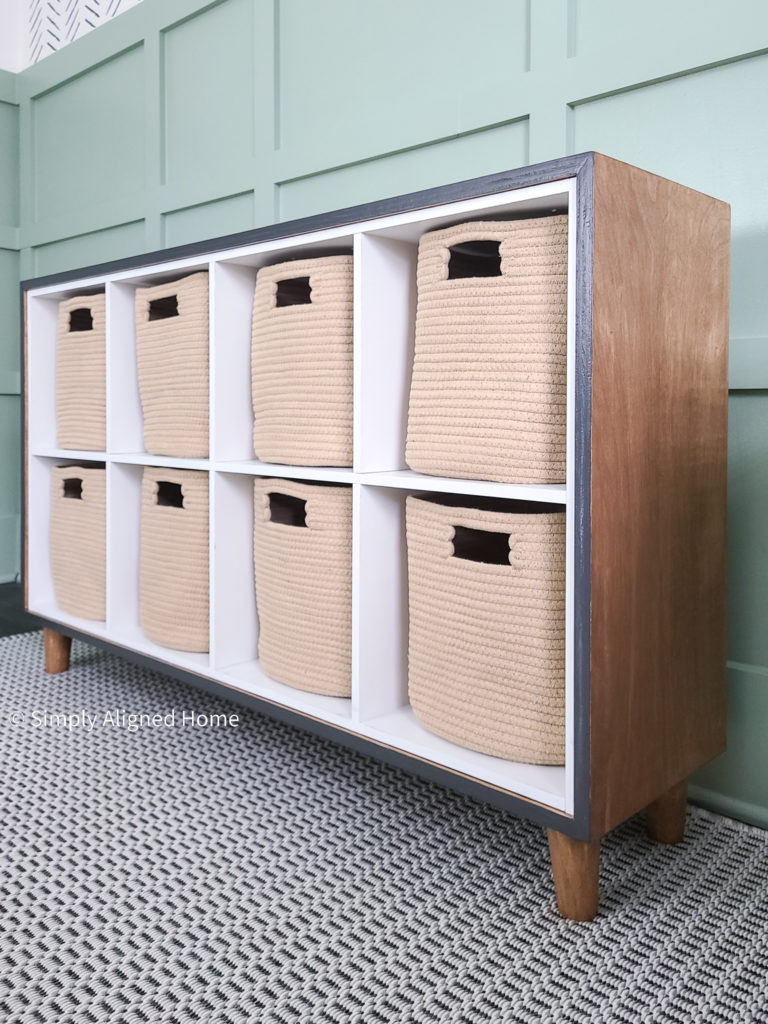
This cube storage unit no longer looks plain and boring…dare I say that it is a statement piece?! I love that it’s not only functional, but attractive now!