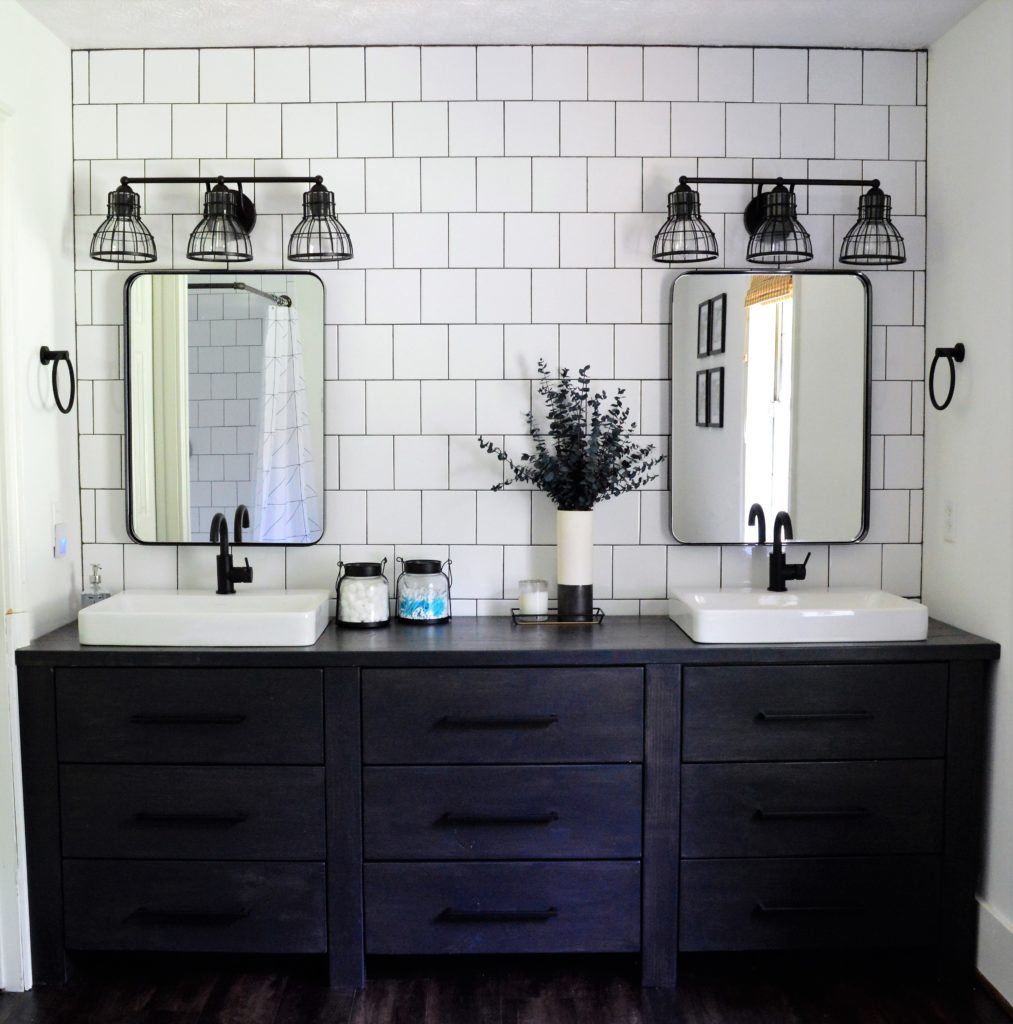
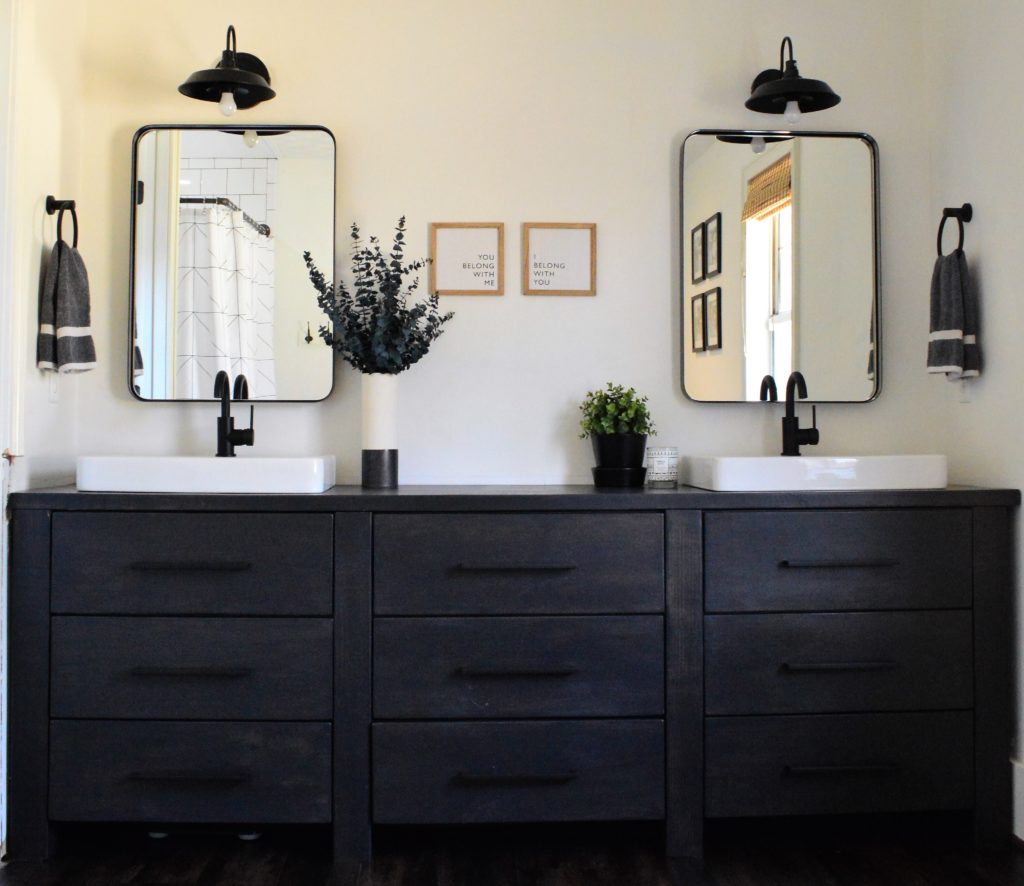
My projects always tend to evolve. I go into them with an idea of what the final picture will look like, but don’t often know all of the details. Our master bathroom began with open shelving and a mess that I couldn’t control. I decided it was time to replace the open shelving with a vanity…which I made myself. With the new vanity came new faucets and mirrors.
When my bathroom vanity project was complete, I knew I wanted to add a tile back splash. I finally found the time (and motivation) to install the tile! I heard about an adhesive tile mat that allowed installation of tile without the use of mortar. No mess…count me in!! Plus, I am always up for trying something new!
**This post contains affiliate links to products that I recommend. If you purchase something through an affiliate link, I may receive a small percentage of the sale at no extra cost to you. I really appreciate your support.**
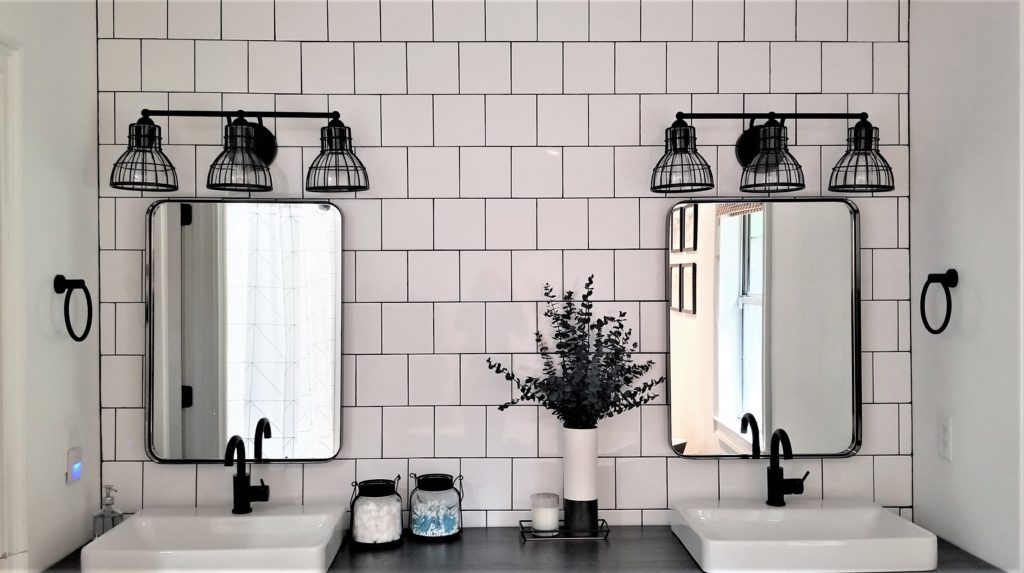
I chose to go with the same tile (Daltile Restore Bright White 6 in. x 6 in. Ceramic Wall Tile) and pattern as our shower. My husband and I both loved the idea of large white hex tile with black grout. However, our shower already had three different types of tile (which I really love), and I didn’t want to add another type of tile.
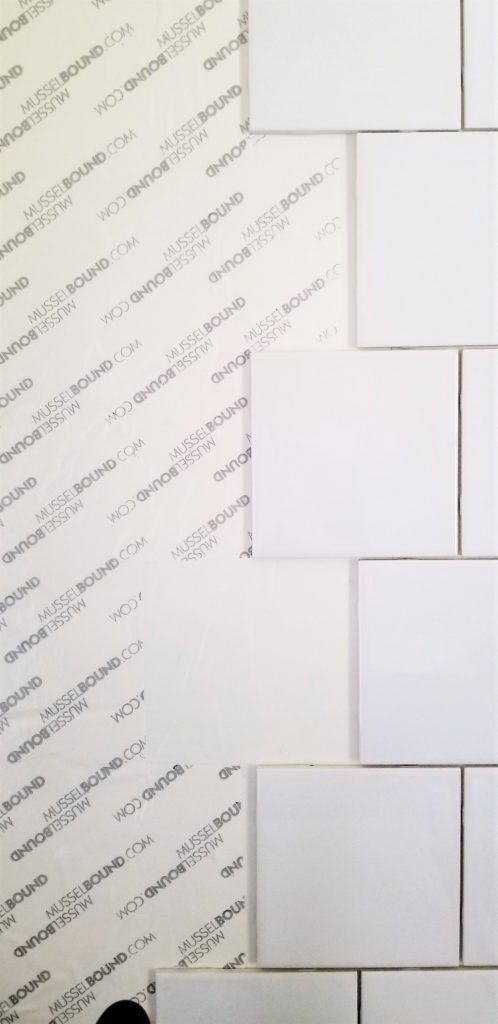
The first step was installing the adhesive mat (after I removed the mirrors and lights, of course). I made sure that the wall was clean and then installed the mat similar to installing wall paper. Hint: If you don’t like installing wall paper, you won’t like installing the adhesive mat. It took me a little longer to install the mat than I would have liked..
Once the adhesive mat was up, I began installing the center line of tile. I wanted to ensure that the tile between the mirrors would be perfectly aligned…or at least as perfect as I could get it.. I started out using leave in spacers. They made installing the tile much easier! I was afraid the leave in spacers would interfere with the grout, so I chose to use them as little as possible.
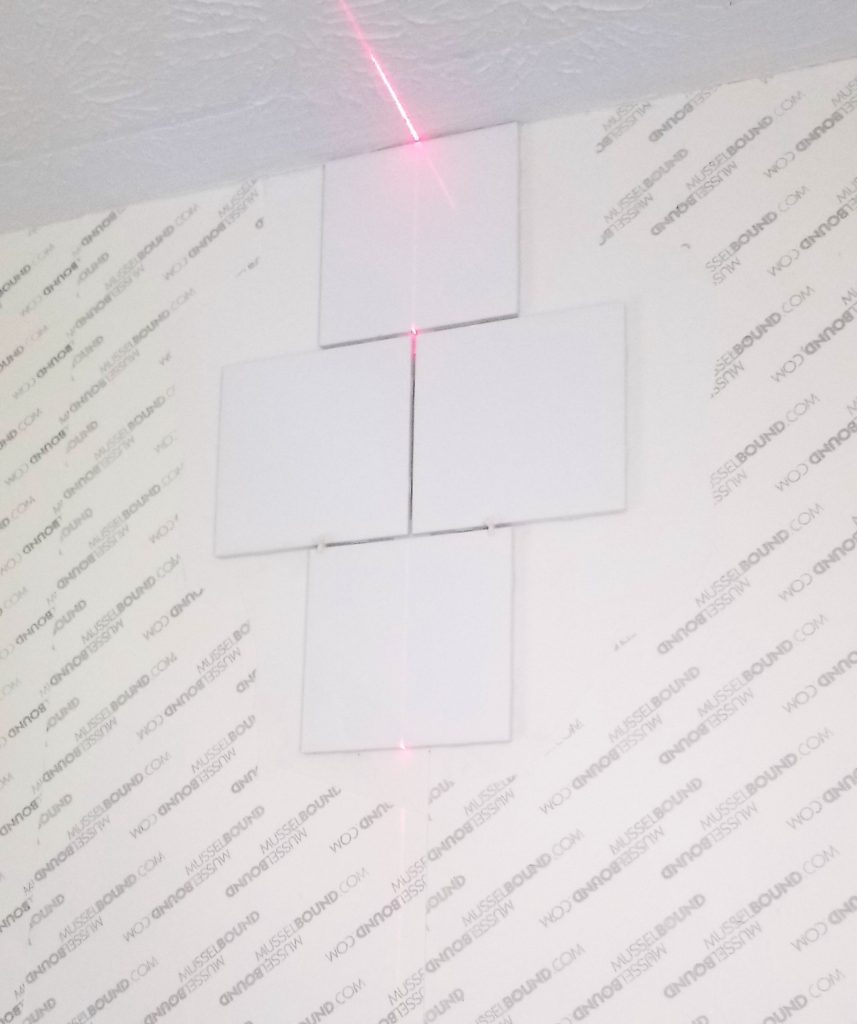
I worked in small sections when installing the tile. I cut the paper to expose the adhesive mat just large enough for one tile with a box knife. The worst part about the adhesive mat was the fact that I could not adjust the tiles once the touched the mat. It might not have been so difficult if I had another set of hands, but it was nearly impossible to do it by myself. About half way through the project, I was seriously questioning my decision to use the mat instead of mortar.
I had the majority of the tile installed when I discovered that I needed to adjust a few tiles. Like I mentioned, it was not possible to adjust the tiles once they were on the adhesive mat. I ended up using a heat gun and hammer to pry the tiles off. Once the tiles were off, I cut and removed the sections of the adhesive mat. I installed more of the mat and carefully reinstalled the tiles.
I left the tiles around the light fixture for the end. I used my Kobalt 24-in Snap Cutter to cut all of the tile up until this point and I refused to purchase or rent a tile saw for the last few pieces. After many Google searches and watching too many YouTube videos, I decided to try tile snippers.
Snippers certainly aren’t the fastest or most accurate way to cut tile. The faster you try to go with the snippers, the more likely the tile is to break.
I started by drawing the cut line on the tile. Since I knew the cut would be covered by the light plate, I wasn’t too concerned about making the cut perfect. Once I had the outline drawn, I scored the tile along the lines using my tile cutter. Next up…tile snippers!
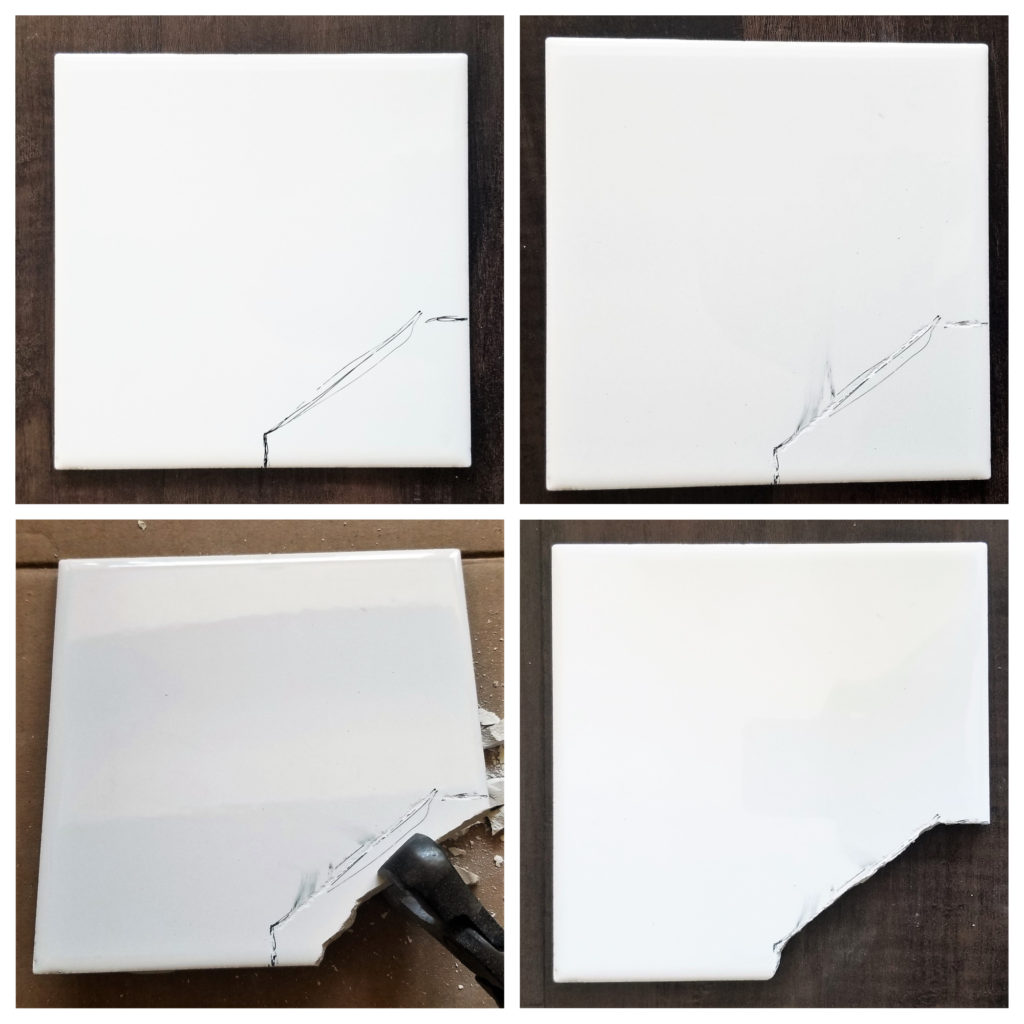
The key to the snippers is to make small cuts. A good way to slowly chip away at the tile is to use just the corner of the snippers. There was one tile that gave me trouble. Every time I would get close to the scored line, the corner of the tile would crack off. I ended up using the corner of the snippers to very slowly chip away at the tile. The fourth time was a charm! Once the tiles were cut, I used a file to smooth out the raw edges.
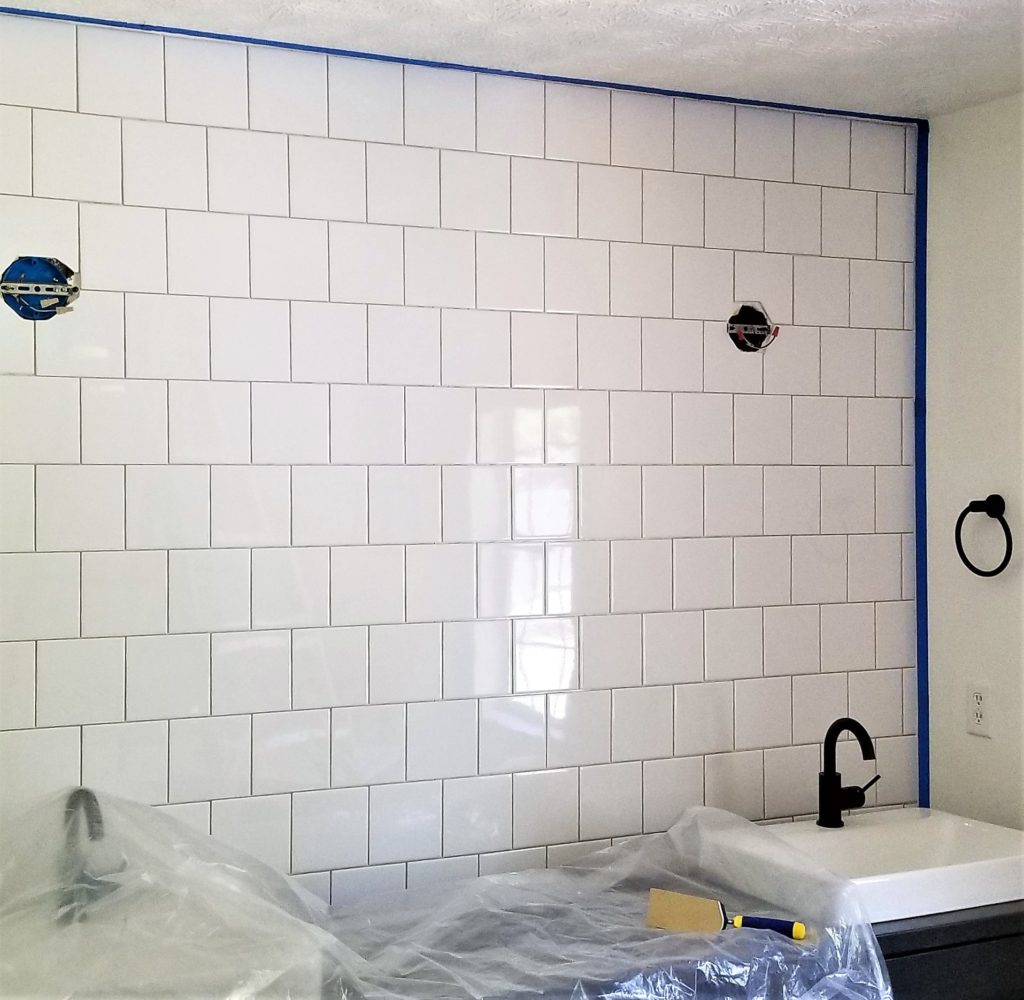
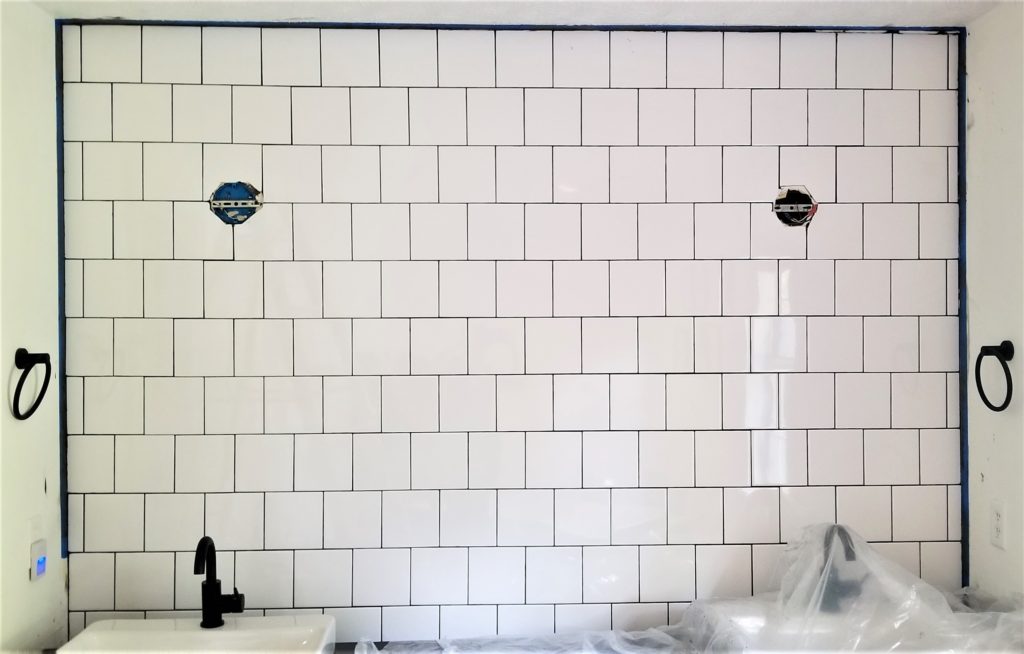
After all of the tiles were installed, it was time for grout! I taped the wall and ceiling around the tiles. I used a black unsanded grout mixed with a grout additive (instead of water). The day after I grouted, I caulked the seams between the walls and ceiling using a charcoal caulk. I was afraid that the charcoal color would look too different against the black grout, but it blended really well!
I also decided to replace our vanity lights. Our old lights weren’t bright enough and did not have matching wall plates. After looking for a few weeks, I finally purchased these Savoy House 8-2102-3-13 Grant 27" 3-Light Bath Bar in English Bronze
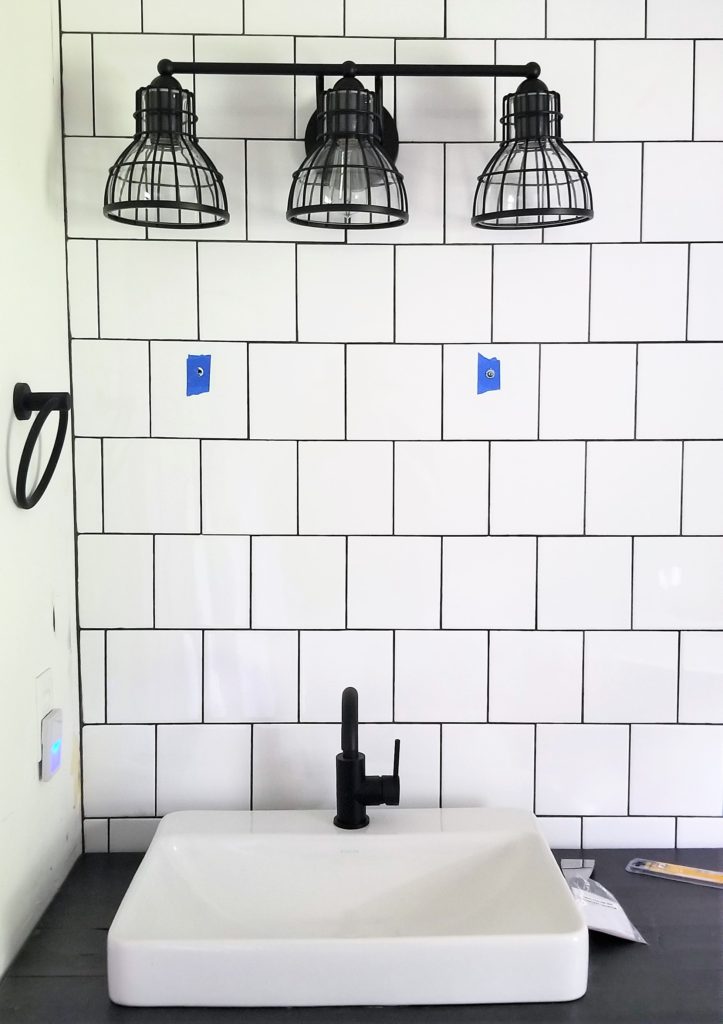
The final part of the project was reinstalling the bathroom mirrors. I was nervous that I was going to crack the tile, so I waited until the very last minute to install them. I chose to use Cobra 172s Triplegrip Universal Wall Anchors, 10, Blue
I placed a few pieces of painters tape where I would be drilling in hopes that the drill bit wouldn’t “walk.” In order to ensure that I didn’t crack the tile, I very, very slowly drilled the holes. My husband might have been a little annoyed by how slow I was drilling, but I didn’t want to risk it. It was a success!! The mirrors were finally in place and my master bathroom is done…for now!
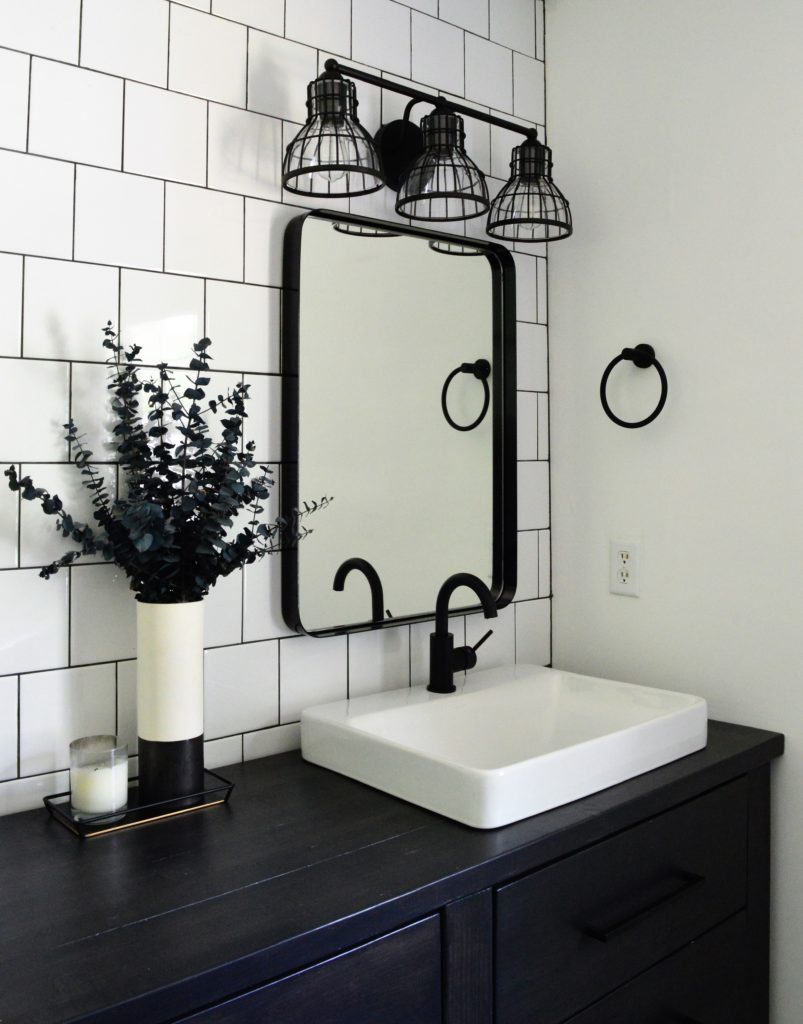
Overall, the tile installation was fairly quick. It would have been so much easier and faster with another set of hands. I might reconsider using the adhesive mat next time…especially if I’m installing tile by myself. I’m quite happy with my first EVER wall tile installation!