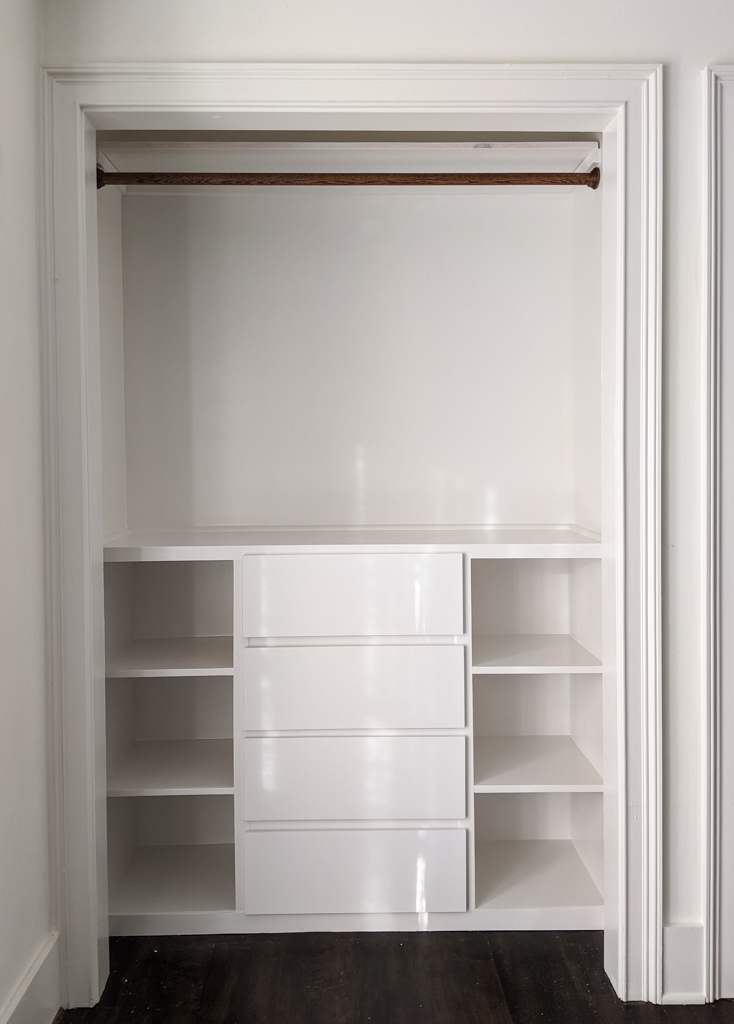
Anyone else sick of wire shelving?! We have the adjustable systems in all of our closest…which is great for flexibility. However, I’m tired of the shelves and hanging rods coming loose every time I bump them.

With another baby on the way, I decided to switch my big boys to another room. Their new room has two closets and I knew that I needed to rearrange the shelving before I moved them. Instead of adding even more of the hideous metal shelving, I decided to get rid of it completely (along with those awful bi-fold doors). This is my first custom closet, so it was a bit of trial and error.

Determine a Layout
Before I began any work, I came up with a rough layout for each closet. I decided that I wanted to purchase dressers and build around them. Therefore, the layout would be based on the size of the dressers.

**This post contains affiliate links to products that I recommend. If you purchase something through an affiliate link, I may receive a small percentage of the sale at no extra cost to you. I really appreciate your support.**
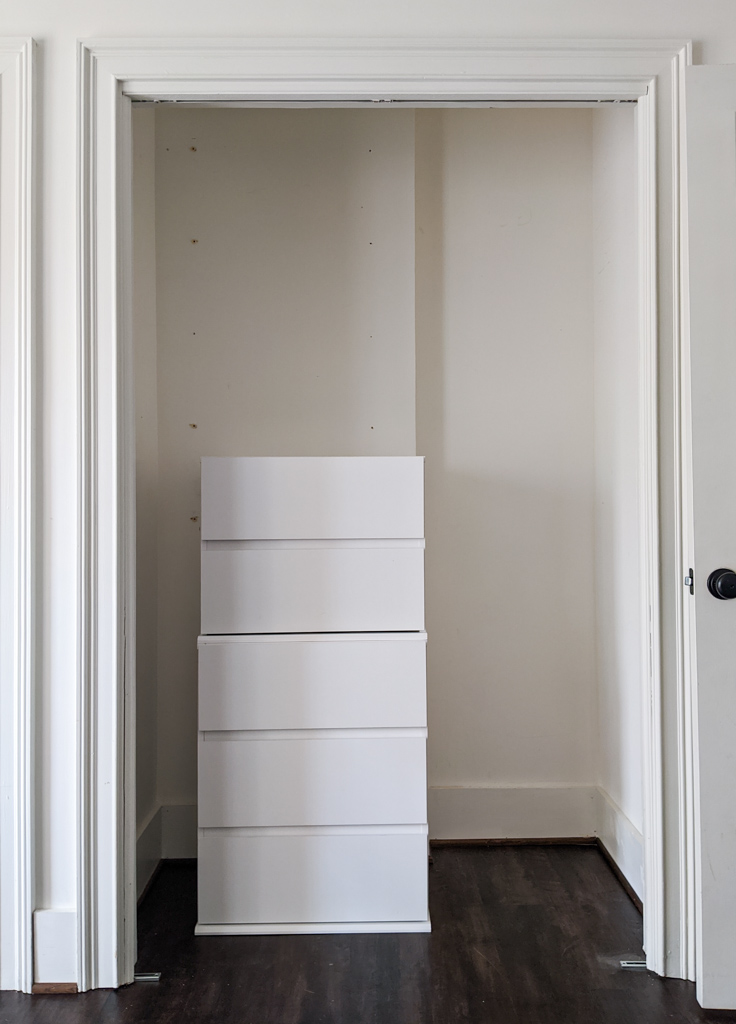
After searching the internet and several stores, I decided on the modular dressers from Target. These dressers are very basic and I knew they could be easily modified. I attempted to use one 3-drawer dresser with one 2-drawer dresser on top. The dressers were too tall with this orientation, so I settled on using two 2-drawer dressers per closet.

Now that I had the dimensions for the dressers, I could finalize the closet layouts. Both closets were roughly the same same size, but one had a small notch out in the back. I would be able to center the dresser in the left closet, but not the right due to the notch. This required a different layout for each closet.

The layout for the left closet was rather simple since I would be centering the dresser. I decided to make two shelving units the same dimensions for either side of the dresser. As for the right closet…that took more thinking. With the dresser aligned with the edge of the notch, there was very little space to the left of the dresser.
After careful planning, I decided to frame out the left side of the dresser with no shelving. I would use this space for bags, sleeping bags or large blankets. To the right of the dresser, I would make a space for a dirty laundry basket. We already had a plastic laundry basket for the boys, so I determined the height of the shelf based on the basket.
Now that I had a layout for each closet, it was time to get to work!
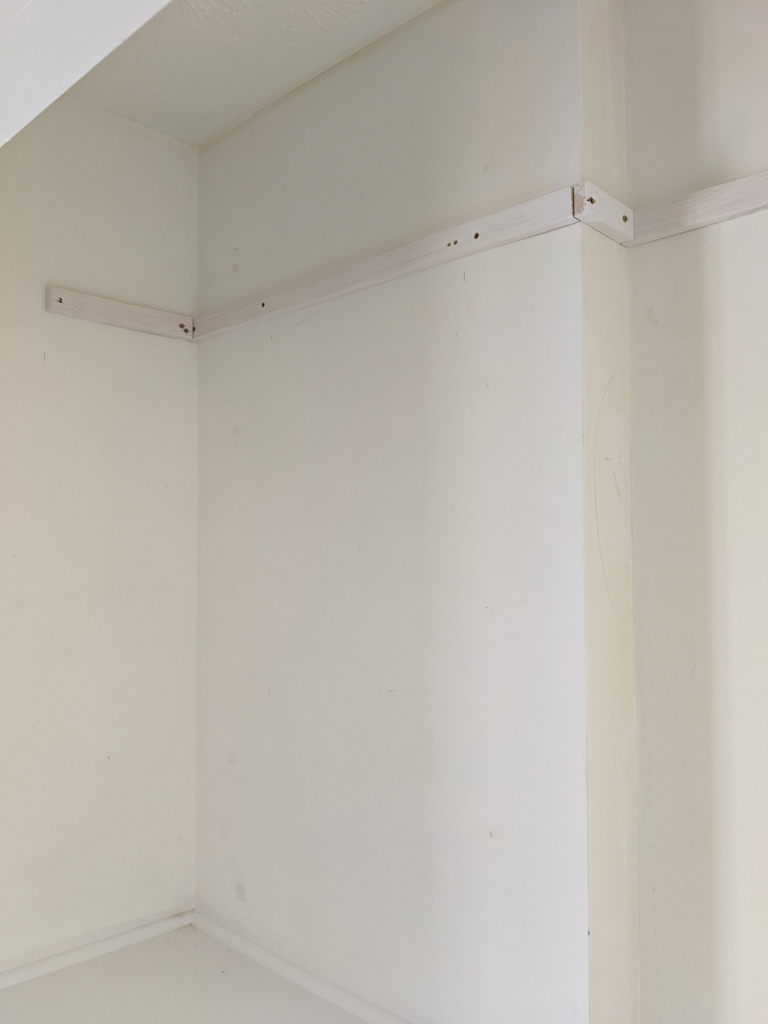
Remove Metal Shelving and Trim
Before I could install anything, I needed to remove all of the metal shelving. I took down the shelving and removed the screws and any drywall anchors that were used. I patched the holes from the screws and anchors using spackle. I always apply slightly more than necessary and lightly sand it down once it’s dry.

Since I would be installing the dressers and units flush against the wall, I needed to remove the baseboards. I removed the baseboards by scoring the caulk with a knife then prying them off with a hammer and small pry bar. They do make a trim puller that makes trim removal easy with minimal damage to the drywall.

Make a Base Frame
If you’ve ever researched custom closets, you know that there is no set way to build a custom closet. I looked at several different closet designs and picked features that I liked the most from these closets. One thing that I really like is when the dressers and closet units sit slightly elevated off of the floor. I think it gives the closet a cleaner, more finished appearance.
The easiest way to make the base frame is using 2×4’s. I based the frame on the depth of the dressers that I purchased. I added 1/4″ to the depth of the dressers because I added a piece of 1/4″ plywood as a backer on the dressers. The frames ran the full width of the closet. I added additional cross supports where the edges of the dressers would sit.

I found it easiest to assemble the base frames in the closets. Using my Kreg jig, I made pocket holes in the cross members. I assembled the frame using 2-1/2″ Kreg pocket screws. Once the base frame was assembled, I secured it to the sub floor using construction screws.
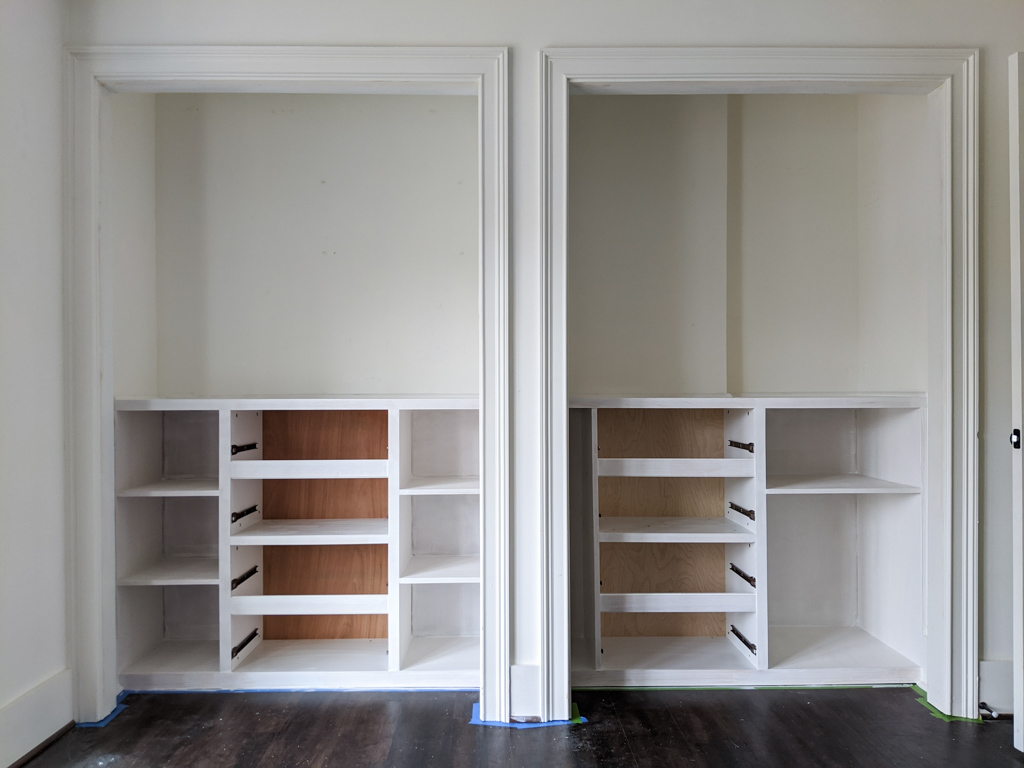
Make Closet Units
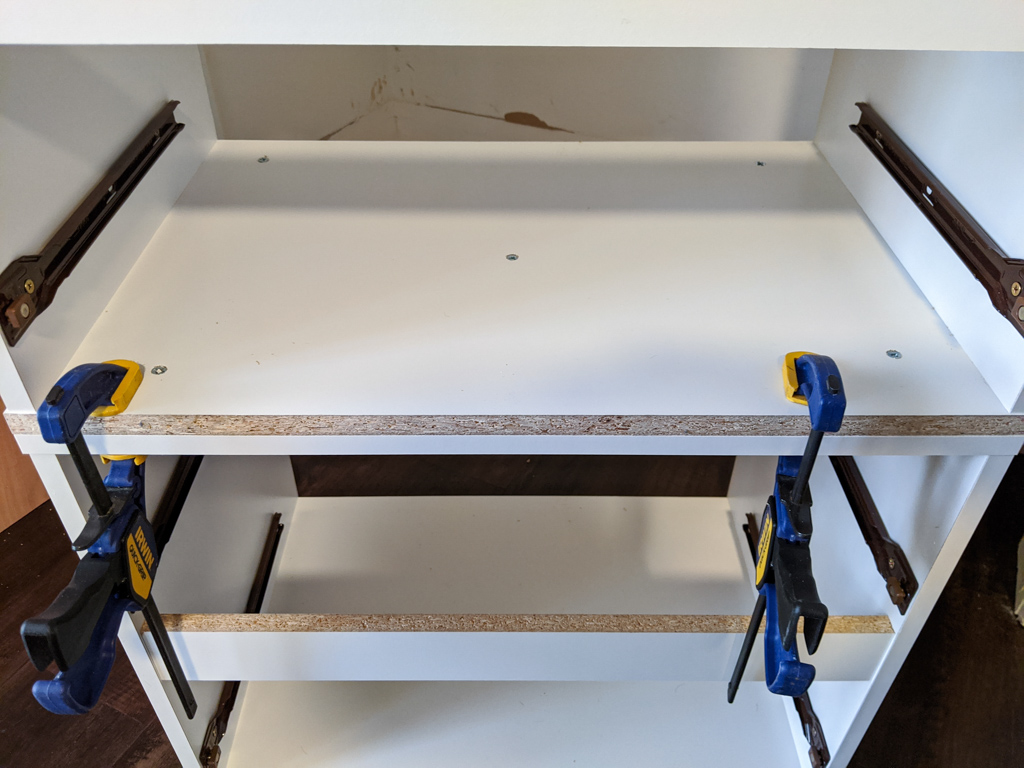
To determine the height and depth of all of the units, I screwed the two 2-drawer dressers together. They wanted to slide around every time I tried to screw them together, so I used clamps to hold them in place. I then used 1″ screws to secure them together. Once they were secured together, I got the overall dimensions.
I started by making the units for the left closet, since the two units were identical. The units were made from 3/4″ plywood. I chose a paint grade plywood since I would be painting everything white.
Once I had all of the pieces cut, I did a quick sanding using 220 grit to get rid of any rough spots. I assembled the units using wood glue, 1-1/2″ construction screws and my trusty corner clamps.
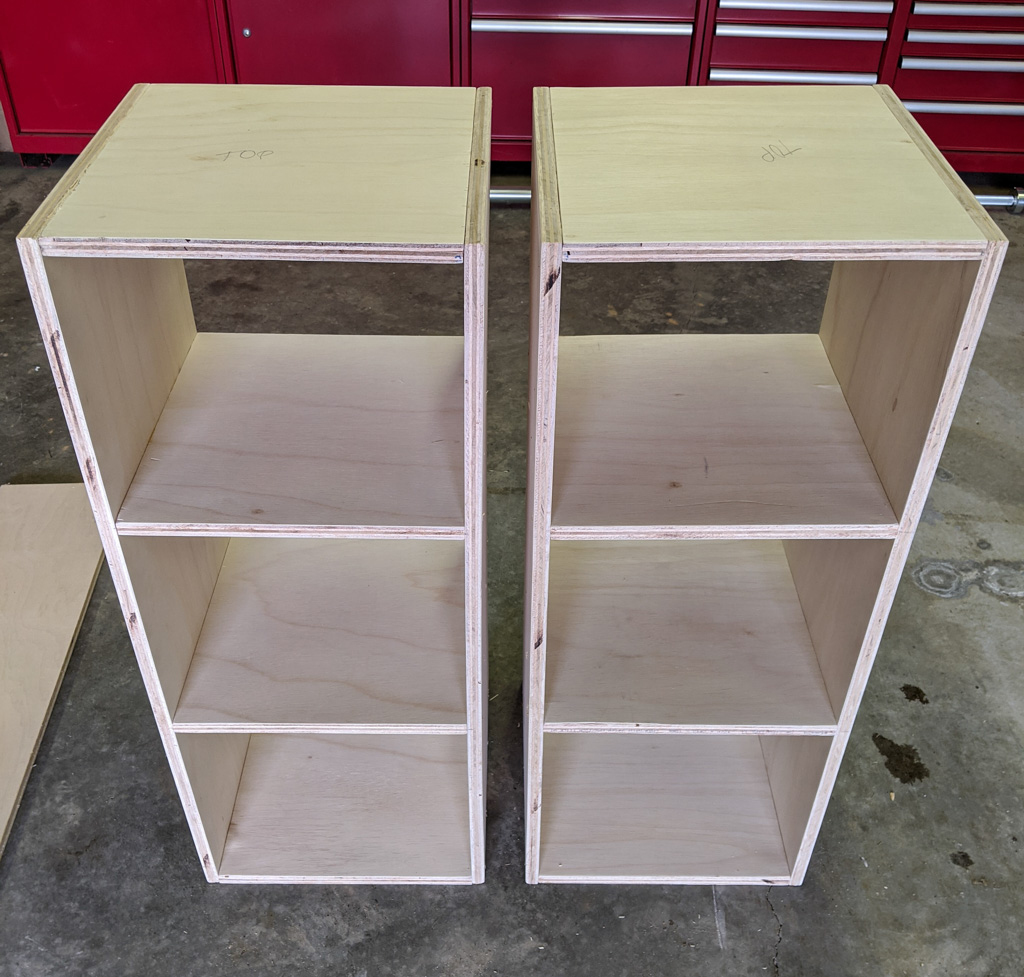
Next up was the closet on the right! The right handed unit was relatively simple to make. It just consisted of a box with one shelf. I made it slightly deeper than the dressers to use the full depth of the notch in the closet.
Once all of the units were built, I added 1/4″ plywood as a backer. I secured it to the units using wood glue and 1-1/4″ finishing nails.

Secure the Dressers and Units
As soon as I had everything in place, I secured it all together. I am a nut when it comes to safety and I secure all of our furniture to the wall. In order to ensure that the units and dresser would stay properly aligned, I used 1″ wood screws to secure them together. I screwed from the inside of the dresser into the units. This way the screws would be hidden.

Once the units were secured together, I screwed through the base on the dresser into the 2×4 base frame using construction screws. I checked to be sure that everything was stable and used construction screws to secure the units the to side walls where necessary. I then added a table top to each side which was made of 3/4″ plywood.

Trim Time
In order to make it all look like a solid unit, I trimmed out the faces. I chose to use 1/4″ lattice molding as the trim. I purchased them in both 1-1/2″ and 2-1/2″ widths and ripped them with my table saw where necessary. I secured them to the face of the units using wood glue and finishing nails. For the face of the dressers, I simply used construction adhesive.
The walls in our home are not straight…which is to be expected with an older home. There were a few minor gaps between the walls and units once installed. In order to hide this gap, I added quarter round to the perimeter of the table tops.
After all of the trim was installed and the glue dried, I patched the seams and nail holes using spackle. I lightly sanded it using 220 grit sandpaper once it dried.

Make and Install the Upper Shelf and Supports
I decided to use a 1×12 piece of wood for the upper shelf. Cutting the shelf for the left side closet was a breeze…I simply cut it the full width of the closet. As for the closet on the right, I cut one piece the full length of the closet. I then cut a piece the width of the notch in the back and ripped it the depth of the notch. Since the notch was so small and it would be resting on supports, I secured the notch piece to the full length piece using wood glue. I clamped the pieces together until the wood glue dried.

Once it was dry, I did a quick sanding on both shelf pieces using 220 grit sandpaper. For ease of painting later, I primed and painted the shelves before I installed them.
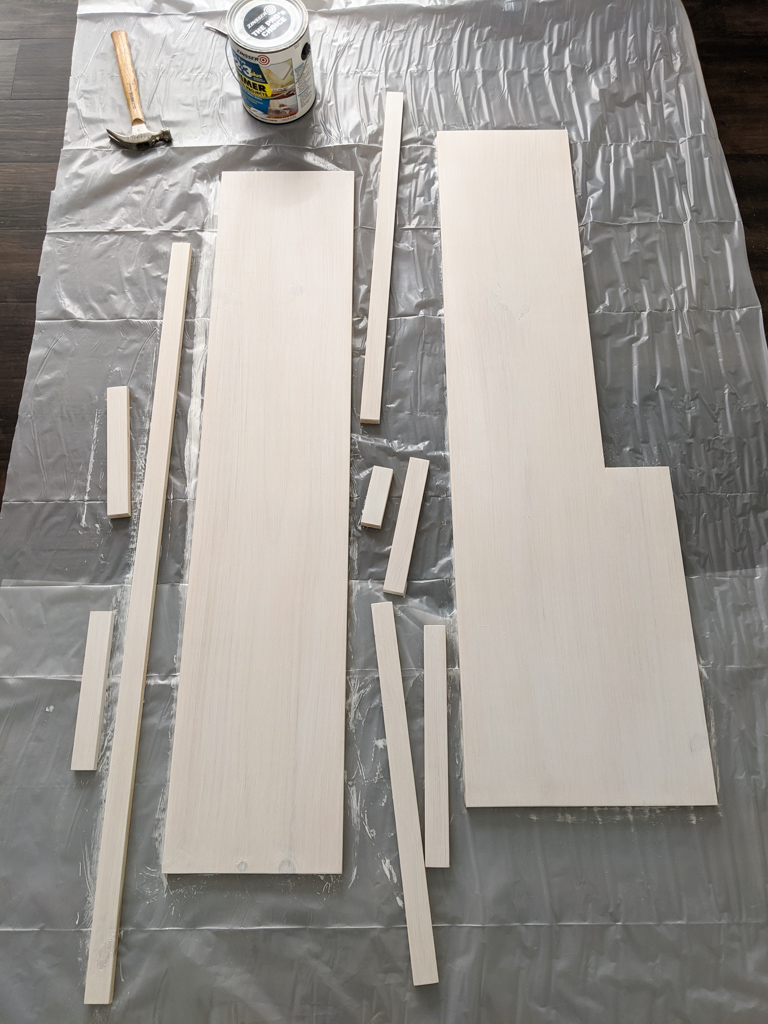
For the shelf supports, I used 1×2 that I had left over from another project. I started by cutting the supports that went along the back wall of the closets. I then cut the pieces for the side walls. The supports were the full depth of the shelf minus the thickness of the 1×2.
I installed the supports using construction screws. I made sure to hit the studs, where possible, and installed drywall anchors where there were no studs. It is important to ensure that your supports not only line up with each other, but are also level.
I’m big on appearance and think that caulk can make a huge difference in the finished product. Therefore, I caulked between the wall and supports and any corner seams.
Paint and Seal Everything
I personally primed and painted the lower units before I installed the upper shelf and hanging rod. I recommend that you wait until everything is installed to break out the paint. The first step is to prime all of the raw wood before you paint. If you don’t prime the raw wood, you will have to do at least one additional coat of paint.
As for my paint selection, I chose to go with what I had on hand. I am all about saving a few dollars where I can! Luckily, I had some Snowbound by Sherwin Williams in a semi-gloss finish. I decided to use this for the entire closet because it is easy to wipe down (after all, these closets are for two little boys).
With the few storage units that I’ve made and painted, I have always had an issue with the paint being scratched or worn by baskets. I know that my boys will constantly be pulling the plastic bins out of the units, so I wanted to add a little bit of protection. I applied one coat of polycrylic to the top surfaces of each unit as well as the table top for that added layer of protection.
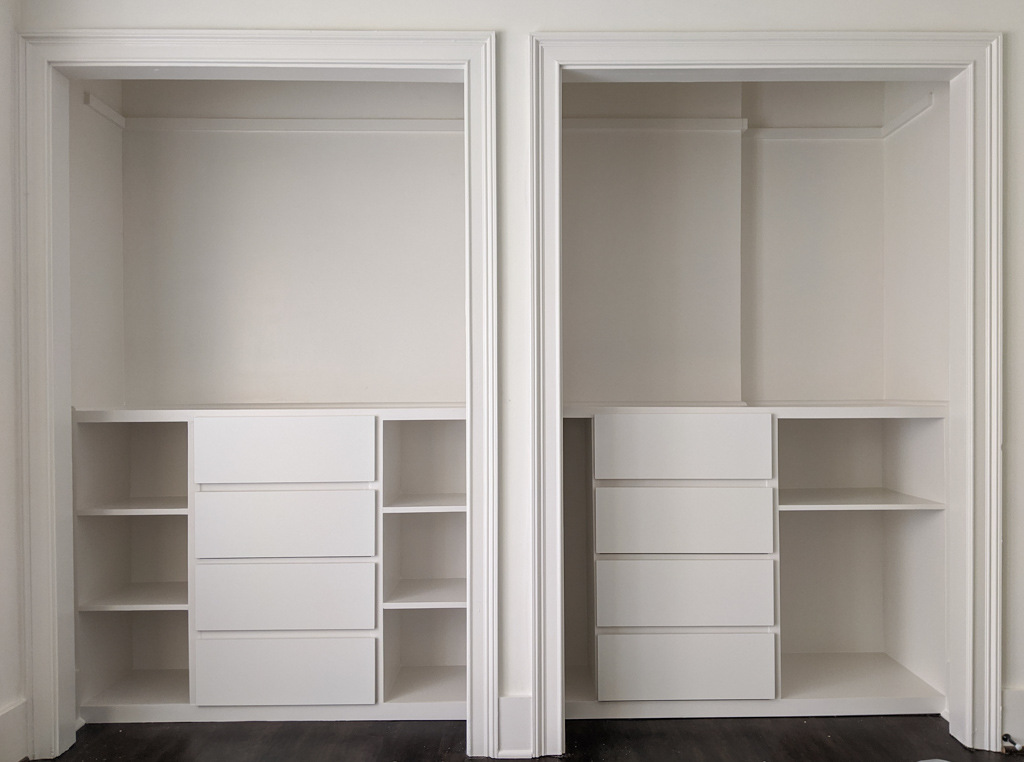
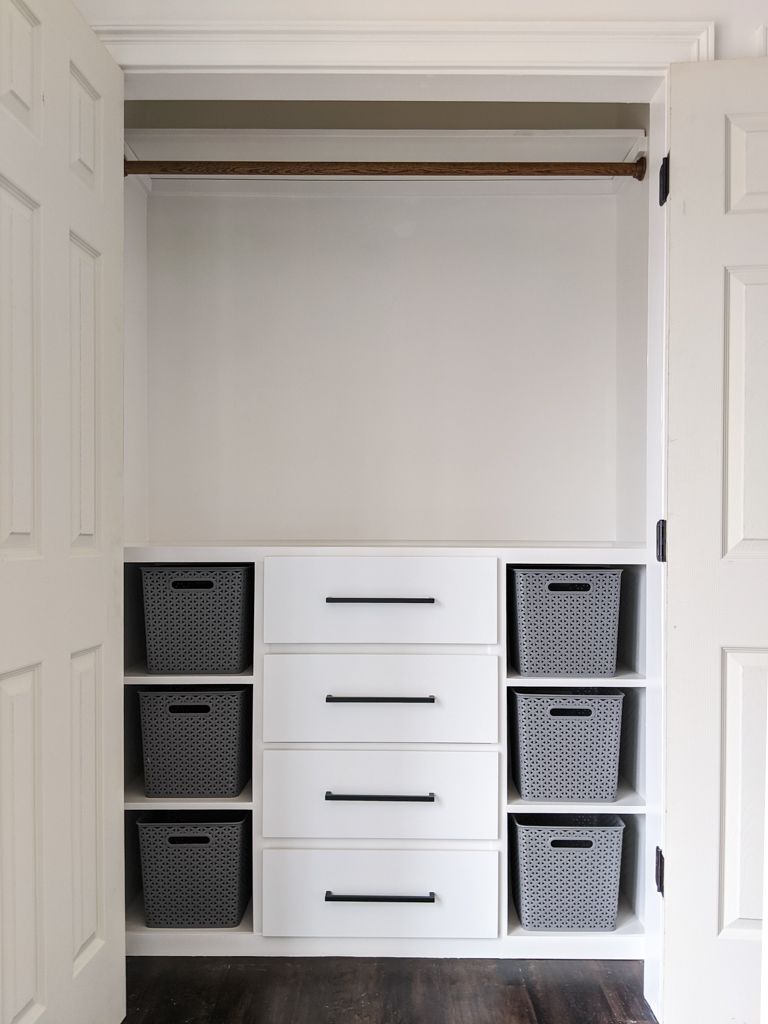
Add a Hanging Rod
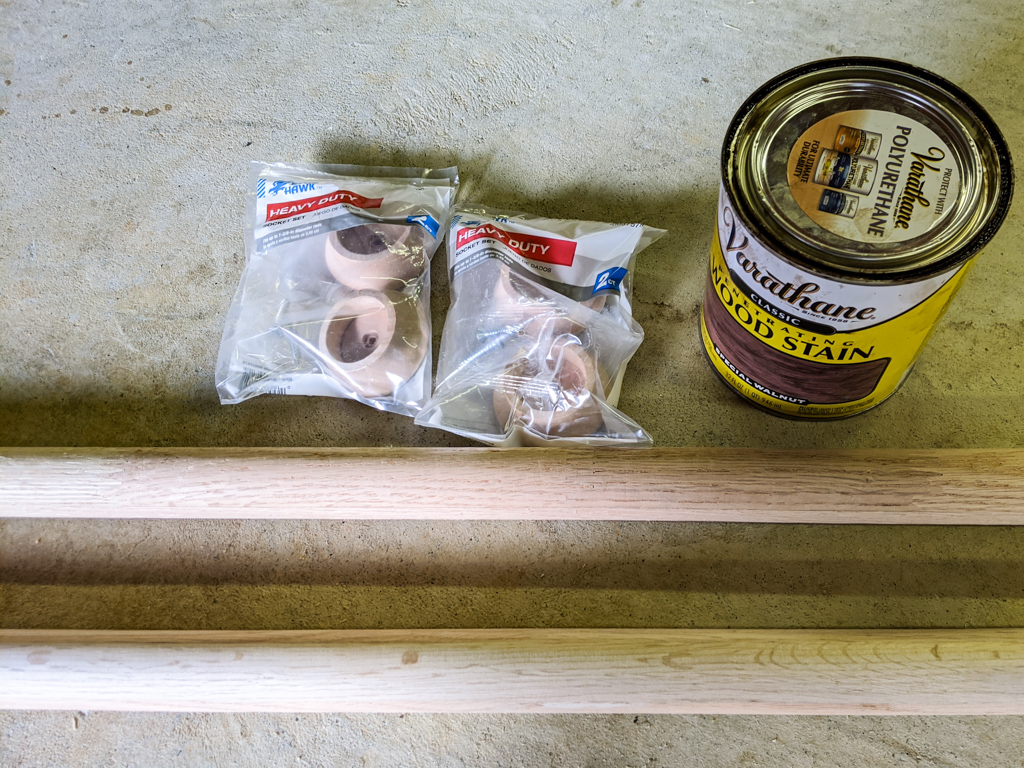
With everything in the closet being white, I decided to add a little warmth with a stained wood hanging rod. I started with a wooden dowel rod that I cut down to the full width of the closet. I purchased the heavy duty wooden socket sets to mount the hanging rod. I stained both the rod and socket set Special Walnut and sealed it with a quick coat of polycrylic.
I installed the socket sets using drywall anchors. I think I could stare at this clean, white closet all day! It’s so much better than that ugly metal shelving!
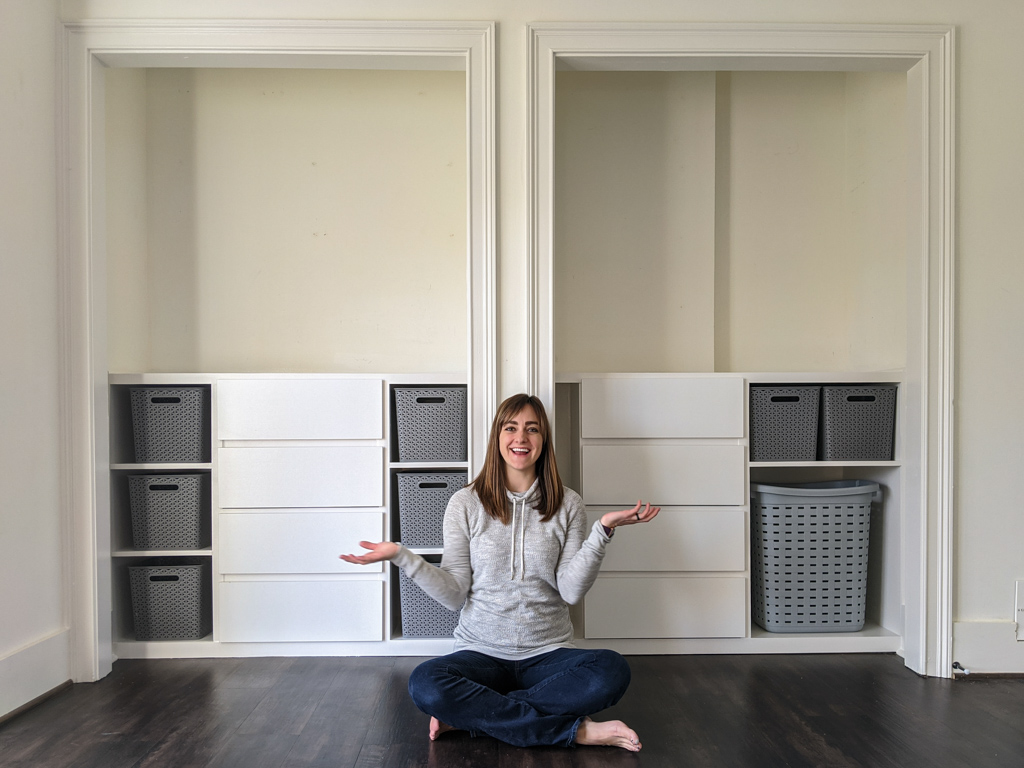
Baskets and Hardware
I just love adding the finishing touches to a space that I put so much time and energy into! I finished off the shelves with plastic bins that I already had laying around the house. Luckily, I had just enough baskets and they fit perfectly!
The dresser drawers were slightly difficult to open. I want my boys to be able to easily open and close the drawers without pinching their fingers. I decided to add my go-to hardware to the dressers! These are the Goldenwarm drawer pulls from Amazon that I have throughout my home. They come in all different sizes and are super affordable!
The final step for these closets is to install French doors in place of the unattractive bi-fold doors. Check back later for a blog post on how to install French doors.