We have been in our home for almost a year now…which is crazy to me! I guess time really does fly when you’re having fun. I have really enjoyed decorating and renovating our home! As with every home that we have lived in, the master bedroom is one of the last rooms that I decorate. I’m not sure why I neglect the one room that we spend the most time in.. Our master bedroom was in desperate need of attention, and I finally found the time and energy to focus on it.
Shiplap Accent Wall
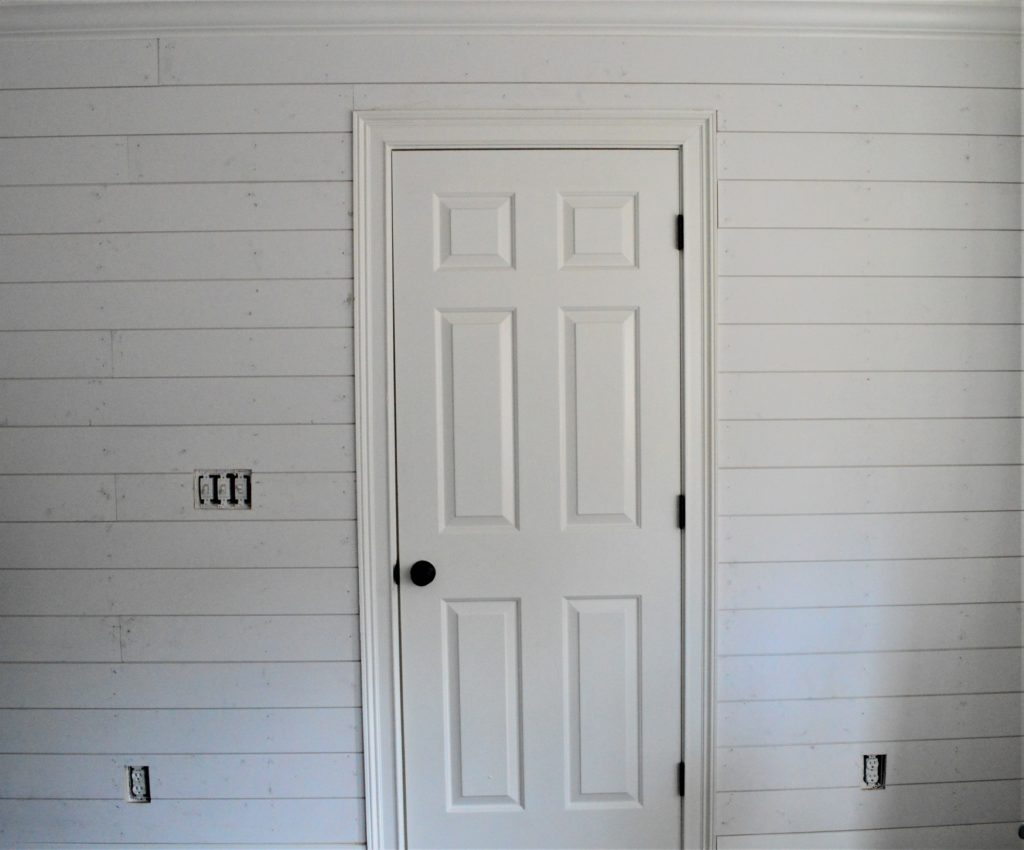
I started off the makeover with a little shiplap (one of my favorite things). I used both a construction adhesive and finishing nails to install the shiplap. We have discovered that if you go with thin wood for shiplap and don’t use an adhesive, it can become warped. If you use an adhesive, it is less likely to warp. When you use real shiplap or a thick wood, you don’t have to worry about warping as much. I just like to be extra sure that my shiplap is secure.
**This post contains affiliate links to products that I recommend. If you purchase something through an affiliate link, I may receive a small percentage of the sale at no extra cost to you. I really appreciate your support.**
I butted the shiplap up against the wall and notched out around the outlets and light switch using my DEWALT Oscillating Multi-Tool. After all of the shiplap was installed, I caulked the seams along the walls and door frame. I used spackle to patch the seams and nail holes. I normally don’t sand down the seams, but chose to this time. It definitely caused some issues when I painted. There was a different finish in the places where I sanded the shiplap and it was very obvious when I painted using an eggshell sheen.
Black Shiplap
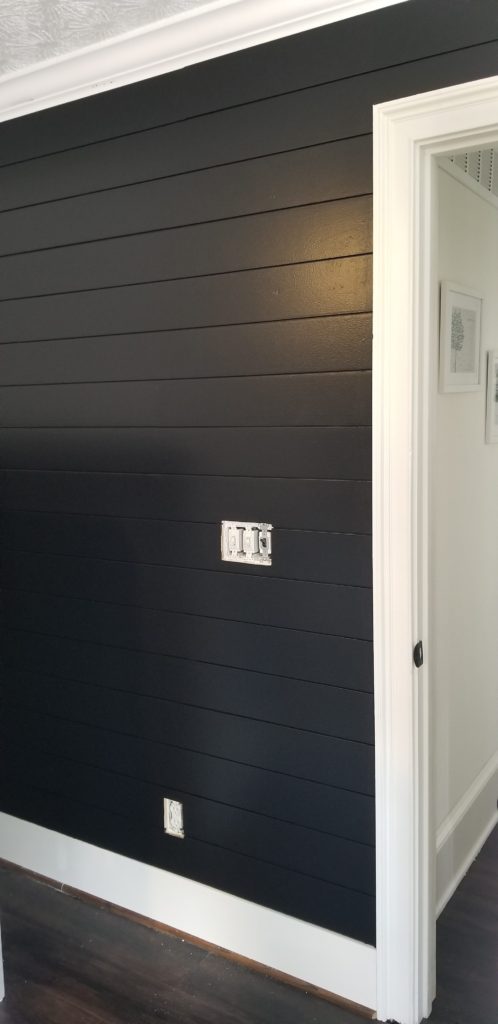
I decided to change it up a little bit and paint the shiplap black. I went with Behr Totally Black in satin. I spent so much time searching for the best sheen for shiplap. Many people post the color they use, but fail to mention the sheen. I was able to find that eggshell and satin are the most common for shiplap. As I mentioned, I had issues with the seams of the shiplap when I painted it eggshell, so I tried to repaint it with a satin sheen. I really like how the satin paint turned out.
Electrical Outlets and Switches with Shiplap
I have never been big on messing with electrical, but decided to give it a try this time. It’s crazy how easy it is to replace light switches and outlets! Just be sure to turn off the power to the outlets at the breaker panel and you’re good to go. I used Voltage Tester Pen to double check that the power was off for peace of mind. I switched the existing white switches and outlets out with black switches and outlets.
One thing to keep in mind when installing shiplap around outlets and switches is that they will be recessed once the shiplap is installed. I installed these Switch and Receptacle Spacers. They space the outlets and switches out enough to be flush with the front of the shiplap. I did have to go buy longer screws to handle the spacers, but they were super easy to install.

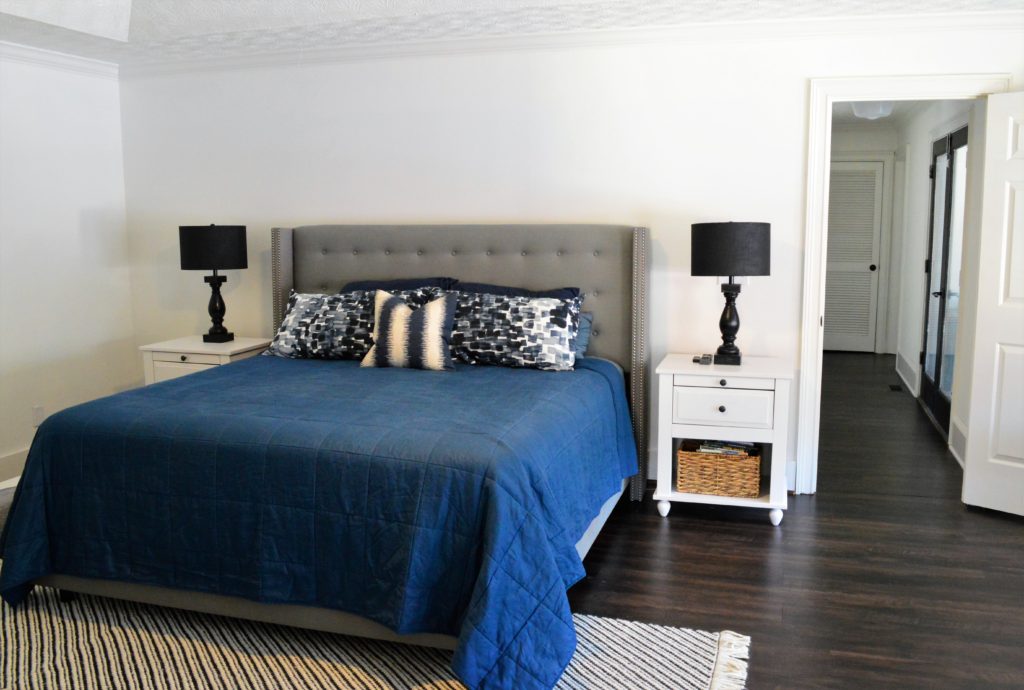
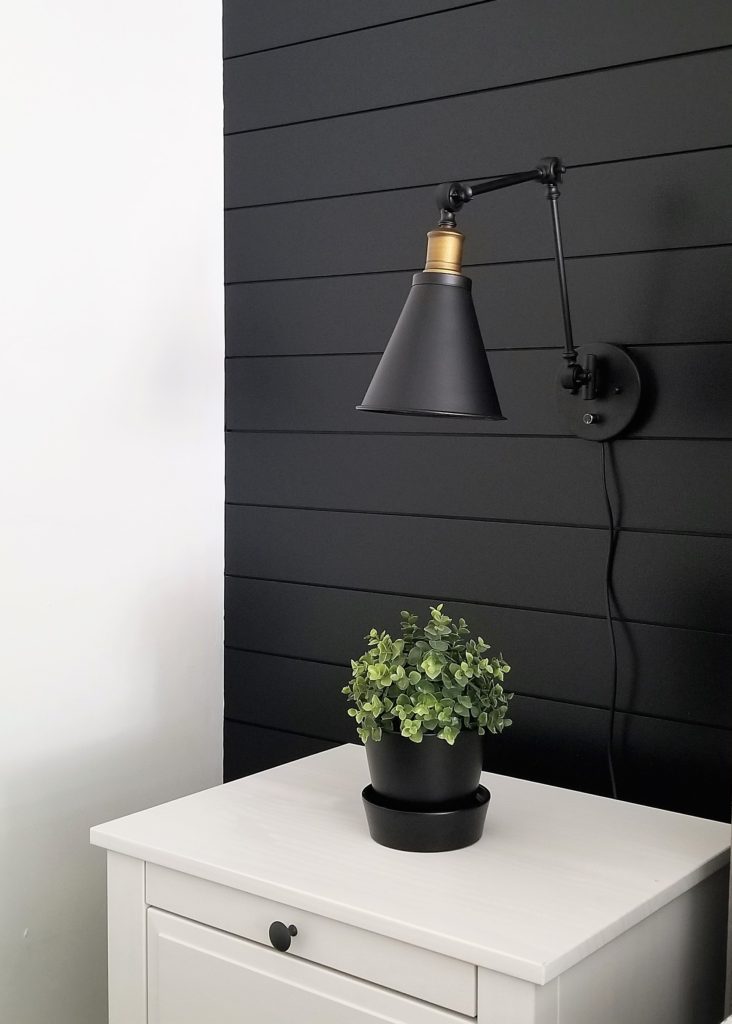
Wall Sconces
After I completed the shiplap, I decided I needed new bedside lights and bedding. I absolutely love the Industrial Black and Antique Brass Swing Arm Wall Sconces that I found! They go perfectly with the black shiplap and they opened up our nightstands…WIN WIN!
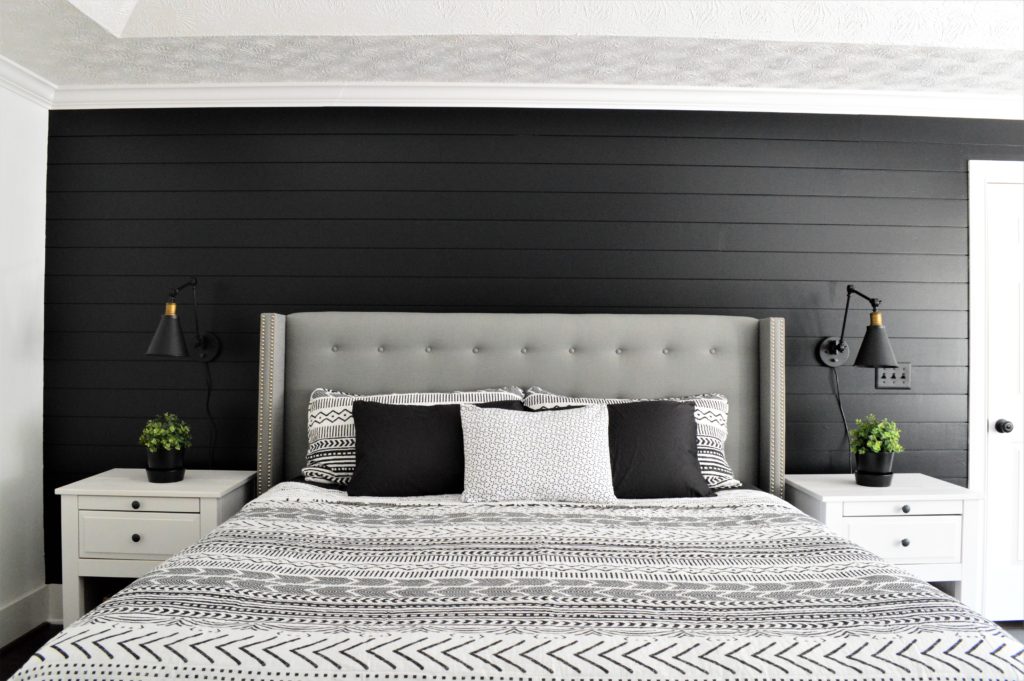
Black and White Bedding
As for the bedding…I love white bedding and knew it would look great against the black wall. The only problem is that we have two young boys and two dogs with black fur.. Instead of all white, I opted for black and white in this Lush Decor Geo Pattern Striped Bedding Set.
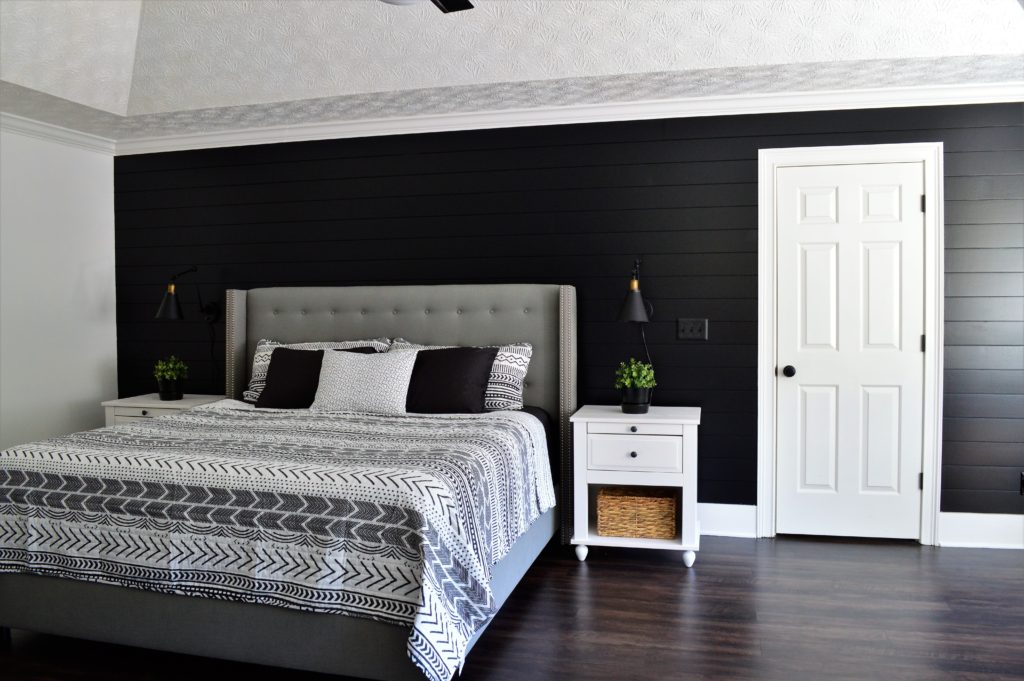
I am so happy with how my mini bedroom makeover turned out! It is such a cozy space now with the black shiplap accent wall. I should have been content with these changes…but I always take things to the next level and decided I needed barn doors too..
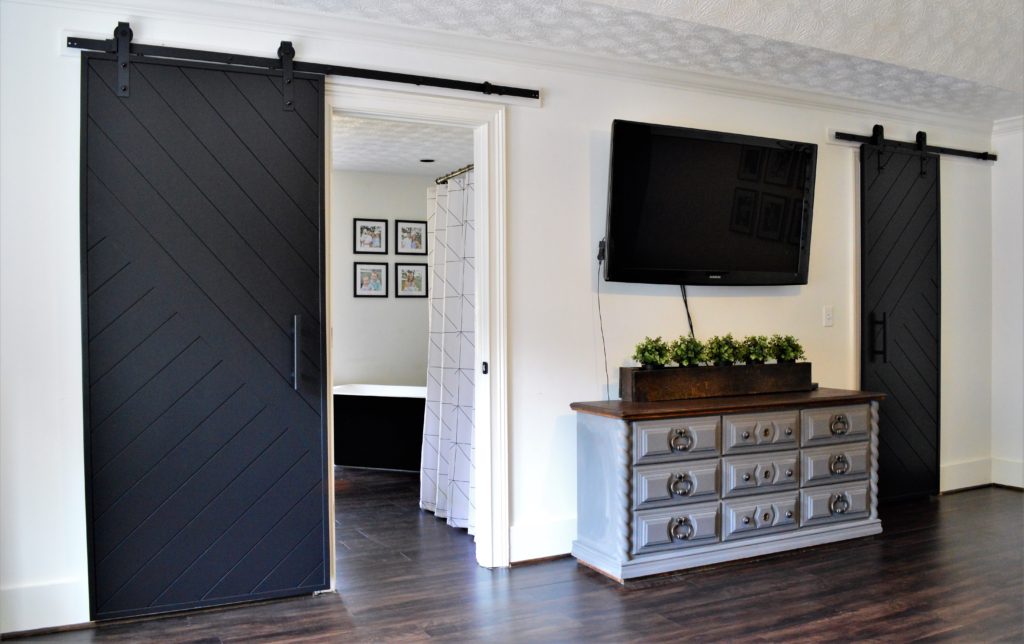
Barn Doors
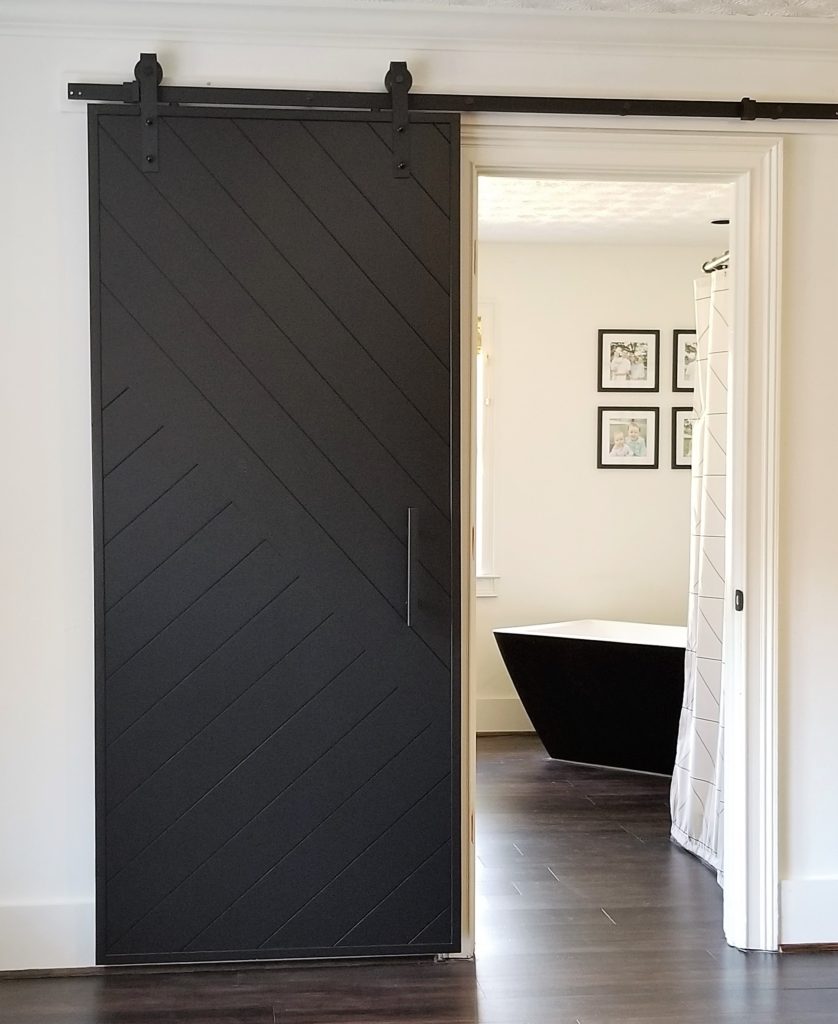
I chose to go with custom made barn doors for our bathroom and closet. The barn doors are made of 3/4″ MDF. When deciding on a size for the barn door, it is best to make it big enough to cover the door trim. It is also important to look at the surrounding area and be sure that you have enough room to fully open the door. I had plenty of room for my bathroom barn door, but the dimensions were tight for the closet door. I ended up making the closet barn door slightly smaller than the width of the trim.
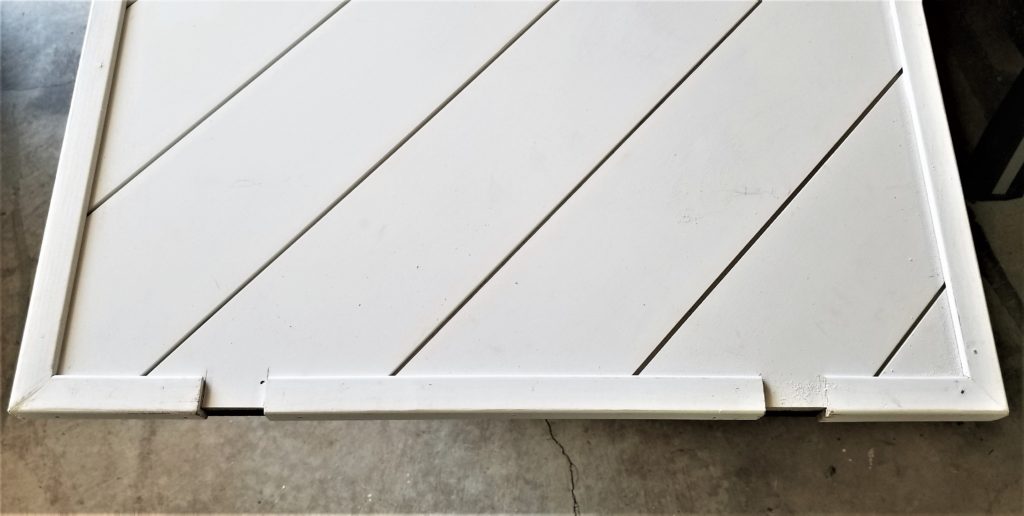
I went with a non-traditional shiplap pattern for the doors. It would have been much easier if I had just cut everything on a 45 degree angle, but I was going for a slightly different look (and I like to make things difficult for myself). I secured the shiplap to the doors using an adhesive and my new DEWALT Cordless Angled Finish Nailer. I didn’t have the nailer when I installed the shiplap on the wall…it made life so much easier when I made these doors!
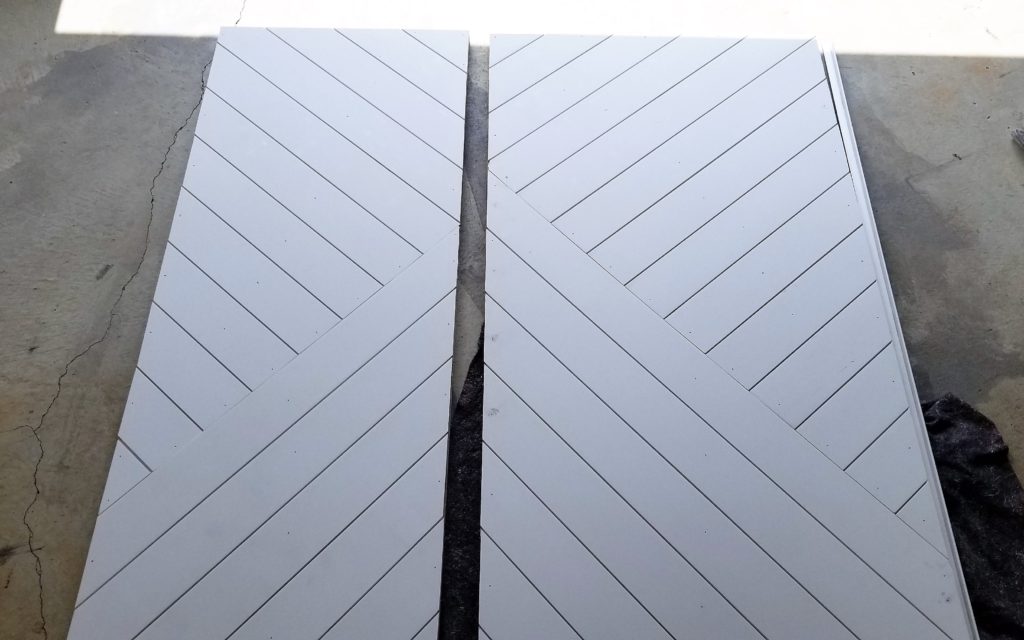
In order to achieve a clean edge, I added corner molding. I notched out the corner molding on the top of the door where the hardware would be installed.
Barn Door Hardware
When installing a barn door, it is important to take a few quick measurements to verify clearance for the door. In this case, our door trim is rather thick. If I mounted the barn door rail directly to the wall, the door would have hit the molding around the door. I decided to mount the barn door rail on a 1″ thick piece of wood. The barn door rail should be just slightly larger than twice the door width. I chose to go with this Rustic Black Sliding Barn Door Track Hardware Kit based on the dimensions of our doors.

Barn Door Handle
Have you ever ordered something online an been super impressed with the product when you received it?! That is exactly what happened when I got the Heavy Duty 12″ Pull and Flush Barn Door Handle Set for our barn doors! I must not have paid attention to the dimensions, because I was very surprised by their size. They are rather large and heavy and look amazing on the doors! The handles included a pull handle for the inside of the door. Definitely worth the price!

Now that we have a new vanity, I absolutely love everything about our bathroom. We have a large free standing tub that is amazing! With the black barn door, the view into our master bathroom is perfect.
I am thrilled with the way that my master bedroom makeover turned out! The black shiplap accent wall and barn doors added the perfect amount of warmth and luxury to our room. It feels like our own little haven!