
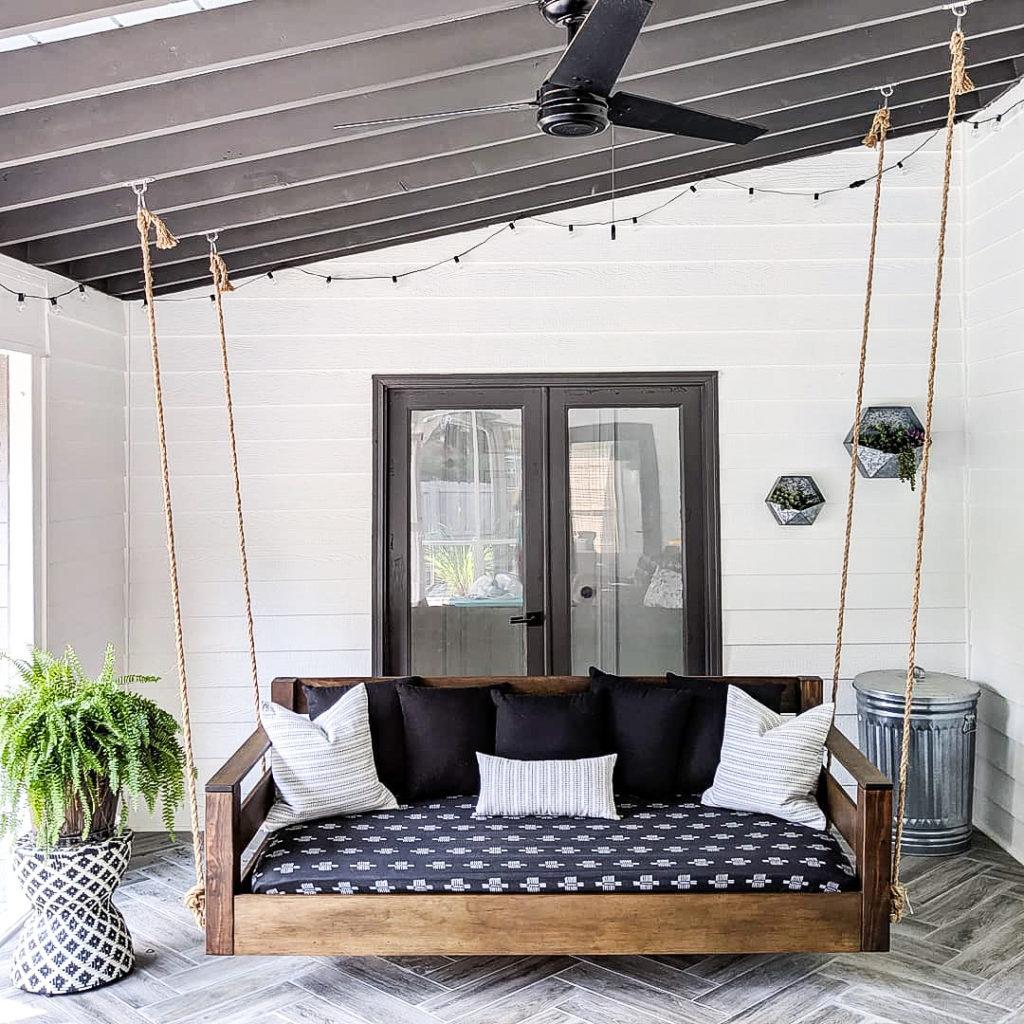
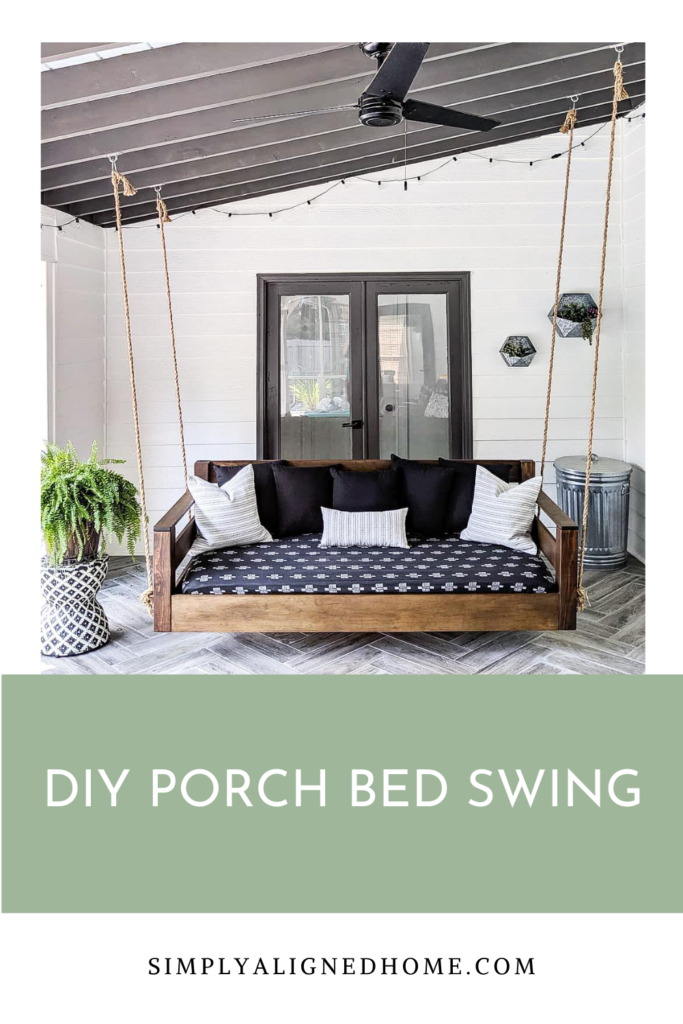
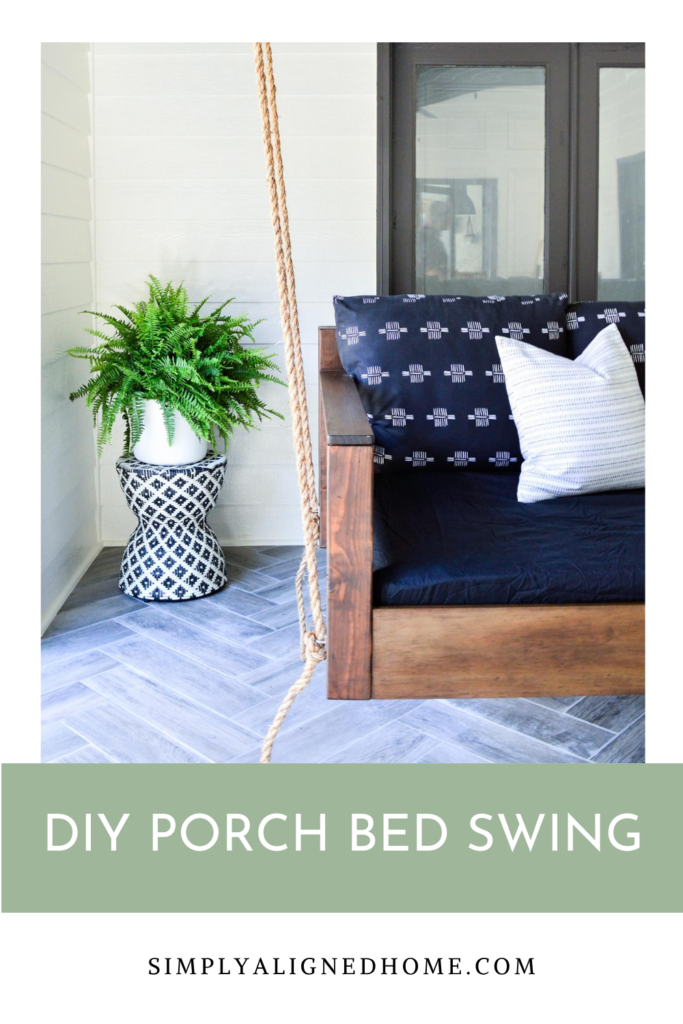
Have you ever wanted to make something, but convinced yourself that you didn’t need it? That’s how I was with a bed swing. I really wanted one for our screened in porch, but I came up with every excuse not to make it (we don’t have room for one, I don’t have the time to make it, we don’t need to spend the money…). After looking at too many pictures of bed swings, I decided it was time to make one!
I wanted a simple design, but I had trouble finding plans that I loved. So, I decided to come up with my own design. Let me tell you…following someone else’s plans is so much easier! I wasted a good bit of time with wrong dimensions, but still built the swing in just a few hours.
**This post contains affiliate links to products that I recommend. If you purchase something through an affiliate link, I may receive a small percentage of the sale at no extra cost to you. I really appreciate your support.**
Materials and Tools
Here is a list of the tools and materials that I used:
- Miter Saw
- DEWALT 20-Volt Max 16-Gauge Cordless Angled Finish Nailer (Nails and a hammer will work just fine.)
- 1-1/4″ Finish Nails
- Wood Glue
- reg Jig Pocket Hole System
- Kreg 1-1/4″ Pocket Hole Screws
- Kreg 2-1/2-Inch Pocket Screws
- Sander
- Varathane Weathered Wood Accelerator
- Varathane Satin Exterior Spar Urethane
- Rope (I purchased 50′. This will depend on the height of the ceilings and how high the swing will hang.)
- ( 2 ) Square Pad Eye Plates U Hook Anchor (I used these for the swing.)
- ( 1 ) Ceiling Hooks (I used these for the ceiling.)
- Twin Size Bed Rails
- Material Cut List:
- ( 2 ) 4×4’s – 20″ Long
- ( 2 ) 4×4’s – 25-3/8″ Long
- ( 2 ) 2×4’s – 75″ Long
- ( 3 ) 2×4’s – 36″ Long
- ( 2 ) 1×8 Pine – 75″ Long
- ( 2 ) 1×8 Pine – 33-1/2″ Long
- ( 2 ) 1×6 Pine – 75″ Long
- ( 2 ) 1×6 Pine – 33-1/2″ Long
- ( 1 ) 1×6 Pine – 25-3/8″ Long
- ( 2 ) 1×4 Pine – 35-3/8″ Long
Note: All of the joints were butt joints. I used wood glue on all joints along with the screws.
How I Made the Bed Swing
Warning: This is my first piece of furniture that I have made without following plans. My approach may not be the best, but it turned out great!
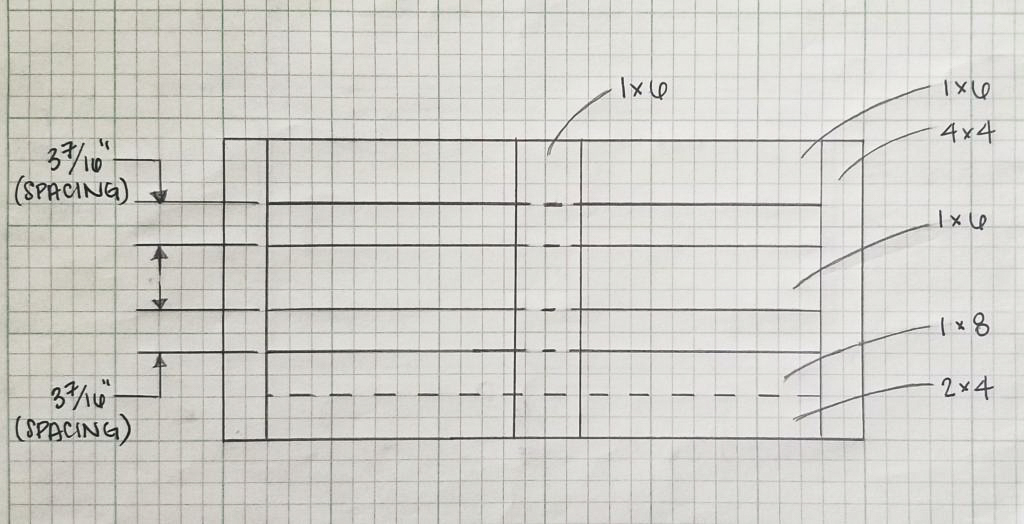
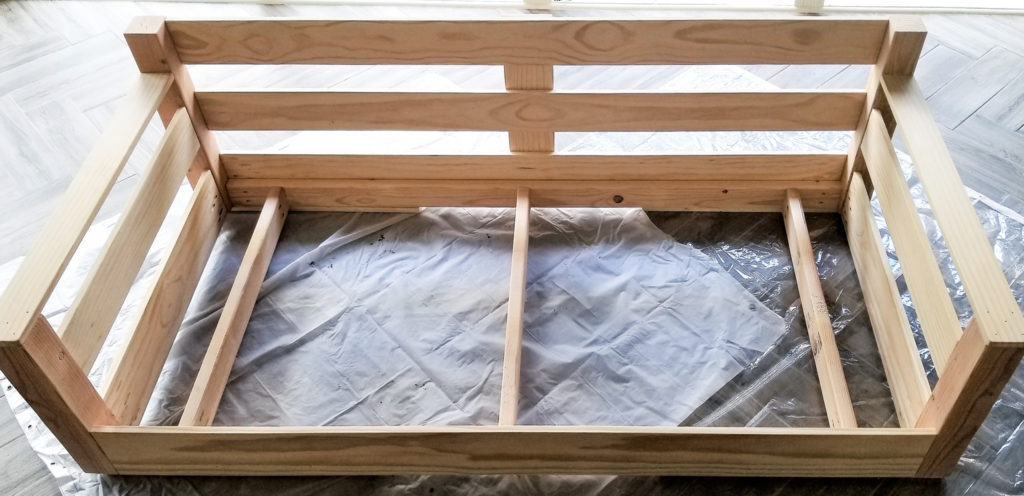
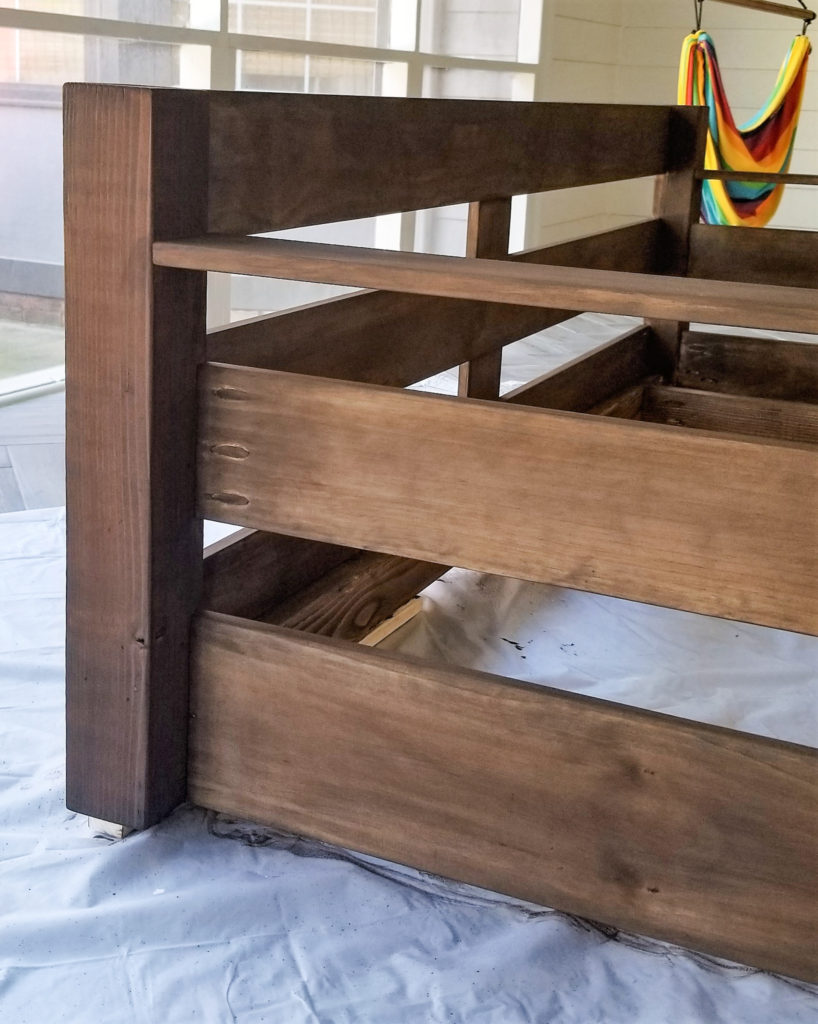
I began by making the base of the swing. See below for a sketch of the layout of the base. I used Kreg 1-1/4″ Pocket Hole Screws to attach the 1×8 Pine to both of the 4×4 pieces. Once the 1×8 was secure, I attached the 2×4’s to the 4×4’s with Kreg 2-1/2-Inch Pocket Screws. I butted the 2×4 up against and flush with the bottom of the 1×8. I secured the 1×8 to the 2×4 with wood glue and finishing nails.
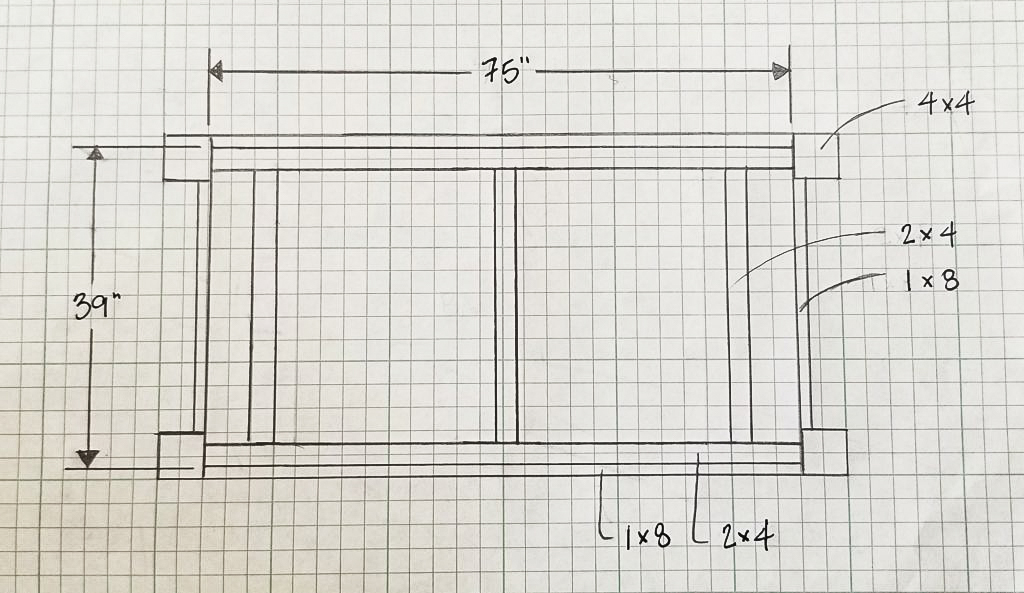
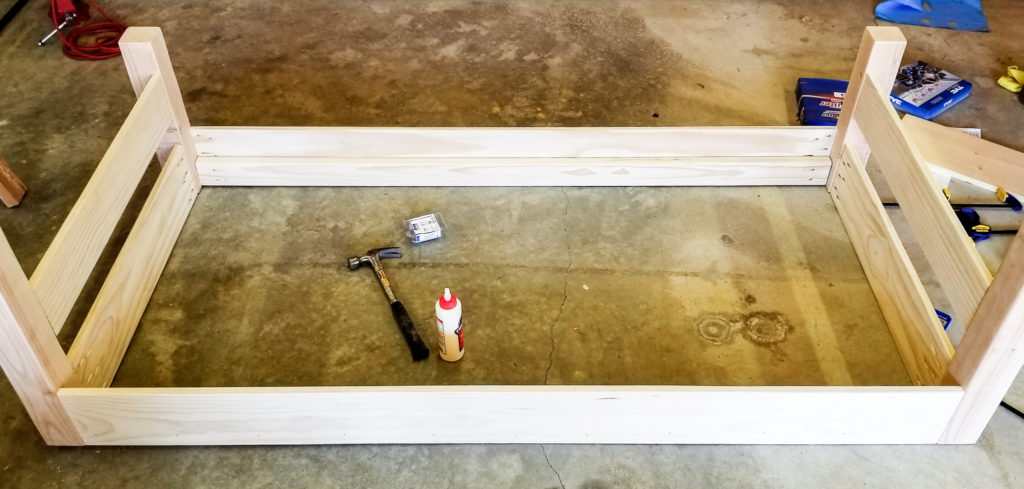
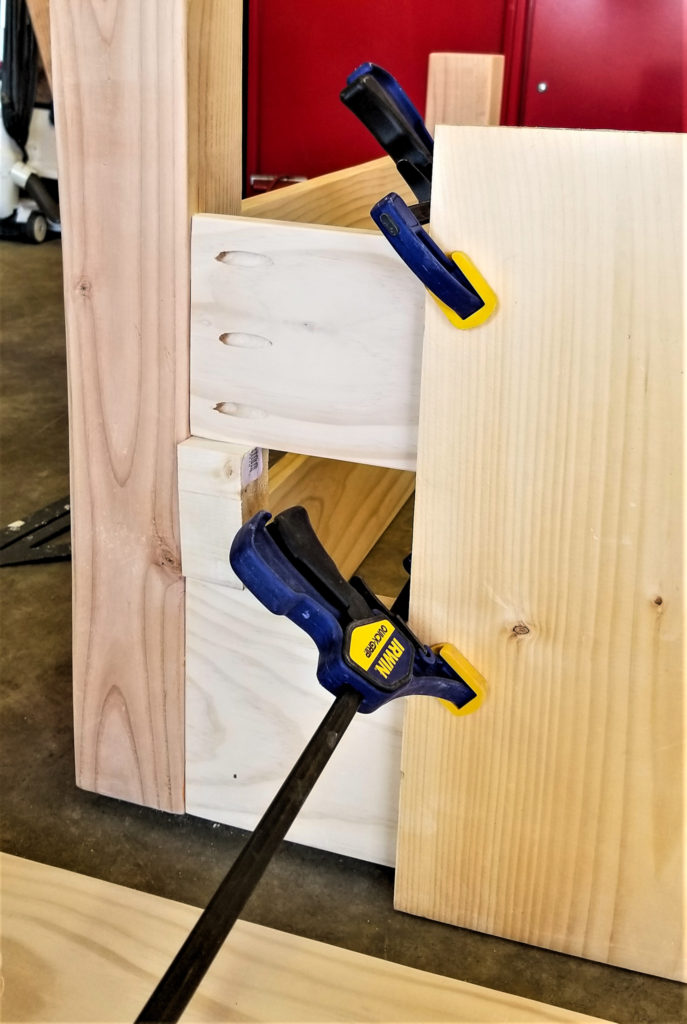
After I was done with the base, I installed the horizontal 1×6 pieces. They were all spaced 3-7/16″ off of the 1×8, so I cut a few pieces of wood this length to make the spacing easier. I used a spare piece of wood and clamps to keep them in line with the 1×8’s. I then installed an additional 1×6 for support in the center of the back.
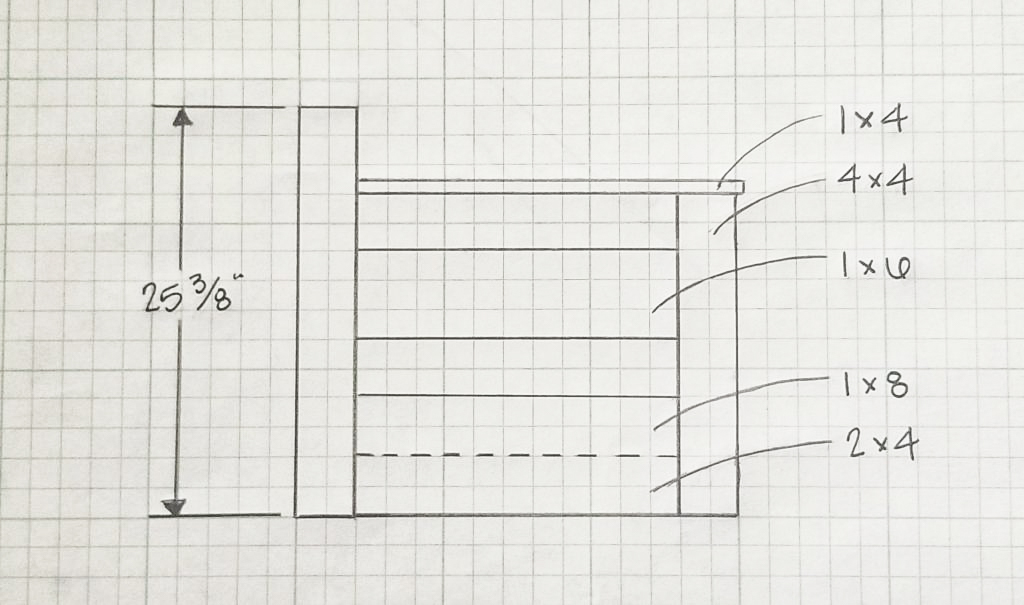
For the arm rails, I used 1×4. I secured it to the top of the front 4×4’s with wood glue and finishing nails and Kreg 1-1/4″ Pocket Hole Screws for the back 4×4’s.
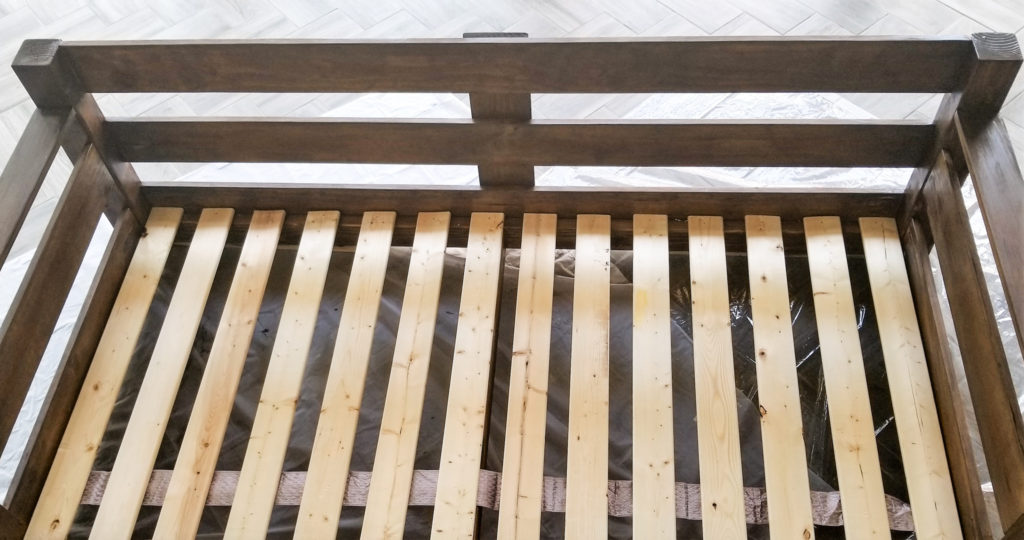
Once everything else was assembled, I installed three 2×4 pieces in the base to ensure that it would not warp. (See Top View of Base for placement of the 2×4’s.) I used Kreg 2-1/2-Inch Pocket Screws to attach the 2×4’s to the previously installed 2×4’s.
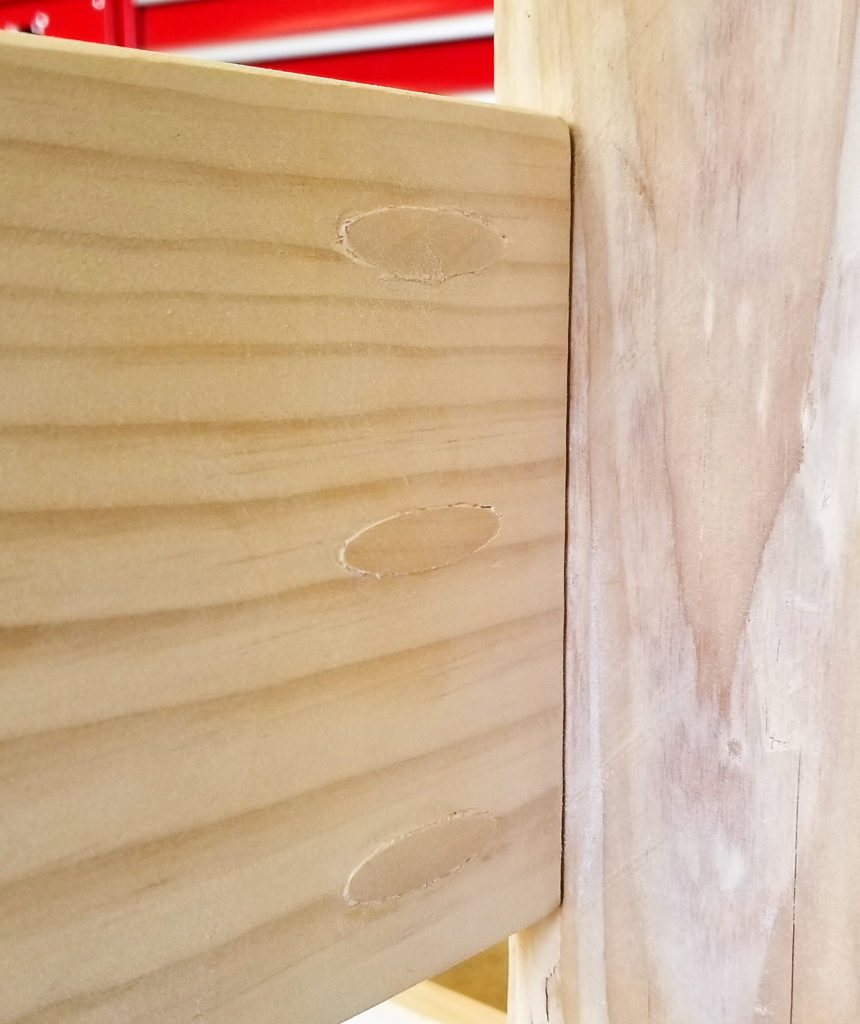
To finish off the swing, I plugged the Kreg screw holes with Pocket Hole Plugs and wood glue and sanded down the plugs so they were flush with the wood.
I hope these directions aren’t confusing and that the sketches actually help!
Wood Finish
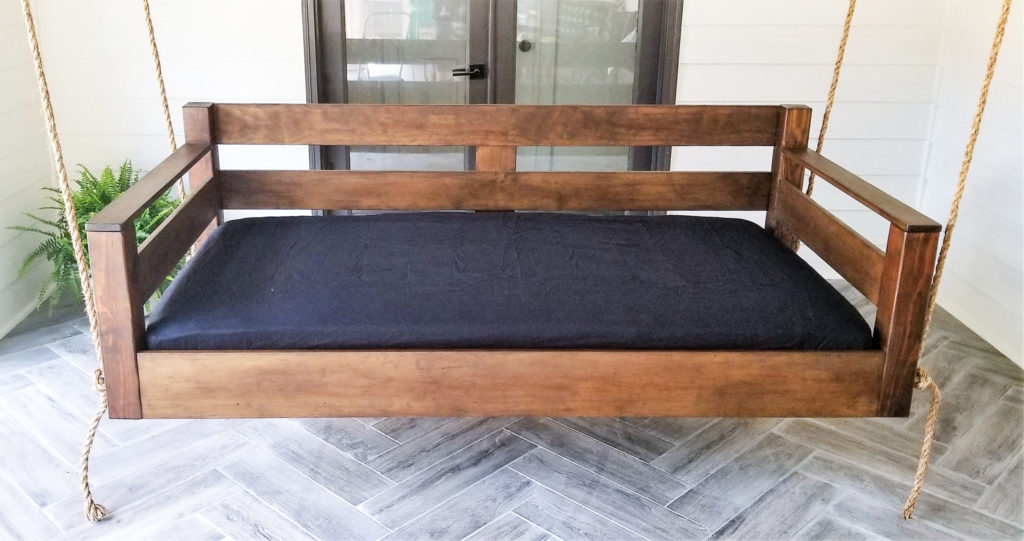
For the finish, I decided to go with Varathane’s Aged Wood Accelerator in brown. I have to be honest…I was a little concerned with my decision to use the accelerator at first. It looked a little dull before I applied the urethane.
Luckily, it turned into a really rich color when I applied the urethane (I went with a satin finish). I absolutely love how the finish turned out!
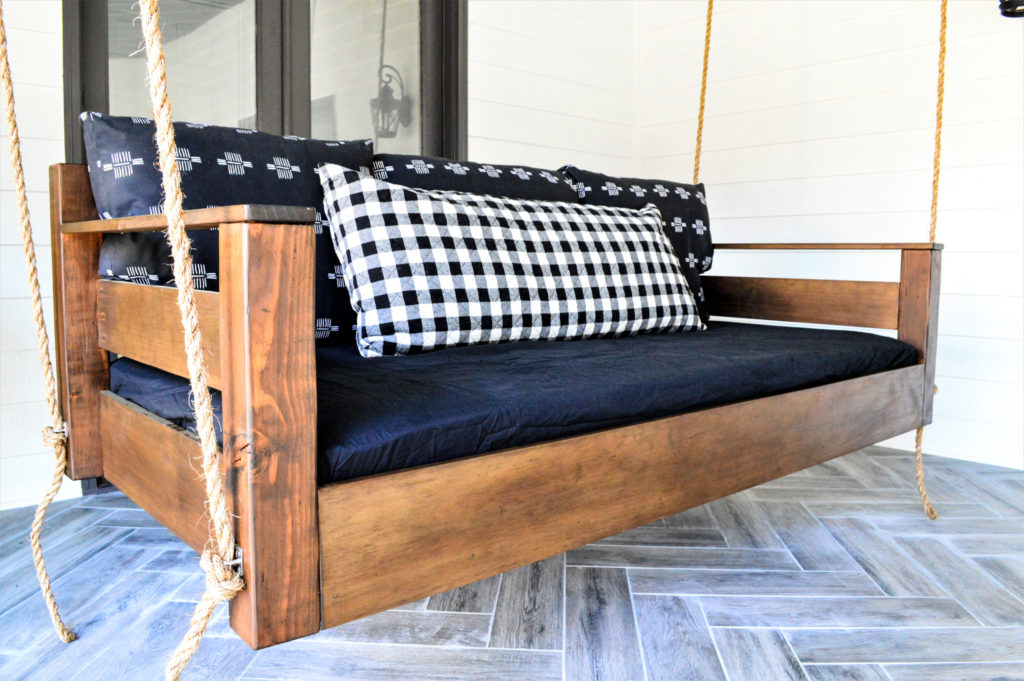
I had a spare set of bed rails in our garage that I was about to use. I could have easily used 1×4’s instead of the pre-cut bed rails. I evenly spaced the bed rails on the 2×4’s and secured them using finishing nails.
Bed Swing Mattress
ot of research on the best mattresses for outdoor bed swings and ultimately decided that I just didn’t want to spend a ton of money. I opted for an affordable Linenspa 6 Inch Innerspring Mattress – Twin sized. I was concerned that if I went with a foam mattress, it would suck up all of the moisture in the air…and it is super humid where we live! I purchased an affordable Zippered Plastic Mattress Cover Protector and fitted sheet.
Installation of Hooks
Quite possibly the worst part of online shopping is the waiting game. I love that you can buy virtually anything from Amazon with free two day shipping, but I wish I got it instantly. The bed swing was done, the mattress and cover were here, and all I was waiting on were the hooks. I planned my entire day around the delivery of the hooks…and they didn’t show up. Not only did they not show up, Amazon told me that they could not be delivered because the building was closed. Funny thing is that I had them delivered to my home. After a quick chat with customer service (which is amazing), I was told they would arrive the next day.
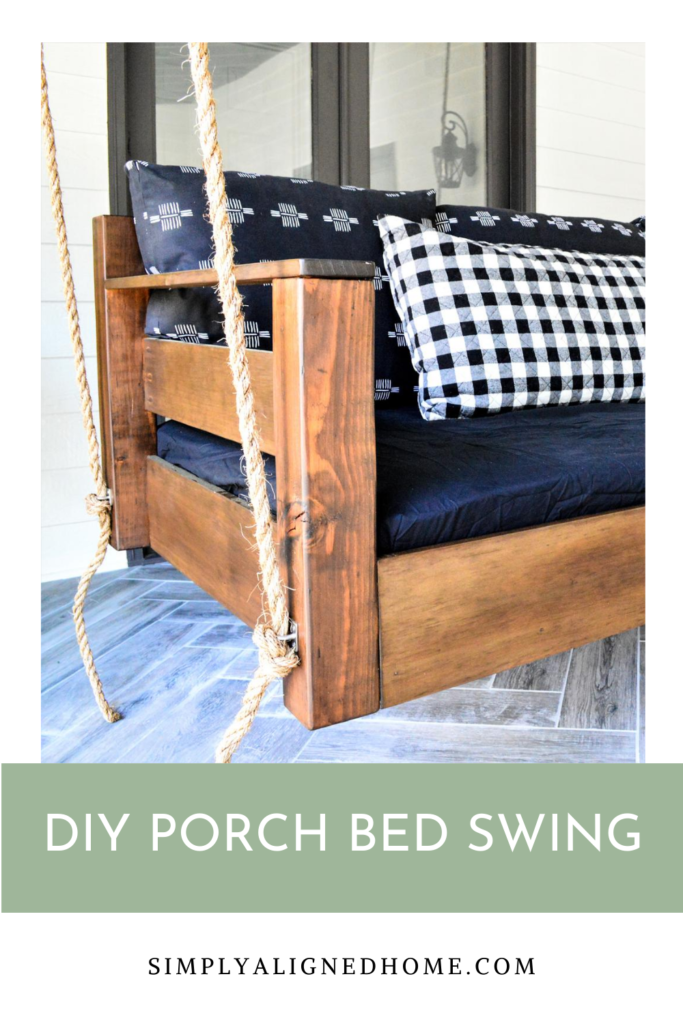
Literally, as soon as the hooks arrived, I installed them. I first installed the hooks on the swing on the outside of the 4×4’s approximately 3.5″ from the bottom. As for the hooks in the rafters, I decided to install them slightly wider than the swing. I try to think of all of the hazards when working on projects. It’s a mom thing… I was afraid that if I installed the ceiling hooks directly above the swing hooks, my boys would pinch their finger between the rope and swing. Spacing the ceiling hooks outside of the swing eliminated a pinch point.
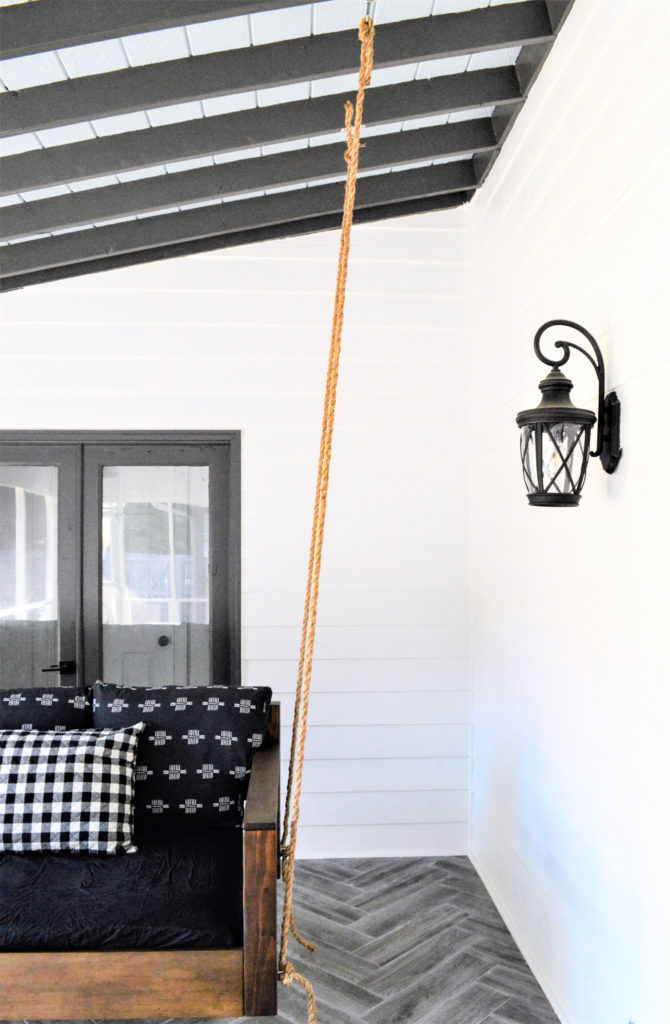
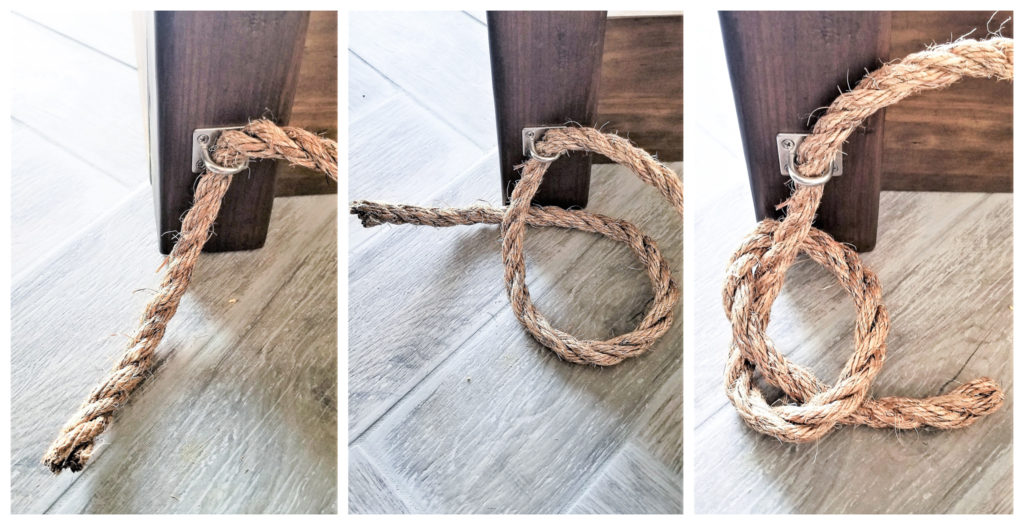
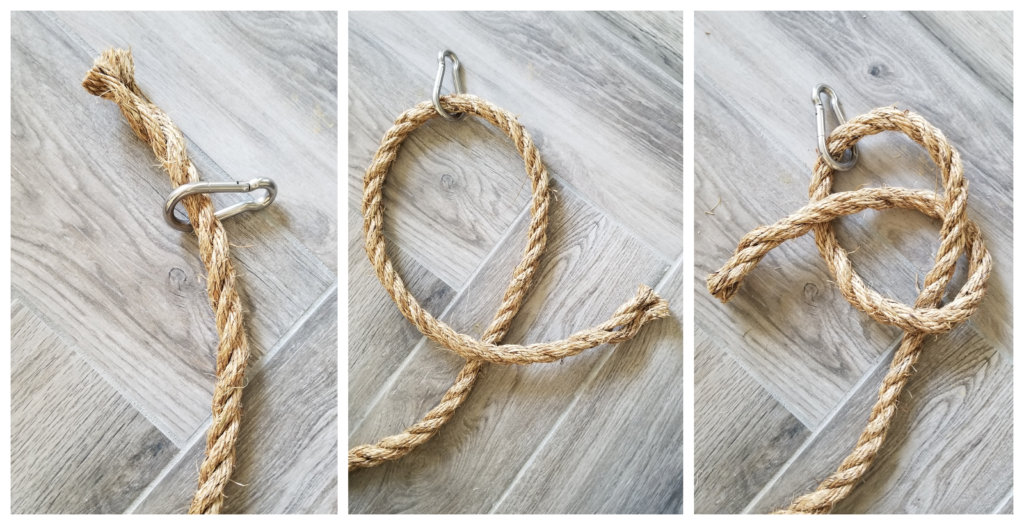
Once the hooks were installed, it was on to the rope! I first attached the rope to the swing. Below is a picture of how I tied the knots for the bottom of the swing. Please note that I am not an expert at tying knots…but I did Google it!
I decided to use the clips that came with the ceiling hooks. I figured that if I ever wanted to take the swing down, it would be easier if I had the clips. It also made it easier to hang the swing.
After the swing was up, I sat on the swing to see how the ropes would settle. I then adjusted the ropes to ensure the swing was level.
If you are even considering a bed swing, you should go for it…it is totally worth it (whether you buy or make one)! My bed swing is quite possibly the most peaceful place in my home. We could all use a little zen in our lives!

**Note: I am not a professional and do not claim to be an expert. Please be sure to always read instructions for all tools and products. Safety is very important and should be your top priority. Wear necessary protection when using tools (eye wear, hearing protection, gloves, etc.) and dust masks when sanding or cutting. Simply Aligned Home is not responsible for any injury or damage. All of my designs are not professionally designed and are for private use only.**
Beautiful write up, great detail….another of your
successful projects!! You should be so proud!!
Thank you so much!! ❤️❤️