A lot of my projects start when I see an object or space that I want to put to better use. As I was cleaning up my garage the other day, I found a broomstick that had been thrown in my scrap materials pile. Since all things baby have been on my mind lately, and the nursery is already done, I immediately knew what to do with it!
I made a quick courtesy call to my husband (I already had my mind made up that I would be cutting it up, but figured I would at least give him a chance to talk me out of it). When his response was “I guess you can cut it up,” I quickly got to work!
For this project, I used materials that I already had on hand. I try to reuse materials and scraps as much as I can!
Cut the Broomstick and Side Supports
**This post contains affiliate links to products that I recommend. If you purchase something through an affiliate link, I may receive a small percentage of the sale at no extra cost to you. I really appreciate your support.**
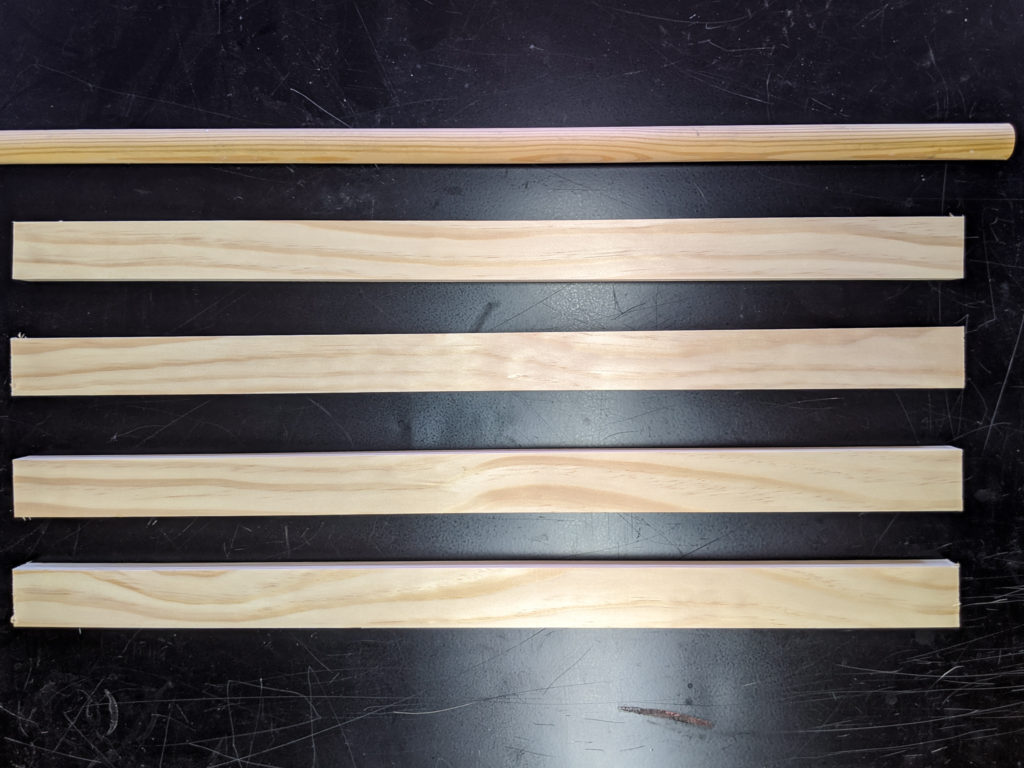
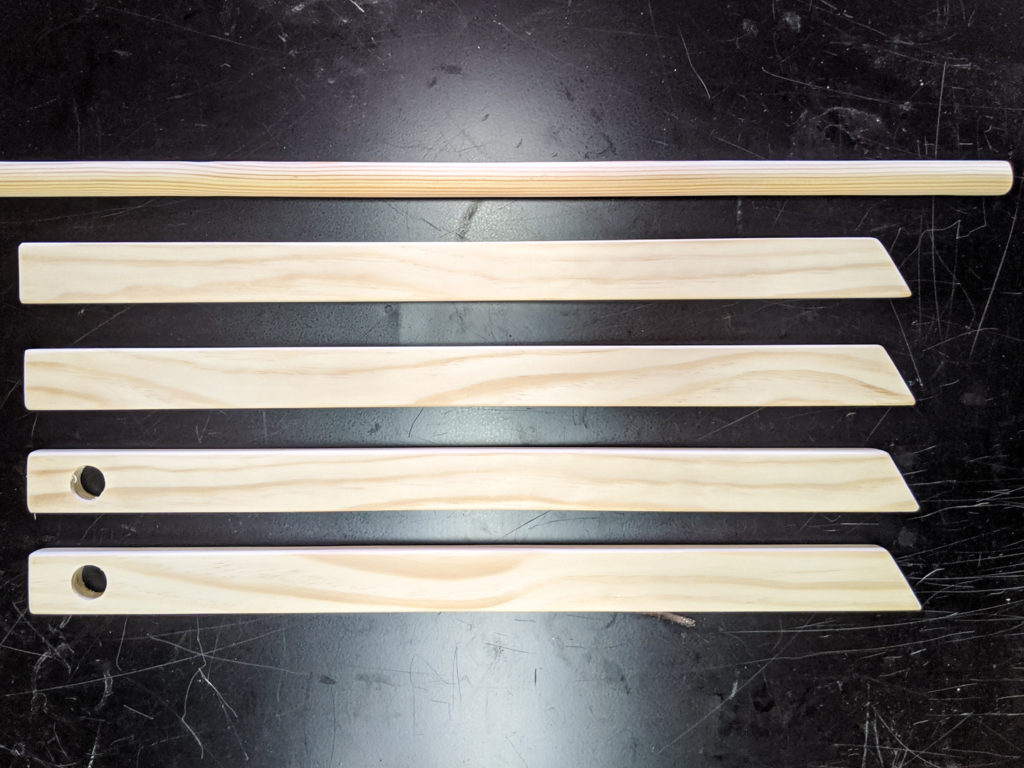
I started out by cutting the broomstick 28″ long using my miter saw. I believe a standard broomstick is 0.95″ in diameter…any dowel roughly that size will work! For the side supports, I used one piece of 1×2 select pine that was 8′ long. I cut it into four 2′ long pieces.
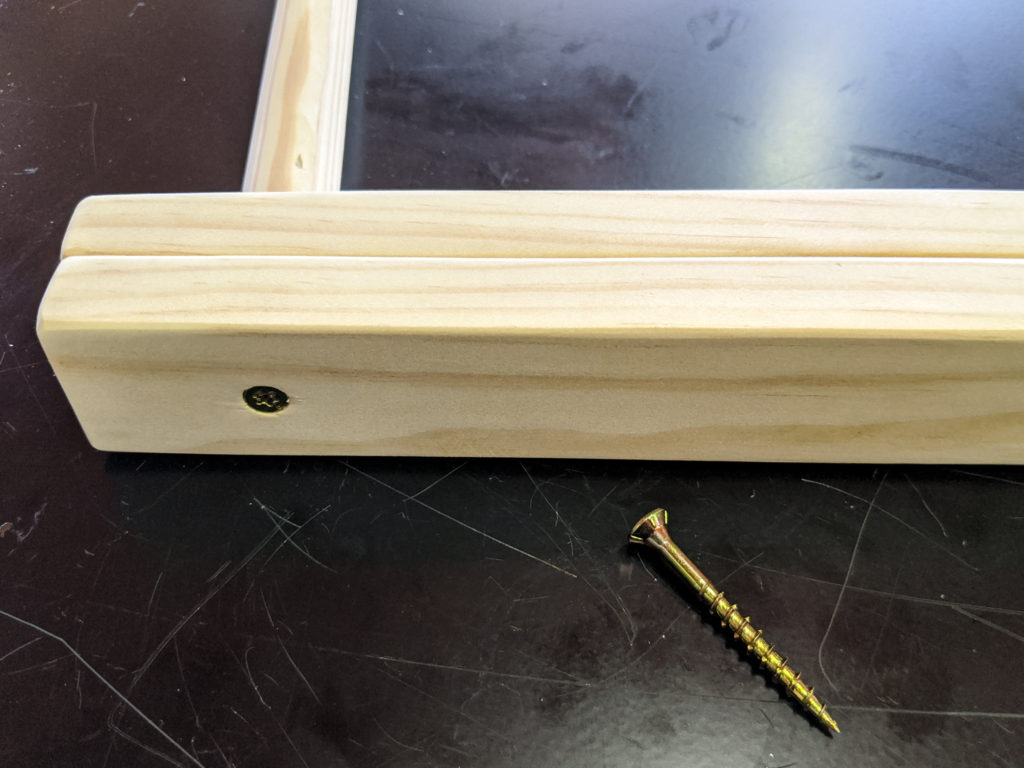
Drill Holes in Two of the Side Supports
I drilled a hole just bigger than the dowel in two of the side support pieces. I centered the hole on the width of the wood and 1-1/2″ in from one end.
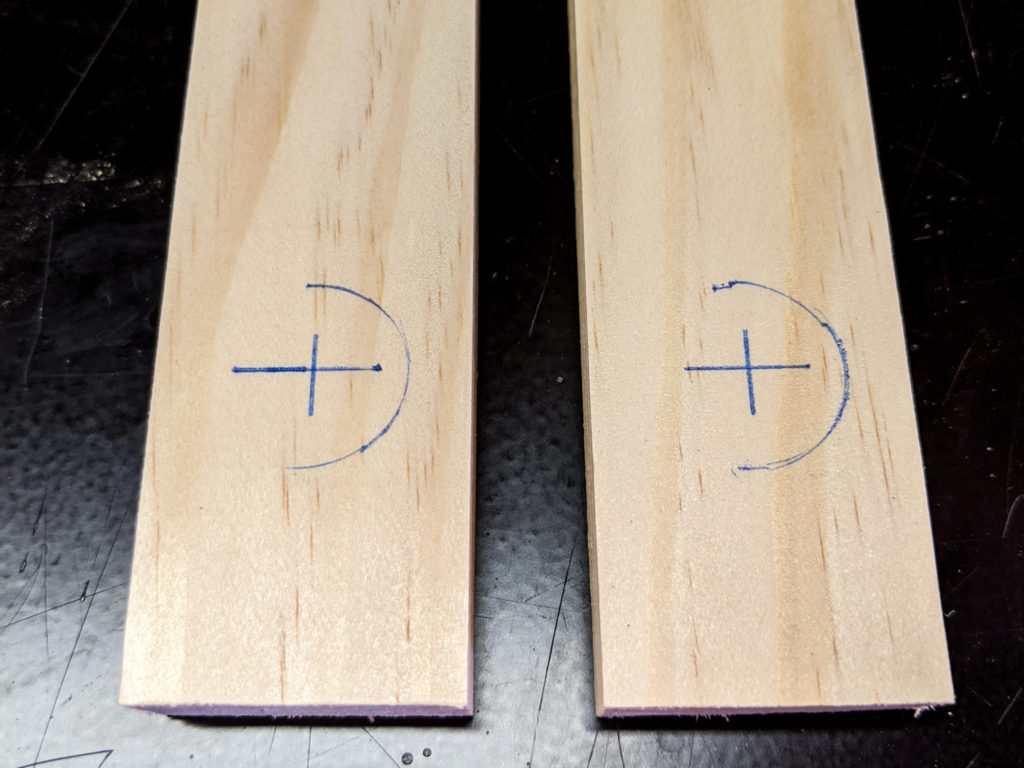
Once I had the holes drilled, I lightly sanded them to remove any rough edges. I then tested out the dowel in the holes to ensure that they were able to move slightly.
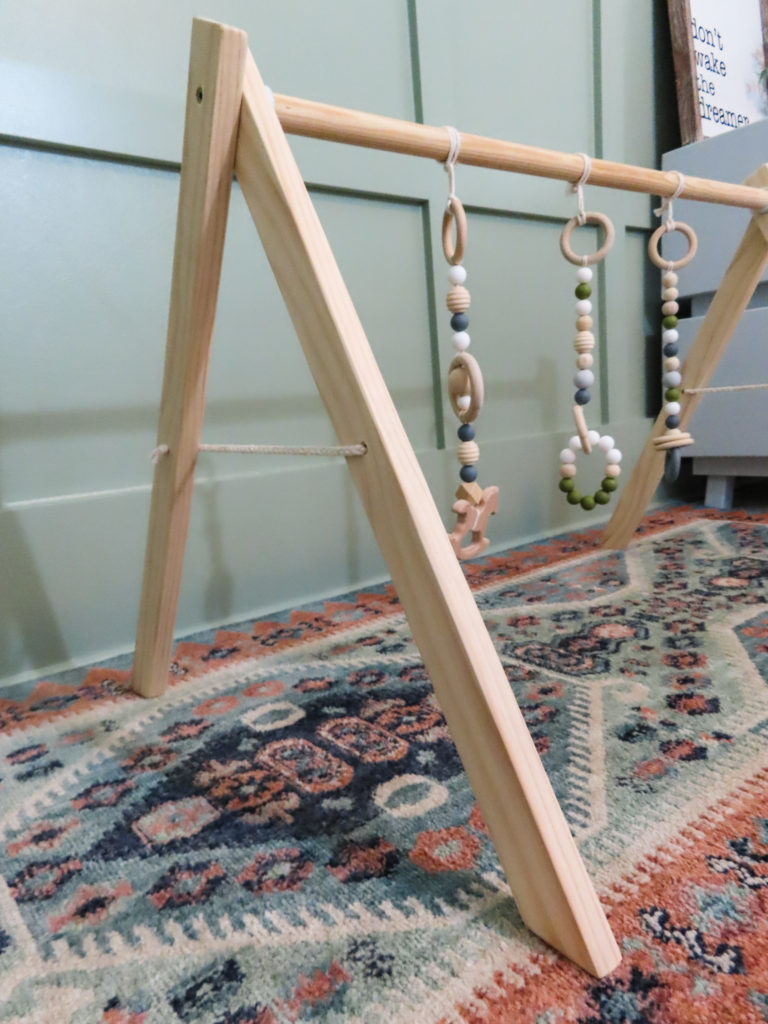
Angle the Ends of the Side Supports
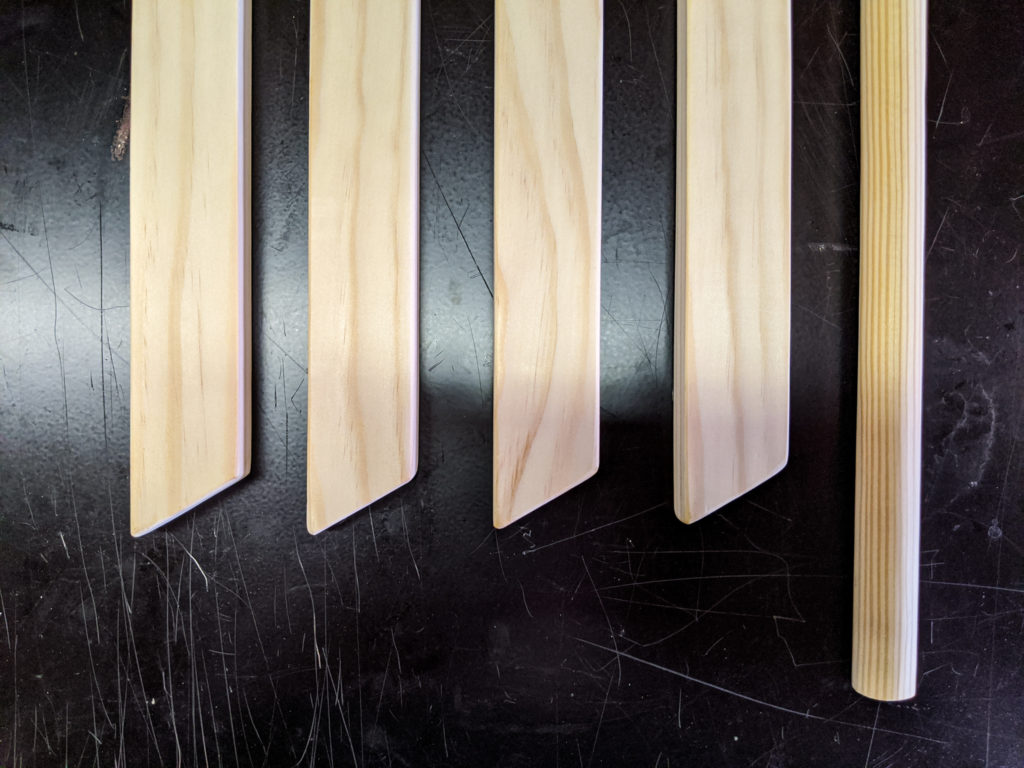
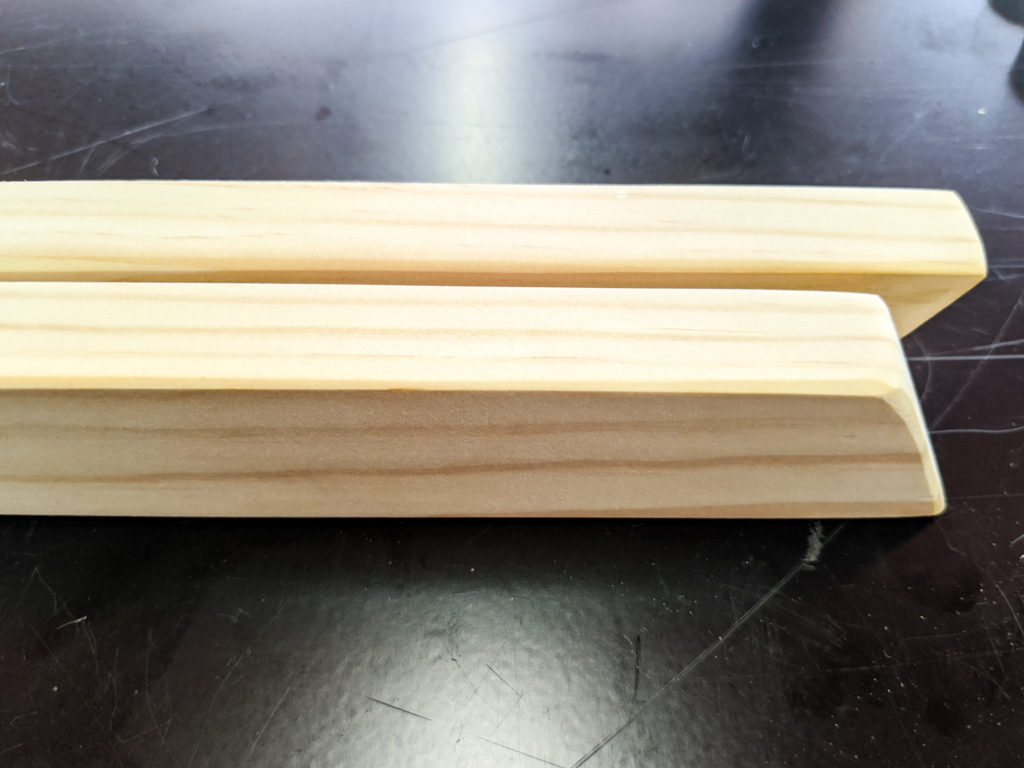
In order for the baby play gym to sit securely on the floor, I needed to cut the bottoms of the side supports on an angle. I cut the bottom of all four side supports at a 30 degree angle with my miter saw. I made sure to cut the opposite ends of where I drilled the holes in the two side supports.
Sand Broomstick and Side Supports
Once everything was cut, I sanded everything using my orbital sander and 220 grit sandpaper. I rounded the edges and smoothed out the surfaces.
Assemble One Side
To assemble the first side, I slid one of the side supports with a hole onto the broomstick. I then put a small amount of wood glue on the end of the broomstick and placed it flush against a side support without a hole. It is important to make sure that the angled cuts of the side supports are opposite of each other before you screw anything together.
I marked where the center of the broomstick should fall on the side support without a hole and screwed through it and into the broomstick using a construction screw. The broomstick is now secured to one of the side supports while the other is able to rotate on the broomstick.
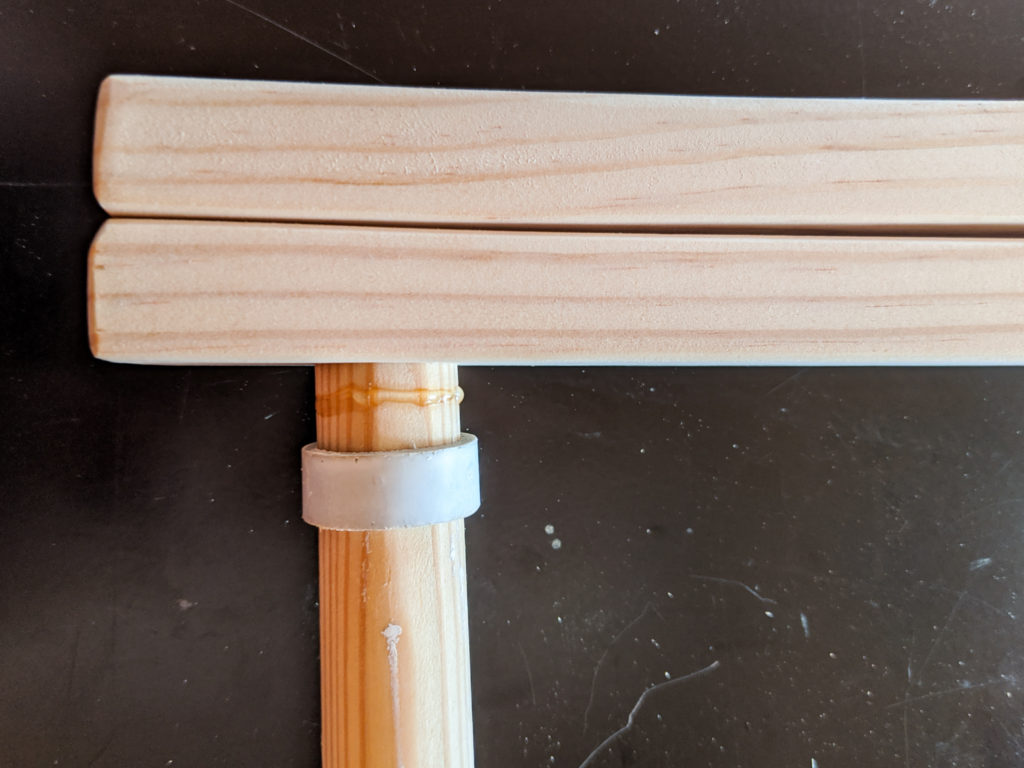
Add a Collar to the Broomstick
Without a collar on the broomstick, the one side support is able to slide along the broomstick. In order to keep the two side supports together, I cut a small piece of PVC pipe to create a collar. The inside diameter of the PVC pipe was 1″…just big enough to slide on the broomstick.
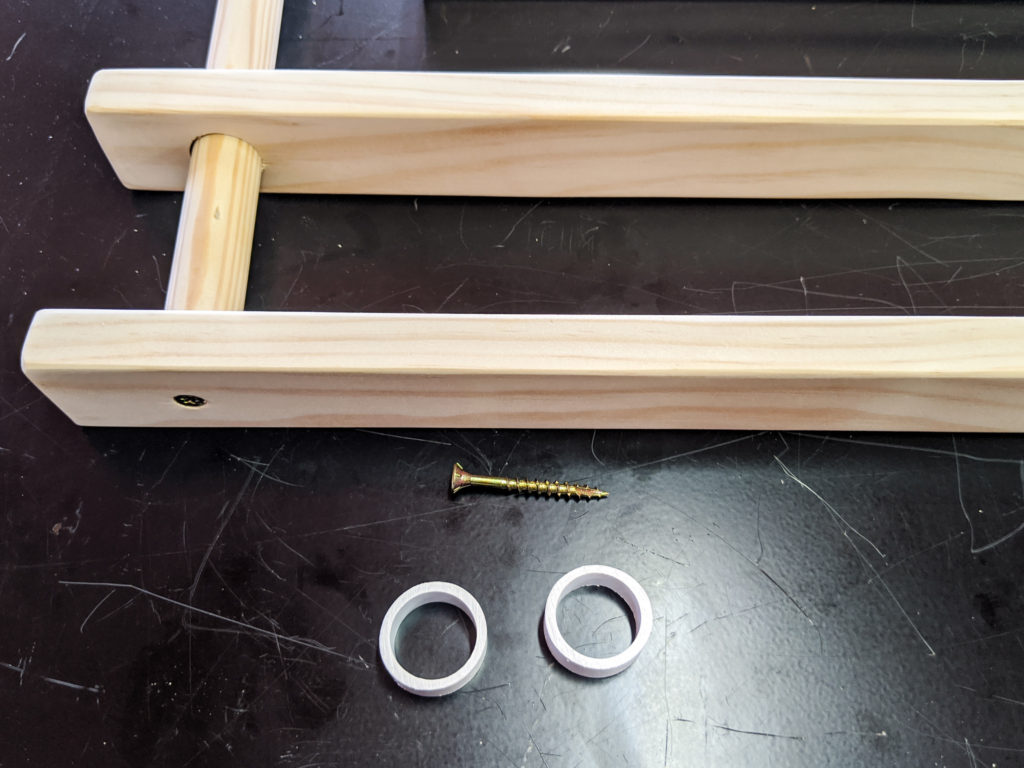
I secured the collar with a small bead of super glue. I applied the glue to the broomstick and slid the collar over it, making sure that the side support was still able to move on the broomstick.
Assemble the Other Side
I repeated the process to assemble the other side. The only difference is that I put the PVC collar on the broomstick before I secured the side support to the broomstick.
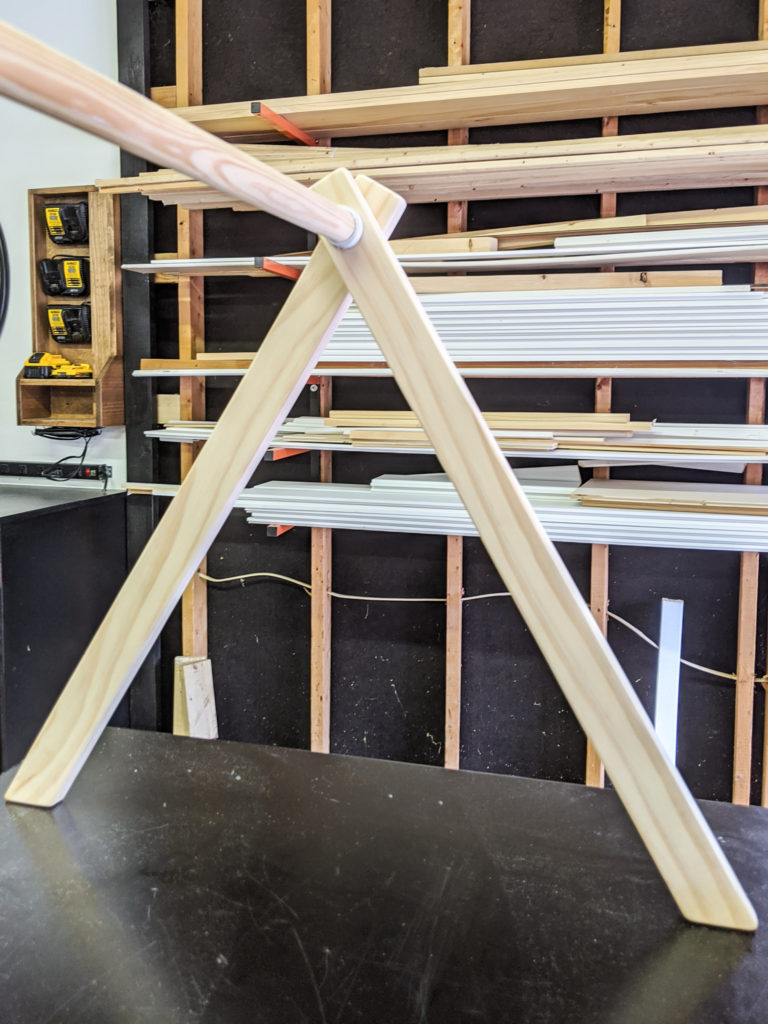
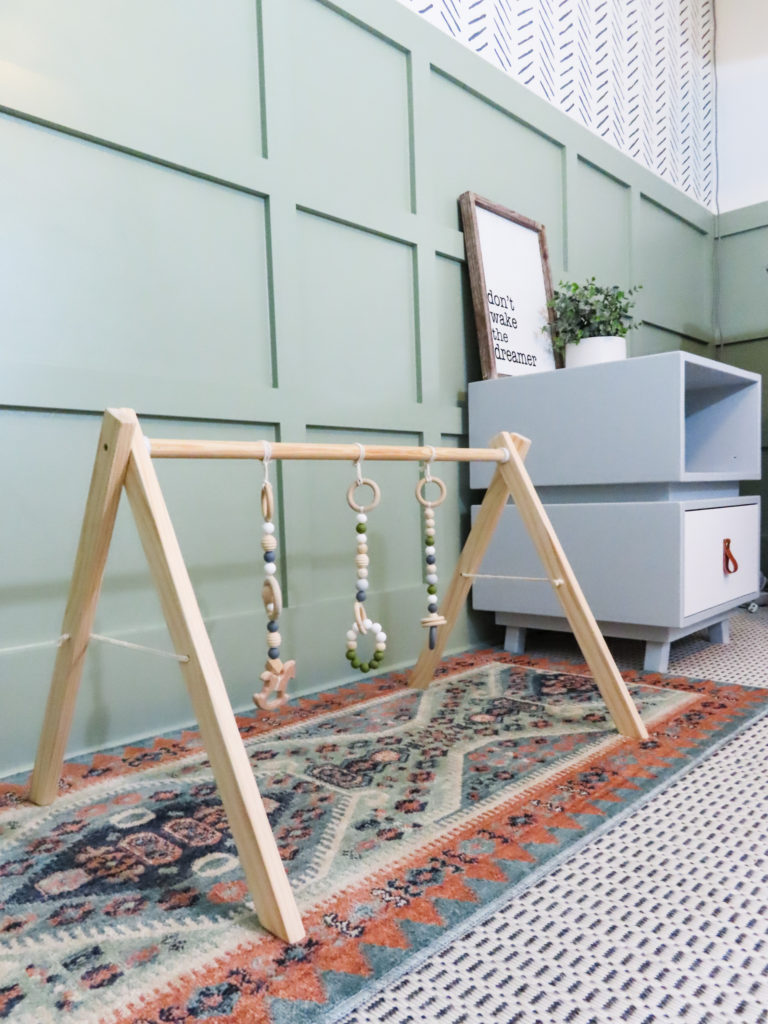
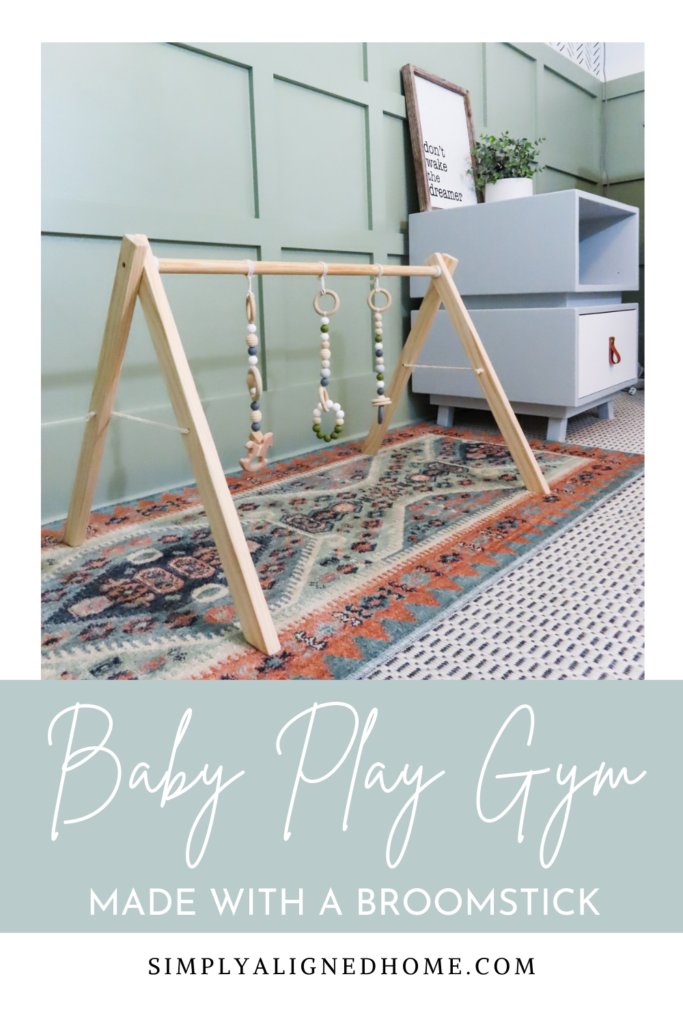
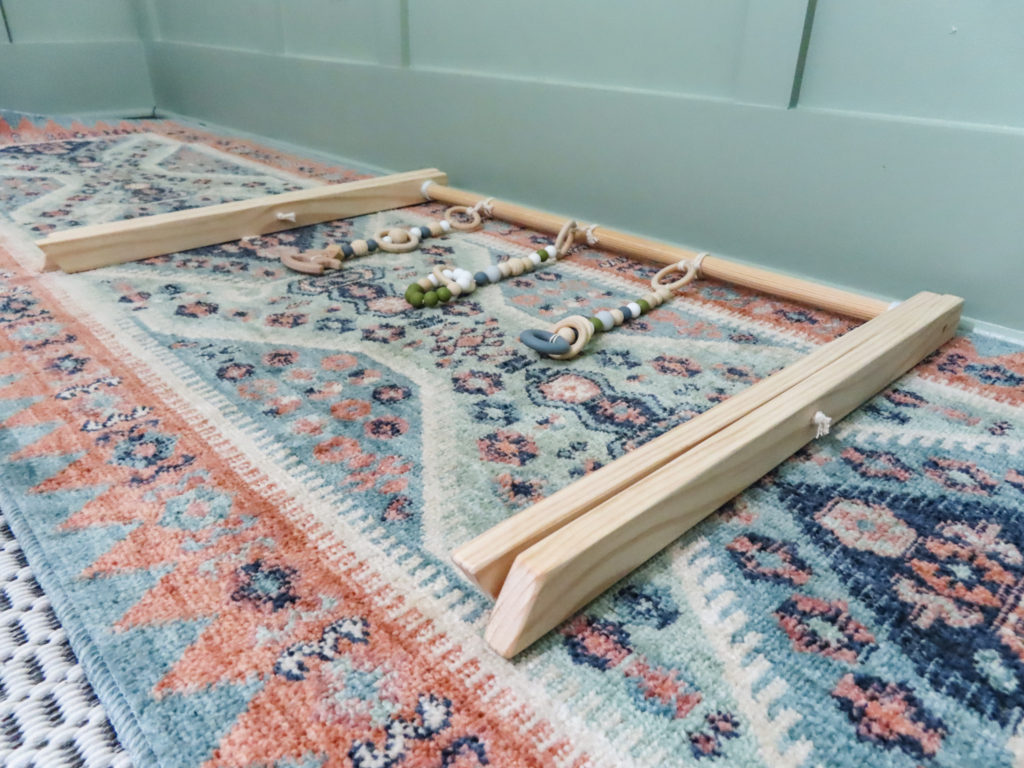
The baby play gym is fully assembled, but there is one more piece to make it complete!
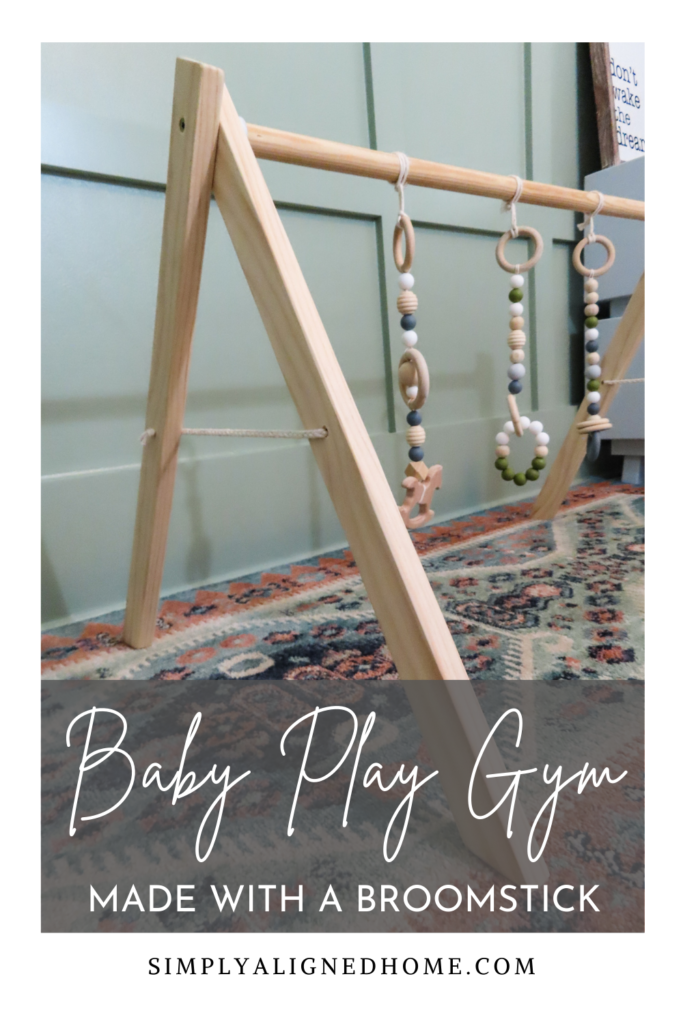
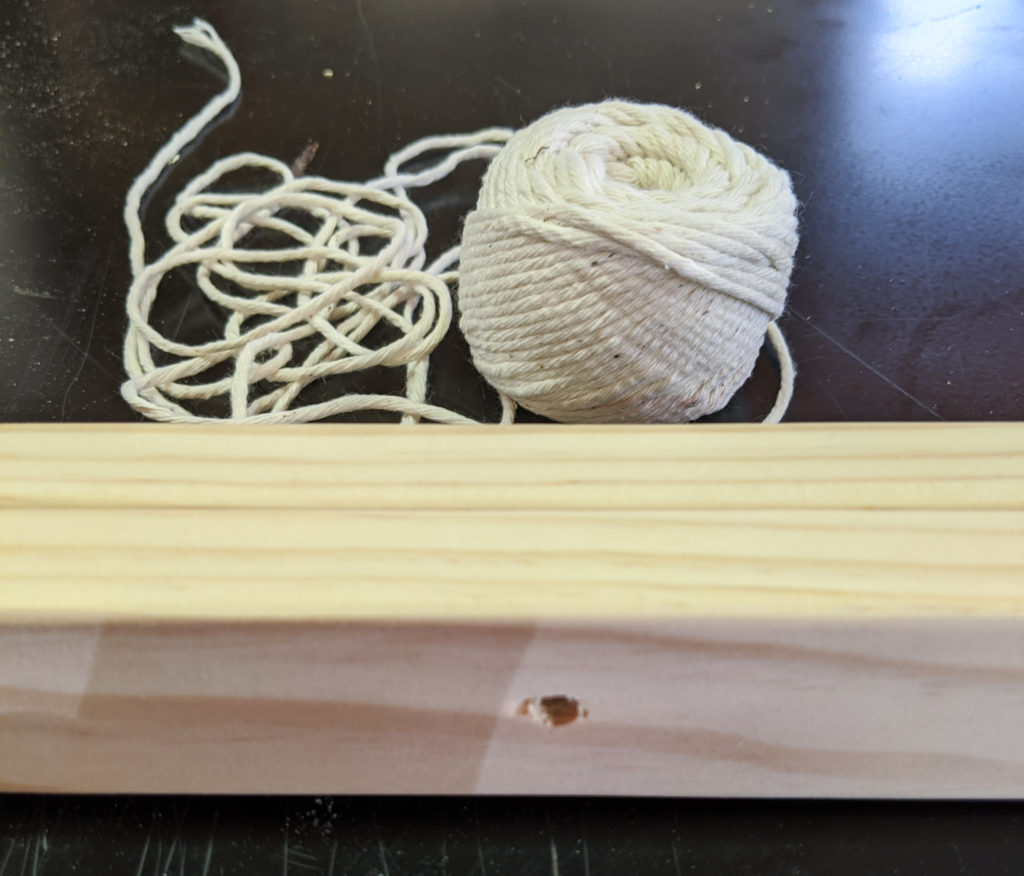
Attach a Rope to Both Side Supports
In order to keep the side supports from opening too far, I secured them together using a rope. I did not have very thick rope on hand, so I braided it to make it thicker. I drilled a small hole through both side supports 11″ down from the top and threaded the rope through the hole, tying it on each end.
Now the baby play gym is complete! I chose to keep it with natural wood. You can easily paint, stain or seal it instead. I added our favorite wooded toys.
It folds up quite nicely for storage and certainly isn’t an eye sore like most baby toys! This would make a great gift for any baby…my 3 month old absolutely loves it!!
Be sure to check out the nursery and this stenciled wall too!