
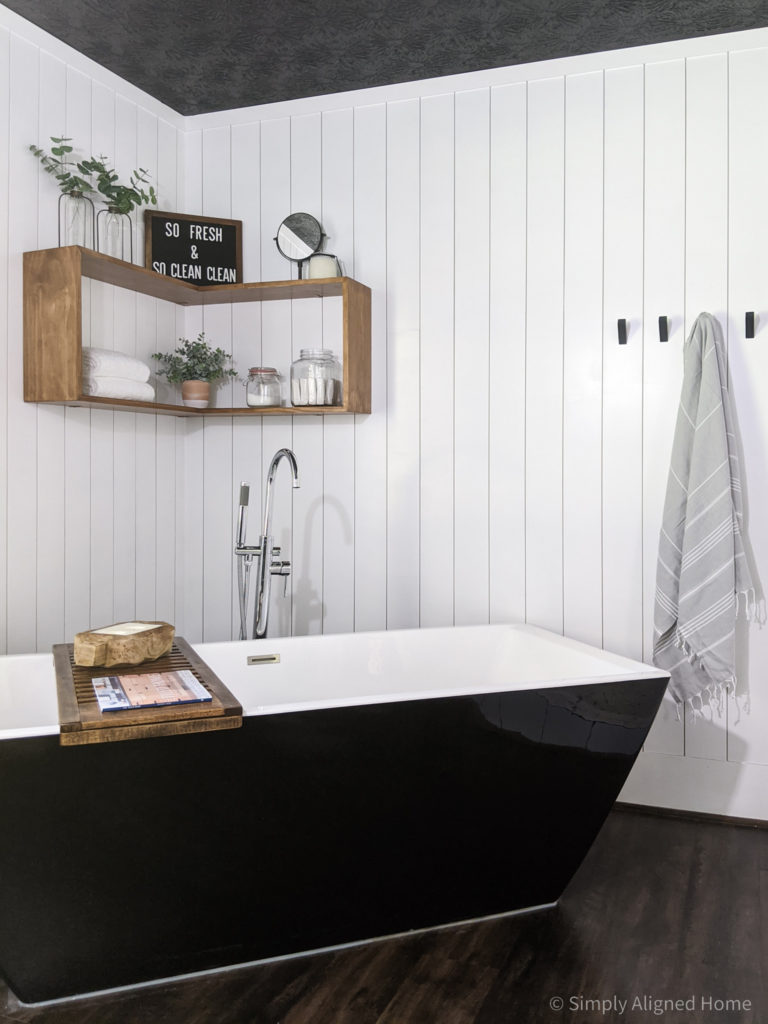
Ever had an ackward corner that was wasted space? The corner behind the soaking tub in our master bathroom was just that…wasted space! I recently shiplapped the bathroom and wanted to add a bit of character to that corner.
I considered making two floating shelves, but wanted to do something just a little different. That’s when I decided to make a corner floating shelf box! It would have two shelves, but would be a little more dainty than two bulky floating shelves.
After I figured out how to build it, it was a quick and easy project! Here’s how I did it..
**This post contains affiliate links to products that I recommend. If you purchase something through an affiliate link, I may receive a small percentage of the sale at no extra cost to you. I really appreciate your support.**
Rip the Wood
When I went to purchase the wood for this project, I had to decide between 1×8 and 1×10 select pine. Did you know that the even though they are called 1×8 and 1×10, they are not actually that size?! A 1×8 is actually 3/4″ thick x 7-1/4″ wide and a 1×10 is 3/4″ thick x 9-1/4″ wide.
I did not want to buy the 1×8 because I didn’t think that 7-1/4″ would be deep enough for the shelves. I wanted to be able to store towels on the shelf, so I wanted a little more depth. I ended up buying the 1×10.
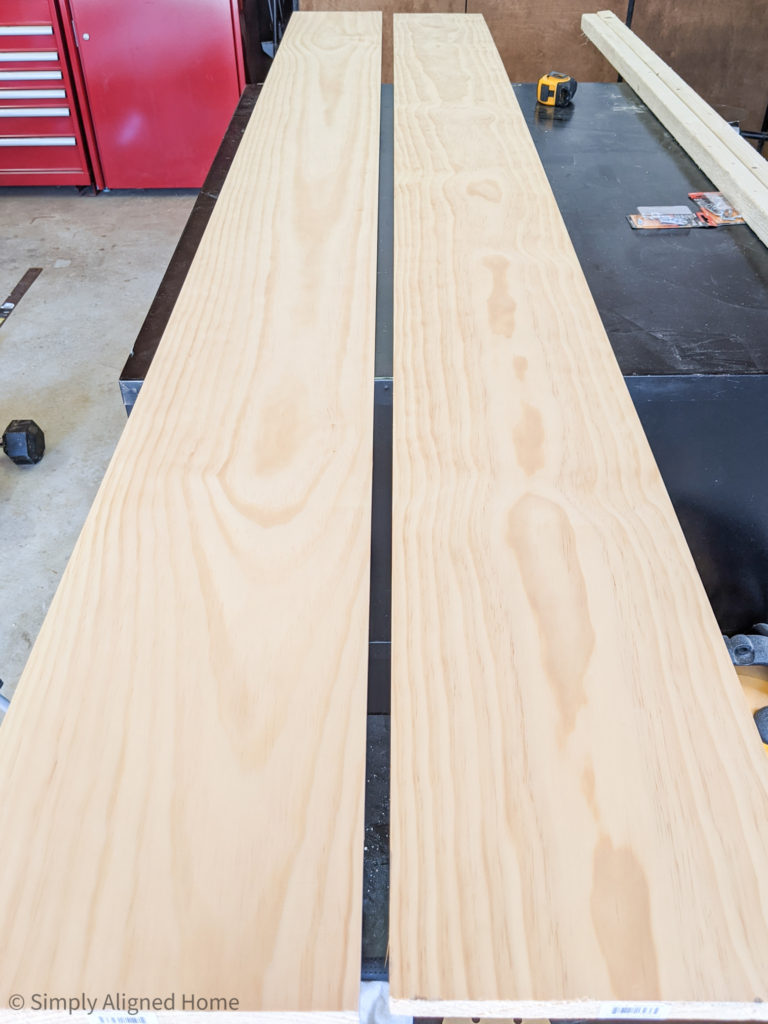
Once I got it home, I decided the 9-1/4″ was too deep…and ended up ripping it to 8″ wide. You can skip this step if you purchase the width you want.
Cut the Wood
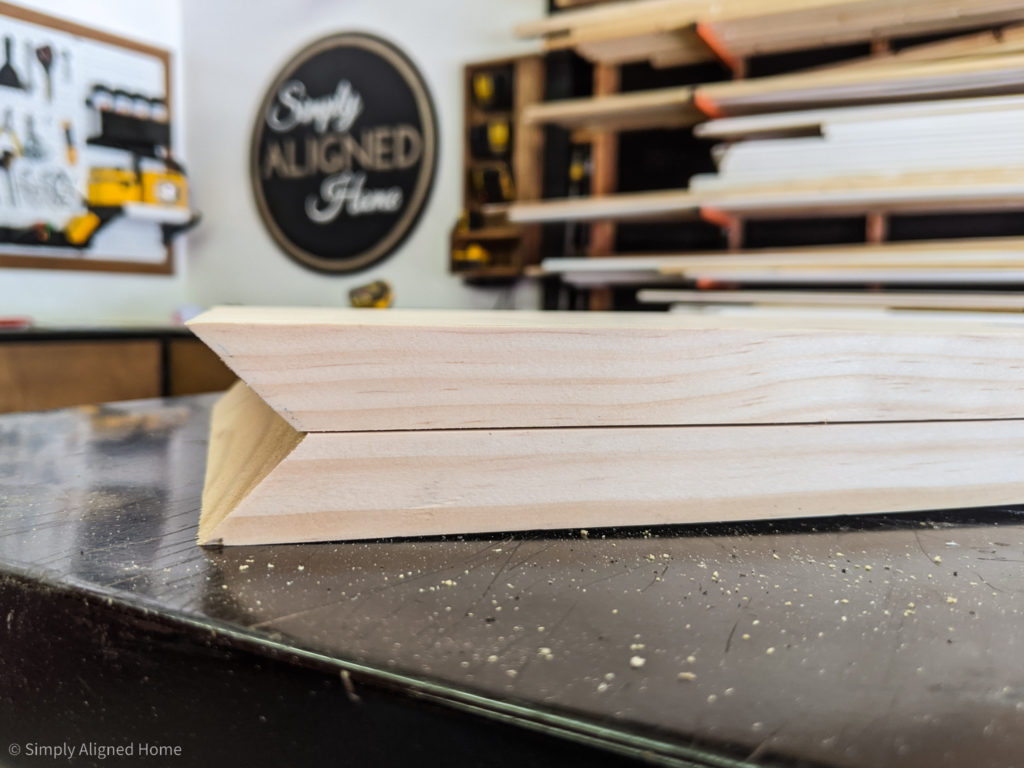
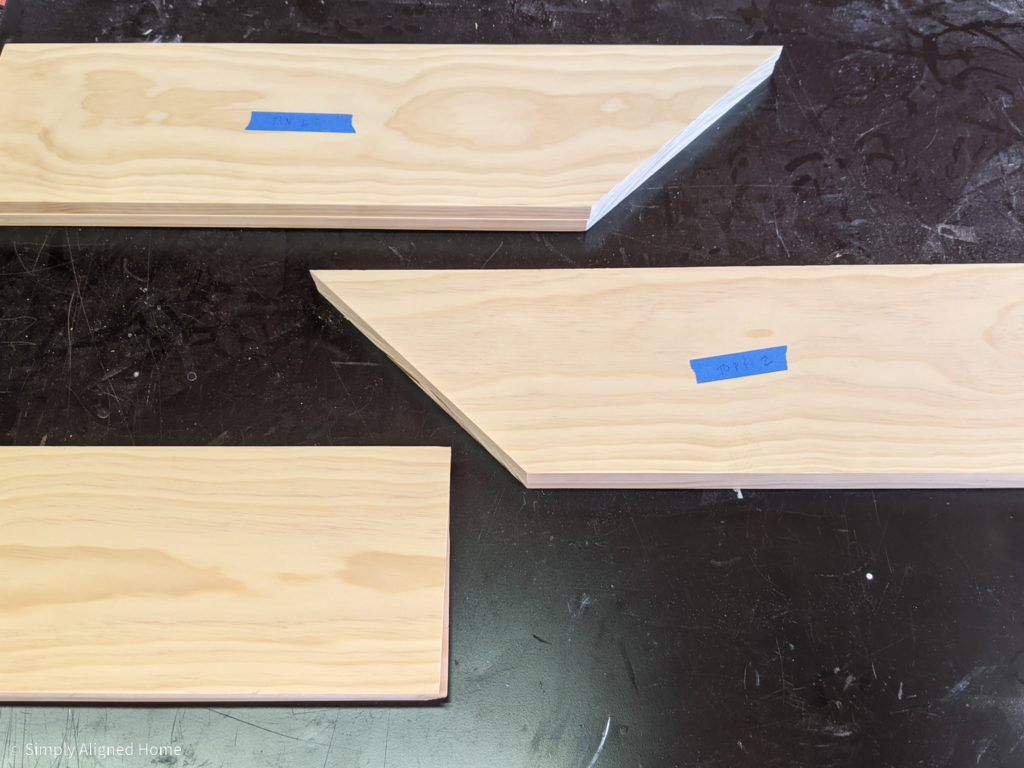
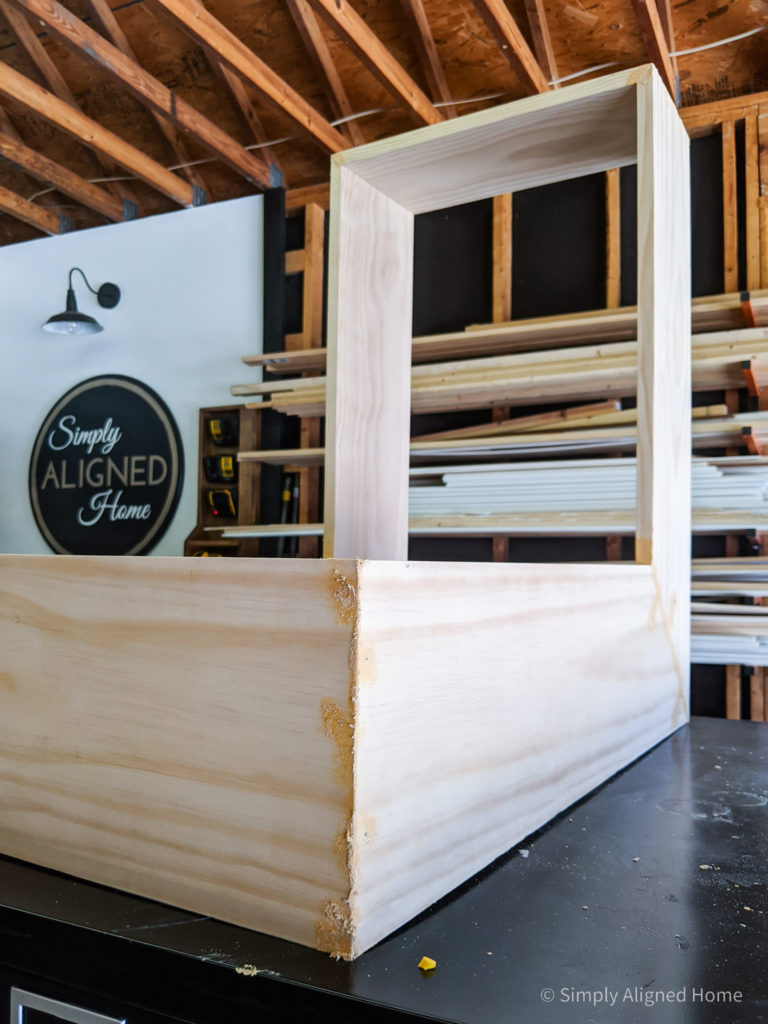
The corner floating shelf box is constructed of three different parts…the top shelf, bottom shelf and sides. I started by cutting the top and bottom shelves. I cut a triangle out of the two boards to make the corner of the shelves. With the triangle piece removed, the two pieces make a corner.
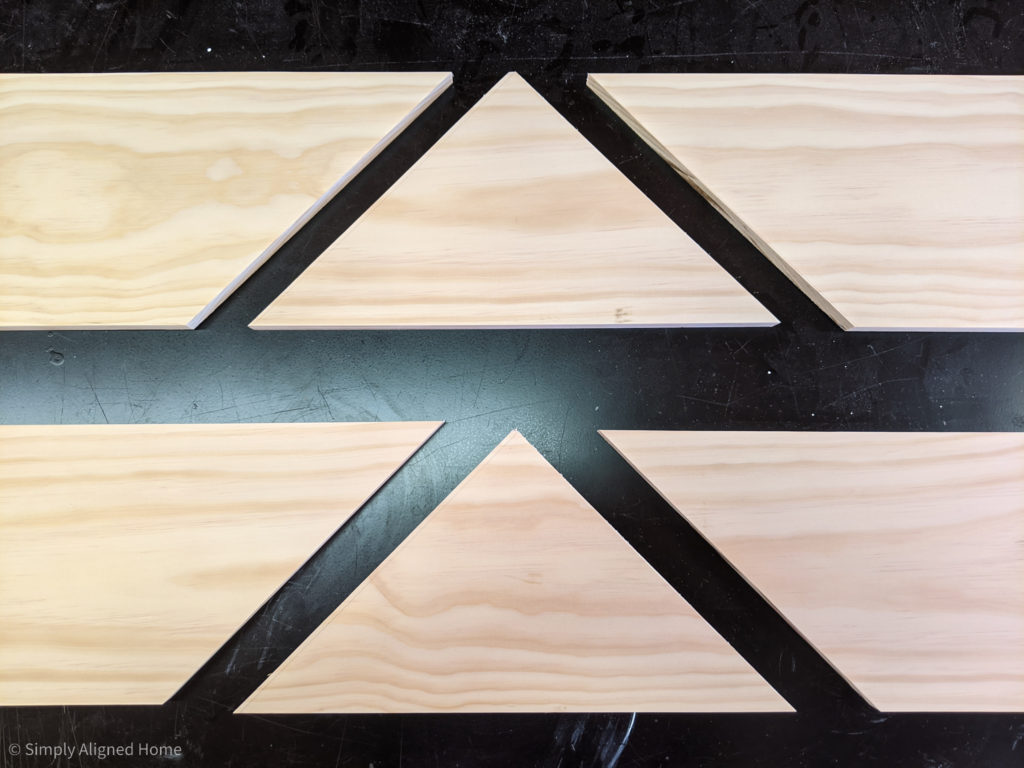
I wanted the corners on the ends to look seamless, so I decided to miter these cuts. I mitered the top shelves opposite from the bottom shelves. The side pieces will also be mitered to fit perfectly between the top and bottom shelves.
The final pieces were the two side pieces. I made the sides 18″ long so I have enough space between the two shelves.
Assemble Top + Bottom Shelves
I assembled the two pieces of each shelf using pocket screws. I made two pocket screw holes on one side and one on the other using my Kreg jig.
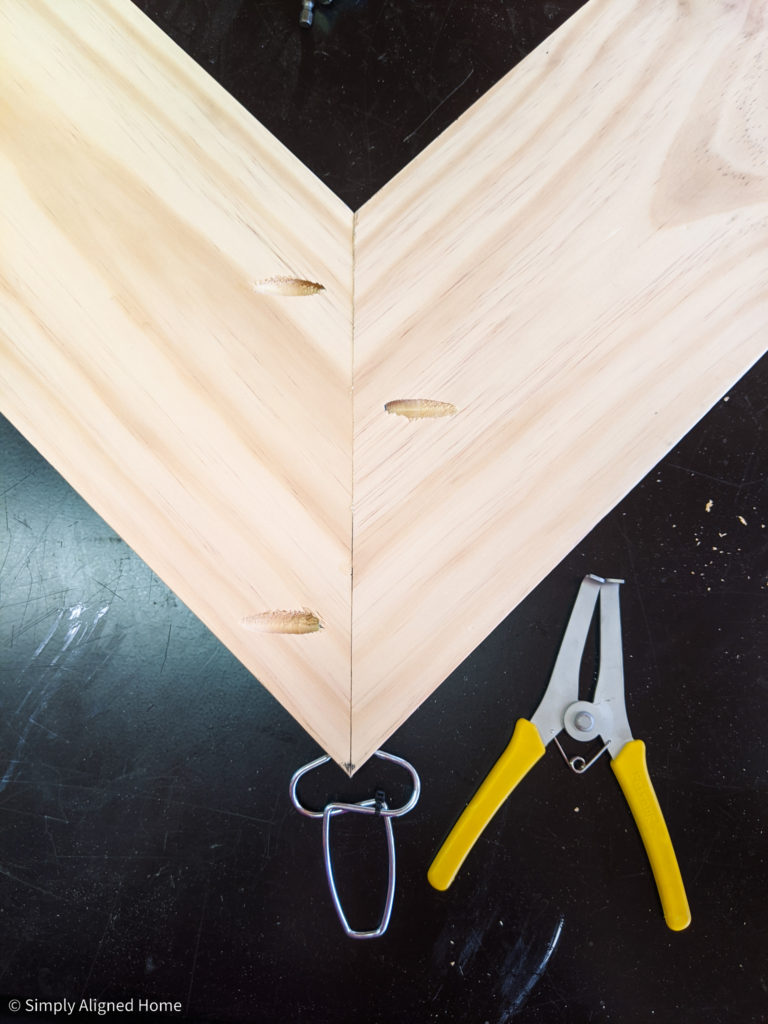
To secure them together, I applied a bead of wood glue and screwed the two boards together. On the endsI attached miter clamps to keep pressure on the corners. These really made this part a breeze! This was my first time using miter clamps…I’ll definitely be using them in the future!!
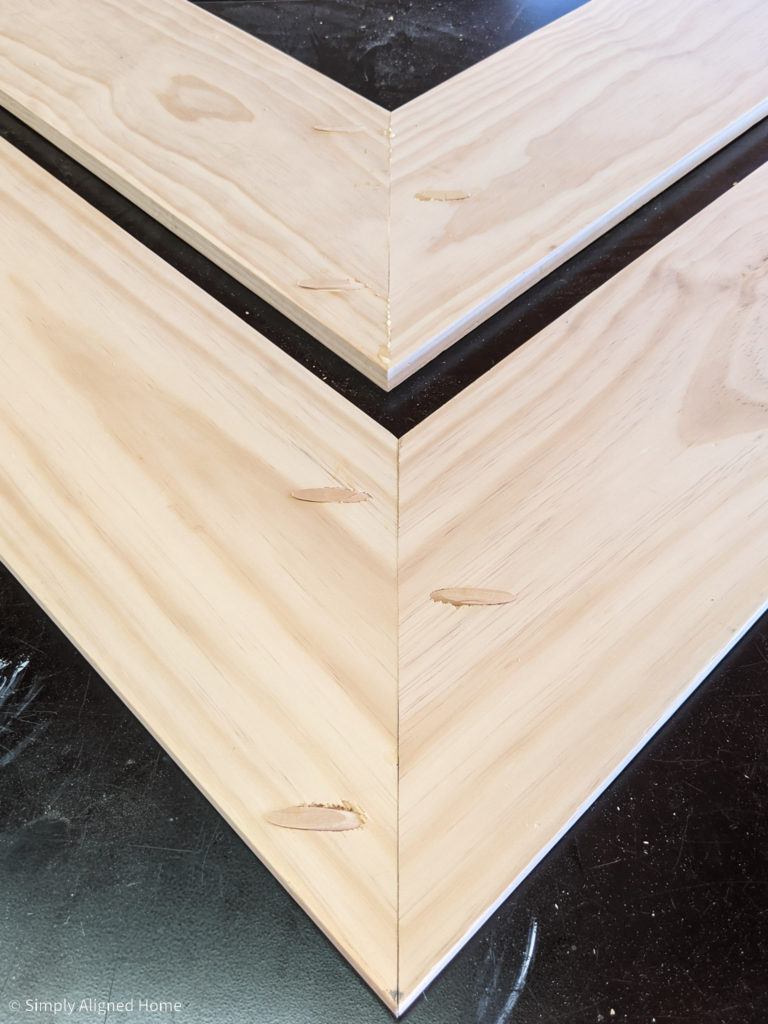
In order the hide the pocket screw holes, I added plugs.
Attach Side Pieces
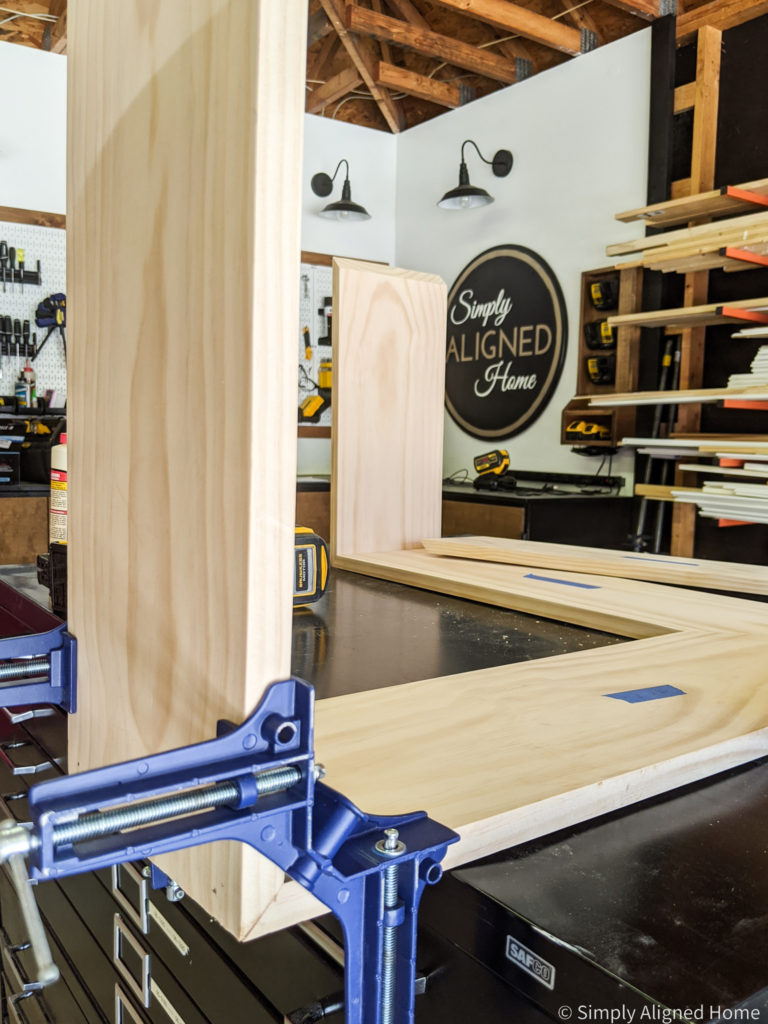
Now that the top and bottom shelves were assembled, I just needed to attach side piece! I applied a bead of wood glue to the ends of the side piece and used my corner clamps to align them with the shelves. I secured the sides to the shelves using finishing nails.
Fill Gaps + Holes
Since I will be staining the floating shelf box, I decided to fill all of the holes and gaps with a stainable wood filler. I did this for all of the corners, nail holes and around the pocket screw plugs.
Once the wood filler was dry, I sanded the entire box with my orbital sander and 220 grit sandpaper. I like to remove any remnants of the wood filler before I stain. Even though it is stainable, it will be a different color than the stained wood. I personally like to hide my many imperfections…
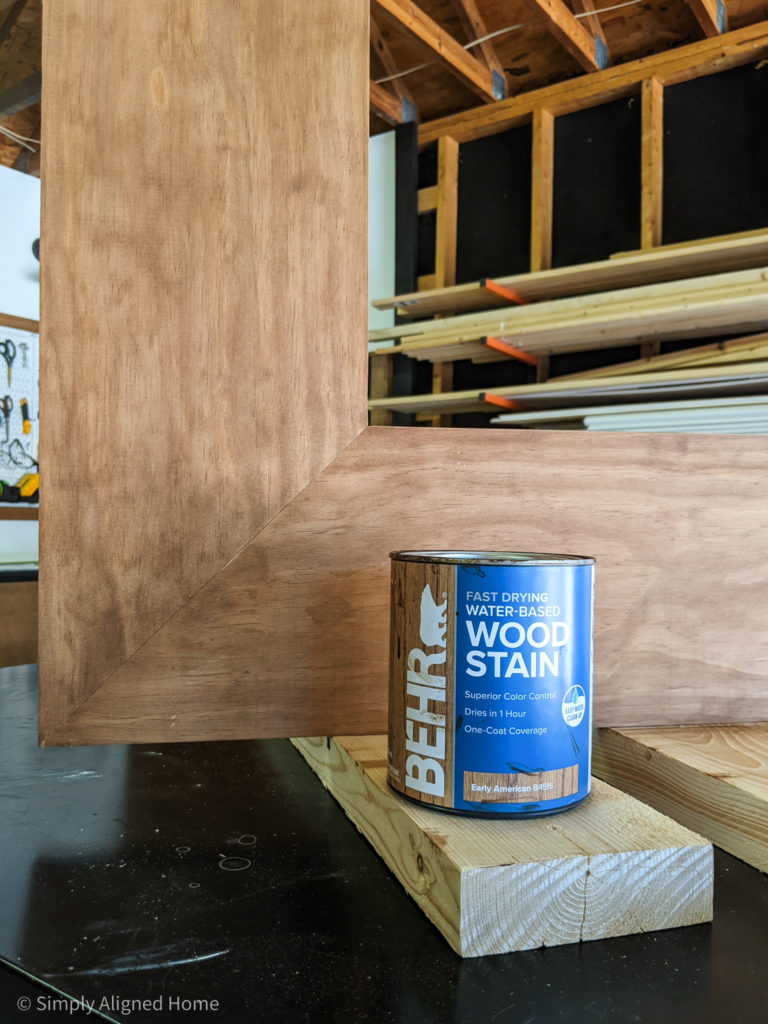
Stain + Seal
As I mentioned, I will be installing this floating shelf box in my bathroom. I recently made a new stained wood countertop for my bathroom vanity. I decided to use the same stain for the floating shelf box as I did for the countertop.
I started by applying the water based pre-stain wood conditioner. Once it was dry, I applied two coats of Behr water based wood stain in Early American.
I finished the shelf off with two coats of Behr water based polyurethane with a light sanding between the two coats.
Hang the Shelf
I wanted the shelf to appear as though it was floating…hence the name “corner FLOATING shelf box.” My main concern any time I install floating shelves is that they are sturdy. Even though I don’t expect my boys to touch them, I want the shelves to be able to stand up to little hands pulling on them. For this shelf, I chose to use corner braces.
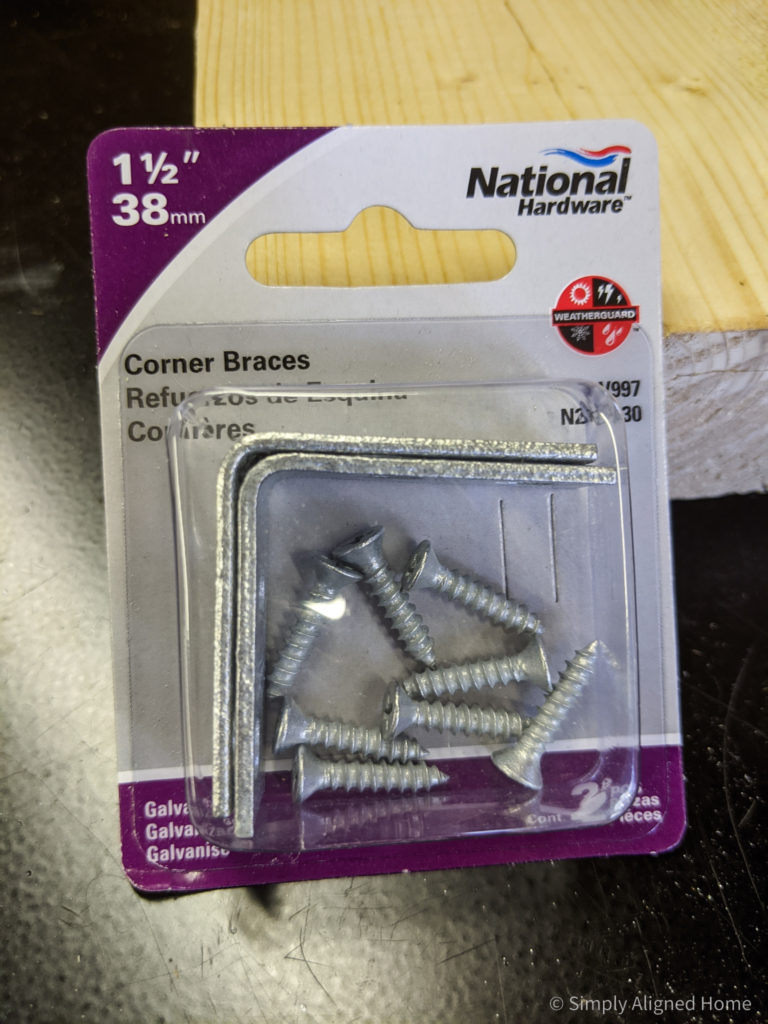
In order to make them blend in and give more of the “floating” appearance, I spray painted them gold to blend in with the wood.
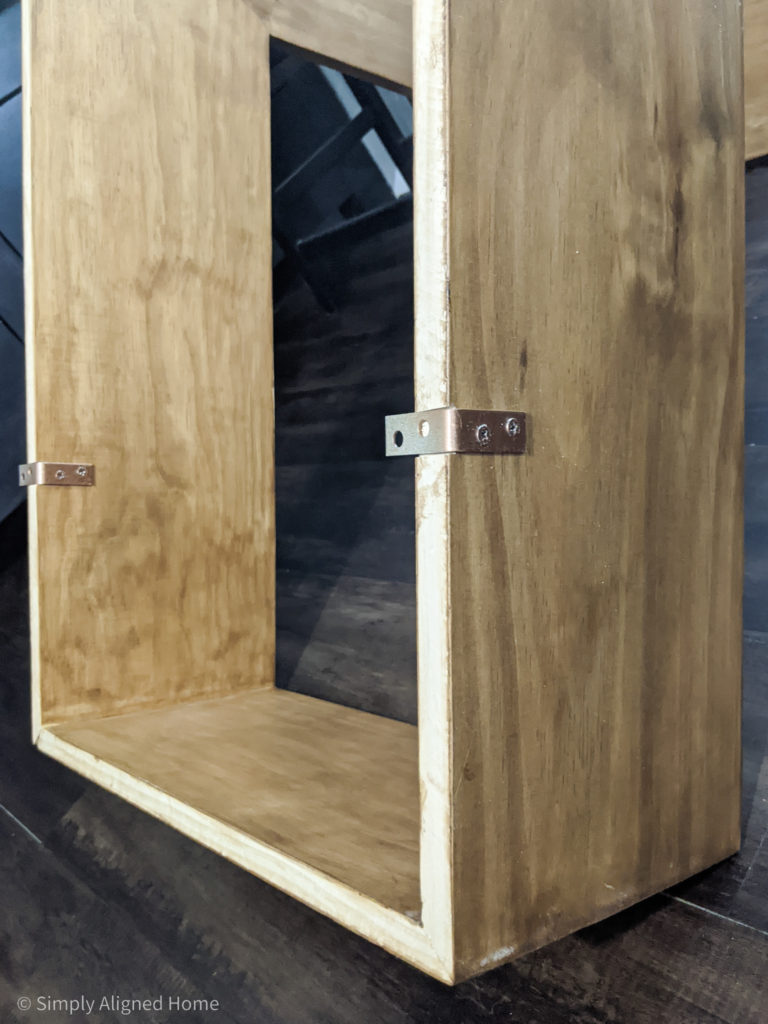
I chose to use three corner braces per shelf (six total). I notched out the wood where I would be installing them. I screwed them to the underside using two screws (that I also painted gold) and will secure them to the wall using one screw per bracket.
I made sure that the corner floating shelf was level and secured the brackets with screws. I used anchors where there were not studs. Once it was installed, I painted both the brackets and screws that were visible white.
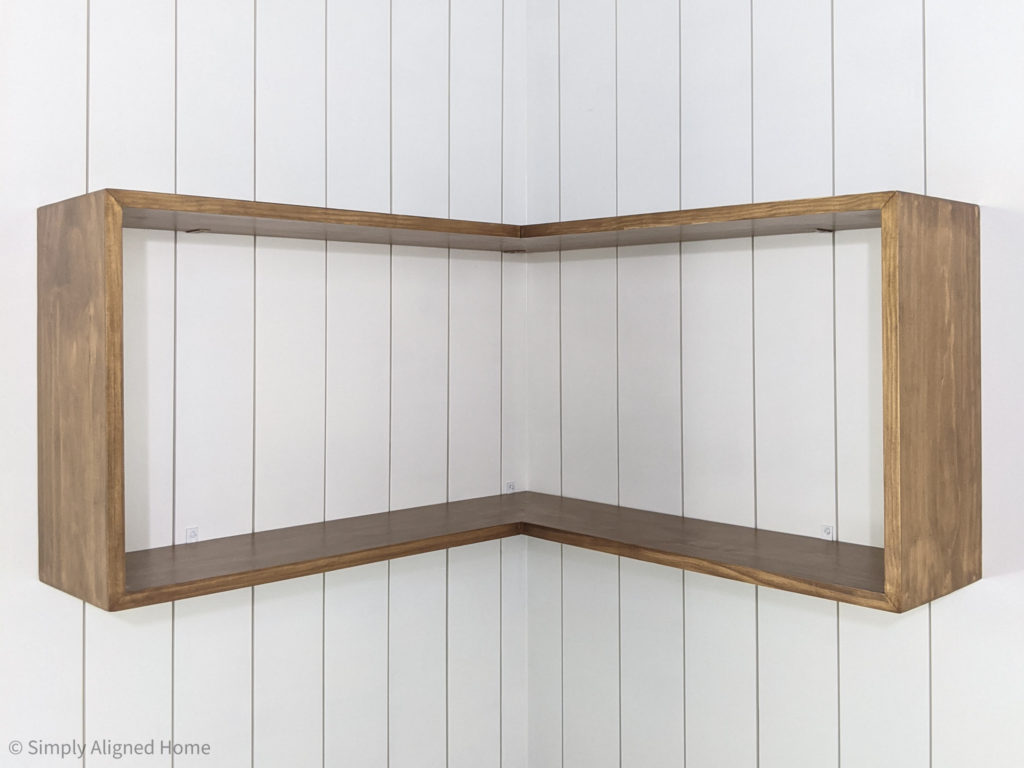
The corner was already looking much less boring!!
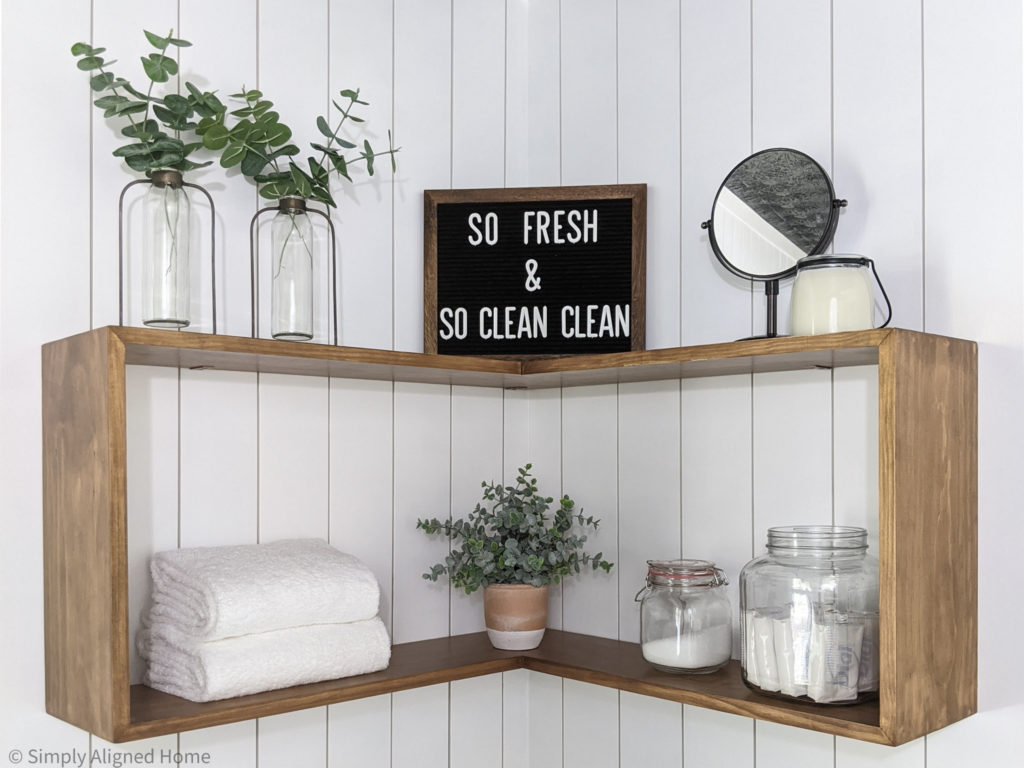
The floating shelf box is not only decorative, it’s functional too! I love having towels and soap neatly dsplayed within reach of the bath tub…and who doesn’t like to light a candle while soaking?!

Materials + Tools
Below is a list of the materials that I used to build the corner floating shelf box:
- Two (2) – 1″ x 10″ x 8′ Select Pine Boards
- Pocket Hole Screws + Plugs
- Wood Glue
- Wood Filler
- Finish Nails
- Corner Braces
- White + Gold Paint
- Pre-Stain Wood Conditioner
- Wood Stain
- Polyurethane
Here is a list of the tools that I used: