I have a hard time “looking past the clutter” sometimes. I had a list of projects that I planned to complete…and a playroom makeover was not on it. However, I decided it would be best for my sanity if I cleaned up the mess. Upgrading our playroom storage became the priority.
Our playroom became overrun with toys. Luckily, we have a very large closet in the playroom where we are able to put all of the toys. This helped hide the mess…until I could no longer look past it. I decided it was time to come up with new playroom storage ideas and get rid of some toys.
Where to Start
I always find it easier to work in a space when it is completely cleared out. I pulled everything out of the playroom closet and began with an empty space.
Our playroom closet is long and narrow. I wanted to utilize as much of the space as possible. It was also important that my boys be able to access all of their toys safely. We previously had wall mounted storage bins that were entirely too high for them.
Storage Options
My initial idea was to install base cabinets along the perimeter of the closet. Although it would provide the most storage, it quickly became too expensive. If there is something that you should know about me, it is that I like budget friendly projects.
I also considered making my own cabinets. Between the time and materials required, it would have cost as much a buying basic cabinets from the local home improvement store. That option quickly went out the window..

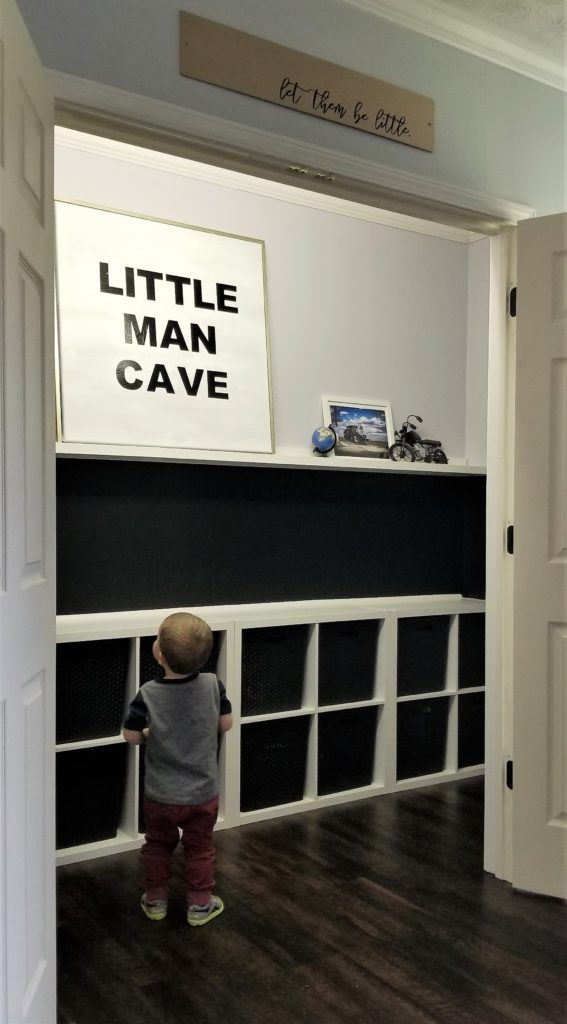
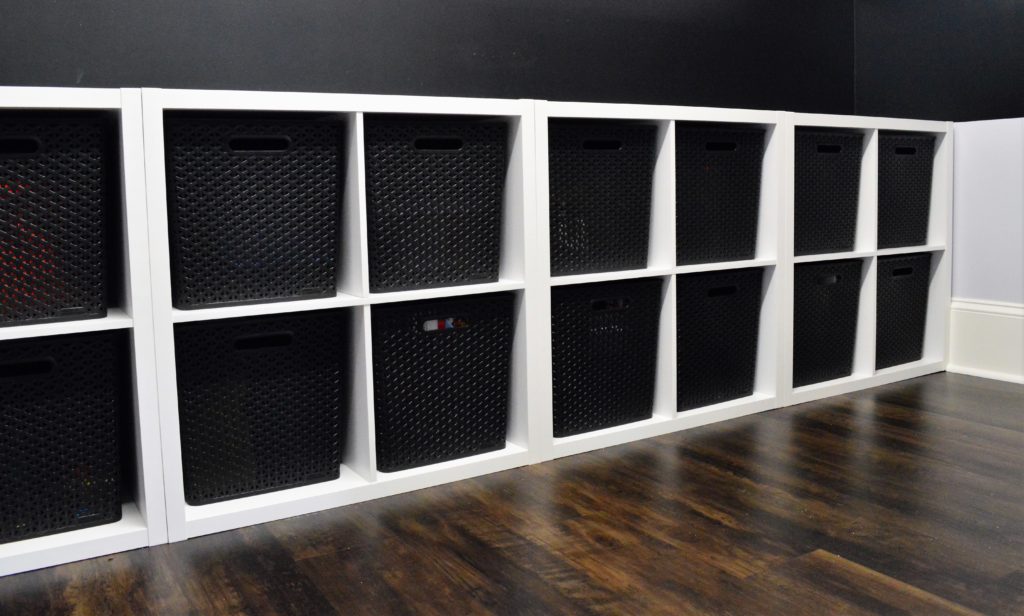
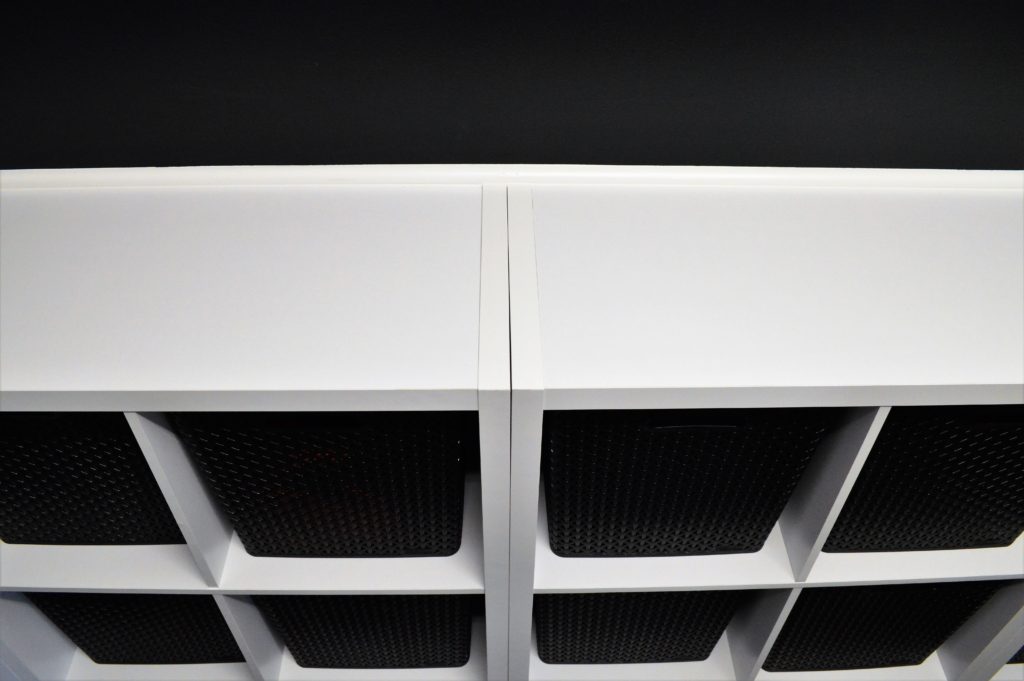
After a trip to Target, I decided on the storage units shown above. I am not a fan of the fabric/cardboard storage bins that are typically advertised with the storage units. I opted for these black plastic bins instead. They are much more sturdy than the cardboard bins…which is always a plus when it comes to kids.
Paint
In order to save money, I chose to use paint that I already owned. I had recently purchased a gallon of paint from the sales rack at our local home improvement store. The tiny dot on the outside of the paint can looked like it was grey. A quick Google search would have shown me that it was actually purple…
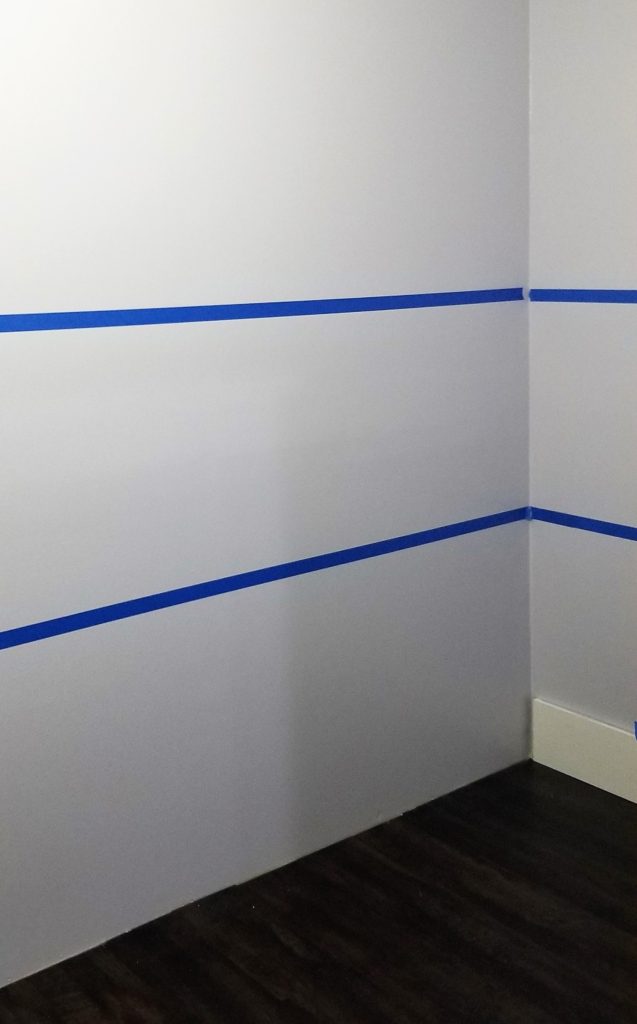
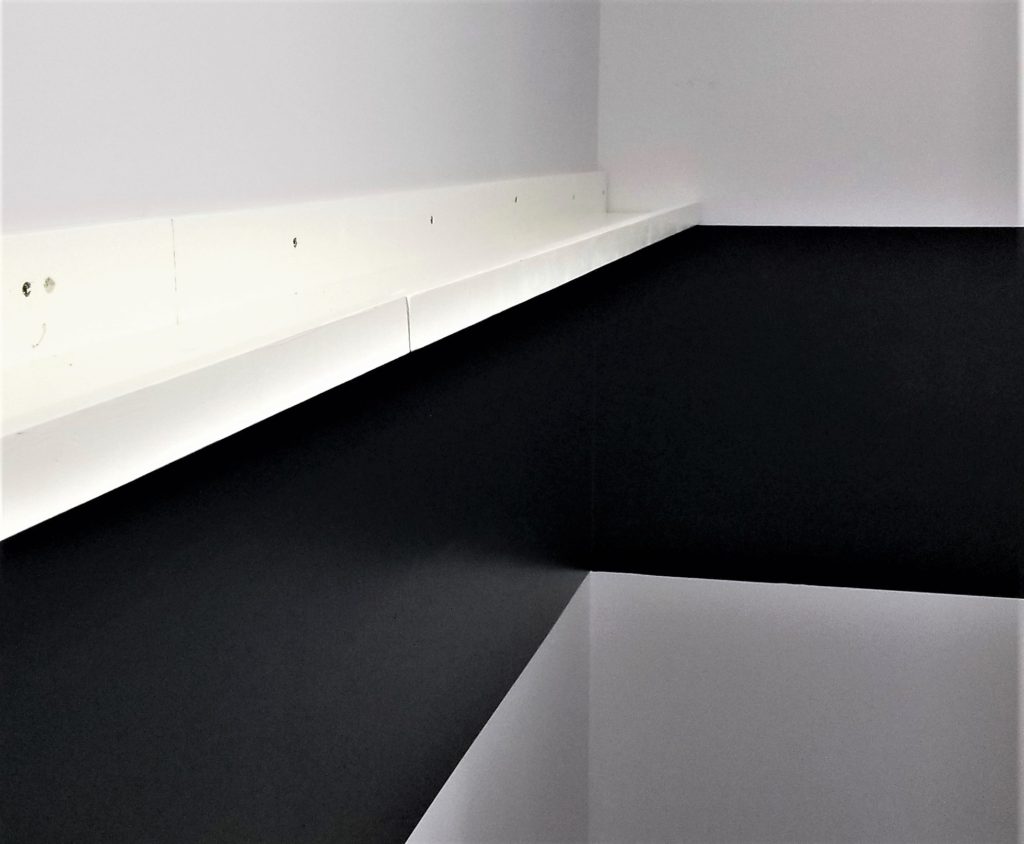
I questioned my decision to use this paint the entire time I was painting. I chose to add a black stripe around the perimeter of the room to cut down on the purple.
When I painted the black stripe, I used the clear caulk trick. I first measured and put the tape on the wall for the black line. Next, I put a small bead of clear caulk on the edge of the tape where I would be painting. I smudged the caulk along the line with my finger to seal any ridges between the wall and tape. I then painted the area between the tapes black. As soon as I was done painting, I removed the tape…and the lines were perfect!
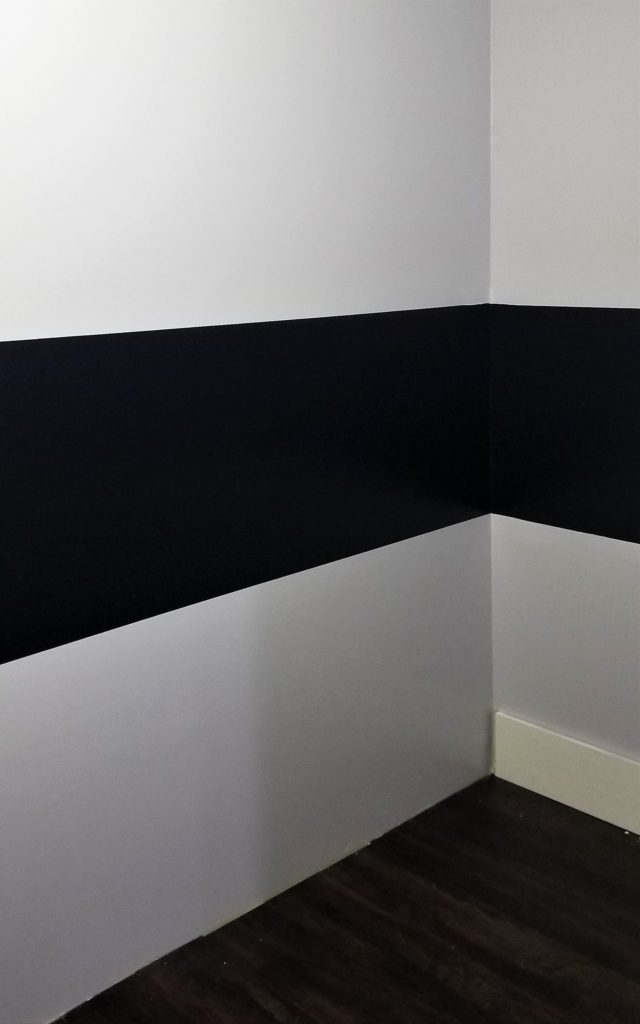
The black paint did the trick…the purple grew on me (it might actually be grey with purple undertones).
DIY Picture Ledge
I absolutely love floating picture ledges! I love that you can easily change up the without putting a bunch of new holes in the wall. After an unsuccessful search for an affordable option (with free shipping), I decided to make my own.
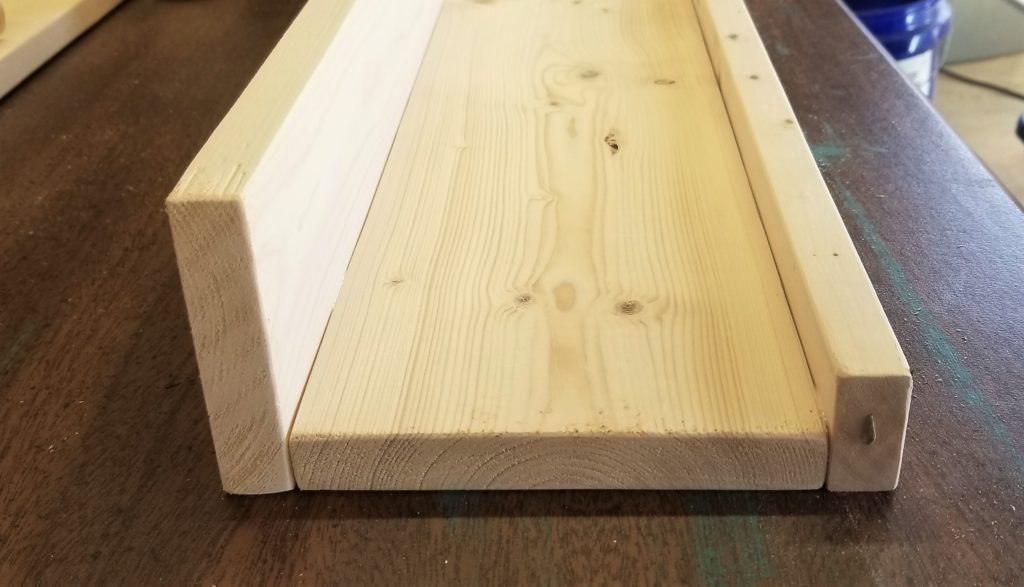
This picture ledge was super affordable and easy to make! Below is a list of materials to make one picture ledge:
- (1) – 1×2 – Cut to length of ledge
- (1) – 1×4 – Cut to length of ledge
- (1) – 1×6 – Cut to length of ledge
- Wood Glue
- Finishing Nails
- 2″ Construction Screws
First, I secured the 1×2 to the 1×6 with wood glue and finishing nails.
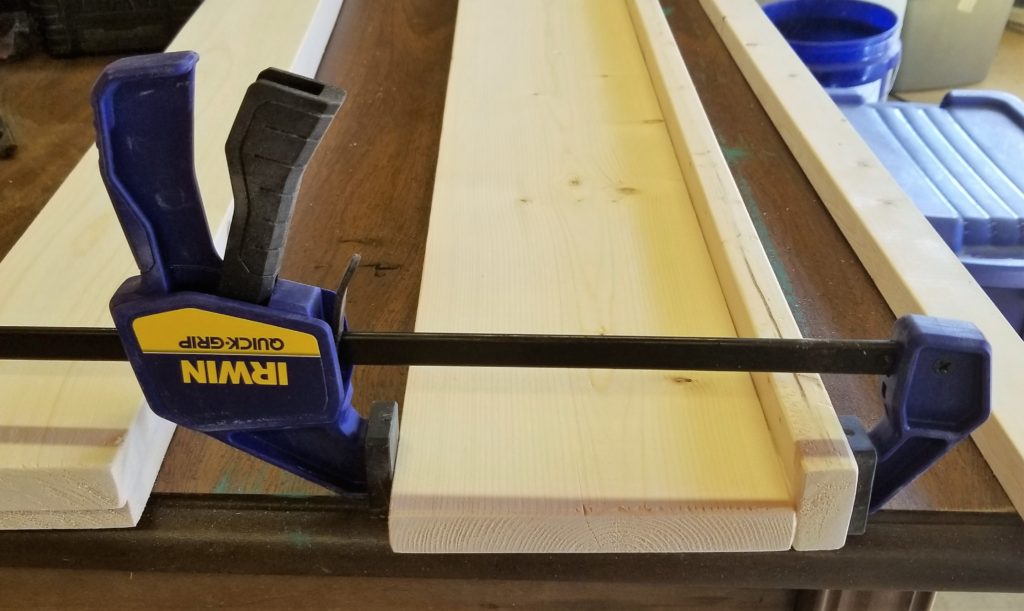
I then secured the 1×4 to the 1×6 with wood glue and the 2″ construction screws.
I finished the shelves off with some white paint and installed them with the 2″ screws in studs. It was that simple!
Installing the Storage Units
Once all of the shelving units were assembled, I staged them in the closet. The four 4-bin units that I initially picked didn’t quite fill the wall. Luckily, the spacing was perfect to add a 2-bin unit as well!
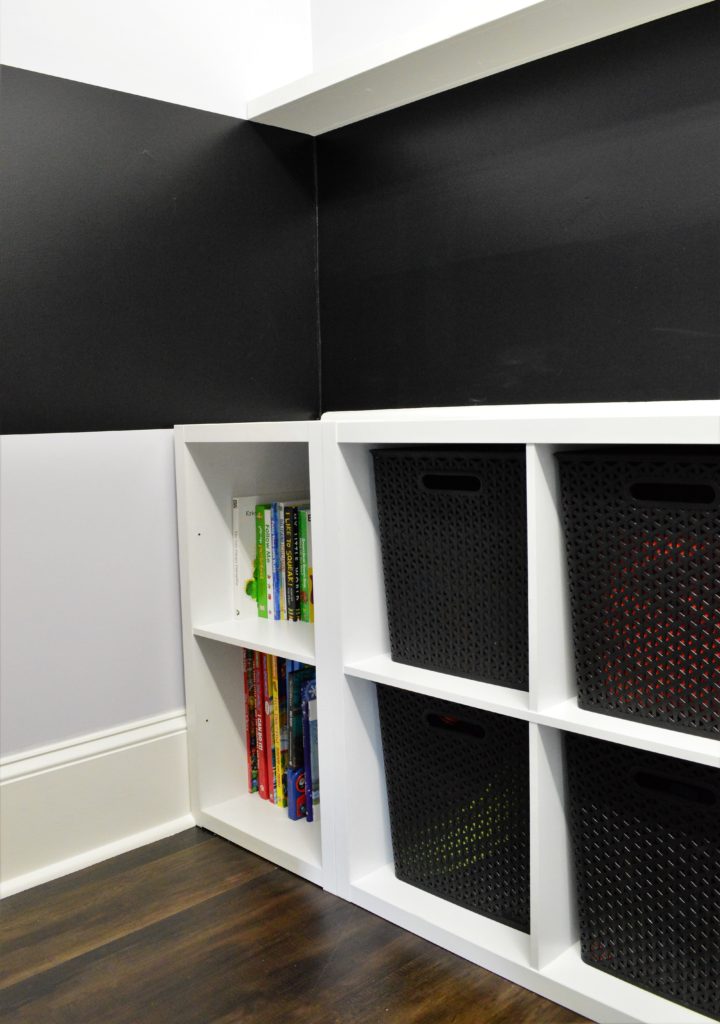
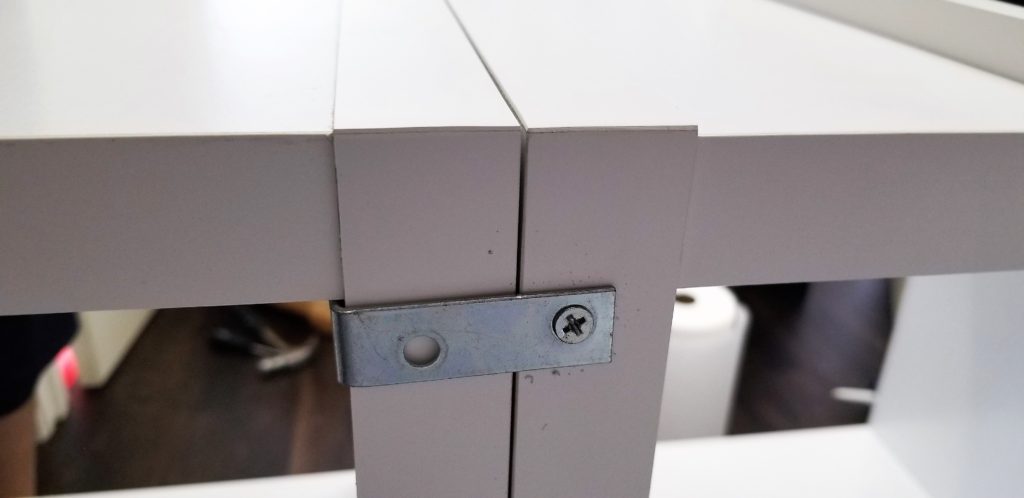
I chose to bolt the units together so they wouldn’t shift. I did this using angle brackets on the back of the units. Although I wasn’t concerned about the units tipping over, I decided to secure them to the wall using two angle brackets.
One thing I’m learning about older homes is that things usually aren’t perfect. I discovered that our wall in the playroom closet is not straight. No one else probably would have noticed, but it bothered me.
I decided to hide the uneven spacing with quarter round. I secured the quarter round to the wall using finishing nails. I caulked between both the wall and storage units and painted it white. This gave it a more finished look.
You certainly don’t have to spend a lot of money for attractive storage solutions. I love the look of the white units with black bins. It is a great feeling to finally clean up our playroom!