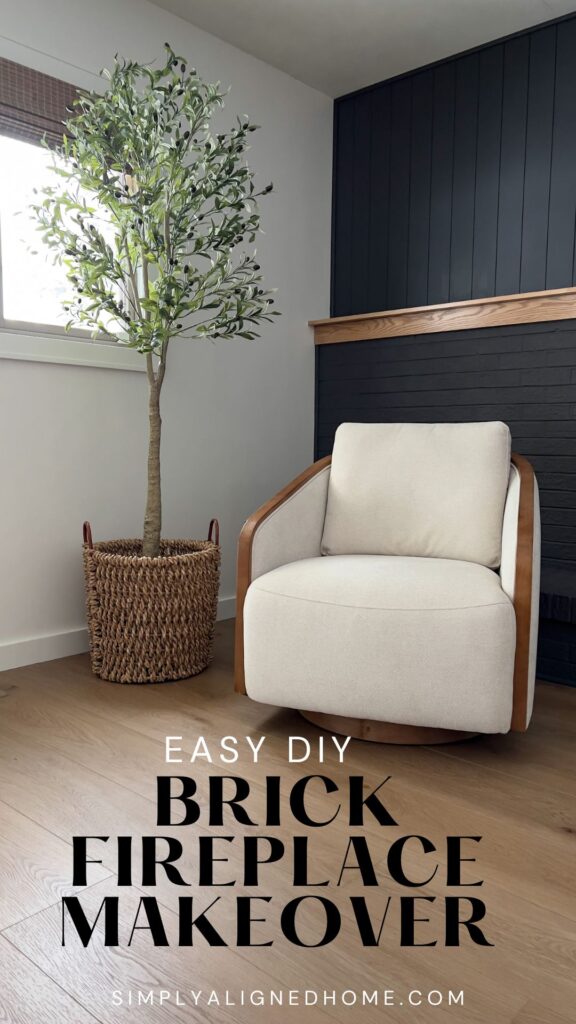
Are you tired of your outdated brick fireplace but don’t want to break the bank with a costly renovation? I’ll show you how to transform your fireplace into a stunning focal point for your home with just a few simple and budget-friendly steps.
As soon as we moved into our new home, I had the itch to start doing some projects. My first undertaking was the transformation of our lower living room’s brick fireplace. While the fireplace was far from being an eyesore, it didn’t quite align with my personal aesthetic.
Armed with some paint, a new mantle, and a bit of minor demolition work, I successfully turned this fireplace into a welcoming focal point that now the entire family loves!
**This post contains affiliate links to products that I used or recommend. If you purchase something through an affiliate link, I may receive a small percentage of the sale at no extra cost to you. I really appreciate your support!**
How To Easily Transform A Brick Fireplace
Removing The Existing Built-Ins
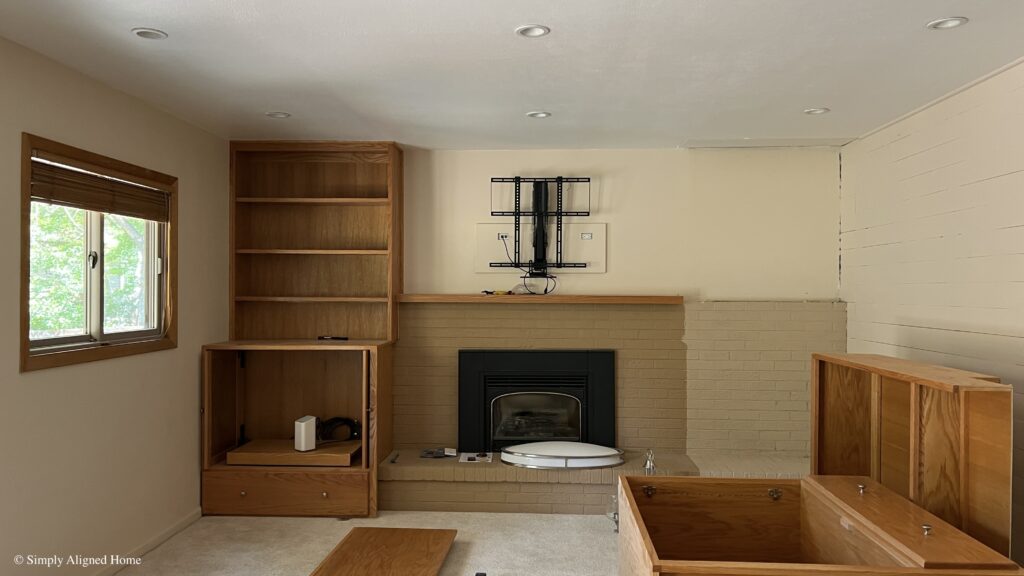
To kick things off, my first step involved the removal of the large, imposing cabinets that the previous homeowners had installed. While these cabinets were undeniably of good quality, the confines of our lower living room simply couldn’t accommodate their substantial size.
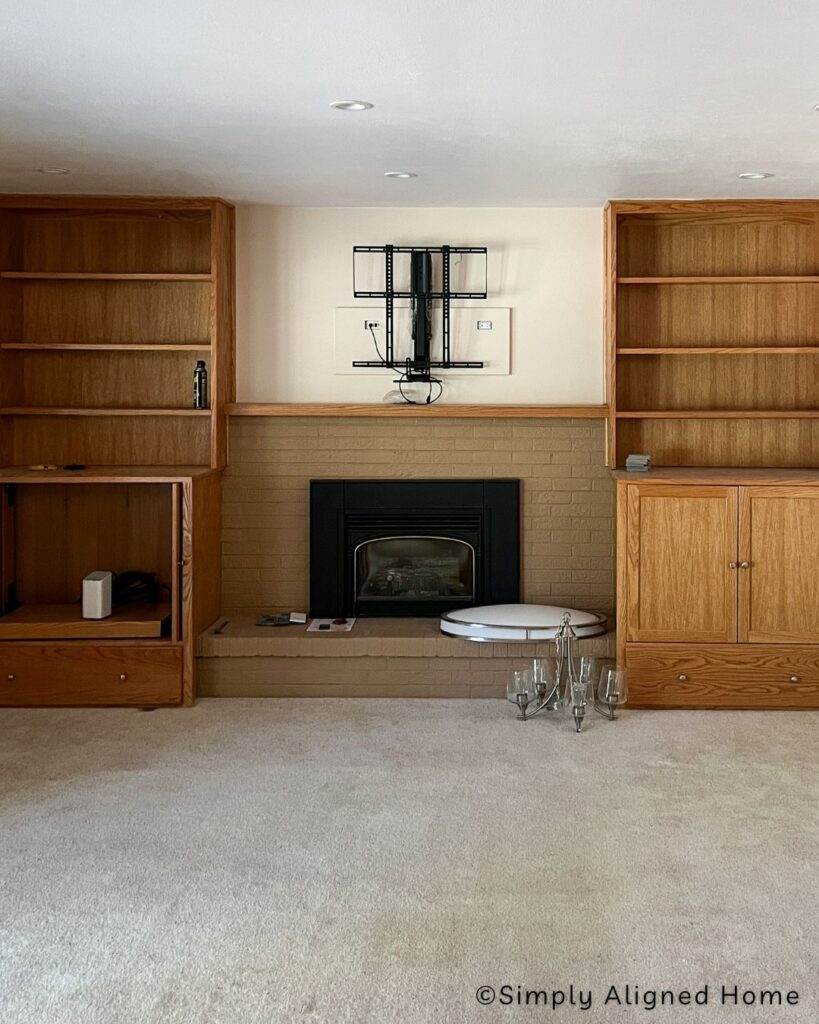
Removing the cabinets was a straightforward process. I began by taking off the cabinet doors and then proceeded to unscrew the bolts securing them in place. Fortunately, everything disassembled smoothly. After the cabinets were detached, it was a breeze to slide the top shelf portion right off the mantle.
Prime And Paint The Brick
Now, that I had a clean slate I was ready to prime the brick. I decided to use the MicroGrip Primer from Romabio Paints. When using the MicroGrip Primer you need to dilute the product first. If you decide to use their paint for a similar project make sure to follow the instructions on the bucket or their website for correct ratios.
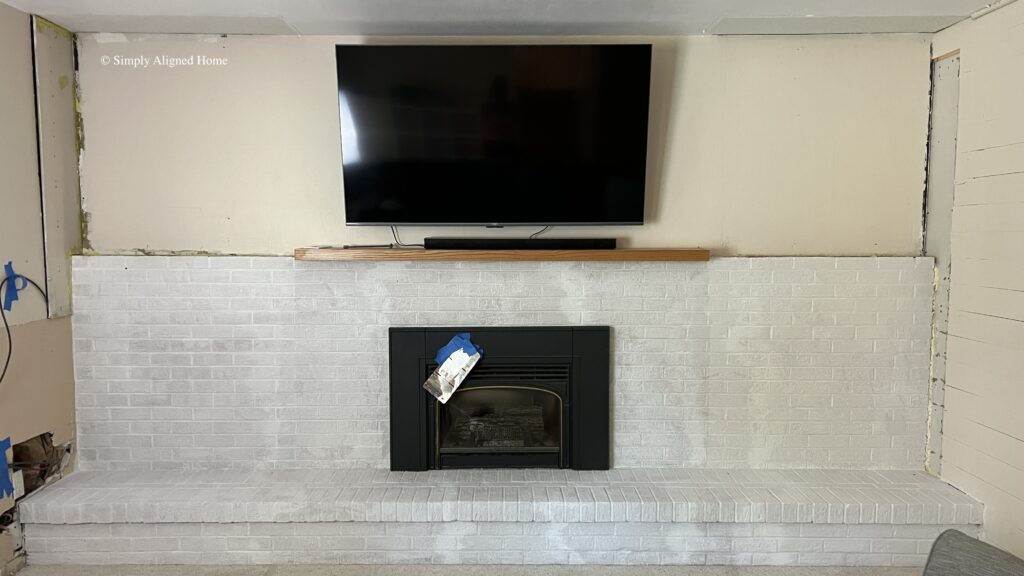
Using their small masonry brush I applied the primer. Once, the primer had a chance to dry for 8-12 hours I went on to painting the brick. For the brick I used Romabio Masonry Flat Paint in the color Celtic Stone.
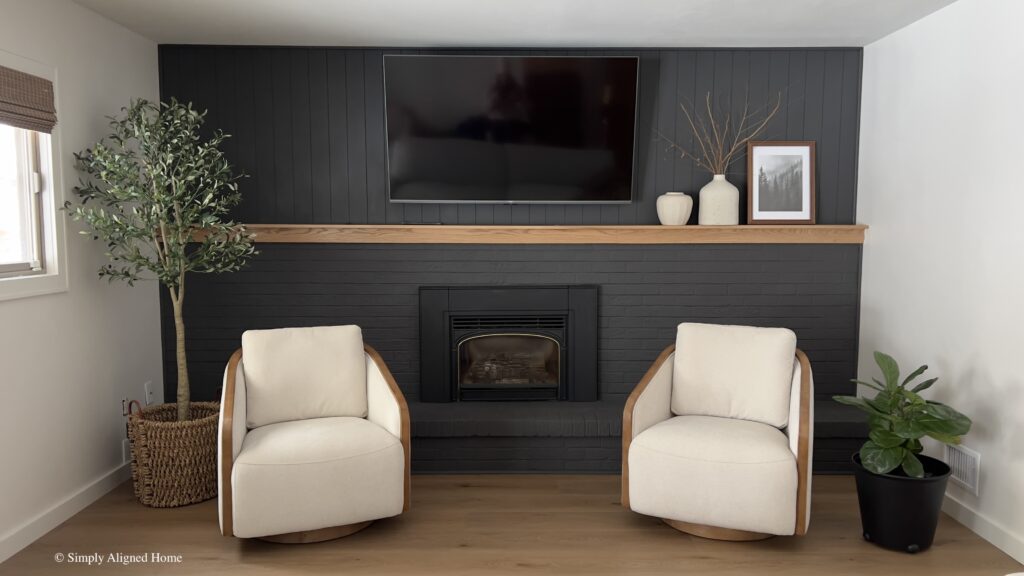
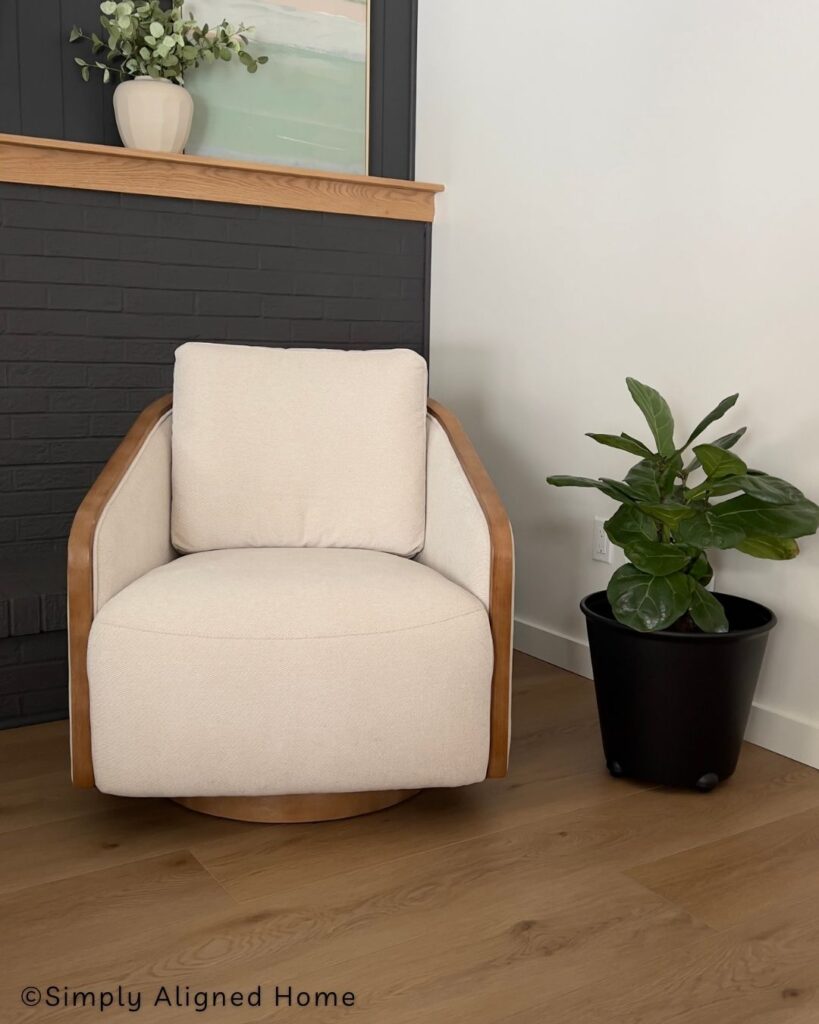
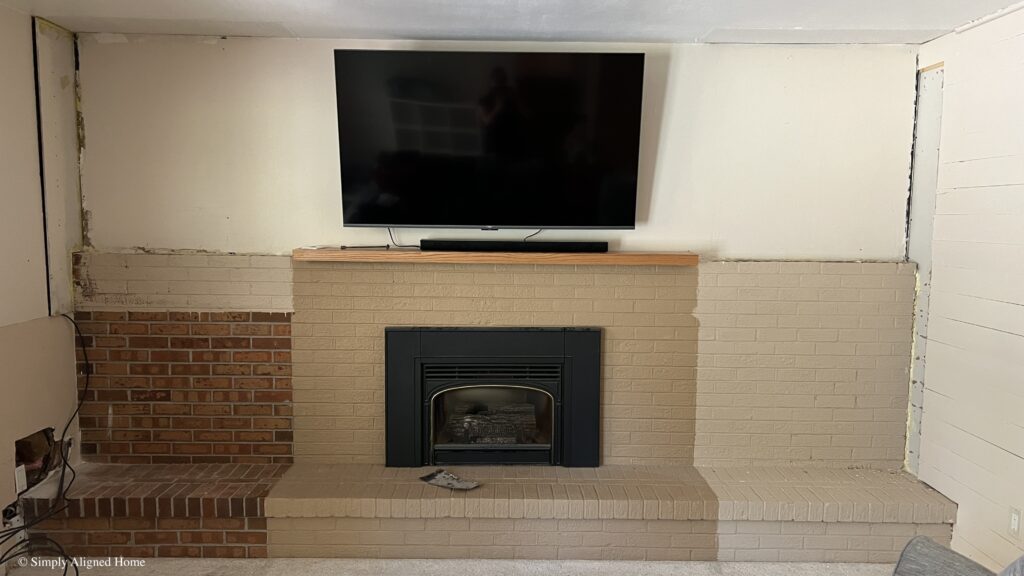
Add New Mantle
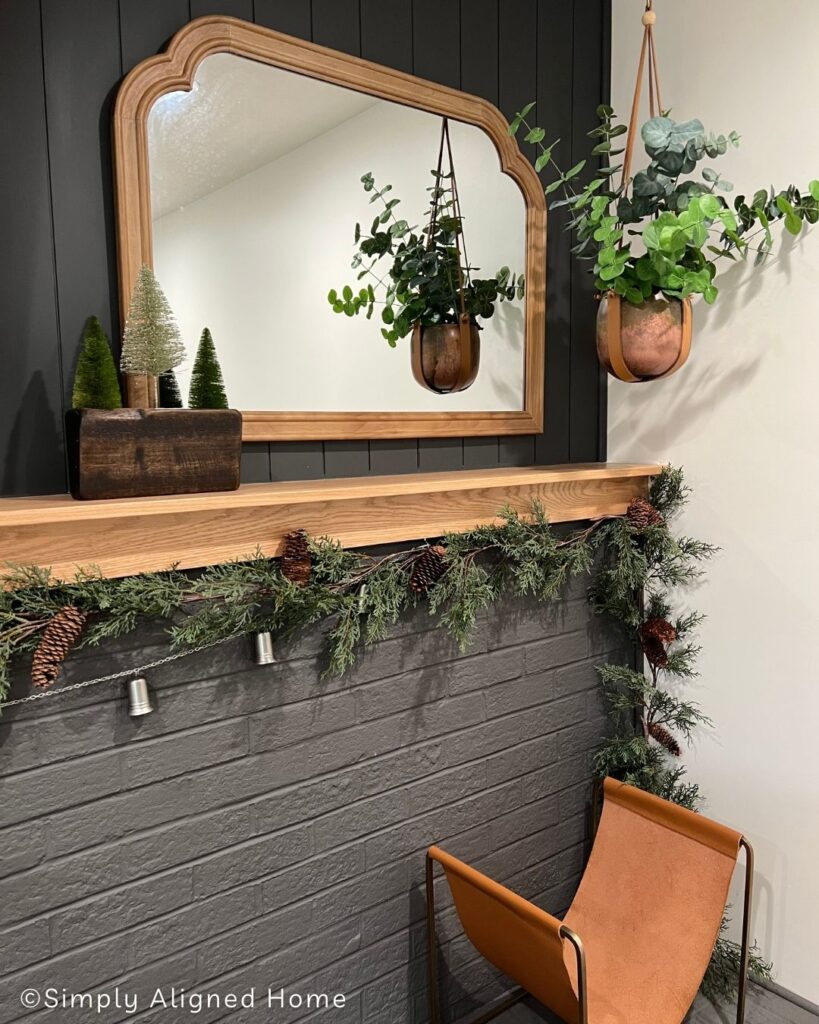
For the new mantle, I opted to construct one from scratch, as the existing one didn’t extend the full length of the fireplace. Given that I’m incorporating plenty of oak accents throughout this house, I chose a sleek oak mantle design.
I placed an oak board across the upper part of the brick, ensuring a perfect fit. To anchor it securely to the brick, I used a forstner bit to create holes, allowing my masonry screws to sit flush with the top surface of the oak board.
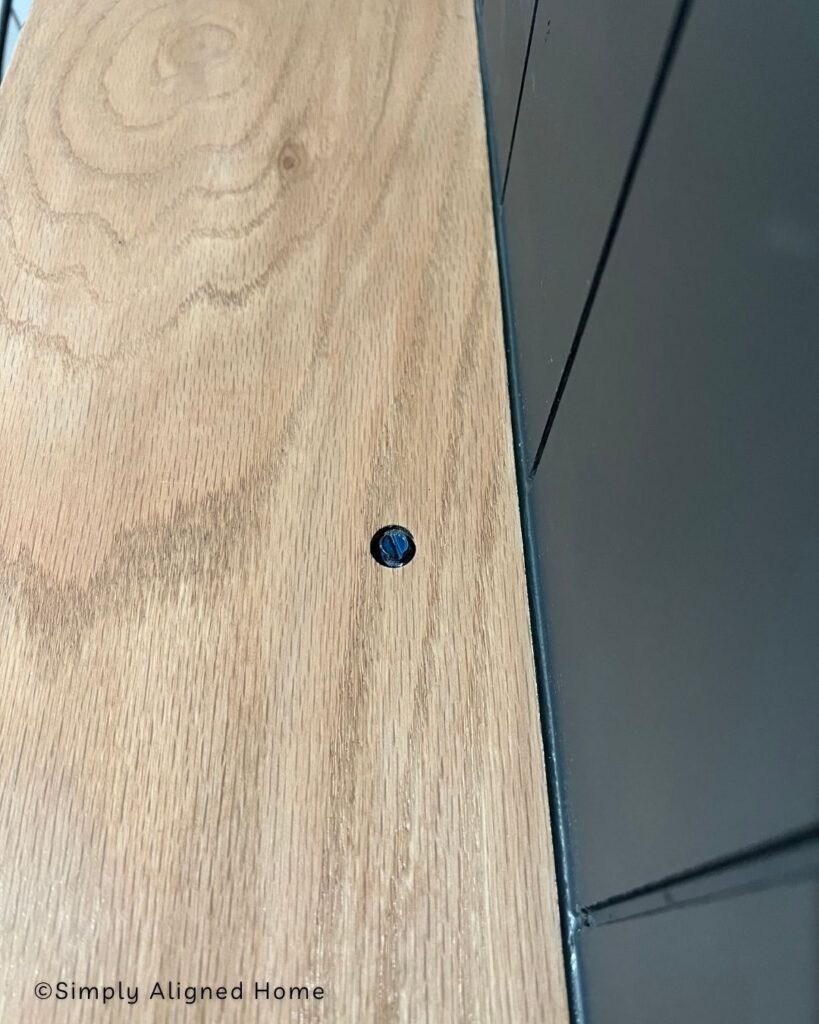
For the lower board of the mantle, I affixed it to both the brick and the upper board using construction adhesive. To hold it firmly in place, I employed a brad nailer to secure the upper board to the lower one by driving nails from the top down into the bottom board.
For my exact stain combo for red oak I have a full blog post stating my method you can read HERE!
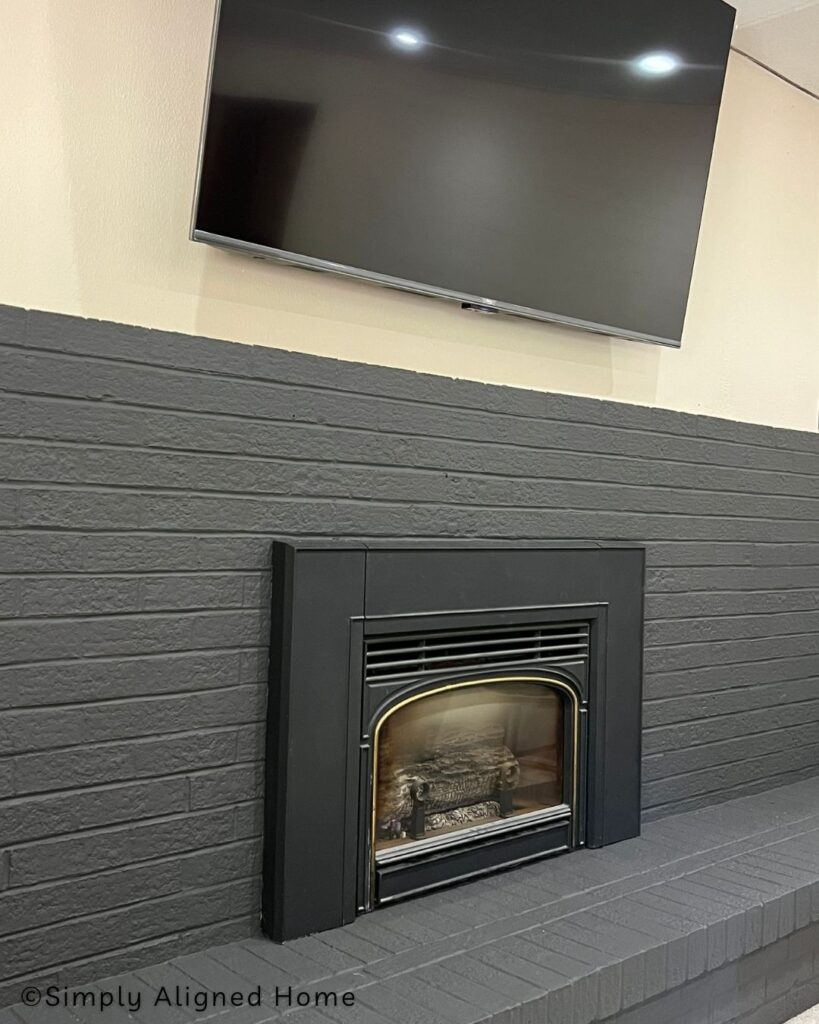
Shiplap Wall Above Fireplace
For the upper part of the fireplace I added 4×8 sheets of vertical shiplap. Usually I love using the tongue and groove shiplap but this was covenant, affordable and honestly looks the same! I filled all the nail holes and caulk all the edges and seams.
Once, that was all dry it was time to paint the shiplap. I used Romabio Low Lustre Paint in Celtic Stone. When I first started painting I got a little nervous with both the brick and shiplap being such a dark color but guys…this turned out so good!
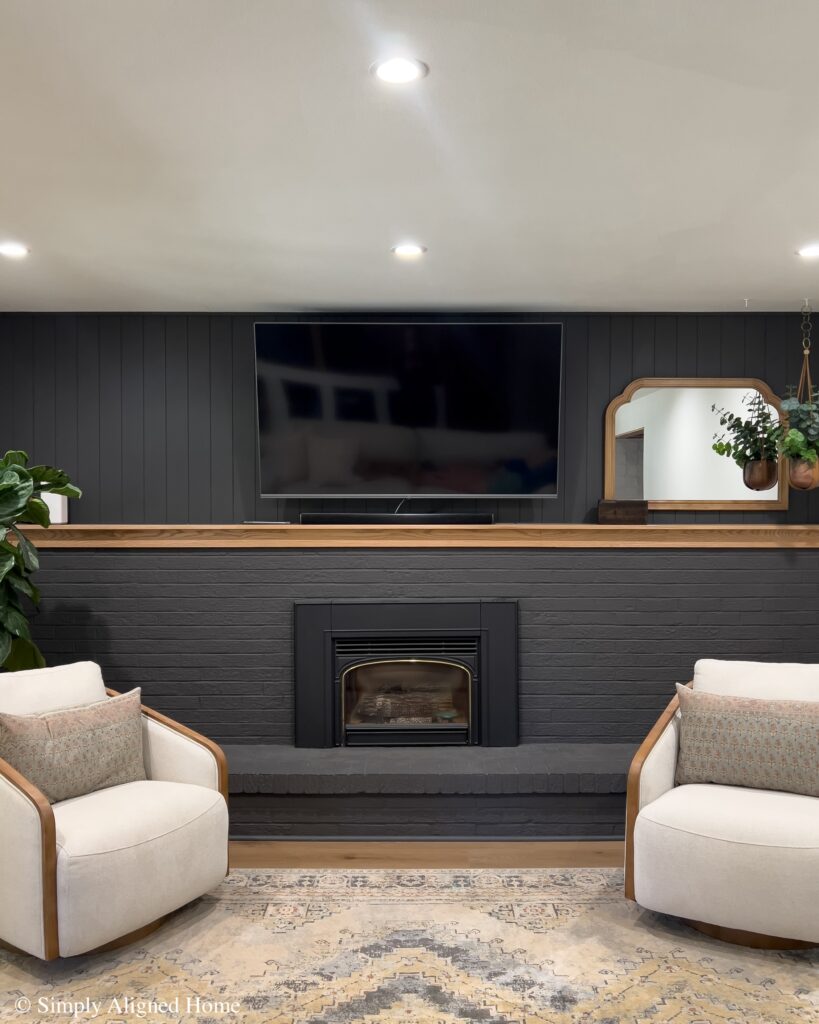
This room somehow magically looks and feels bigger now. With those bulky built-ins removed and new flooring on the way this is a whole new room. I couldn’t be more happier with my bold choice of a dark color down here in the lower living room!
Tell me are you team built-ins or team moody fireplace?!

**Note: I am not a professional and do not claim to be an expert. Please be sure to always read instructions for all tools and products. Safety is very important and should be your top priority. Wear necessary protection when using tools (eye wear, hearing protection, gloves, etc.) and dust masks when sanding or cutting. Simply Aligned Home is not responsible for any injury or damage. All of my designs are not professionally designed and are for private use only.**
Materials Used
- Romabio MicroGrip Primer
- Romabio Masonry Flat Paint-Celtic Stone
- 4×8 Sheets Of Vertical Shiplap
- Oak Boards
- Brad Nails
- Masonry Screws
- Construction Adhesive
- Caulk
- Wood Filler
Tools Used
- Small Masonry Brush
- Impact Driver And Drill
- Forstner Bit
- Miter Saw
- Track Saw
- Brad Nailer
- Tape Measure
Decor And Finishing Touches