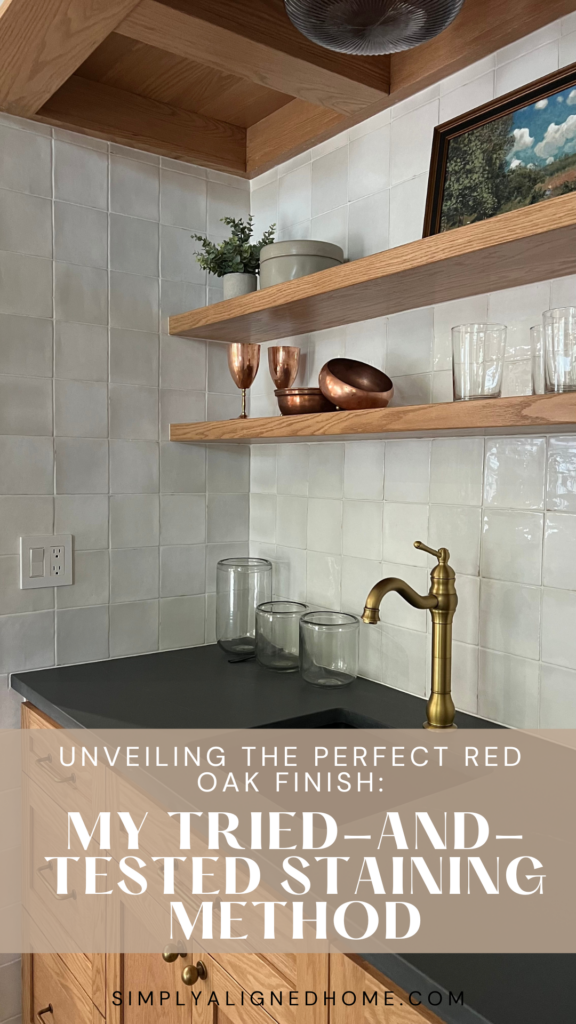
In this article I am going to share my favorite go-to stain combination for red oak and spill the secrets on how to achieve that perfect finish by minimizing the overpowering red tones.
One of my most asked questions is, how do you stain your red oak? Since moving across the country and into a split level house I have added a ton of oak accents into our space. In that time I have mastered what I feel is the best stain combo to minimize the red undertones in red oak wood.
There are so many stains out there that come in different shades and brands but my go-to for staining red oak is Behr Water Based Stain. Keep in mind, when I’m using this combo and brand I am staining red oak, and if you apply this stain to any other species of wood you will get a different result!
**This post contains affiliate links to products that I used or recommend. If you purchase something through an affiliate link, I may receive a small percentage of the sale at no extra cost to you. I really appreciate your support!**
How I Finish Red Oak
Steps To Staining Wood:
- Lightly Sand Wood
- Stain Wood
- Seal Wood
Prepping The Red Oak For Stain
To prep red oak for stain my process is fairly simple. I start out by lightly sanding the wood with 180 grit or 220 grit sandpaper. When sanding wood, it can affect how the wood absorbs stains. Finer sanding grits create a smoother surface, leading to a more even stain absorption
For staining red oak, I skip using a wood conditioner. It’s mainly used on soft woods like pine wood.
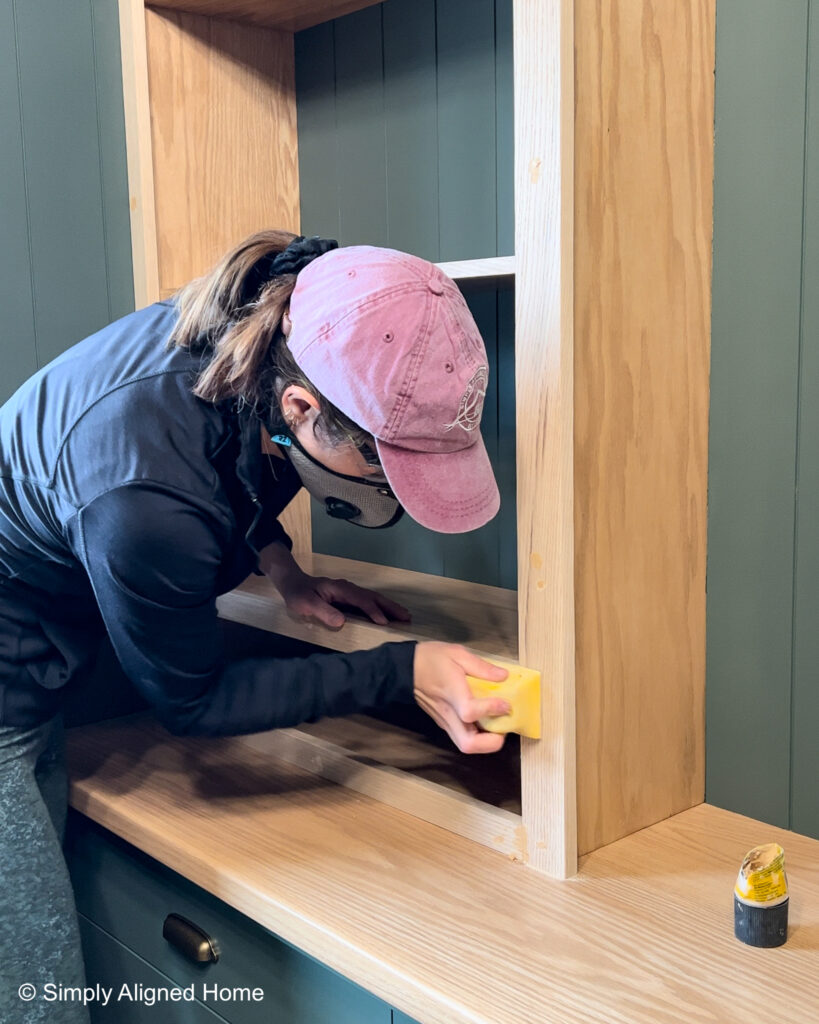
When I have nail holes to fill I always use Minwax Natural Wood Filler. Once I apply it I sand it right away before it drys.
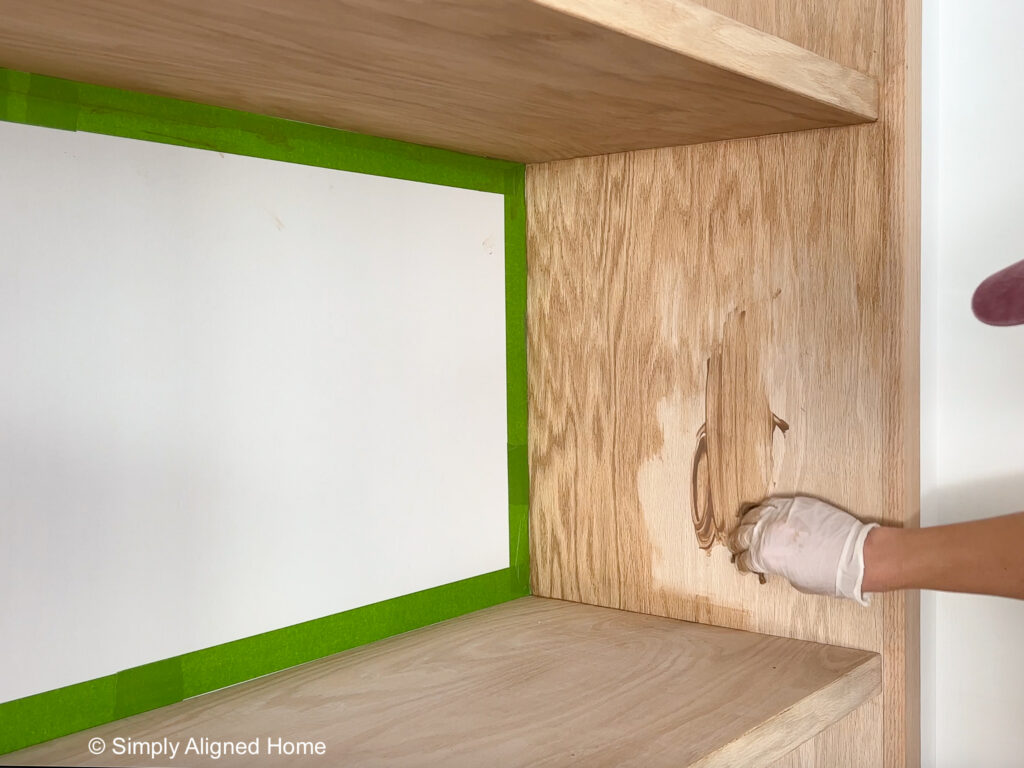
Staining Red Oak With My Favorite Combo Of Stains
Next up, is staining the red oak! I use 3 separate stains to achieve my desired stain combo. I start out by grabbing a container and mixing the 3 stains together, making sure to stir it really well.
The recipe to my favorite combo is:
- 1 part Golden Pecan Water Based Stain
- 1 part White Wash Pickling Water Based Stain
- 1/2 part Early American Water Based Stain
To apply the stain I have found using an old baby sock works best! Wearing a plastic glove first then slipping the baby sock on next, I have found keeps my hands free of any stain seeping through the sock.
Keep in mind if you have never used water based stain it dries really quickly. Work fast and only apply as much as you need. When applying the stain go in the direction of the grain for the length of the board. Then, immediately wipe off any excess with a rag.
One thing I have found is water based stain doesn’t smell near as bad as oil based stain, which is great for indoor projects!
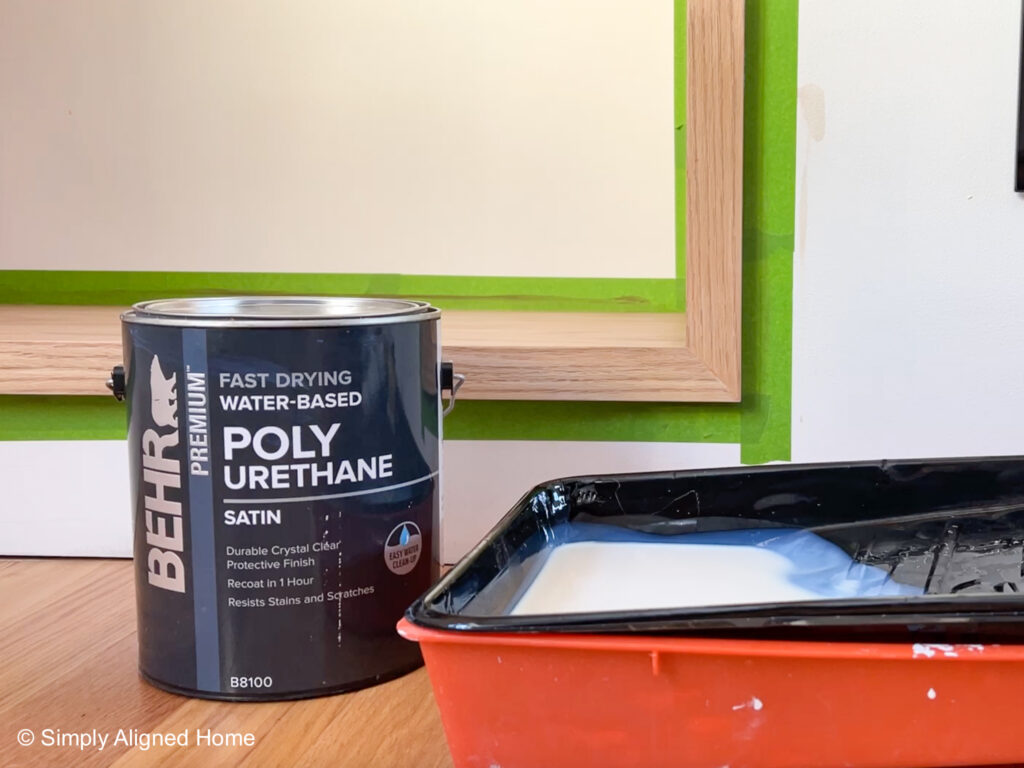
Sealing Red Oak
Once the stain is dry, I recommend using a topcoat. I typically apply three coats of water based poly with a light sanding between coats on all of my projects!
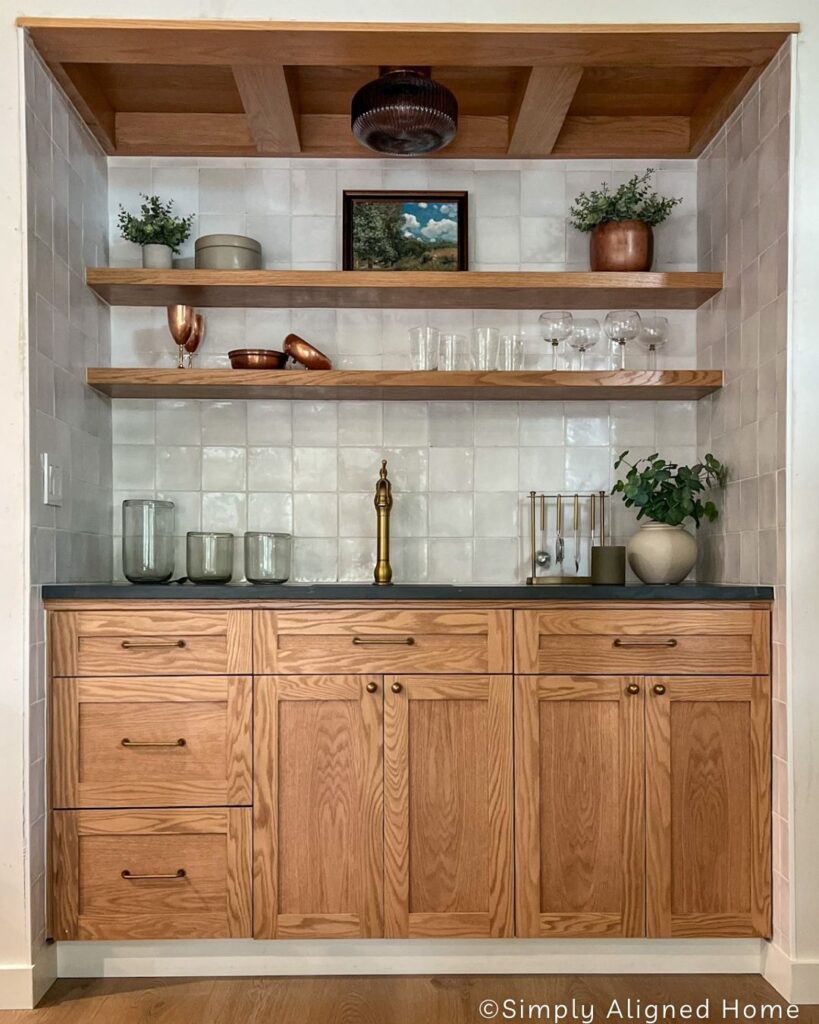
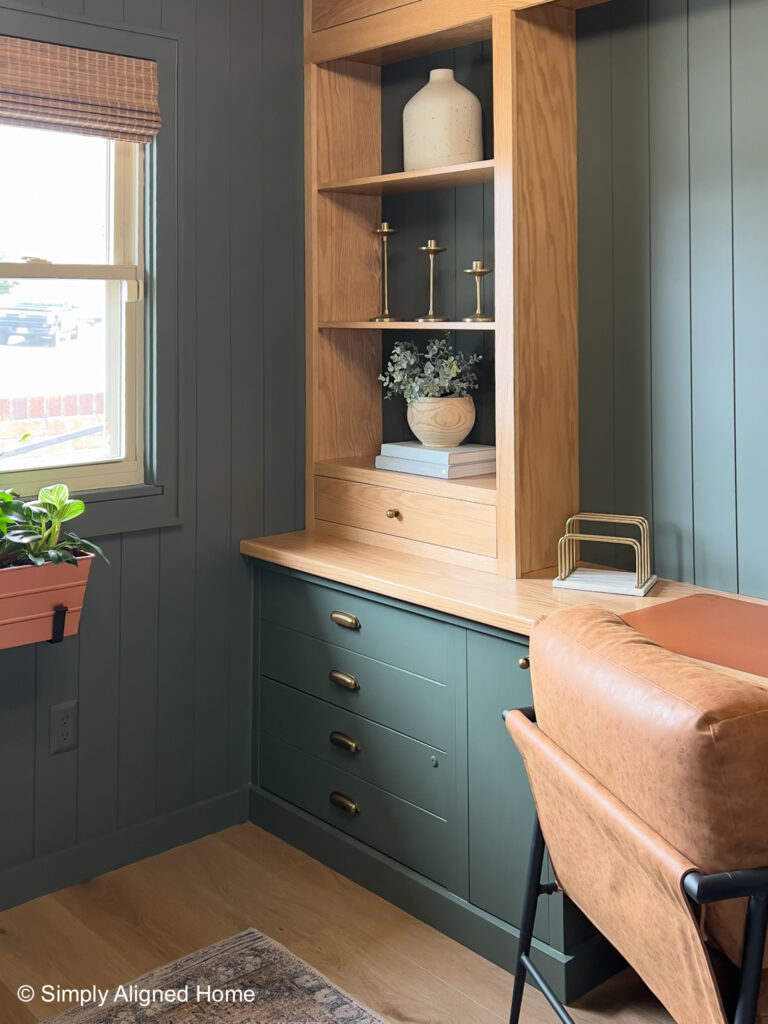
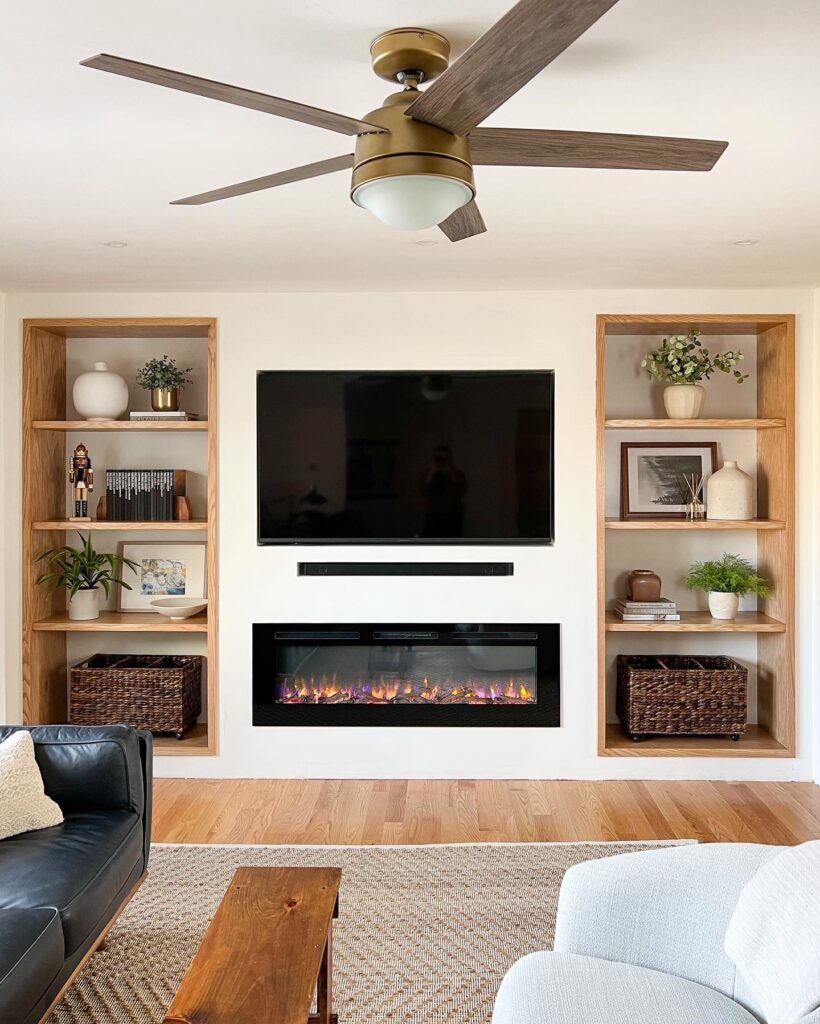
Projects That I Used My Favorite Stain Combo On
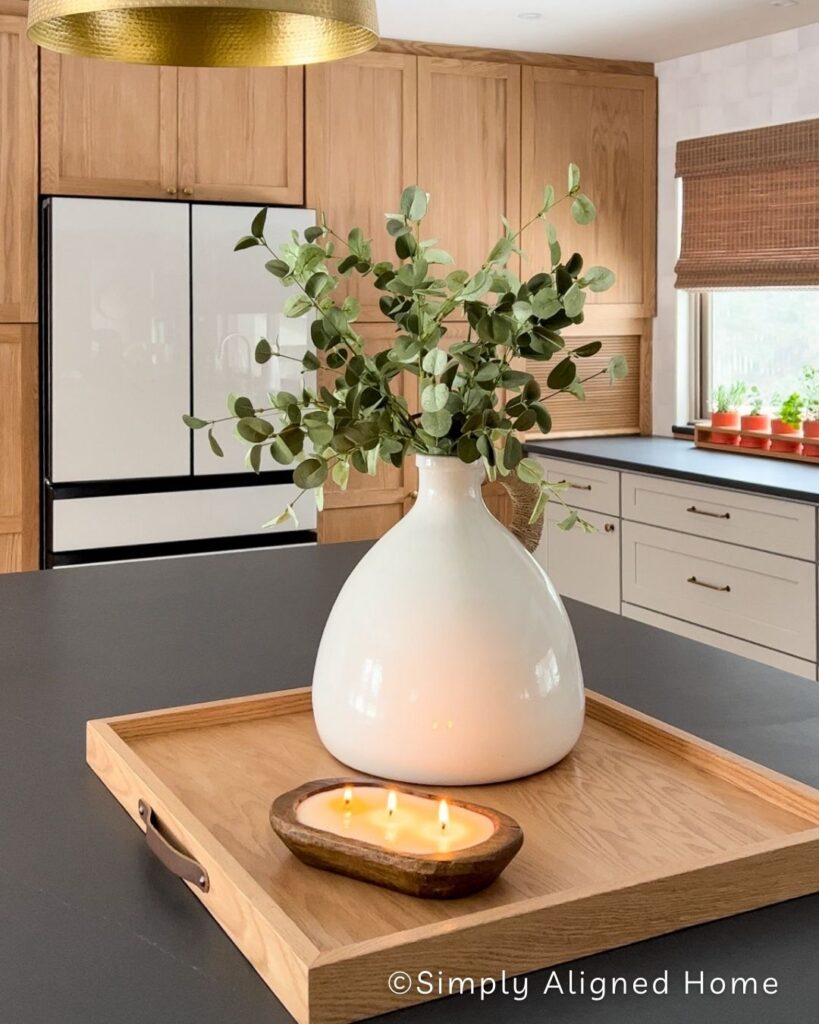
Some of my favorite projects that showcase my favorite stain combo is my wet bar makeover, fireplace built-in bookcases and my home office makeover!

**Note: I am not a professional and do not claim to be an expert. Please be sure to always read instructions for all tools and products. Safety is very important and should be your top priority. Wear necessary protection when using tools (eye wear, hearing protection, gloves, etc.) and dust masks when sanding or cutting. Simply Aligned Home is not responsible for any injury or damage. All of my designs are not professionally designed and are for private use only.**
Materials Used
- Empty Quart Paint Can
- Sandpaper
- Sanding Sponge
- Wood Filler
- Old Baby Sock
- Plastic Gloves
- Water Based Poly
- Golden Pecan Water Based Stain
- White Wash Pickling Water Based Stain
- Early American Water Based Stain
Tools Used