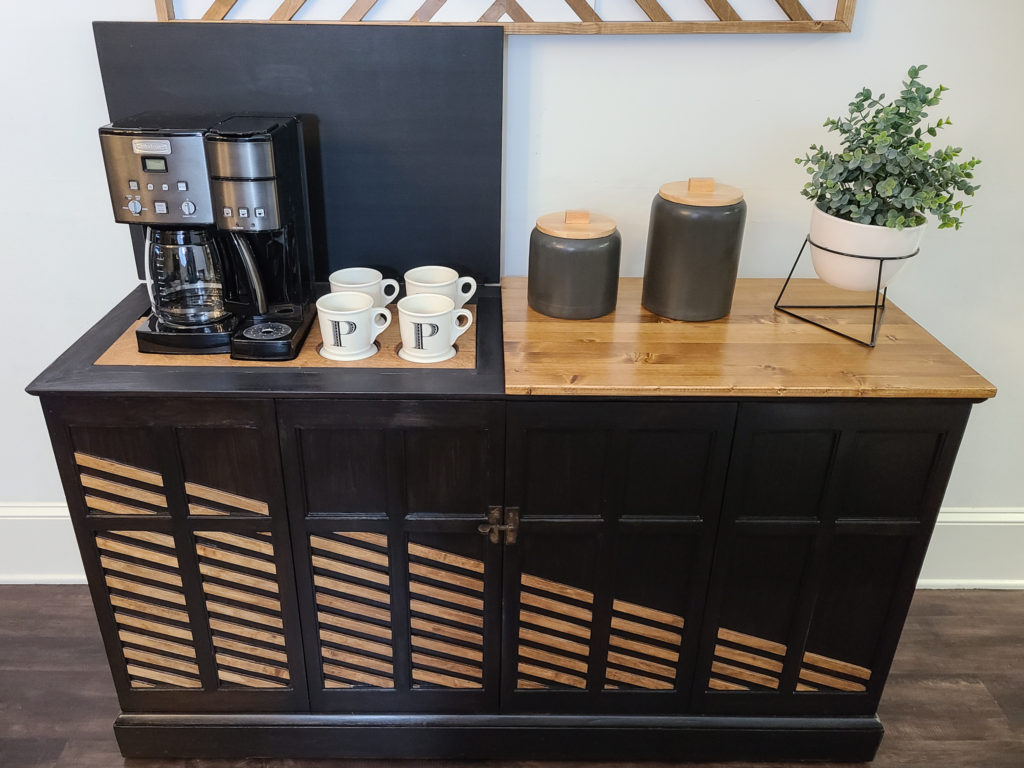
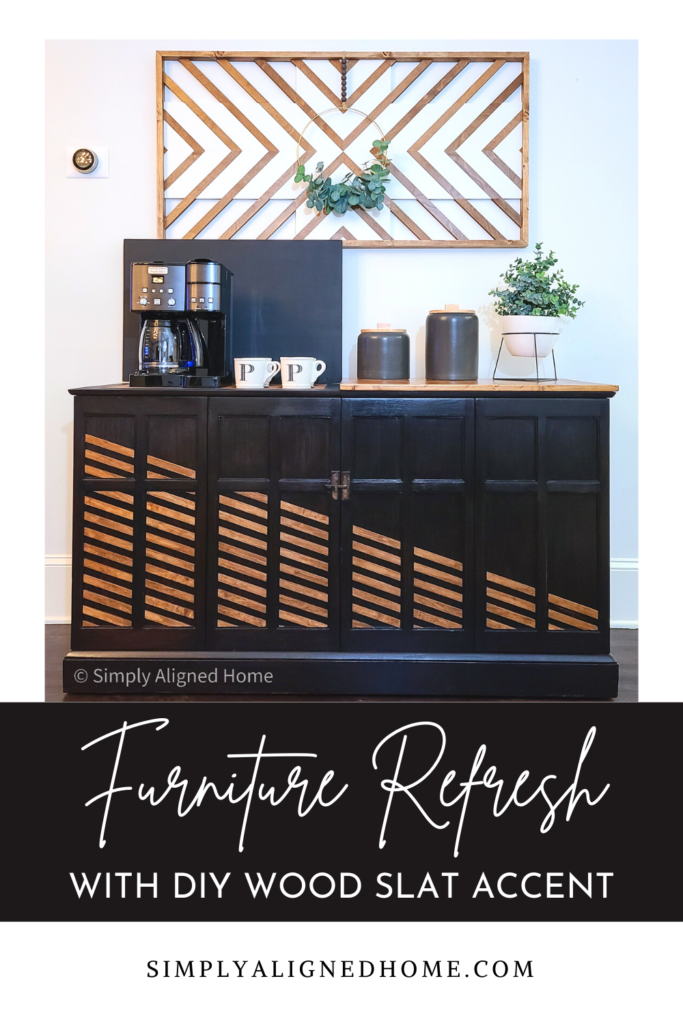
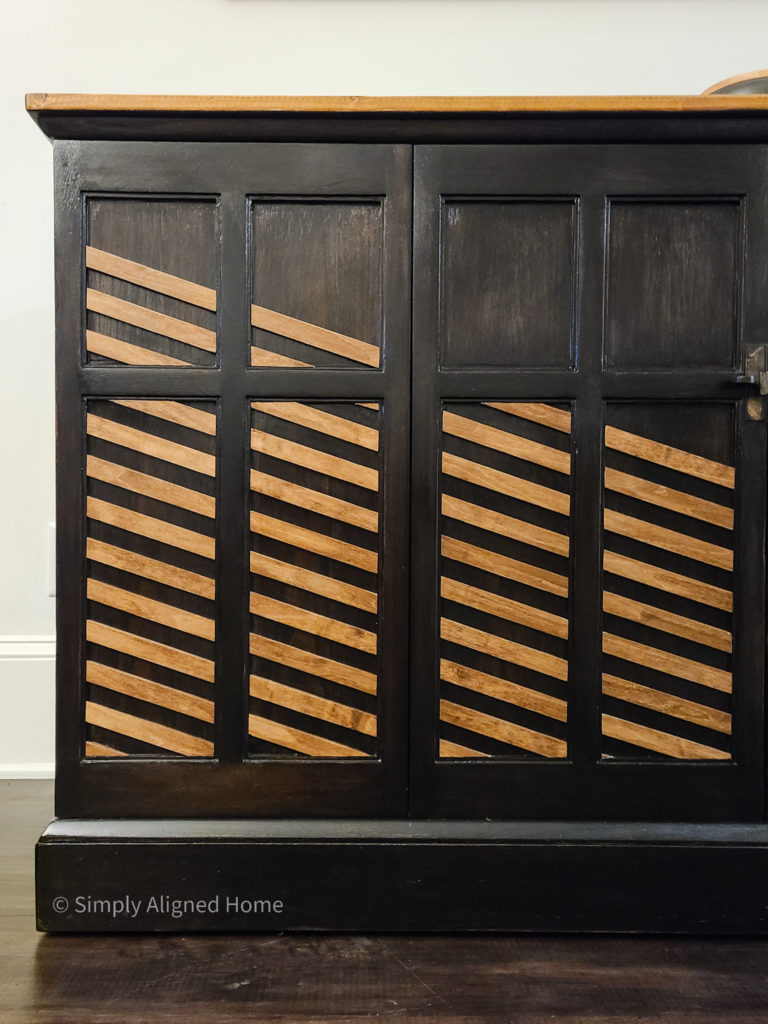
Have you ever spent way too much time working on a project for it to not turn out the way you hoped?! That’s exactly what how this wood slat accent found a home on my custom coffee bar.
I entered the Furniture Flip Challenge hosted by The Builders Challenge and Do It Yourself Magazine with plans to simply sand and stain an old chest before turning it into a coffee bar.
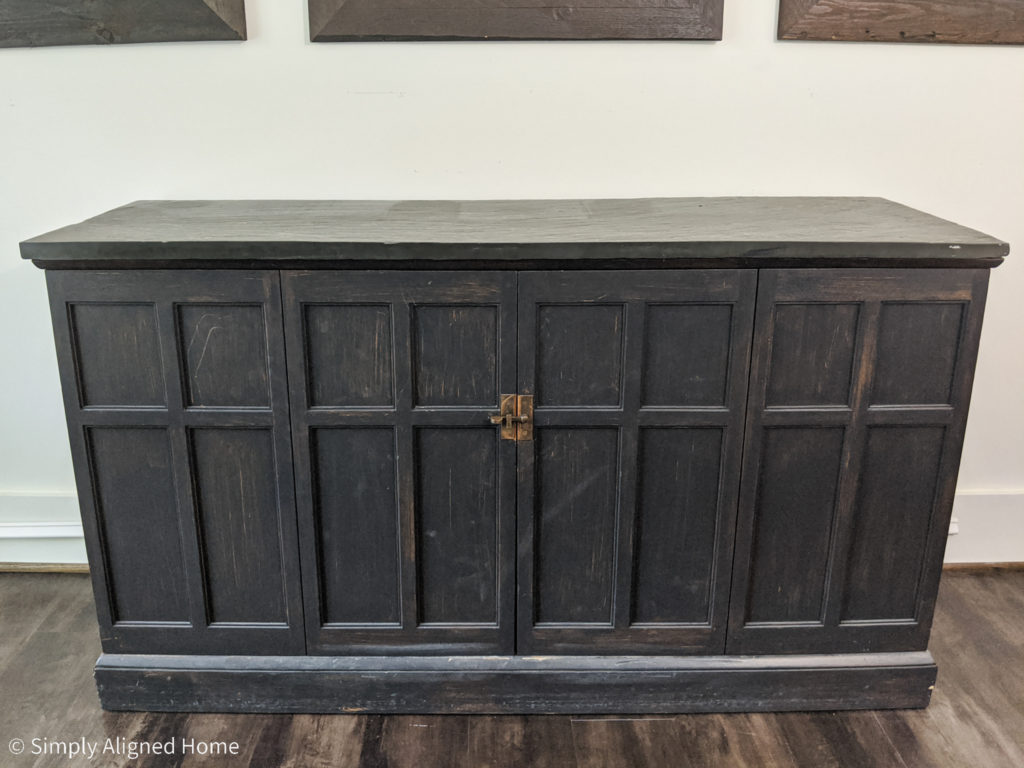
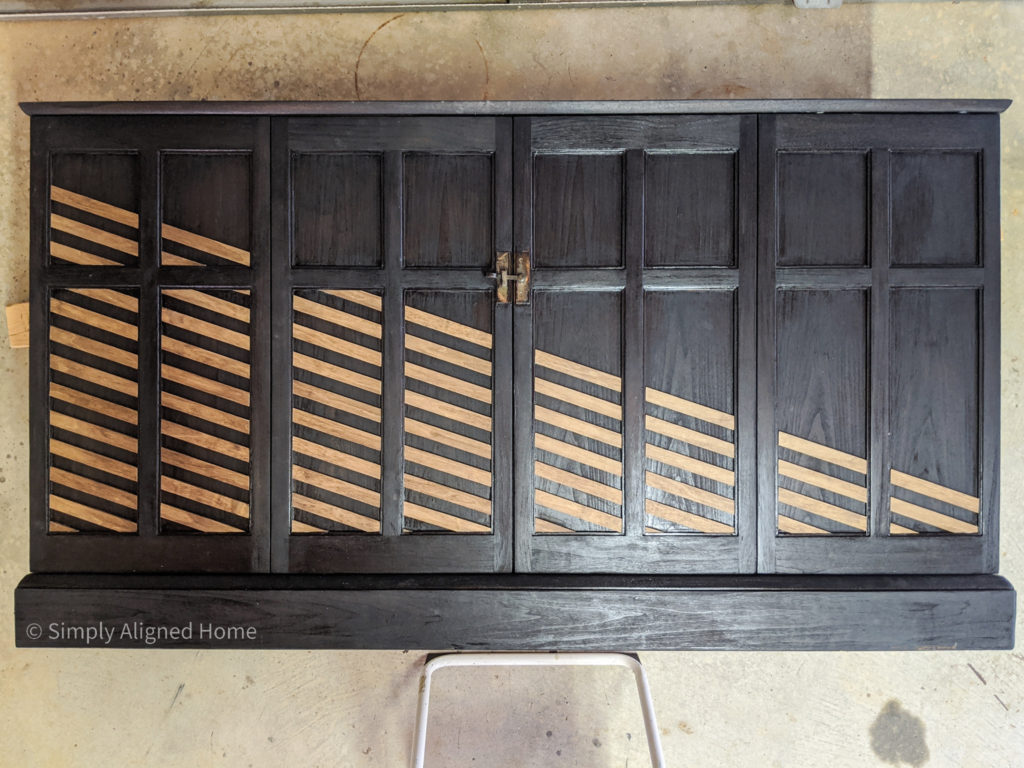
After several failed attempts at staining the chest with a lighter stain, I settled on a black gel stain to hide the imperfections. Even though the black stain looked good on the chest, I felt there was something missing…it had no character.
Luckily, I found the inspiration I needed! I decided to take the slat wall design that I used in my boys’ bedroom and add it to the chest!
**This post contains affiliate links to products that I recommend. If you purchase something through an affiliate link, I may receive a small percentage of the sale at no extra cost to you. I really appreciate your support.**
Cut Plywood into Slats
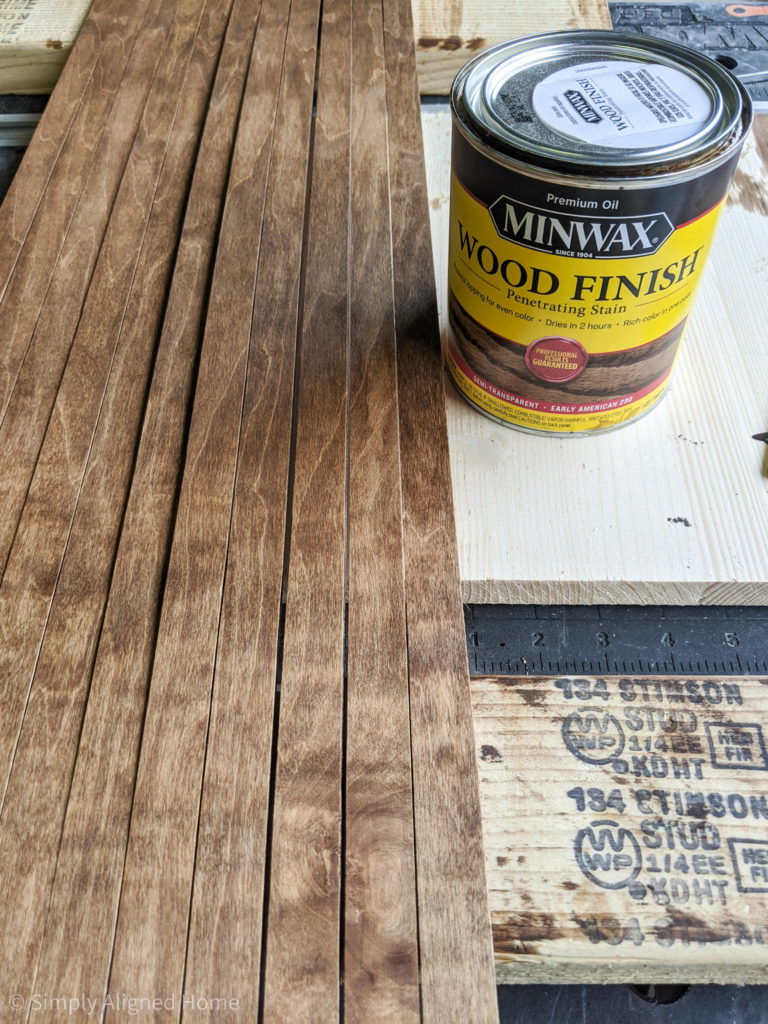
For the wood slats, I decided to use 1/4″ birch plywood. The 1/4″ plywood was thin enough to lay inside of the existing trim on the chest.
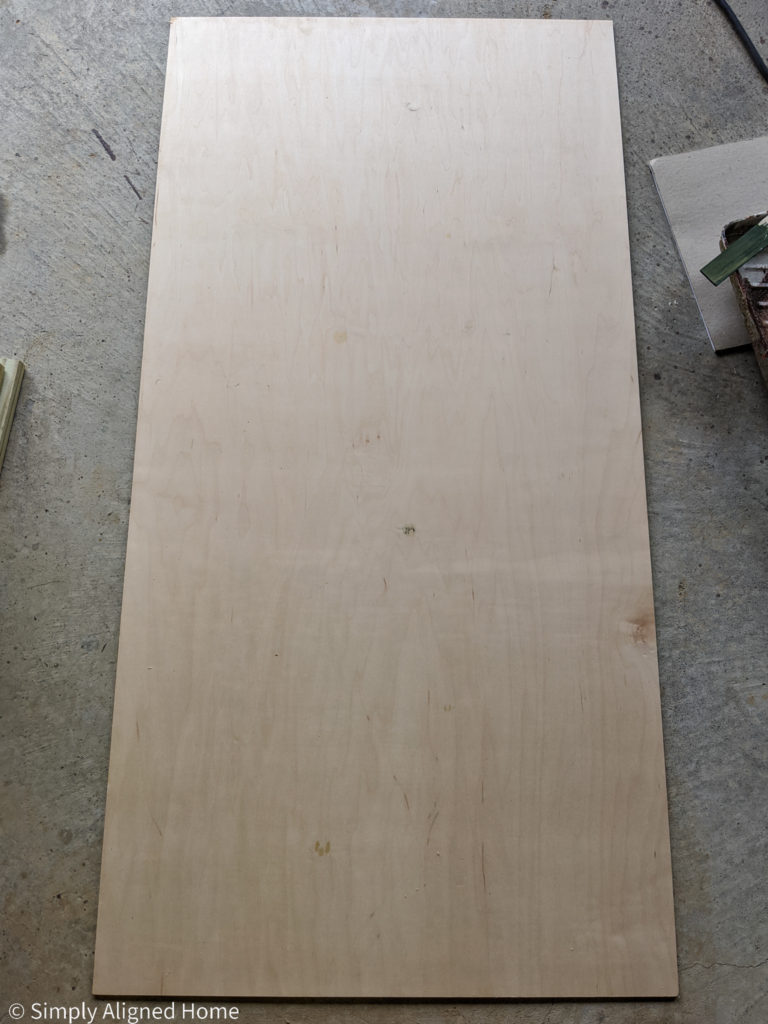
I ripped the plywood into 3/4″ slats using my table saw.
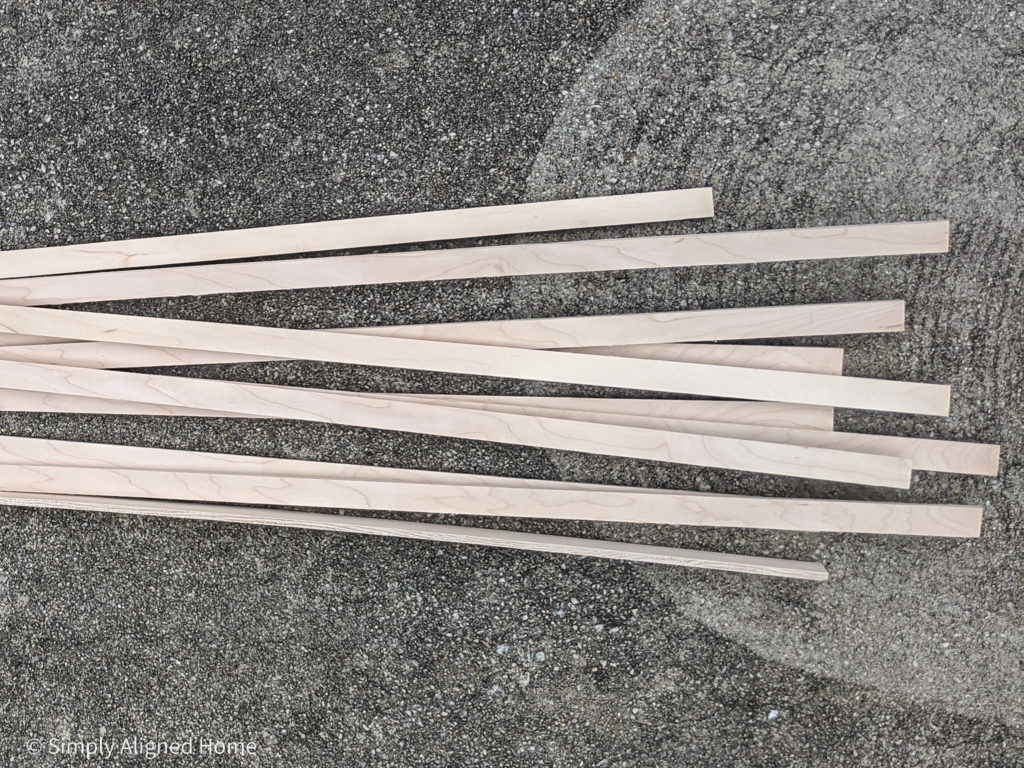
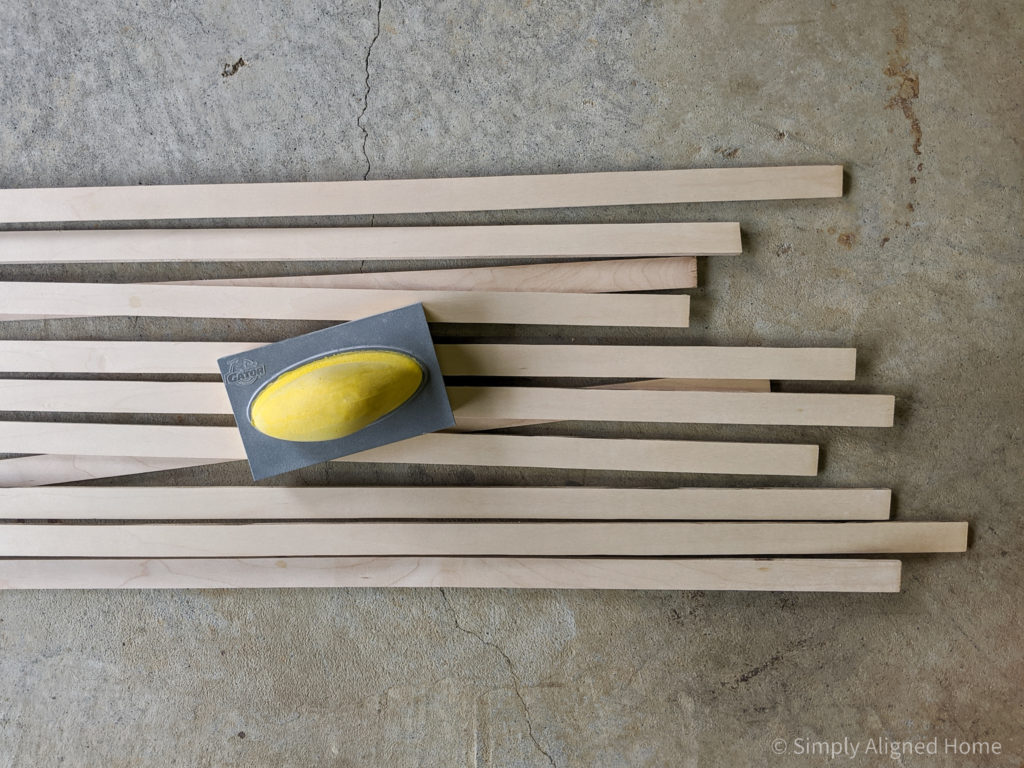
Sand the Wood Slats
Using a sanding sponge, I sanded the cut edges of the slats to get rid of any rough spots.
Stain the Wood Slats
I chose to stain the wood slats with Early American stain. I used a paint brush to stain the slats. The sides of the plywood sucks up the stain and it’s easiest to apply it using a brush.
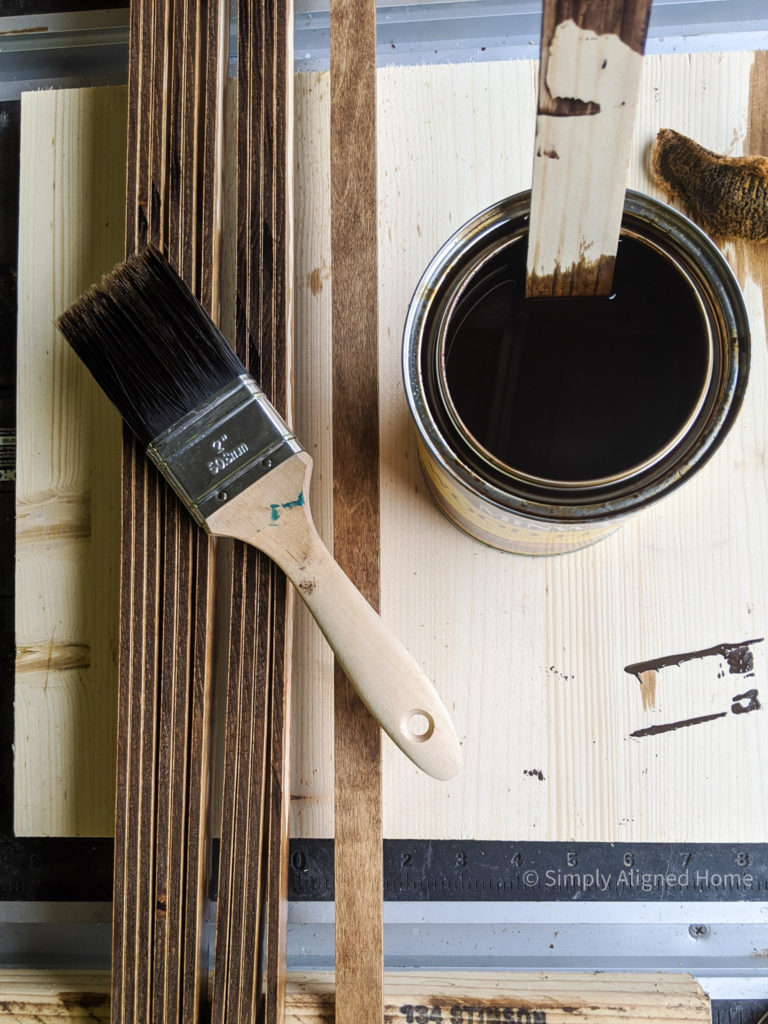
Once the stain dried, I quickly wiped the front faces using a rag. I did not bother staining the faces that would be against the chest.
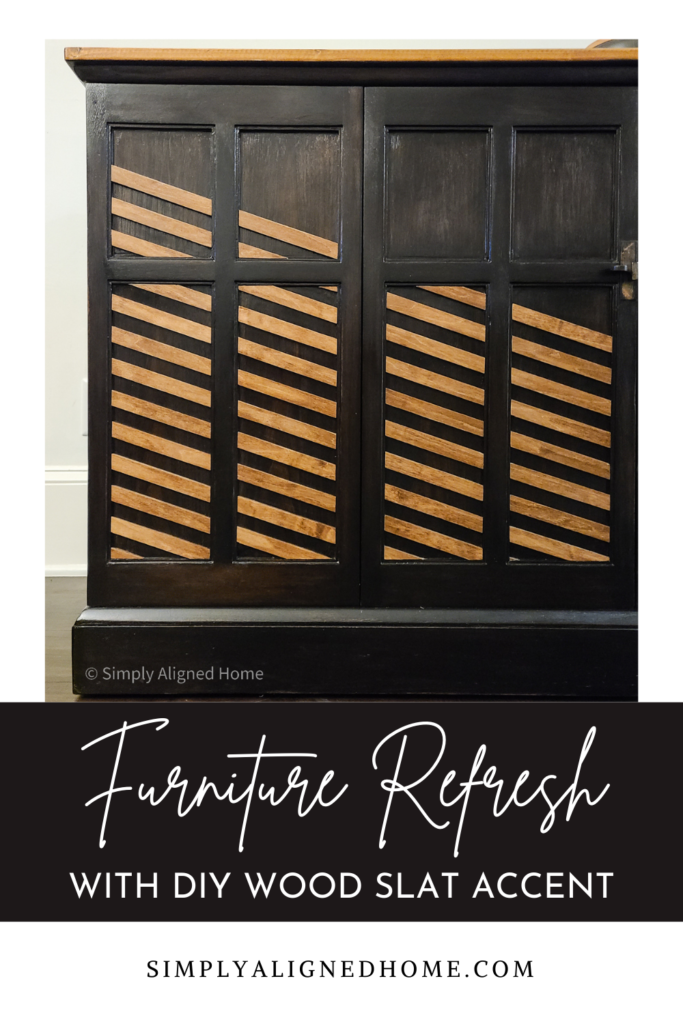
Determine the Slat Design
I tested out several different designs using a 2D software. This helps me to visualize the design. I hate putting time and energy into a project to not like the final design.
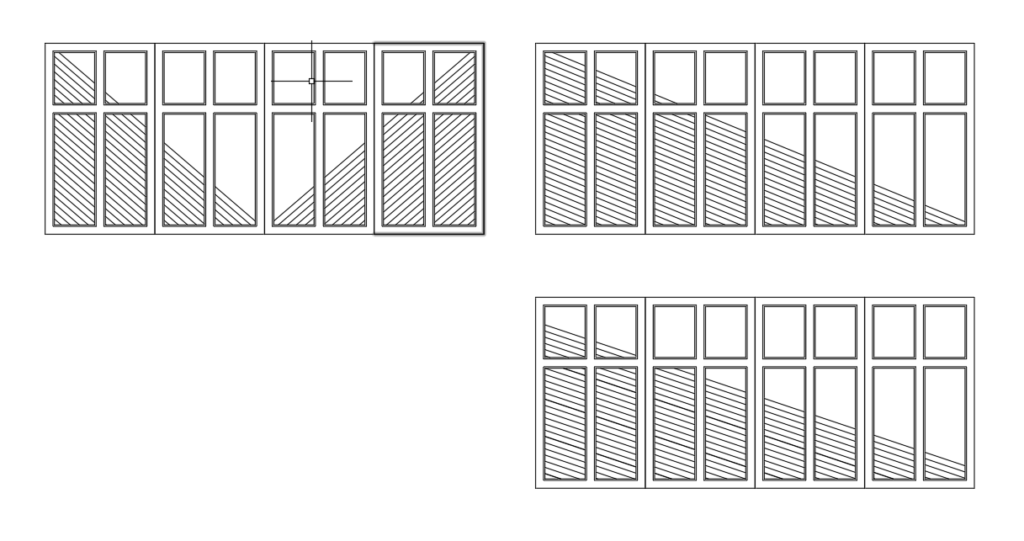
I’m so glad I drew them all out. I originally planned to go from corner to corner, but I like the slightly offset design so much better!
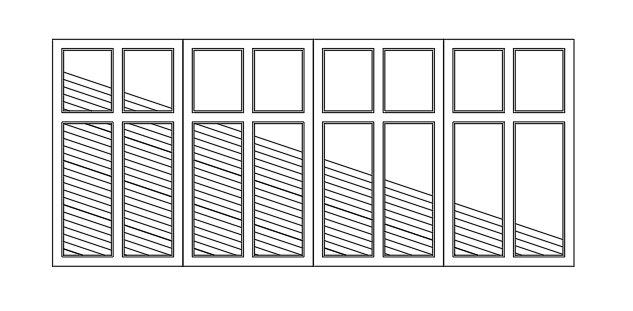
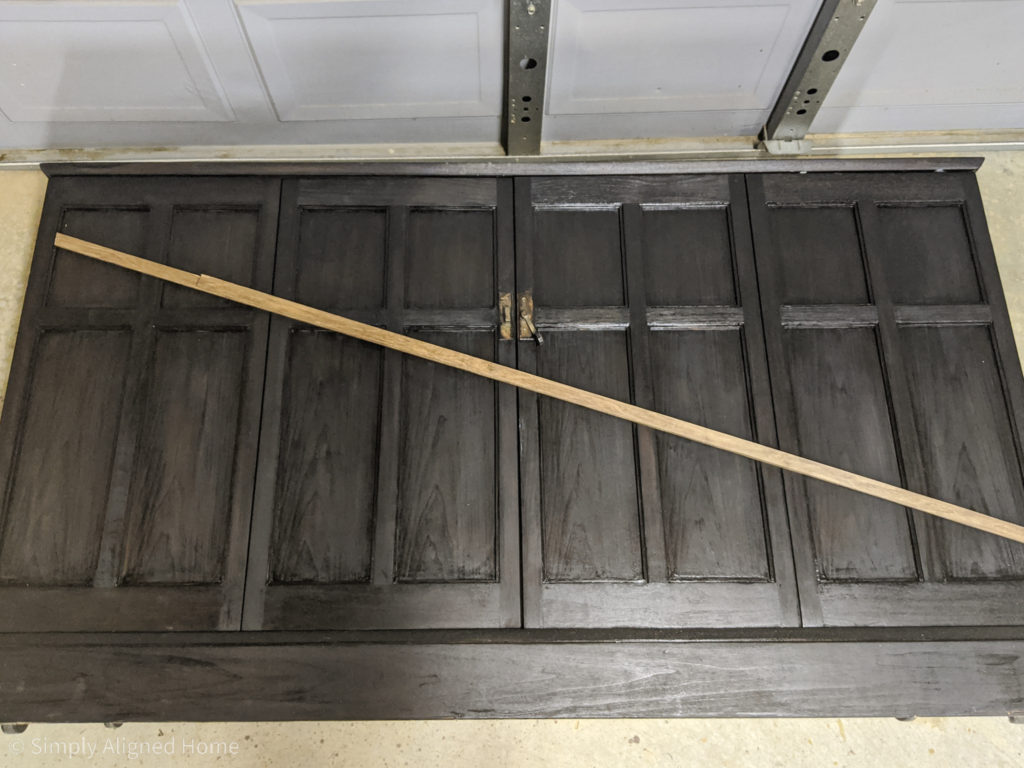
Another benefit of using a design software is that you can get the cut angle from the drawing. Most of my cuts would be made on an 18 degree angle. I laid one of the wood slats on the chest to be sure that I liked the design before I began.
Cut the Wood Slats
I made one template piece that would work for most of the wood slats. I cut several pieces based on the template using my miter saw. I decided to leave all of the pieces that needed to be cut on a 72 degree angle for later.
Install the Wood Slats
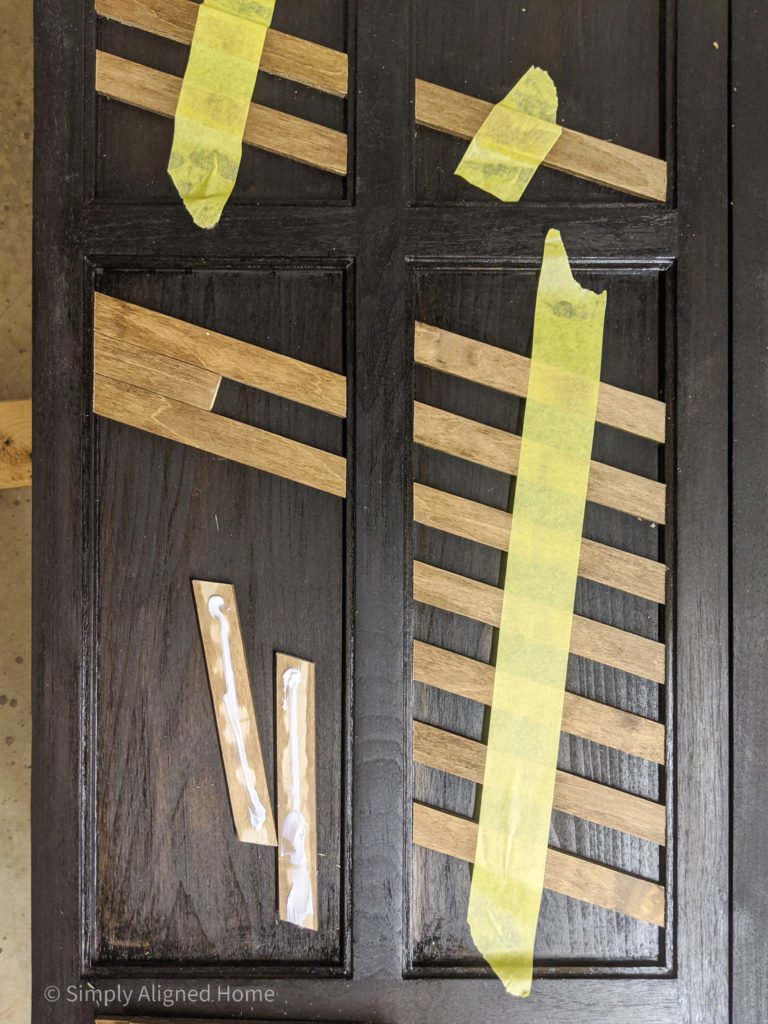
For the first line of the design, I used a straight edge to ensure that the line was straight across the doors.
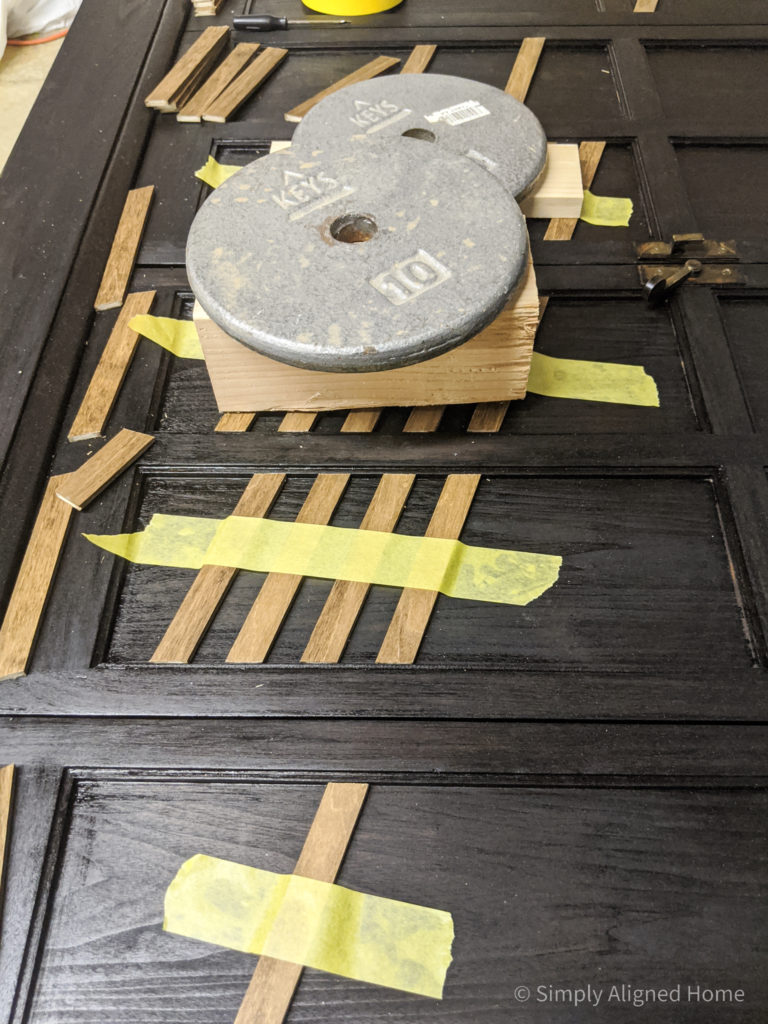
I secured the wood slats to the chest using construction adhesive. In order to make sure that they stayed in place, I used painters tape for delicate surfaces.

After the first line was in, I was able to use a spacer to install the rest. The spacer made installing the slats so much quicker!
Once I had a sectional complete, I placed a weight on the slats until the construction adhesive could dry.
Make the Custom Cuts
It was super quick to install the full pieces. The pieces that required a 72 degree cut were another story.. I couldn’t make these cuts with my miter saw, so I had to break out the oscillating multi tool.
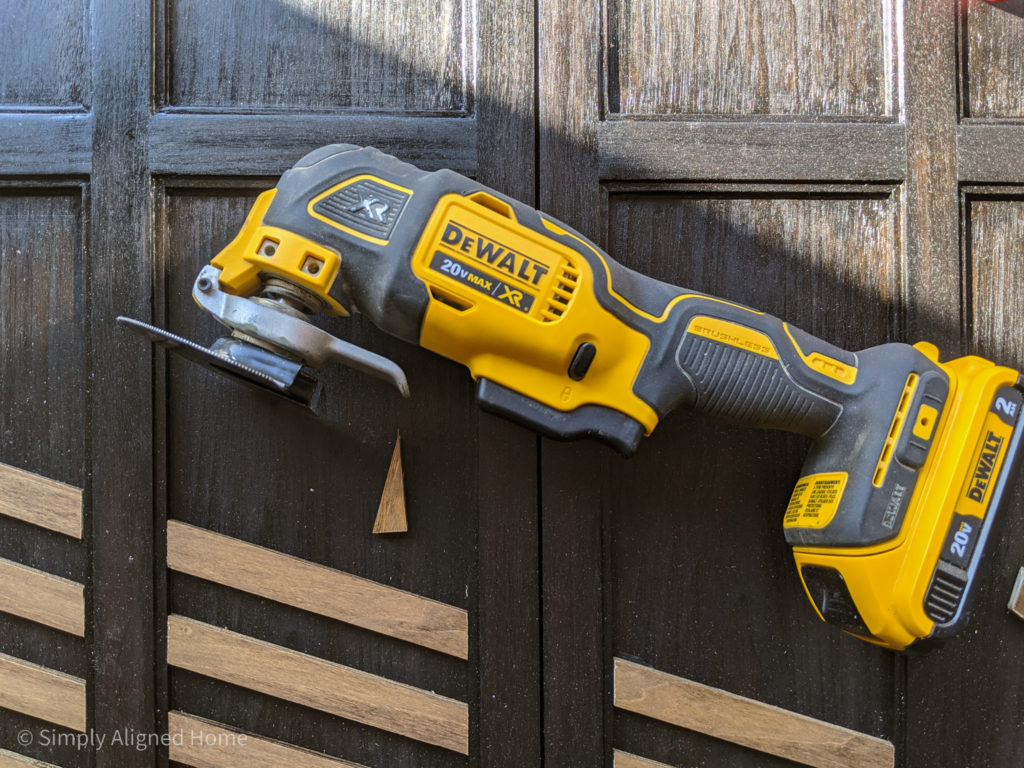
I placed the wood slat where it should go on the chest and marked the cut line. I then used my multi tool to make the cut.
Seal the Wood Slats
Once the construction adhesive was dry, it was time to seal the slats! I sealed both the chest and wood slats at the same time using polyurethane.
The finished product was stunning! The wood slats were the perfect finishing touch for this chest!!

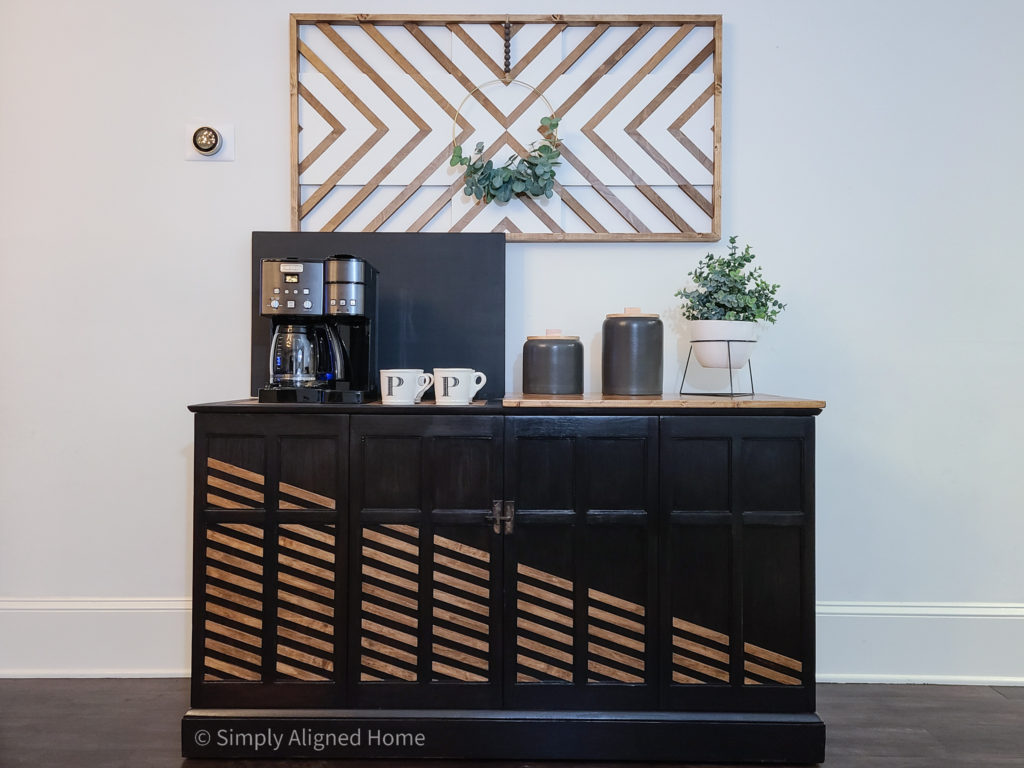
Be sure to check out my post on how I made the custom coffee bar to see how it works!