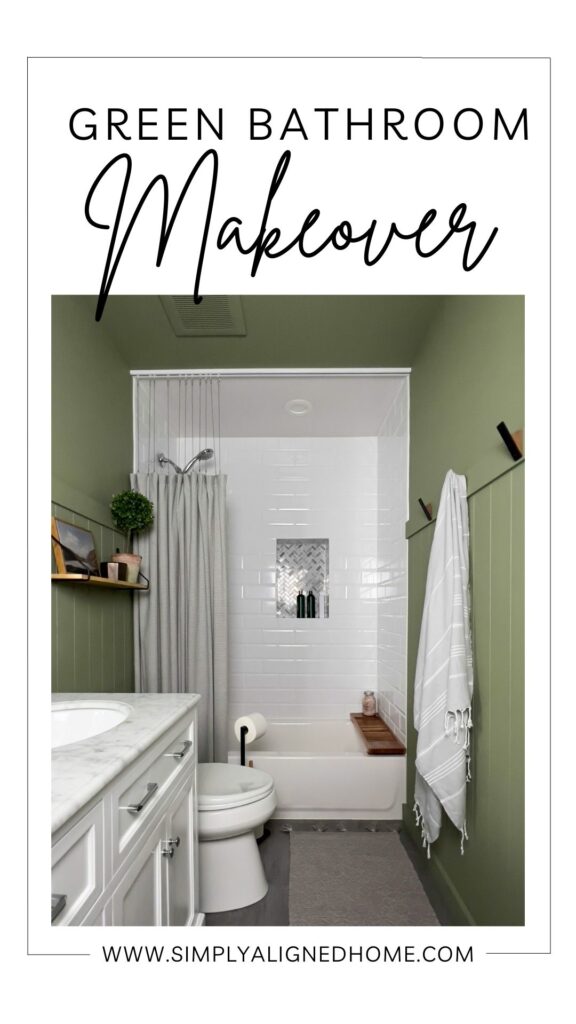
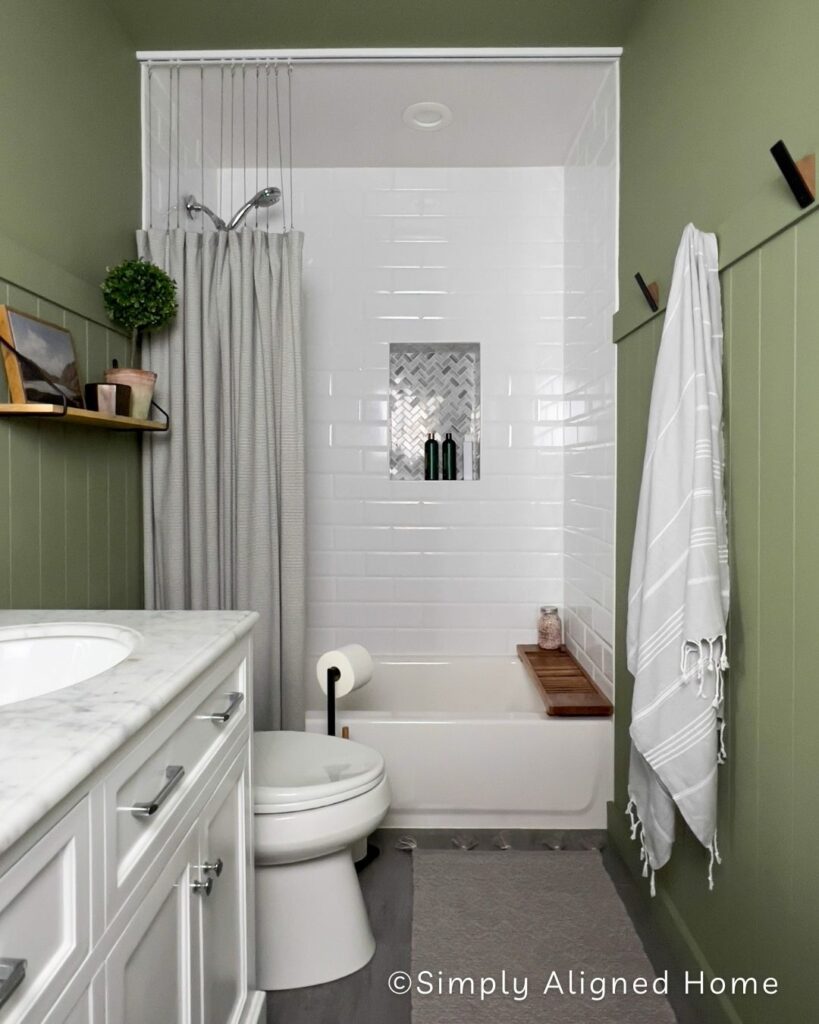
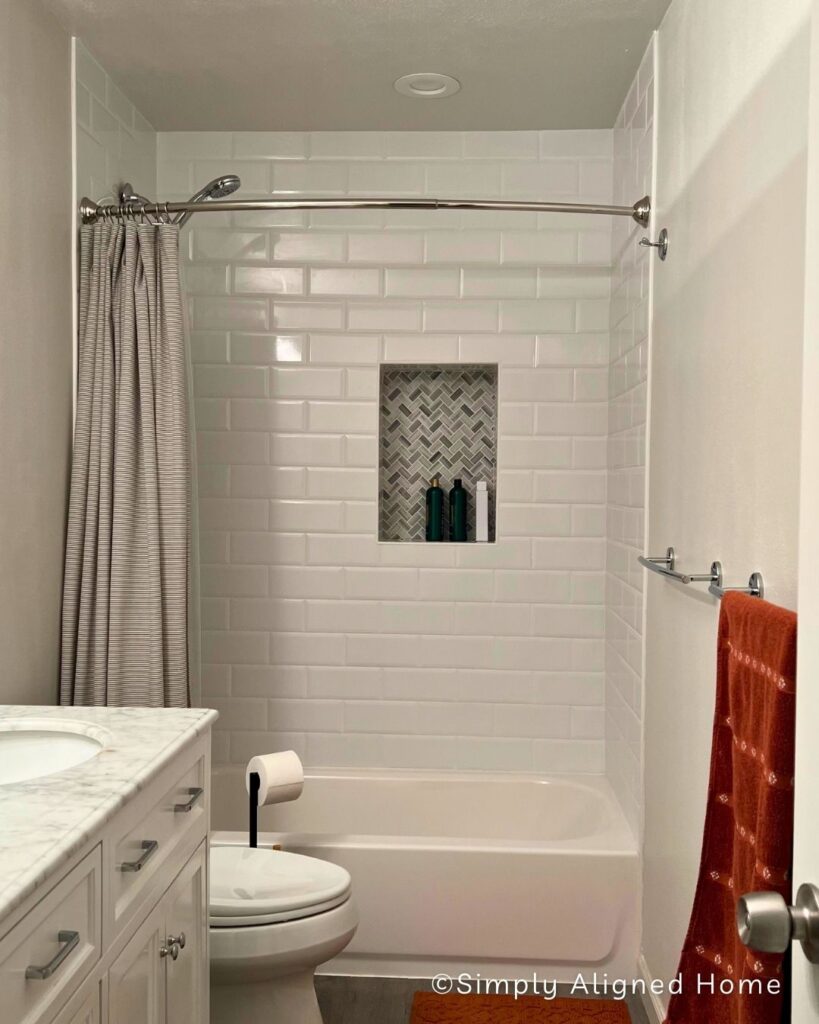
Just recently, I took our plain white guest bathroom to a stunning green oasis. This makeover took minimal effort compared to most of my projects, but had a BIG impact. I wanted to add some character without doing a lot of demo. With only a little bit of paint, paneling and some new decor I did just that!
SET OF 3 HOOKS | SHELF | DROP CHAIN | CEILING SHOWER TRACK
PAINT COLOR: Benjamin Moore Mistletoe
**This post contains affiliate links to products that I used or recommend. If you purchase something through an affiliate link, I may receive a small percentage of the sale at no extra cost to you. I really appreciate your support!**
Demo
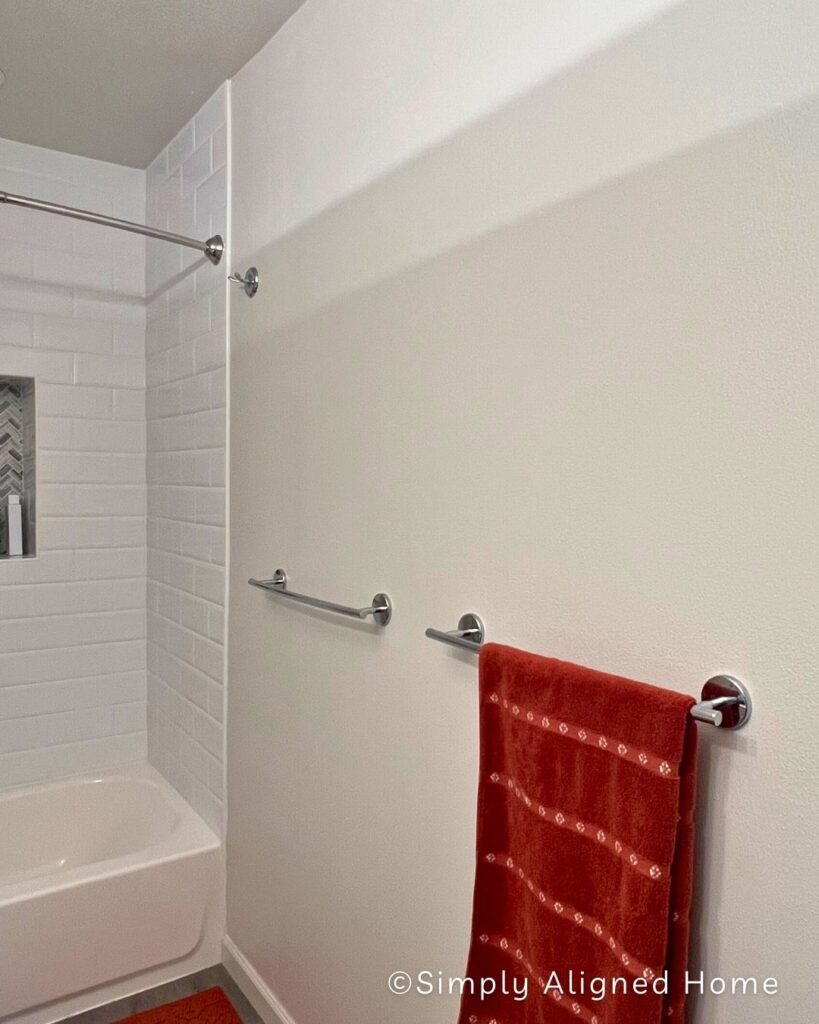
First step, to making over this bathroom was to demo the existing baseboards and take down the old towel bar. Using a utility knife I began by carefully scoring the caulk on top of the baseboards. To detach the baseboards from the wall I used a trim puller.
Trim pullers are designed to make the removal process more efficient and reduce the risk of damaging the trim or your walls.
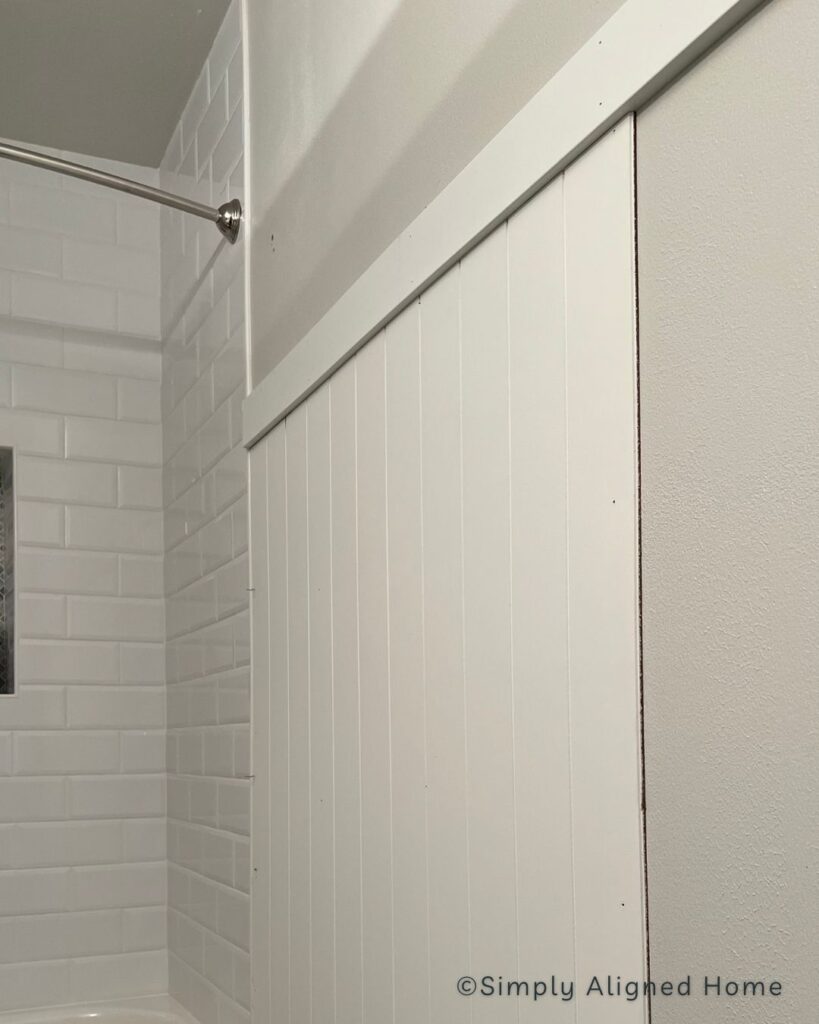
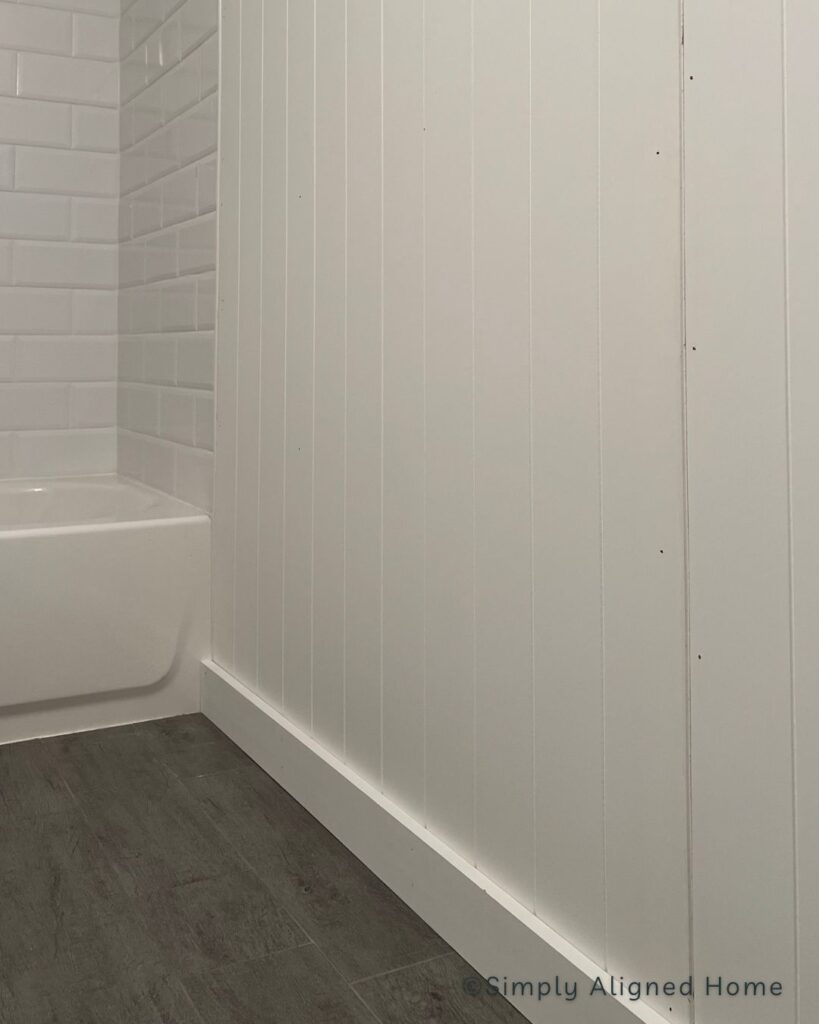
Install Shiplap Paneling
After removing all the baseboards it was time to add some character and texture to the space. I decided to go with a vertical shiplap accent wall. Instead of doing individual tongue and groove shiplap boards, I went the budget route and got shiplap paneling that can handle the humidity in my bathroom.
To cut the shiplap paneling, I used my track saw to cut to the desired length. For a more finished look, I added a 1×4 on top of the paneling and updated the baseboards to a 1×4 also. Using my brad nailer I installed the paneling and 1×4’s by nailing into the studs.

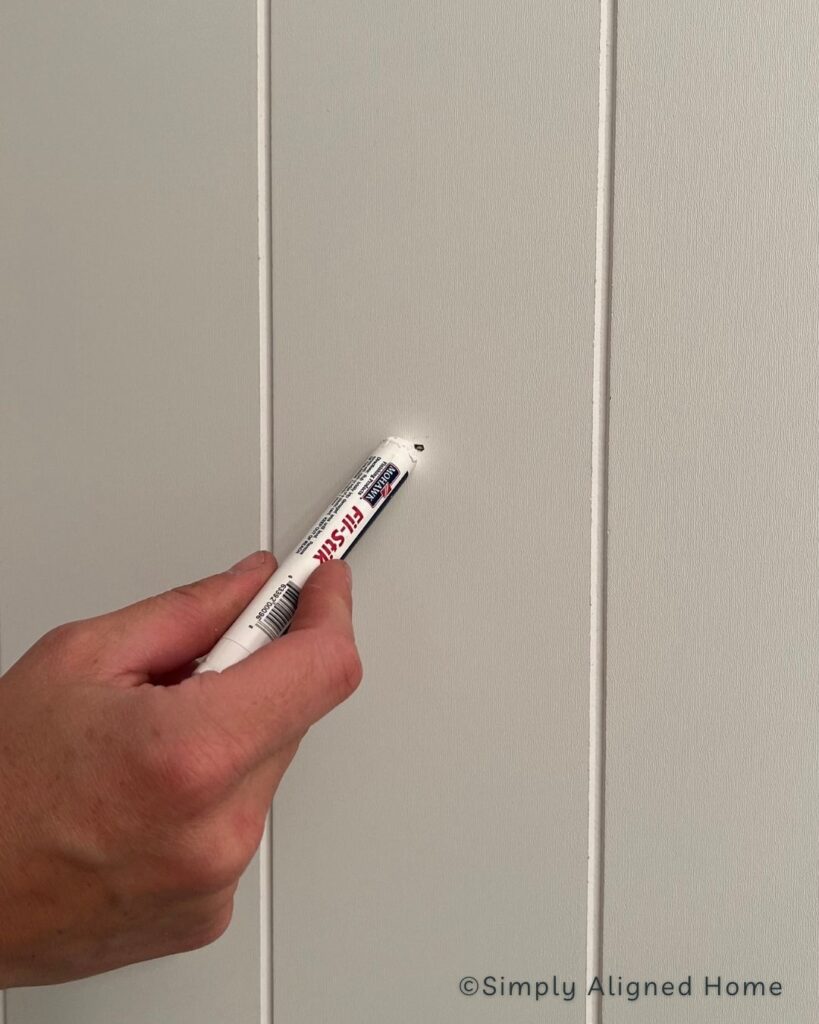
For this project I decided to try a Fil-Stik instead of spackle or wood filler. I am happy to report that I loved the end result. It was easy to fill all the holes and wipe clean, no sanding required! I used caulk to fill all the seams and used a baby wipe to smooth it out.
Paint With A Bold Color
If you don’t already know I love the color green! I decided to go the bold route in this bathroom makeover and used the color Mistletoe by Benjamin Moore. I used their bathroom line of paint called Aura Bath and Spa. It is designed for high-humidity interior spaces.
When painting shiplap, I paint the seams first with a paint brush and then roll. I do this in small sections so that my brush strokes don’t dry before I have to roll over them. As I was painting the shiplap I decided it would be fun to take the green color up the entire wall and the ceiling!
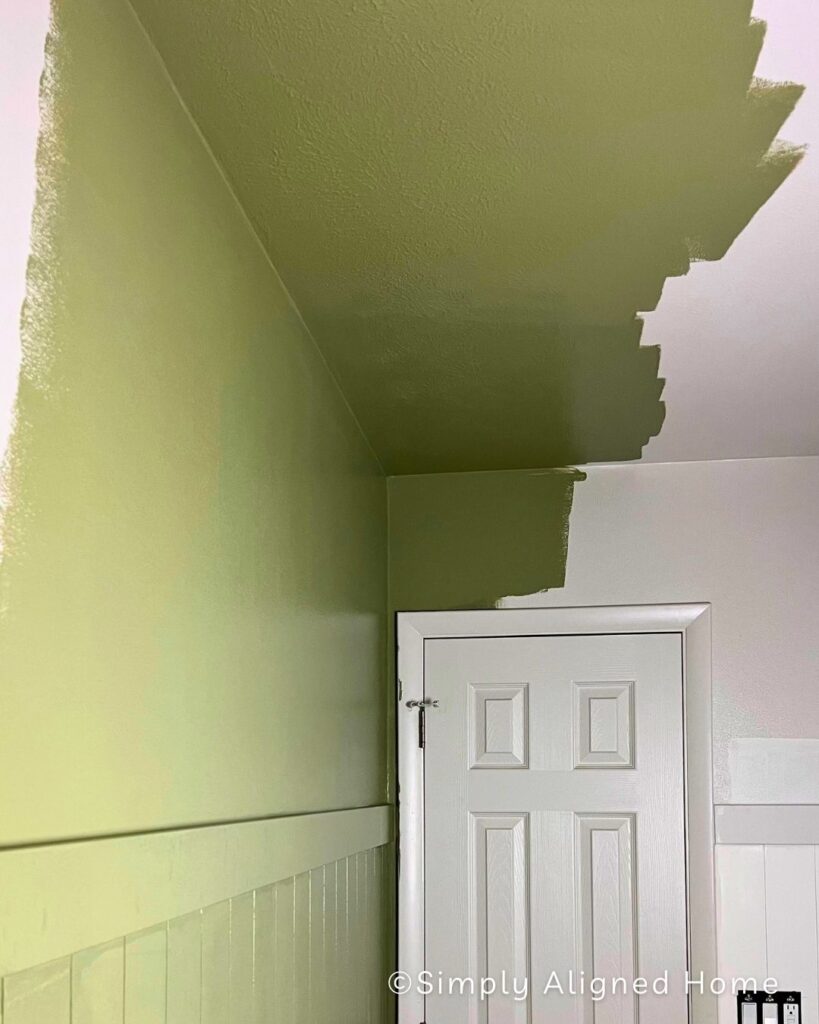
I aimed to maintain a white ceiling above the shower, so I positioned my laser level against the wall, ensuring a straight even line along the ceiling. This ensured a neat and seamless transition between the white and green paint.
The Finishing Touches
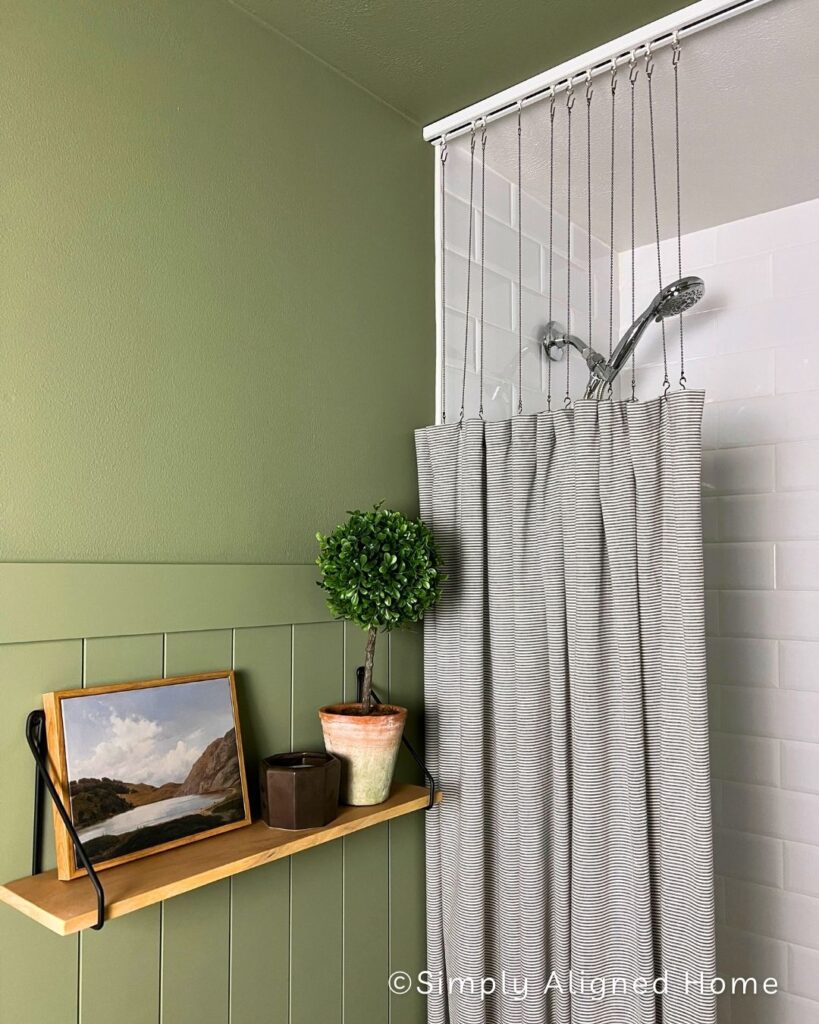
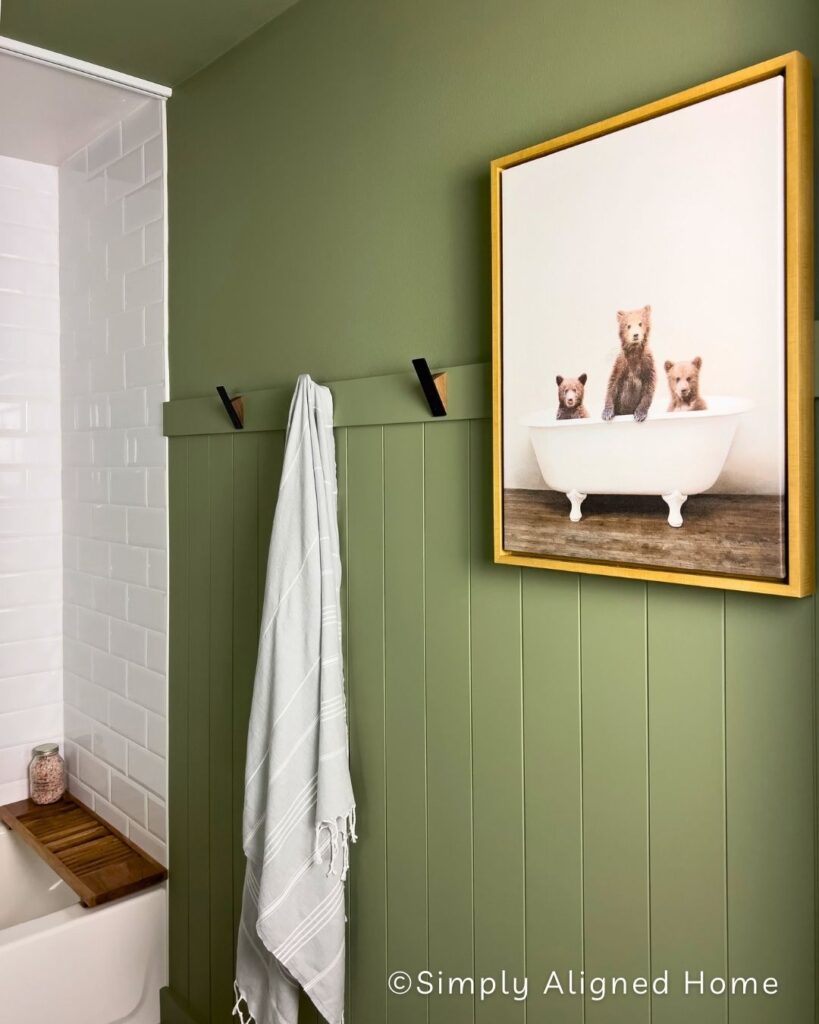
Now for my favorite part of DIY-ing, the finishing touches! I bought these black metal walnut hooks in a set of 3 from Amazon. They complement our new bathroom beautifully, and their quality is spot on.
The showstopper of this bathroom makeover has to be this ceiling curtain track and drop chains. I loved how the chains allows for this space to stay open and keeps the shower curtain touching the floor.
Our guest bathroom is now prepped for visitors! I’m thrilled with the results of this affordable DIY project. The space has taken on a distinctive character and seems more spacious than its previous all-white look.

**Note: I am not a professional and do not claim to be an expert. Please be sure to always read instructions for all tools and products. Safety is very important and should be your top priority. Wear necessary protection when using tools (eye wear, hearing protection, gloves, etc.) and dust masks when sanding or cutting. Simply Aligned Home is not responsible for any injury or damage. All of my designs are not professionally designed and are for private use only.**
Materials Used
- Brad Nails
- Shiplap Paneling
- 1×4 Boards
- Fil-Stik
- Caulk
- Paint
Tools Used
- Trim Puller
- Utility Knife
- Nail Gun
- Level
- Paint Brush
- Paint Roller Frame
- Paint Roller
- Paint Tray
- Drill and Impact
- Caulk Gun
- Track Saw
- Miter Saw
- Laser Level
Decor & Finishing Touches