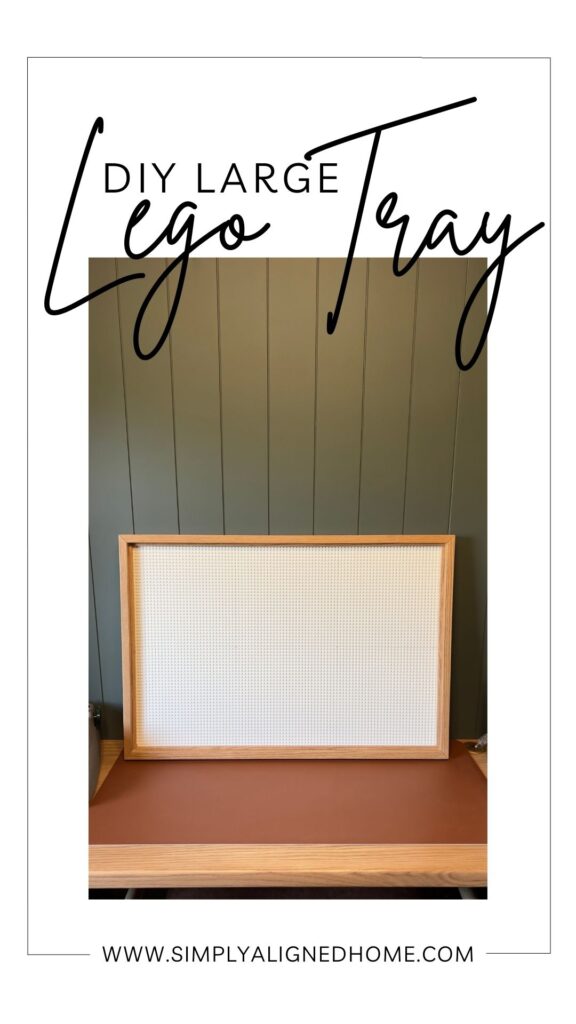
Do you have a LEGO enthusiast in your life? If you do, this article is all about showing you how to craft a DIY Large LEGO Tray that’s not only quick and simple to build but will also revolutionize the way you engage with your favorite bricks.
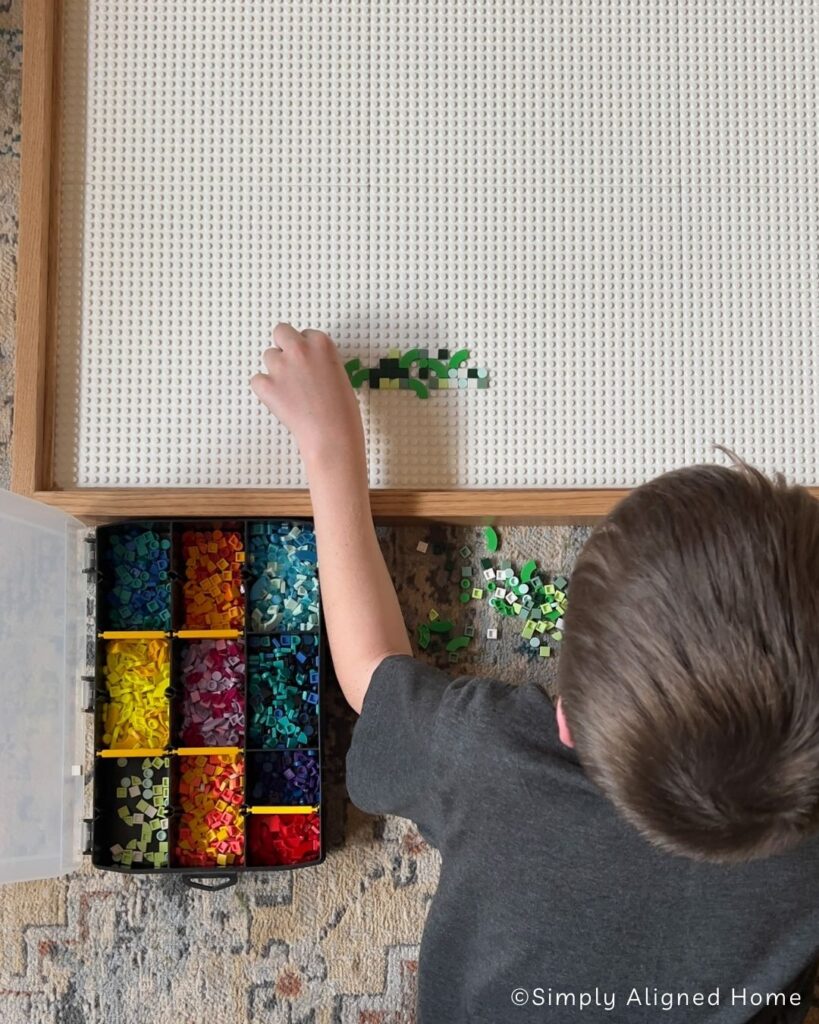
One of the greatest joys for my son is creating, building, and playing with those little plastic bricks. So I decided to build him a large Lego tray to play with his Lego Dots on.
**This post contains affiliate links to products that I used or recommend. If you purchase something through an affiliate link, I may receive a small percentage of the sale at no extra cost to you. I really appreciate your support!**
How To Make A Large Lego Tray
Step One: Cut, Stain & Seal Wood
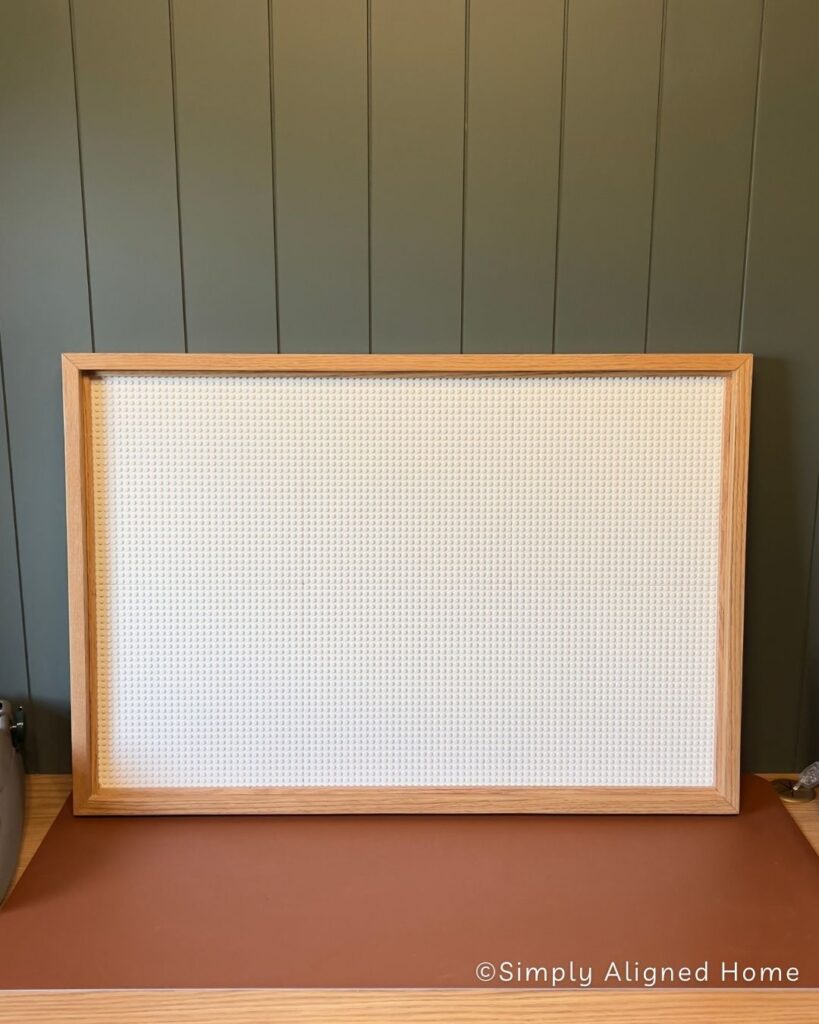
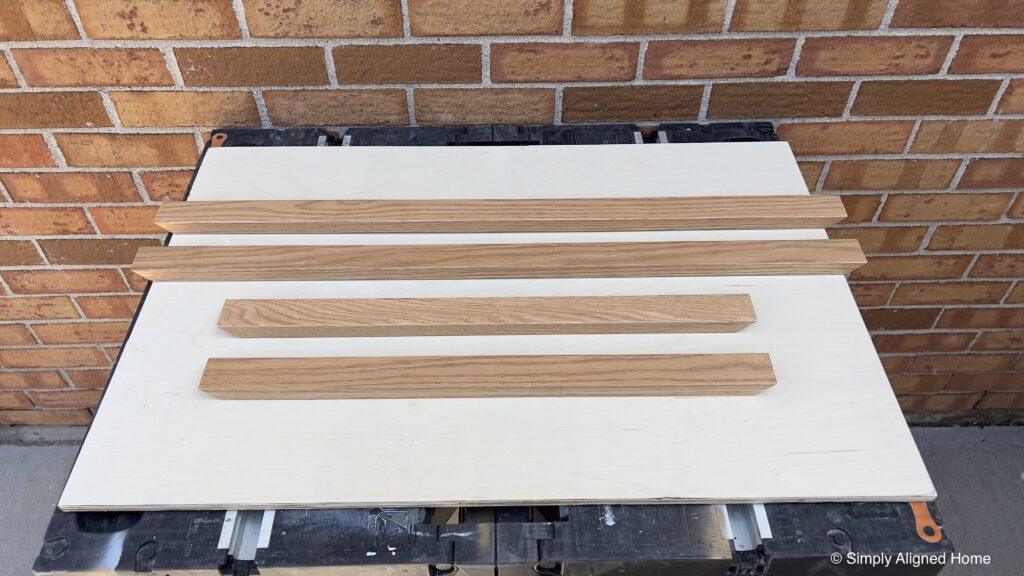
To determine the size of Lego tray that I wanted to create, I grabbed 6 Lego base plates. For the bottom of the tray I used 1/2 inch plywood. When cutting the plywood I trimmed it just slightly larger than the plates to ensure the plates would fit in nicely.
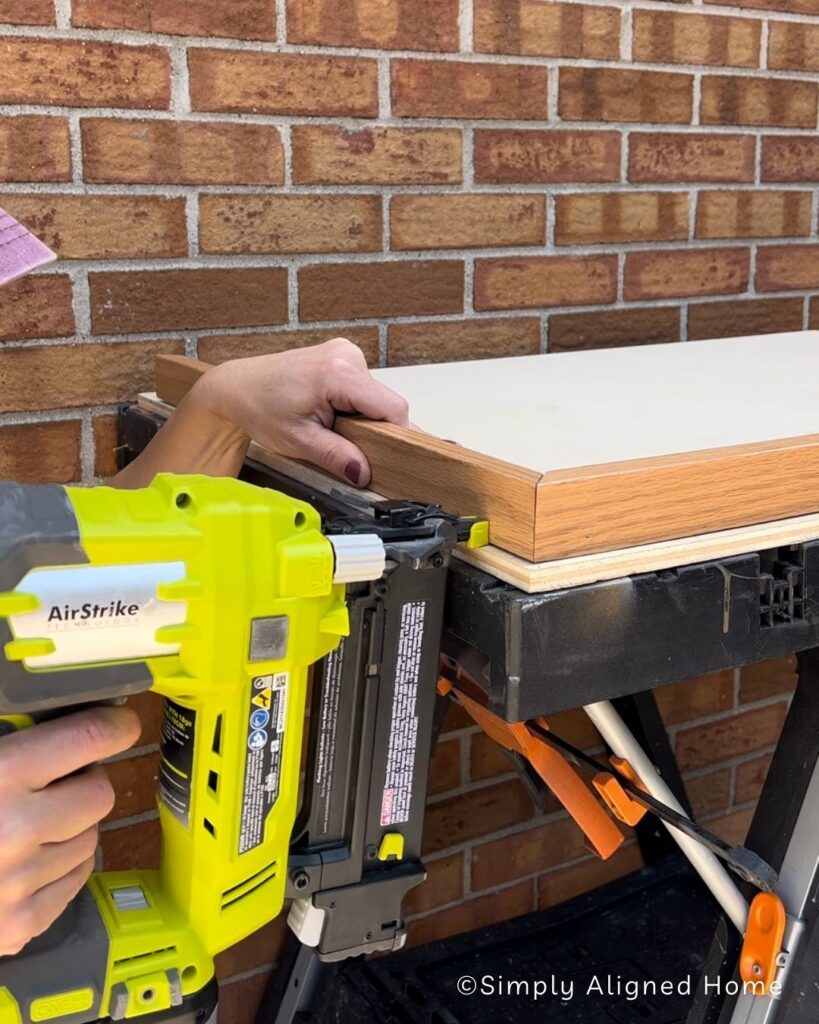
To provide a border for the plywood, I opted for oak 1×2 boards. I wanted a neat and polished appearance, so I mitering the edges at a 45-degree angle. I found it more convenient to apply the stain and sealant to the trim boards before affixing them in place, so I followed that approach.
Step Two: Assemble Lego Tray
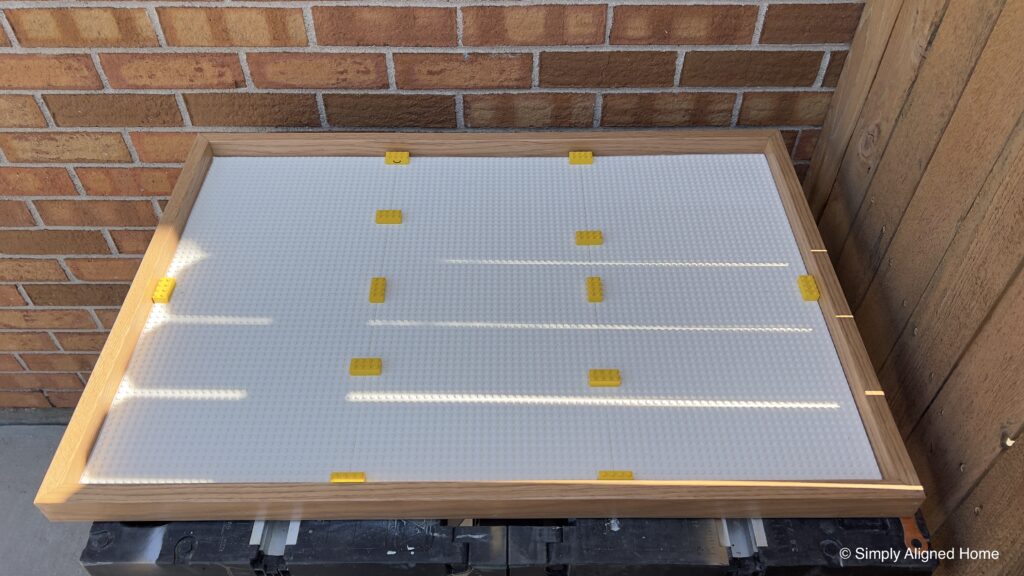
To assemble this large Lego tray I added construction adhesive to the 1×2’s and brad nails to attach to the plywood.
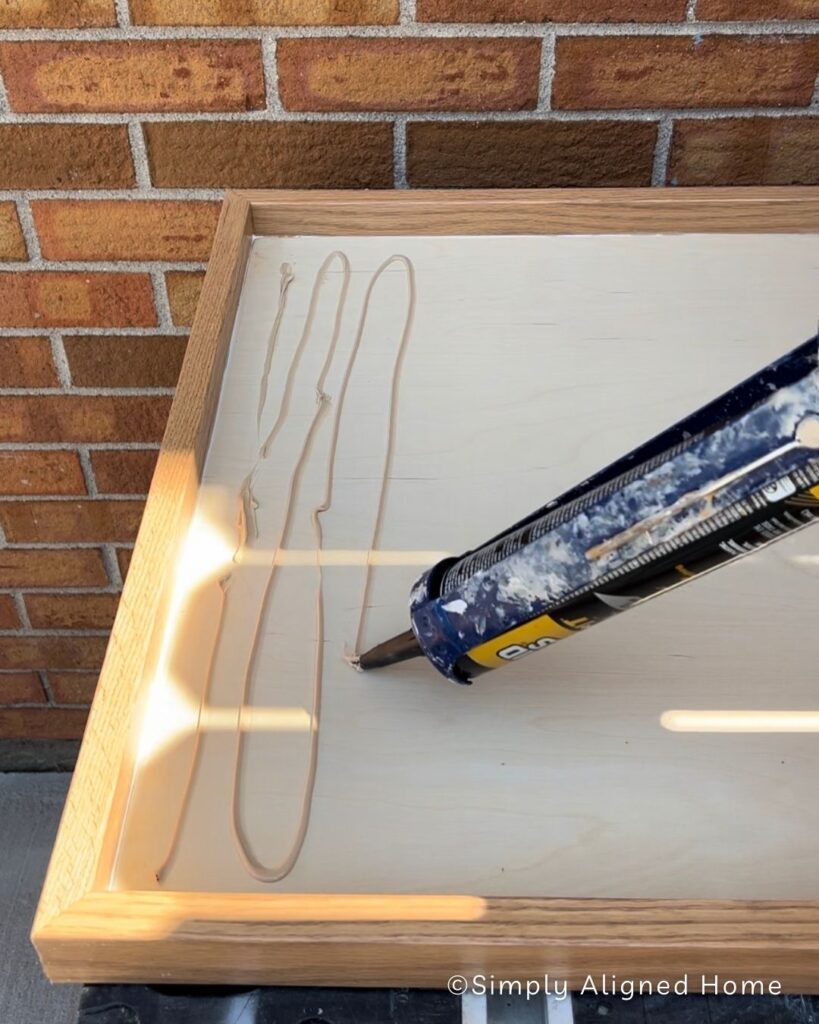
For the Lego base plates, I applied construction adhesive directly to the plywood surface and then carefully placed the Lego plates atop it. I intentionally made the plywood slightly larger than the plates to ensure a comfortable fit, avoiding any unnecessary cramming. To prevent the plates from shifting or misaligning, I cleverly utilized Lego pieces to interlock and hold them in place.
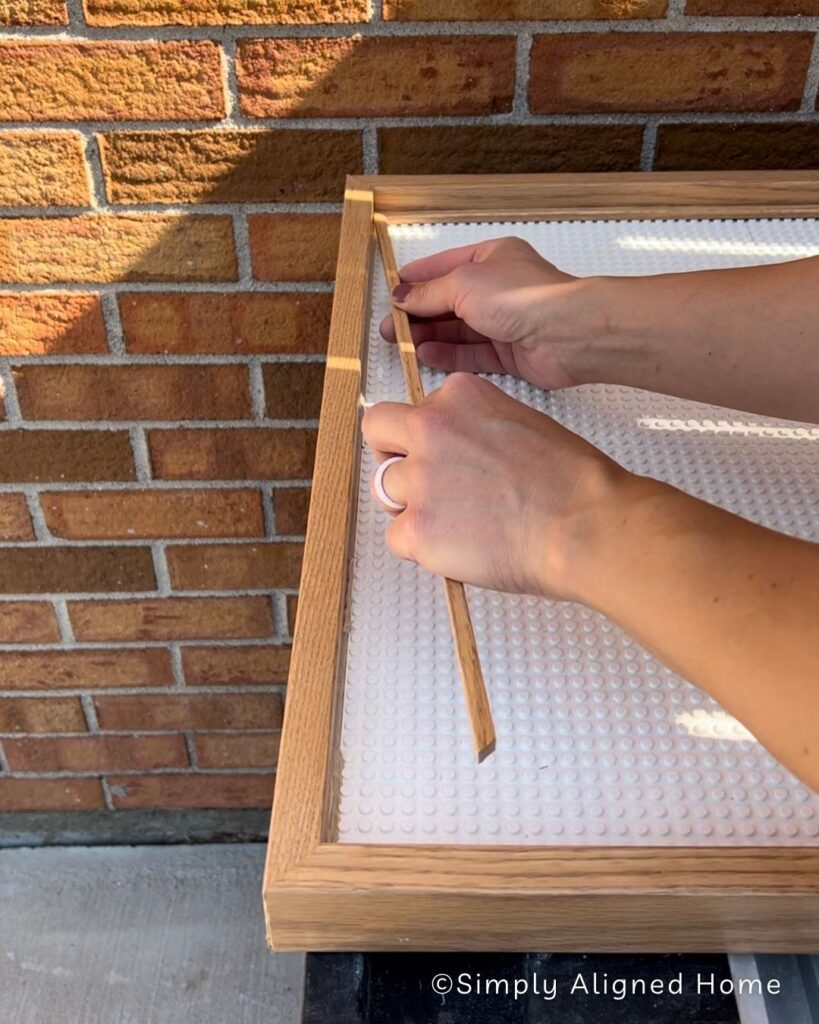
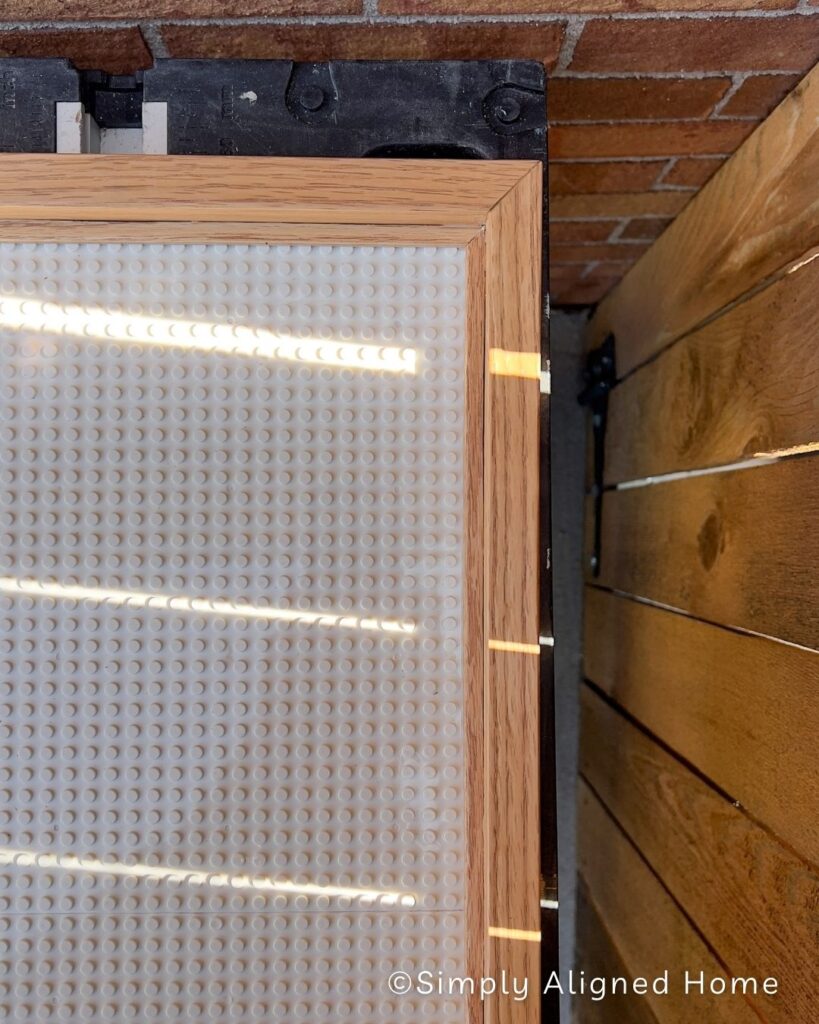
Step Three: Add Trim Pieces
After successfully assembling the tray, I found myself somewhat dissatisfied with the small gap that remained between the Lego base plates and the 1×2 trim. It’s the little details that often make a project truly stand out, and I wanted to ensure that this Lego tray was no exception.
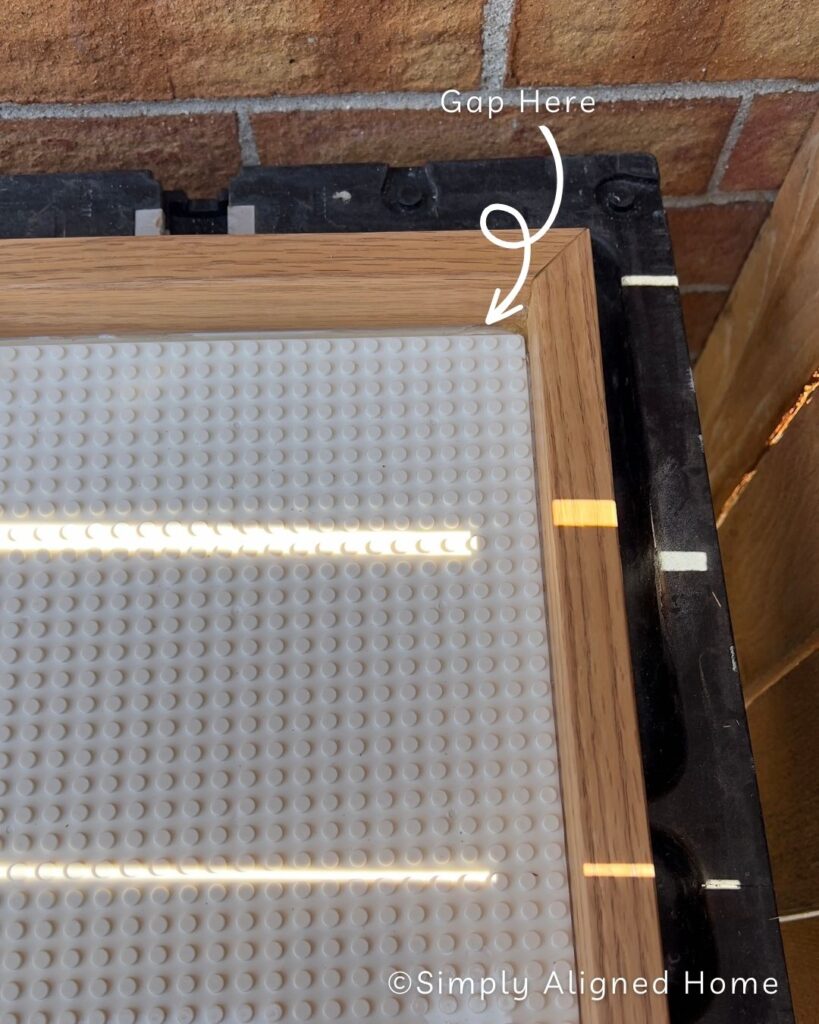
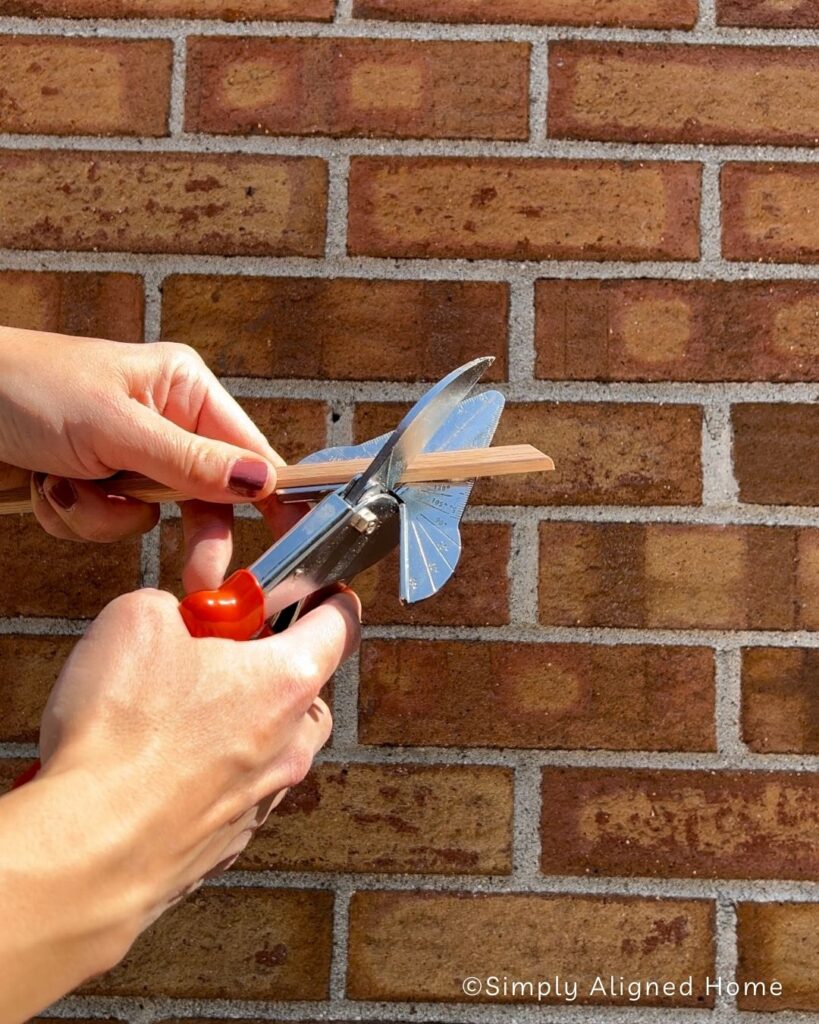
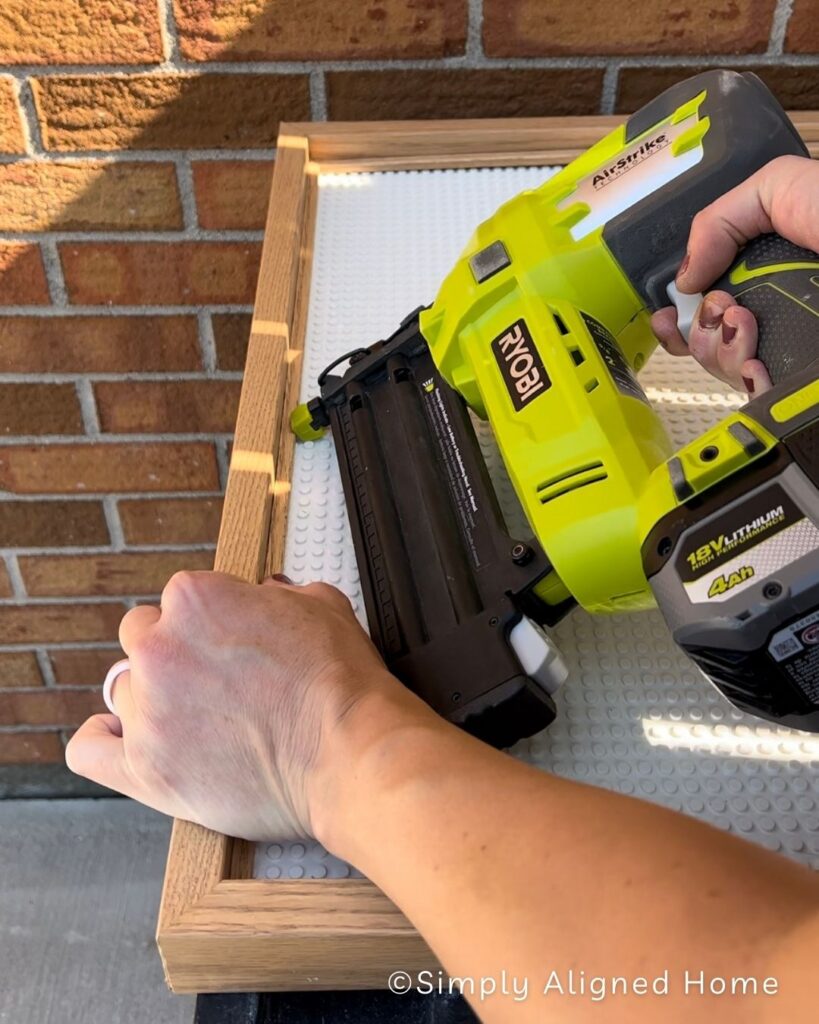
I carefully measured and cut a small piece of trim with my trim shears, that perfectly fit in the gap. Then, I applied construction adhesive to the back of the trim piece, making sure it would bond securely with both the plywood and the 1×2 trim. To provide additional reinforcement and secure the trim in place, I carefully drove brad nails through the trim into the plywood, ensuring a tight and permanent bond.
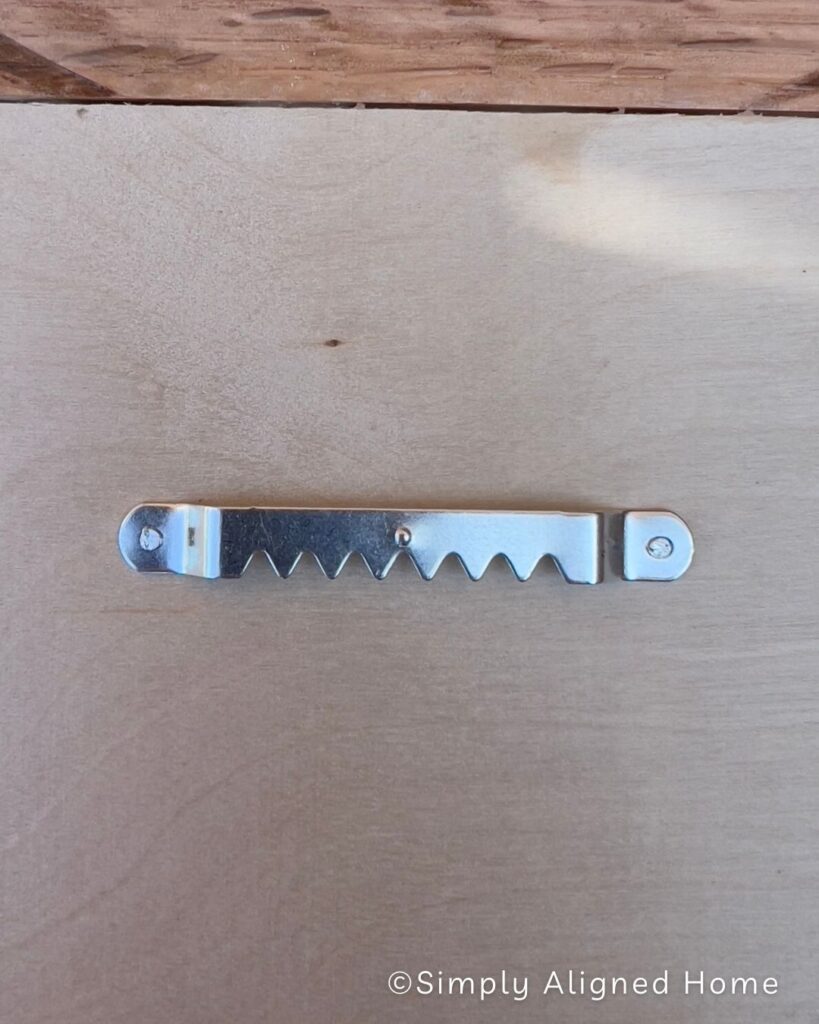
Now that the Lego tray was complete, I added some picture sawtooth hangers on the backside of the plywood. That way we could display his creations he makes with his LEGO Dots on the wall in his room!
I’m happy to report that my son absolutely loved the DIY large Lego tray I made for him! I have a strong hunch that this tray is going to provide countless hours of endless play and creativity.

**Note: I am not a professional and do not claim to be an expert. Please be sure to always read instructions for all tools and products. Safety is very important and should be your top priority. Wear necessary protection when using tools (eye wear, hearing protection, gloves, etc.) and dust masks when sanding or cutting. Simply Aligned Home is not responsible for any injury or damage. All of my designs are not professionally designed and are for private use only.**
Materials Used
- LEGO Baseplate
- 1/2 Inch Plywood
- Small Trim Pieces
- Oak 1×2 Boards
- Construction Adhesive
- Brad Nails
- Stain of Choice
- Sealer of Choice
- LEGO DOTS Large Set
- LEGO DOTS Small Set
Tools Used
- Miter Saw
- Measuring Tape
- Nail Gun
- Caulk Gun
- Trim Shears