This post is sponsored by Armstrong, but all views and opinions shared in this post are my own.
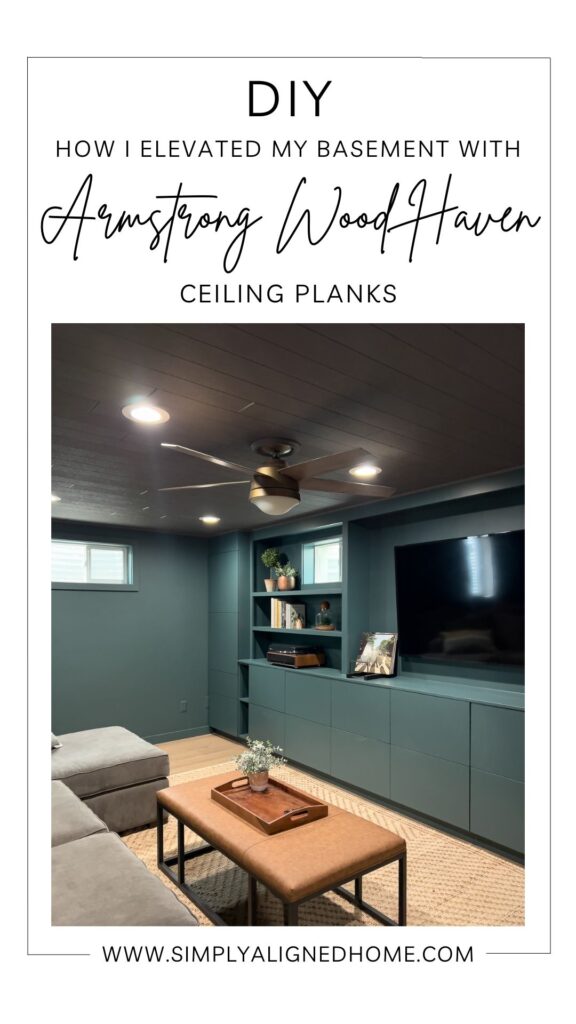
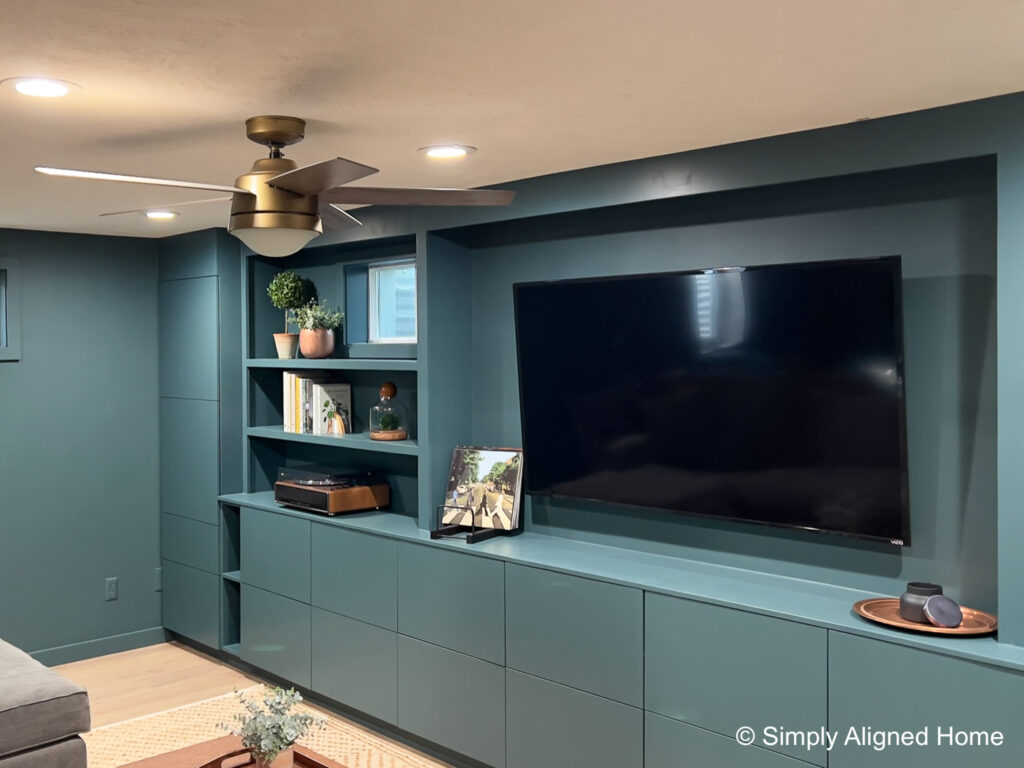
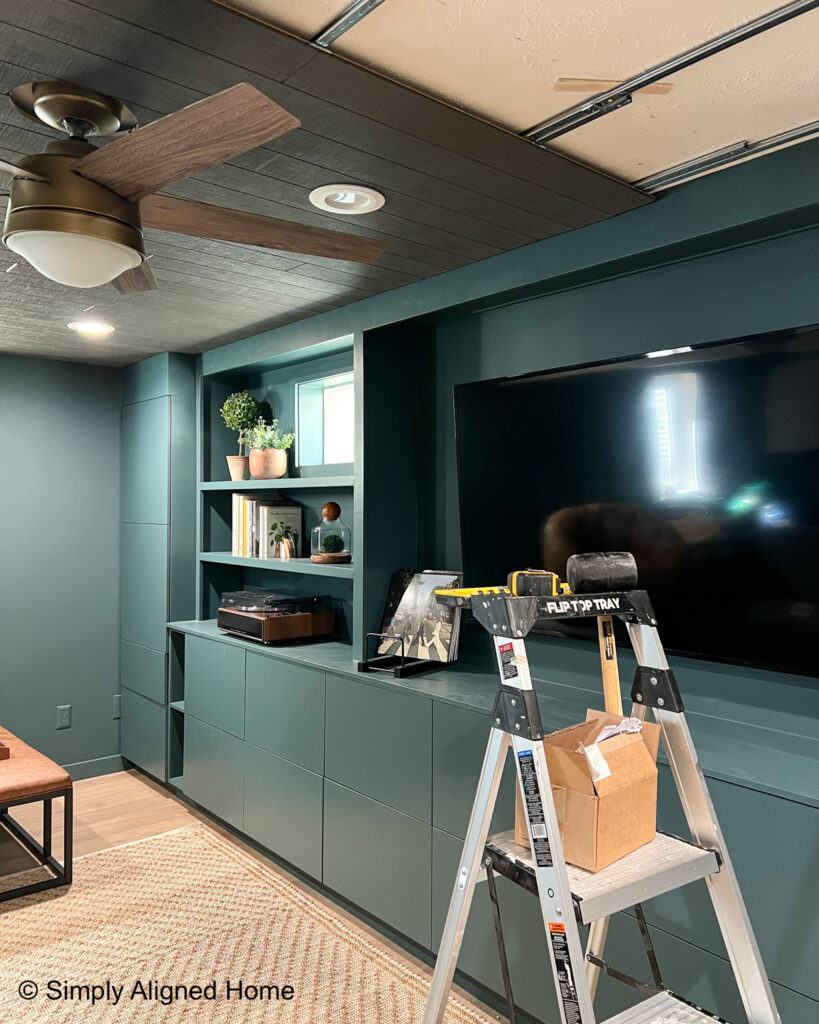
I recently turned our basement into the perfect movie/play room by adding a built-in unit. While I loved the built-in, it just felt like something was missing. The bright white ceiling was keeping it from being the cozy space that I wanted. I decided that I needed to somehow change the ceiling!
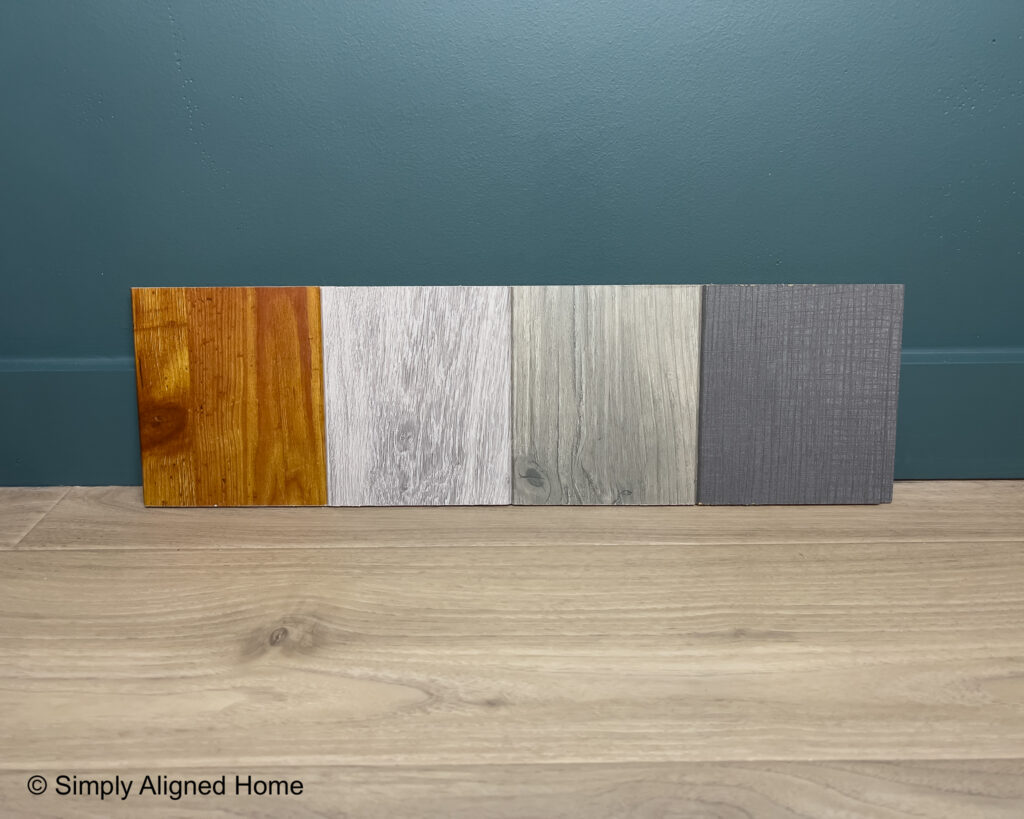
Armstrong offers a lot of great options for ceiling planks. I ultimately decided to install the Armstrong WoodHaven Woven Charcoal Gray planks. I love the texture of them and the fact that it is not a faux wood that would compete with our LVP flooring.
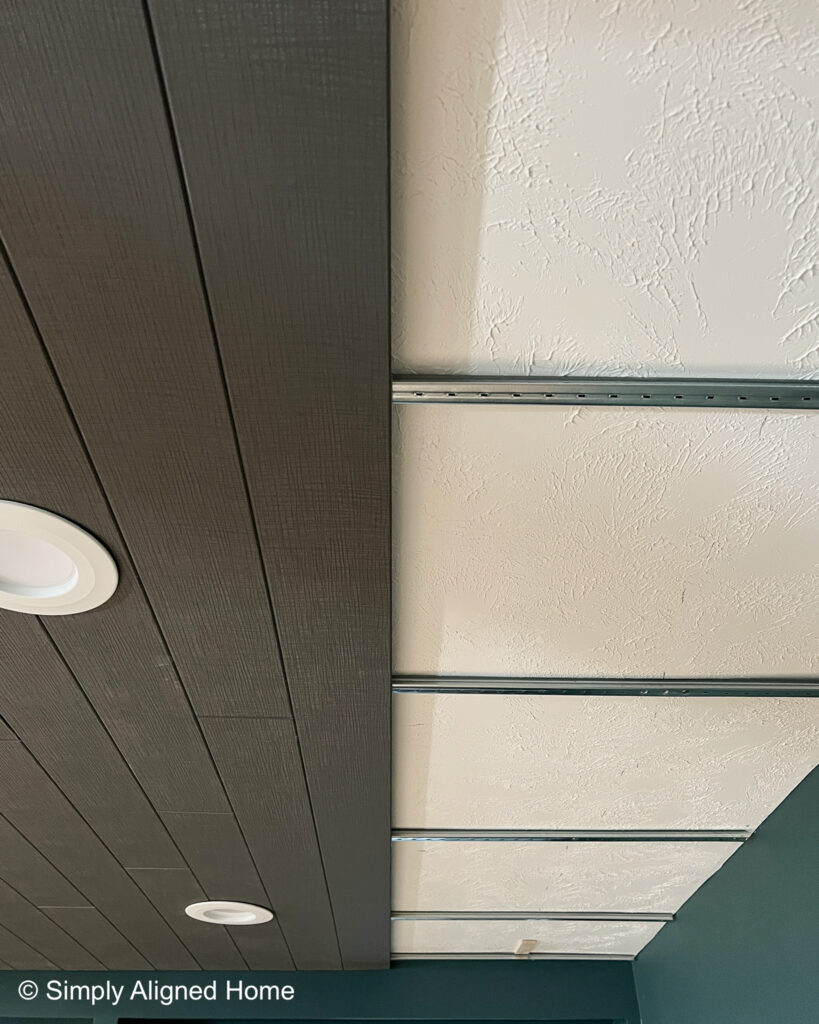
Armstrong WoodHaven products can be installed directly to smooth ceilings. However, my ceiling is lightly textured, so I need to use the Easy Up Installation System to install the ceiling planks.
Locate Ceiling Joists
The first step to installing the Armstrong Easy UP Installation System is to locate your ceiling joists. I did this by using my magnetic stud finder. The magnetic stud finder will locate the drywall screws that hold the drywall to the ceiling joists. Please note that it will not locate any electrical and plumbing that might be in your ceiling. Use care when drilling or screwing through your drywall.
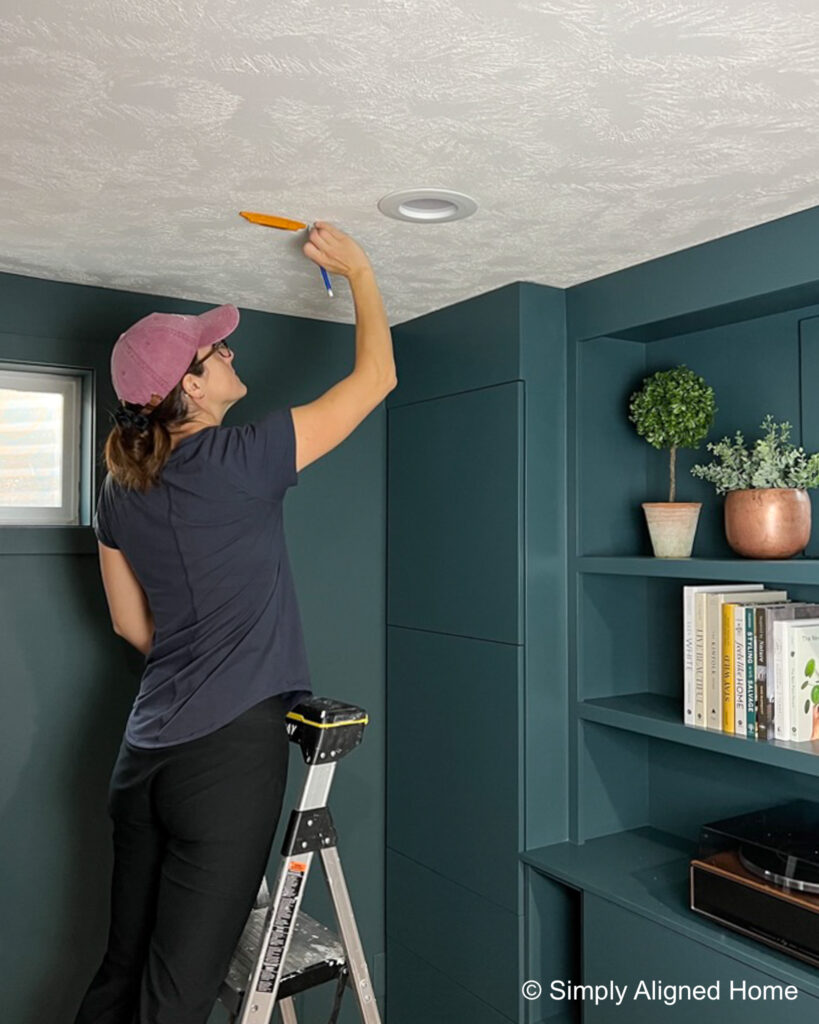
I marked the location of each ceiling joist in several locations. My ceiling joists are spaced 16″ on center. Most ceiling joists are evenly spaced either 16″ or 24″ apart.
Install the Easy Up Installation System
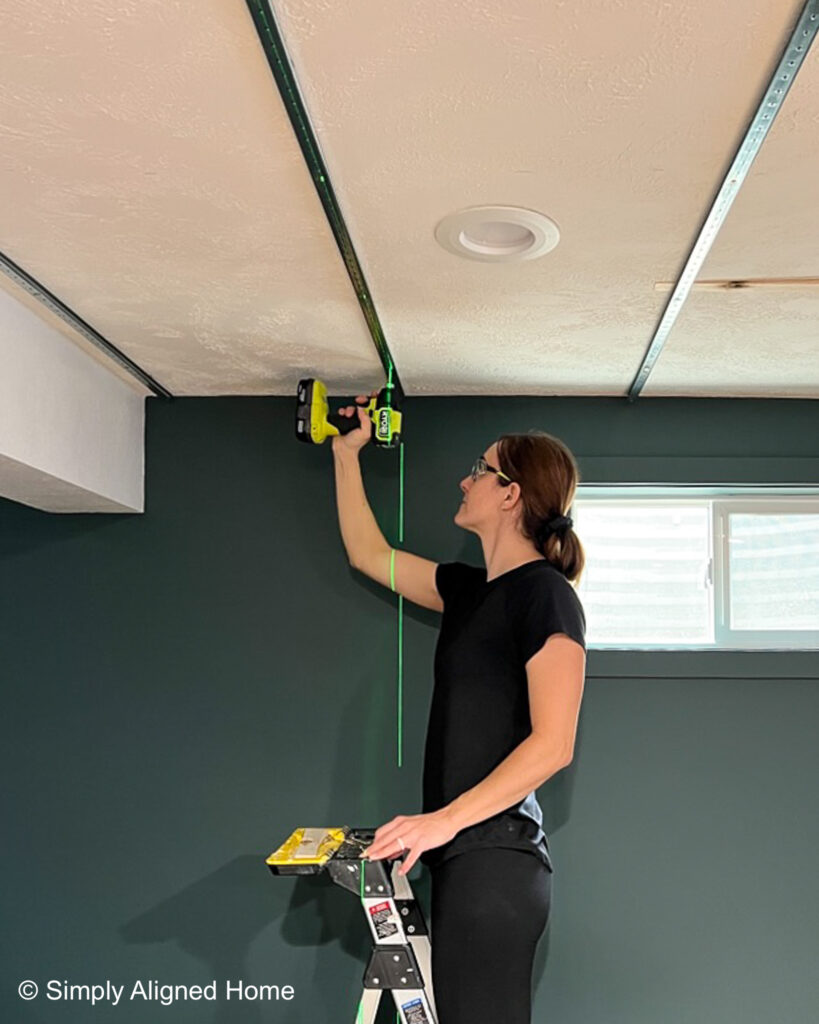
The Easy Up Installation System is installed perpendicular to your ceiling joists. You start by installing the first Easy Up track 2″ from the parallel wall. Using 2″ #6 coarse thread screws, as specified by Armstrong for my ceiling type, I secured the tracks to the ceiling joists.
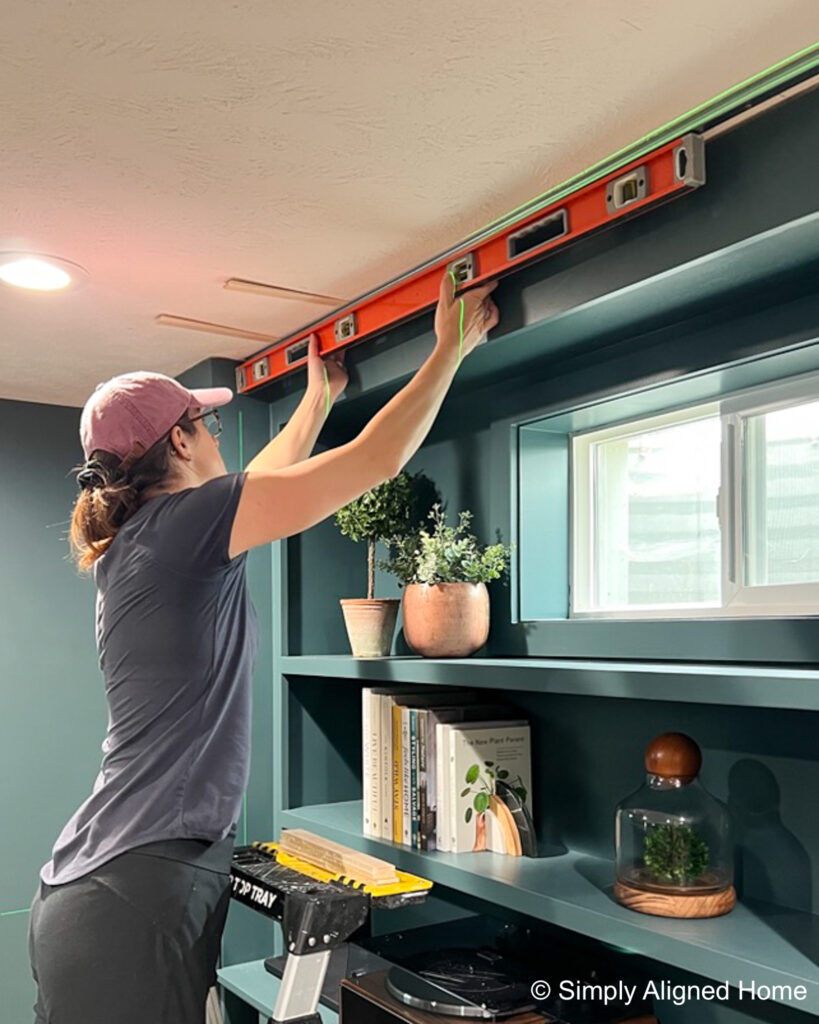
The tracks should be spaced no more than 24″ on center from each other. I spaced my tracks based on my recessed lighting and ceiling fan. Therefore, I kept the spacing of my tracks well under the specified 24″. I found that it was easiest to align the tracks as I was installing them using a laser level.
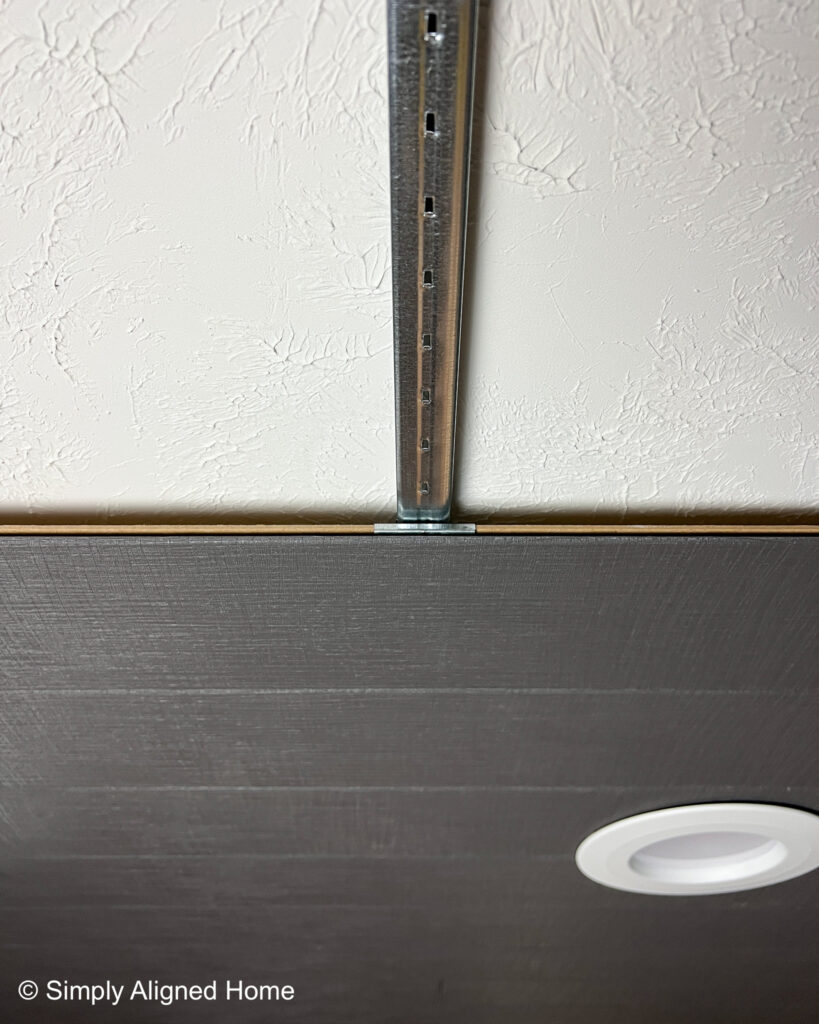
Since the Easy Up tracks will support all of the ceiling planks, it is important to maintain the track spacing. I did have to overlap the tracks and I made sure that the ends of the overlapping tracks landed on a ceiling joist.
It is also important to level the tracks so that your finished ceiling lays flat. I checked level of each track as well as level across tracks. I found that it was easiest for me to install all of the tracks first and then go back and level them. I used wood shims to level the tracks.
Install the WoodHaven Ceiling Planks
The WoodHaven ceiling plank system is a floating ceiling system. Aside from the first and last row of planks, the rest of the planks are secured to each other with the tongue and groove as well as the Easy Up system clips. A 3/4″ gap is left around the entire perimeter of the planks to allow for expansion and contraction.
As with all projects, getting the first row up and secured was the hardest part for me. I held the first plank in place using brad nails on the side closest to the wall. I then slid the clips into the other side. I did find that it was easiest to keep the first row properly spaced from the wall by nailing two pieces of 3/4″ plywood to the wall.
To ensure that each plank was fully installed into the previously installed plank, I gently tapped it with a mallet. It is easy to damage the planks with the mallet, so I used very little force. Once the tongue of the new plank was seating in the groove of the previous installed plank, I slid the clip into the groove of the plank.
Cut Around Obstructions
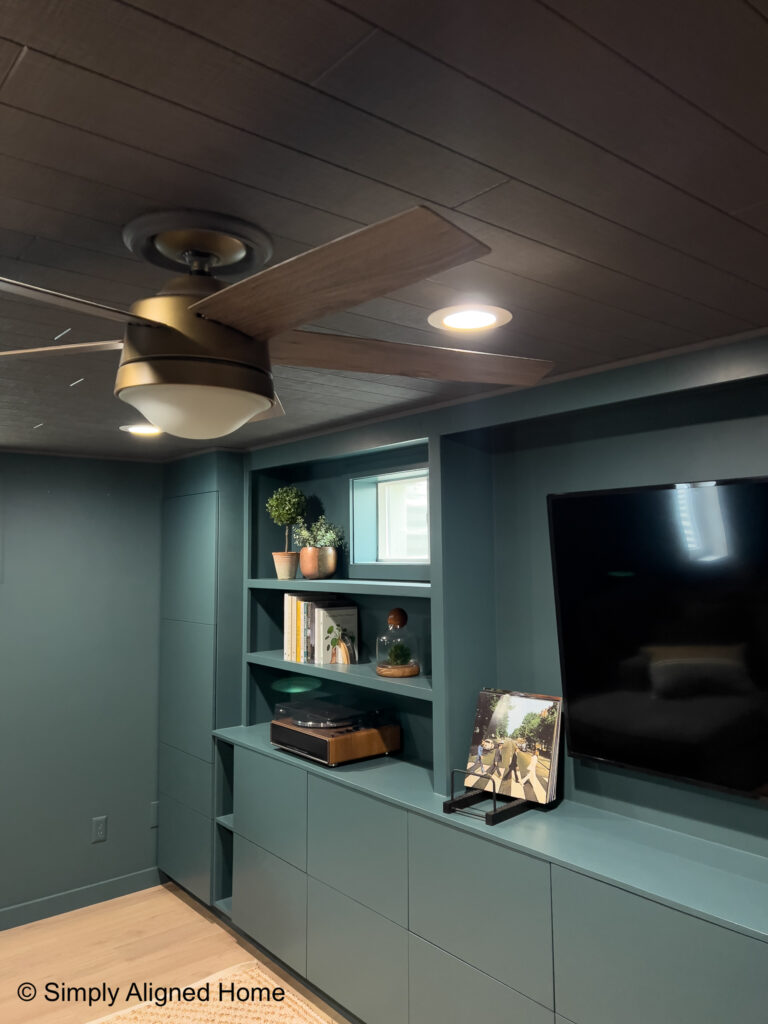
I did have six can lights and one fan that I needed to cut out around. The lights were really easy to cut around. I used a jigsaw to cut circles in the planks where the existing cans were located. Once the planks were installed, I was able to reinstall the can lights. The trim of the can lights covered the cut edges of the planks.
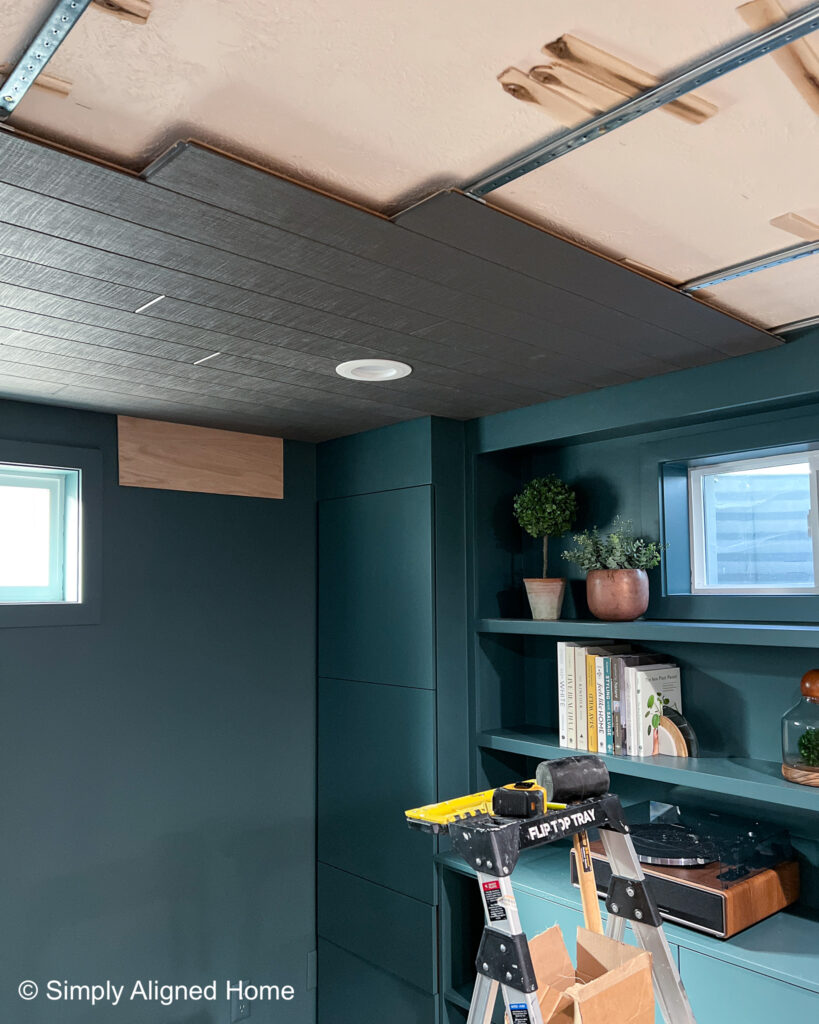
As for the ceiling fan, it is recommended that you install fan and light boxes to account for the height difference of the ceiling and installed plank height. The ceiling height in my basement is 7′ and I could not afford to lose any more space by dropping the ceiling fan. Instead, I cut the planks to where I could still fully access the ceiling fan mount. I then installed a ceiling medallion to hide the opening and cut edges. The medallion can be removed if I ever need to access the ceiling fan mount.
I installed the remaining planks the full width of the room.

The WoodHaven woven planks are much more beautiful than the white textured ceiling. It immediately elevated the space!
For the last row of planks, I did have to rip them down to allow for the gap between the planks and wall. When the final planks were secured to the previously installed planks, I secured the free hanging edge to the ceiling with brad nails.
Trim Out the WoodHaven Planks
Once all of the ceiling planks were installed, I installed trim to hide the gap between the planks and walls. In order to make the trim blend with the ceiling planks, I purchased a color matched paint for the trim. I painted the trim pieces prior to installing them.
The trim should be secured to the wall, not the planks. I nailed the trim to the walls with brad nails. Adding the trim really finished off the space nicely!
Installing the WoodHaven planks with the Easy Up Installation System was so much easier than I expected. I was nervous about installing ceiling planks by myself, but it was a quick and easy installation!
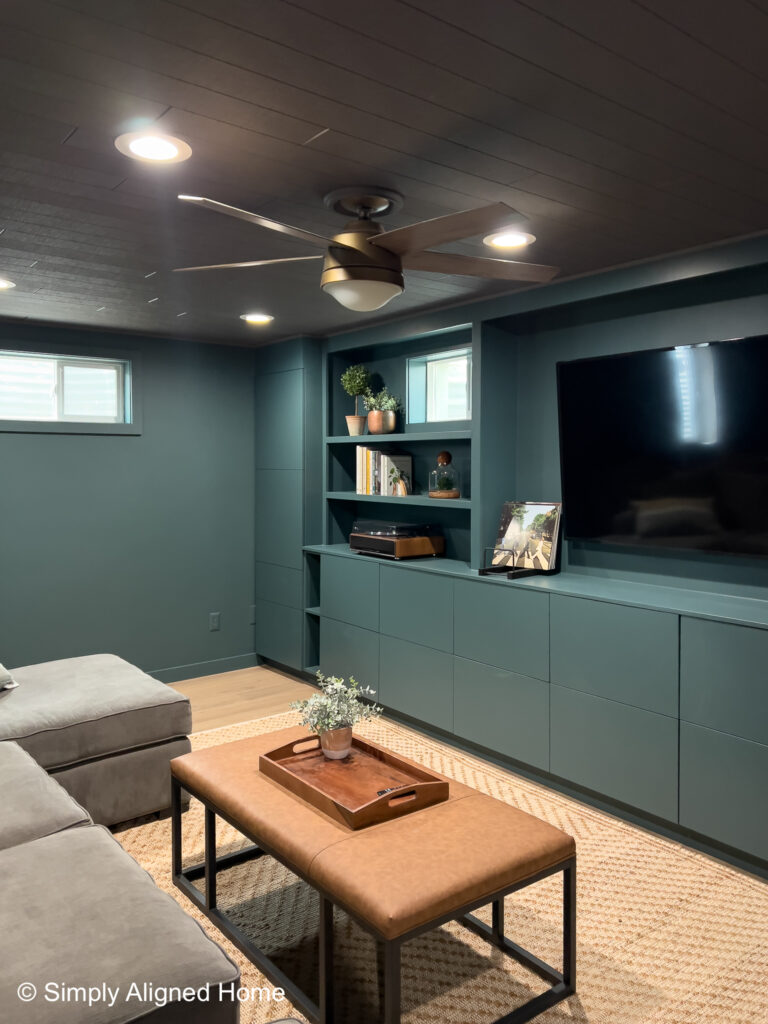
The WoodHaven planks really elevated the look of our basement! It made the space so much cozier and I absolutely love every inch of our basement now!!

**Note: I am not a professional and do not claim to be an expert. Please be sure to always read instructions for all tools and products. Safety is very important and should be your top priority. Wear necessary protection when using tools (eye wear, hearing protection, gloves, etc.) and dust masks when sanding or cutting. Simply Aligned Home is not responsible for any injury or damage. All of my designs are not professionally designed and are for private use only.**
Materials Used
- Armstrong Easy Up Installation System
- Armstrong WoodHaven Woven Charcoal Gray Planks
- Screws
- Wood Shims
- Trim
- Paint
Tools Used
- Stud Finder
- Cut Off Wheel
- Impact
- Level
- Measuring Tape
- Miter Saw
- Jigsaw
- Mallet
- Brad Nailer