In this article, we’re diving headfirst into skim coating textured walls, and trust me, it’s a game-changer.
Textured walls are indeed a thing of the past. While they were once a popular choice, many homeowners now view them as outdated. Since living in our new home I have skim coated all the textured walls in our lower living room and basement.
Skim coating walls on my own was a cheaper option than hiring out the job to a contractor. With just a few supplies and a couple days you too can tackle this easy DIY to achieve a smooth wall.
**This post contains affiliate links to products that I used or recommend. If you purchase something through an affiliate link, I may receive a small percentage of the sale at no extra cost to you. I really appreciate your support!**
What Is Skim Coating?
Skim coating essentially involves applying a thin layers of a specialized compound, typically joint compound or plaster, over a textured wall to create a smooth, even surface. This process is often used to cover up drywall seams, imperfections, popcorn ceilings and rough texture. The end result leaves you will a smooth surface that is perfect for painting or wallpapering.
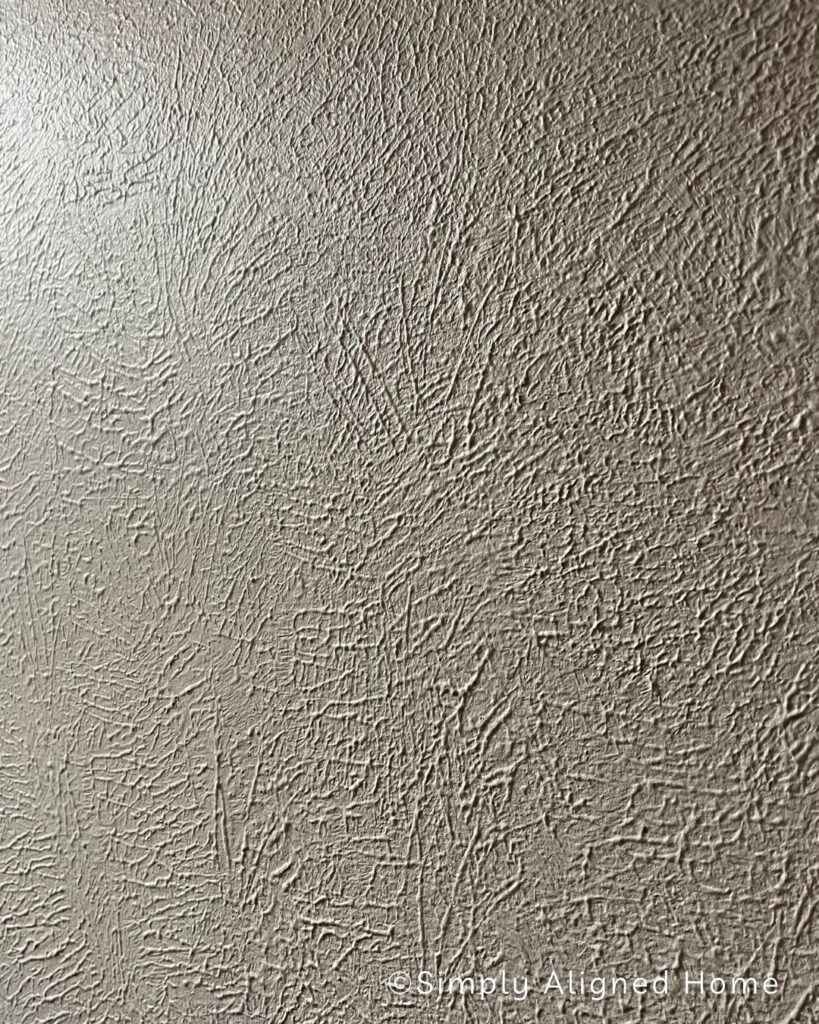
In this article we will focus on covering up the old Splat Brush or stipple wall texture in our current home.
How To Skim Coat A Textured Wall
Prep Your Space
Preparing your space before skim coating is essential to ensure a successful and smooth application. Skim coating can get a little dusty so make sure your prep includes sealing off the room and removing any furniture or decorations. If removing them isn’t in the cards, I would just cover them up with a canvas drop cloth or plastic.
Thoroughly clean the walls you intend to skim coat. Remove any dirt, dust, or loose debris by wiping them down with a damp cloth. If your walls have cracks or significant imperfections, patch them with joint compound before hand. Allow the patches to dry completely and then sand them smooth.
As for outlets, switch covers and baseboards…remove them. If you aren’t replacing your baseboards you could always cover them with painter’s tape and plastic.
Lastly, protect yourself! Don’t forget to wear safety gear, such as safety glasses and a dust mask. You want to protect yourself from breathing in dust during the skim coating process.
Prepare The Joint Compound
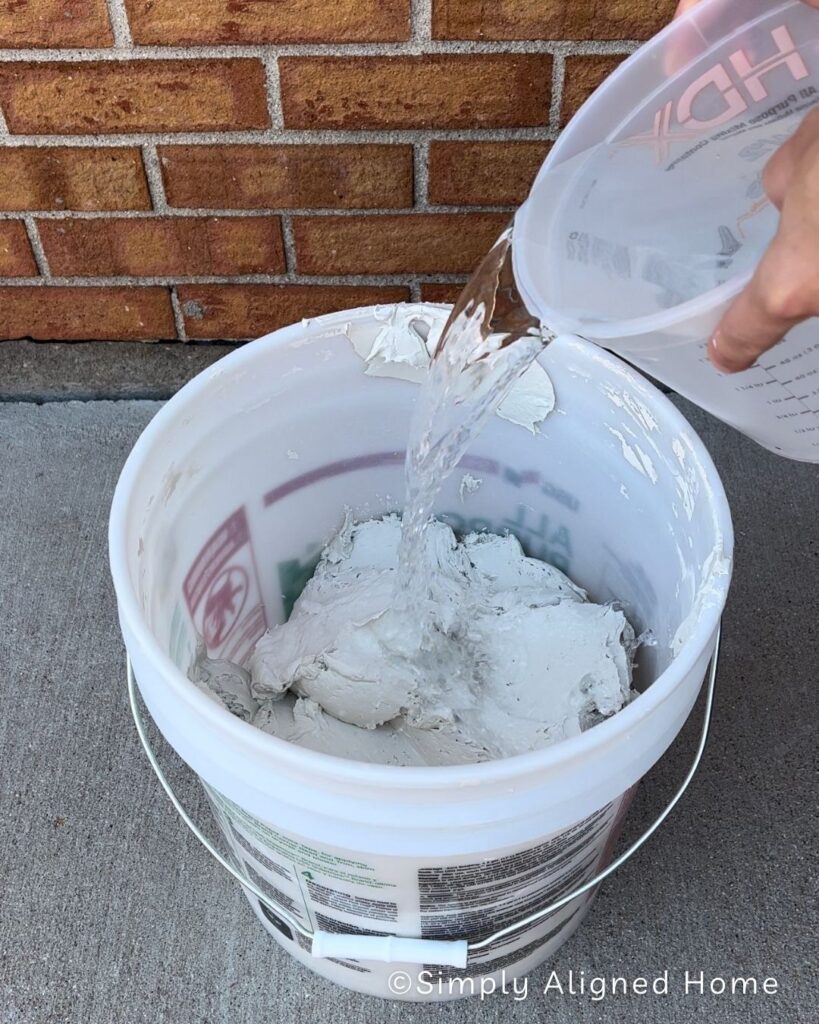
Before you start skim coating your textured walls you will want to thin your joint compound. Start by adding small amounts of water to the compound. It’s essential to add water gradually to avoid making the mixture too thin. You are looking for a pancake batter consistency.
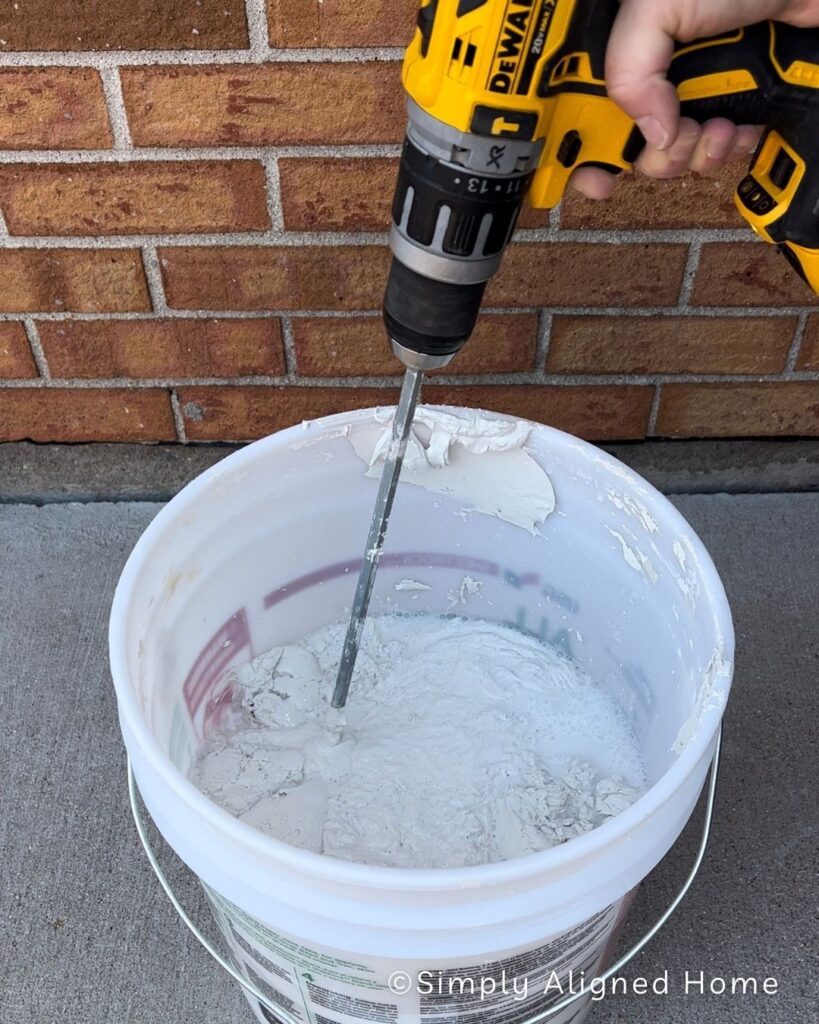
A good rule of thumb is to start with about 1/4 cup of water per gallon of joint compound. Using your drill and mixing paddle start at a slow speed and increase the speed as needed. Keep mixing until the joint compound reaches a smooth, creamy consistency with no lumps or dry patches.
Apply Joint Compound To The Walls
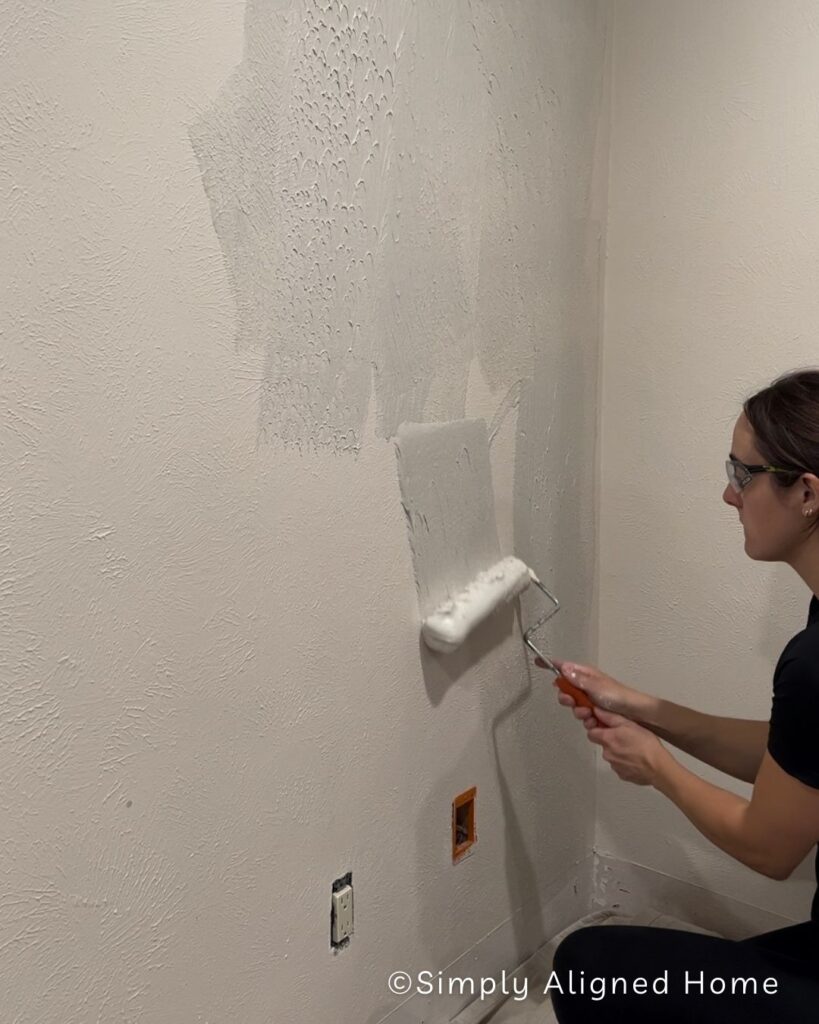
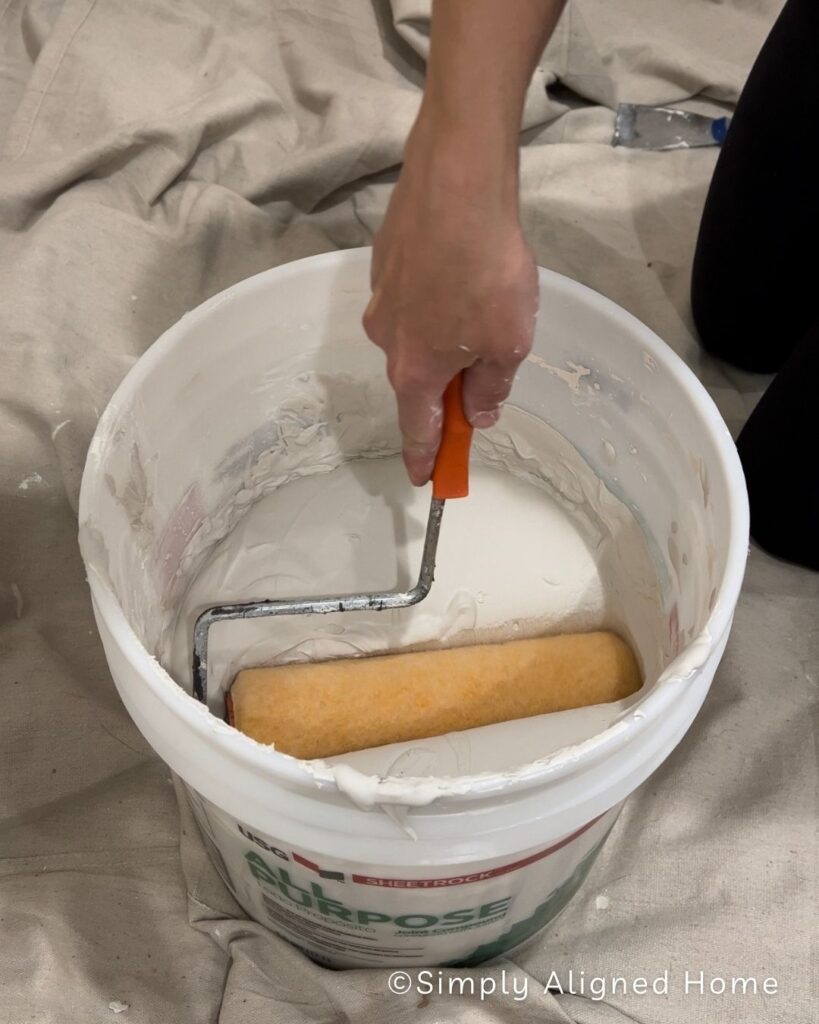
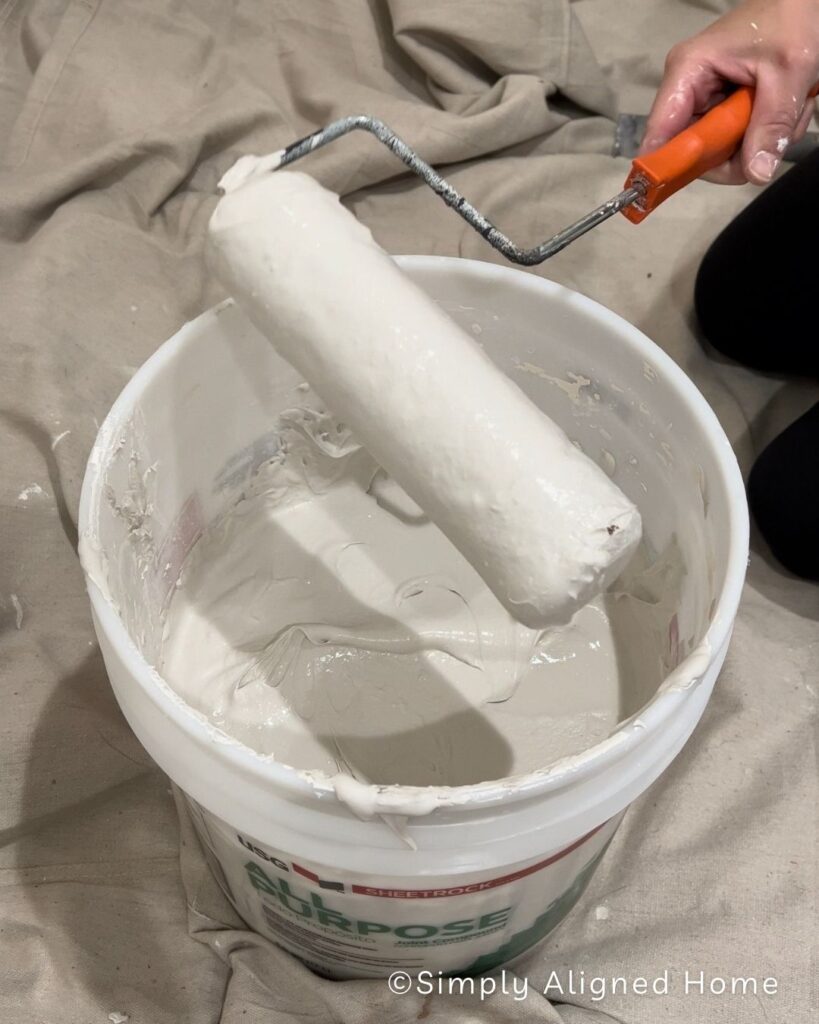
The easiest way to apply joint compound to the walls is with a paint roller. You will want to work in small sections. That way you have time to come back and skim the wall you just applied joint compound to before it drys. I try to apply a generous amount so that it will skim fairly smooth.
The paint roller method gets more joint compound on the walls than if you were scooping it out and troweling it on the walls. Working smarter not harder is the name of the game!
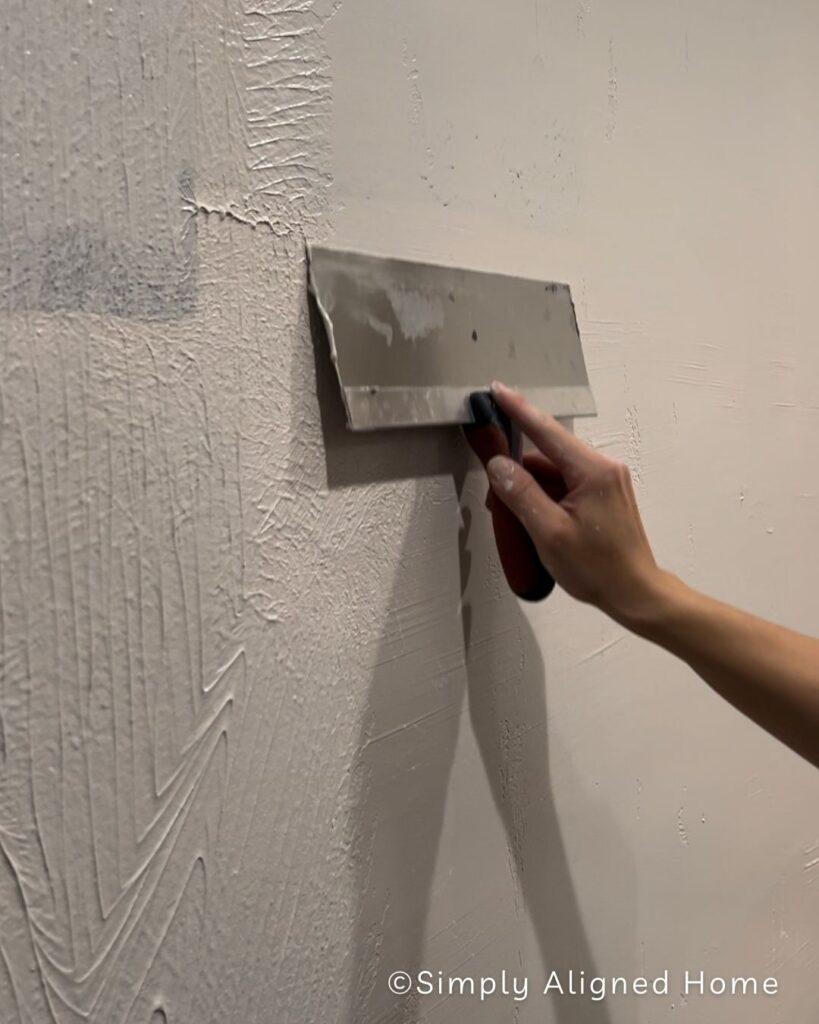
Skim The Walls With A Drywall Knife
After you have applied a generous amount of joint compound to the walls you will need to skim coat them. My contractor gave me a few pointers last time I skim coated our lower living room. He suggested to skim the top half of the wall and then come back and skim the bottom of the wall.
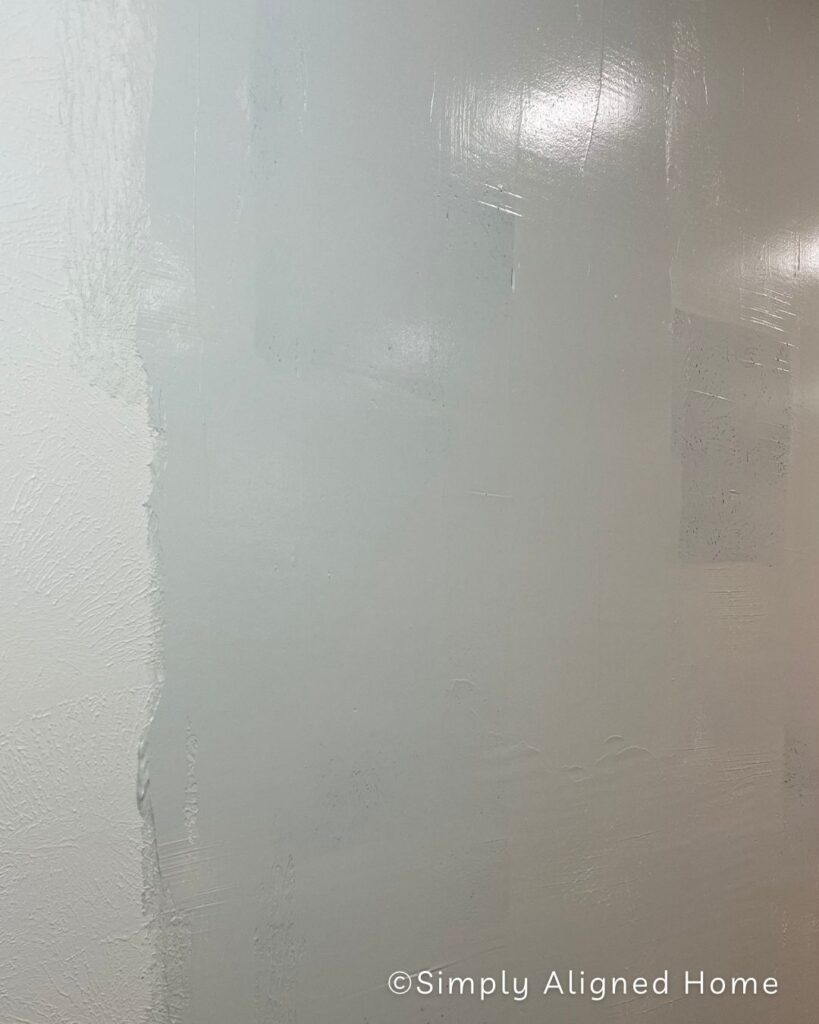
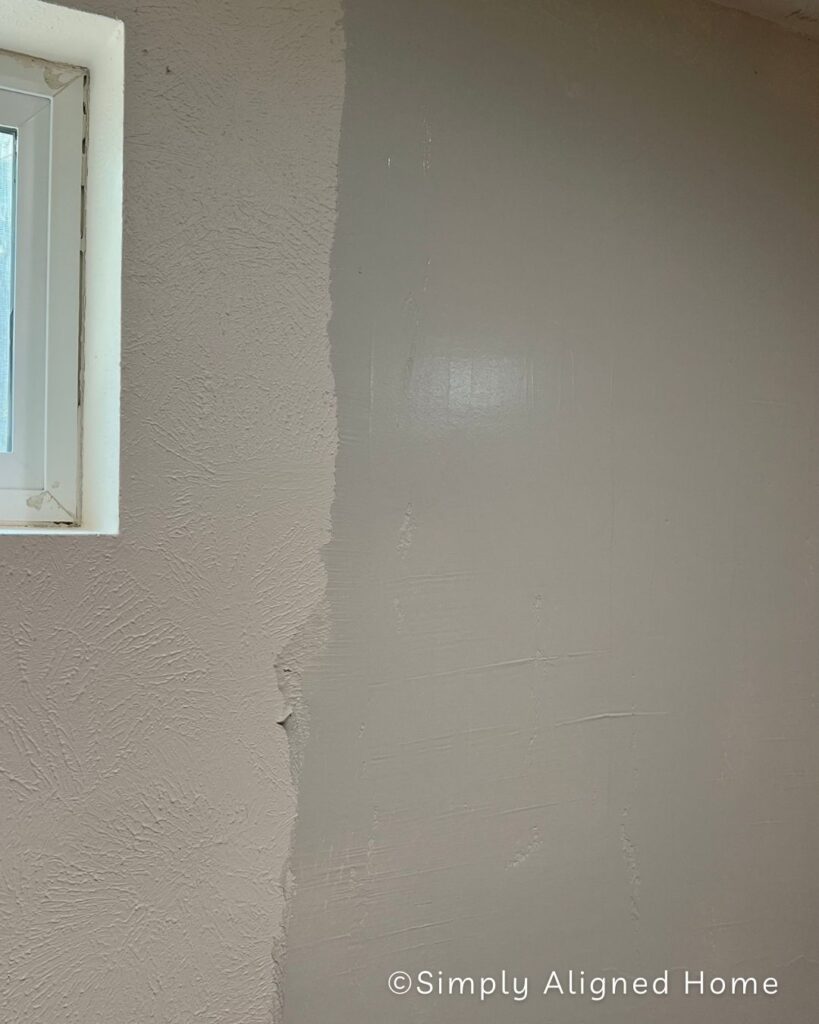
When skimming your walls you will want to hold your drywall knife at a angle (around 15-30 degrees) for best results. The first coat might look a little rough but that’s okay. The joint compound is filling in all around the existing texture. It’s also important to not apply too much pressure when skimming. Keeping the application even is ideal so it all dries evenly.
Allow the first coat of joint compound to dry completely before sanding or applying another coat. Drying times can vary and sometimes take several hours, so be patient.
Sand Joint Compound Smooth
Now for the messy part. Skim coating usually takes a few coats before reaching the smooth finish that you desire. Lightly sanding in between coats to make sure everything is smooth and even is something you can do, but isn’t necessary. It all depends on the level of texture you had previously.
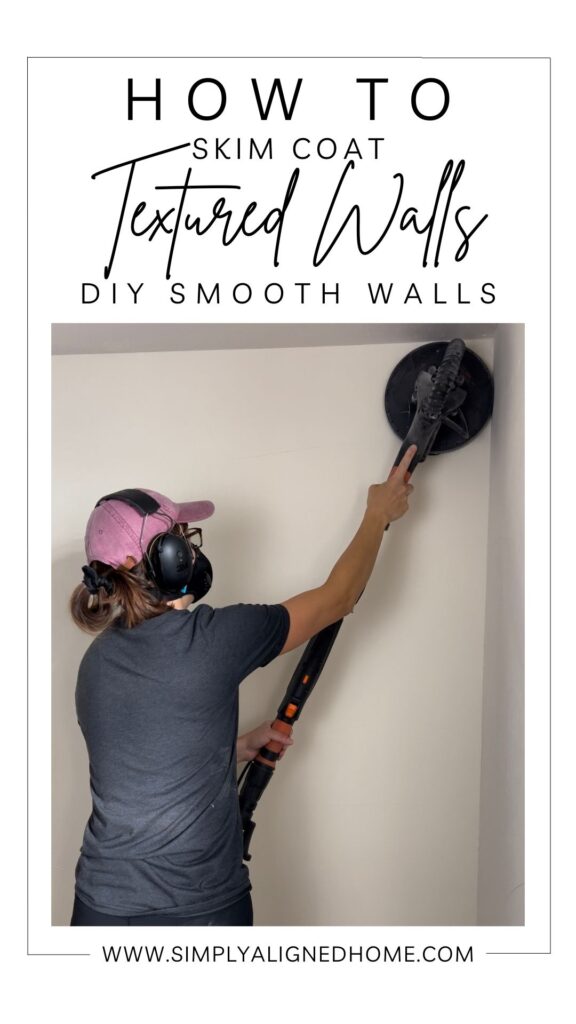
When performing a light sand on the final coat you have a few different tools for sanding to choose from. A palm sander, sanding sponge or my favorite choice a drywall sander hooked to a shop vac. If you are doing a room or multiple rooms a drywall sander is a great way to save your arms and your sanity. My drywall sander hooks up to a shop vac and the clean up is so much easier!
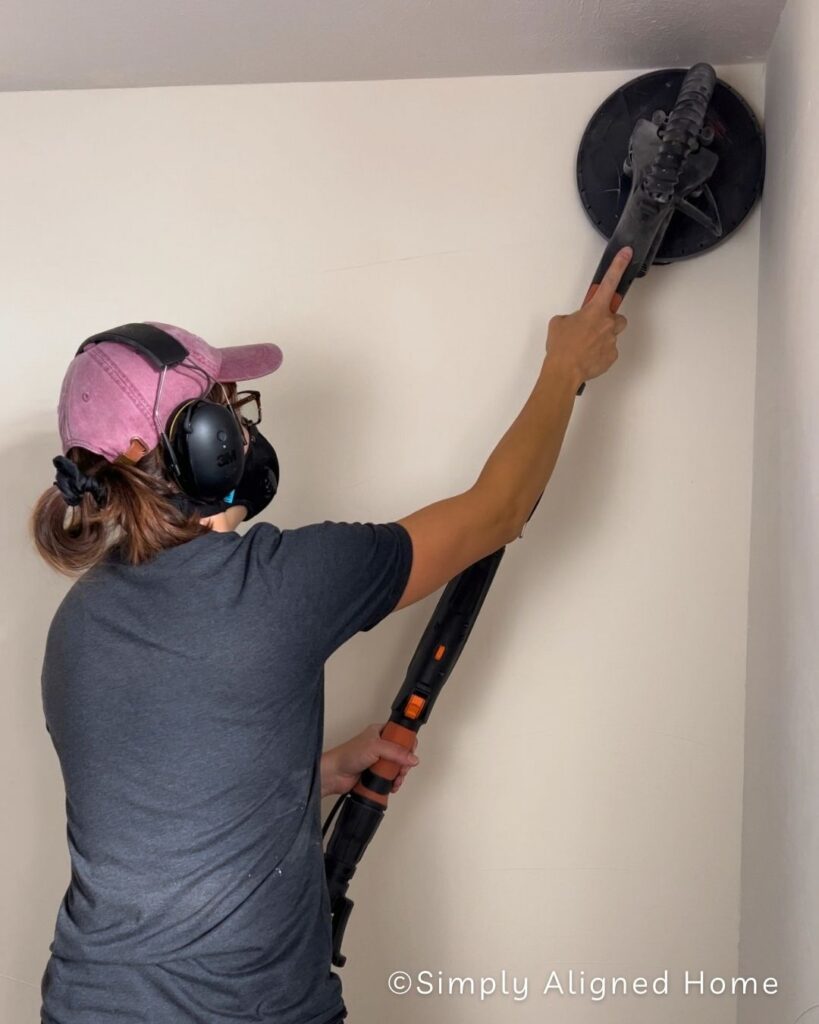
When sanding make sure to keep a light hand and to stop and check periodically. Wipe off any drywall dust and get a closer look to see how the smooth and even your surface is.
Sealing Your New Skim Coated Walls
While it might seem like an extra step, priming can save time and money in the long run. With proper priming, you may require fewer coats of paint to achieve the desired finish.
Skim coating your walls essentially makes them act like fresh drywall. The surface is very porous and will absorb more paint. Using a PVA primer will help seal the surface and ensures that the paint adheres consistently, leading to a more even and professional finish. Primers also have great adhesion properties helping the paint bond securely to the surface. This reduces the likelihood of peeling or flaking over time.
I am so much happier with the smooth walls we now have in our basement and lower living room! I hope this inspired you to give skim coating a try and update your space. If you have any questions feel free to reach out to me over on Instagram!

**Note: I am not a professional and do not claim to be an expert. Please be sure to always read instructions for all tools and products. Safety is very important and should be your top priority. Wear necessary protection when using tools (eye wear, hearing protection, gloves, etc.) and dust masks when sanding or cutting. Simply Aligned Home is not responsible for any injury or damage. All of my designs are not professionally designed and are for private use only.**
Materials And Tools Needed For Skim Coating
Below is a list of materials and tools needed for skim coating textured walls. What’s nice is you don’t need much for this project but, it’s always good to have a list going to the store so you don’t forget anything.
If you don’t have a drywall sander for this project, I highly suggest getting one. It’s a game changer and gets the job done in record time! It will be your best friend.
Materials Used
- All Purpose Joint Compound
- Sandpaper or Sanding Block
Tools Used
- Heavy Duty Plaster Mixer Attachment
- Power Drill
- Paint Roller
- Roller Frame
- Drywall Knife
- Drywall Mud Pan
- Drywall Sander
- Shop Vac
- RZ Mask or Respirator
- Safety Glasses