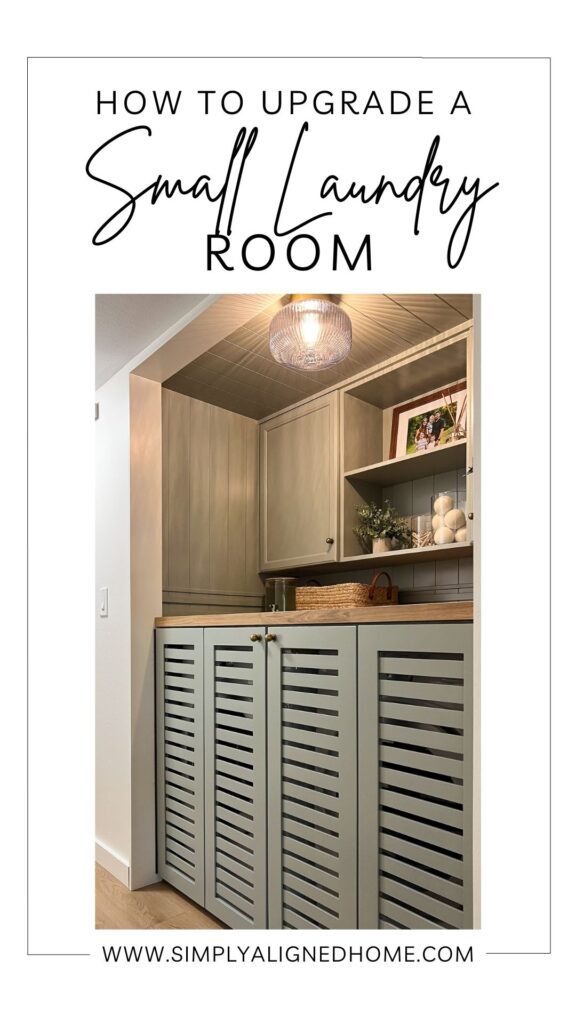
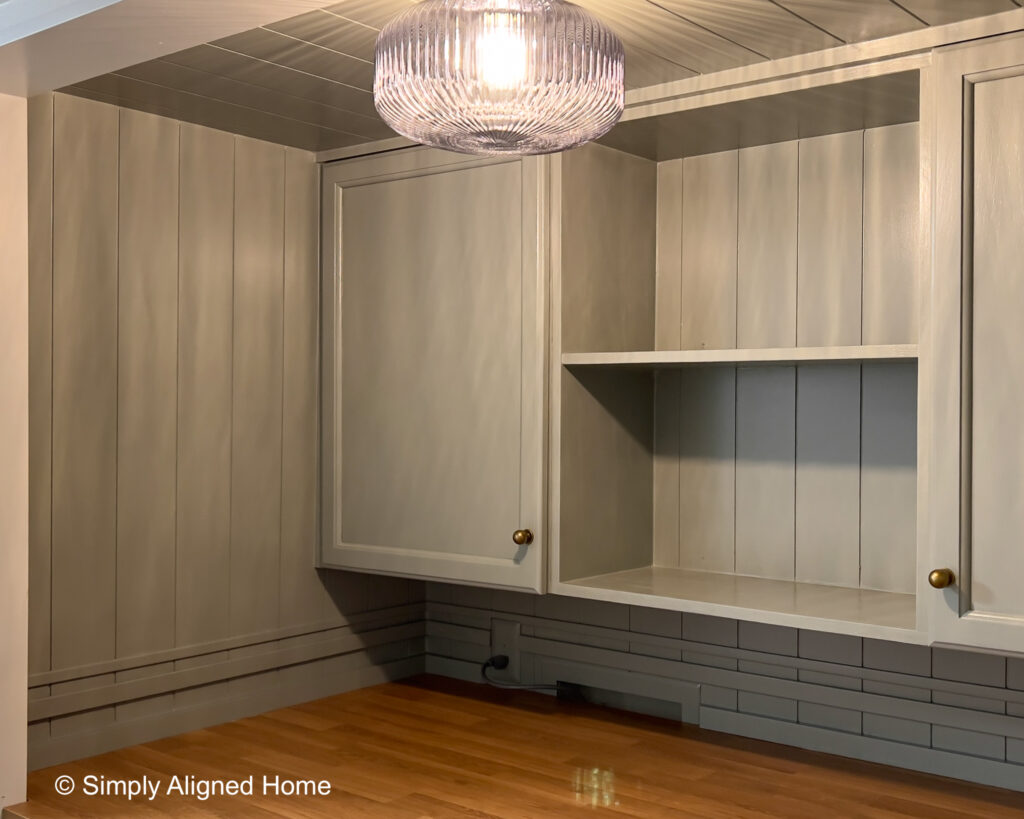
Do you have a small laundry room that is actually just a closet? Try removing the closet doors to see how much bigger the space feels! That’s exactly what I did…and I knew I couldn’t put the doors back on. Instead, I came up with a way to hide the washer and dryer while keeping the rest of the space open. Here is how I upgraded my small laundry room closet into a beautiful space!
**This post contains affiliate links to products that I used or recommend. If you purchase something through an affiliate link, I may receive a small percentage of the sale at no extra cost to you. I really appreciate your support!**
Removed the Closet Doors
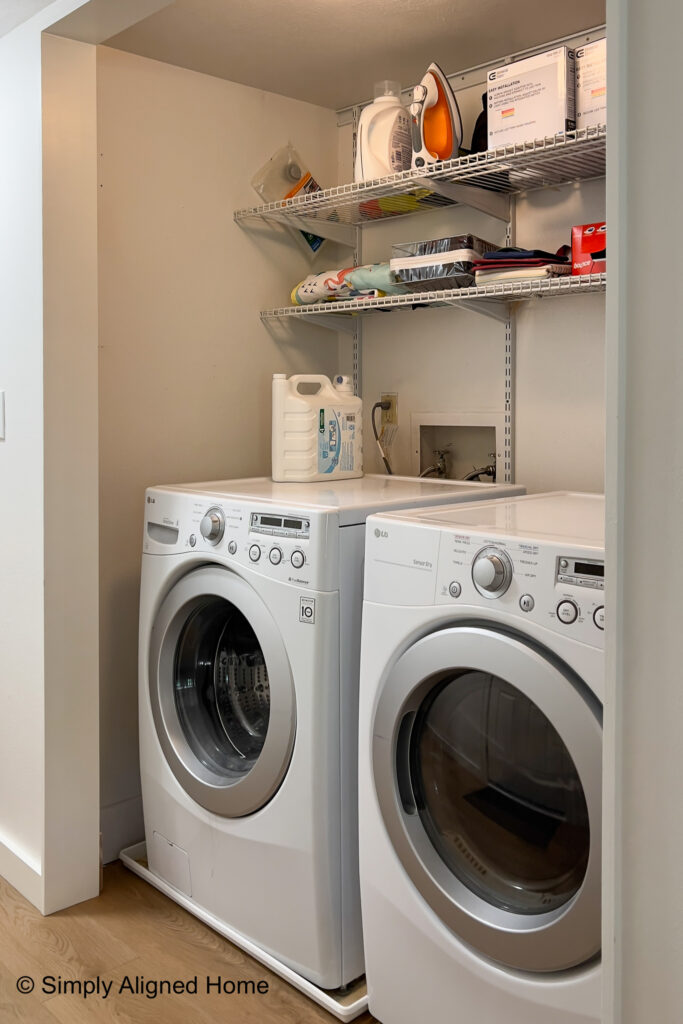
The first step and biggest inspiration for this project came when I removed the closet doors. I had two large bifold doors hiding the laundry space in my hallway. As soon as I removed the doors, the hallway felt much bigger and brighter! After seeing the laundry closet without doors, I knew that I couldn’t reinstall them. Instead, I came up with a way to make the space both functional and beautiful without them!

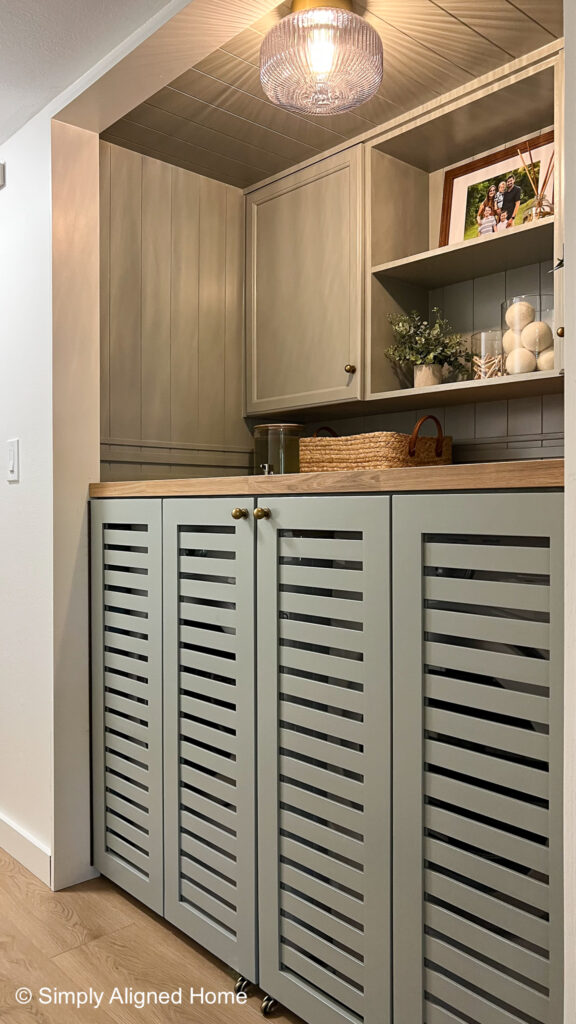
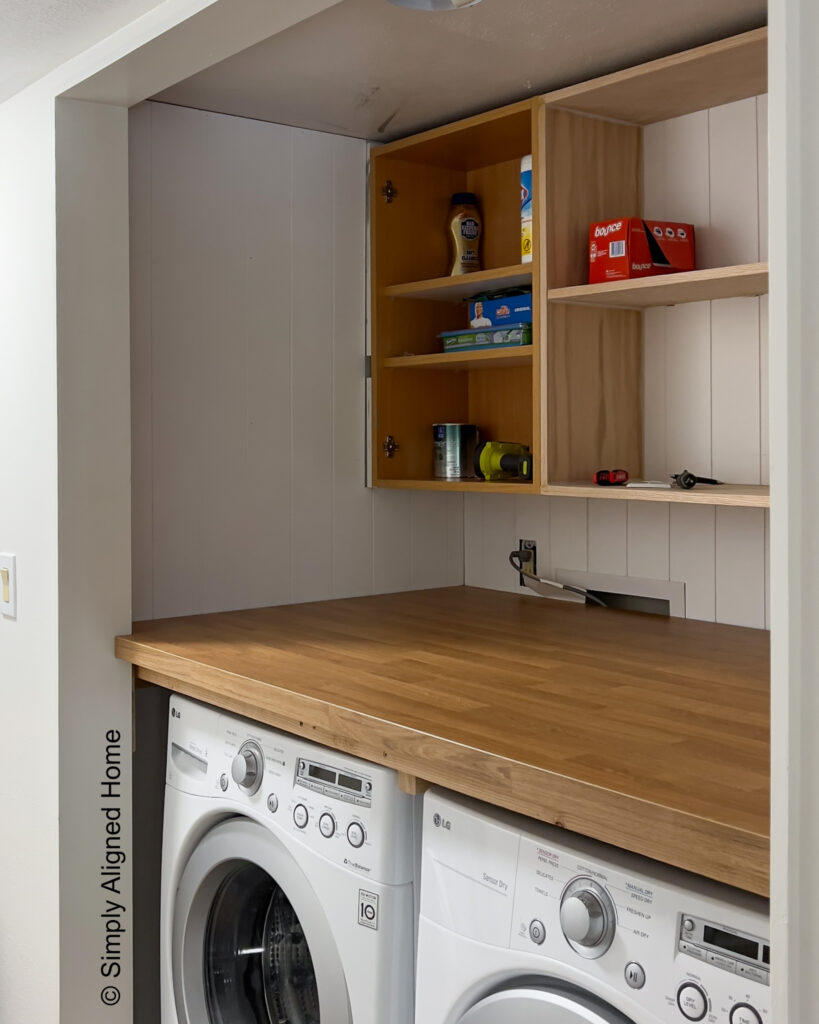
Installed Upper Cabinets
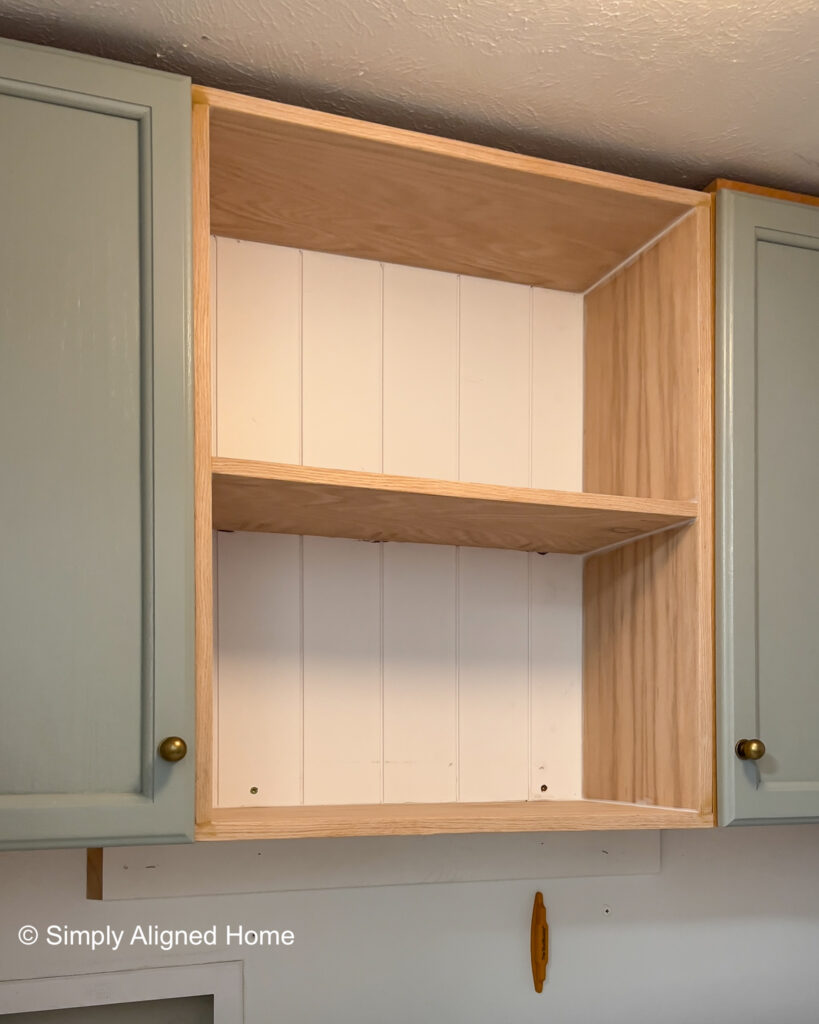
Luckily, I was renovating our little wet bar at the same time as the laundry room/closet. I removed two upper cabinets from the wet bar and decided to install them in our laundry space. I installed them on far sides of the back wall with the intention of installing another cabinet in the middle of them.
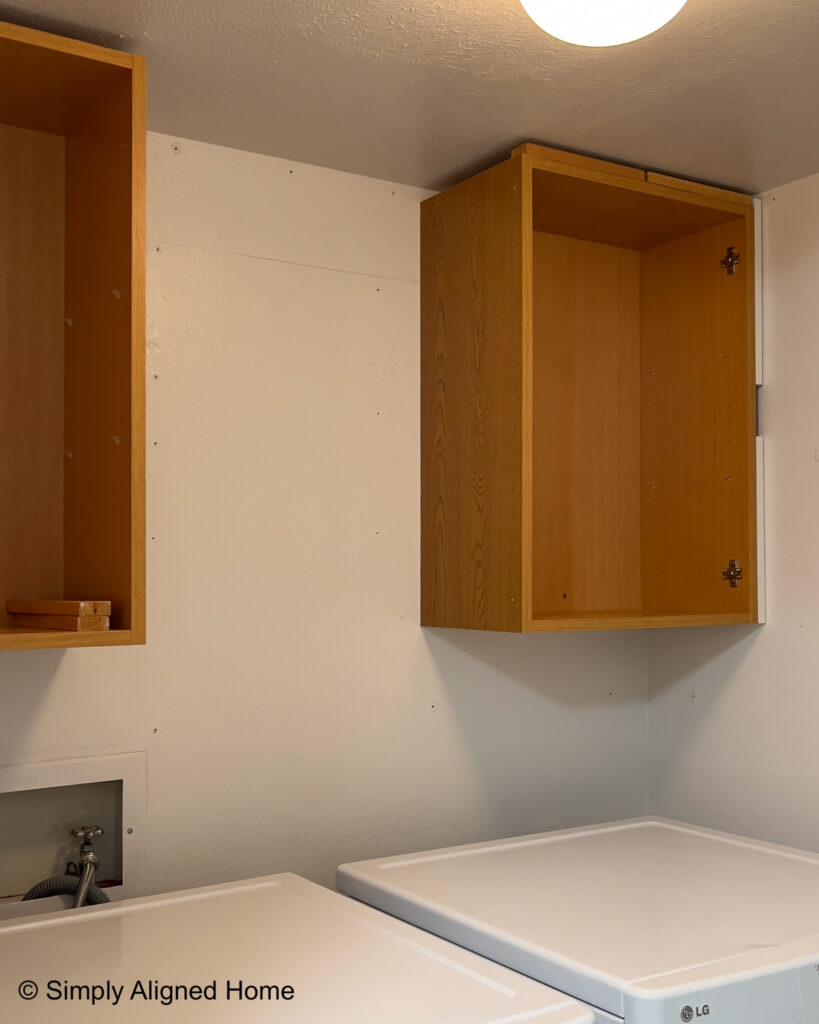
I was initially thrilled about my purchase of an unfinished upper cabinet from Home Depot and eager to have it installed. However, my excitement quickly faded when I realized that it didn’t match the style I needed and wouldn’t be suitable. Back to square one I went, revisiting my plans.
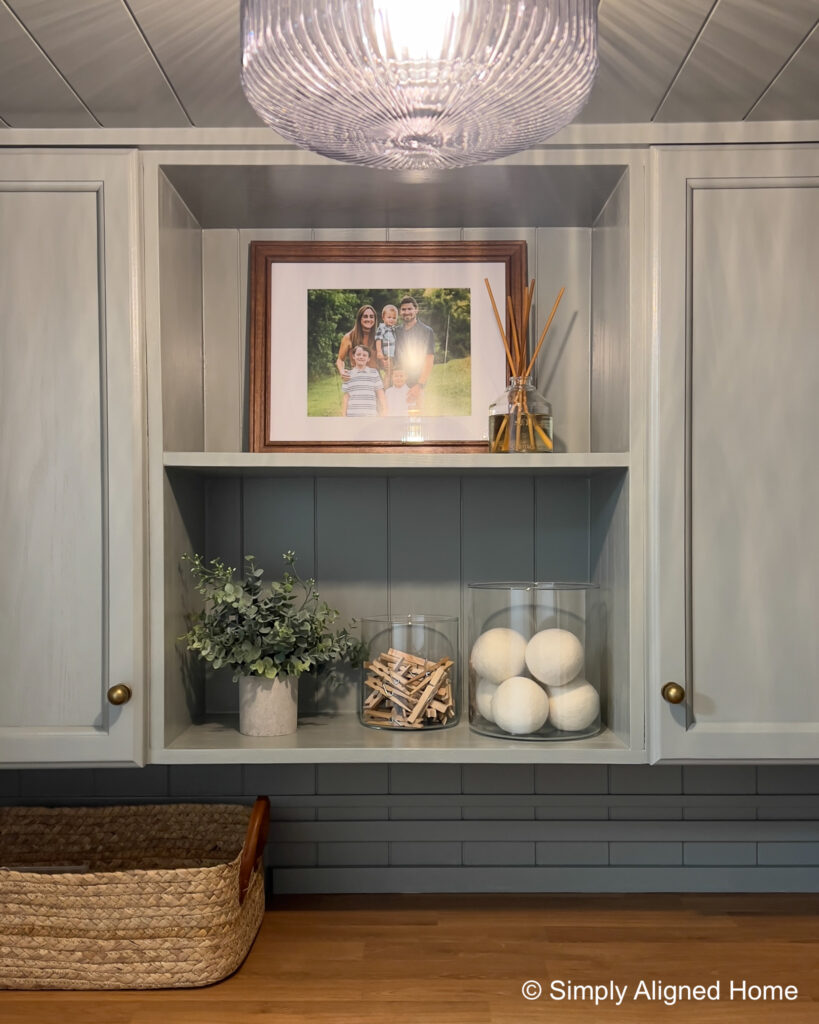
I ultimately decided to build a small shelving unit to fit between the two upper cabinets.
With the cabinets in place, I was able to get my dimensions for the shelving unit. I wanted it to fit snuggly between the two cabinets and be the same depth as the cabinet boxes.
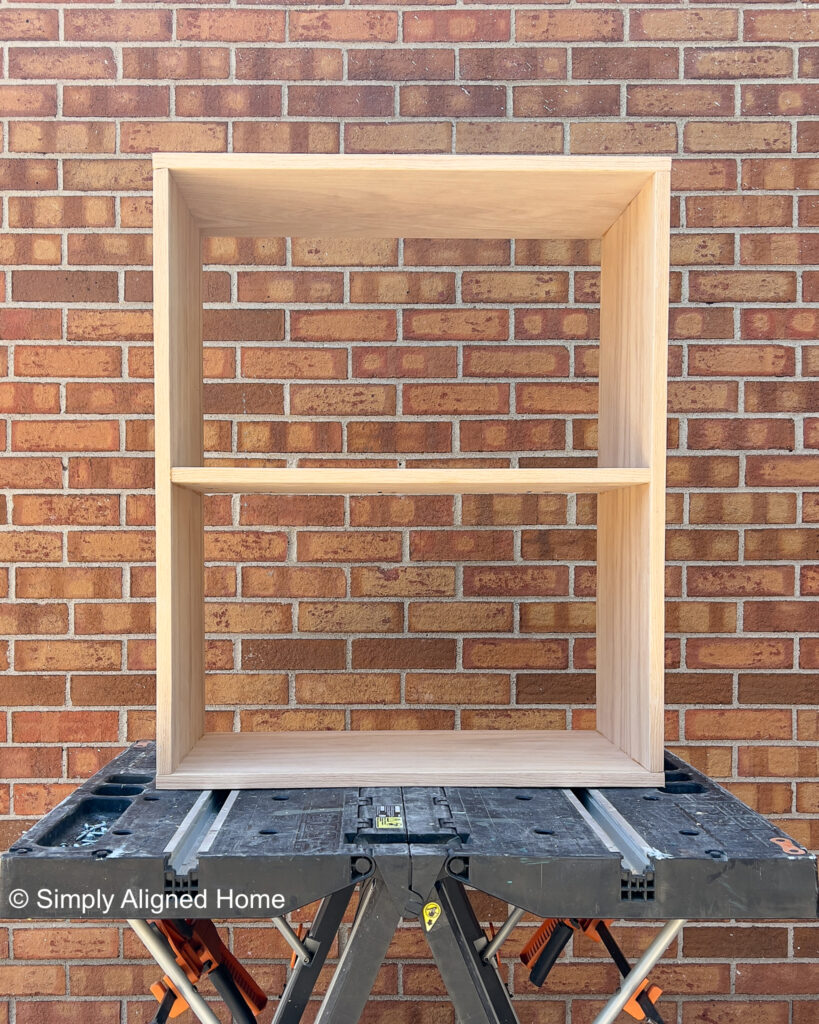
The shelving unit was constructed using a combination of plywood and shiplap paneling. I employed 3/4″ plywood for the top, bottom, sides, and the main shelf of the unit. Additionally, I affixed a shiplap paneling piece to 1/2″ plywood, using it as the backing for the shelving unit.
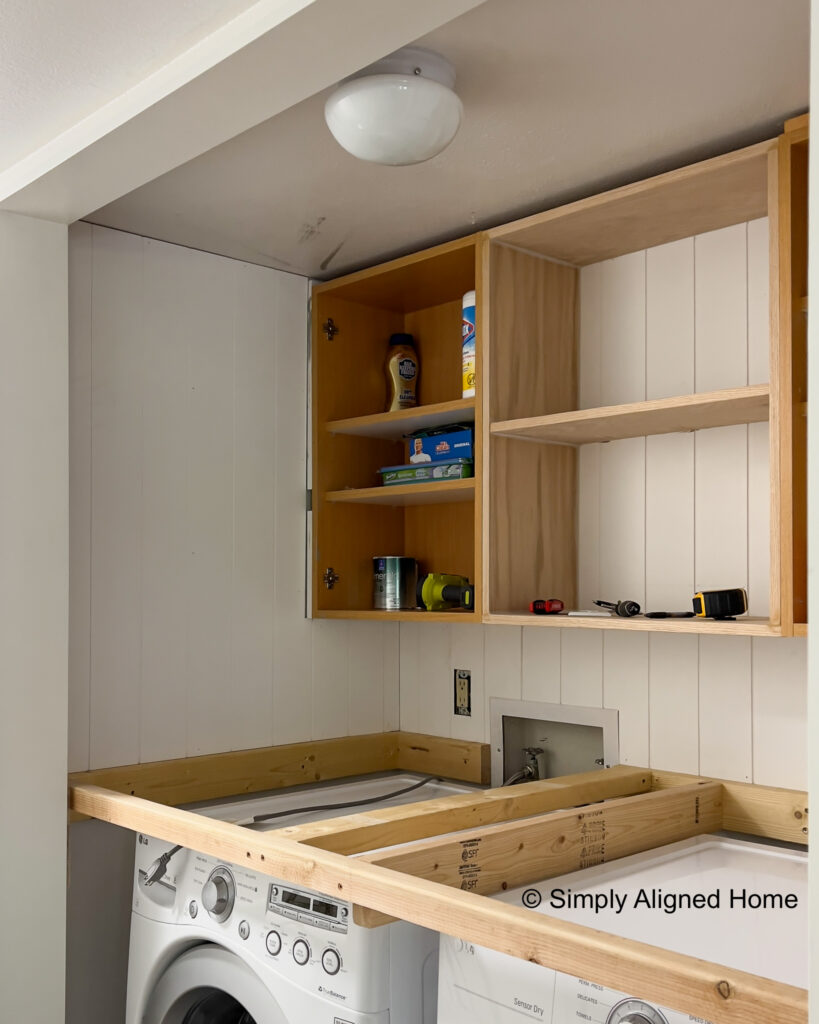
Installed Countertop Supports
Once the cabinets were installed, I was able to start working on the countertop supports. I used 2×4’s for the wall supports. I secured them to the studs using construction screws.

The height of the countertop was largely based on the height of the washer and dryer as well as the location of the water connections. I wanted to be sure that I had plenty of space between the countertop and washer/dryer.
In order to prevent the countertop from sagging, I added a front support and two cross supports.
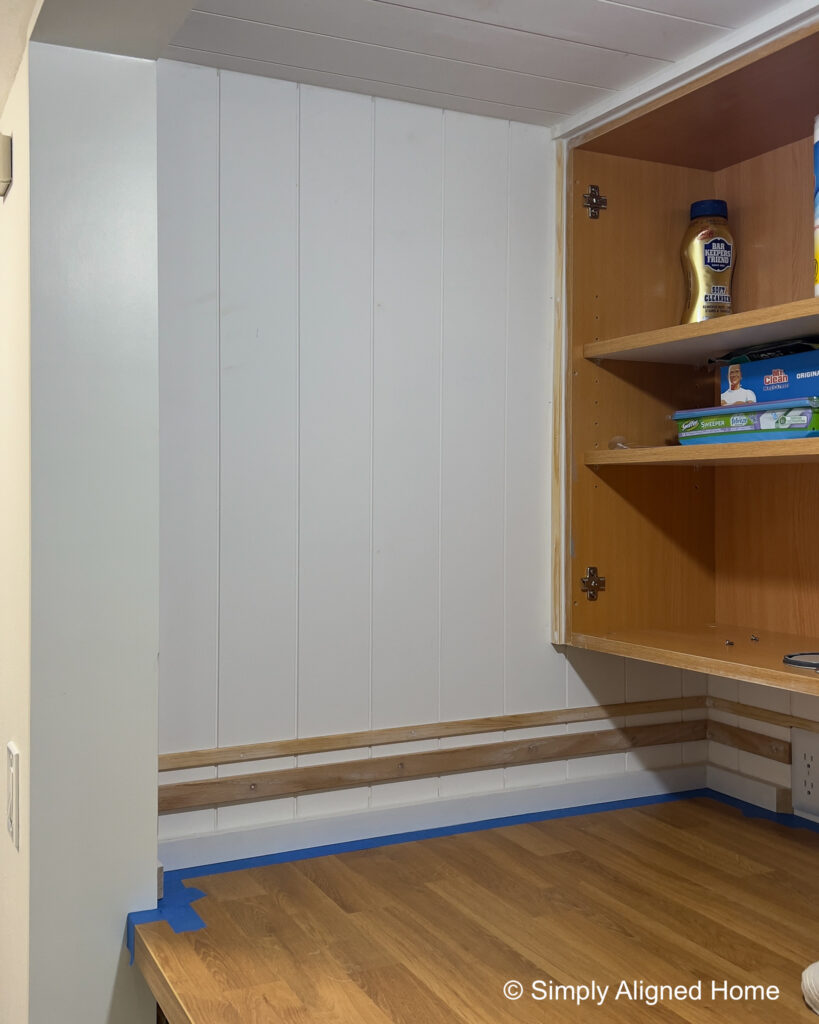
Added Wall Treatments
I decided to add the wall treatment before installing the countertop because I had shiplap paneling on hand before I purchased the countertop.
I started by adding the paneling to the side and back walls of the laundry room/closet. For the back wall, I made sure that the shiplap was aligned with the shiplap on the shelving unit. I secured it to the walls using brad nails. I finished off the space with shiplap paneling on the ceiling, making sure that it was also aligned with the shelving unit shiplap.
Installed Countertop
Time for the countertop! I was actually really nervous about this part. I honestly wasn’t sure if I could fit the countertop into the small space without cutting it into two pieces.
In an effort to mitigate any potential mishaps, I opted for a more budget-friendly laminate countertop from IKEA.
One thing I’ve learned from projects is that walls are never straight or perfectly square. I knew that the corners of my laundry closet were not perfectly 90 degrees. Therefore, I decided to make a quick template for my cuts.
I used wood shims and hot glue to make my template. Using two wood shims per corner, I glued them together to get the exact angle for that corner. I then measured the distance between each corner.
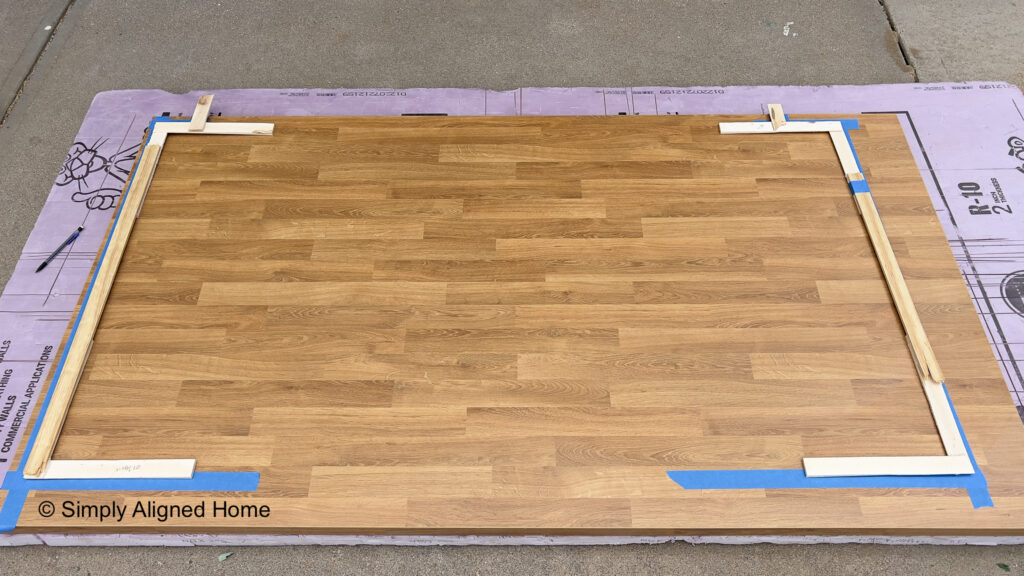
Cut the Countertop
I placed the countertop on a piece of insulation board and applied painters tape to the top of the countertop where I would be making my cuts. I then placed my template pieces on the painters tape and traced my cuts. Using my track saw, I cut the countertop down to size.
My husband and I were actually able to get the countertop to fit without cutting it into a few pieces!! I was shocked!
Added Trim and Painted
I really wanted to avoid adding trim to hide the gaps around the countertop, but it just wasn’t possible. My laundry closet walls bowed out and there were a few large gaps that couldn’t easily be filled with caulk. Instead of adding just one piece of trim, I decided to make the trim a unique feature by adding three pieces all the way around.
I started by adding a piece of trim directly at the countertop. I then added two more pieces of trim that were slightly smaller than the first.
Once all of the trim was installed, I caulked all seams and filled the nail holes using spackle. Since most of my materials were pre-primed, I skipped the primer. Instead, I just went straight to painting!
I decided to paint the entire area one color…I just love the monochrome paint trend! I feel like painting everything the same color makes the space feel bigger. Having a contrasting color trim breaks up the wall and can make it feel smaller.
My current obsession is green paint. I just love the natural feel! I tried a few different grey/green paints and struck out. Luckily, I had a friend mention Farrow & Ball’s Pigeon paint color. It was perfect!!!
Built Custom Bifold Doors
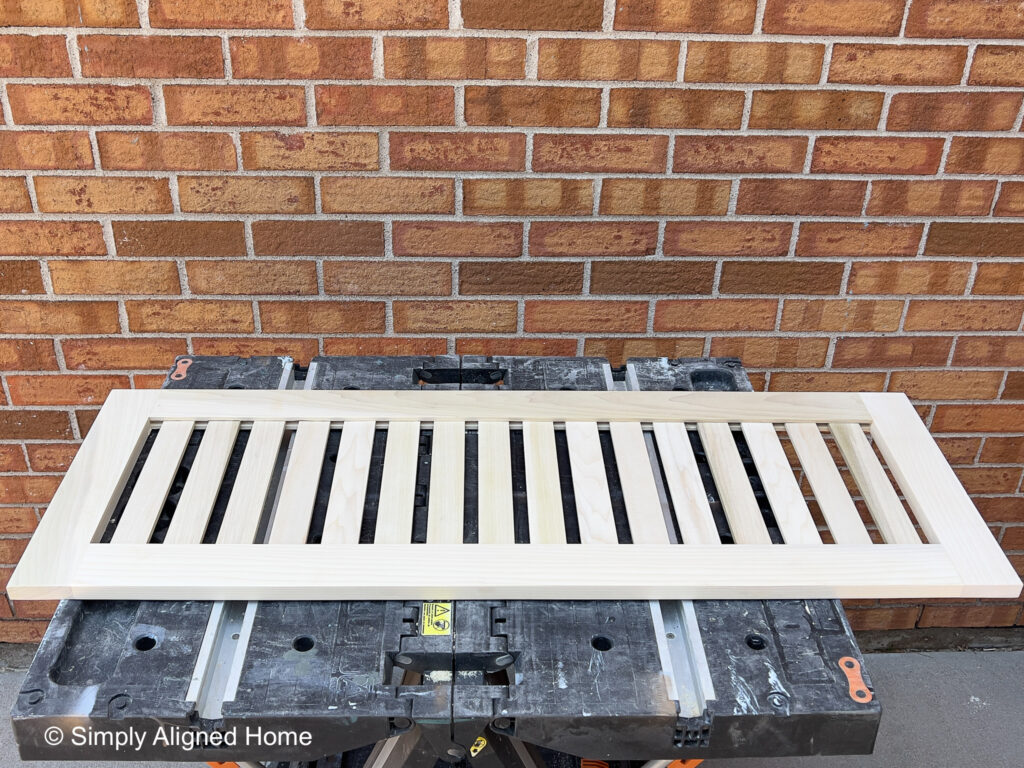
I had a vision for the bifold doors and knew that it would be nearly impossible to find something that would work for my space. Not only would they need to be a custom size, I also wanted a custom design. Therefore, I decided to build my own!
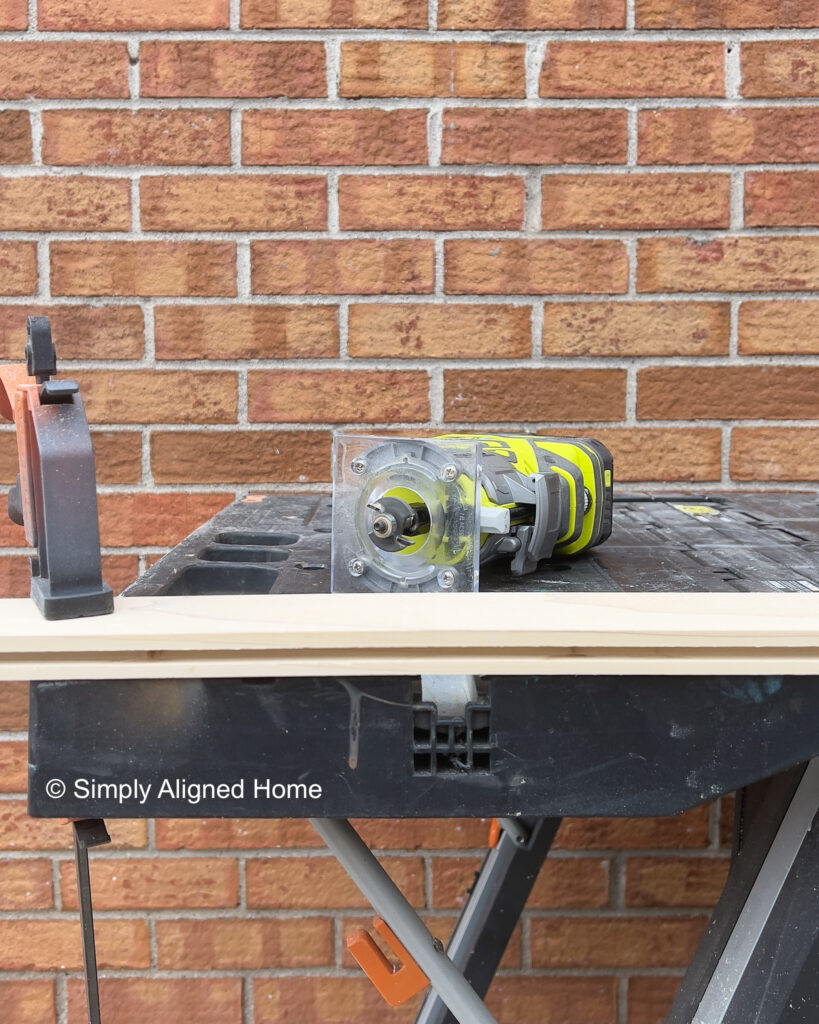
I chose to make the doors out of poplar since they would be painted. I started by cutting a slot into the 1×2 frame pieces using my palm router and slot cutting router bit.
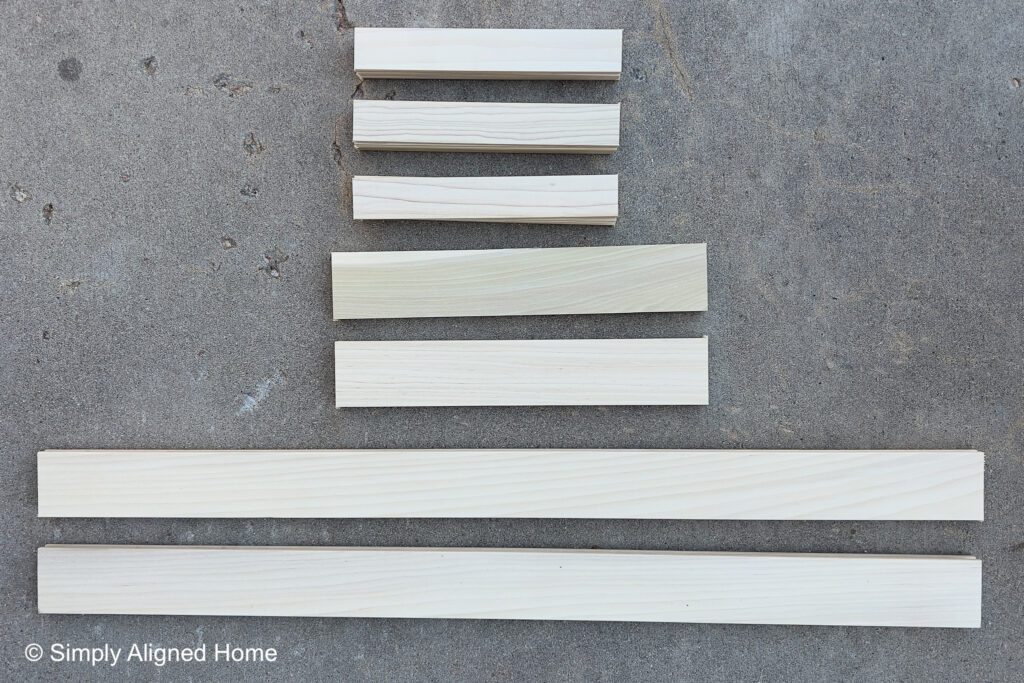
Cut and Sanded the Pieces
Next, I cut all of my pieces to the correct lengths. I cut both the frame pieces and slats for the doors. Once they were cut, I sanded all of the pieces. I have found that it’s easiest to sand all of the pieces before assembling them. I will do a light sanding of the finished, assembled piece later on.
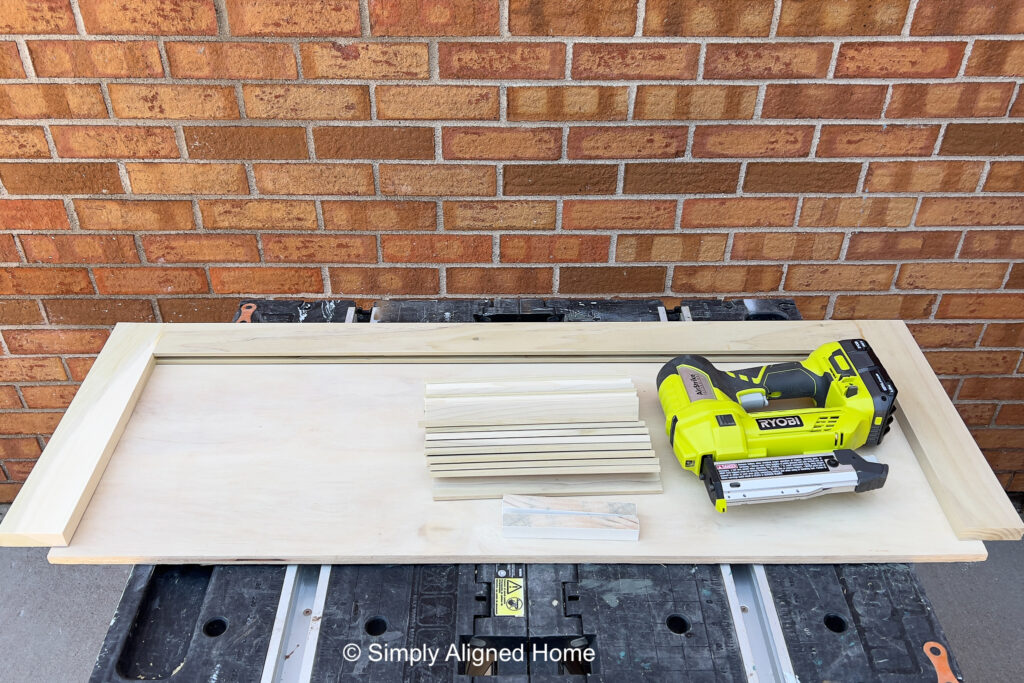
Assembled the Bifold Doors
I started making the doors by assembling one side of the frame. I did this using wood glue and pocket screws. My favorite corner clamps were super helpful with this step! They keep the pieces square and flush while I screwed them together.
Once the one side was assembled, I was able to add the slats. I cut two spacers to make this part quicker. I slid the slat into the slot (that is a tongue twister) that I created with the router. I secured the slat with two pin nails.
With the slats secured to the one side, I was able to add the second side. I first secured the side of the frame with pocket screws and then secured the slats in place.
Filled Holes and Painted Doors
I concealed the pocket holes by inserting pocket hole plugs, then secured them with glue and smoothed the surface by sanding. To hide the seams and nail holes, I applied wood filler and sanded it until smooth. Once the doors were nice and smooth, I cleaned off all of the sawdust.
The best way to get a smooth finish with paint is to use a paint sprayer! I usually opt for a brush and roller when painting because I don’t want to do the prep that is required for spraying. You really do have to cover everything when using a paint sprayer. Luckily, when painting something like these doors, I can just use a paint tent!
I quickly assembled my paint tent and set the doors on paint stands.

Installed Custom Bifold Doors
To install the bifold doors I used piano hinges. I had to cut the hinges to the correct length which scared me because, I’m not a fan of cutting metal. But, it went smoothly and the hinges were exactly what I needed to make these doors work.
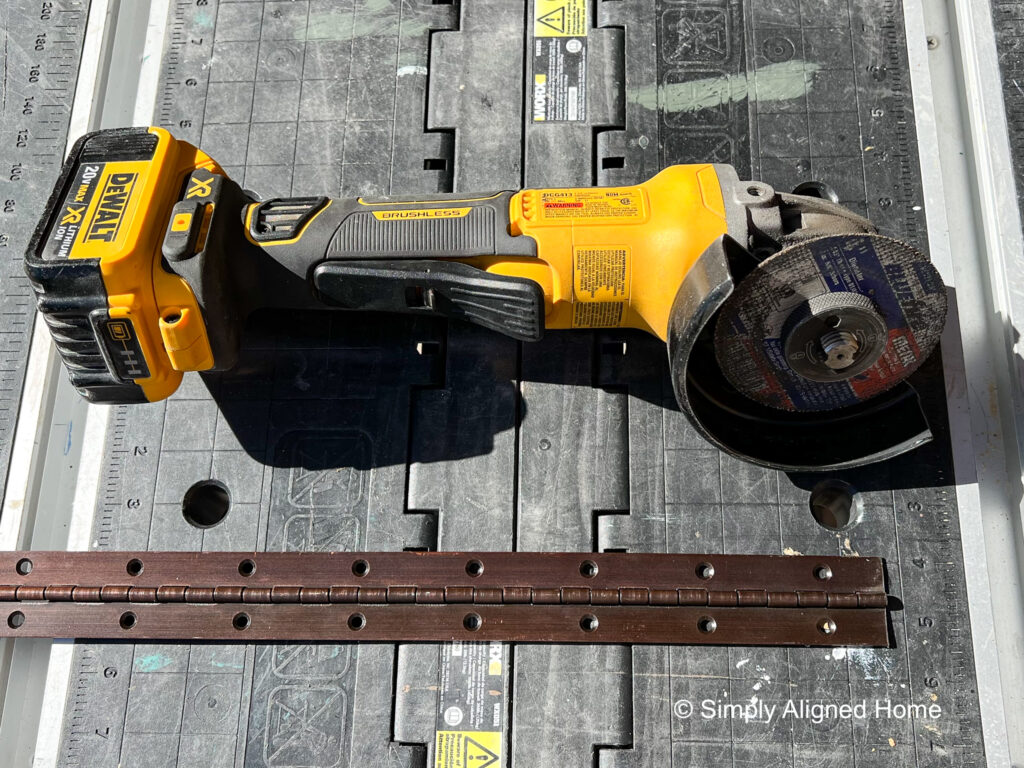
I ended up needed two hinges per set of doors. One to hold the doors together and another to attach the doors to the wall.
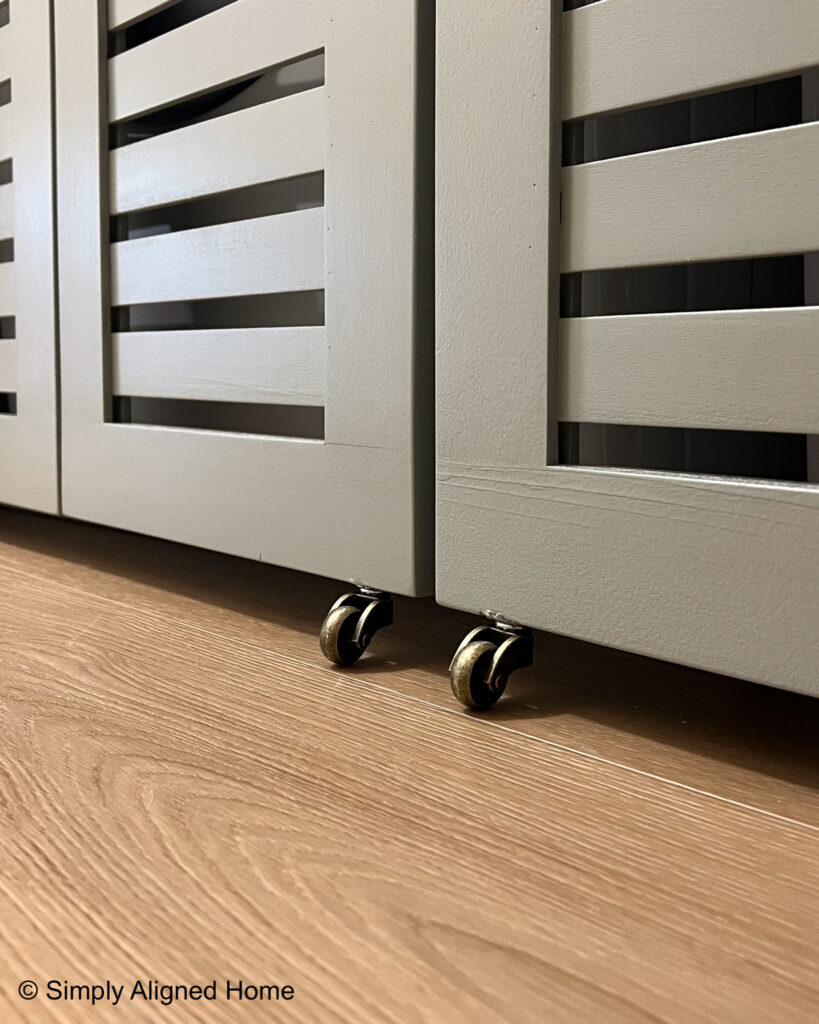
Once, the hinges were installed I drilled a hole on the bottom of each set of doors to add a castor. The casters supported the weight of the doors and made it easy to open and close.

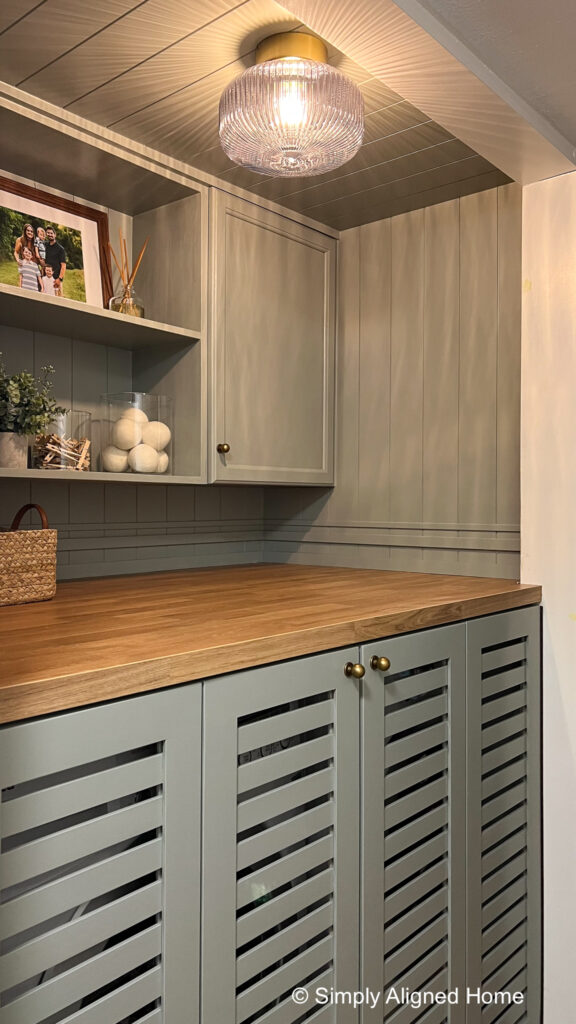
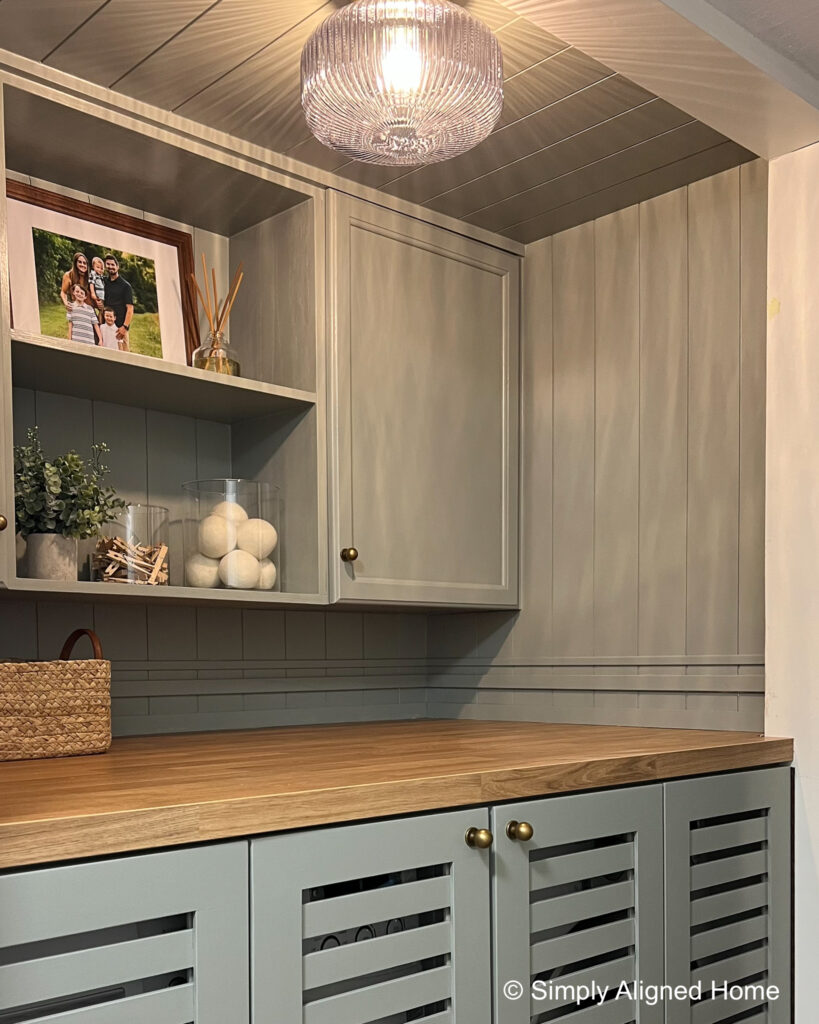
Our hallway where our laundry room/closet lives is much more open now! This is exactly what we needed in here for it to feel more built-in and open. With every project we do in this house it’s feeling more and more like home!

**Note: I am not a professional and do not claim to be an expert. Please be sure to always read instructions for all tools and products. Safety is very important and should be your top priority. Wear necessary protection when using tools (eye wear, hearing protection, gloves, etc.) and dust masks when sanding or cutting. Simply Aligned Home is not responsible for any injury or damage. All of my designs are not professionally designed and are for private use only.**
Tools Used
- Miter Saw
- Table Saw
- Impact Driver and Drill
- Brad Nailer
- Level
- Corner Clamps
- Pocket Hole Jig
- Palm Sander
- Pipe Clamps
- 90 Degree Impact Attachment
- Sanding Sponge
- Pin Nailer
Materials Used
- Shiplap Paneling
- Wood Glue
- Pocket Screws
- Oak Pocket Hole Plugs
- Construction Screws
- Brad Nails & Pin Nails
- Wood Filler
- Piano Hinges
- Magnetic Door Catch
- Casters
- Door Knobs
- IKEA Countertop
Decor and Finishing Touches