Who loves wire closet shelving?! Not me! My wire shelving was constantly falling apart and I was always afraid it was going to rip out of the wall (despite being secured to the studs). I could not wait to replace the wire shelving with a custom closet! Here is how I built my custom DIY closet out of plywood.

Some other post that you might want to read that go with this article are:
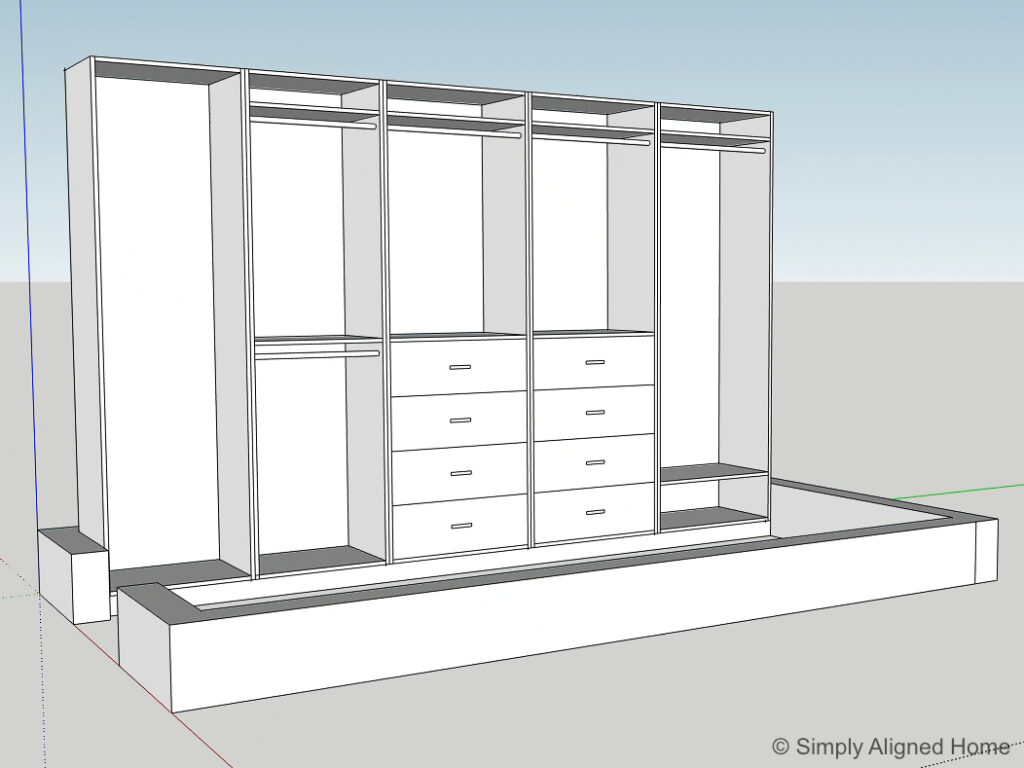
Design the Closet
I shared a detailed post on how I designed my closet and came up with an overall layout. When renovating a small space, like a closet, I feel as though it is best to fully design the space before you begin the renovation. This will ensure that you are fully utilizing the space.
**This post contains affiliate links to products that I used or recommend. If you purchase something through an affiliate link, I may receive a small percentage of the sale at no extra cost to you. I really appreciate your support.**
Demo
Before I could begin building the closet, I needed to remove the wire shelving!
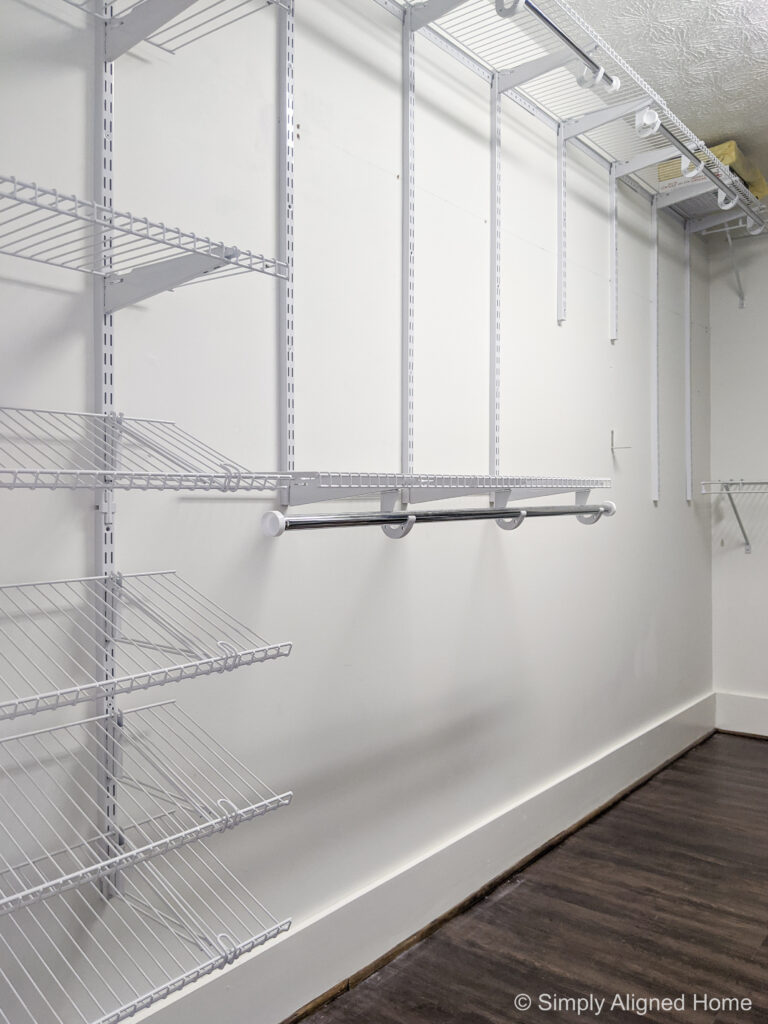
I removed all of the wire shelving, hardware and any anchors that were used. There were so many holes left behind!
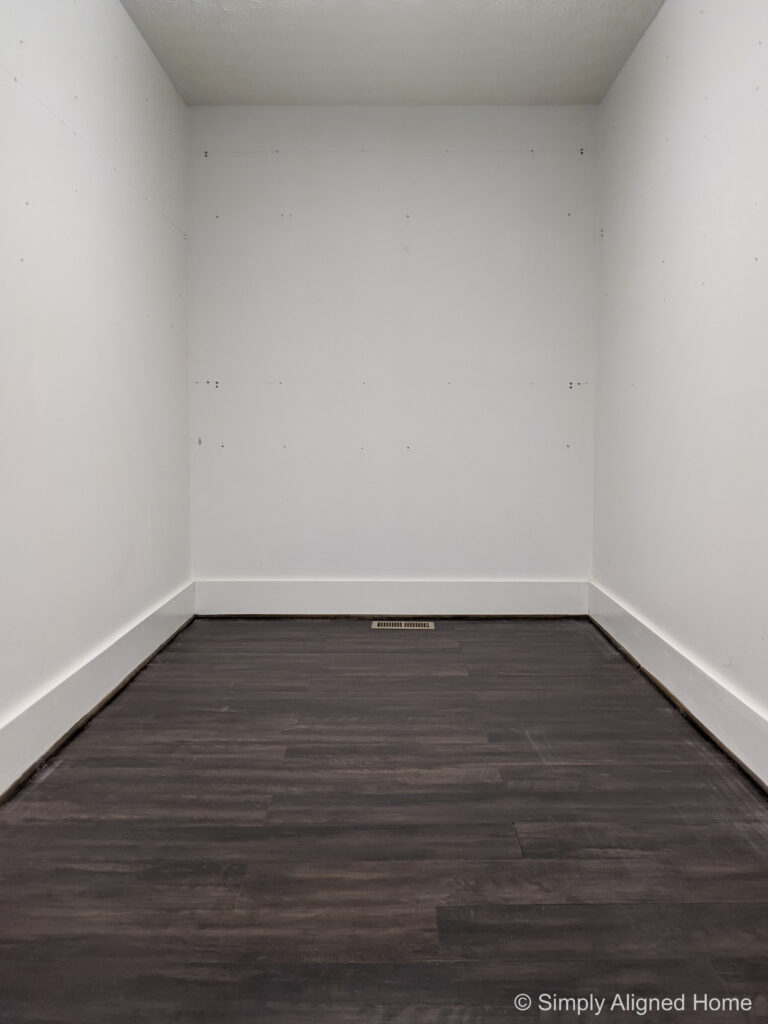
Once all of the shelving was removed, I removed the baseboards and set them aside to be reinstalled later. I did this by scoring the caulk between the drywall and baseboard with a knife. Using a trim puller, I then pried the baseboard off of the wall.

I patched any holes left behind with spackle. Once the spackle was dry, I sanded it smooth and primed and painted the walls.
Purchase the Materials
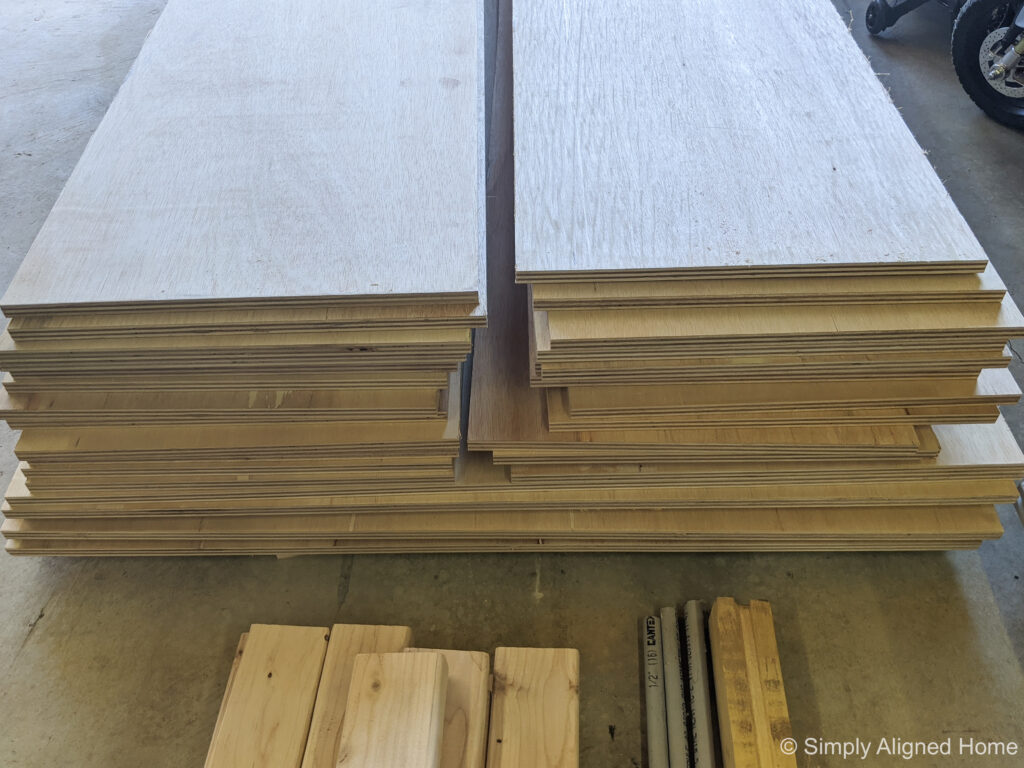
I did my best to estimate the number of sheets of plywood I would need to build the closet. I wanted to place an online order for pick up to minimize the number of trips I would need to take to the store. When I went to pick up my order, they had the plywood perfectly bundled and ready to place in the back of my truck. It would have been so much work to have to load all of that plywood on my own…I think I ordered like 20 sheets of plywood!
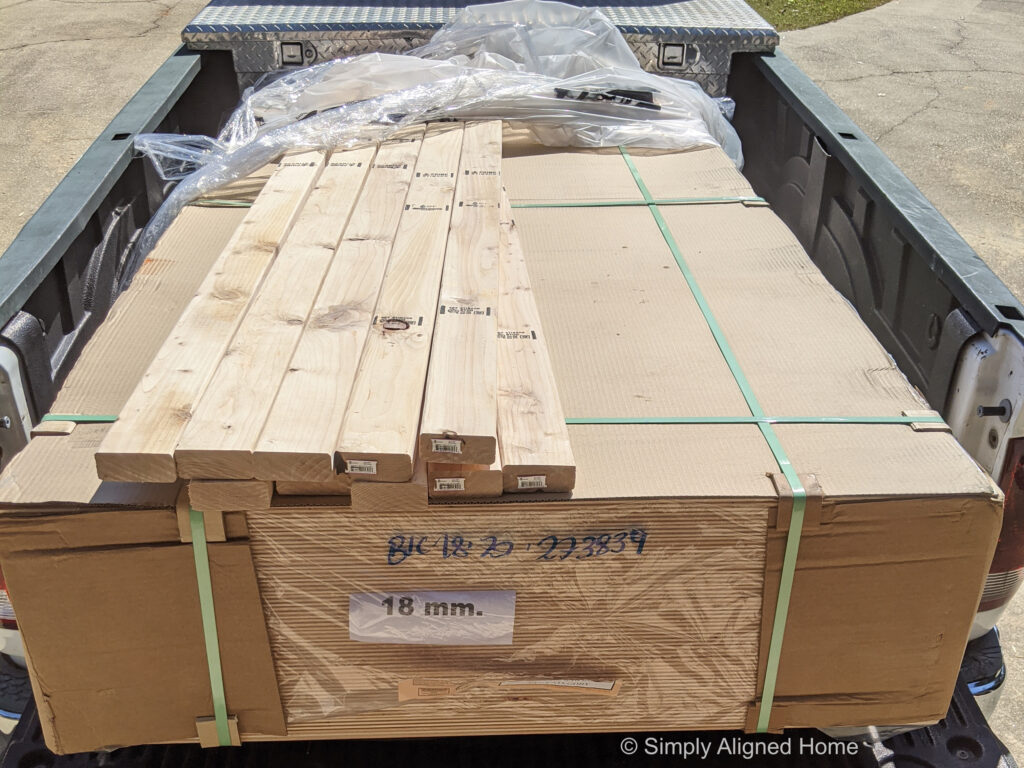
As for the type plywood I selected, I went with a 3/4″ paint grade plywood. Paint grade plywood is a little cheaper than a stain grade plywood. It does have some imperfections, but looks just fine when painted.
Along with the plywood, I also purchased a few 2×4’s (to use for the base), wood glue and construction screws. I decided I would buy any additional materials that I needed later on…I just couldn’t wait to get started!
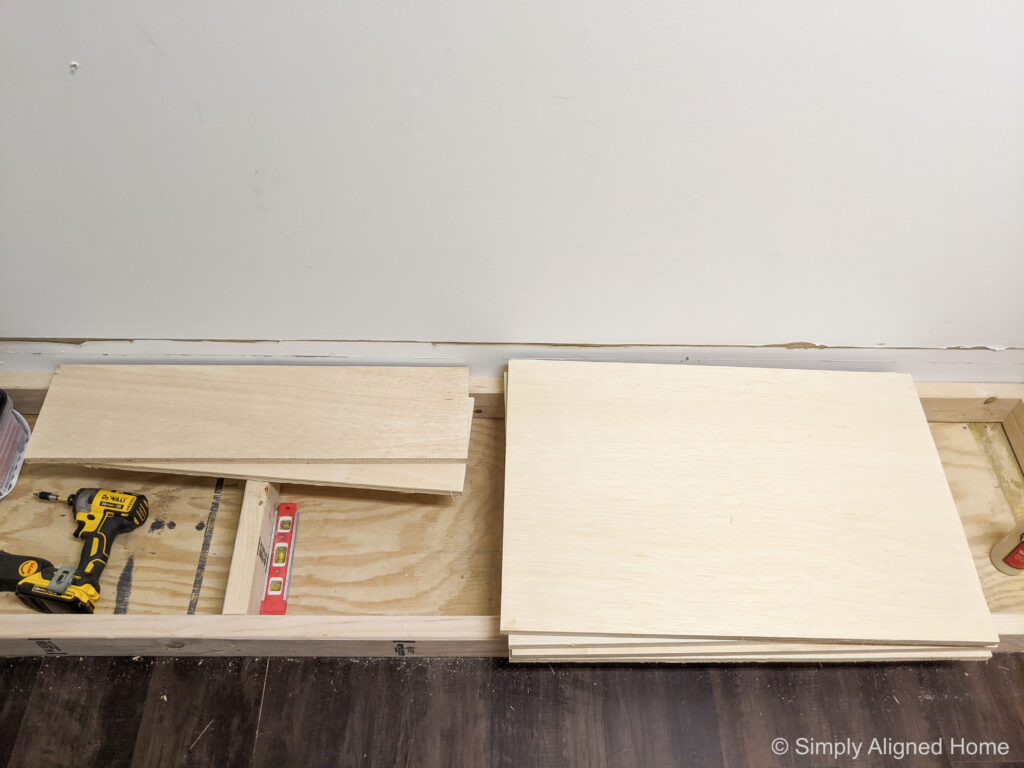
Install a Base
I didn’t want my closet units to sit directly on the floor, so I decided to build a base first. This would allow me to add a small baseboard to nicely tie all of the units together.
I made my base out of 2×4’s. The base ran the full length of the closet and had cross members where the edges of upper units would sit. Having the closet already designed made this part quick and easy! I didn’t have to guess where the cross members needed to go.
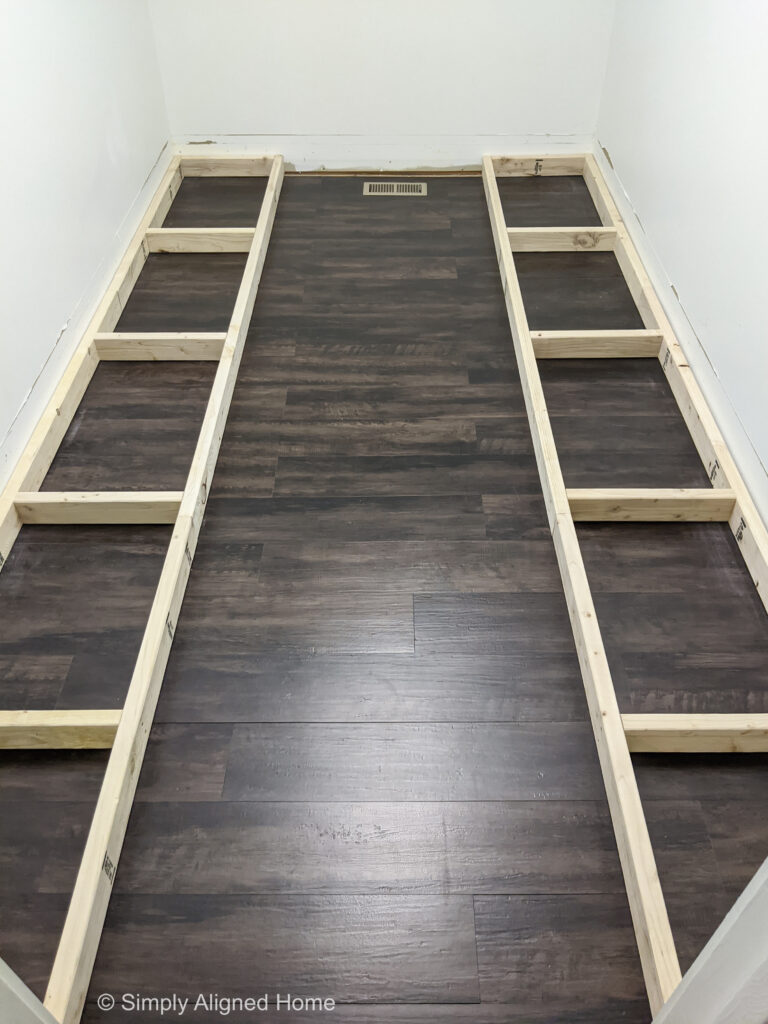
We have LVP (luxury vinyl plank) flooring throughout our home. It has a soft backing, so I wanted to remove the flooring under the base. If you have carpet in your closet, it is necessary to remove the carpet where the closet units will be installed.
Once the base was built, I was able to cut the LVP flooring with my oscillating tool where it needed to be removed. I then made sure the base was level before securing it to the wall studs in multiple spots. I used shims to help level it out.
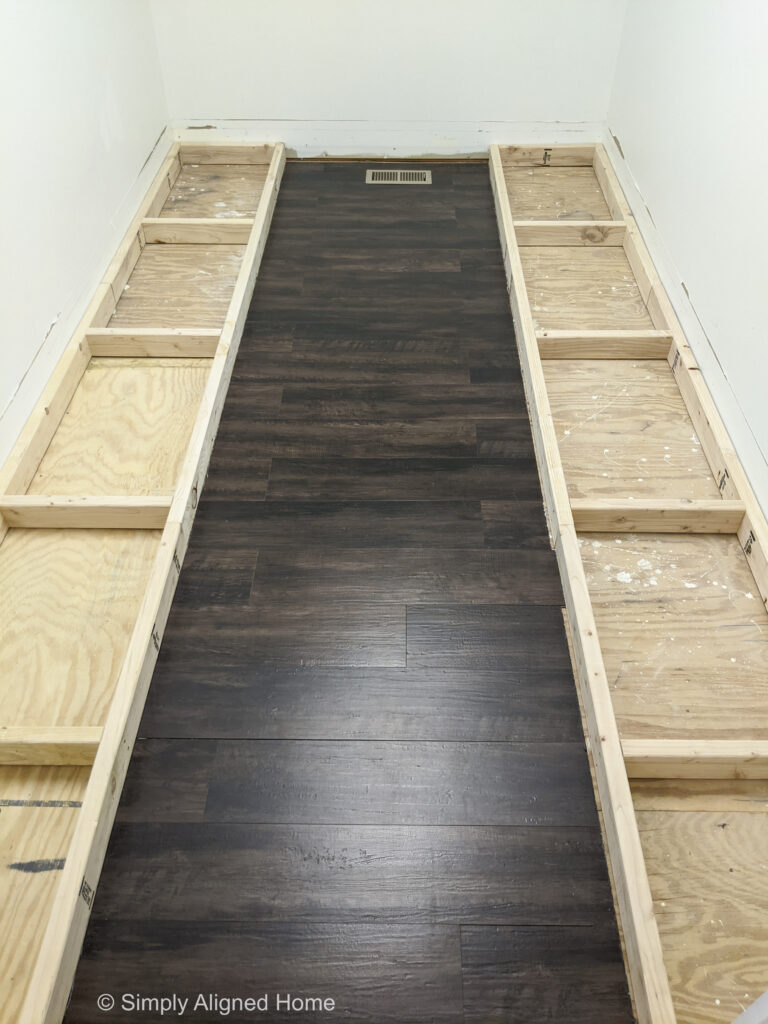
Make the Closet Units
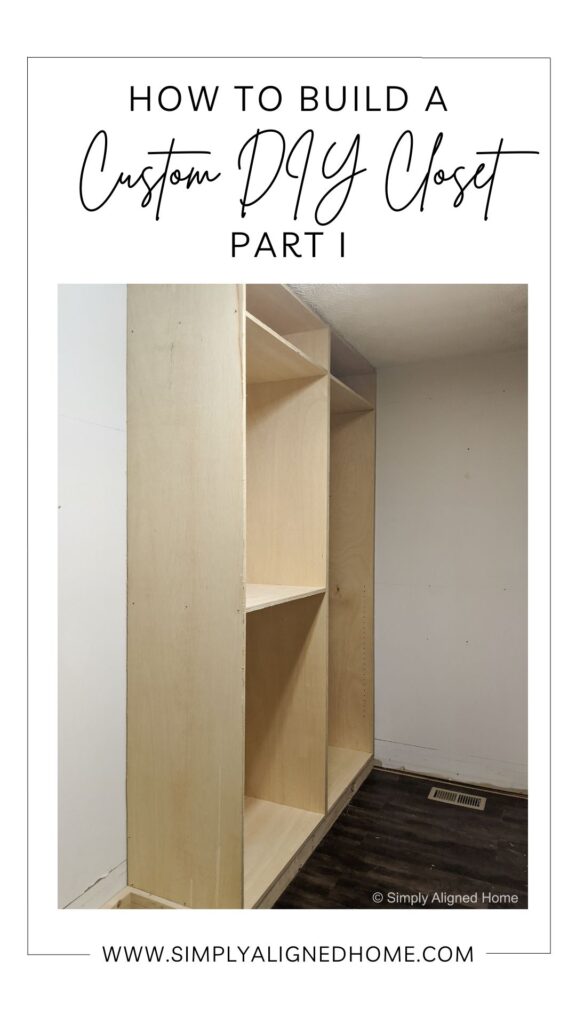
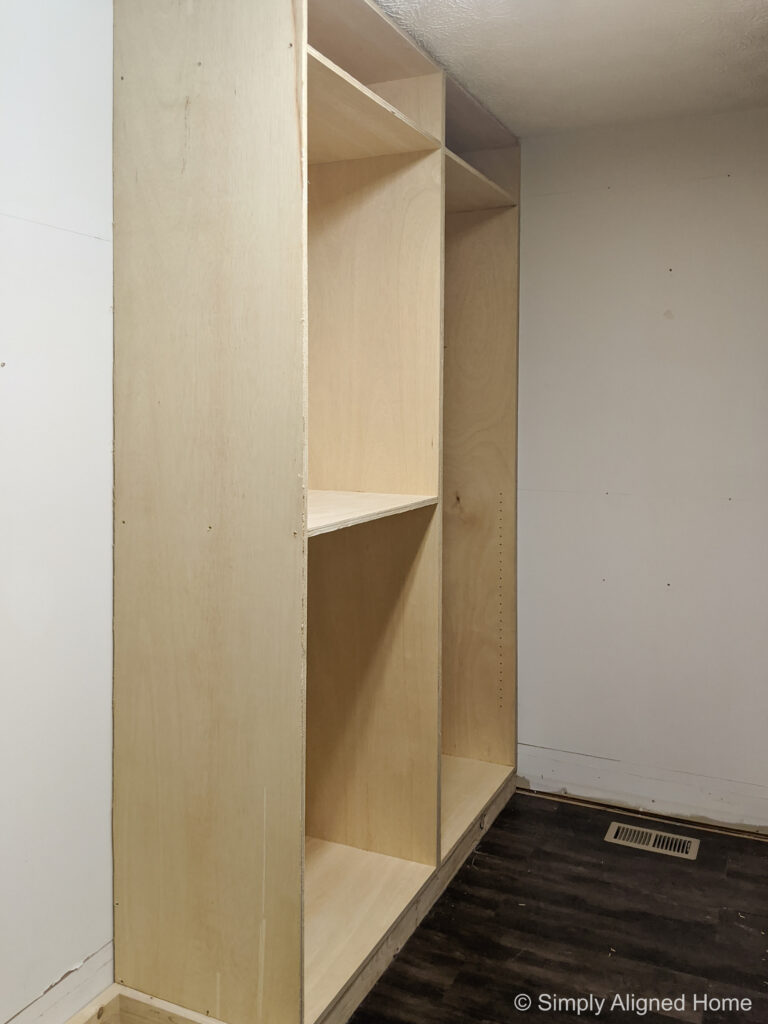
Based on my design, I needed ten total closet units (five per side). I made the closet units one at a time and secured them together once they were built.
Rip the Plywood
First, I ripped several pieces of plywood to the depth of my closet units with my table saw. Since I decided to make my units 20″ deep and the pieces of plywood that I purchased were 48″ wide, I had minimal waste!
Cut the Vertical Pieces to Length
With a base made out of 2×4’s and a set ceiling height of 8’, I knew the potential maximum height of my closet units. I decided to make the units 3/4″ shorter than the ceiling. This allowed me to easily fit the units into place.
Using my miter saw, I cut twenty (20) pieces down to 91-3/4″ long for the vertical pieces of the units.
Cut the Top, Bottom and Shelving Pieces
Now for the horizontal pieces…I designed my closet to have three units that were 29-1/2″ wide and two units that were 24″ wide per side. The horizontal pieces were the same depth as the vertical members, but I cut eighteen (18) pieces 29-1/2″ long and twelve (12) pieces 24″ long.
I did consider adding back panels to the units to add to the rigidity of the units, but I decided that adding a small panel at the top and bottom of each unit would be sufficient. These panels would help keep the units square and allow me a way to secure them to the studs. You can see the panels in the photo below.
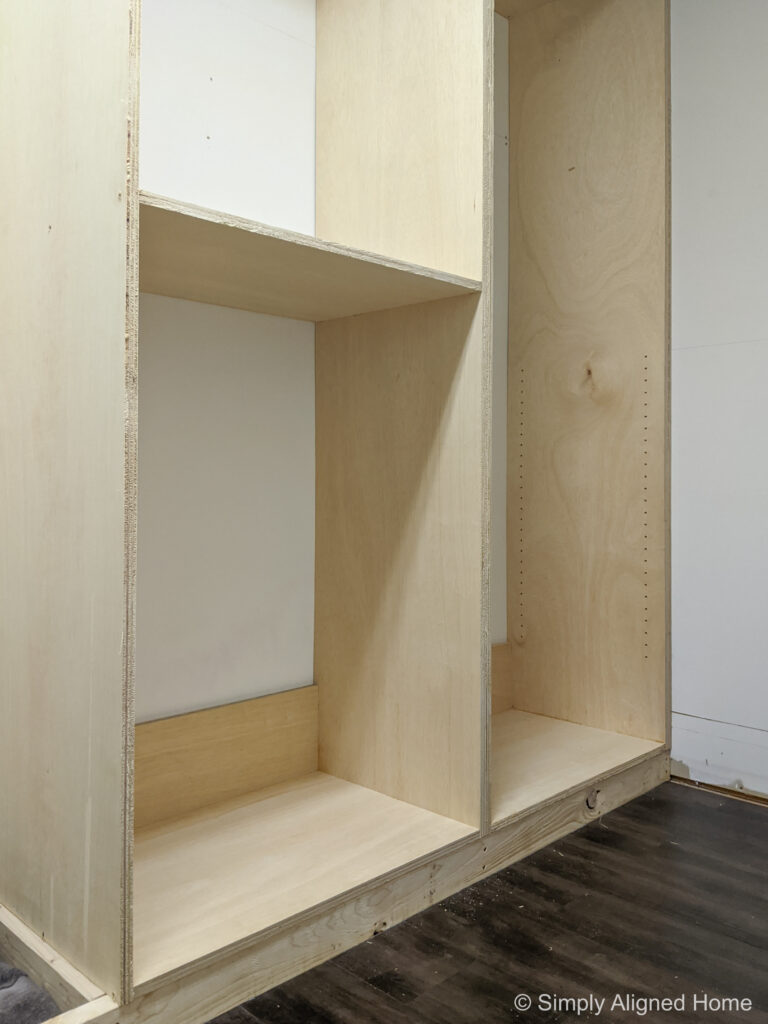
These panels were roughly 10″ wide. I cut six (6) 29-1/2″ long and four (4) 24″ long.
Assemble the Closet Units
Here is where I start to share my fails of the project.. I attempted to assemble the units in my shop and then carry them into the closet. Not only were they very heavy and not easy to carry by myself, I struggled to get it into the hallway to my room.

After struggling to get the first unit into the closet, I decided I needed to assemble them in the closet. If you are going to assemble them in the closet, be sure that you have enough space to lift them up and set them into place. It may be necessary to build the units in place if you do not have enough space.
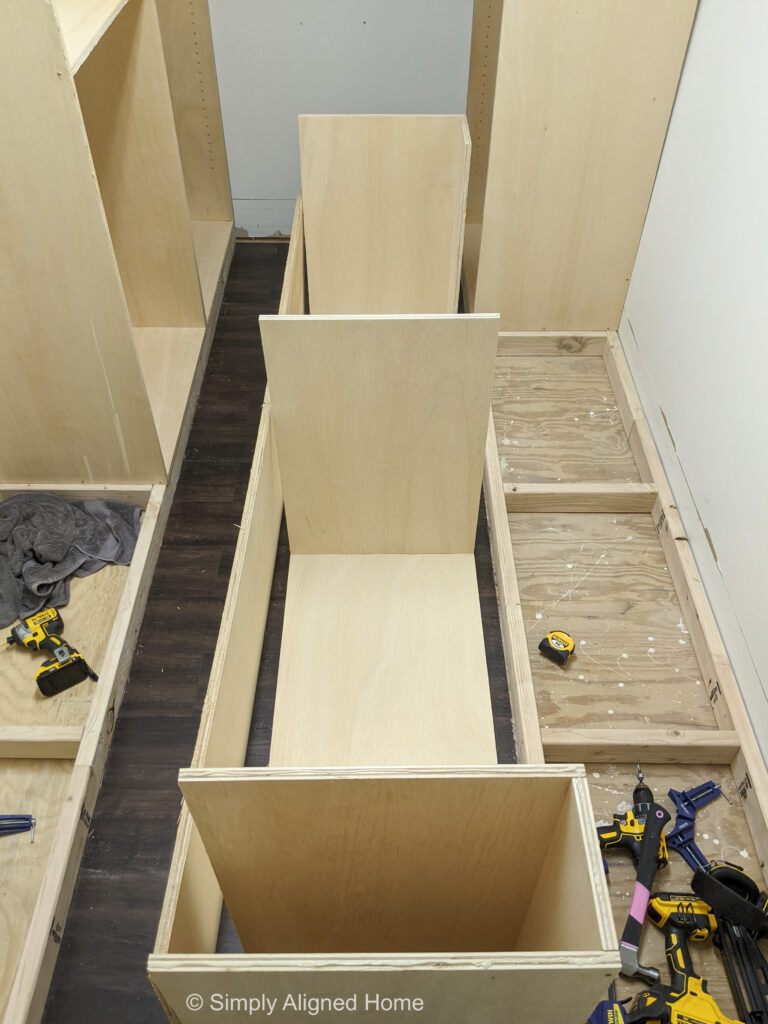
I used wood glue and construction screws to assemble the units. Corner clamps were the true MVP of this project! I used the corner clamps to hold everything in place while I screwed it together.
I set the units into place as I finished assembling them.
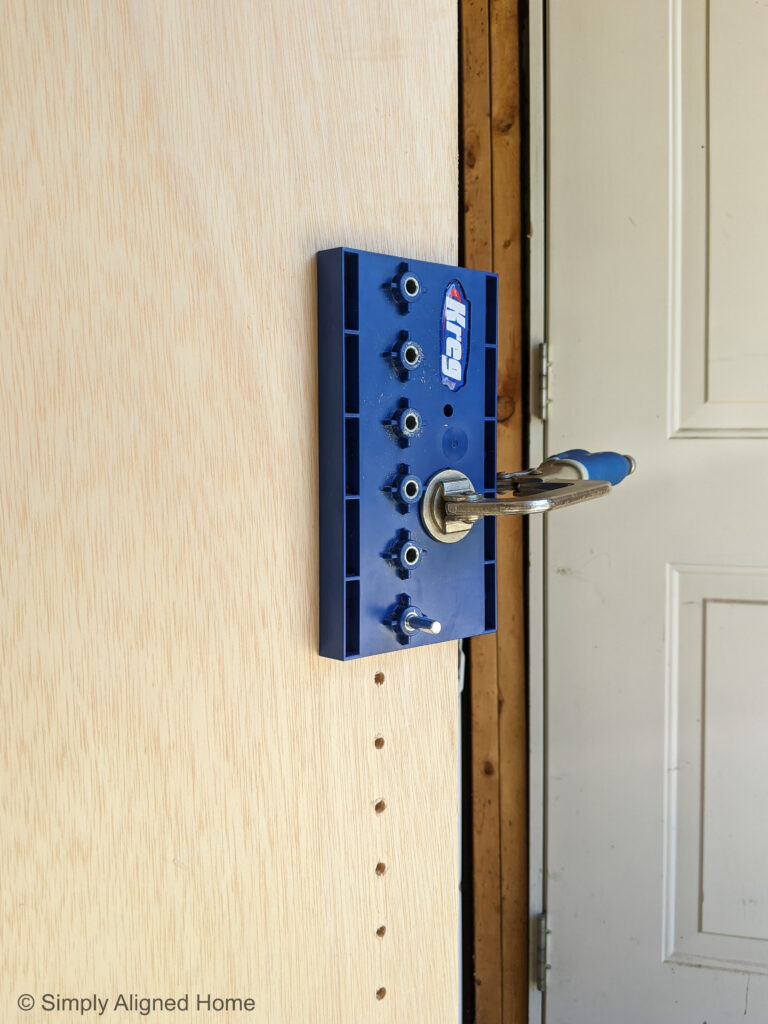
Add Shelf Pin Holes
I designed my closet to have one unit per side that would only have shelving. Once the units were built, but before they were installed in place, I added shelf pin holes to those two units. Shelf pins offer the flexibility to adjust the shelving to whatever height we would like. The shelf pin holes are actually really easy to add when using a shelf pin jig!
Secure the Closet Units
Once all of the units were in place, I secured them to each other using construction screws. I made sure they were not going to move by also screwing them into the base and to the studs.
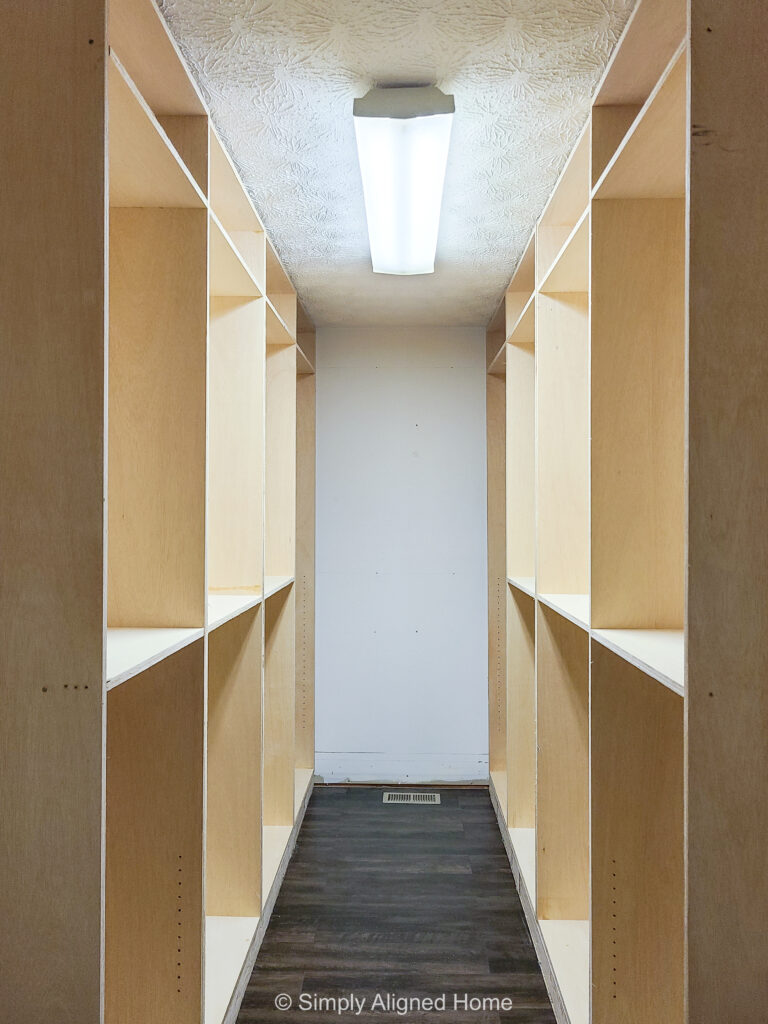
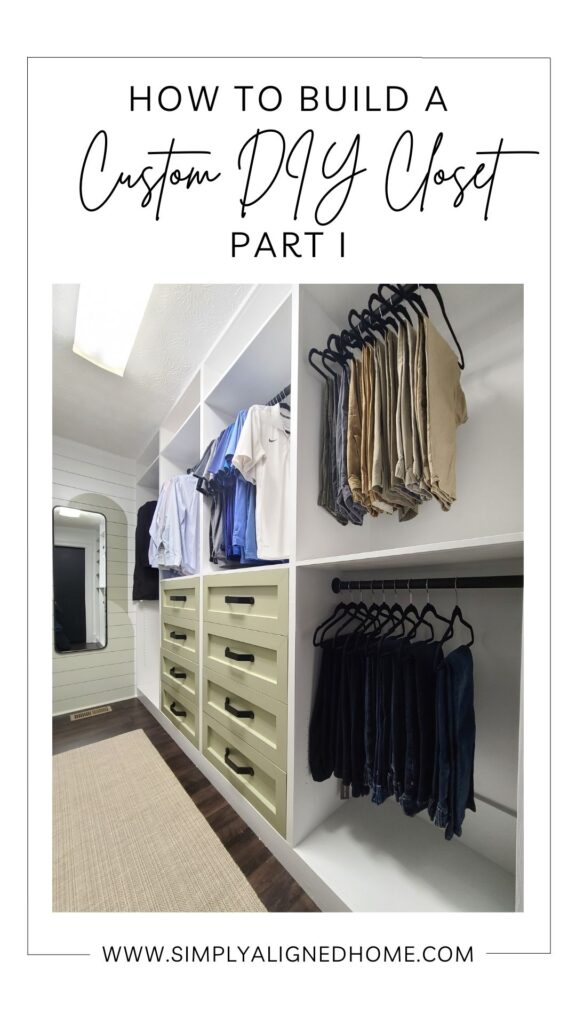
With the closet units in place, I could really start to see just how amazing this closet was going to be! There are still so many steps to complete the custom closet build, but I thought it would be best to break it into two different posts. In How To Build A Custom DIY Closet Part 2, I share how to trim the units, build and install the drawers and finish it all off!

**Note: I am not a professional and do not claim to be an expert. Please be sure to always read instructions for all tools and products. Safety is very important and should be your top priority. Wear necessary protection when using tools (eye wear, hearing protection, gloves, etc.) and dust masks when sanding or cutting. Simply Aligned Home is not responsible for any injury or damage. All of my designs are not professionally designed and are for private use only.**