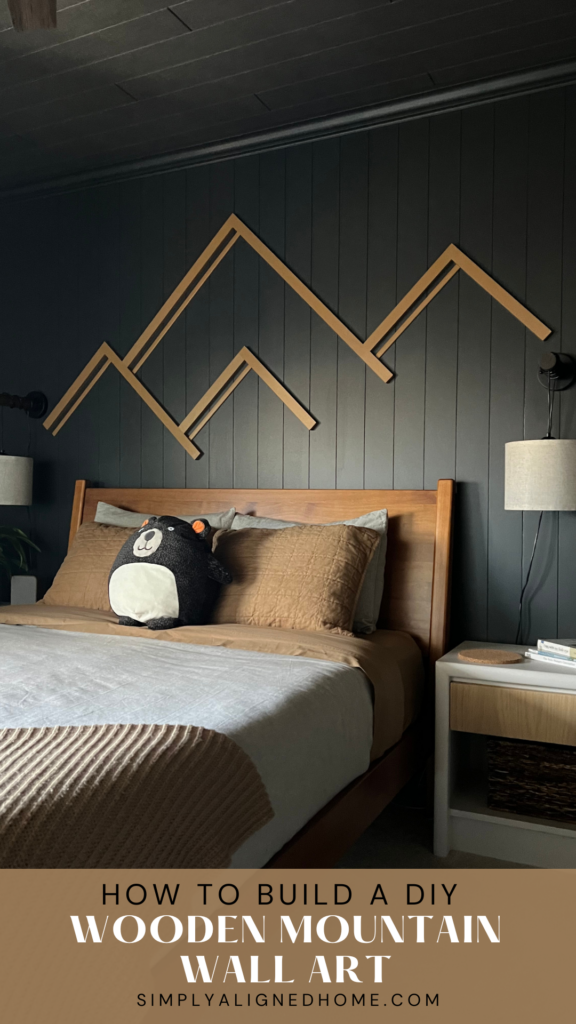
Transform your space with a touch of nature-inspired mountain wall art! Whether you’re a seasoned woodworker or a novice DIY enthusiast, this tutorial will empower you to bring the beauty of the mountains indoors by adding a personalized and captivating touch to your home.

Ever since I revamped my son’s room, I felt like it was missing something. I needed something to go over his bed that would create a striking contrast with the Iron Ore painted walls. Since we live near the mountains, I thought this would be the perfect addition to his room!
**This post contains affiliate links to products that I used or recommend. If you purchase something through an affiliate link, I may receive a small percentage of the sale at no extra cost to you. I really appreciate your support!**
A Guide To Building A DIY Wooden Mountain Art Piece
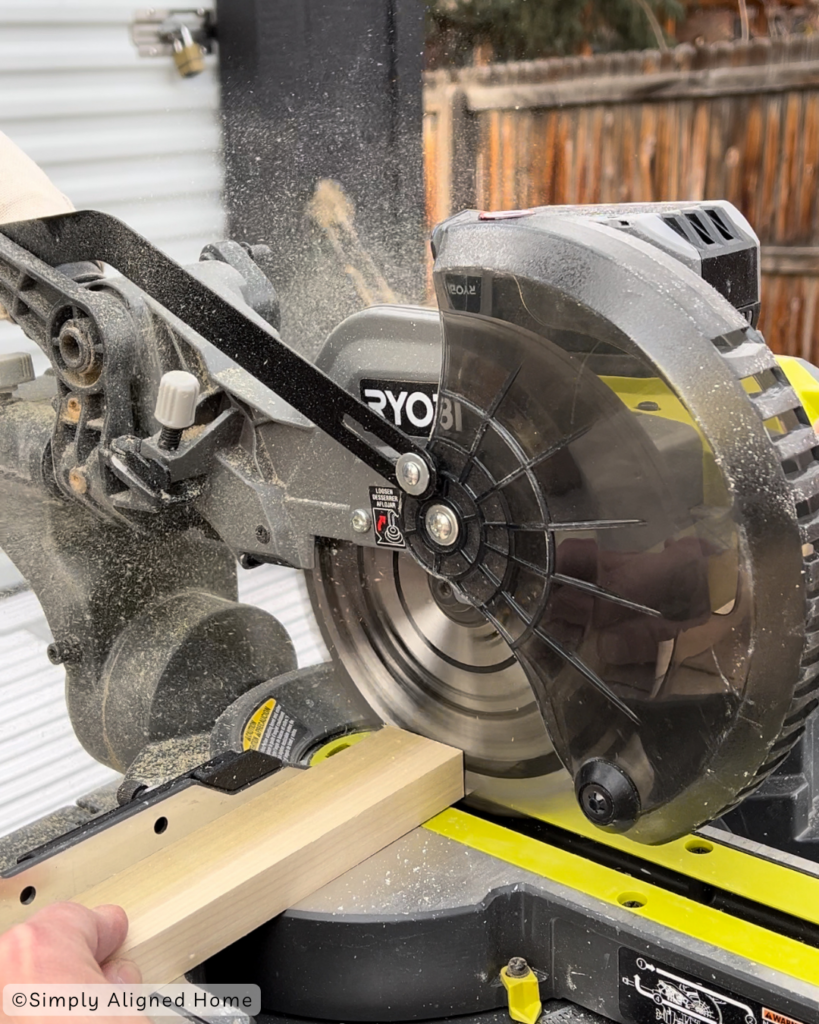
Cut Wood To Length
First step, to building these mountain art pieces is to gather a couple 1×2’s and some small trim pieces. The choice of wood is flexible, with options such as pine, poplar, and oak.

Next, assess the number of mountains you aim to create and the available space for your project. Once you’ve determined these factors, proceed to trim your pieces accordingly.
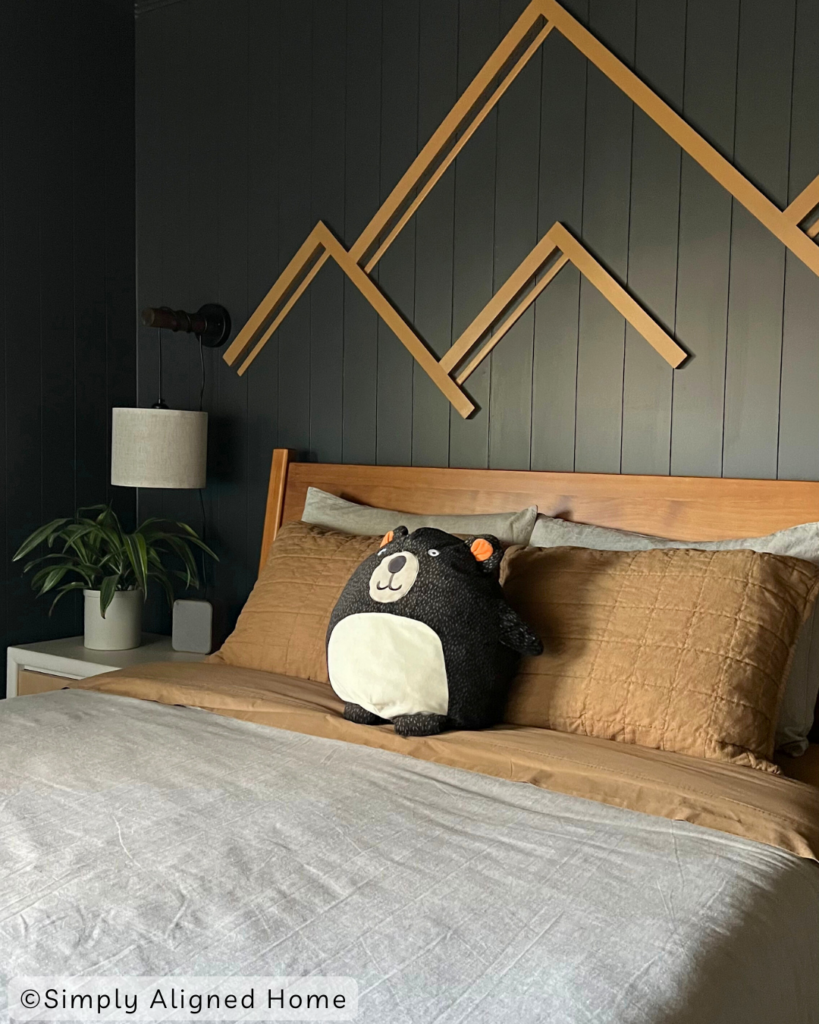
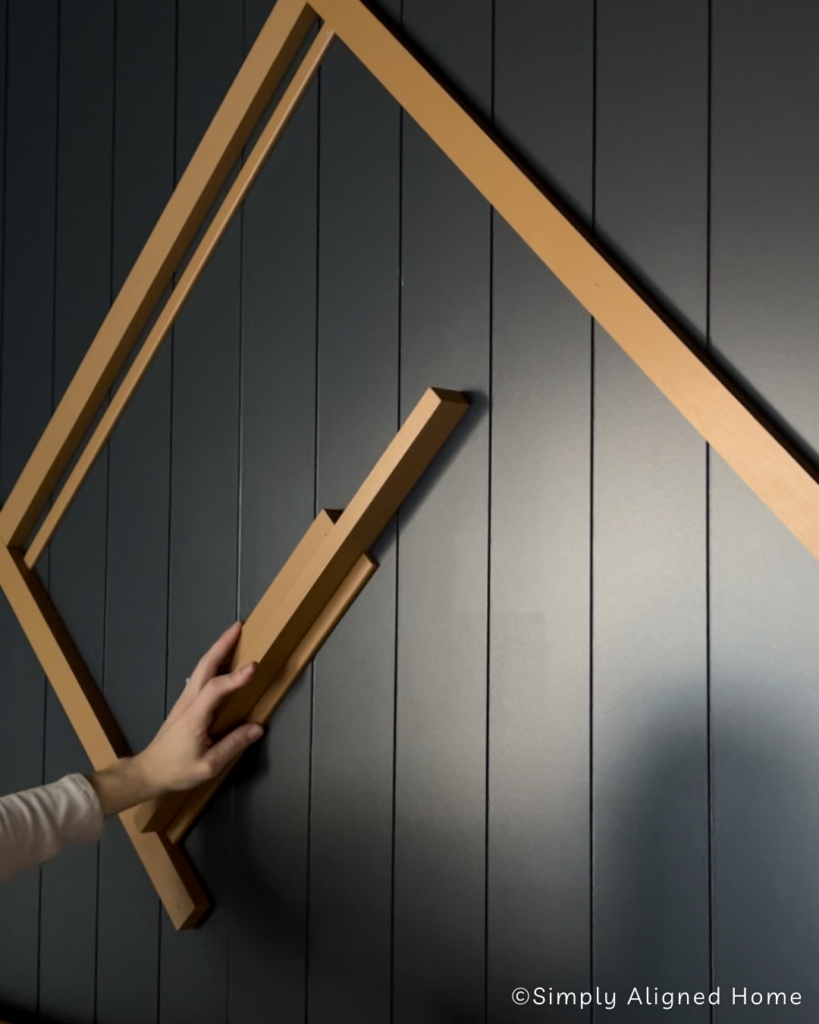
When cutting the wood, ensure a variety in sizes, both small and large mountains. This technique imparts a sense of depth, creating the illusion of some mountains being closer while others recede into the distance.
The small trim pieces I only paired with one side of each mountain. I felt like this gave it a more detailed look and created more depth to the artwork.
Paint Your Mountain Pieces
We are halfway done with our mountain art work and it’s time to paint! Since this wasn’t a huge piece of art, I decided to only buy a paint sample instead of a full quart in the color I chose. I wanted something that was true to nature but that stood out from his Iron Ore colored shiplap.
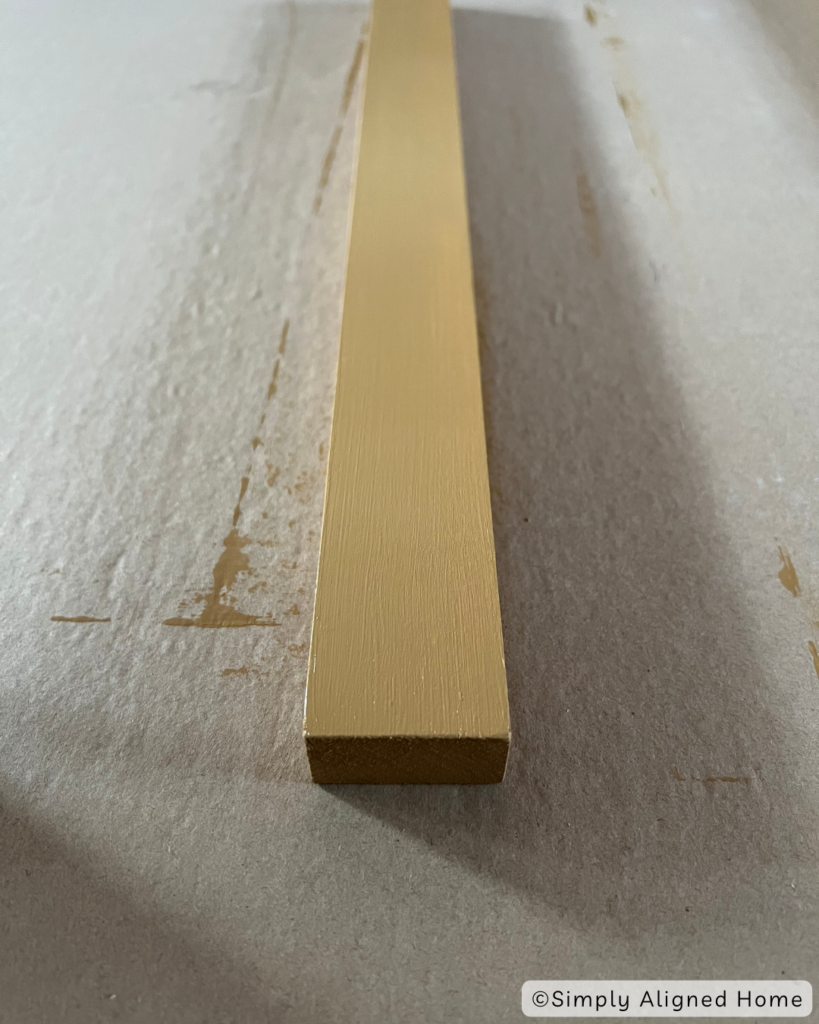
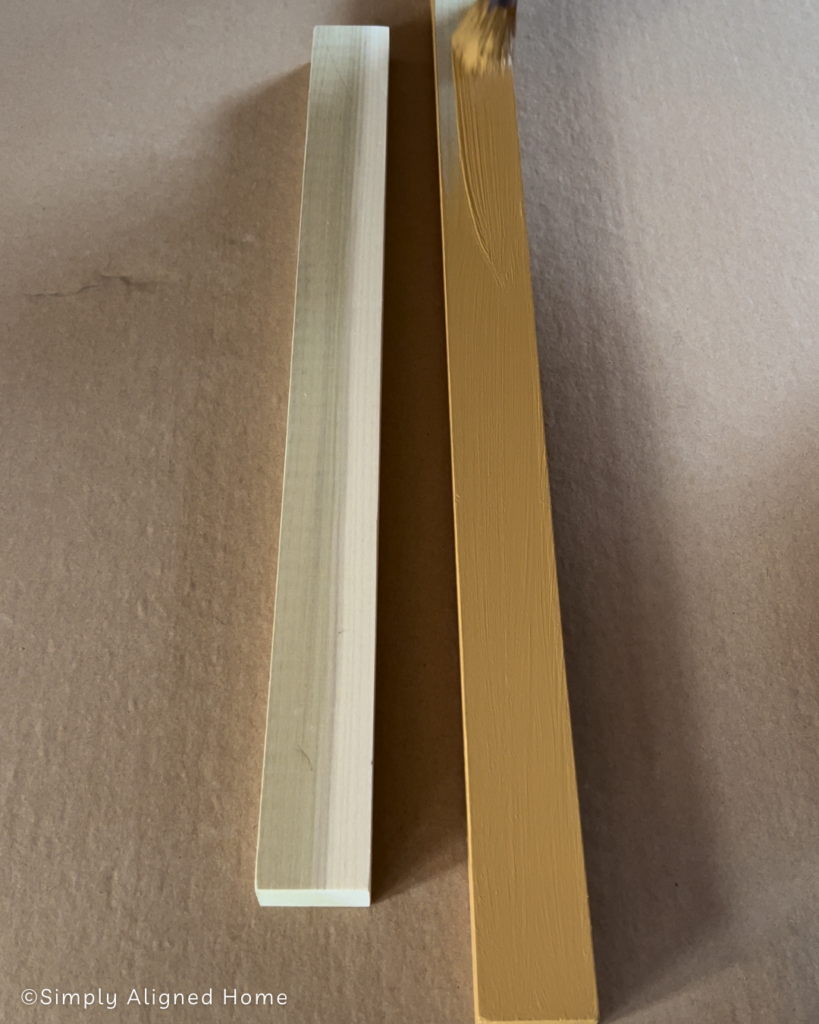
When looking through sample colors I landed on the color Antique Penny by Behr Paint.
Start out by laying all your pieces of wood on a flat surface. Then paint the top and both sides of each 1×2 and small trim pieces.
Installing Artwork On The Wall
The last step is getting those mountains up on your wall! You are going to need a speed square to install these mountains correctly. Once you have your speed square you want to make sure you are installing your pieces at a 45 degree angle. For me I was going off the shiplap on the wall and installing it at a 45 degree angle from that.

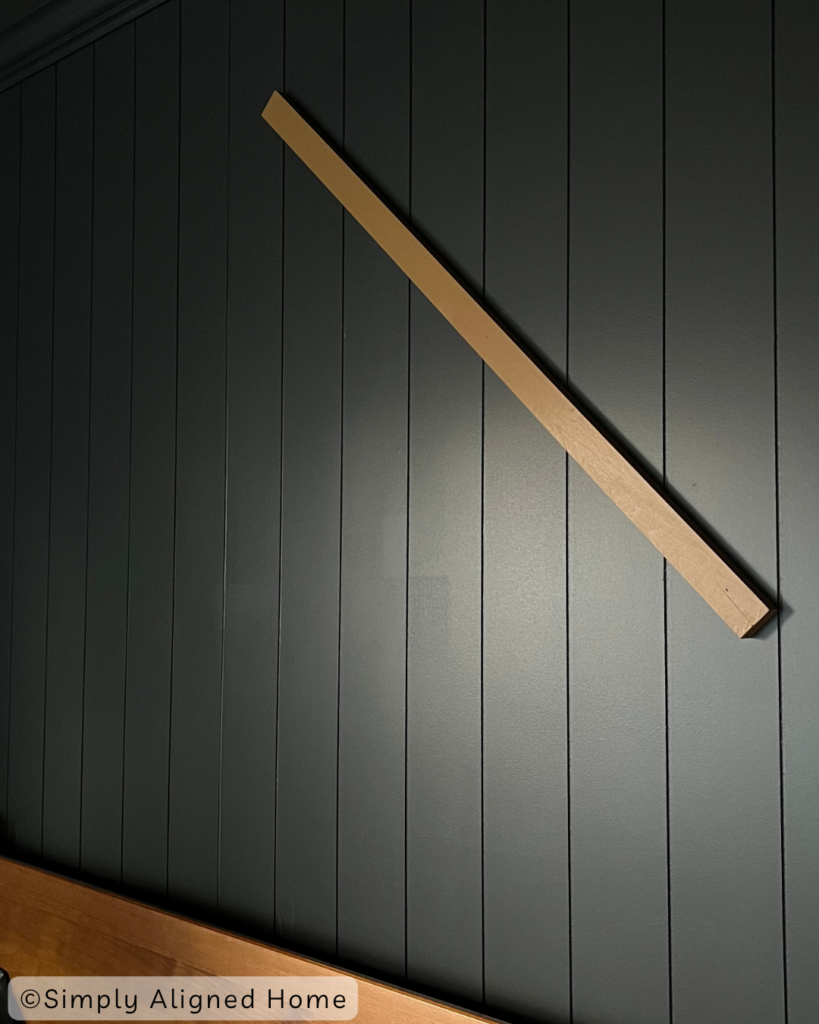
If you don’t have shiplap on the wall you could always use a laser level to go off of to make sure it’s straight. To attach them to the wall I used my brad nailer with 1-1/2″ brad nails. I installed the nails at alternating angles to hold them securely to the wall.
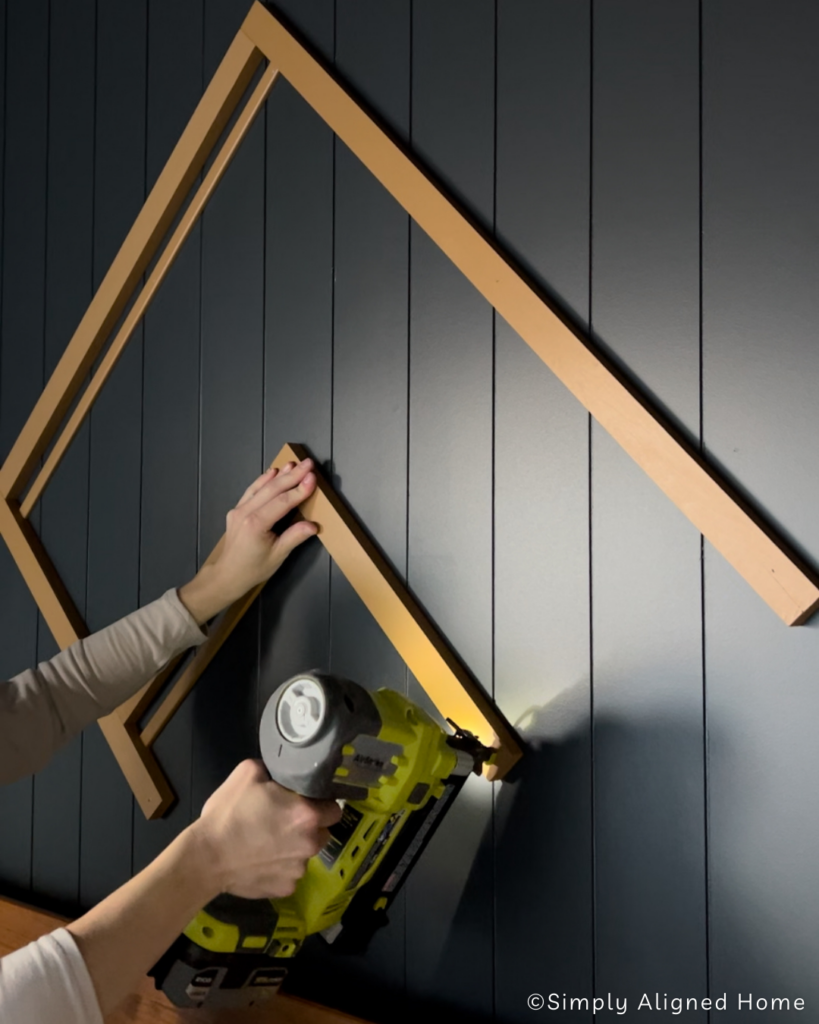
To attach the small trim pieces I used the same brad nails and took a spare 1×2 turned it on it’s side and used it as a spacer. That way it was the same width from the 1×2’s on every mountain.
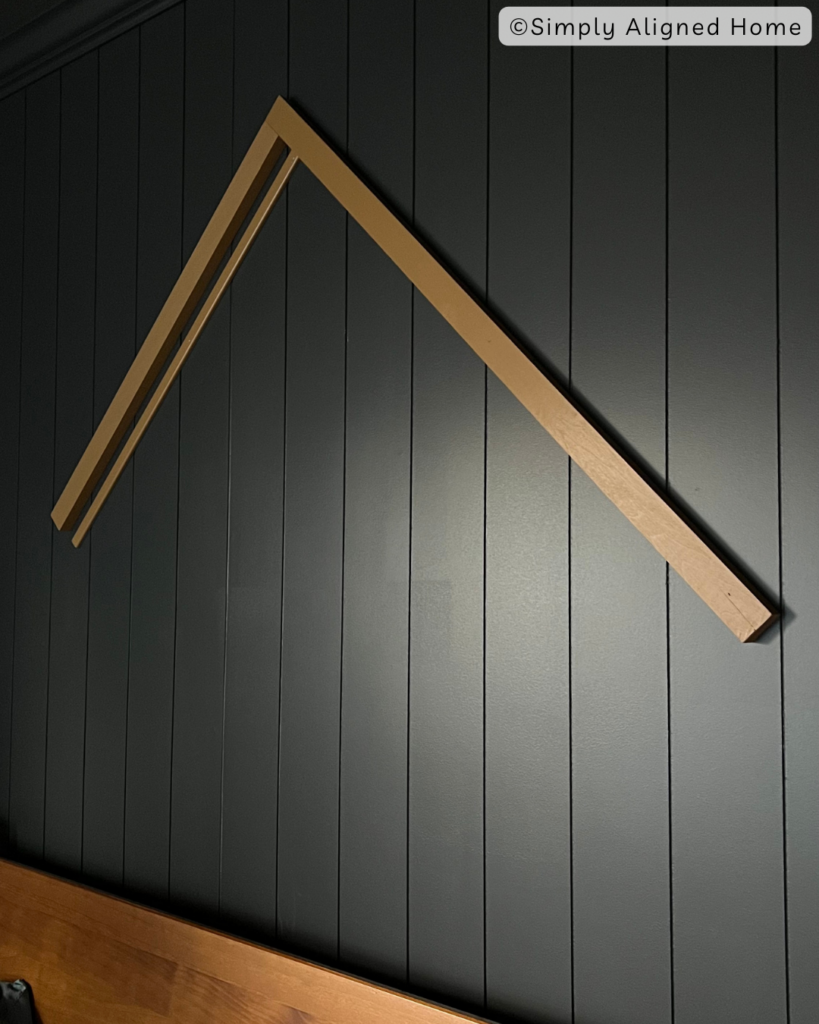
Once, your mountains are on the wall how you like them, take your spackle and fill all nail holes and seams where the two pieces of 1×2’s touch. When that’s dry, give it a light sand and touch up with leftover paint.

There you have it…DIY wooden mountain artwork! I am so thrilled with how it turned out, I feel like this is exactly what this space needed.

**Note: I am not a professional and do not claim to be an expert. Please be sure to always read instructions for all tools and products. Safety is very important and should be your top priority. Wear necessary protection when using tools (eye wear, hearing protection, gloves, etc.) and dust masks when sanding or cutting. Simply Aligned Home is not responsible for any injury or damage. All of my designs are not professionally designed and are for private use only.**
Materials Used
- 1×2 Wood Pieces
- Small Trim Pieces
- 1-1/2″ Brad Nails
- Spackle
- Paint Sample- I Used Behr Paint In The Color Antique Penny
- Sandpaper or 220 Grit Sanding Block
Tools Used