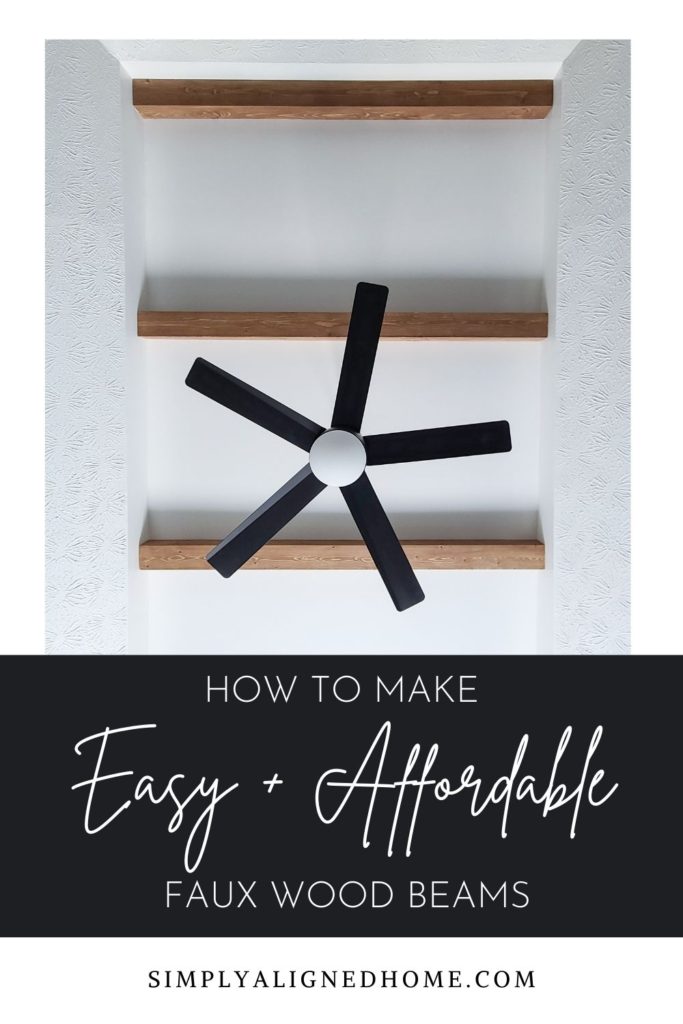
There are some home features that seem like they would be difficult and expensive to install. Wood beams, in my opinion, were one of those features…until I actually installed them in our master bedroom! Not only were they very affordable, they were so easy to install!!
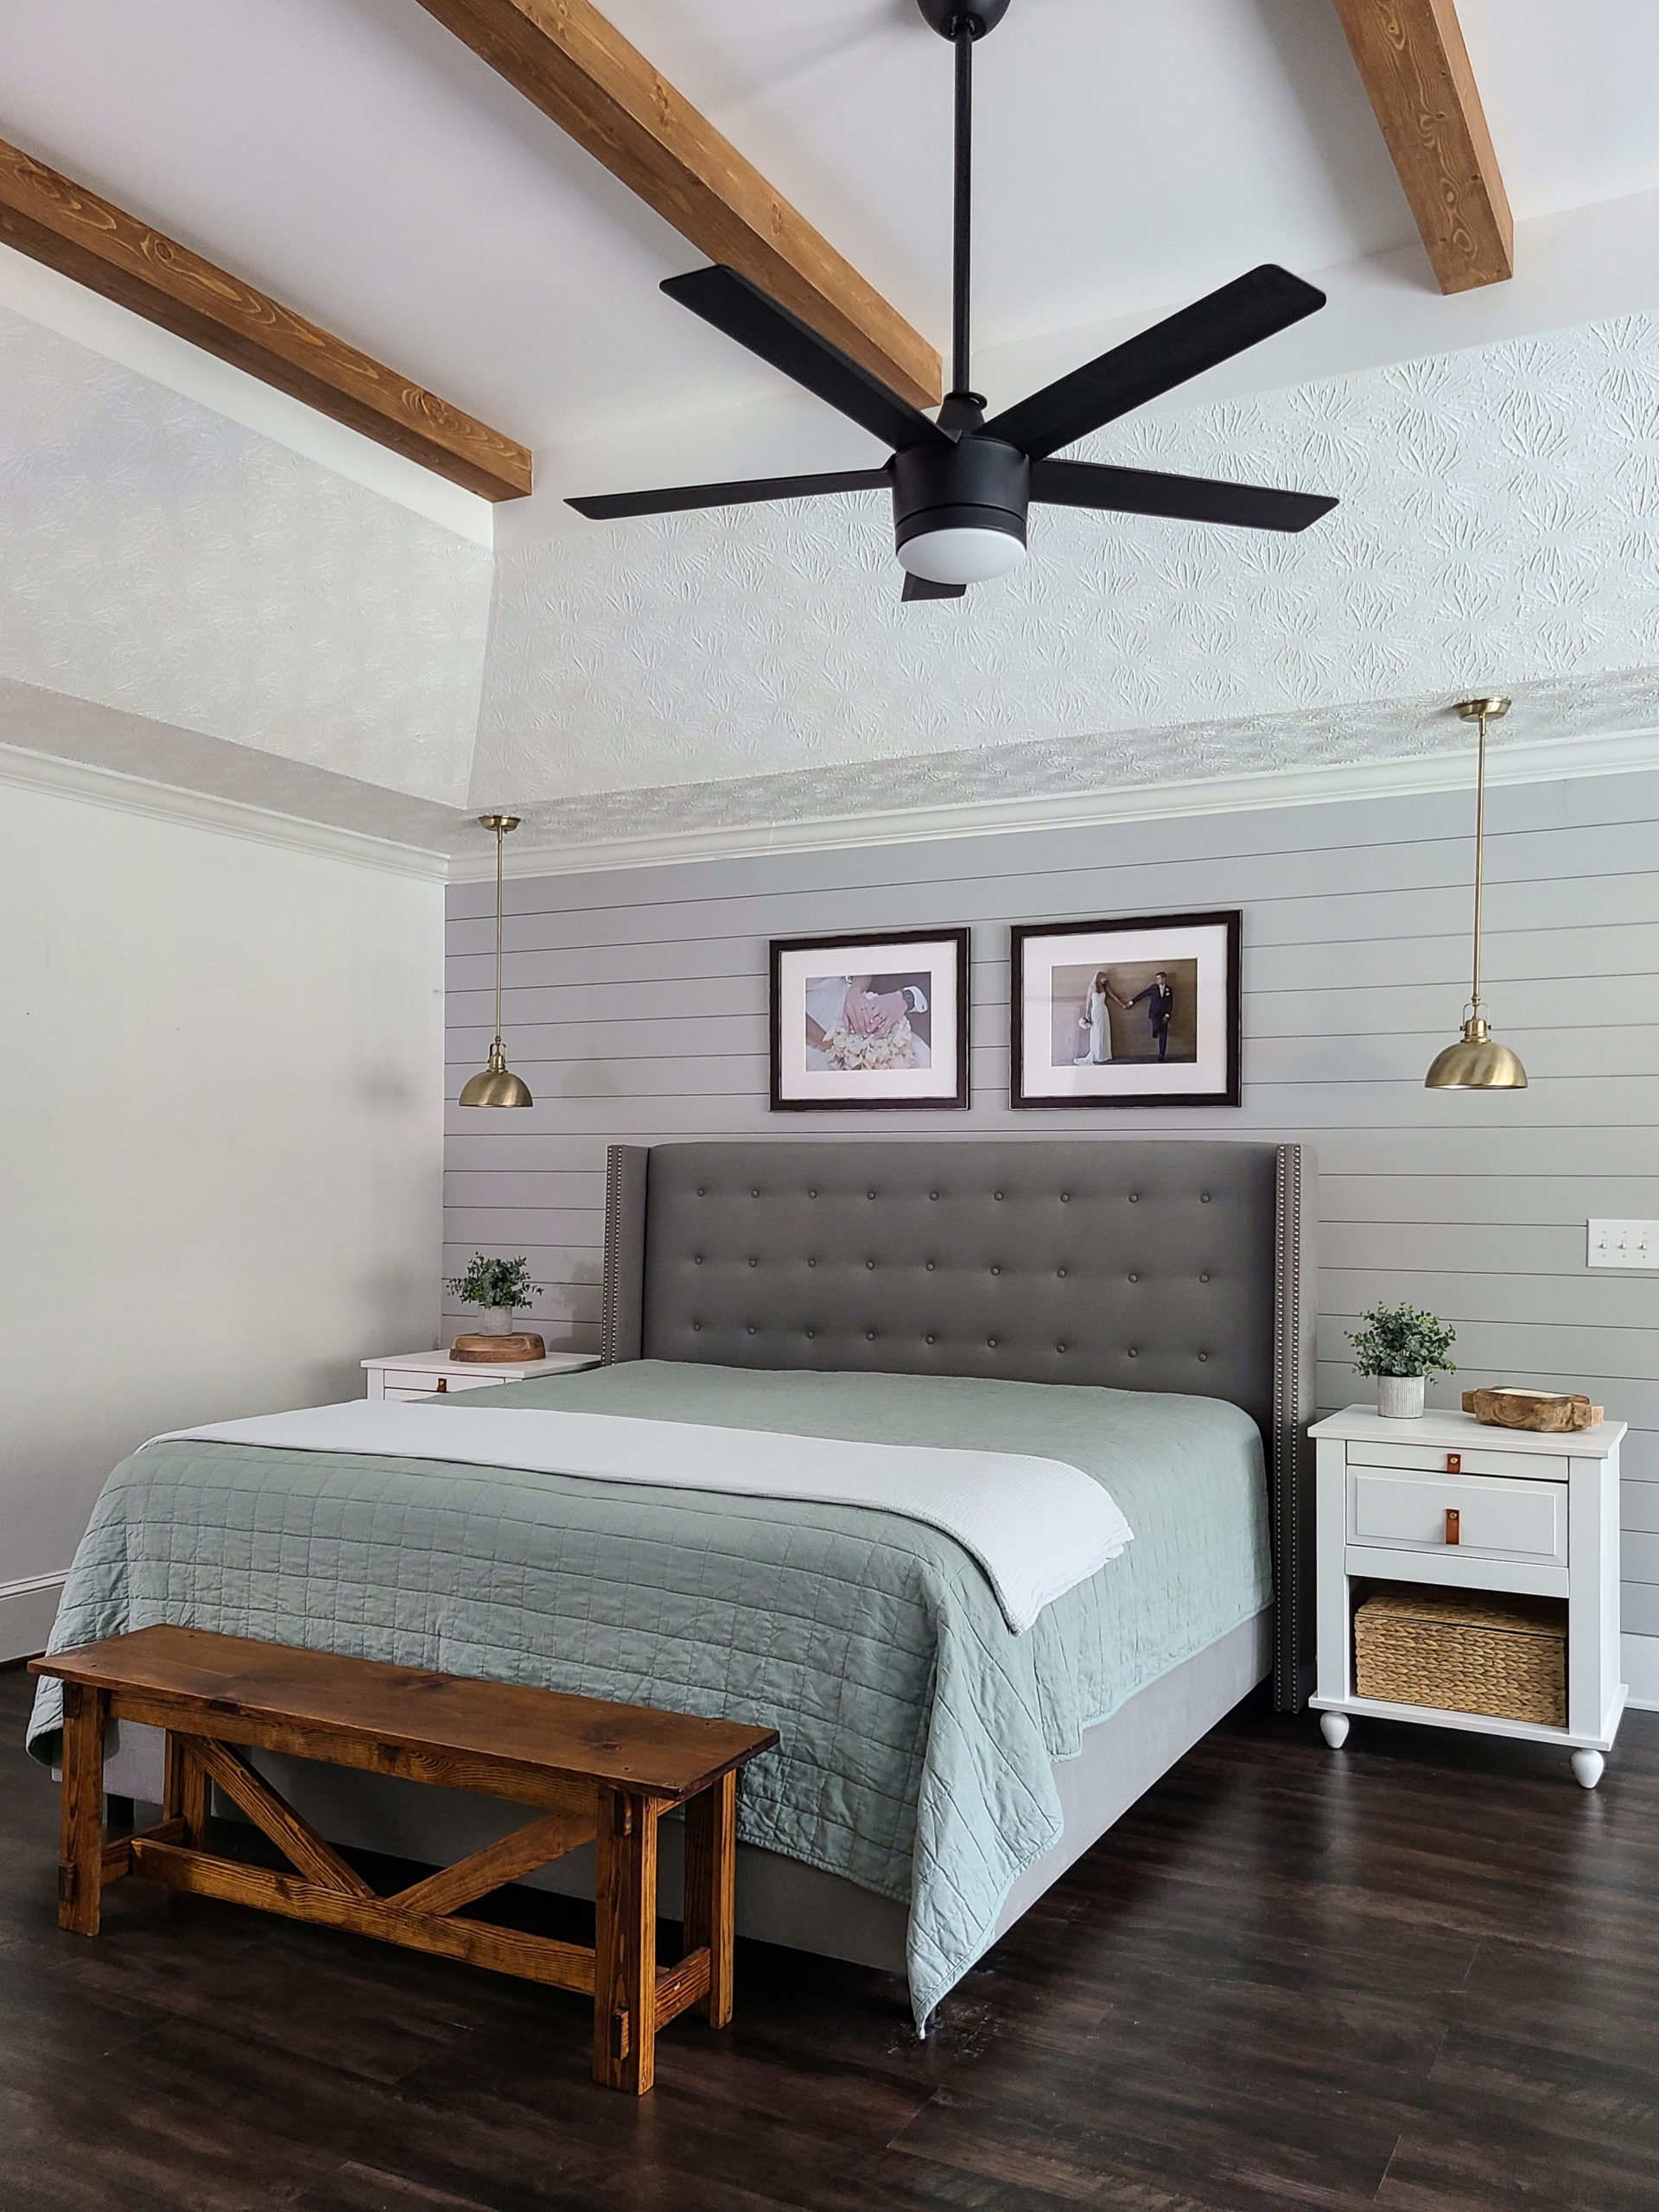
The faux beams added so much character and warmth to our room! They were so easy to install that I’m actually considering installing them in two other rooms in our home.
Here is how I made and installed my faux wood beams!
Select the Wood
I wanted wood that was affordable and lightweight, yet full of character. After debating whether to use plywood, common board, select pine or a nice hardwood, I settled on common board (also known as unfinished pine board). It is the most affordable wood at my local hardware store and has so much character. Common board is a knotty pine. There are a lot of imperfections in the wood, which is why it is cheaper than select pine. It is also relatively lightweight…perfect for the faux wood beams that would be hanging over my bed!
Cut the Wood
There are two main ways to cut the wood for faux beams. The wood can either be joined with miter or butt joints. Miter joints give the beams a more seamless look, but ripping wood on a 45 degree angle is more difficult than making a straight cut.
I the joints would not be very noticeable with the stain that I selected and ultimately decided to make my life easier by going with butt joints. (I’m so glad I went this route!)
I started with 1×4 common board for the vertical pieces and 1×6 common board for the bottom face of the faux wood beam. I decided to use 2×4’s to mount the wood beams to the ceiling and I wanted the beams to fit snuggly over the 2x4s. Therefore, I chose to rip the 1×6 boards down to 5-1/16″ wide.
I cut the 2×4’s to the length of the ceiling where the beams would be installed.
Make the Faux Wood Beams
There are two different style beams that I made for my ceiling…edge mounted beams and center mounted beams. The edge mounted beams were the ones that mounted right up to the side wall of my ceiling. For ease of installation, I made these L-shaped. I made the center mounted beams U-shaped.
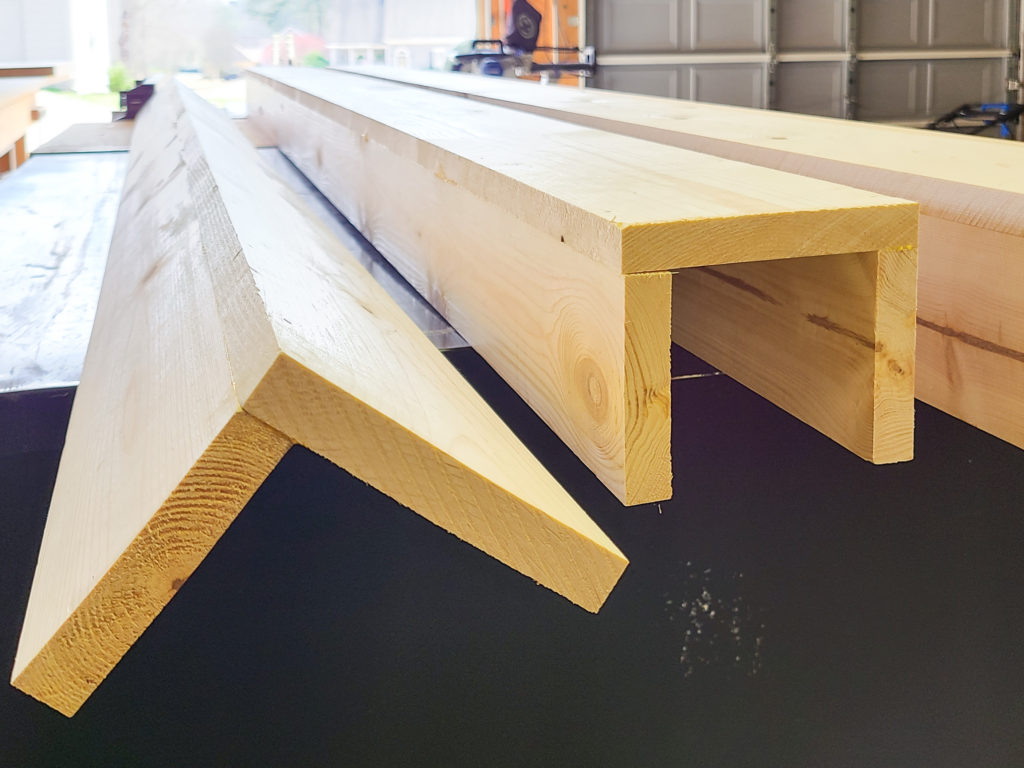
L-Shaped Beam
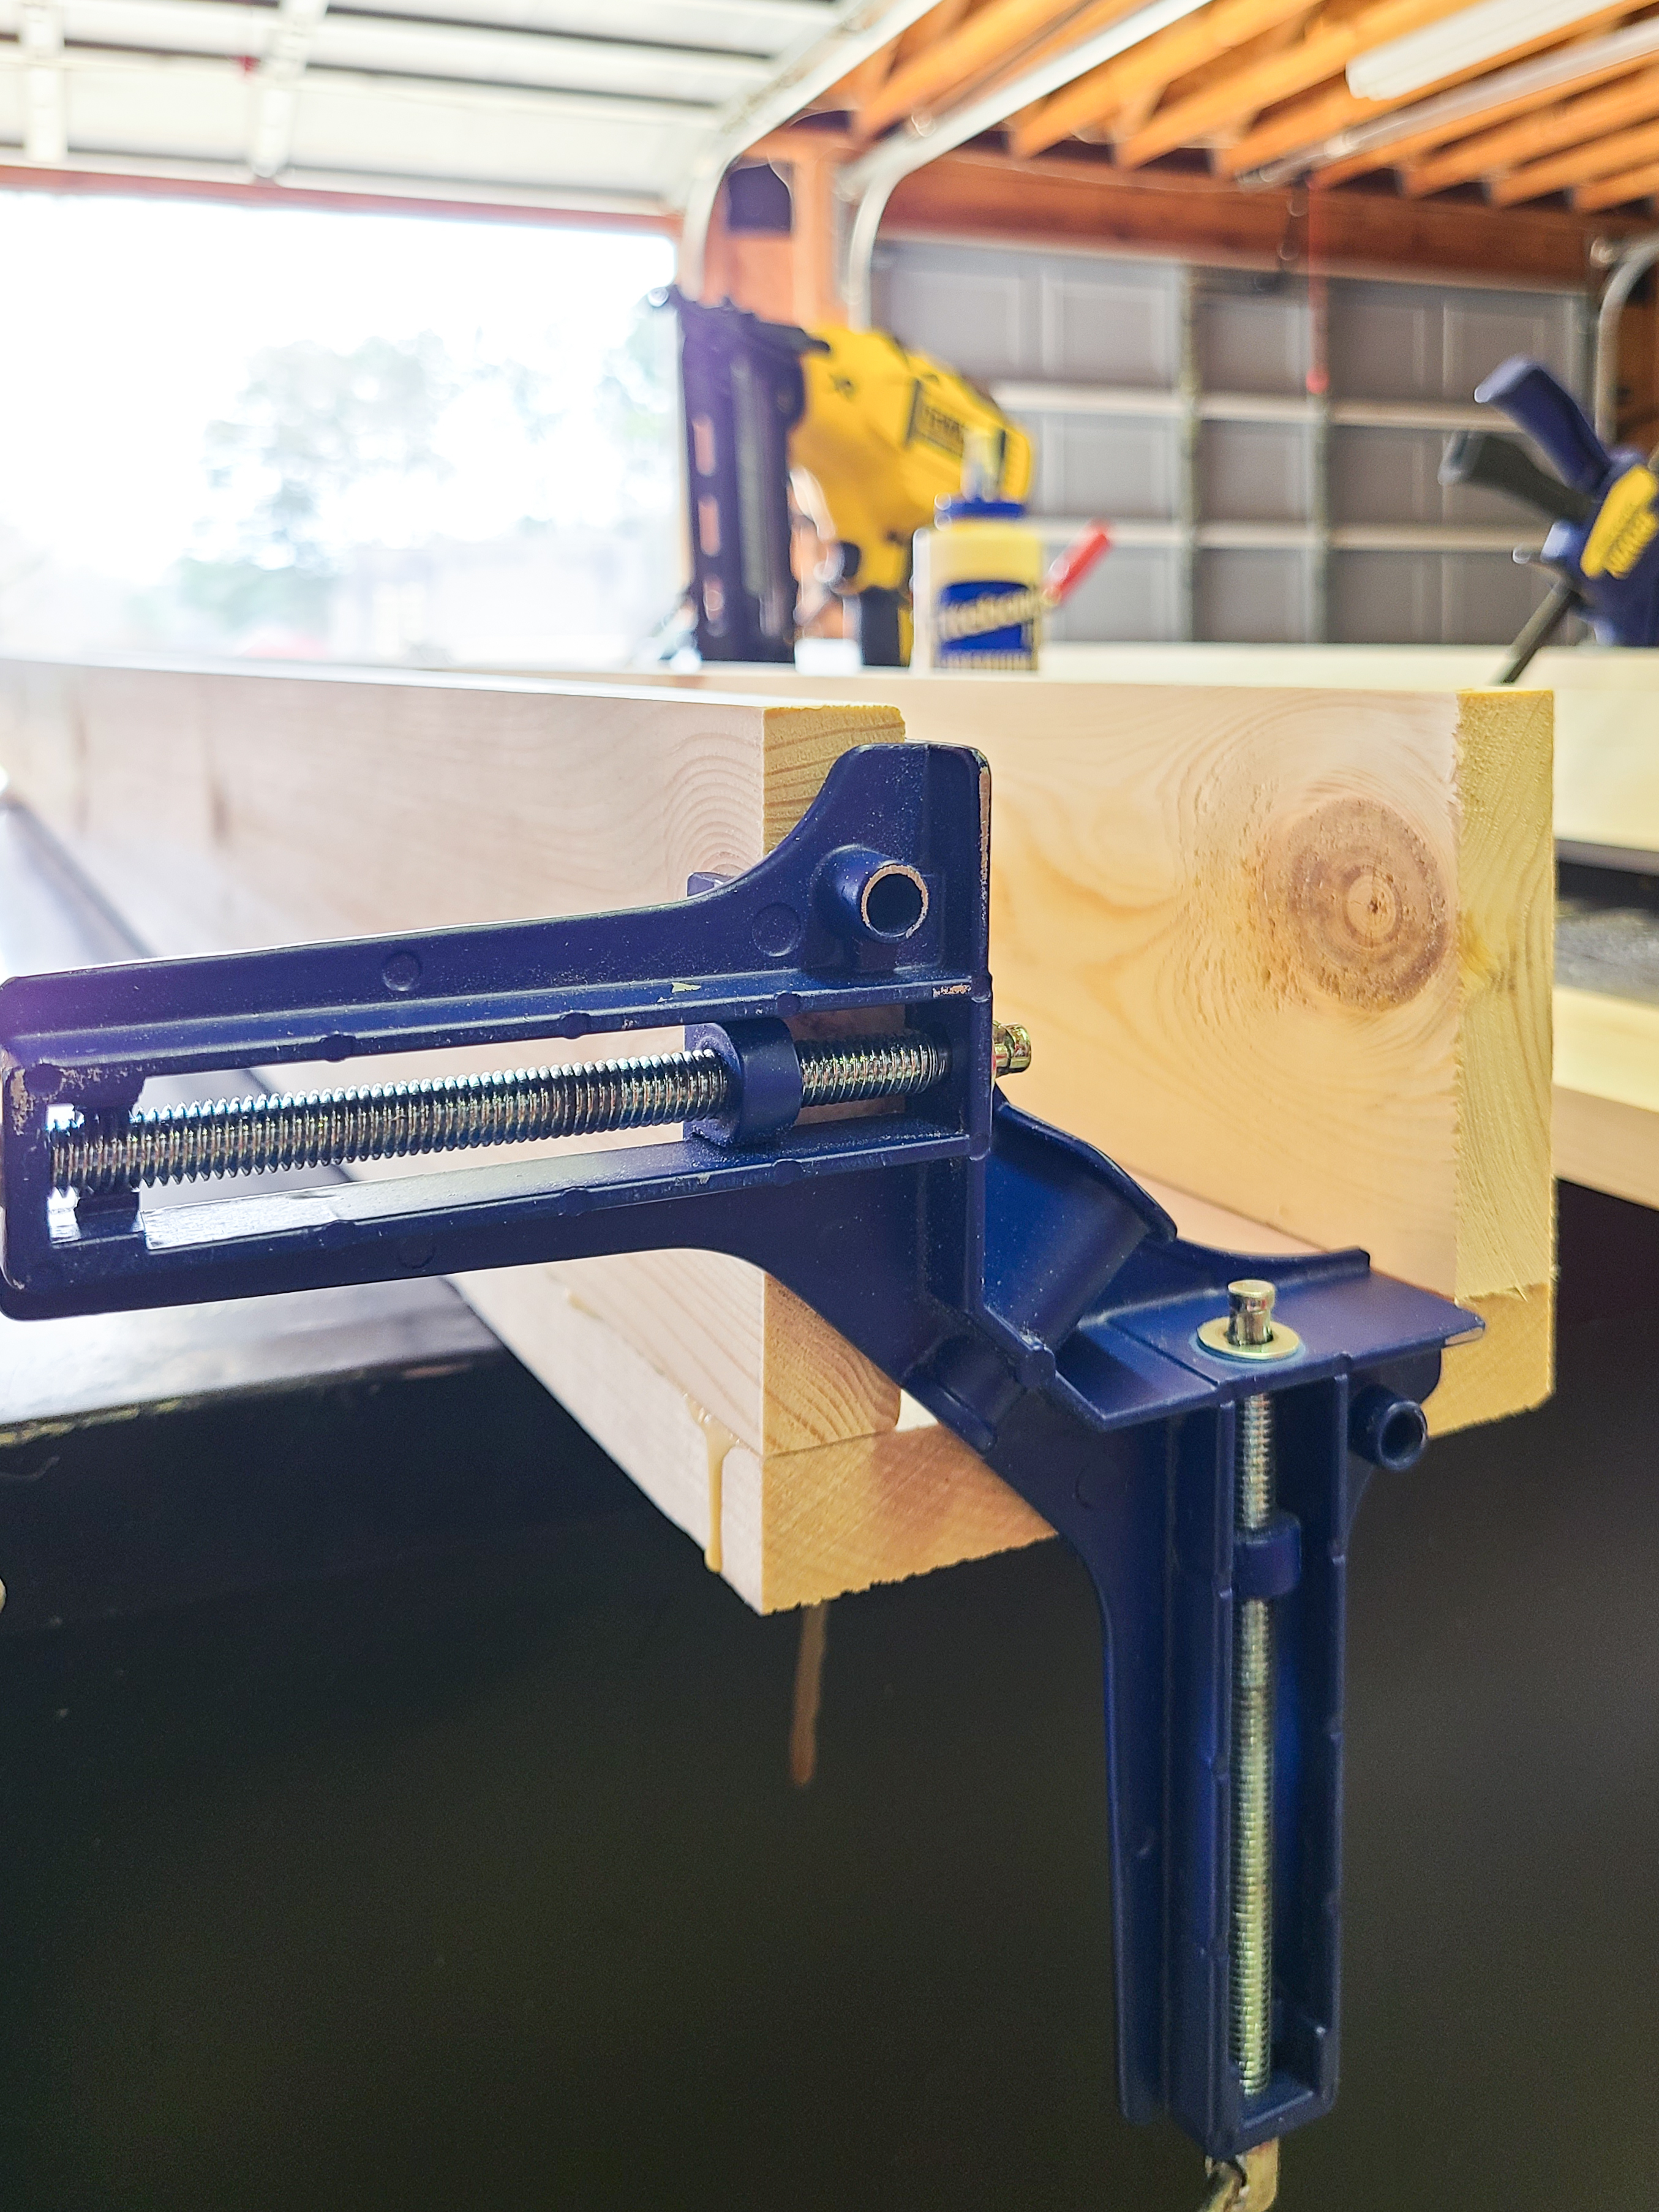
The L-shaped beams were very quick and easy to make. I simply secured the 1×5 ripped common board to the 1×4 board with wood glue and finish nails. I used corner clamps to align the boards and then nailed them together. It is important to allow the wood glue time to fully cure before doing aything else with the beam.
U-Shaped Beam
I assembled the U-shaped beam in the same fashion as the L-shaped beams. The only difference is that I used two pieces of 1×4’s. Corner clamps were a huge help with this step!
Once the beams were assembled, I cut them down to size using my miter saw. Cutting the beams down to length after they are assembled gives you a nice, clean end and ensures all boards are the exact same length.
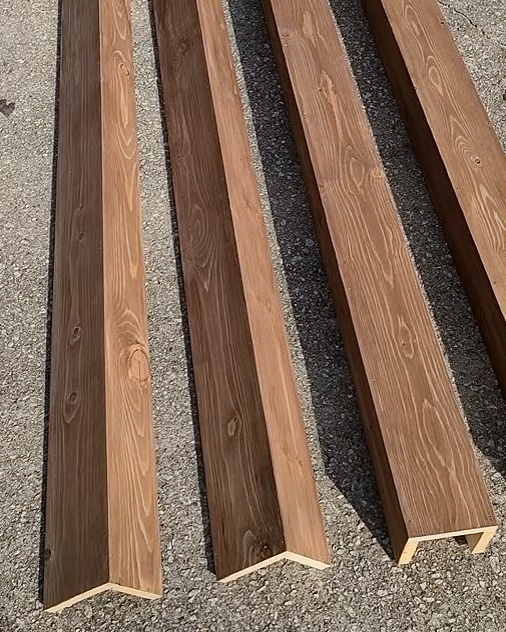
Sand the Beams
I did a quick sanding of the full beam using 120 grit sandpaper. I went with a rough grit because I wanted the wood to really suck up the stain. Higher sandpaper grits tend to close up the surface of wood and don’t allow the stain to really sink into the wood.
Stain the Beams
For the stain, I used my favorite…water based stain in Early American. I applied two coats of stain and decided to skip the sealer. After all, they are going to be installed on my ceiling and will see no water or wear.
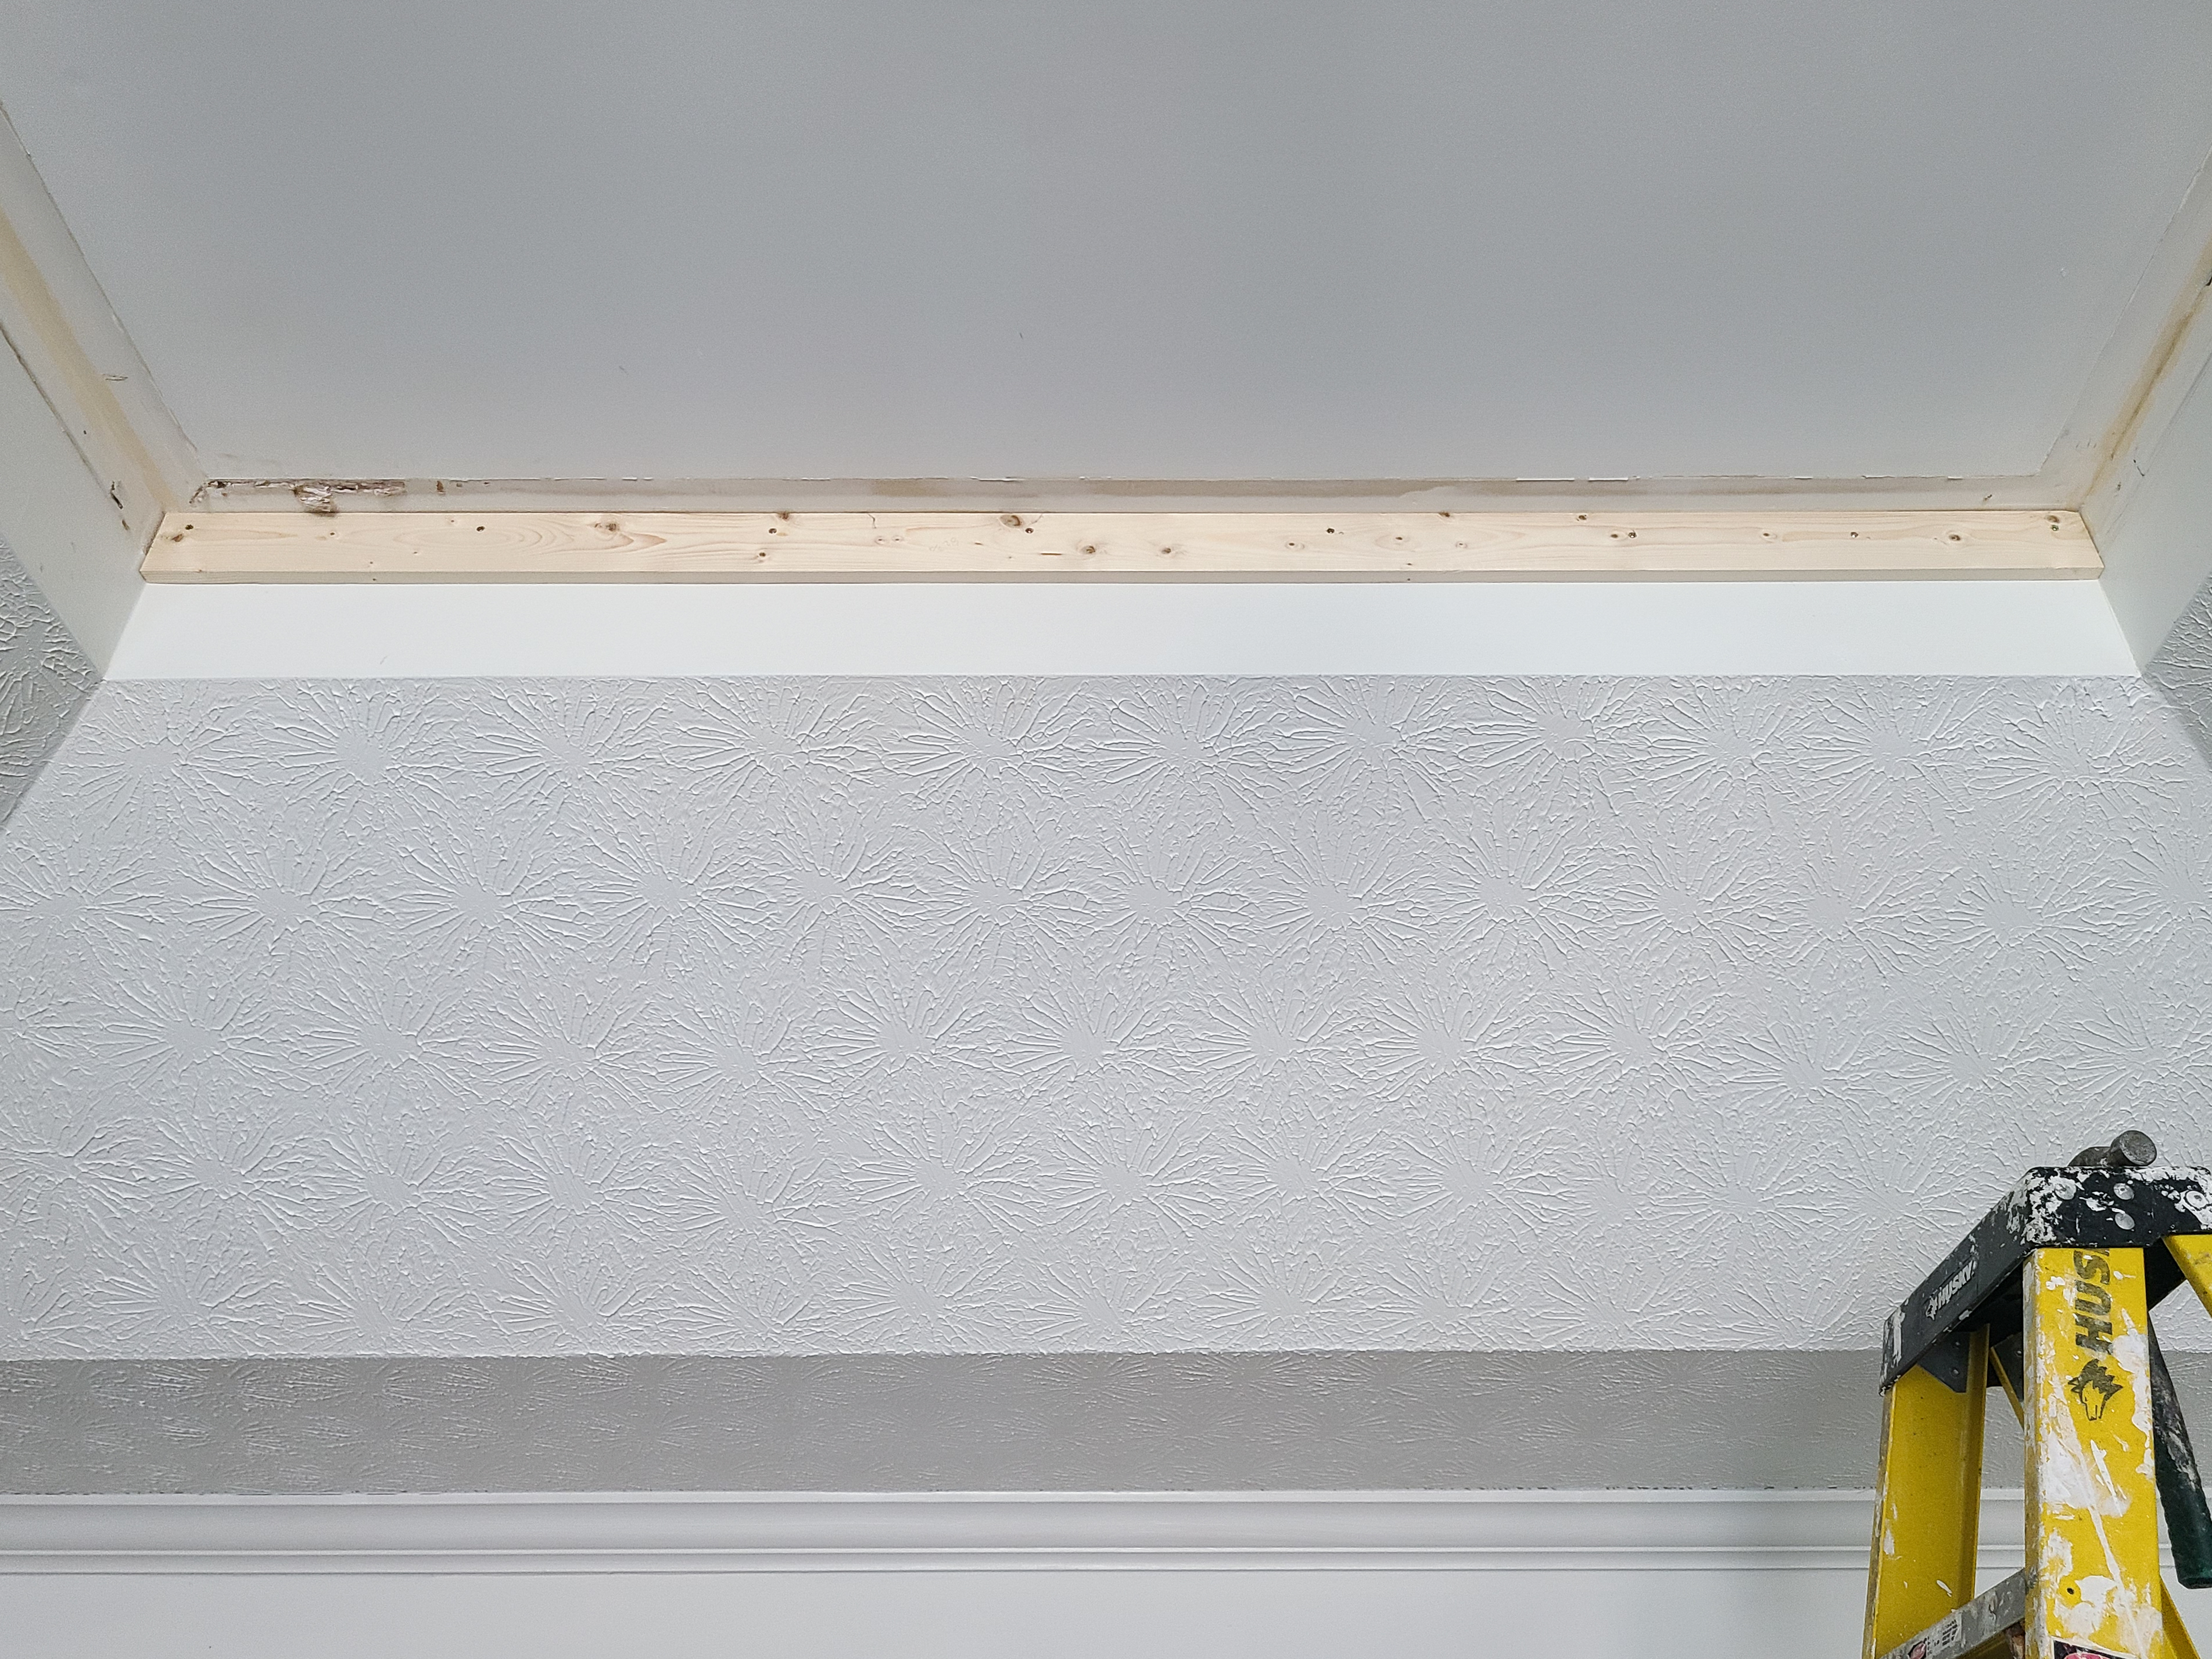
Remove Existing Trim
I had a decorative crown moulding around the top of the tray ceiling. Before I installed the supports for the wood beams, I removed the crown moulding.

Install 1×4’s for the Edge Mounted Beams
The reason that I did not include the second 1×4 for the edge mounted beams was because I wanted to secure them to the ceiling joists instead. I placed the 1×4 against the wall and ceiling and secured them to the joists using construction screws.
Install the 2×4’s
It is so important to install the 2×4’s into the ceiling joists! The 2×4’s are the only structure that is going to hold up the beams. If they are not properly supported, the beams could come crashing down.
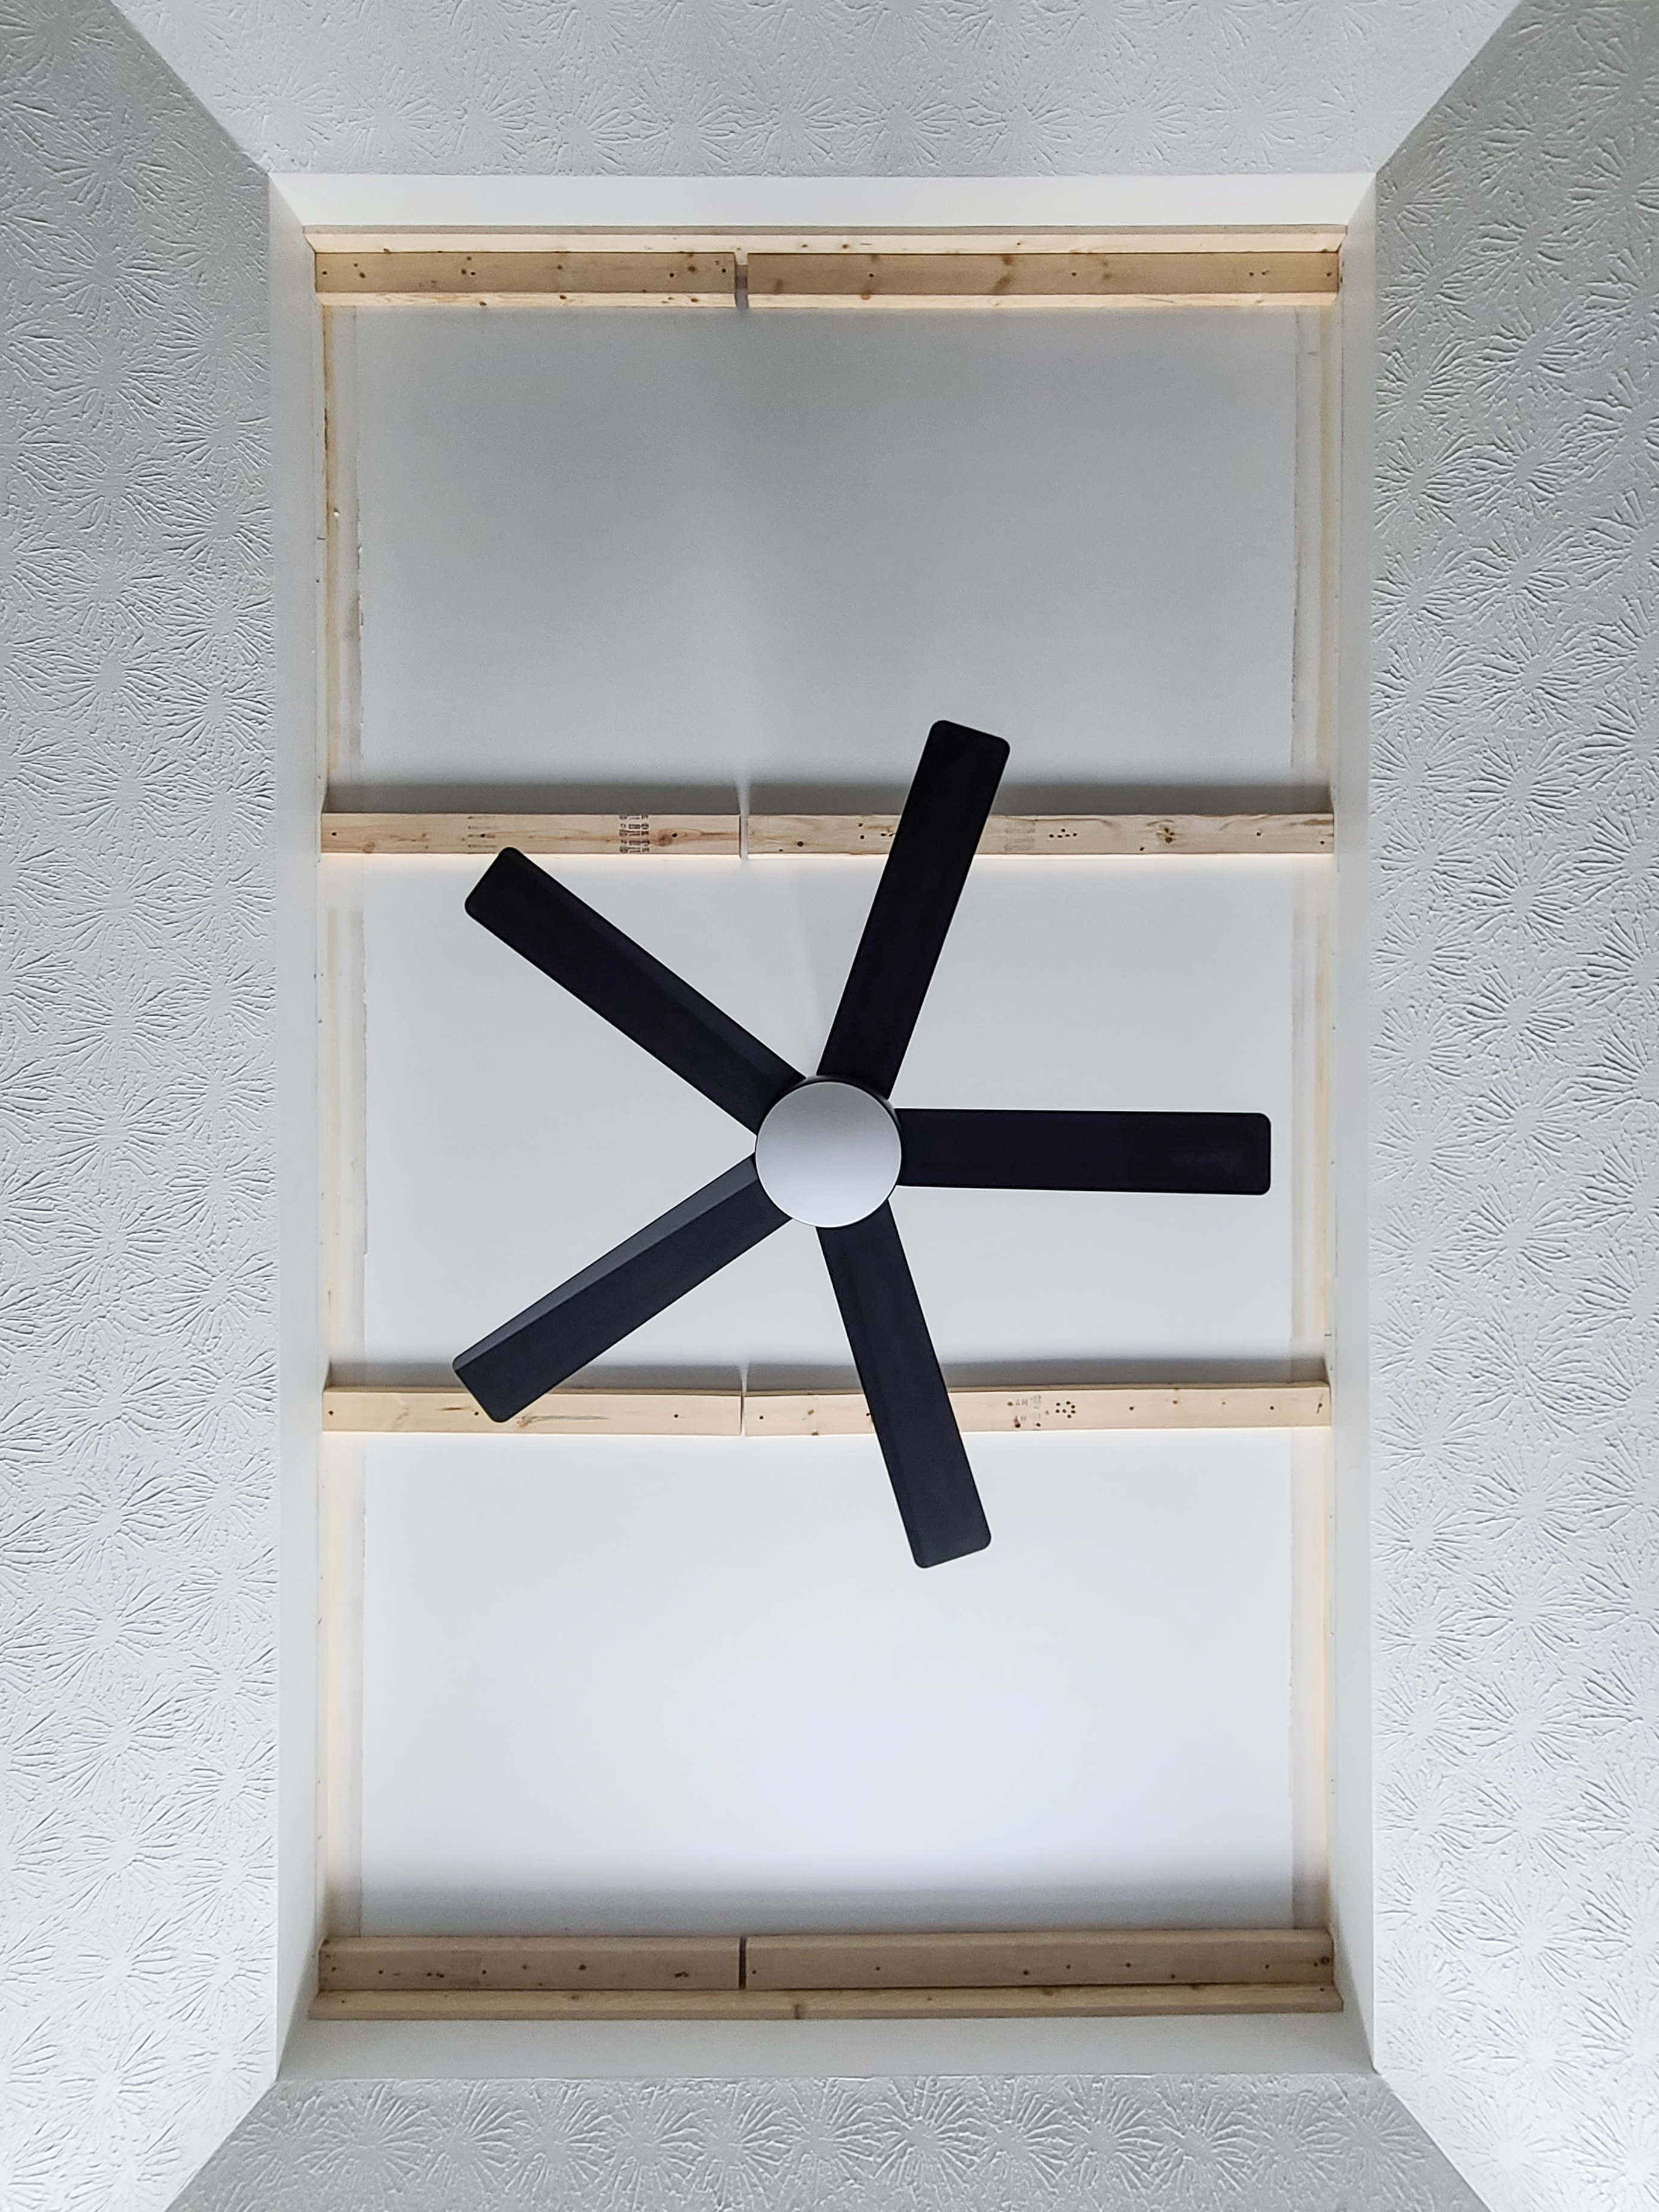
I used 3″ long construction screws and secured them to every joist I could find!
Install the Faux Wood Beams
For the edge mounted beams, I simply secured the L-shaped faux wood beams to both the 1×4 and 2×4 using finish nails. I made sure to put the nails it at alternating angles (right and left) for a stronger hold.
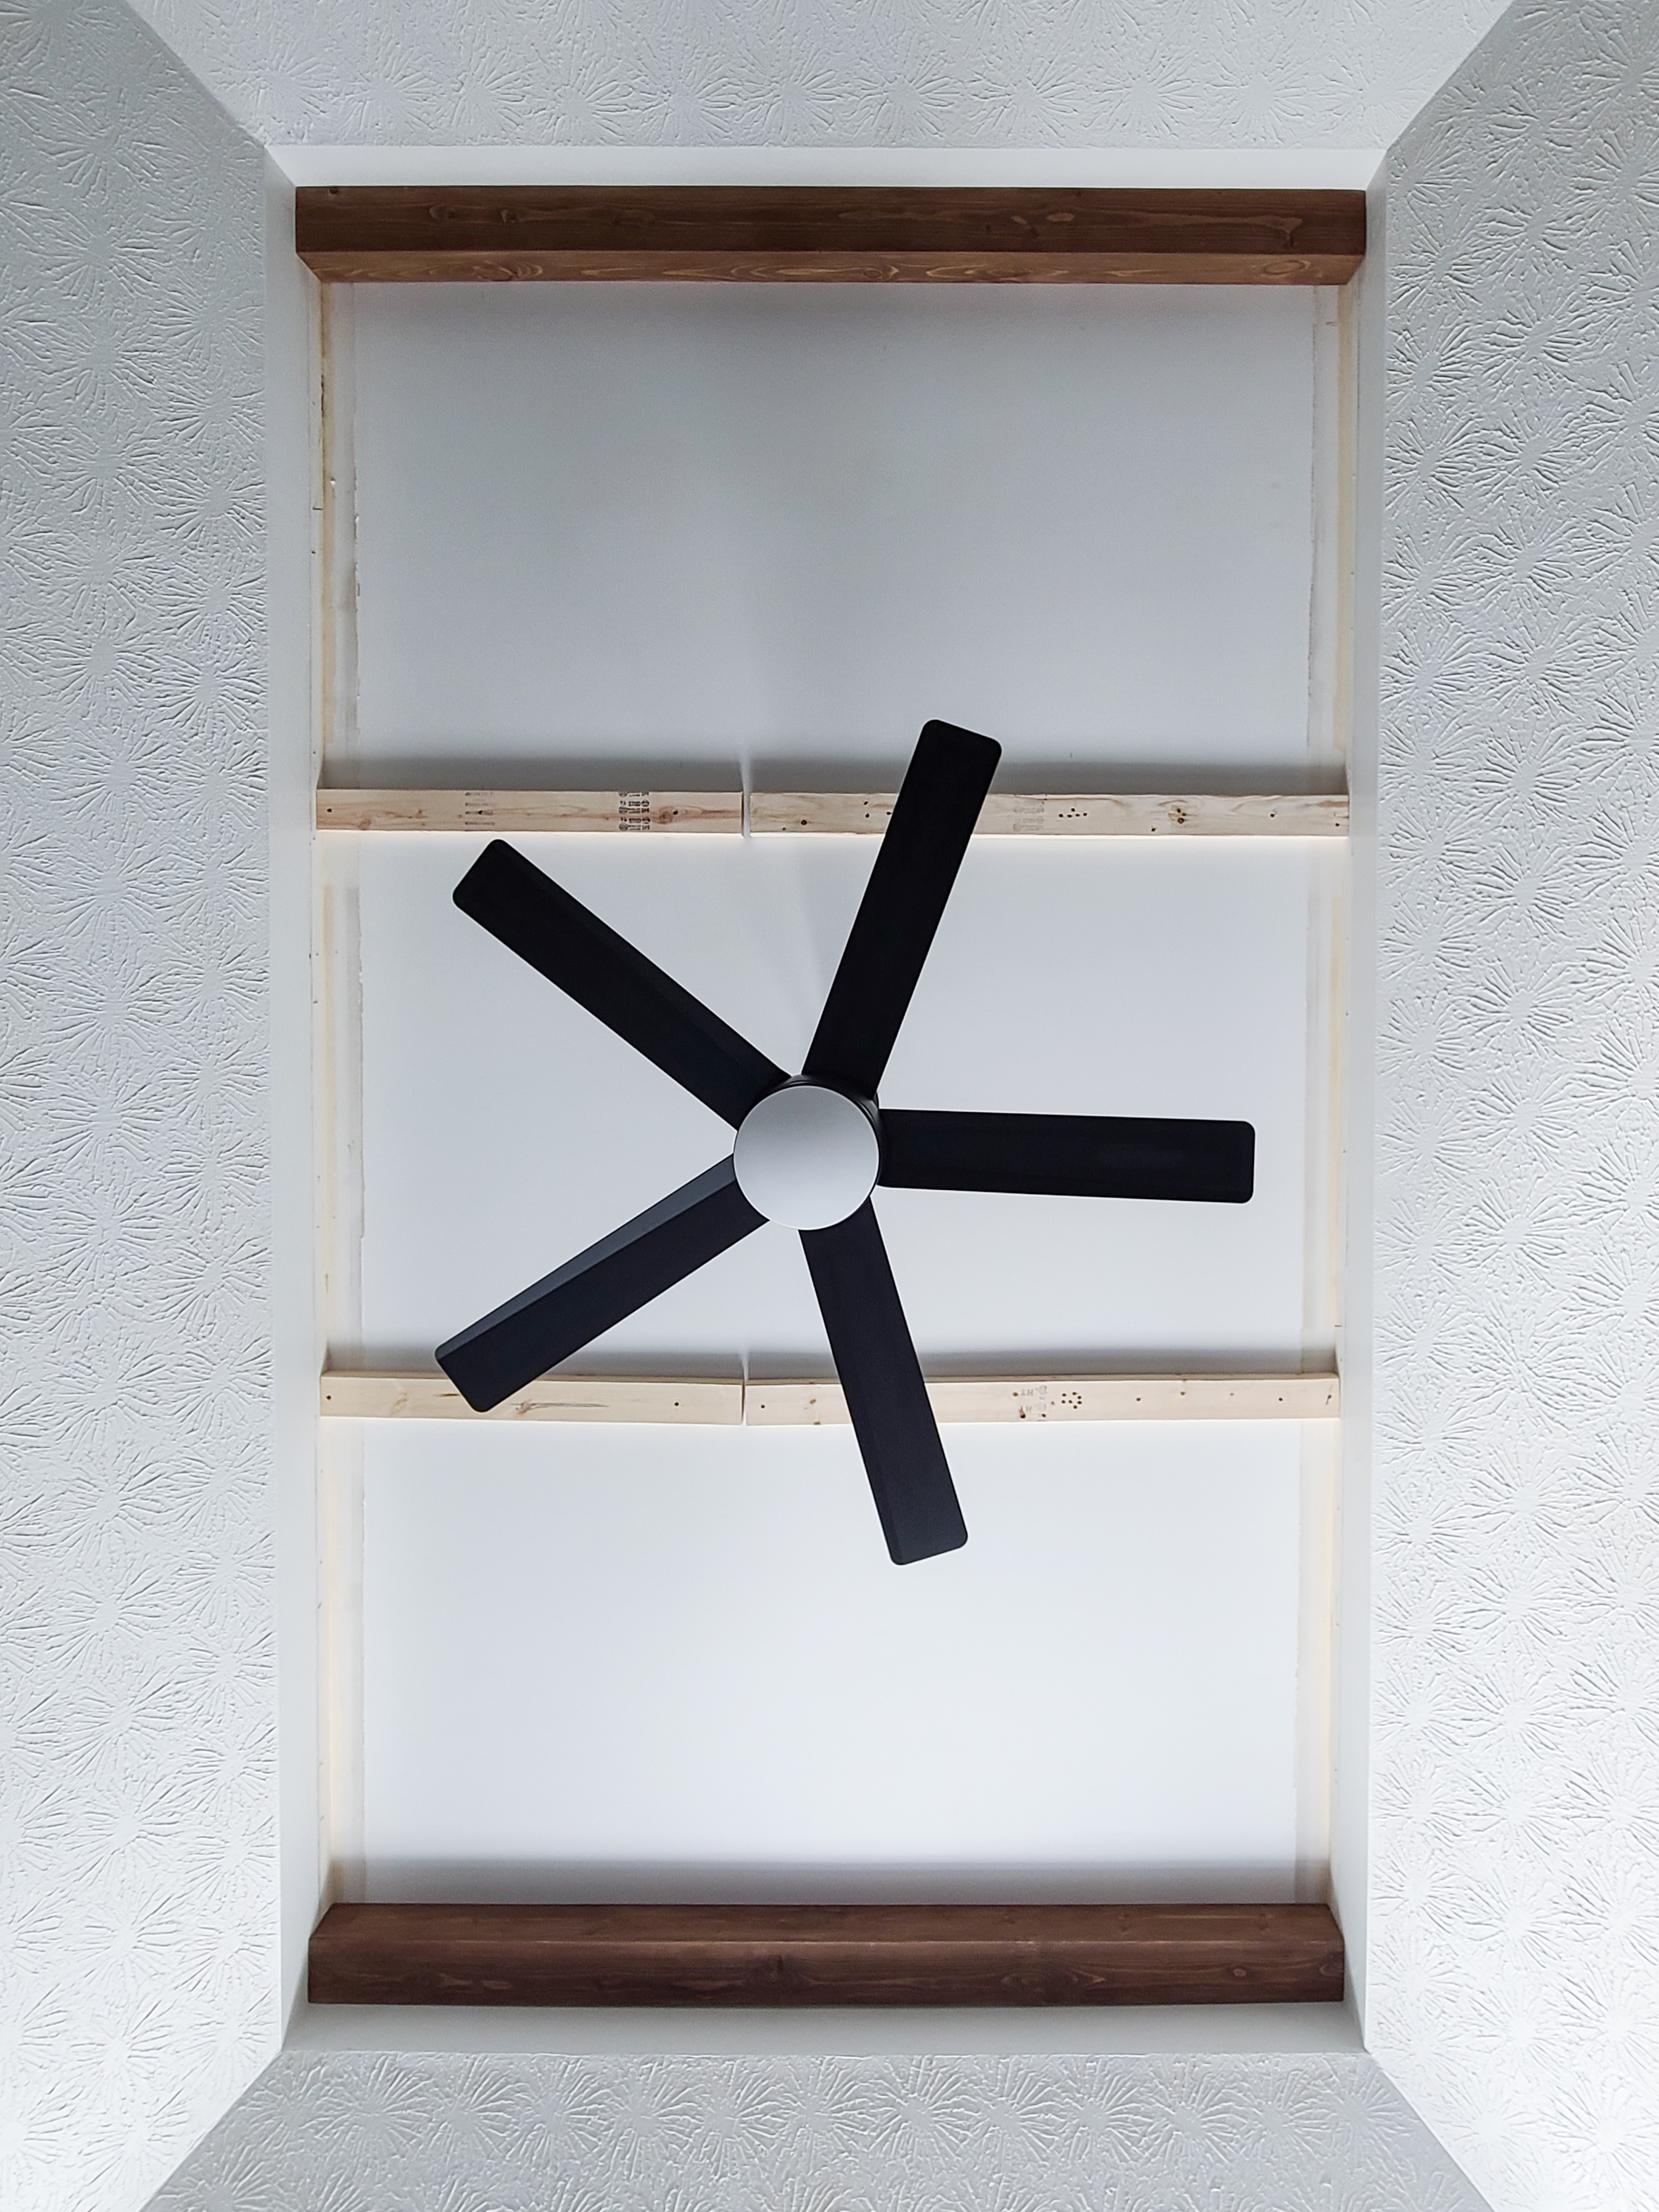
The center mounted beams proved to be a little more difficult to install, which means they hopefully won’t be moving! I had to not only wedge the beam between the two walls, but also slide it over the 2×4. I did have to use a dead blow hammer in a few spots to get it to slide over the 2×4. Once it was in place, I secured it to the 2×4 on both sides using finish nails.

It took me roughly two days to complete this project, although I could have done it in one day if I didn’t have to remove and patch the trim around our ceiling.
The faux wood beams added so much character and warmth to our master bedroom!! I cannot wait to add them to our other rooms…starting with the dining room that I recently renovated!

**Note: I am not a professional and do not claim to be an expert. Please be sure to always read instructions for all tools and products. Safety is very important and should be your top priority. Wear necessary protection when using tools (eye wear, hearing protection, gloves, etc.) and dust masks when sanding or cutting. Simply Aligned Home is not responsible for any injury or damage. All of my designs are not professionally designed and are for private use only.**