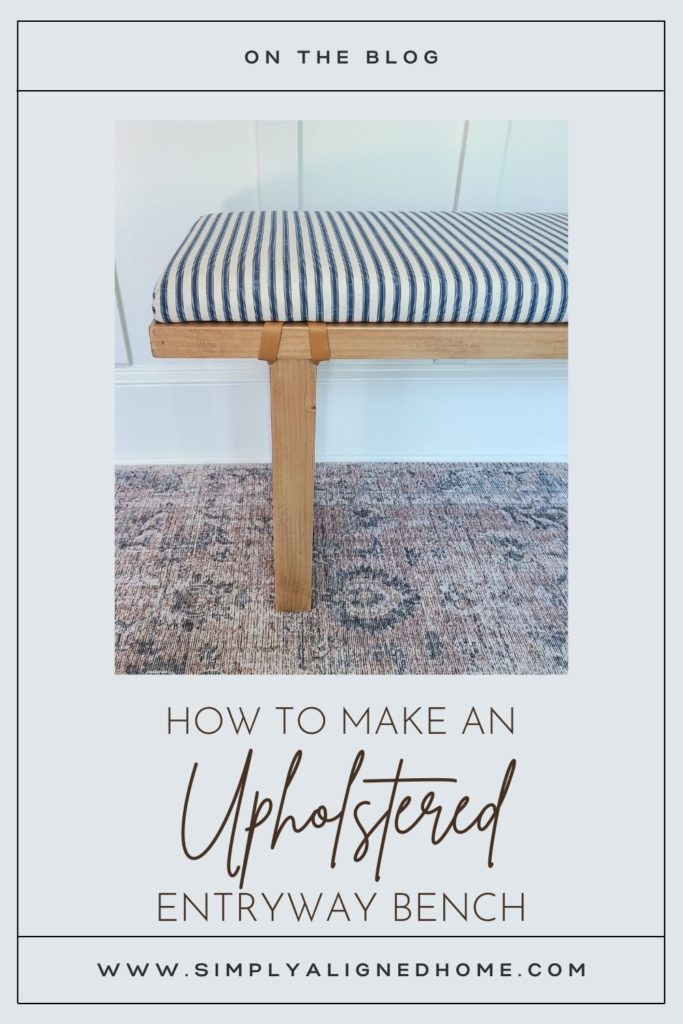
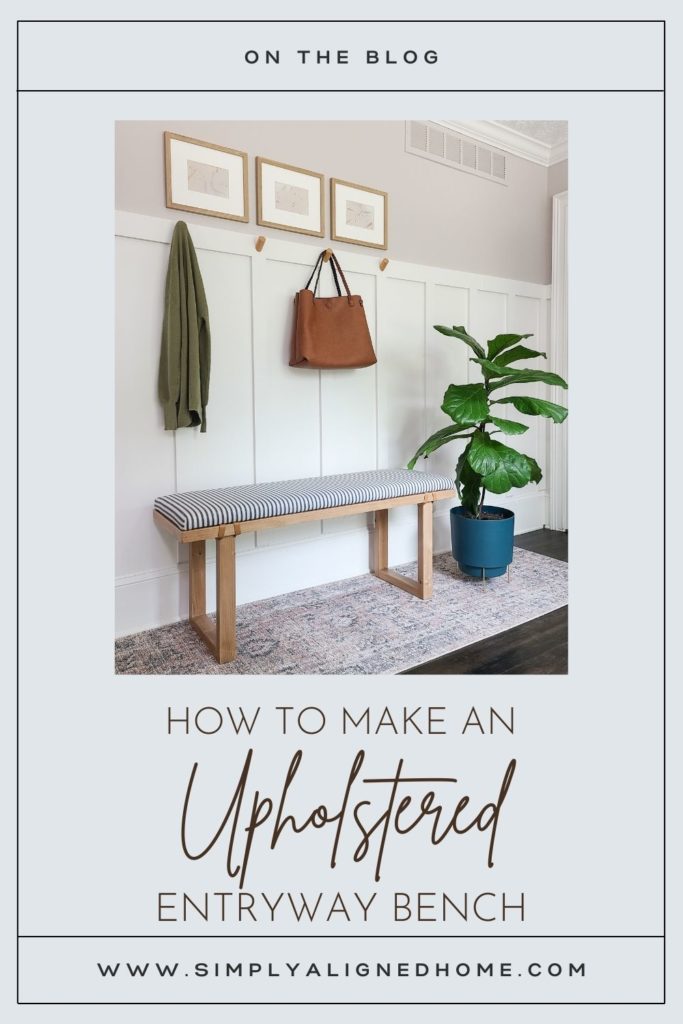
I recently gave my entryway a little refresh. The style of my entryway was farmhouse and it was time for a change. I wanted something a little more modern and contemporary. After searching for inspiration, I found an entryway bench that I loved! The only problem…I couldn’t justify buying it. Instead, I decided to make it! Here’s how I made it.
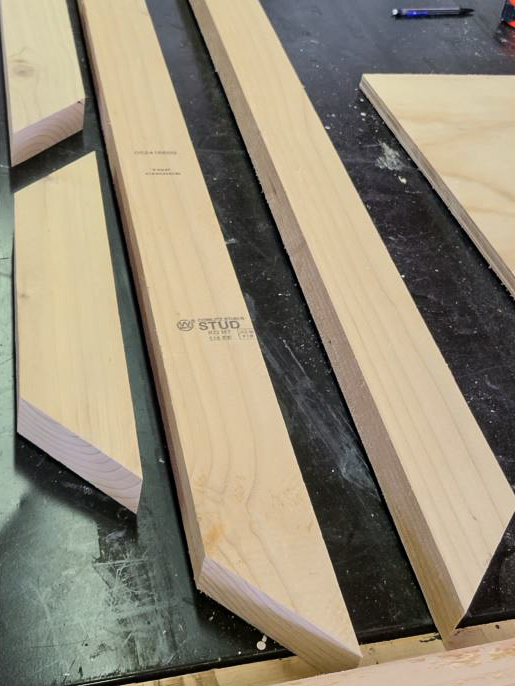
Cut the Wood
I like to cut everything out before I begin assembling. There are three main pieces to the bench…the legs, top frame and top piece.
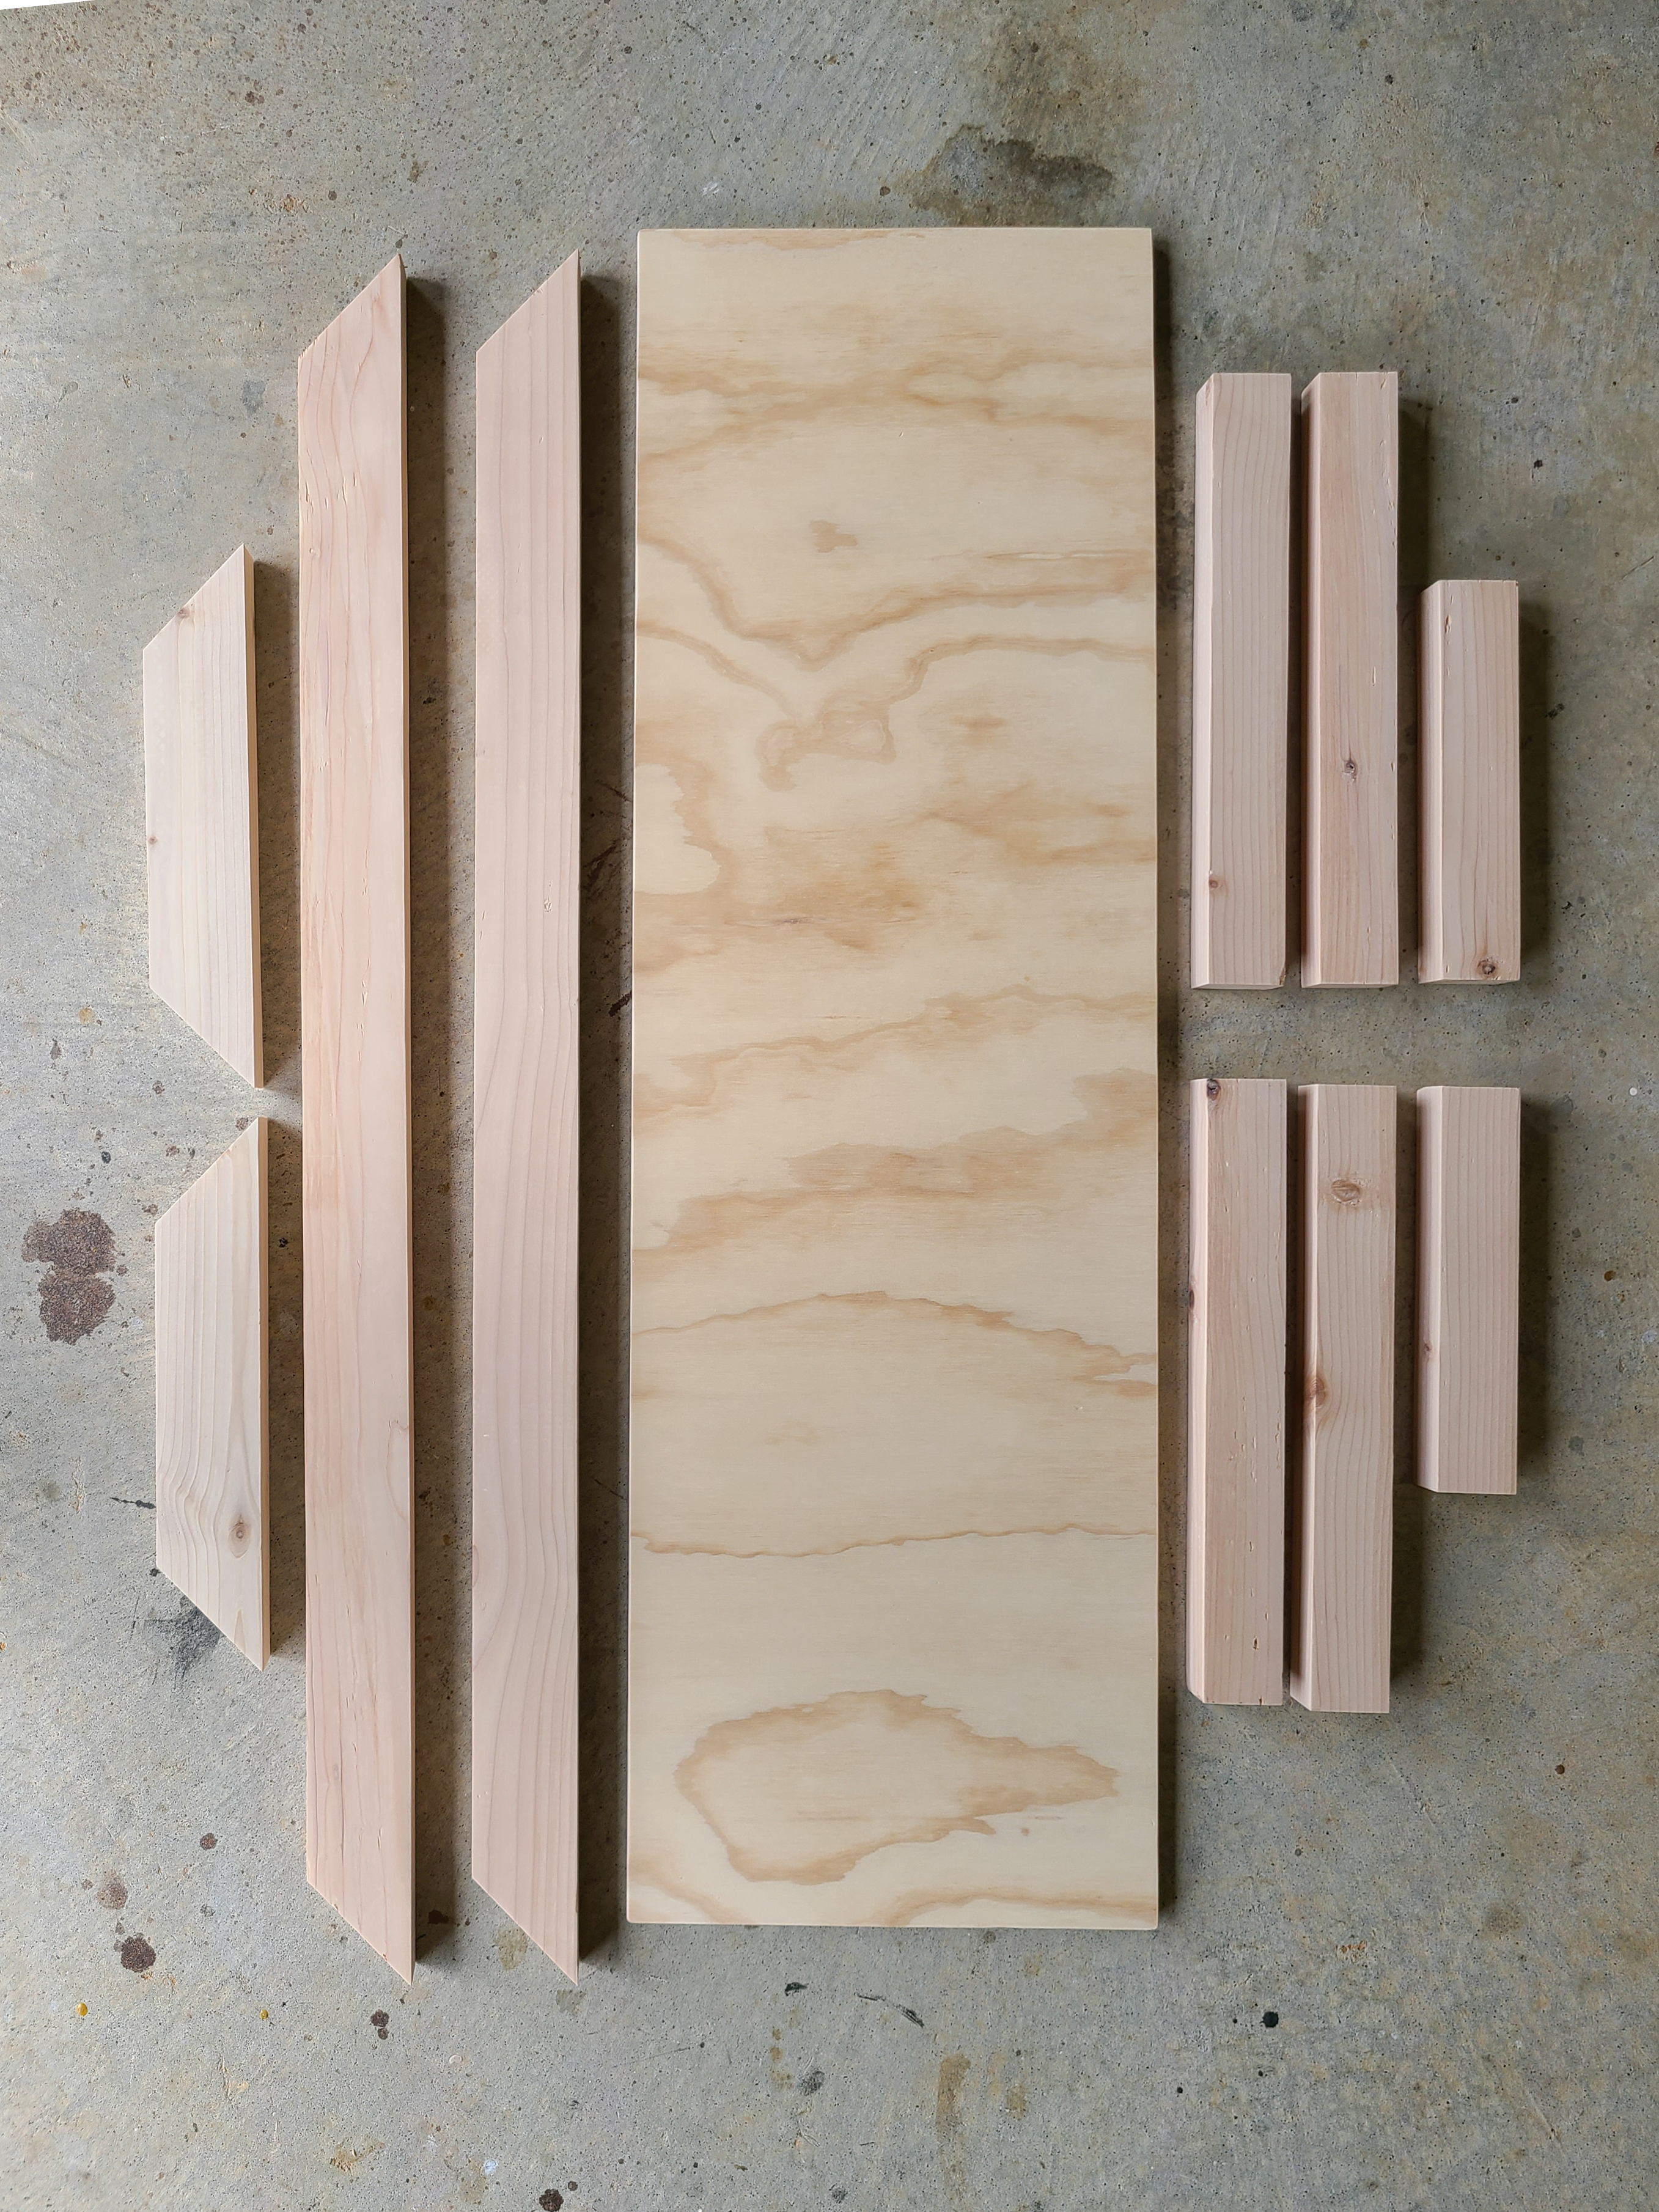
Legs
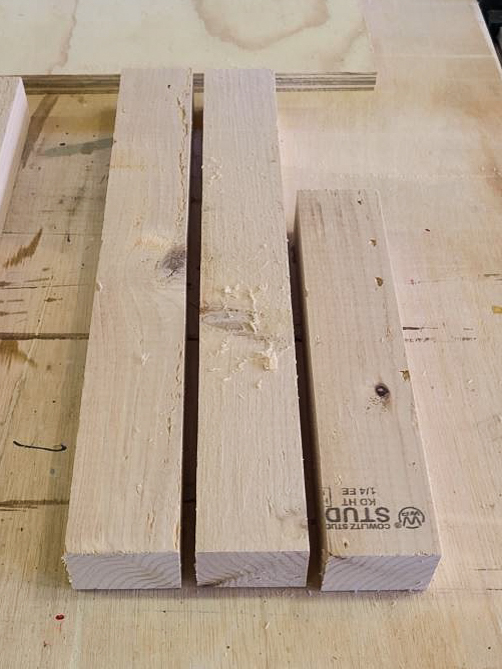
I started by ripping a 2×4 to 2-1/8″ wide. I did this to not only have a more narrow leg, but also to remove the rounded edges of the 2×4. I then cut four (4) pieces 17″ long and two (2) pieces 11″ long.
Top Frame
I wanted the wood for the top frame to be wider than the wood for the legs, so I ripped the 2×4 to 3″ wide. The overall dimensions of the top frame are 15-1/4″ x 48″. I made mitered cuts for the top frame. This will give me nice, clean corners for the top.
Top Piece
The top piece is made of 3/4″ plywood. I chose to make the top a fixed piece instead of a loose cushion because I thought it would be more durable…kids..
I cut the piece of plywood 1/2″ smaller than the top frame in each dimension (14-3/4″ x 47-1/2″).
Sand Everything
I personally like to sand down the cut pieces of wood before assembly. It’s easier to sand the individual pieces than it is to sand the assembled bench.
Assembly
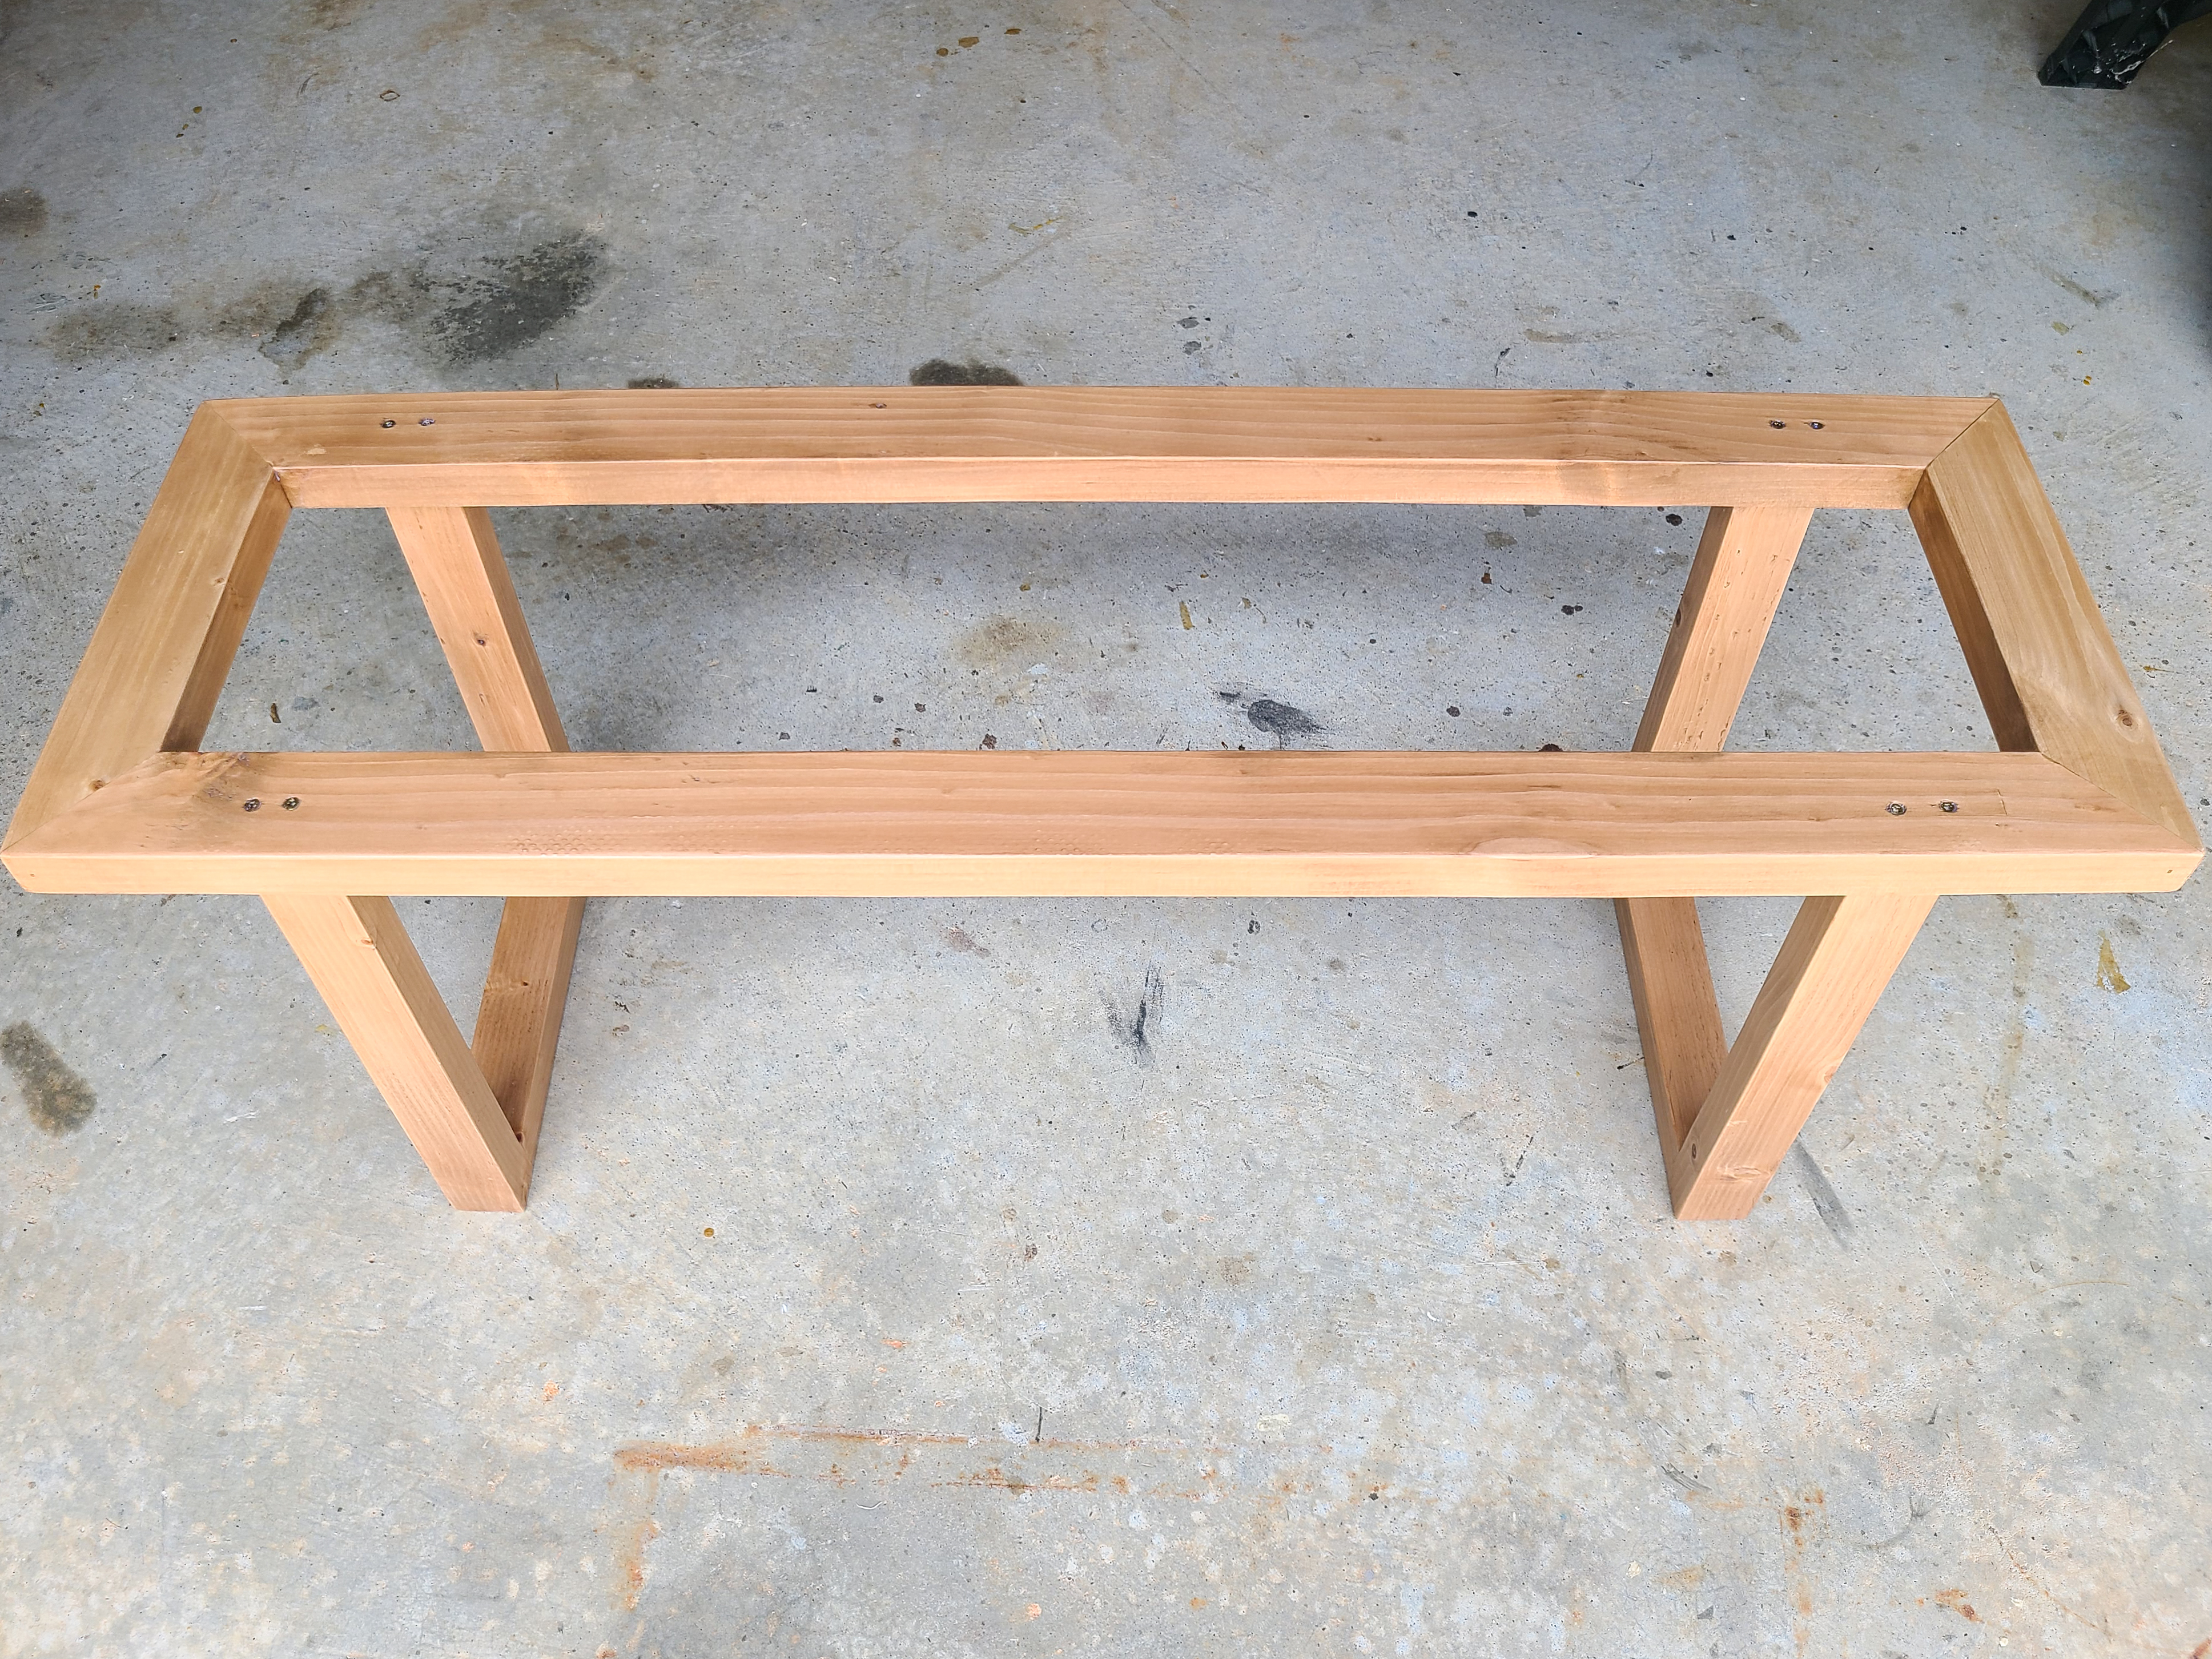
Once everything was sanded, I started to assemble the pieces of the bench. I needed to assemble both legs and the top frame first.
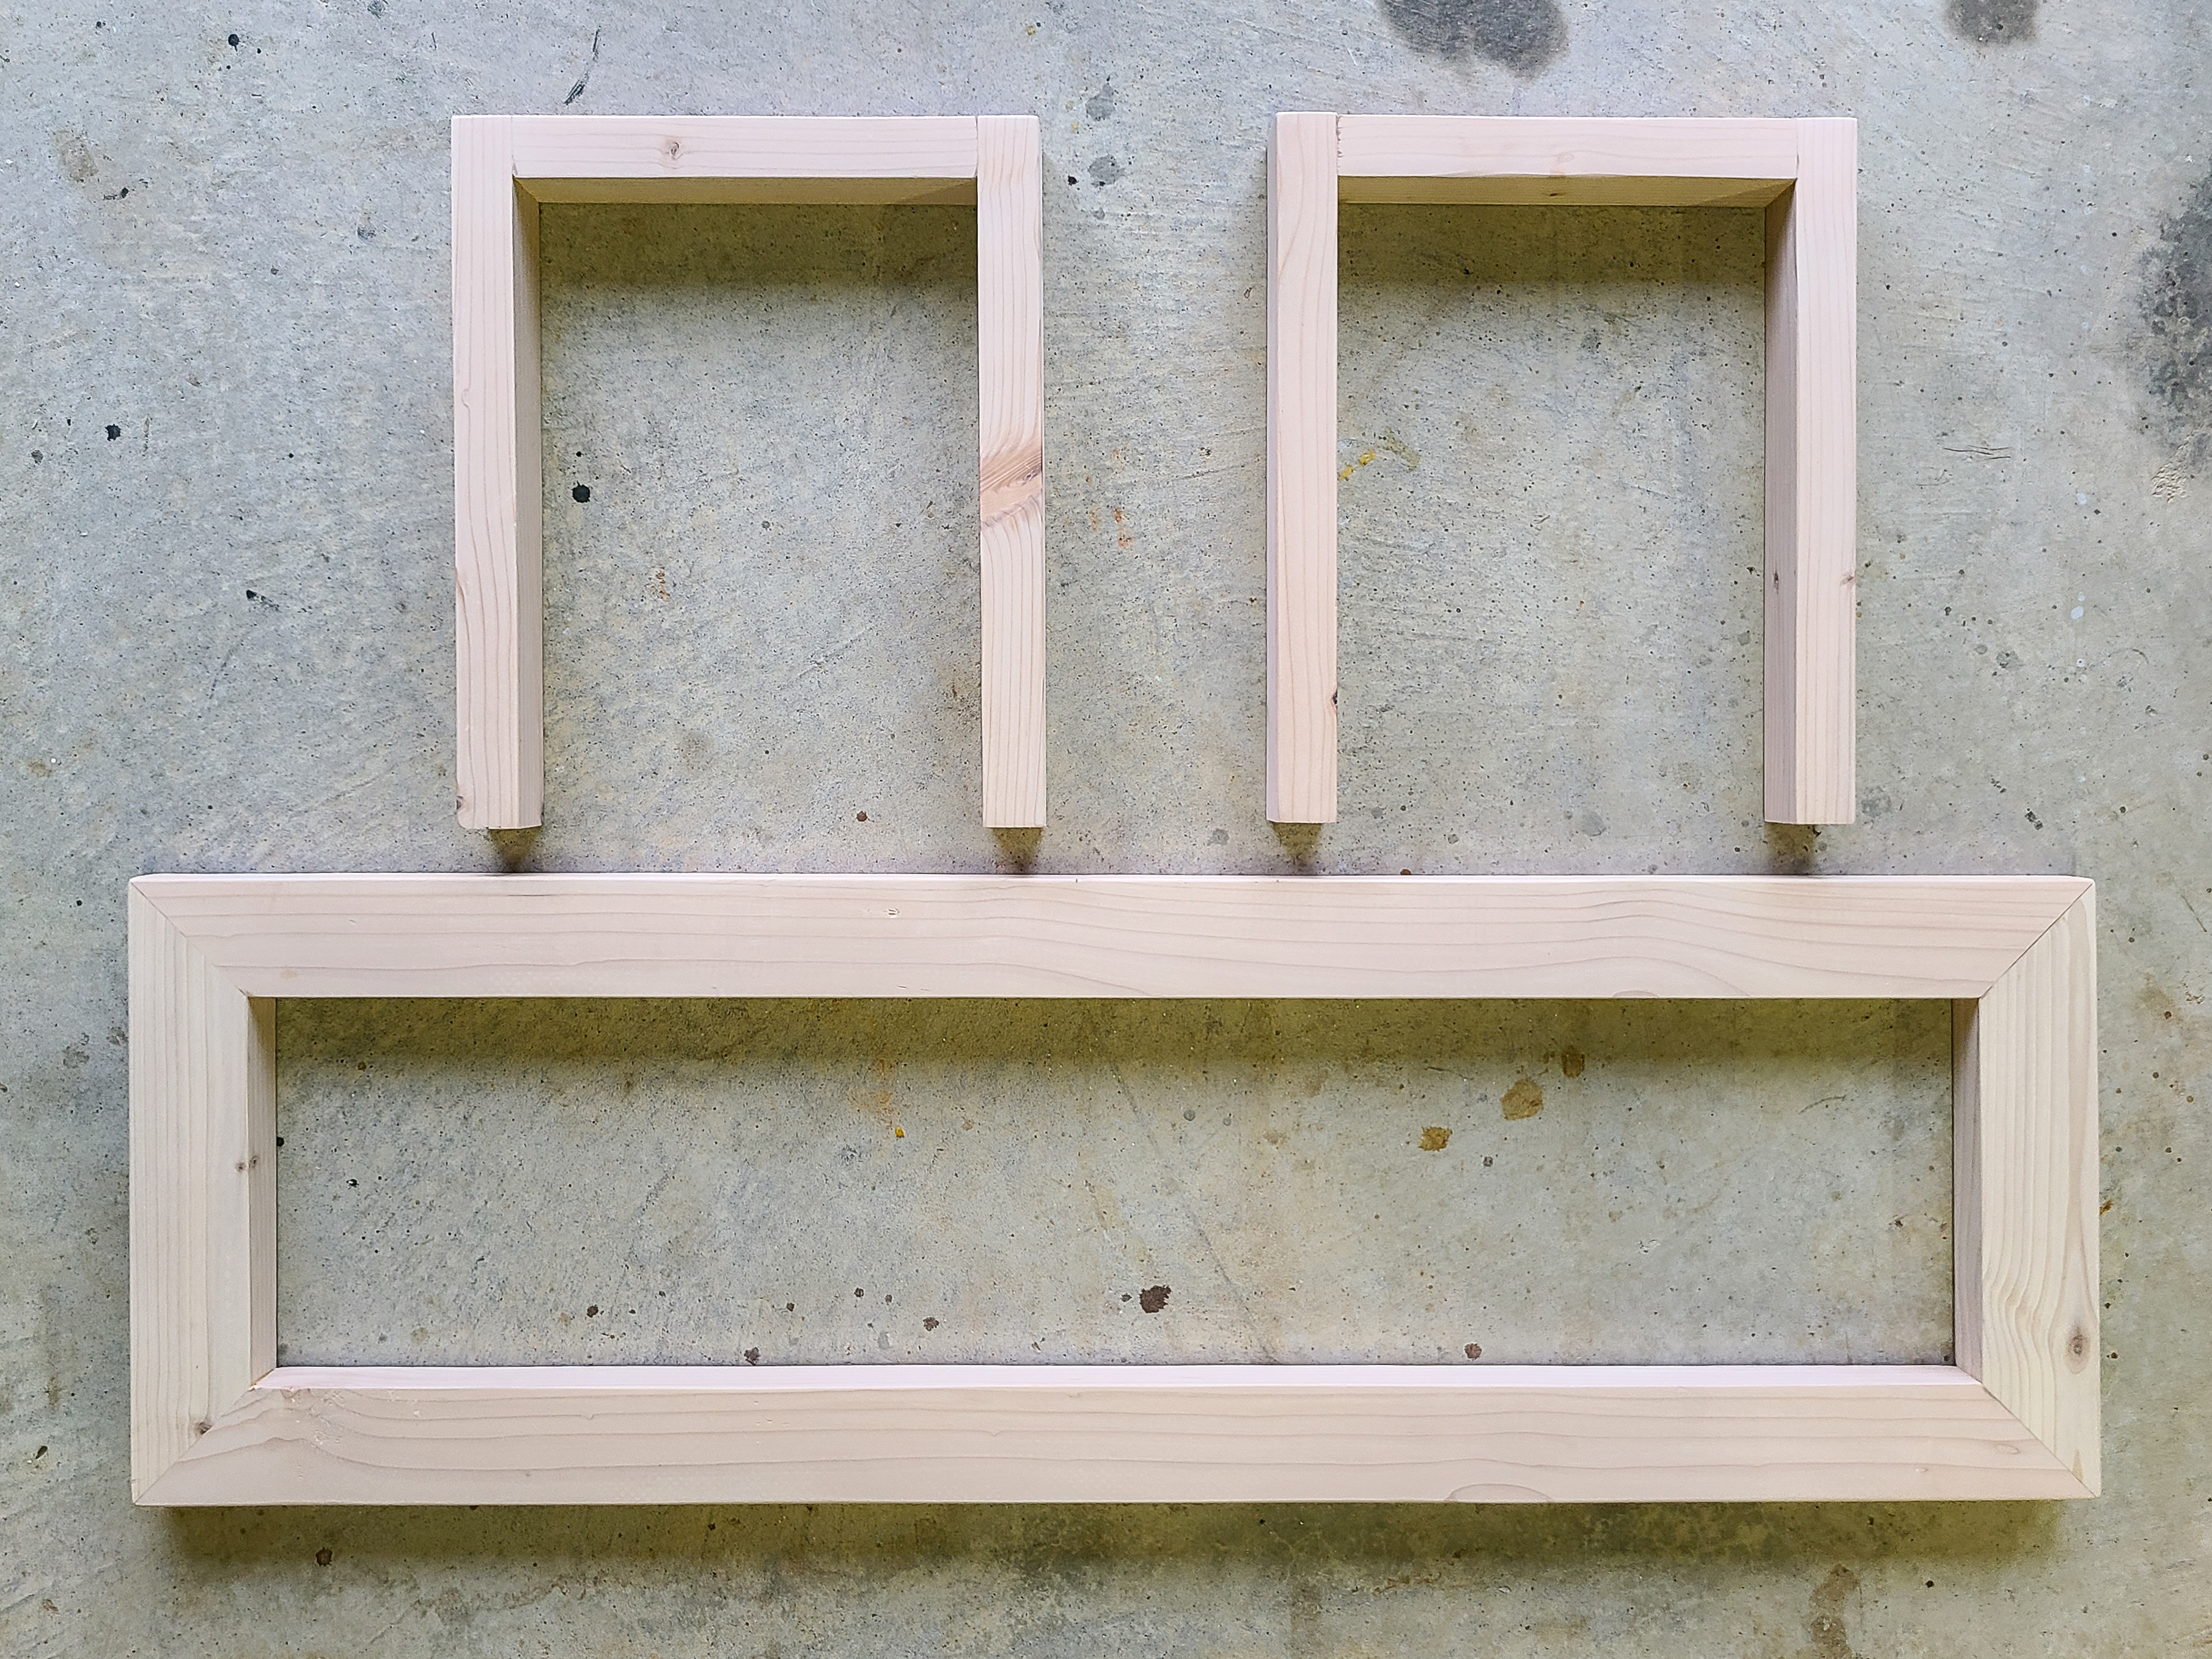
Legs
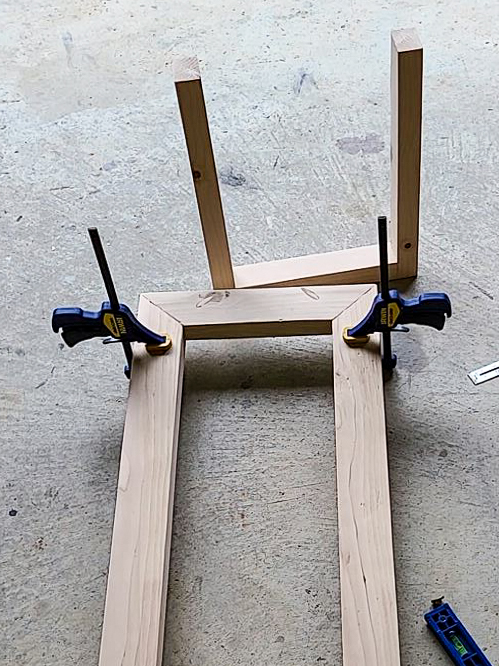
I started by assembling the two legs. In an attempt to hide the screws, I used pocket hole screws to assemble the legs. I made four (4) pocket holes on the bottom of each of the two (2) 11″ long leg pieces.
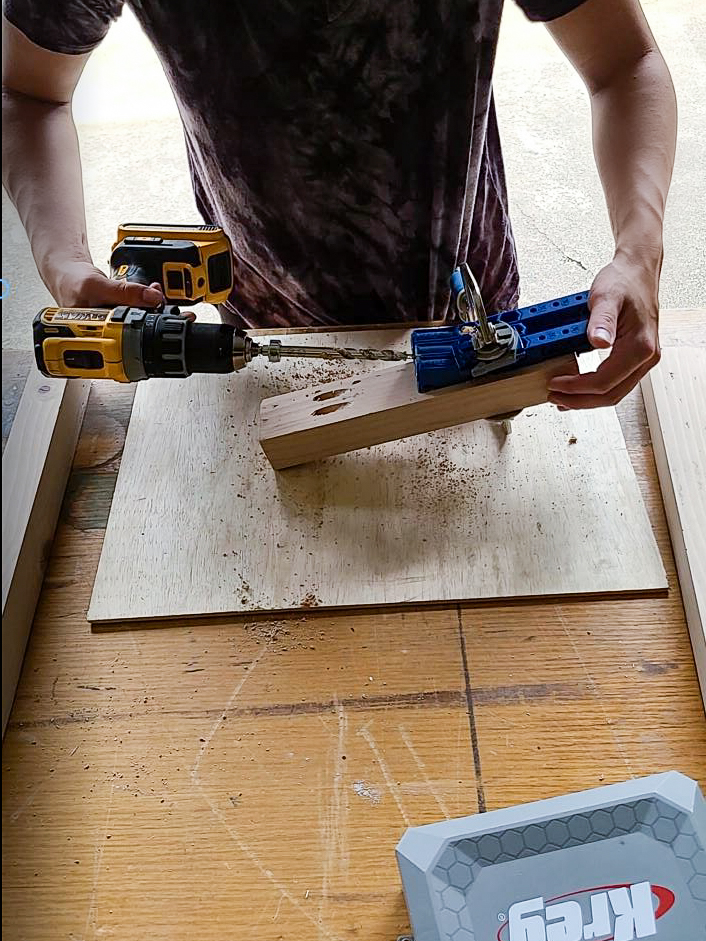
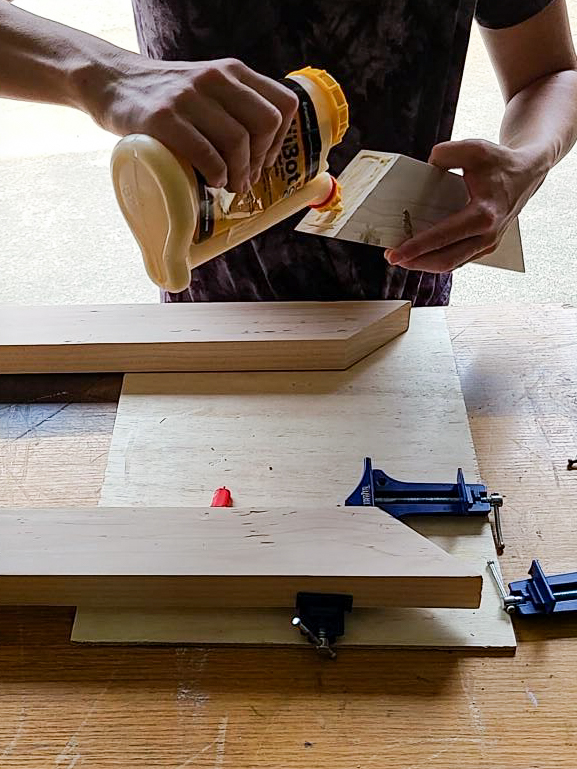
I secured the bottom pieces to the side leg pieces with wood glue and 2-1/2″ pocket screws. Corner clamps were very useful for this step!
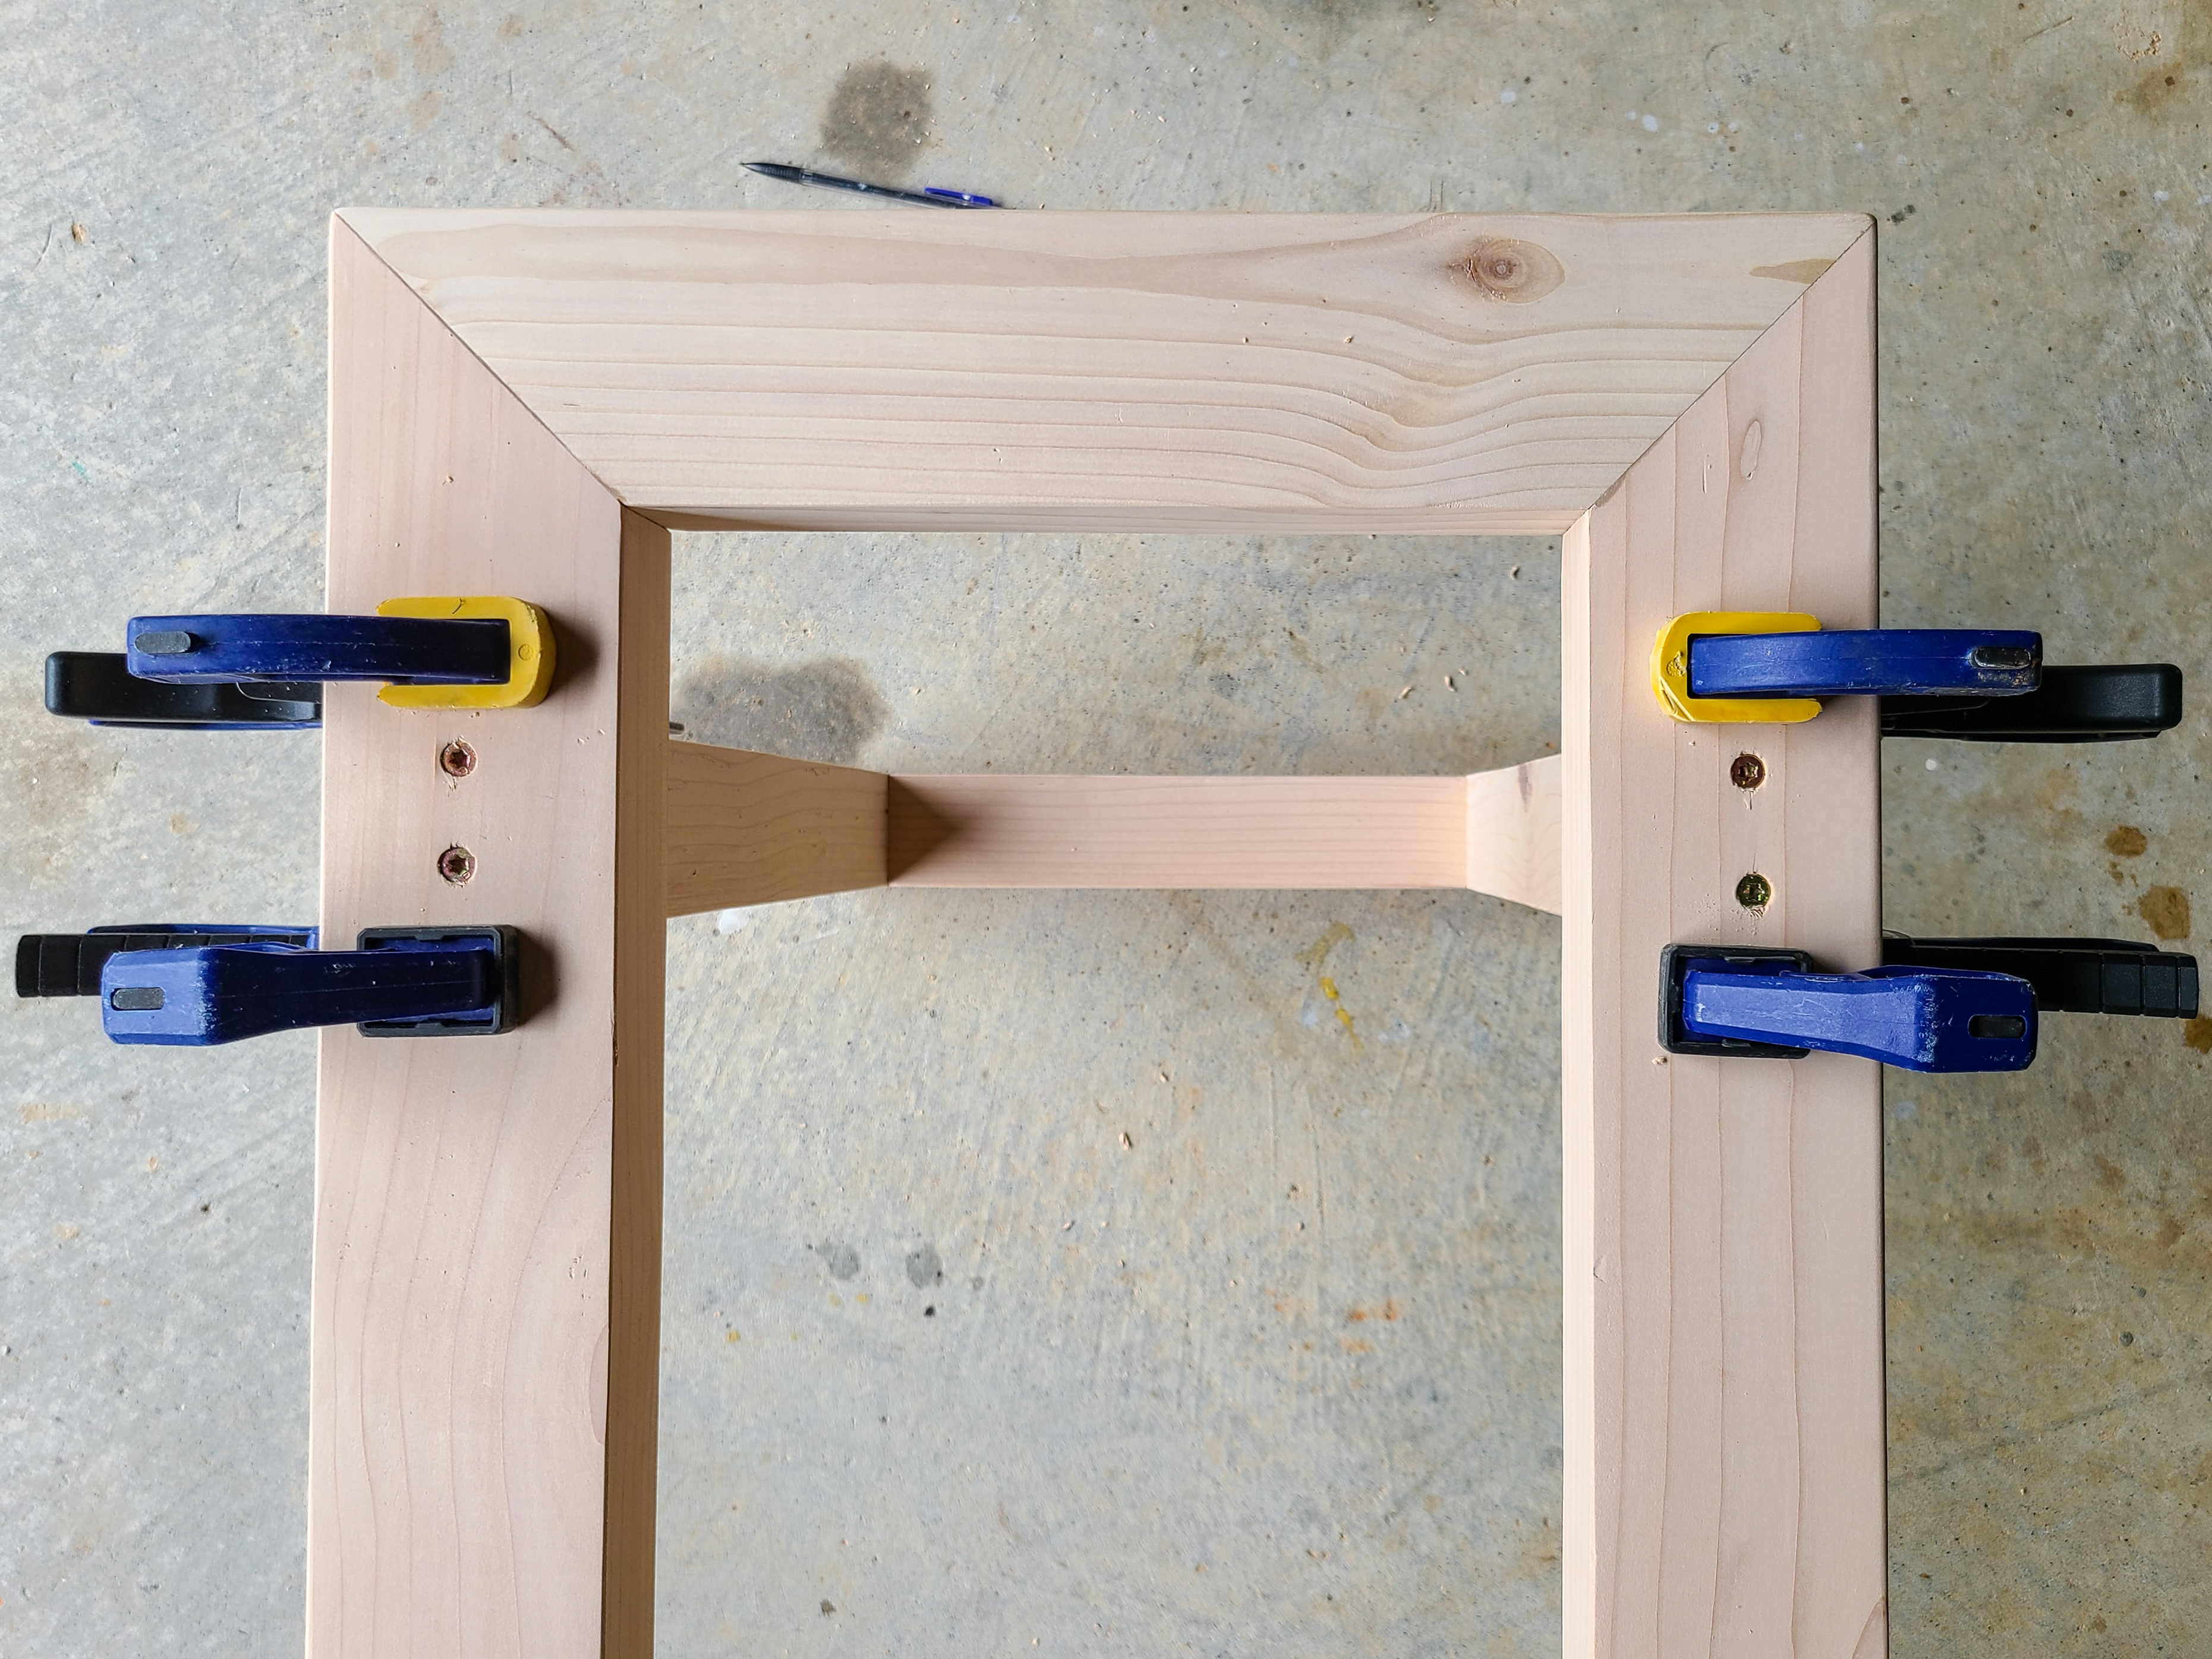
Top Frame
Now for the top frame! I started by making two (2) pocket holes on the bottom of the 15″ long pieces. I attached the short pieces to the two long pieces using wood glue and pocket screws.
Since I only used one pocket screw per side, I decide to make them a little more secure by nailing each side of the corner. This would allow the wood to stay in place while the wood glue dried.
Attach Legs to Top Frame
On the underside of the top frame, I marked 4″ in from each end. I then placed a clamp at the edge of this mark.
I put wood glue on each side of the legs, placed the leg upside down on the top frame and butted it up against the clamp. I then placed another clamp securely against the other side of of leg. The clamps kept the leg in place when I turned the bench over.
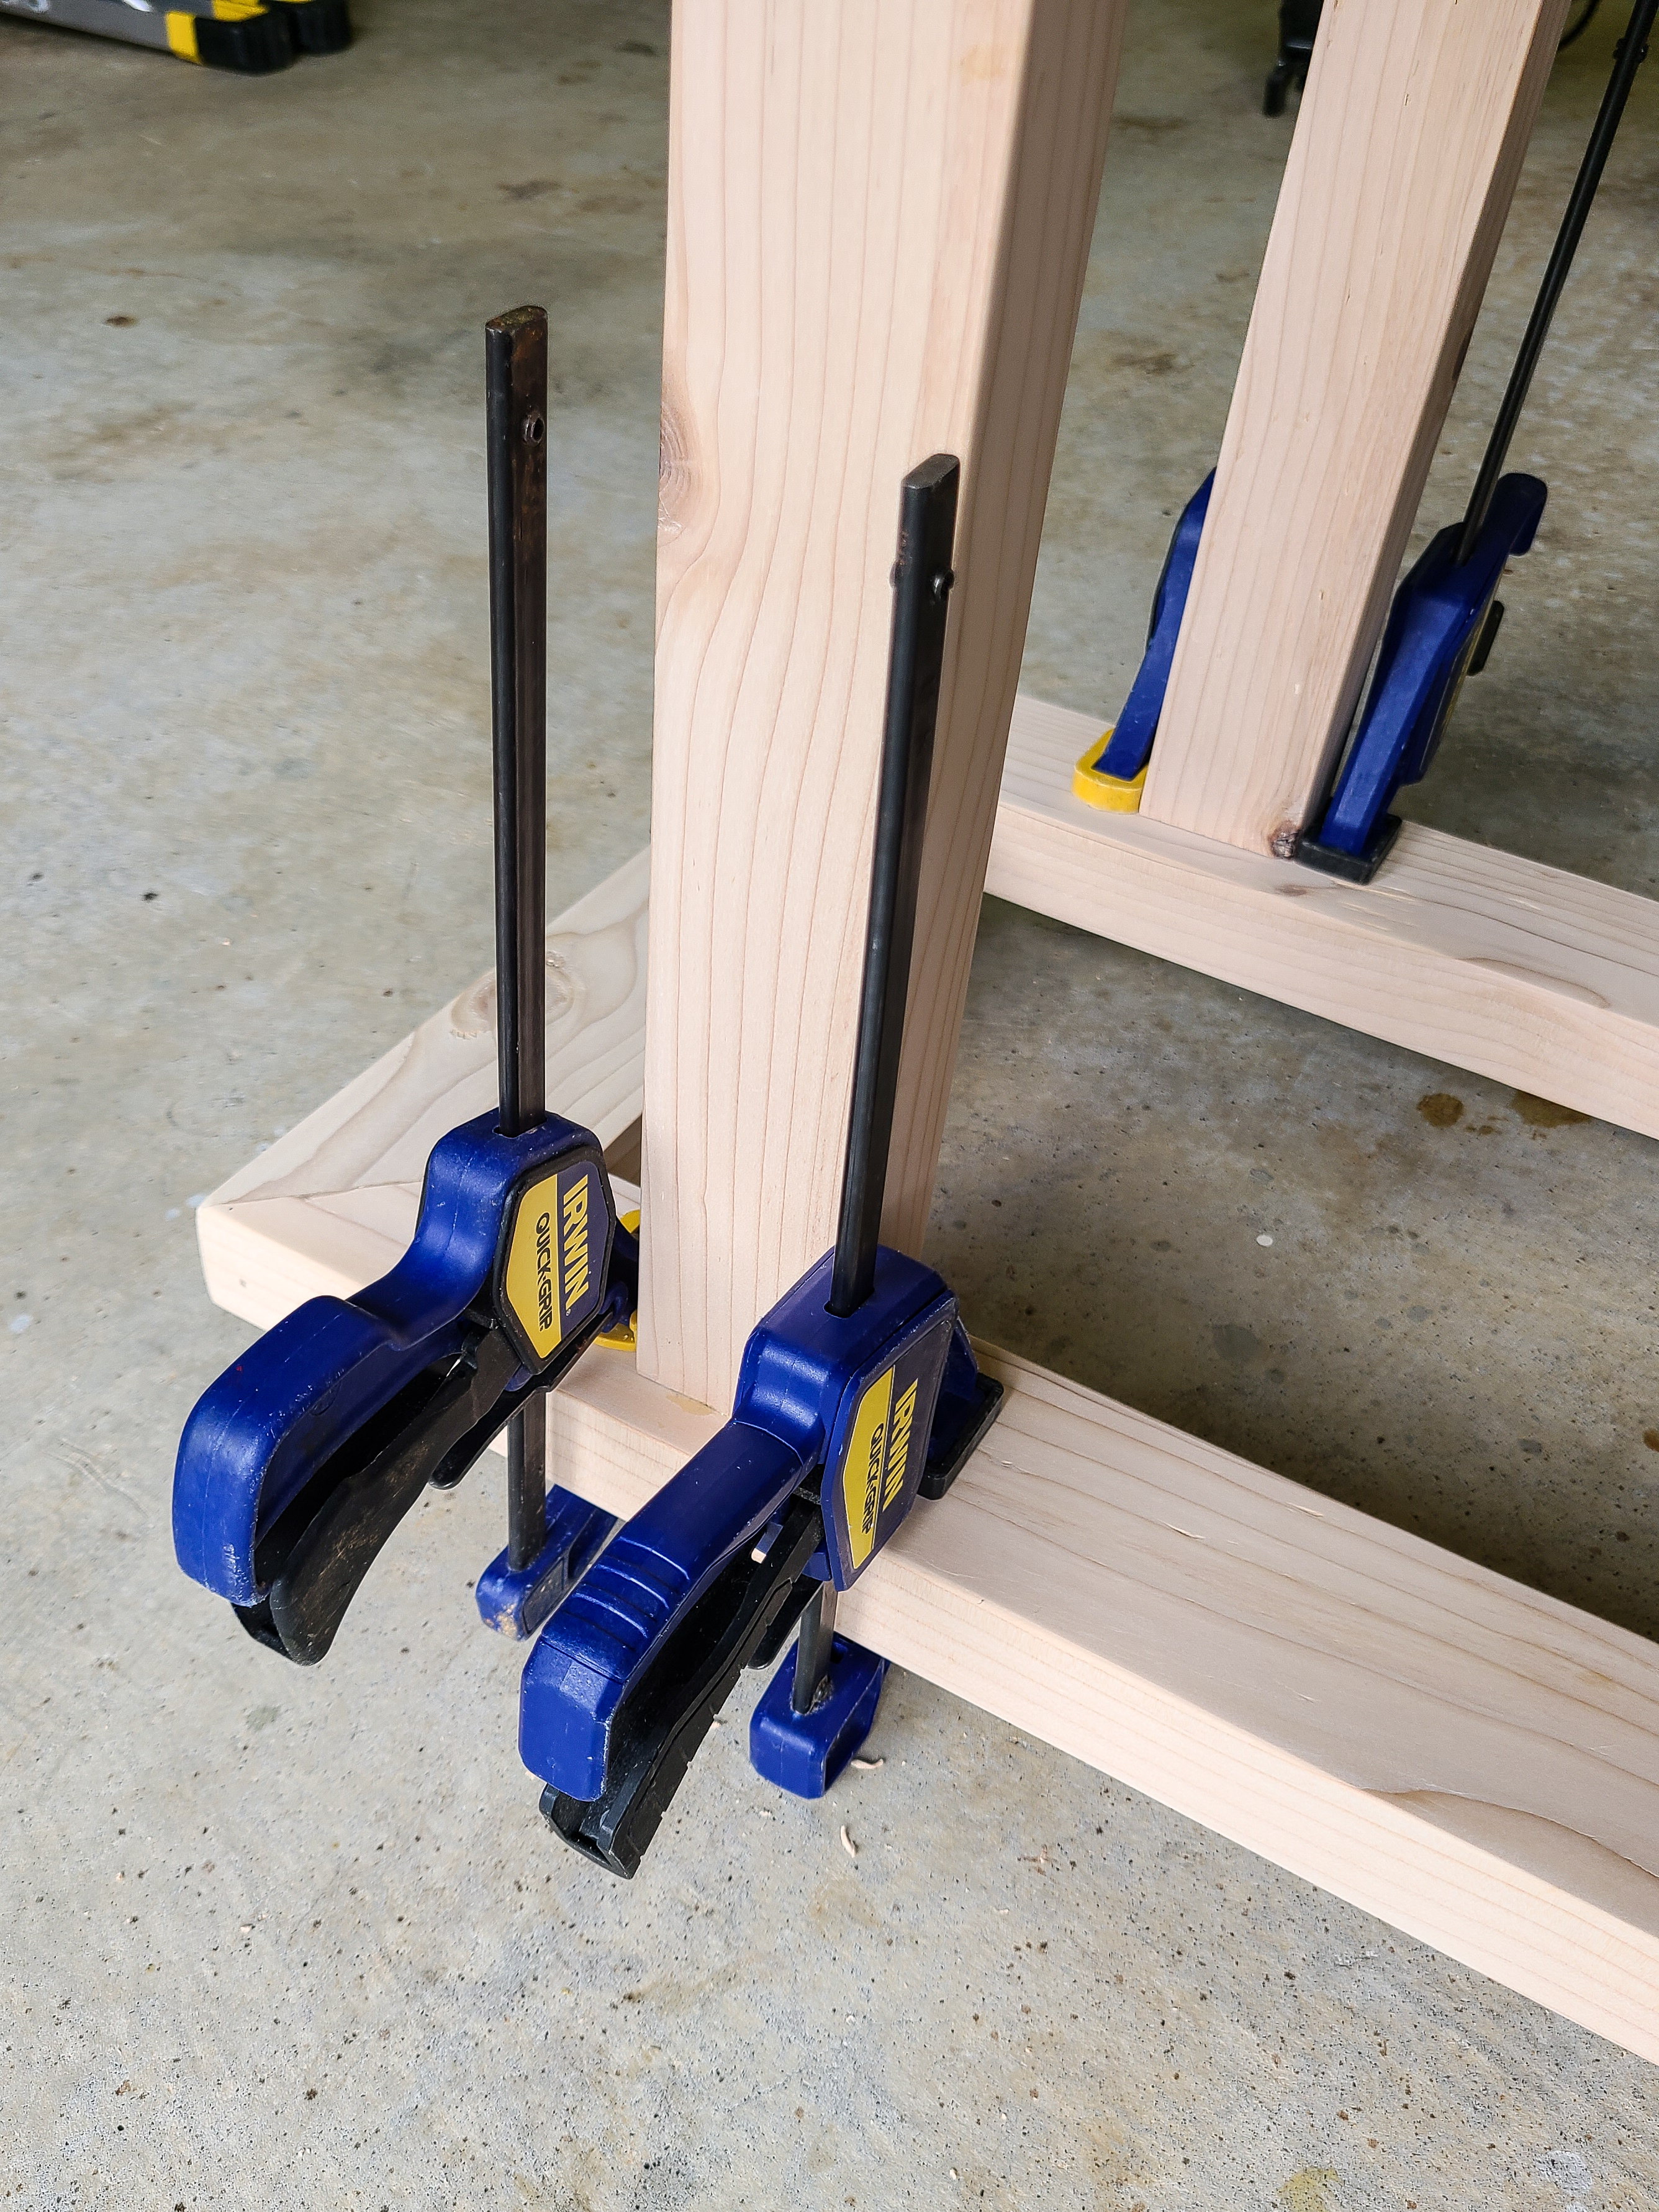
From the top of the top frame, I made two pilot holes through the top frame and into the legs.i secured them together with 3-1/2″ construction screws.
Stain and Seal Frame
Once the frame was fully assembled, I stained and sealed it. For the stain, I used my favorite water based stain in Early American. I then applied two coats of a water based poly and lightly sanded between coats.
Upholster Top Piece
I started by cutting a piece of 1″ foam the size of the piece of plywood. I used a spray adhesive to hold the foam to the plywood (which honestly didn’t work very well) and cut the foam with an electric carving knife. The electric carving knife was key…it made the cuts clean and easy!
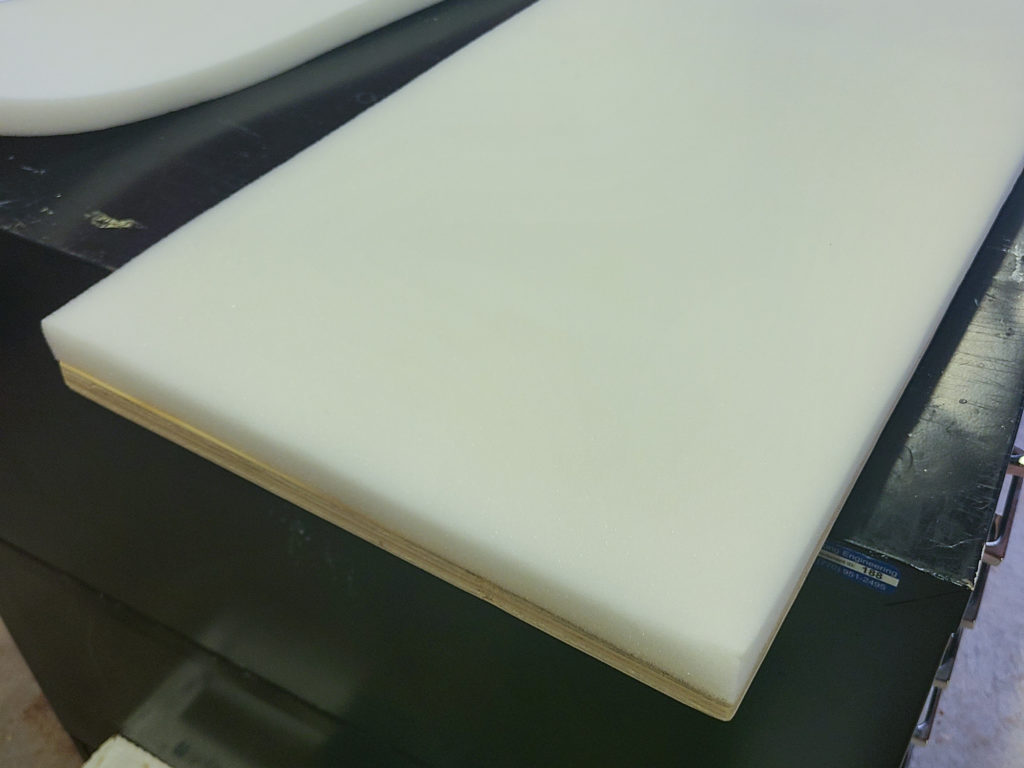
If I would have know what I was doing, I probably would have cut the foam larger than the plywood. Unfortunately, I did not and when I wrapped the fabric around the foam and plywood, the plywood edges felt pretty rough. I decided to wrap the foam and plywood in batting before upholstering it.
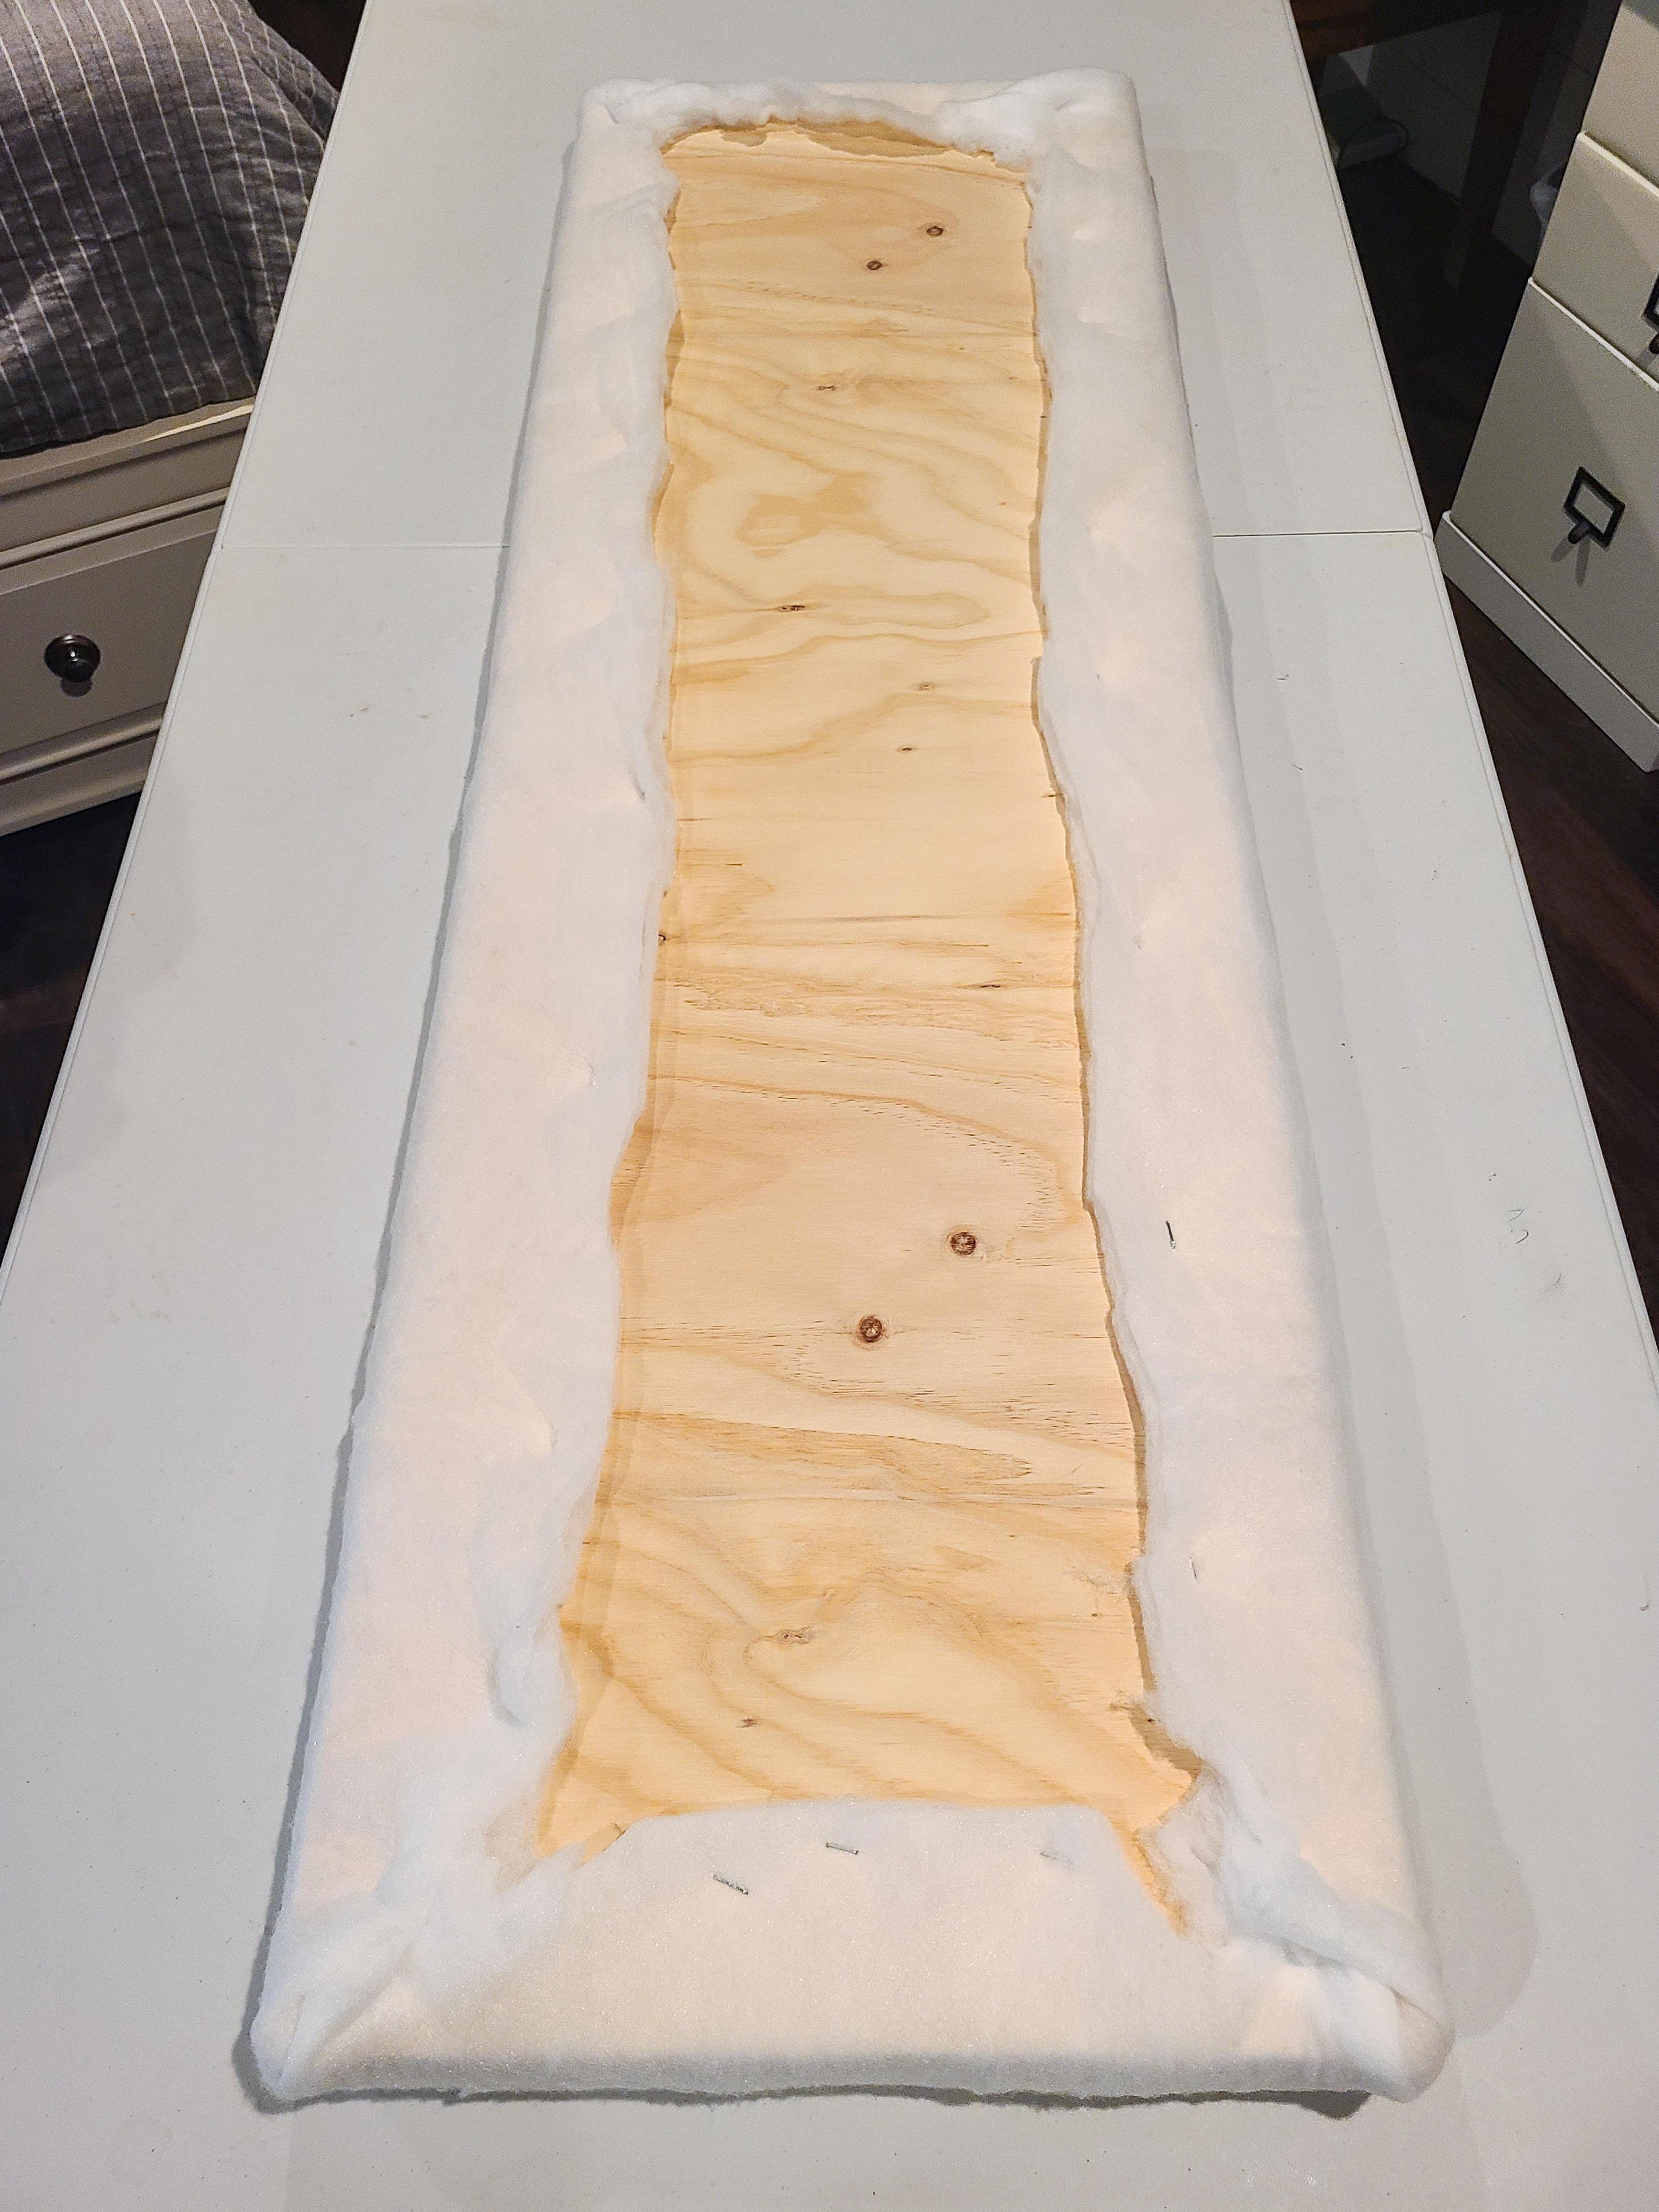
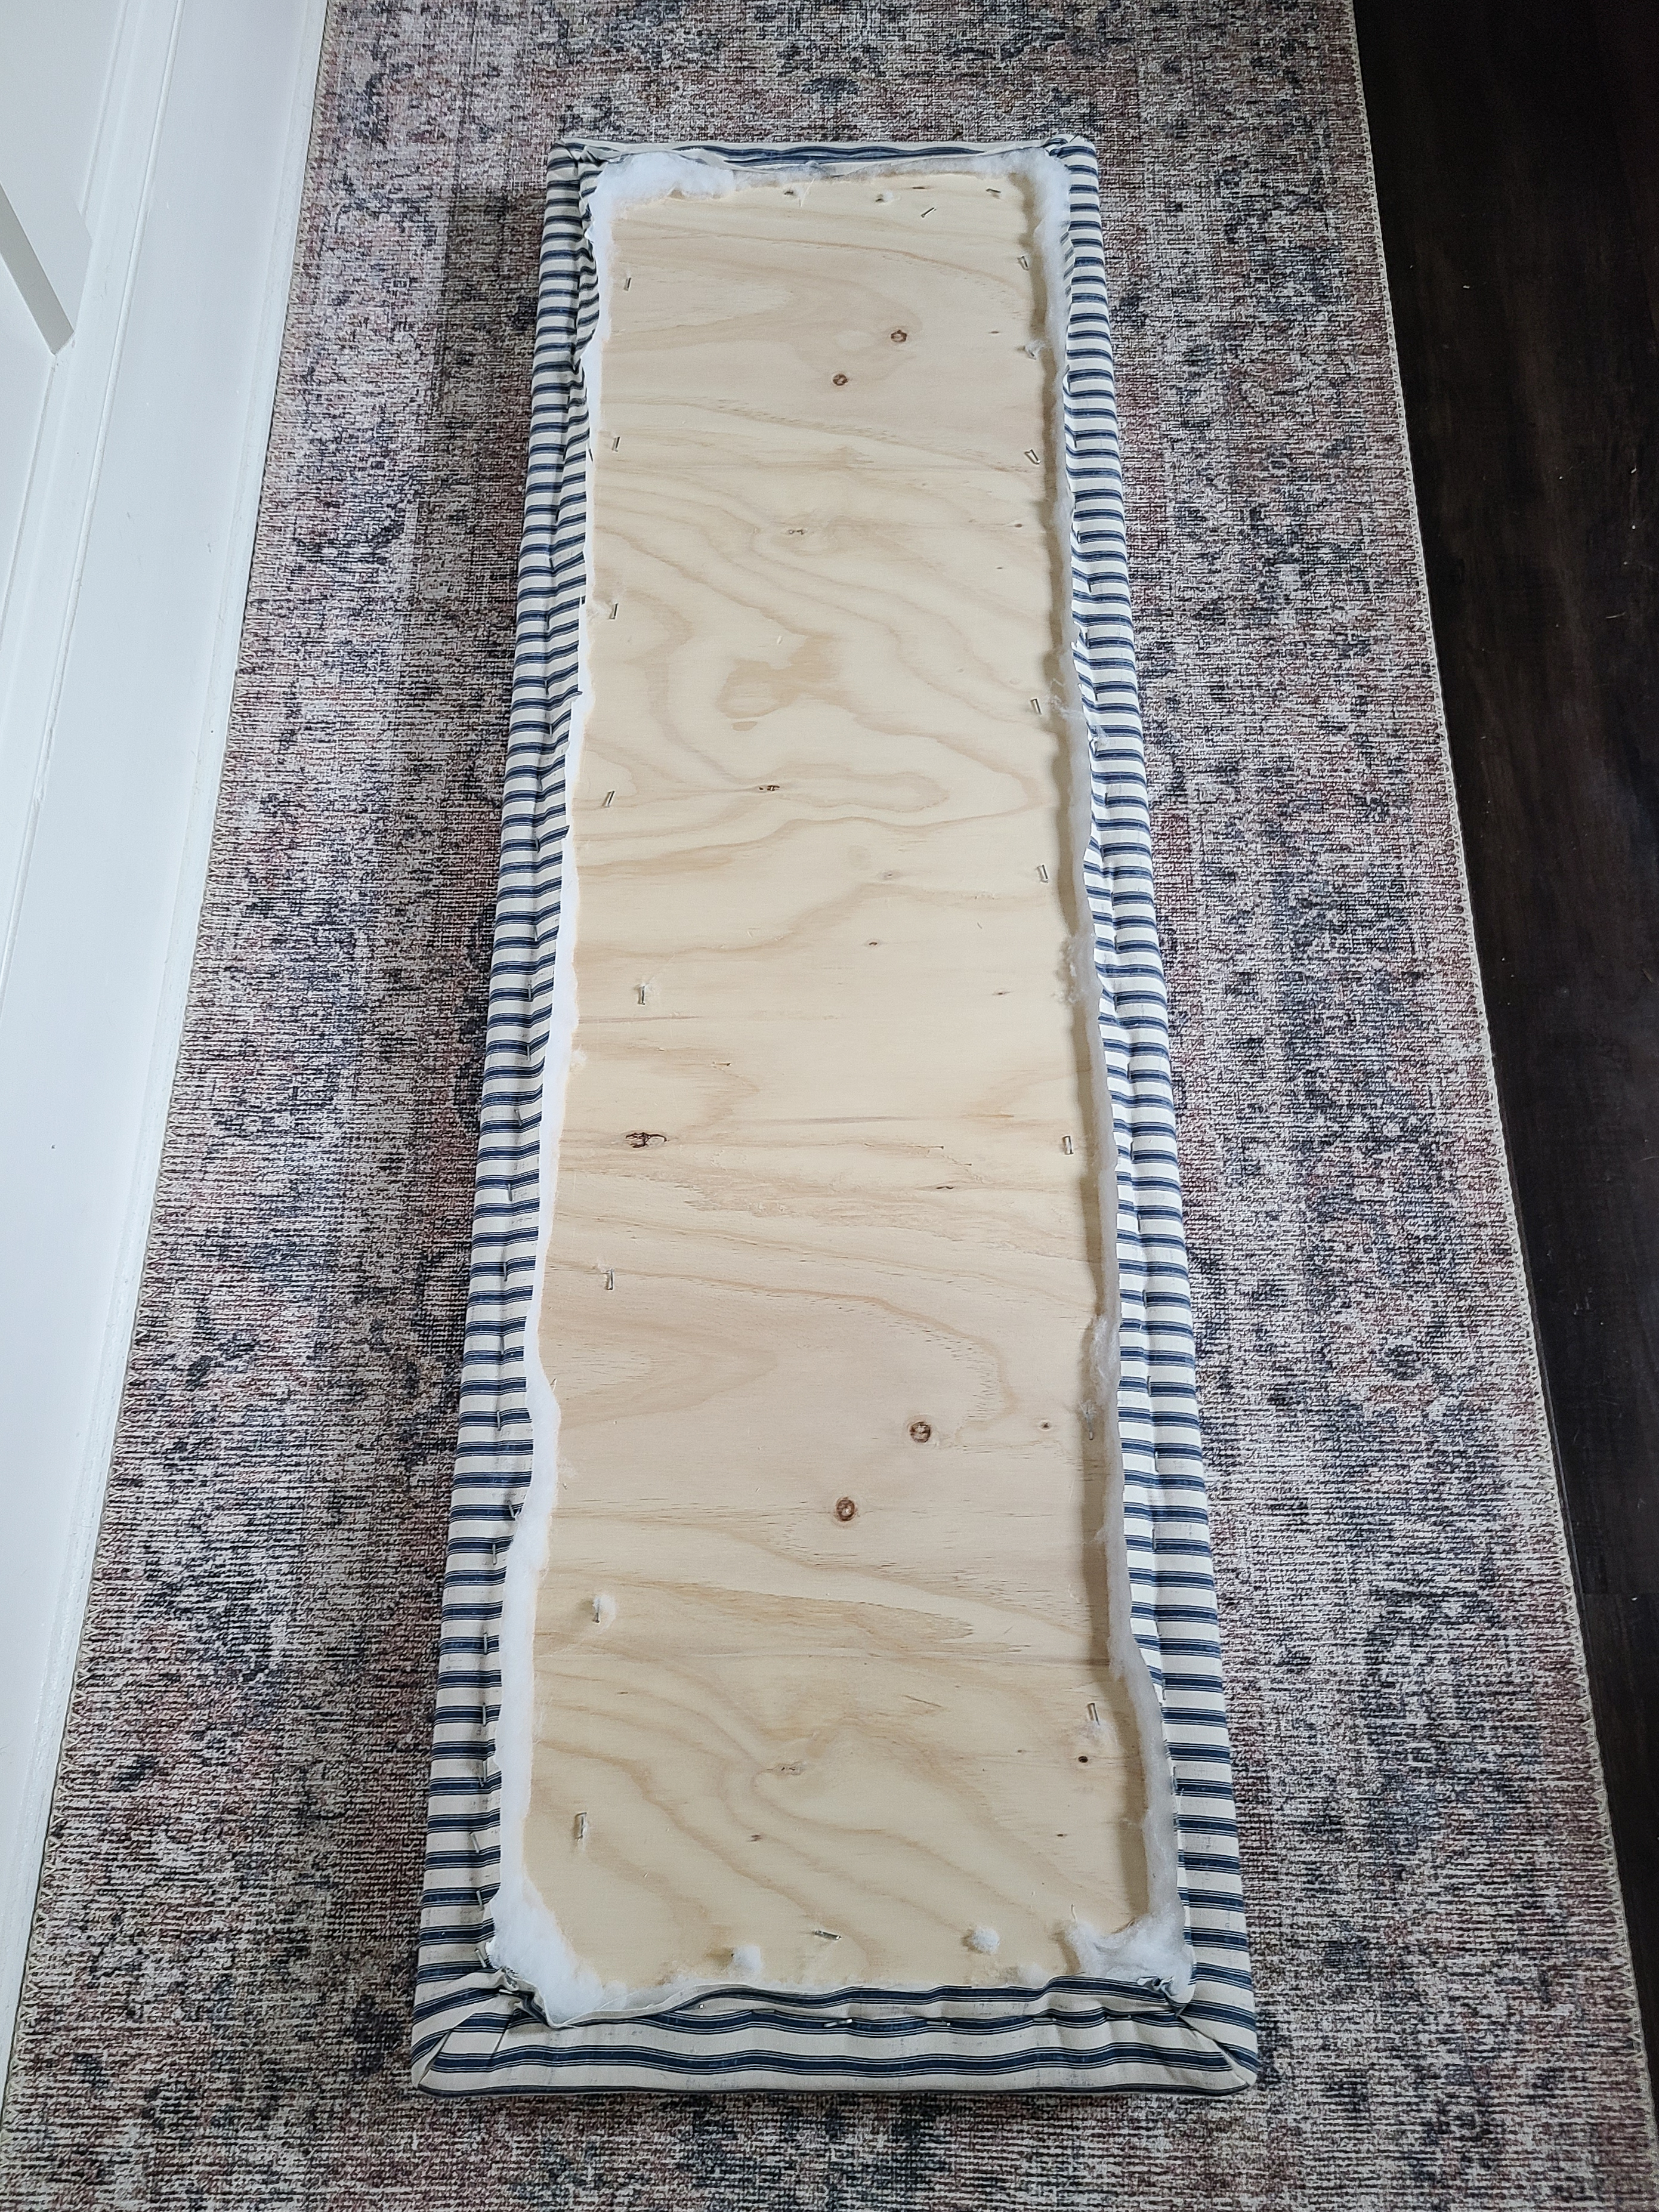
Now for the fabric…I picked a blue and white striped fabric. I wanted nice, clean corners, so I had my mom sew the corner seams before I stapled it to the plywood. This step can be skipped.
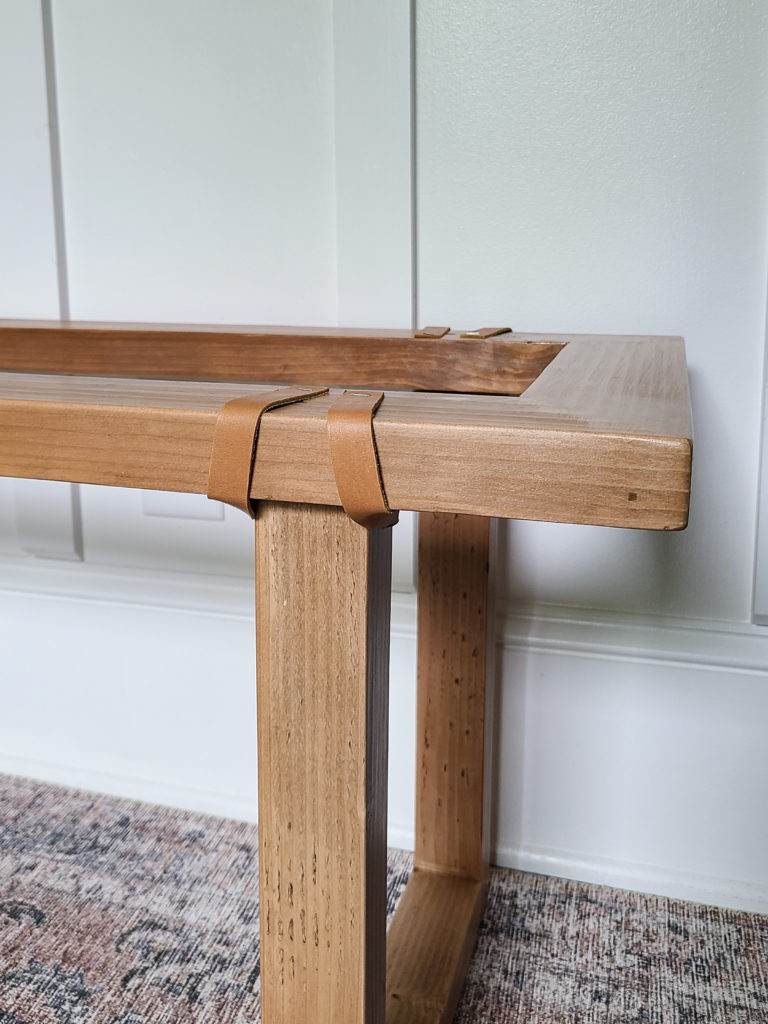
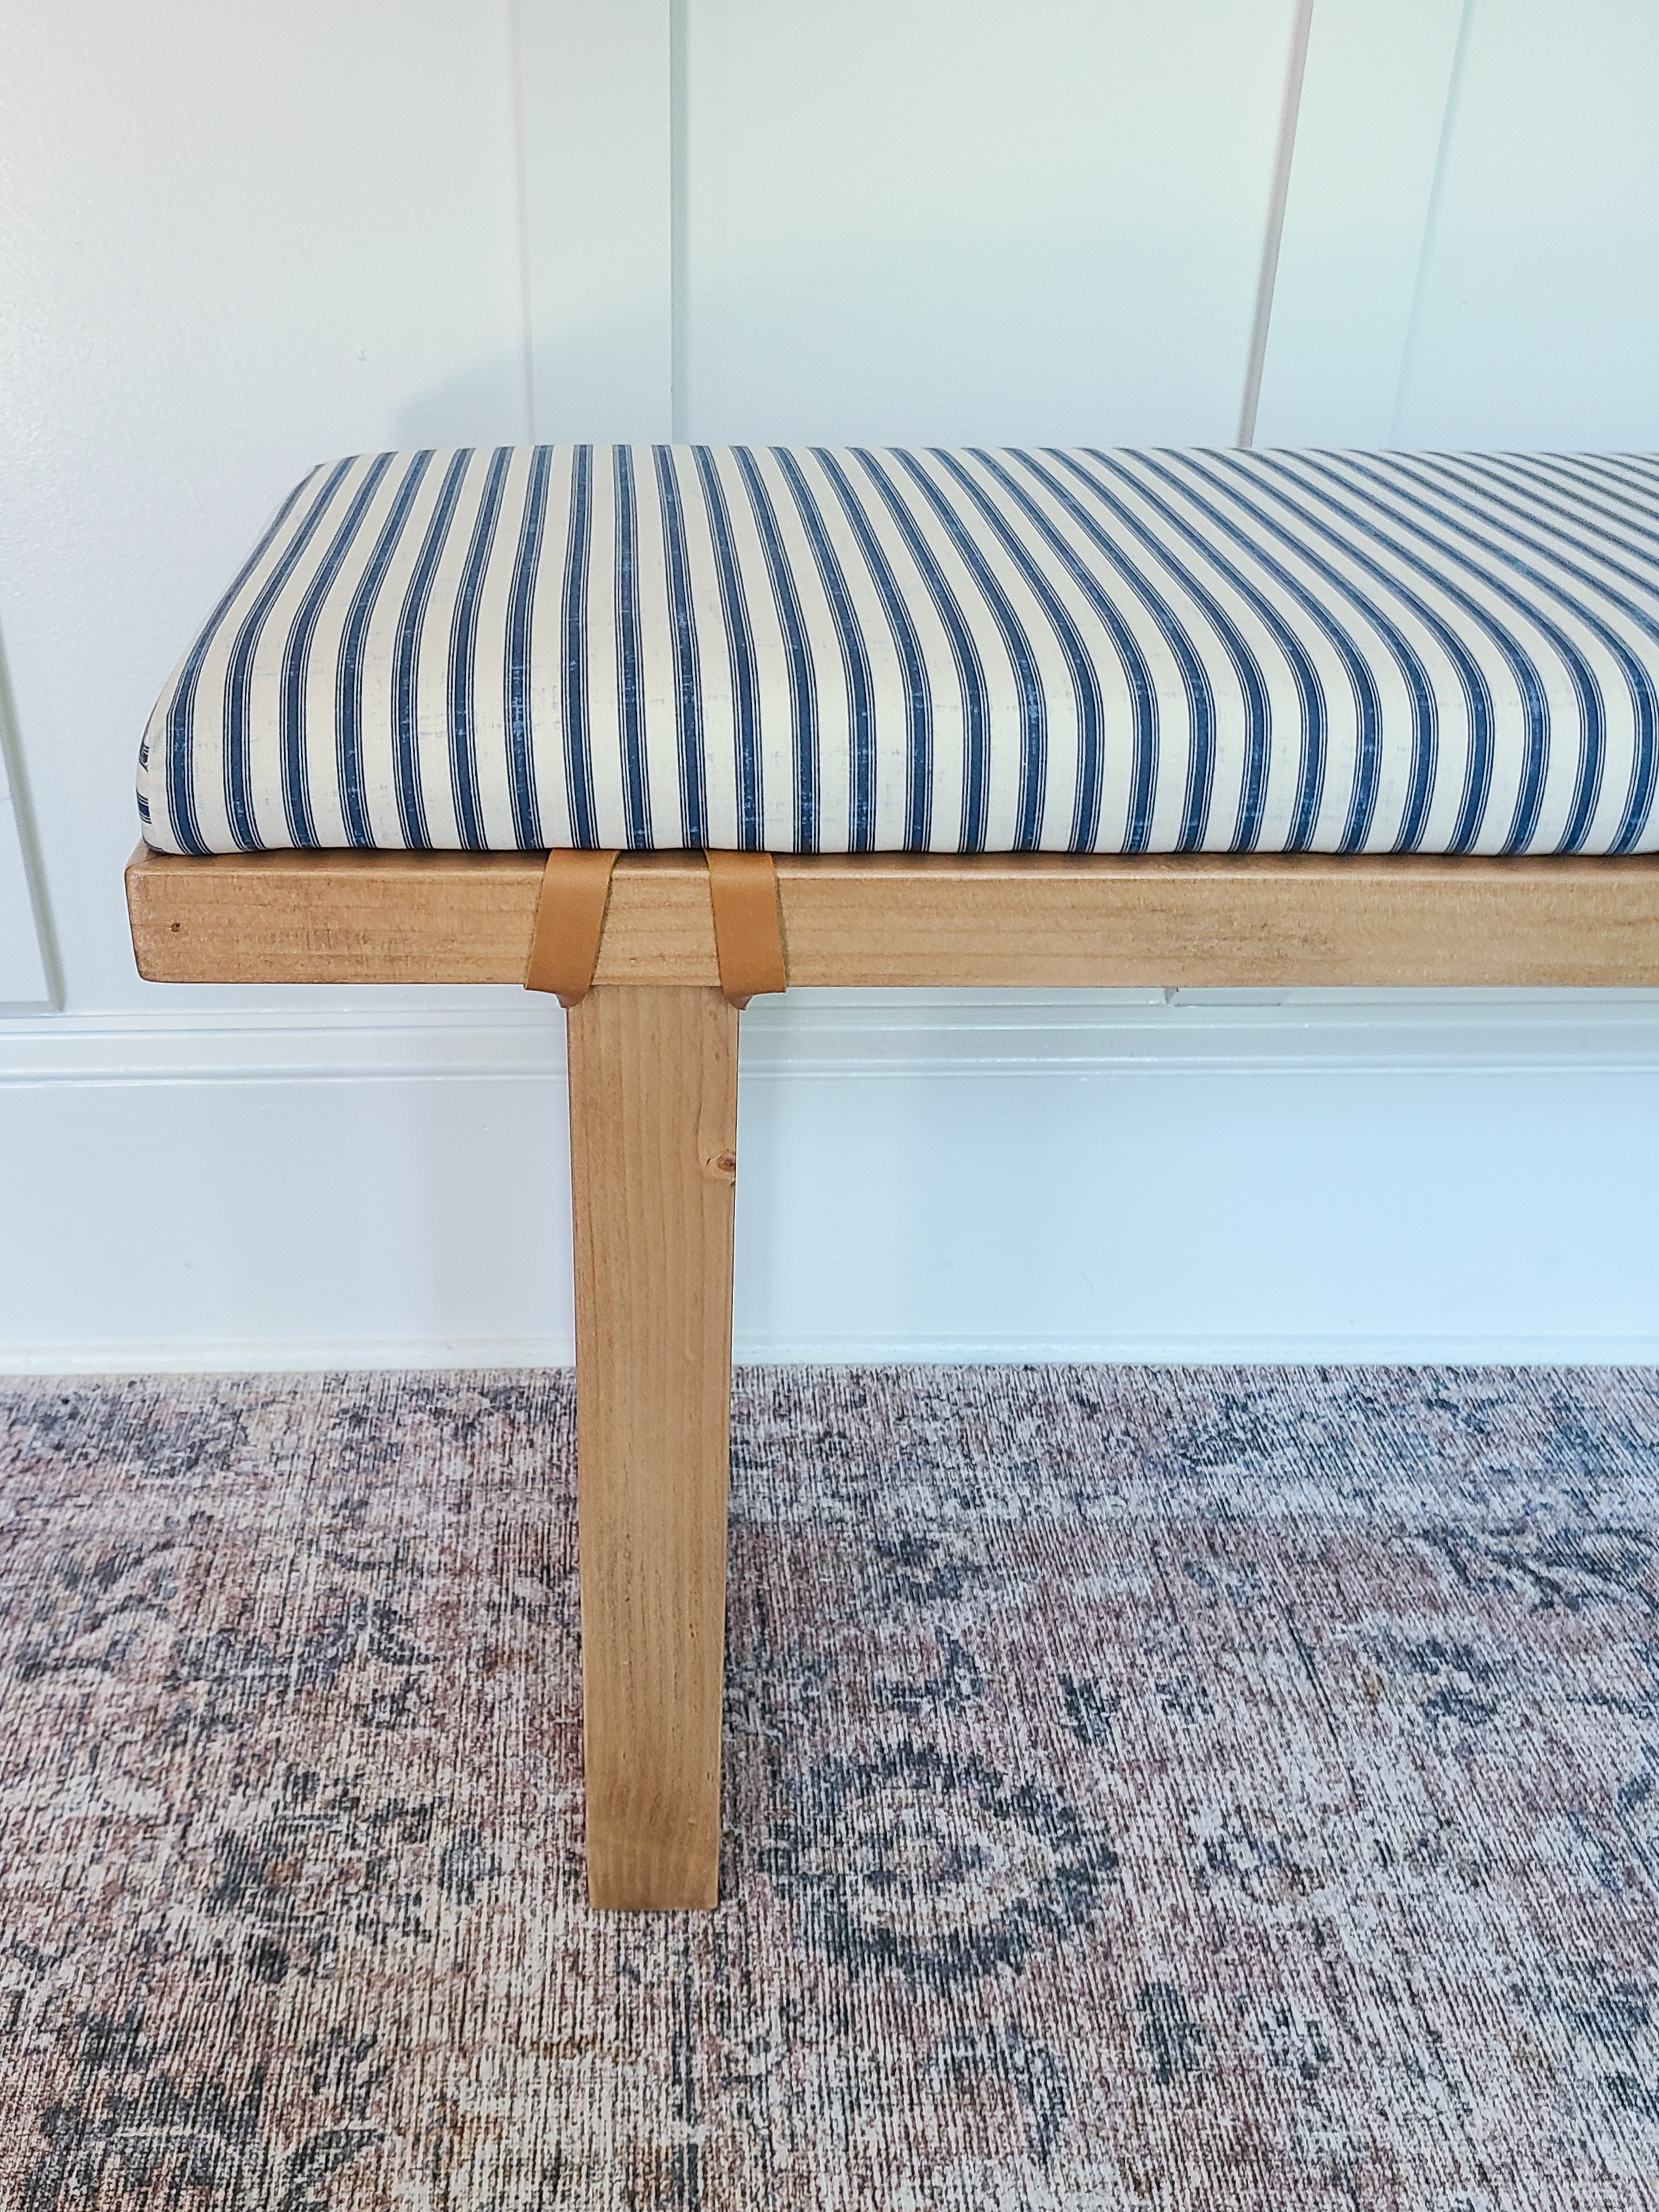
Leather Strap Detail
Once the legs were attached to the top frame, I added my favorite detail…the leather straps! The straps are purely decorative, but I feel like they added so much character to bench.
I stapled one end of the leather strap to the top of the top frame, wrapped it around the back of the leg and stapled the other end to the top of the top frame. I made sure it was tight and laid flush against the leg.
Top Piece
The final step of the assembly was securing the top piece to the frame. I place the upholstered top piece upside down. I then positioned the frame on top of the top piece. I made pilot holes through the frame and into the plywood of the top piece. I secure them together with 2″ long wood screws.
This entryway bench was a quick and fun build! The end product was beautiful and fit perfectly in my entryway! That’s the beauty of DIY…you can make exactly what you want to fit your style and space.
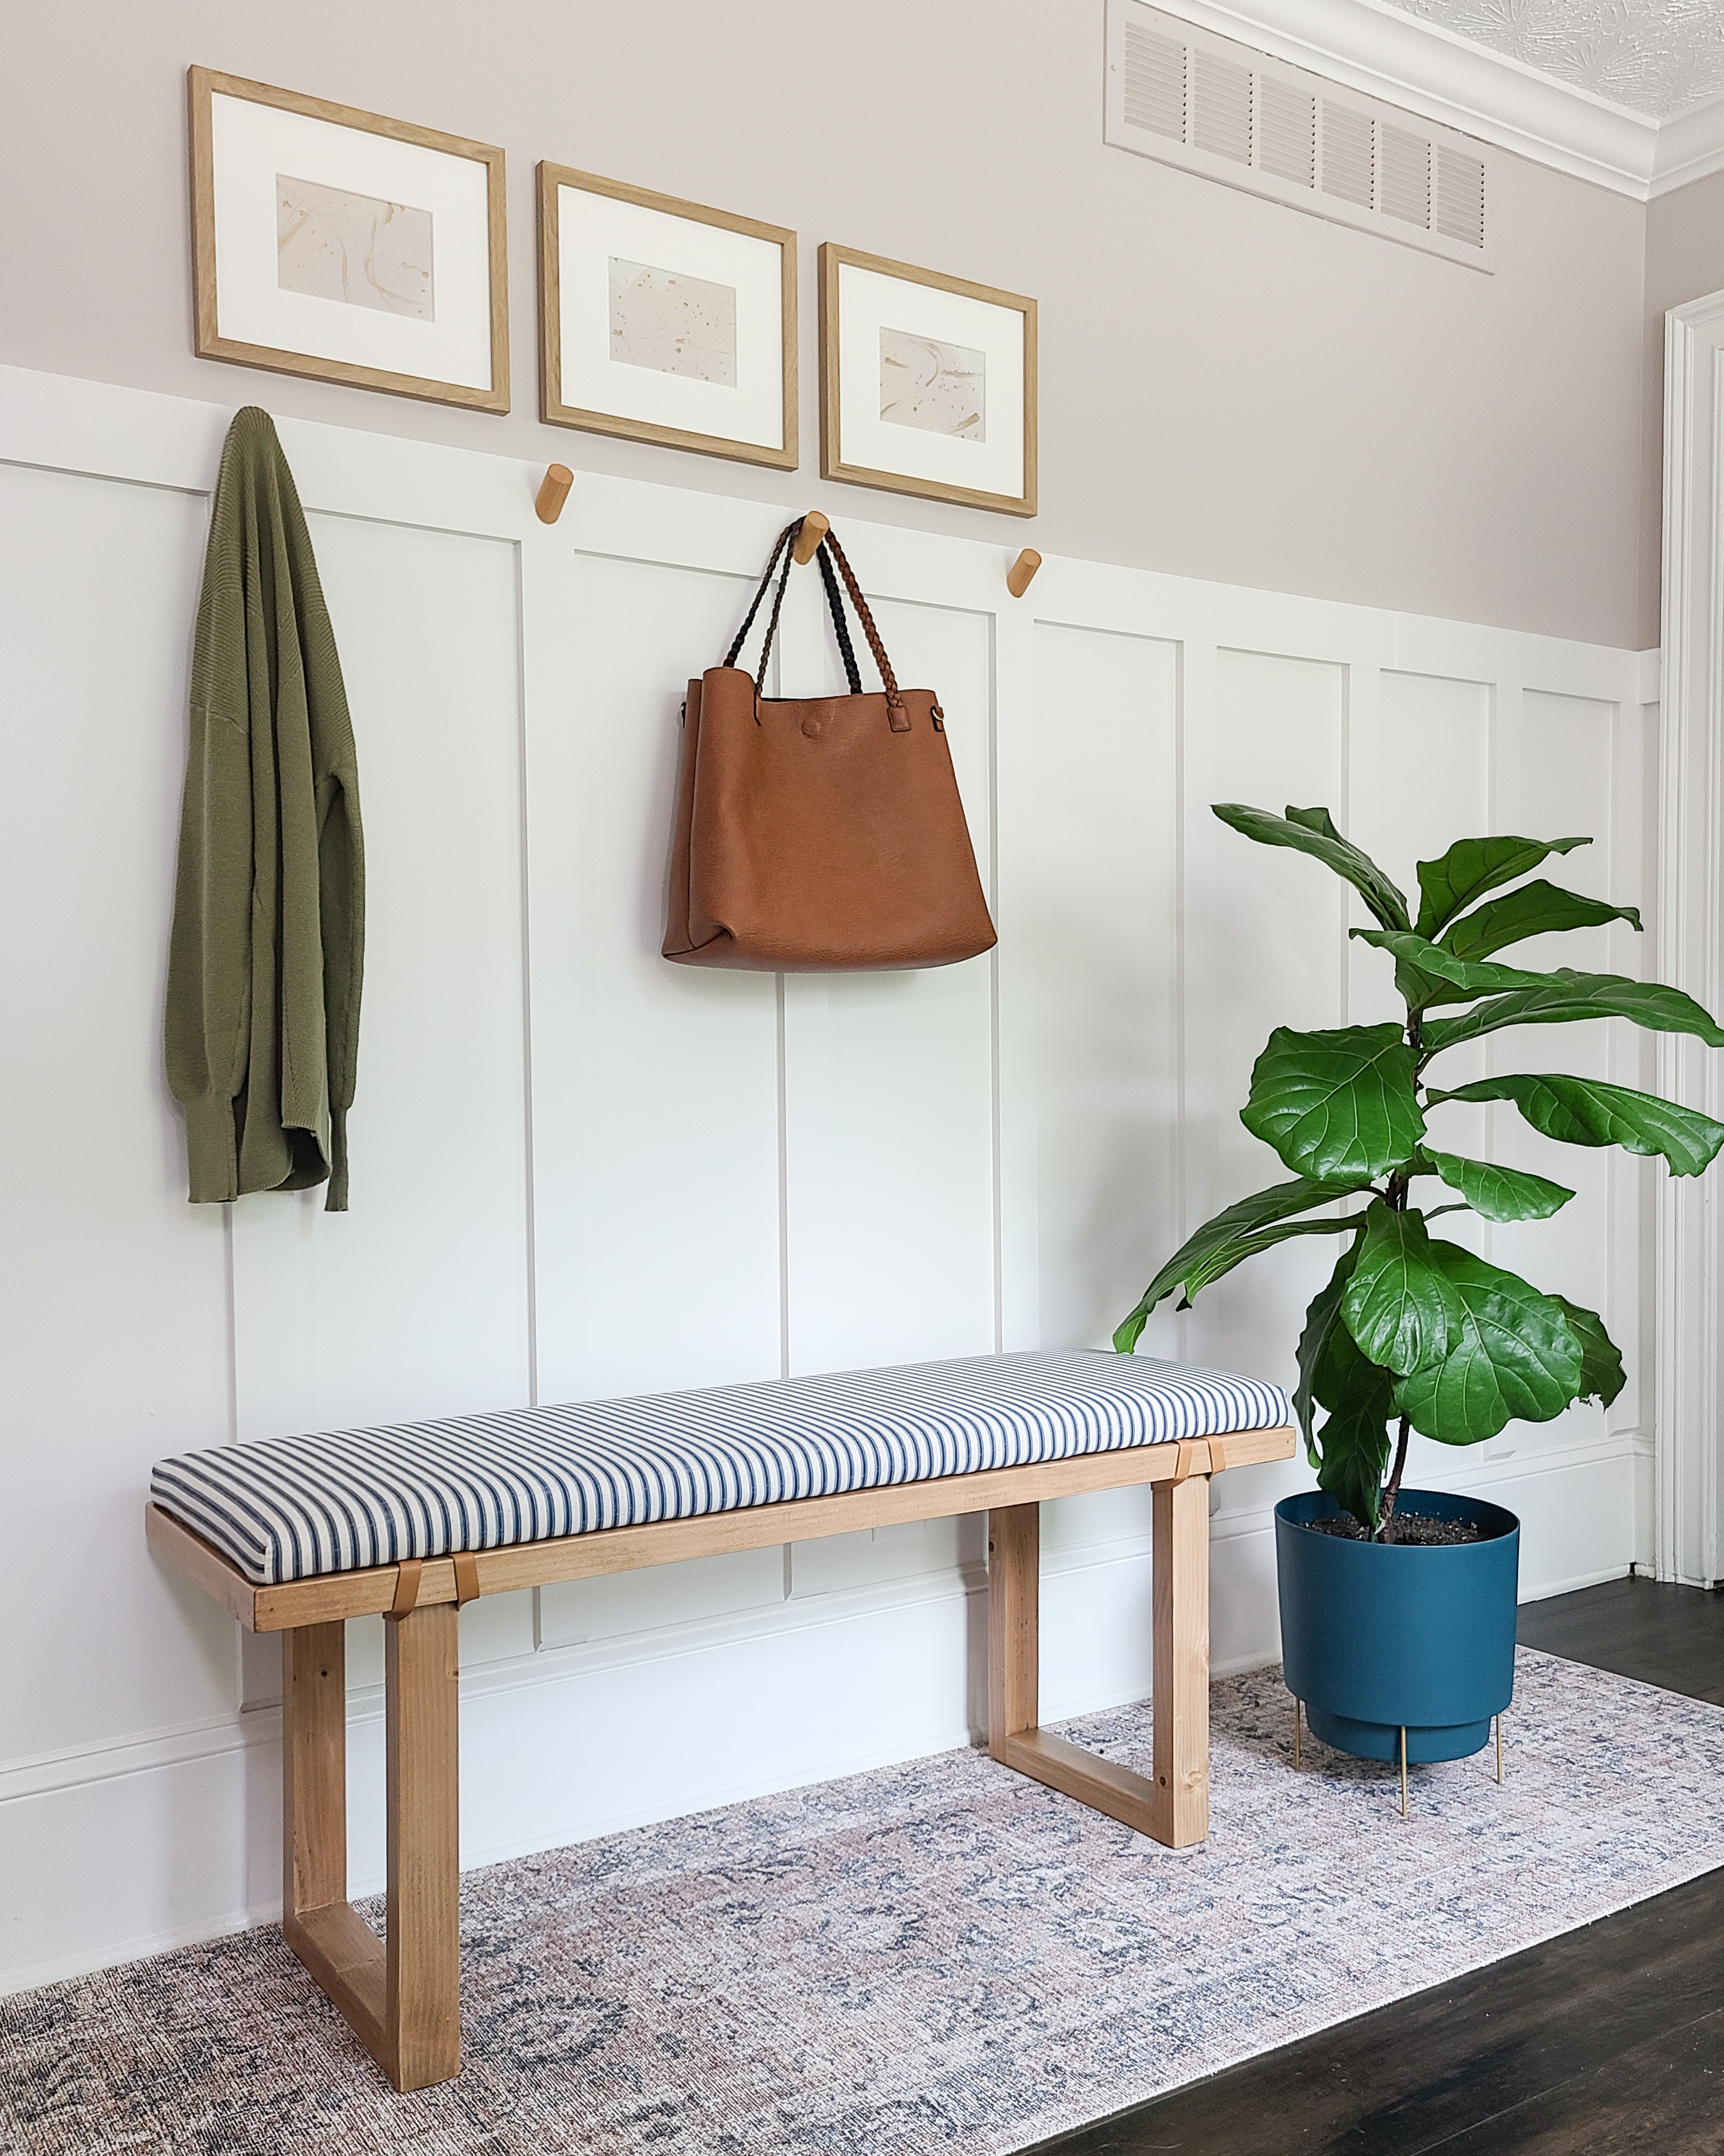
If you like the style of this entryway, be sure to check out my post on how I installed the board and batten!