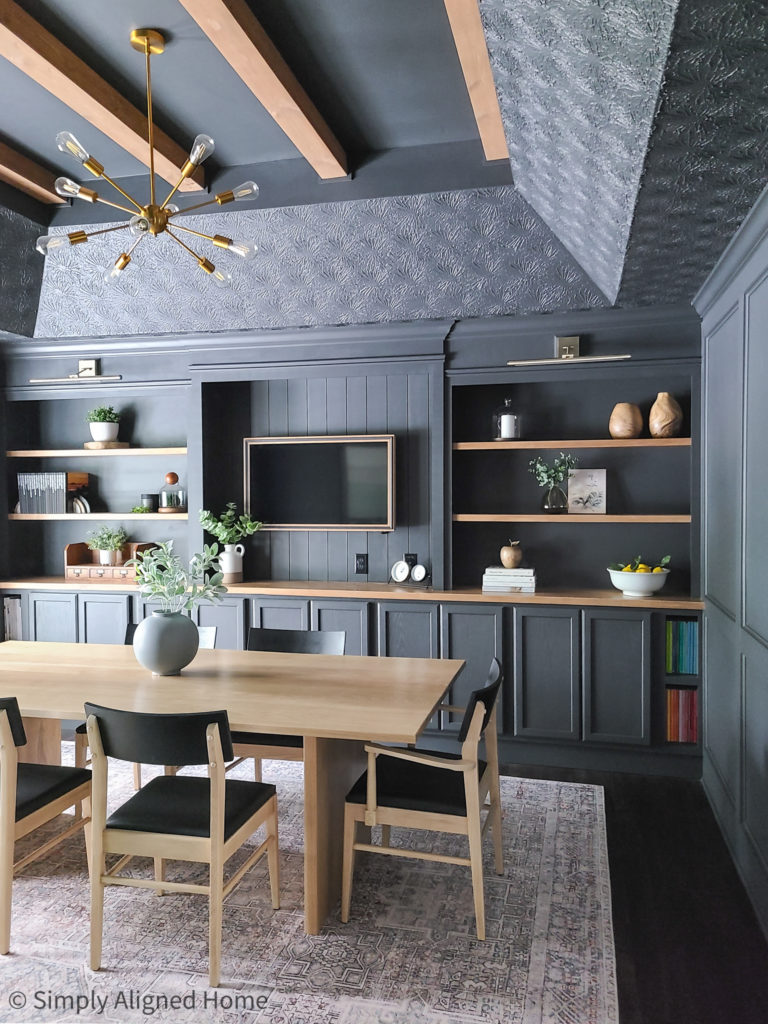
My office/dining room transformation was quite the undertaking! I built everything including the massive built-in unit, white oak dining room table, faux wood beams and picture frame moulding. I have received so many questions about how I made the built-in unit. Well, I took it one step at a time…so that is how I’m going to share the process. I’ll start here with how made the base of the built-in unit, then I will share how to make the upper units and finish it all off with trim and paint.
**This post contains affiliate links to products that I used or recommend. If you purchase something through an affiliate link, I may receive a small percentage of the sale at no extra cost to you. I really appreciate your support!**
Design
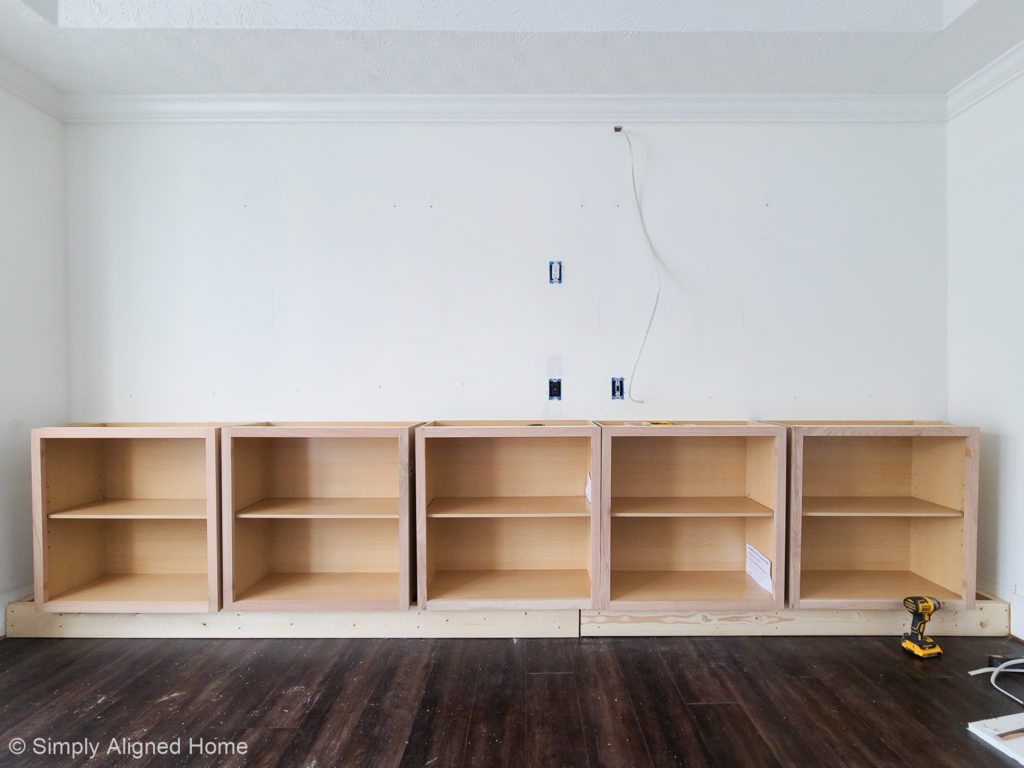
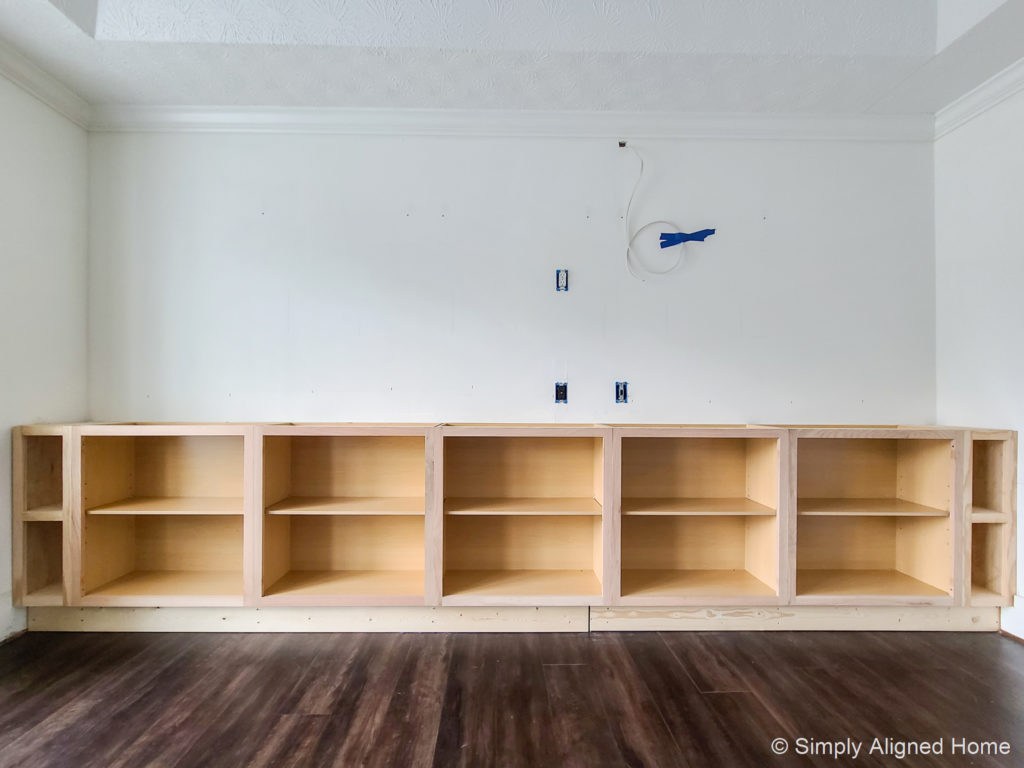
The design of the base was based largely upon the adjacent wall that housed bay windows. The depth of the wall was not great enough to use standard base cabinets. I could have custom built cabinets, but chose to use pre-made unfinished upper cabinets instead.
Once I decided on upper cabinets, I needed to decide the width and quantity of cabinets. As with a lot of my projects, I was planning this part out the day before I wanted to start building it. My decision was based on what was in stock at the time. I ultimately decided to purchase five (5) cabinets that were all the same width. This left me with space on either end of the base that I would fill with custom built bookcases.
Build the Frame
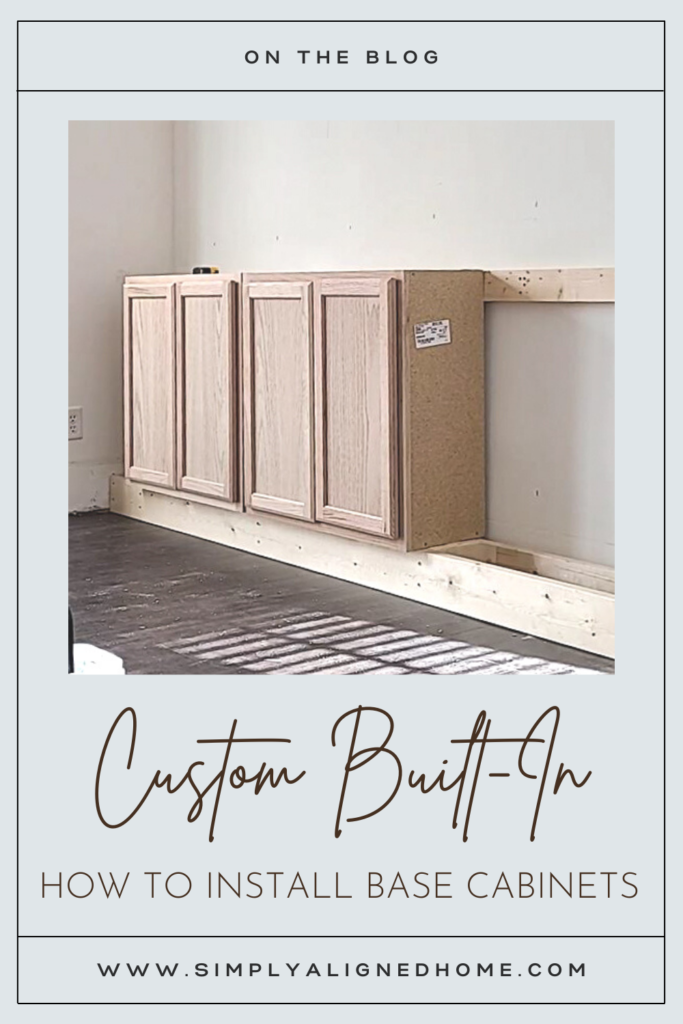
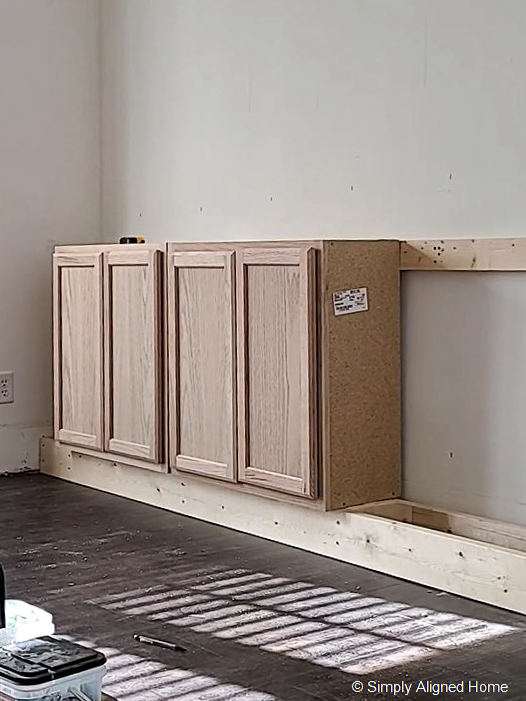
With the cabinets purchased, I was ready to build the frame for the cabinets to sit on. I chose to build it out of 2×6’s to give the base of the unit a little extra height. The frame was the full length of the wall and the slightly narrower than the depth of the cabinets. I put one cross member where each of the cabinets would sit.
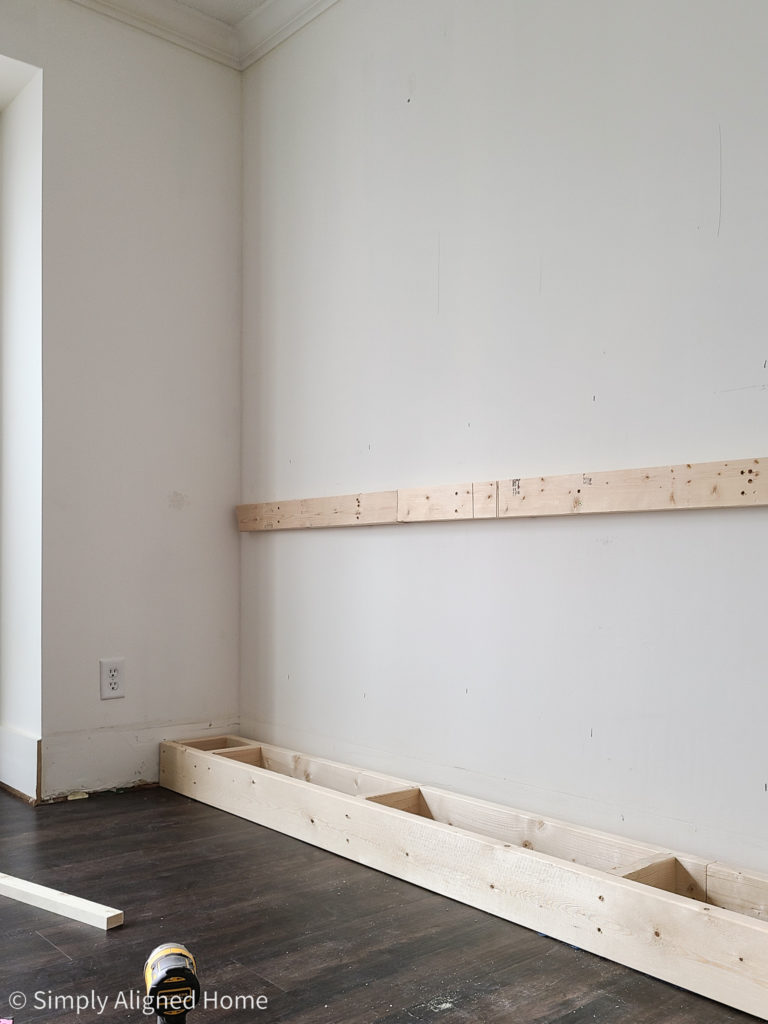
In order to gain just a little more depth for the countertop, I spaced the frame and cabinets off of the wall using 2×4’s. I secured 2×4’s to the studs at the bottom of the wall and also at the same height of the cabinets. I then made sure the frame was level and secured it to the lower 2×4.
Remove Cabinet Doors and Hardware
I wish I would have done this earlier in the project. I waited until I was ready to screw the cabinets together. It is easiest to just remove the doors and hardware first. I set the doors aside until I was ready to paint them.
Add Cross Supports to the Cabinets
Since I used upper cabinets, I wanted to add cross supports to the cabinets. I added strips of wood to the top and bottom of the cabinets. If you’re using base cabinets, this step is not necessary.
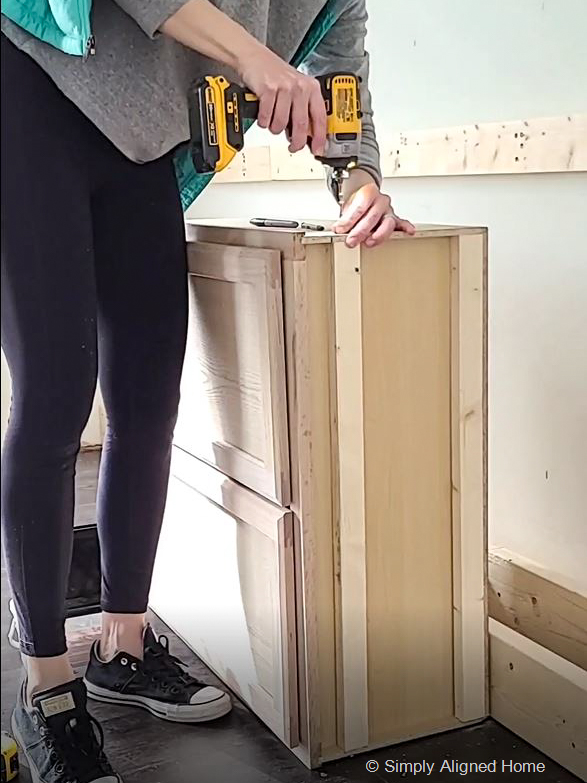
Screw the Cabinets Together
Before I secured the cabinets to the frame, I screwed the cabinets together. It is important to perfectly align the cabinets before you screw them together. If they are not perfectly aligned, you will see the seam between the two cabinets and it won’t look as nice.
I started by clamping the cabinet frames together. I then pre-drilled a hole to prevent the face frame from splitting. Using construction screws, I secured the cabinets together.
I wish I would have known about cabinet clamps before this project! They align the cabinets and hold them in place while you screw them together. Cabinet clamps really do make a huge difference when installing cabinets!
Secure the Cabinets to the Frame
With the cabinets secured together, it was difficult to move them. I tried to center them as best I could before I secured them all together. I made sure everything was level, and secured them to the base with construction screws. I screwed through the cross supports that I previously installed on the cabinets and into the base frame. I then secured the cabinets to the top 2×4 support by screwing through the back panel of the cabinets.
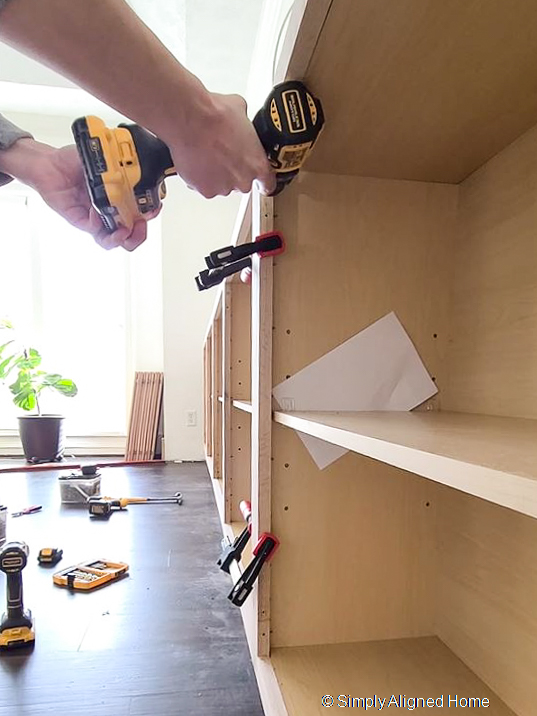
Make and Install Two Custom Book Shelves
The remaining space on the ends of the cabinets I filled with custom book shelves. I made the shelves using 3/4″ plywood. I made a box with one fixed shelf and a back panel. I finished them off with face frames made from 1×2 select pine.
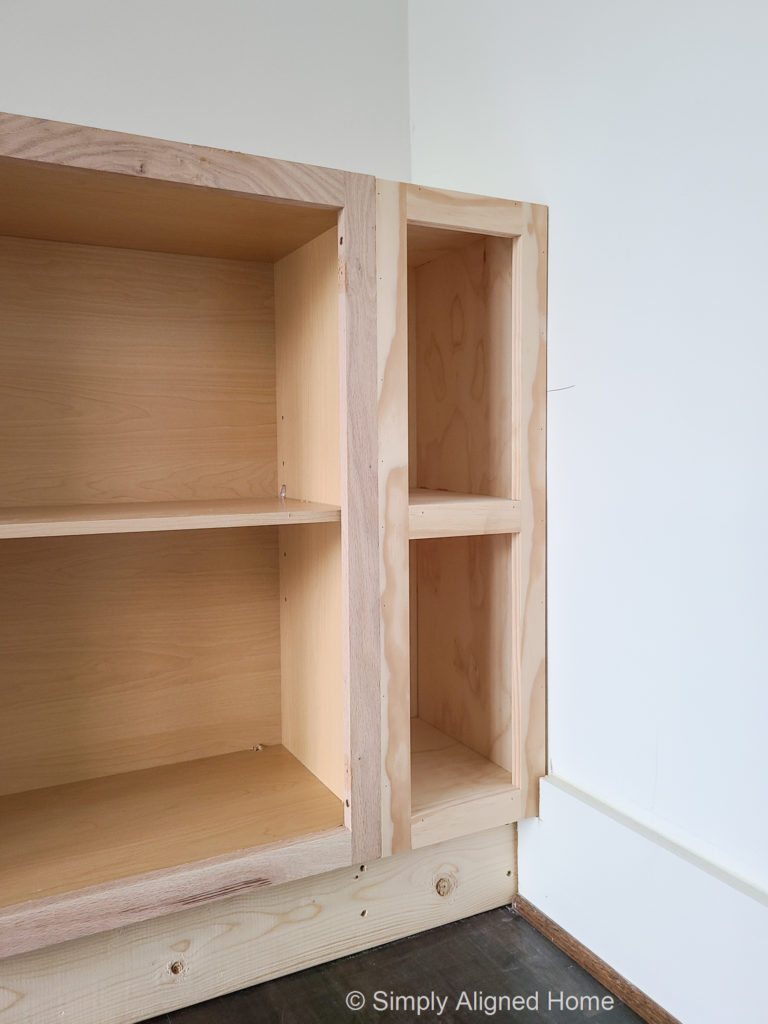
I secured the book shelves to the cabinets the same way that I screwed the cabinets together.
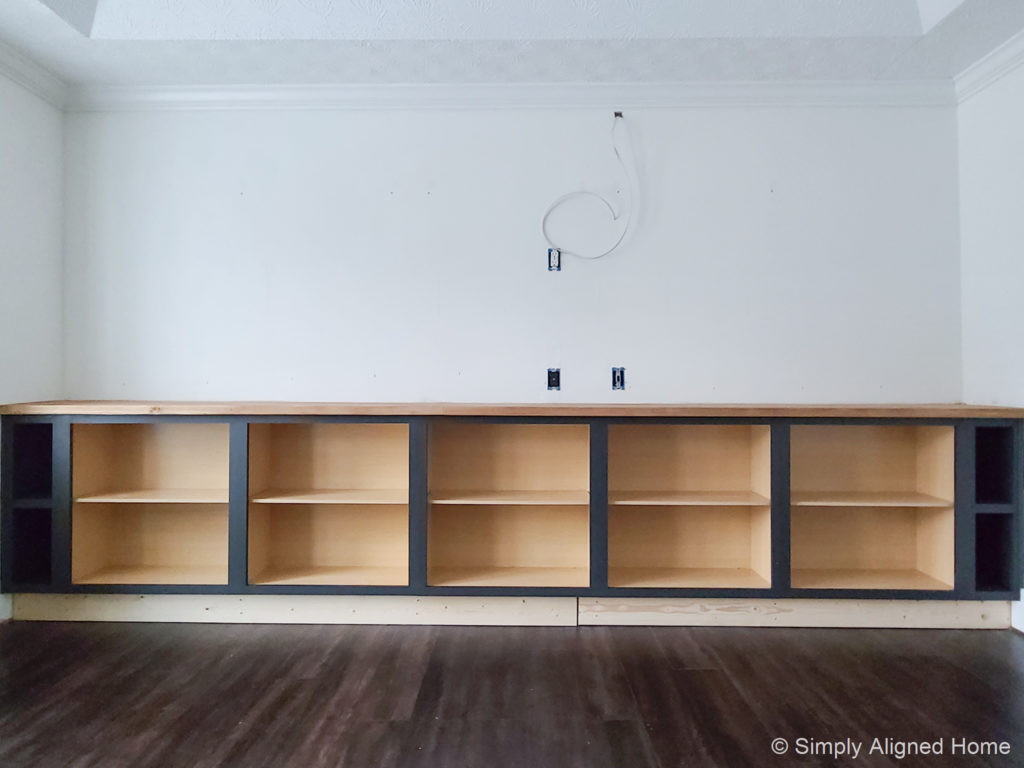
Wood Fill and Sand Cabinets
In order to make the cabinets look seamless, I added wood filler to all of the seams where the cabinets met. Once it dried, I did a light sanding using 220 grit sandpaper. It’s the little details like this that make it look more professional.
Prime and Paint the Frame
Before I installed the countertop, I primed and painted the cabinets. I decided to just paint the face frames for the cabinets with doors and the inside of the book shelves.
I applied one coat of primer and did a really light sanding before applying my first coat of paint. I finished off the cabinet base and cabinet doors with two coats of paint.
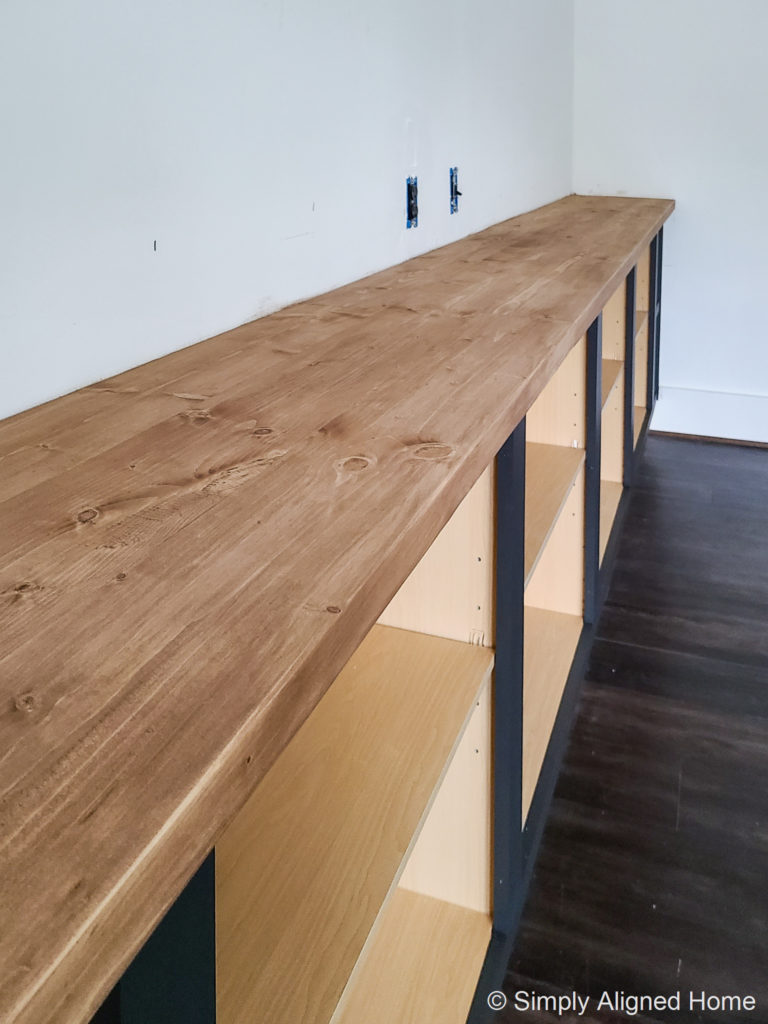
Install the Countertop
While you can buy a custom countertop, I decided to make one instead! I made a roughly 15′ long countertop out of 2×6’s. I positioned the countertop on the cabinets and secured it by screwing through the top of the cabinets where I installed the cross supports and into the bottom of the countertop.

I was being a little impatient and installed the countertop before I stained and sealed it. I recommend staining and sealing before install. I used an water based stain in Early American.
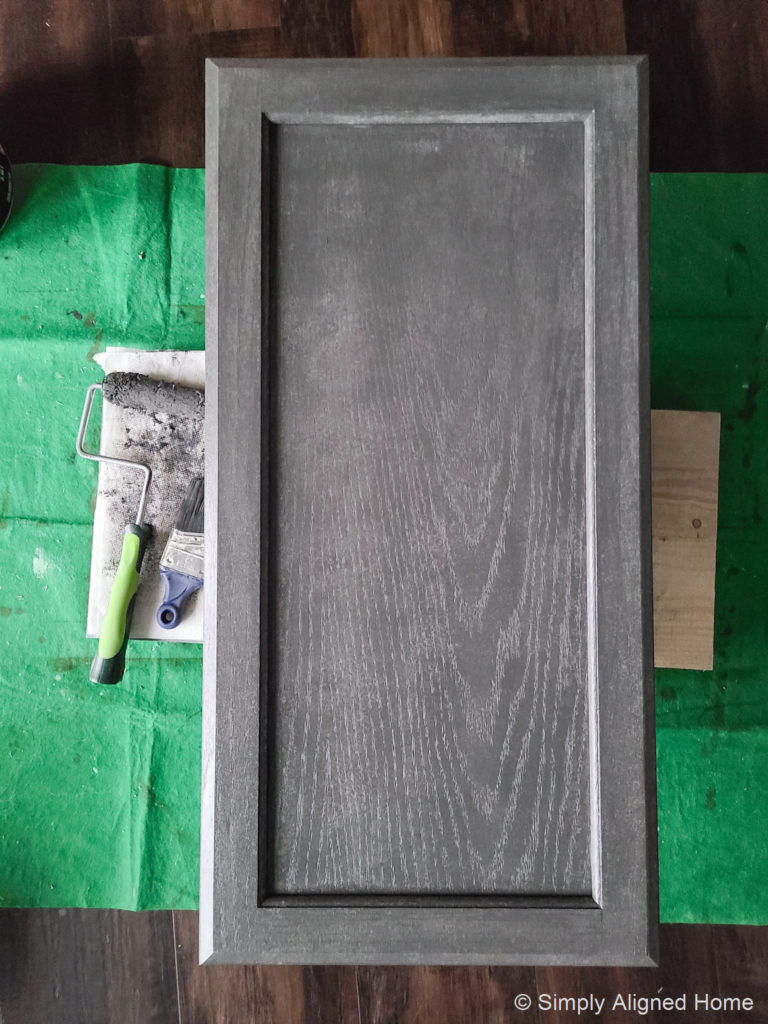
Prime and Paint the Cabinet Doors
It is so much easier to paint cabinet doors when they are uninstalled and the hardware is removed! I decided to use a grey primer. Grey primer is easier to cover than a white primer when you are dealing with a dark paint. I used a grey spray primer for the doors and my easy grip spray handle for the spray paint can.
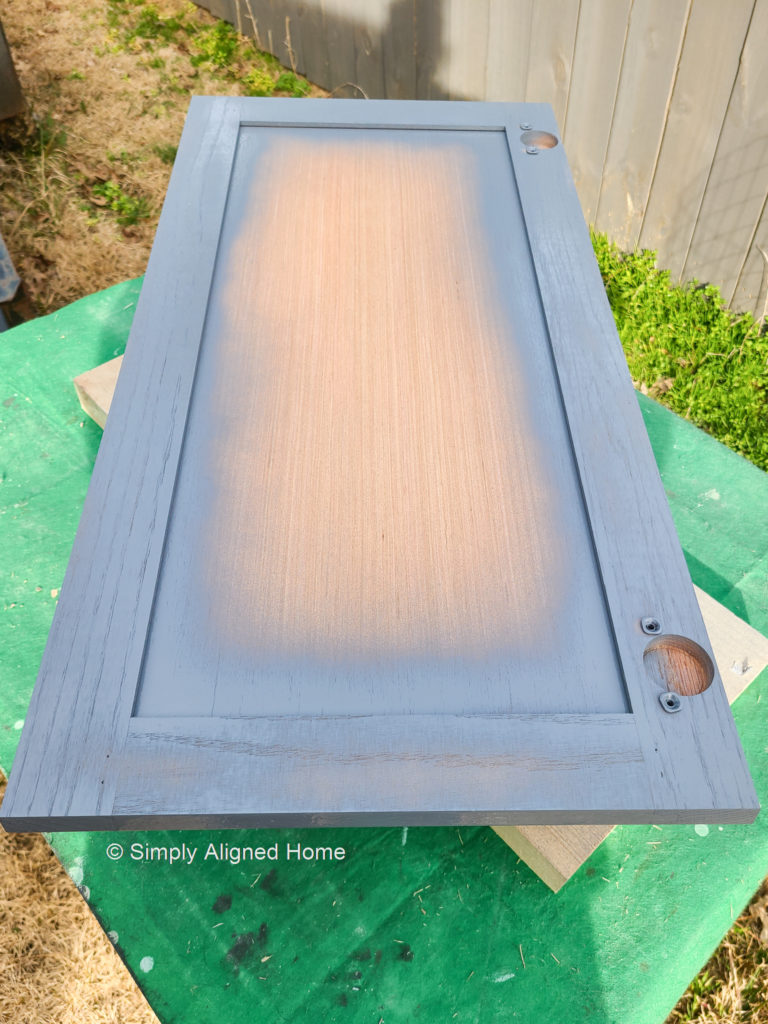
Once the primer was dry, I did a very light sanding before I applied two coats of Sherwin-Williams Iron Ore paint.
Reinstall Cabinet Doors
With everything installed, it was time to finish off the base cabinets by reinstalling the doors! The hinges for my cabinets are adjustable, so I spent far too long adjusting every door so they were properly aligned.
That’s it! Installing base cabinets really is not hard…especially if you are using pre-made cabinets! Next up…the top of the built-in unit. Be sure to also check out how I finished off the unit with trim!

**Note: I am not a professional and do not claim to be an expert. Please be sure to always read instructions for all tools and products. Safety is very important and should be your top priority. Wear necessary protection when using tools (eye wear, hearing protection, gloves, etc.) and dust masks when sanding or cutting. Simply Aligned Home is not responsible for any injury or damage. All of my designs are not professionally designed and are for private use only.**
Materials Used
- 2×4 Lumber
- 2×6 Lumber
- Unfinished Upper Cabinets
- 3/4″ Plywood
- 1×2 Select Pine
- Wood Filler
- 220 Grit Sandpaper
- Grey Primer
- Grey Spray Primer
- Early American Water Based Stain
- Water Based Polyurethane
Tools Used