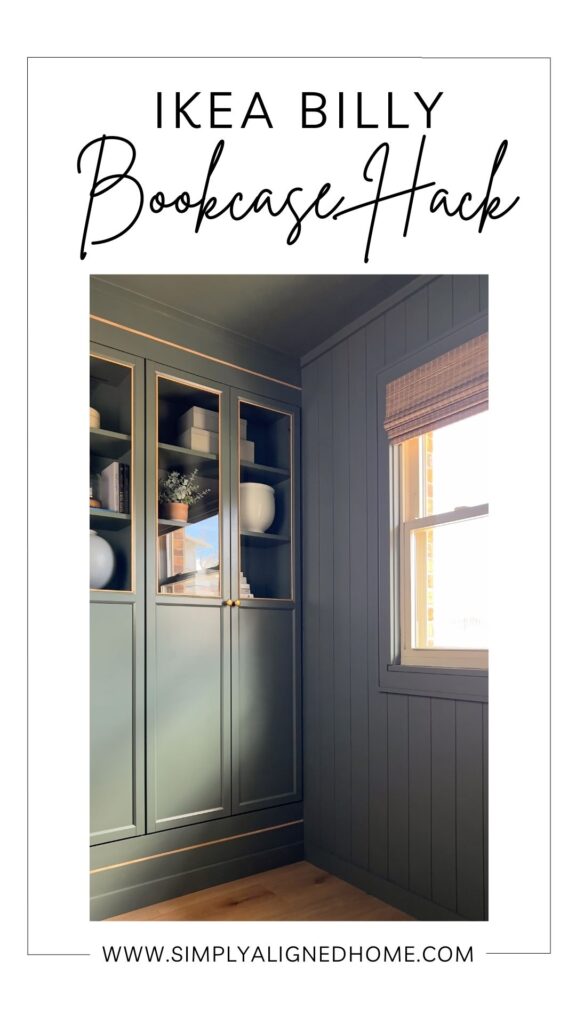
Are you looking to add a touch of personalization and creativity to your home while maximizing your storage space? If so, then this DIY IKEA hack using Billy bookcases might just be the project for you.
Upon settling into our new home last year and completing a kitchen renovation, it quickly became evident that my next project needed to be my home office. This room had turned into a catch-all, and I yearned for a workspace where I could be productive, as opposed to relying on our kitchen island for work-related tasks.
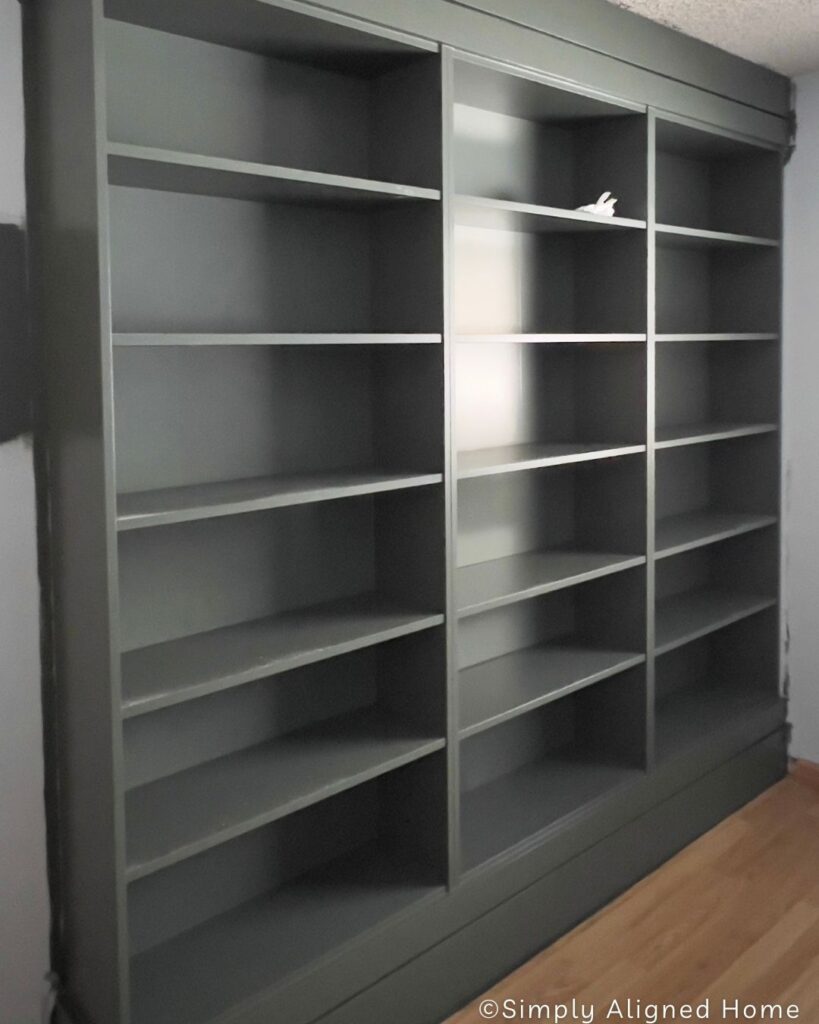
First, step to this office makeover was my built-ins made from IKEA Billy Bookcases!

**This post contains affiliate links to products that I used or recommend. If you purchase something through an affiliate link, I may receive a small percentage of the sale at no extra cost to you. I really appreciate your support!**
How to Make a Built-In Billy Bookcase
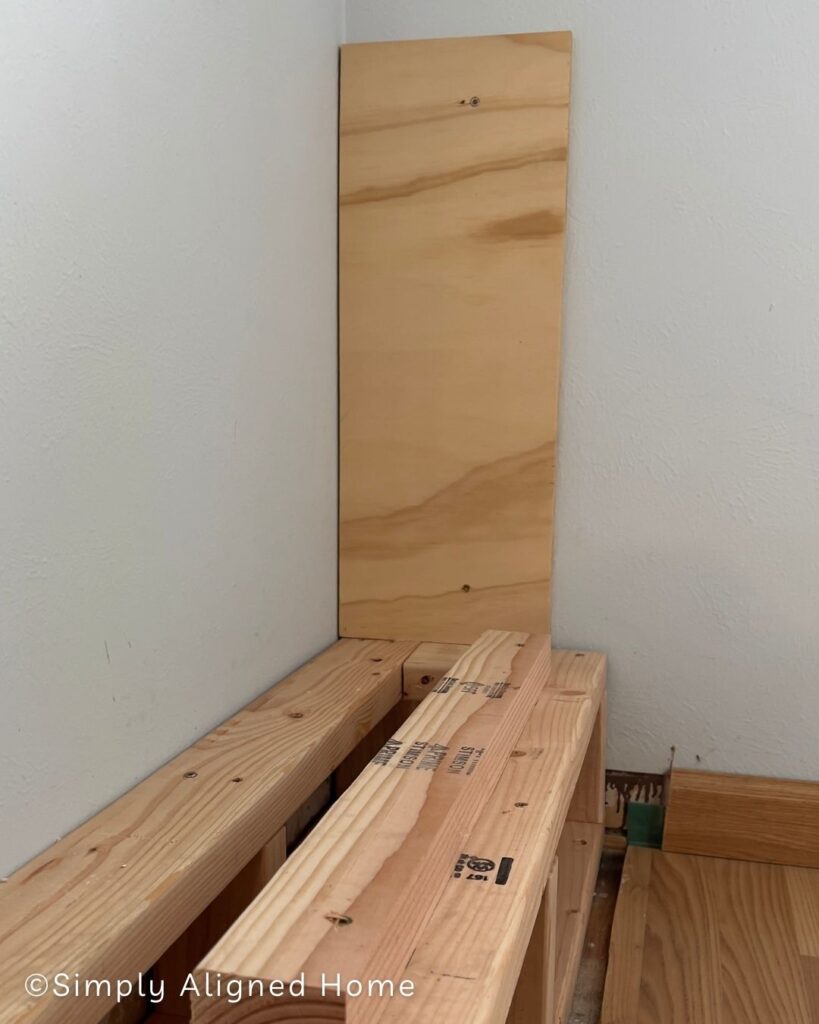
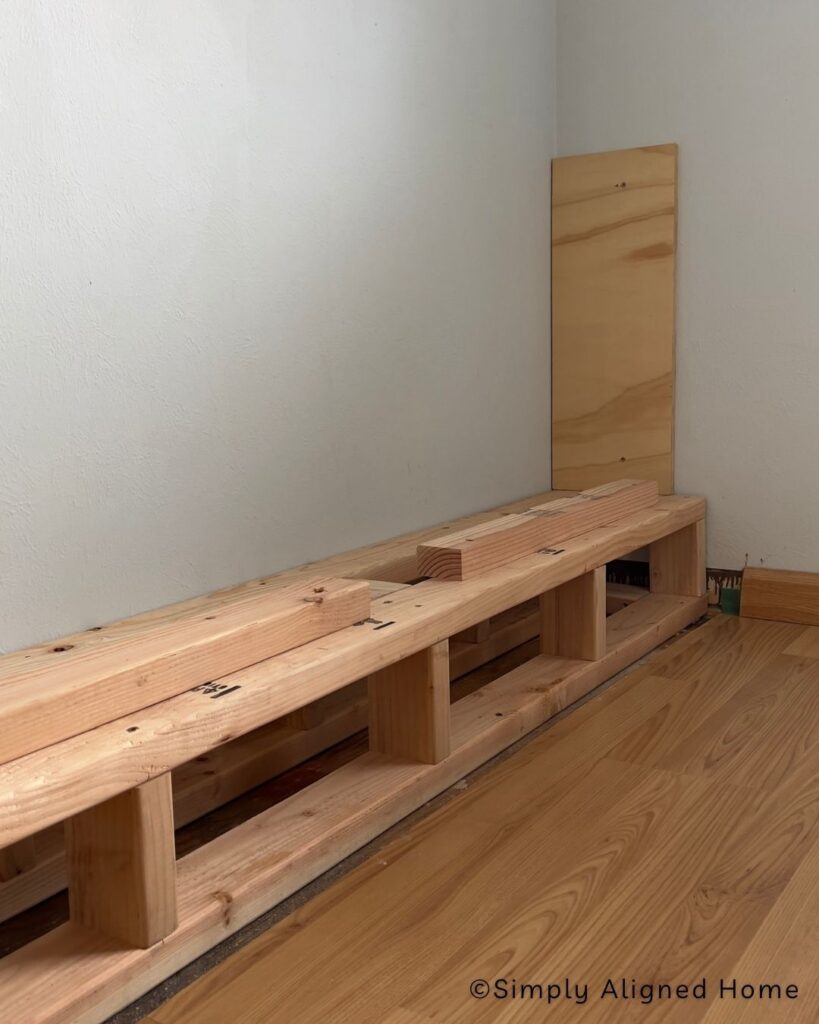
Build A Floor Base
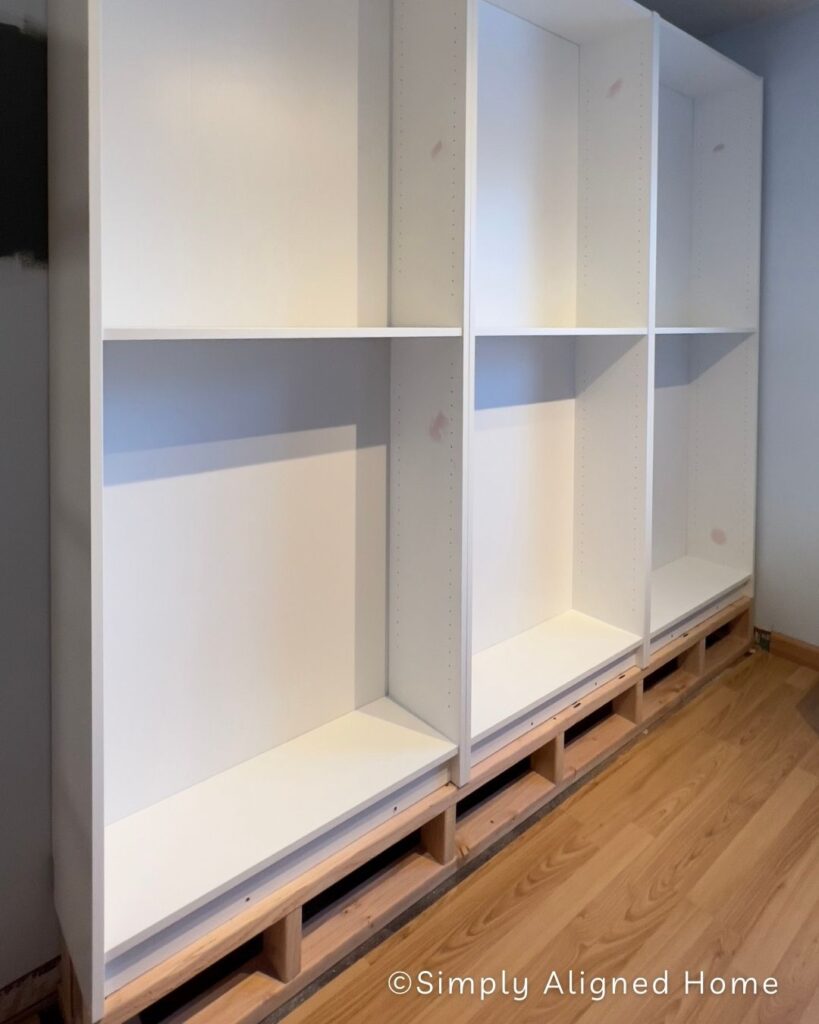
In my quest to achieve a more personalized and custom appearance for my built-in bookcases, I opted to elevate them off the floor. The initial phase involved cutting out the preexisting flooring and making a base to fit in its place.

Using 2×4 lumber, I constructed a sturdy rectangular frame with center bracing to provide essential support for the bookcases. To enhance stability, I incorporated additional 2×4 supports atop the base and 3/4″ plywood to the side wall. In return that provided something to fasten the bookcases too.
Install Bookcases
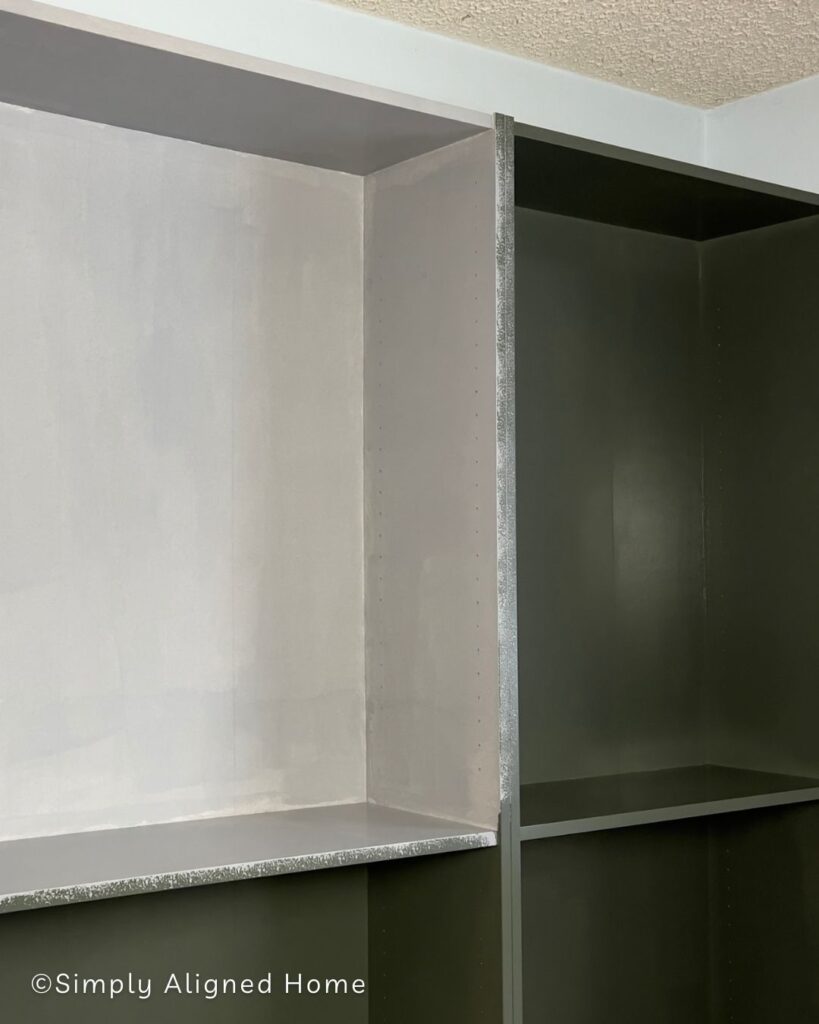
Next step, is to install the Billy Bookcases to the base frame. Once I had the bookcases up on the frame I made sure they were level and snug together. Taking some construction screws I screwed the bookcases together at the top and bottom sections.
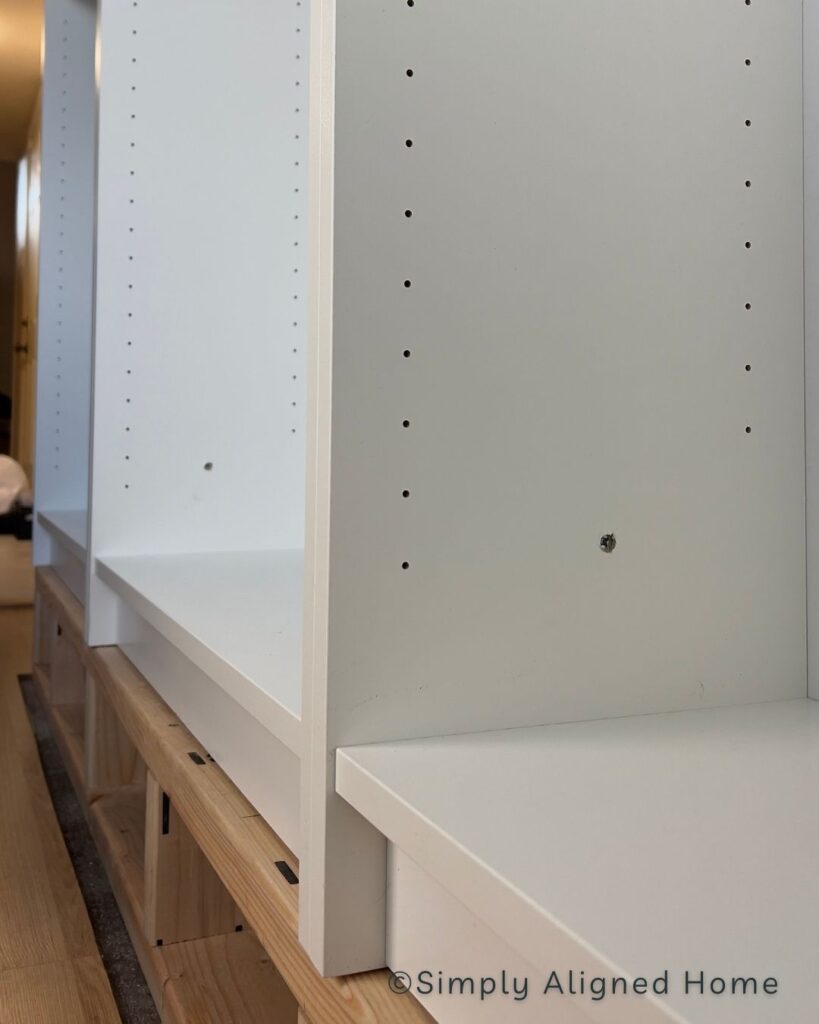
To reinforce the base, I made certain to secure them into the additional 2×4 lumber integrated into the base for extra support. I anchored them into the 3/4″ plywood I had previously affixed to the side wall to firmly attach them to the wall. I also secured them to the studs above the units using L brackets.
Trim Out Bookcases
Before installing my trim, I needed to notch out the bottom of the bookcases. I wanted the bottom trim to sit flush against the bottom shelf so that there was no gap. Once, I notched out a small part of the shelf I added spacers to the bookcases so that I had something to attach the trim too.
For the trim I took primed pine boards and ripped them down to the desired size. I used two different sizes for the trim since I had such a big space to fill. After the trim was installed I had a small gap that was left. I initially thought I would leave the gap empty but decided that a stained oak piece would look good instead.
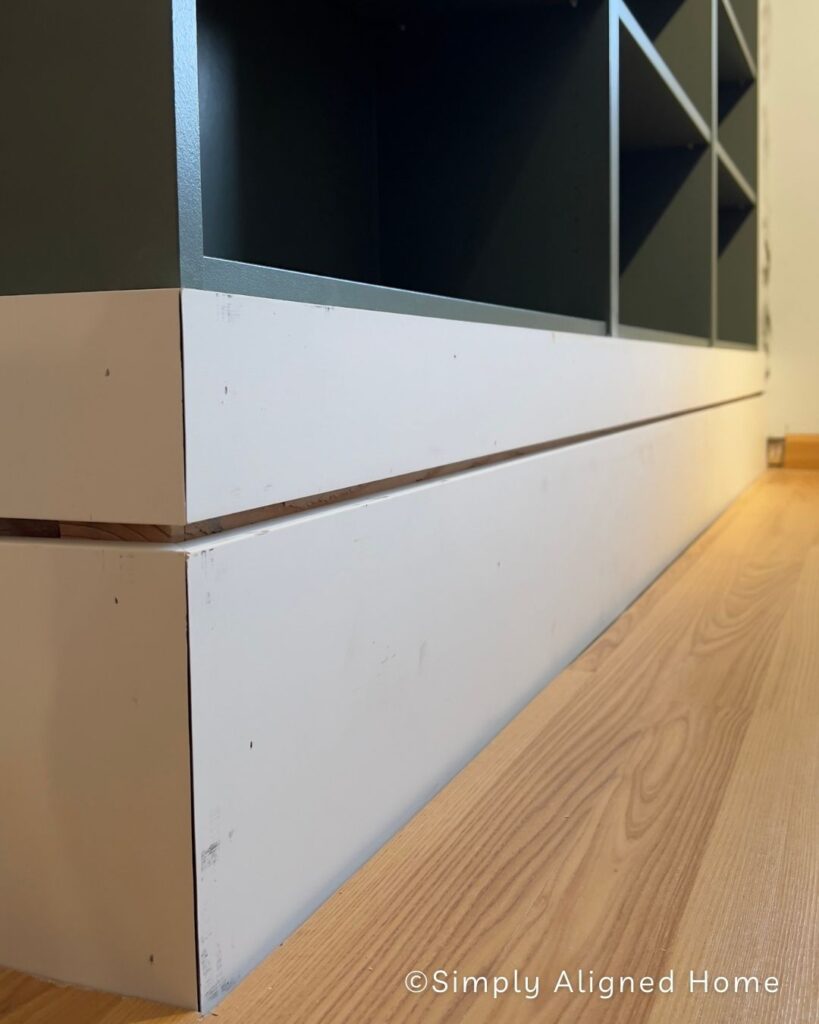
Taking 3/4″ oak plywood I ripped down a piece that fit in the gap perfectly!
With the bottom trim in place, the next task was to install the top trim for a coordinated look. To do this, I introduced a few 2×4 lumber braces at the top section, providing a solid anchor point for attaching the trim securely.
Prime & Paint
When painting IKEA furniture, prep is everything. You want to make sure that you sand your bookcases with fine sandpaper. Somewhere around 220 or 320 grit will do the job. Once, I had sanded the bookcases, I wiped everything down with a damp cloth.
I decided to go with a shellac based primer. Once the primer was dry, I gently sanded it smooth before applying the final paint.
I spent several days applying two coats of enamel paint to the bookcases. It wasn’t until a full two weeks had passed that the paint reached its maximum level of durability after curing.
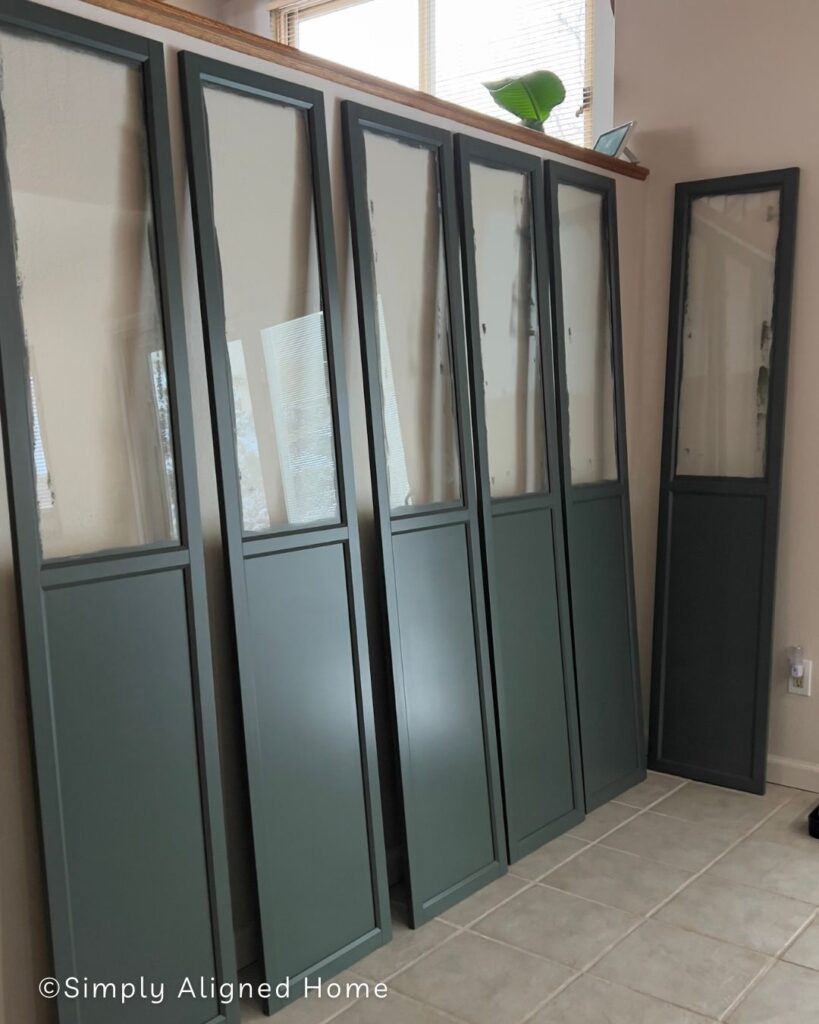
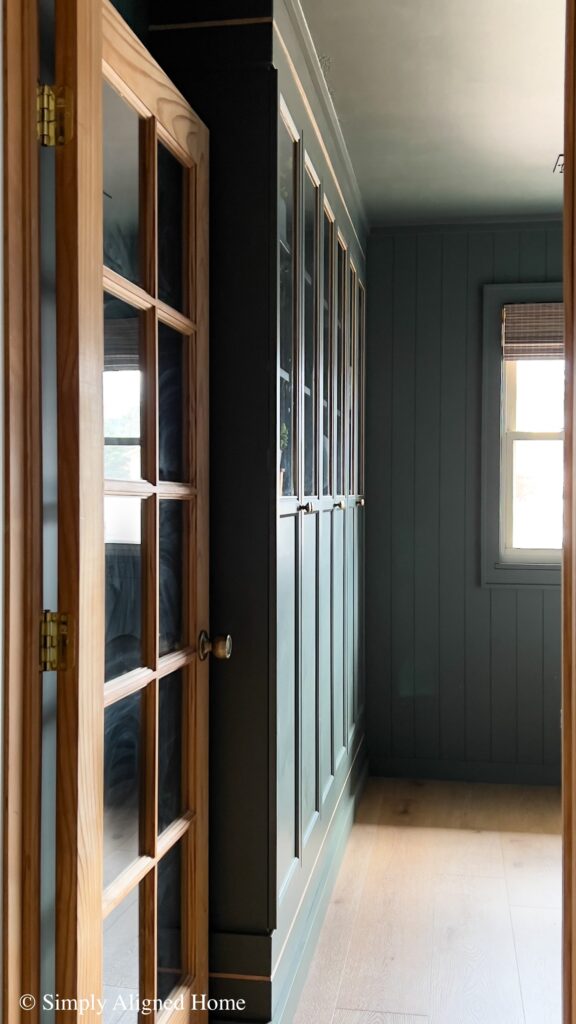
Install Billy Doors
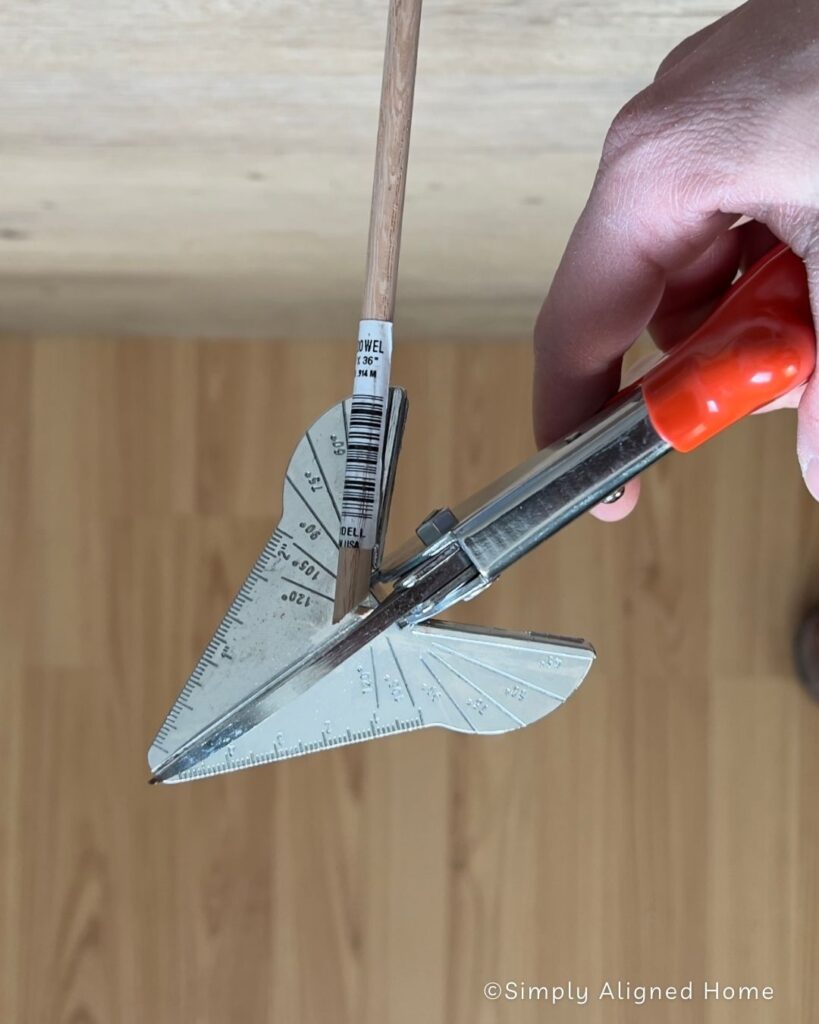
When installing my Billy doors I noticed that when painting the doors you could still see the white around the glass. It was nearly impossible to get that area painted green. So to try and hide that imperfection I chose to install tiny oak dowel rods along the window frame.
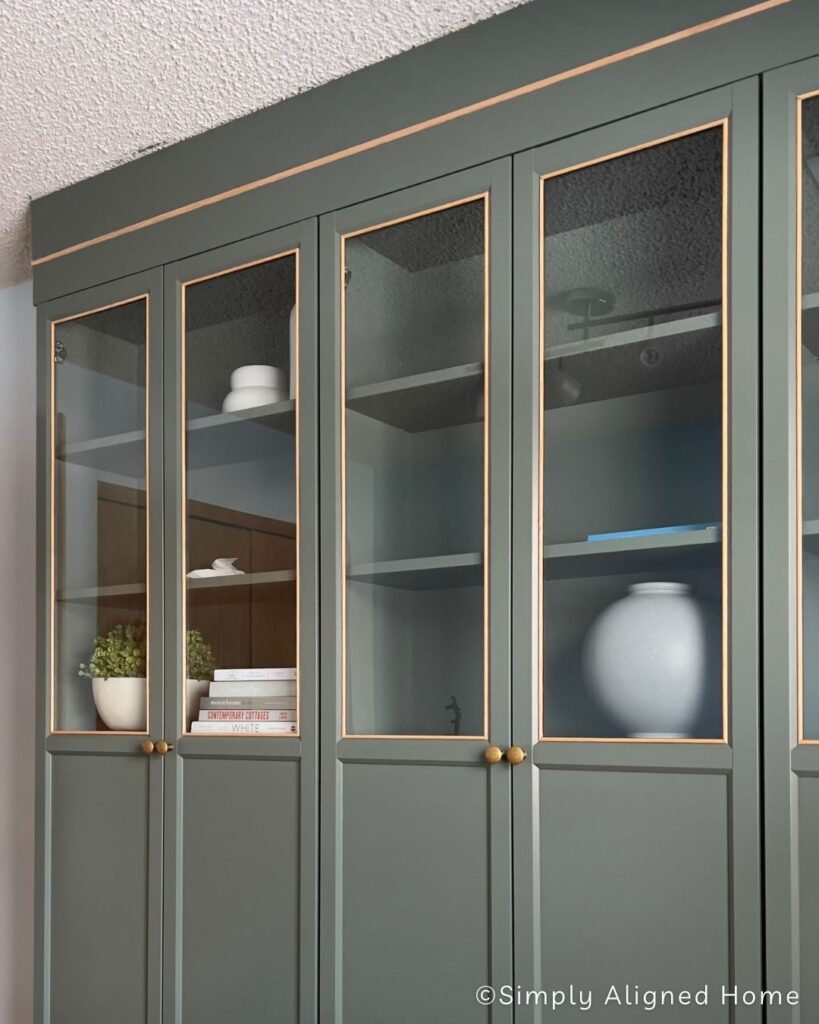
I love how these Billy bookcase built-ins turned out! This view is easily one of my favorites in our home. To see more of the office build you can read more about it HERE!

**Note: I am not a professional and do not claim to be an expert. Please be sure to always read instructions for all tools and products. Safety is very important and should be your top priority. Wear necessary protection when using tools (eye wear, hearing protection, gloves, etc.) and dust masks when sanding or cutting. Simply Aligned Home is not responsible for any injury or damage. All of my designs are not professionally designed and are for private use only.**
Materials Used
- IKEA Billy Bookcases
- IKEA Billy Doors
- Door Hardware
- Shellac Primer
- Enamel Paint of Your choice
- Caulk
- Wood Filler
- Brad Nails
- Construction Adhesive
- Construction Screws
- Small Trim Oak Dowel Rods
- 3/4″ Oak Plywood
- 2×4’s
- Primed Pine Boards
Tools Used
- Paint Tray, Roller and Roller Frame
- Paint Brush
- Paint Pouring Spout
- Multi Tool
- Trim Shears
- Clamps
- Miter Saw
- Brad Nailer
- Tape Measure
- Level
- Impact Driver & Drill