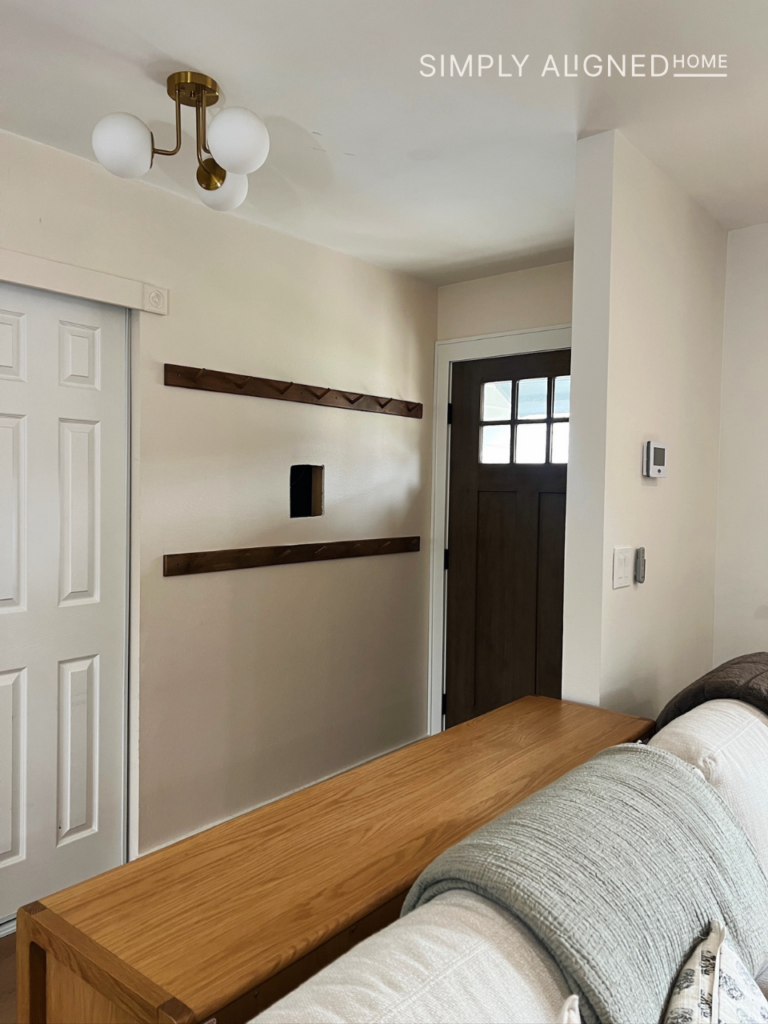
If you’ve been following along, you might remember that I originally started this entryway makeover with a console table. I finished the flip, put it in place… and immediately hated it. So—time to pivot! I decided to build some entryway built-ins instead!
**This post contains affiliate links to products that I used or recommend. If you purchase something through an affiliate link, I may receive a small percentage of the sale at no extra cost to you. I really appreciate your support!**
Demo
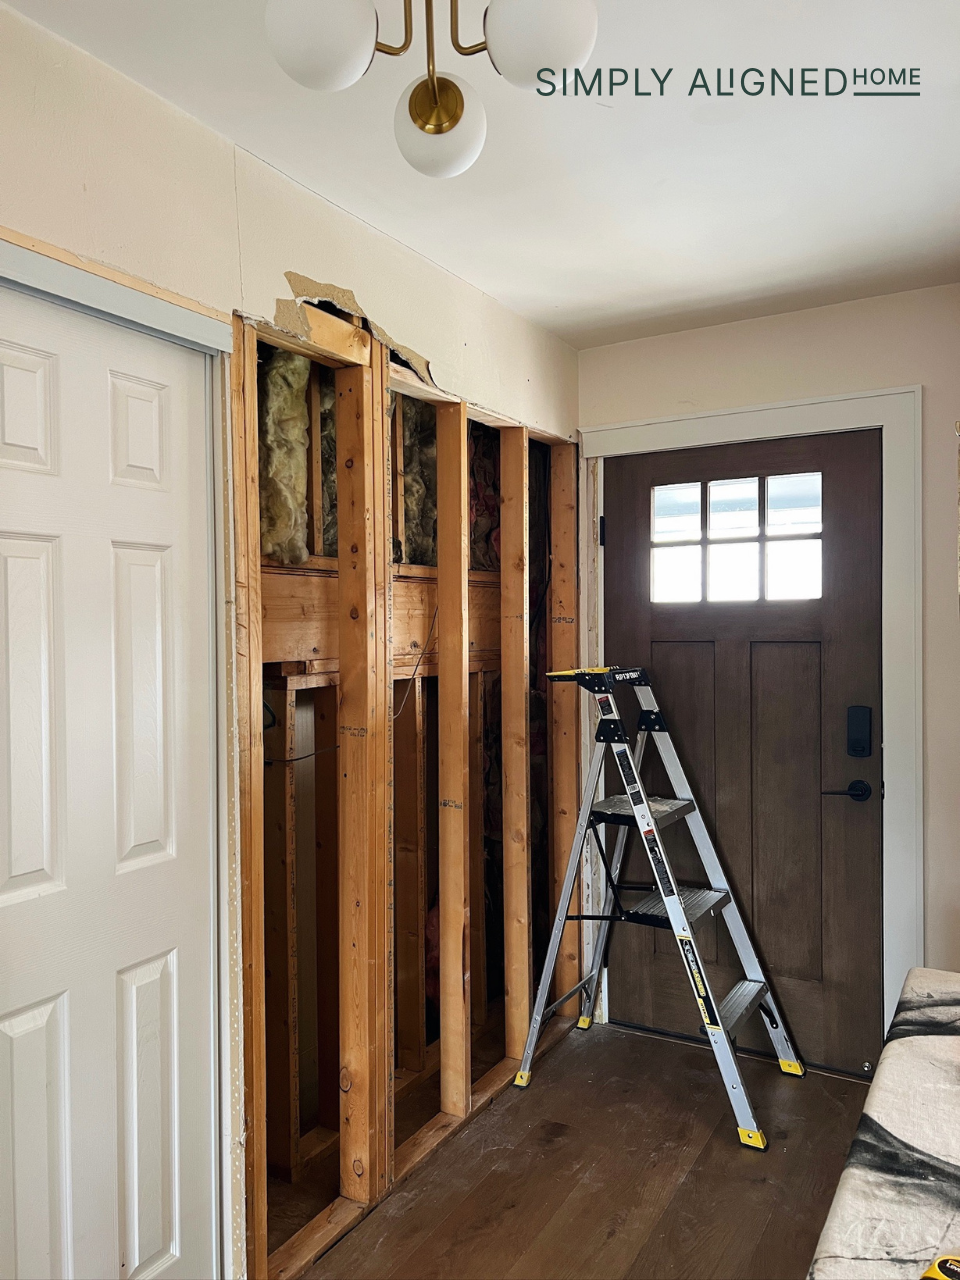
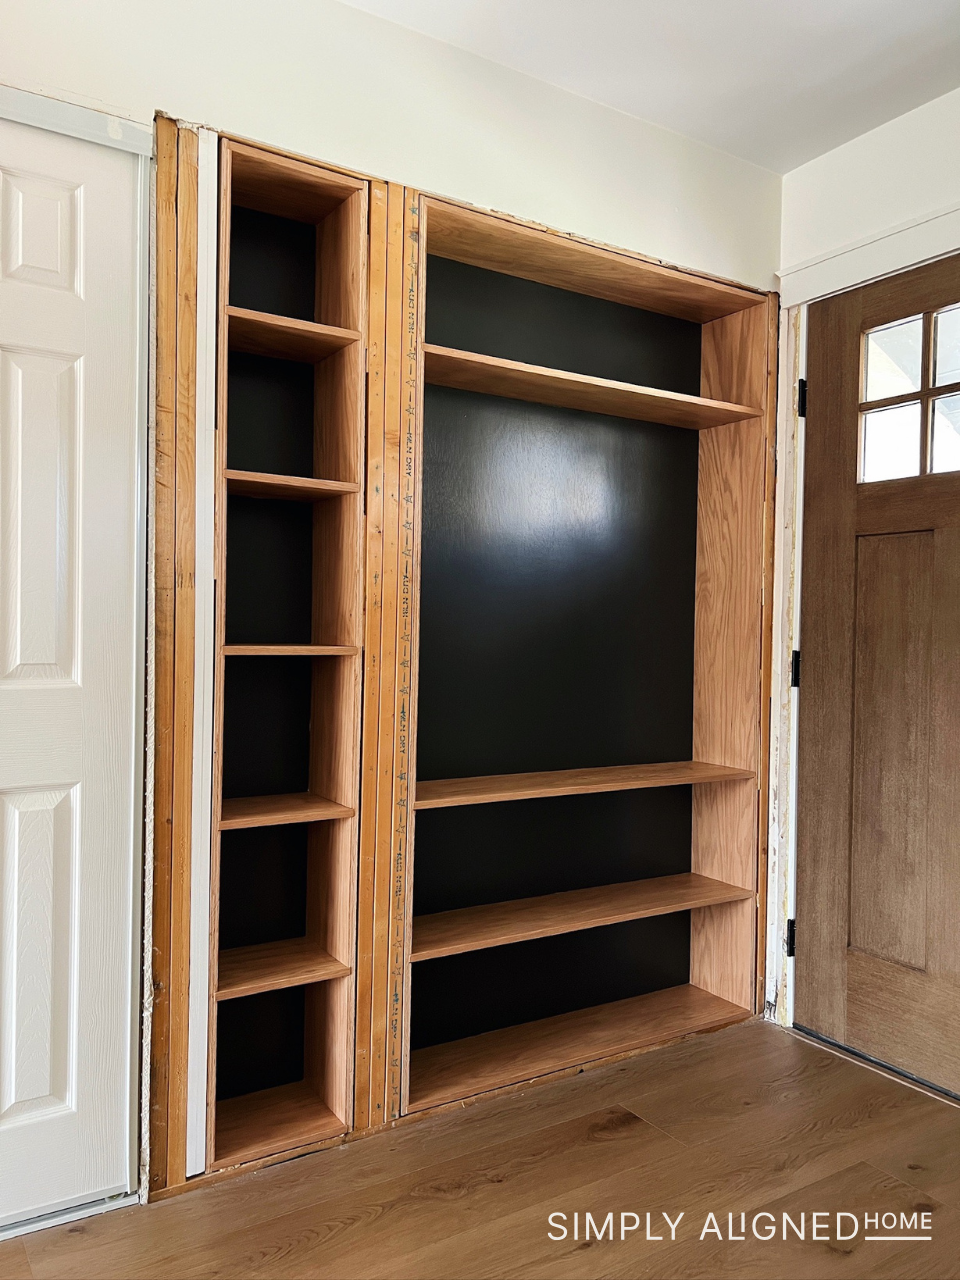
Before going full steam ahead, I did a bit of exploratory demo to make sure there wasn’t anything important hidden behind the wall. Luckily, it was a pretty straightforward space—nothing in the way and lots of wasted space—so I decided to tackle that first and leave the closet doors for later. Once the wall was opened up, I was left with a big, blank canvas.
Rethinking The Space
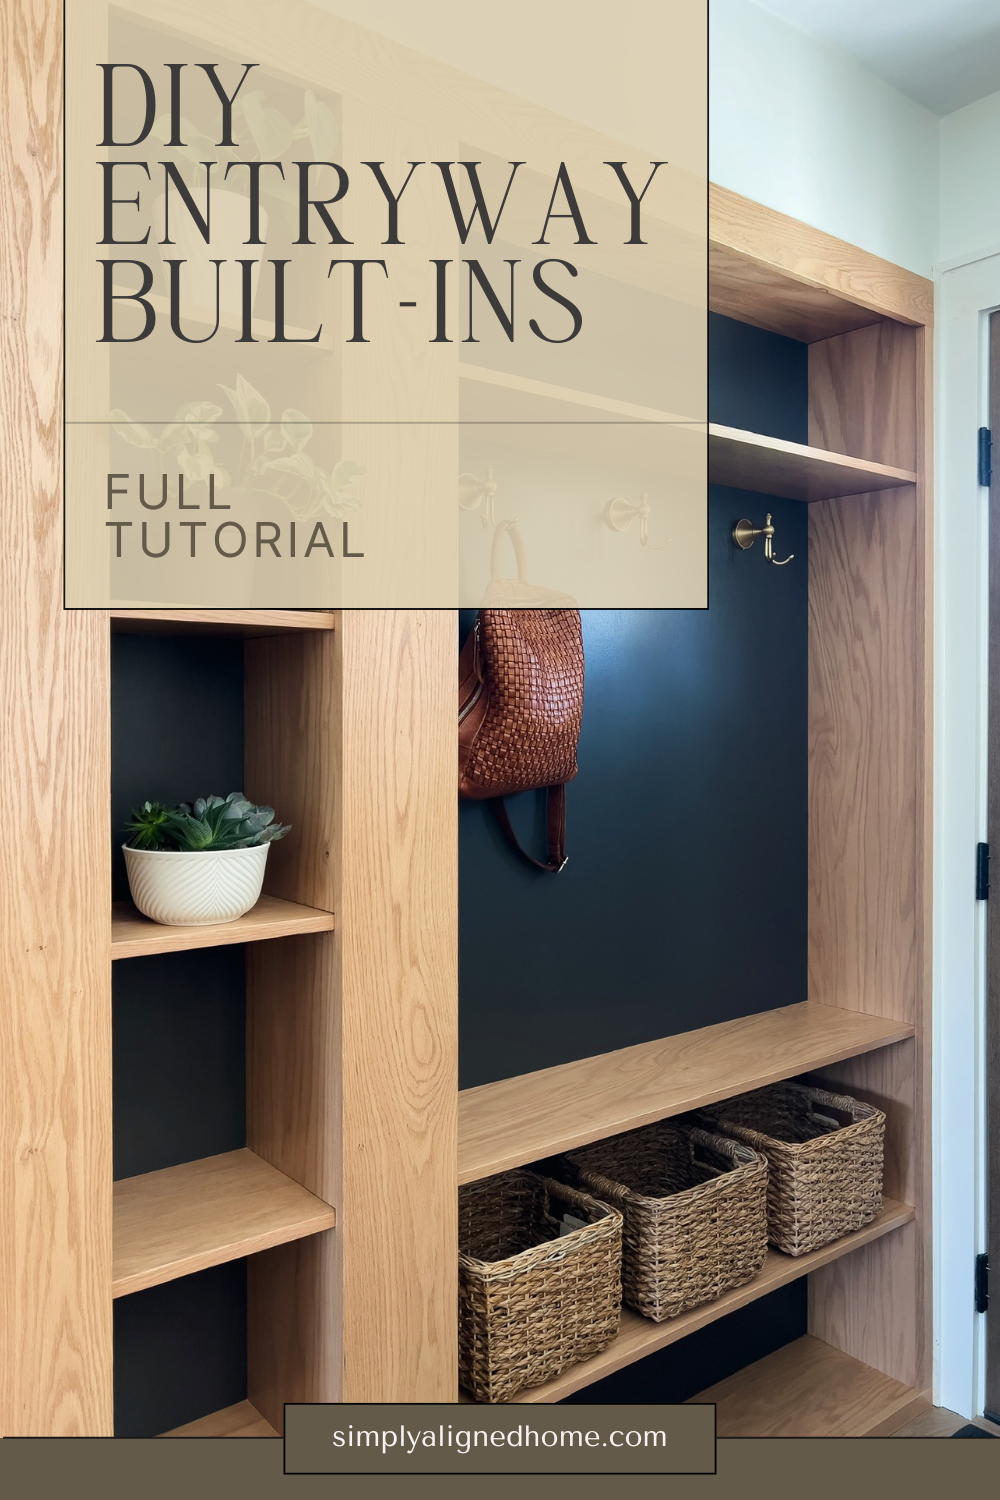
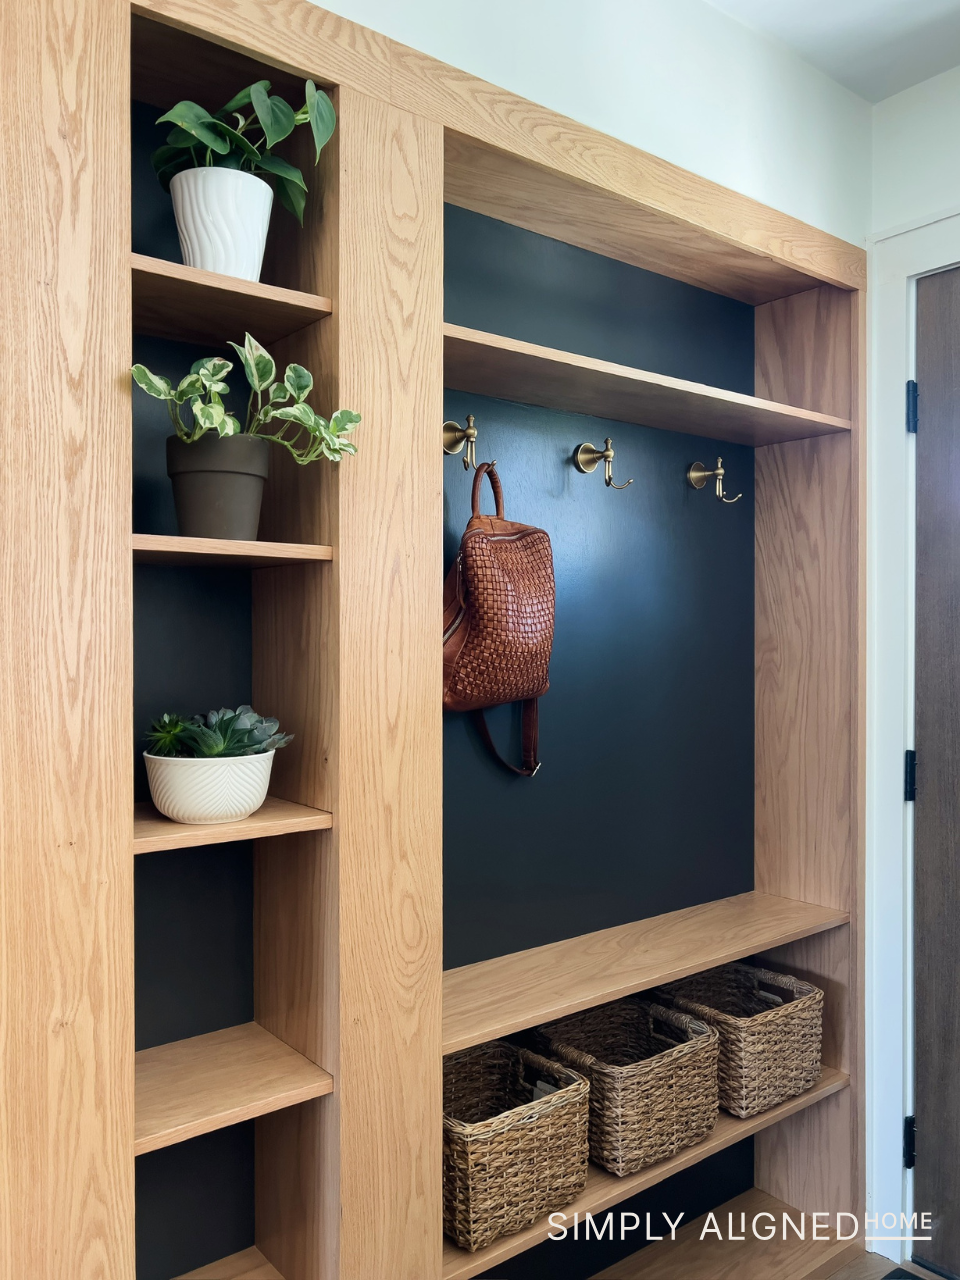
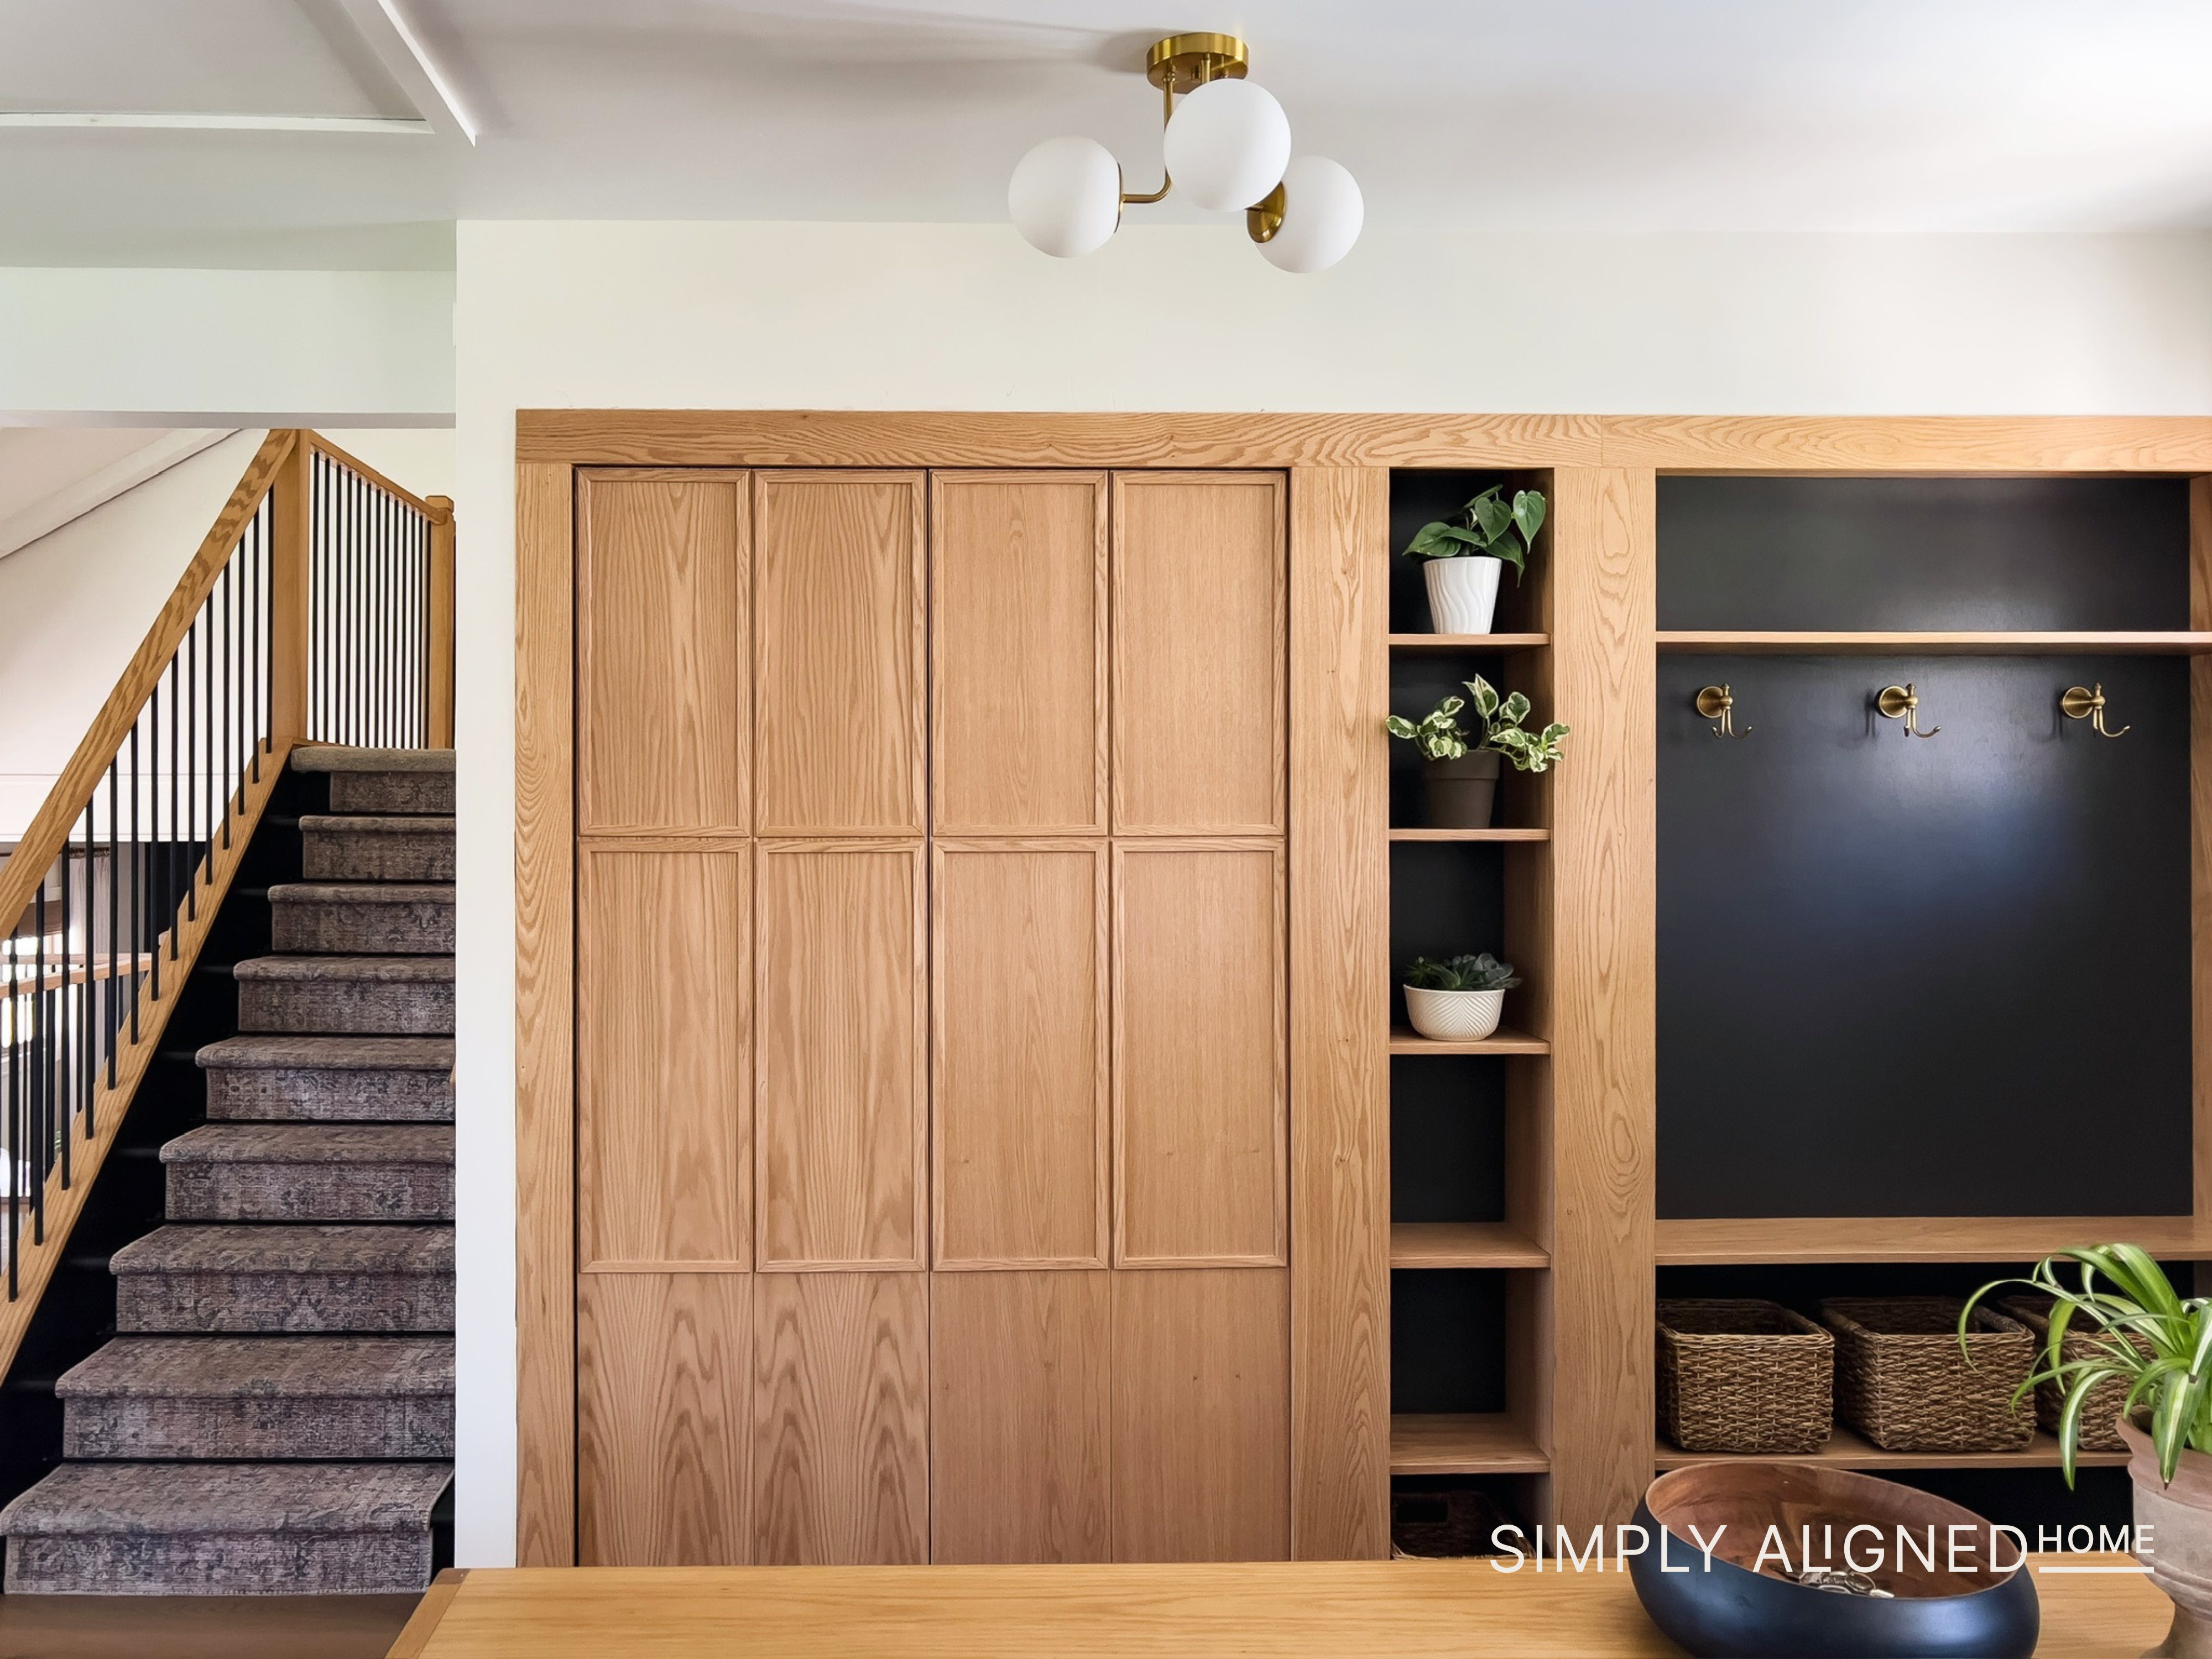
Instead of trying to divide the entryway from the living room with furniture, I decided to switch focus to the opposite wall—the one with some basic hooks we’d been using. I sketched out a new plan featuring entryway built-ins to use as cubbies for function and open shelving for a bit of style. Here’s the design I landed on!
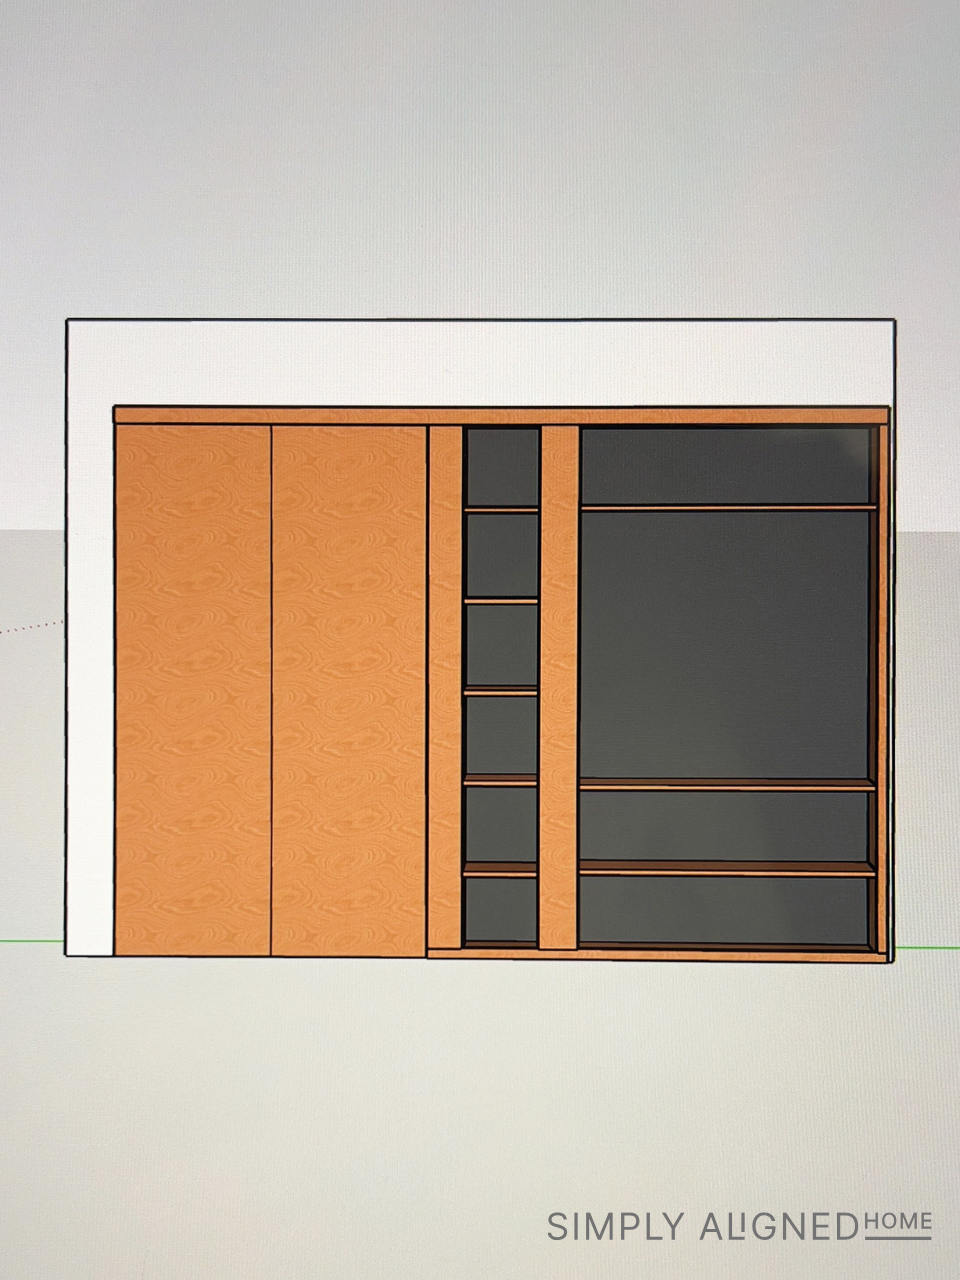
Creating My Units
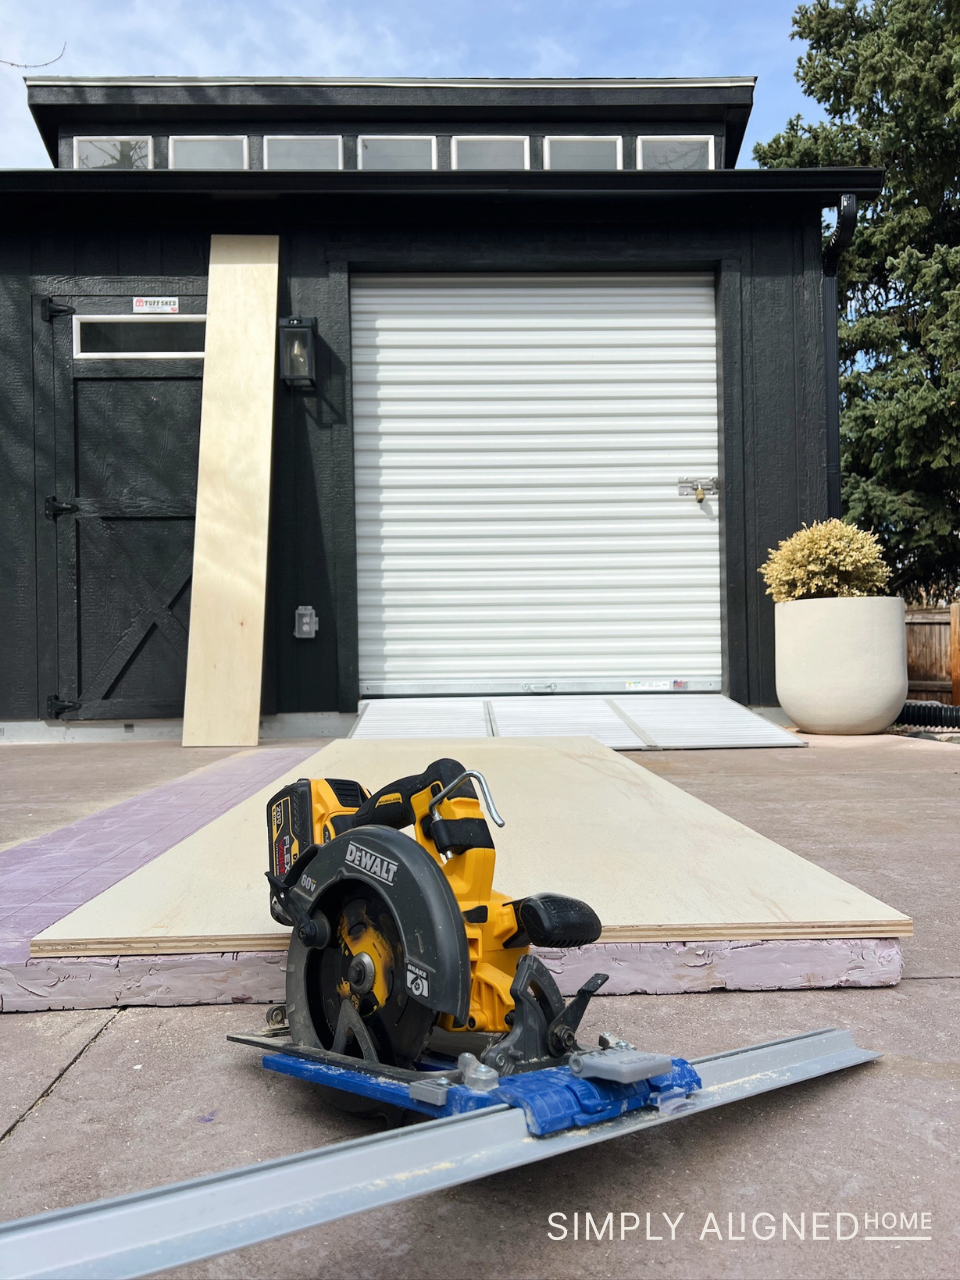
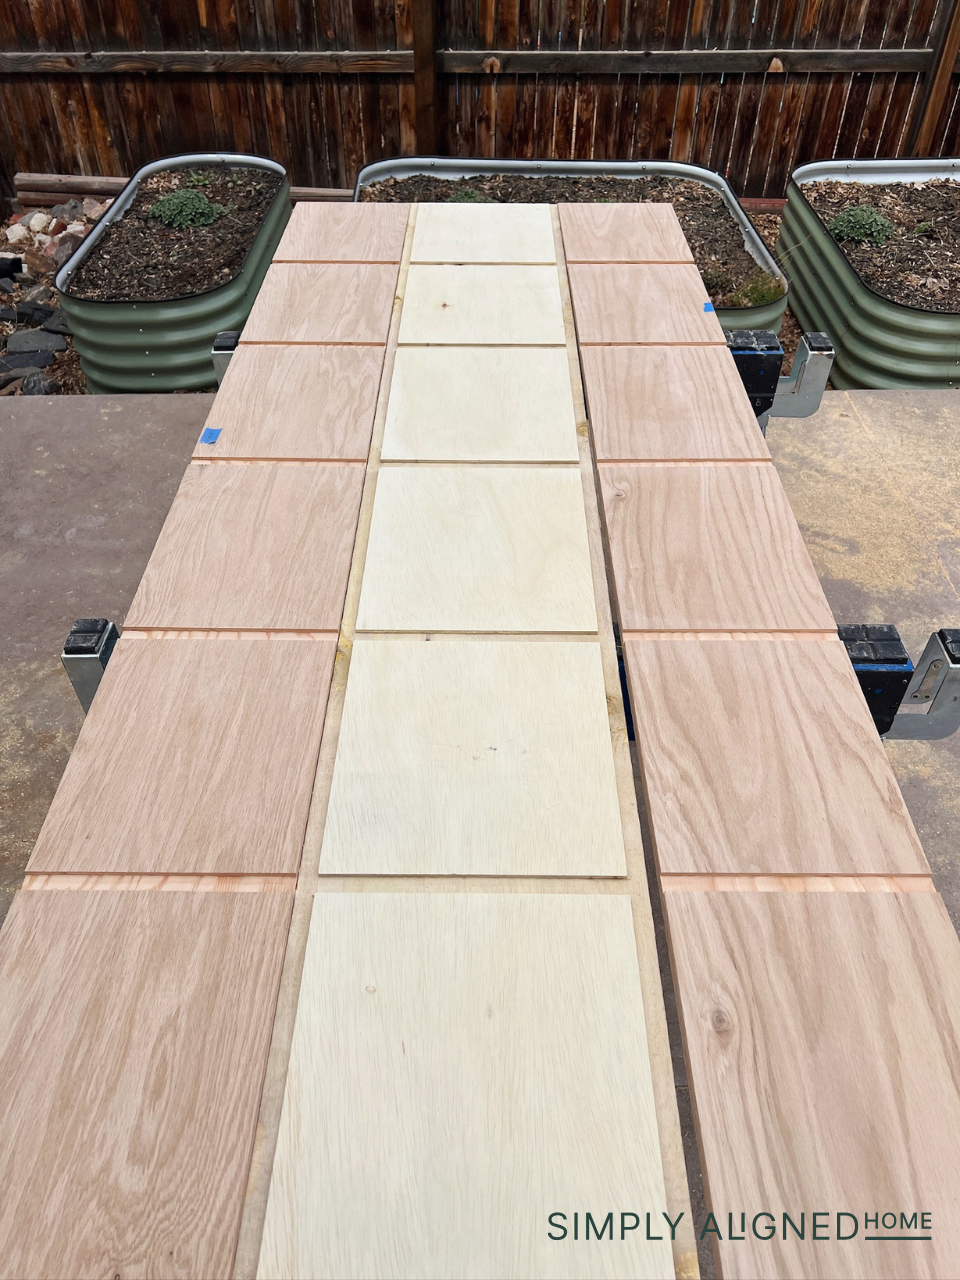
For the built-ins, I used red oak plywood. When I’m cutting plywood solo, I like to lay down a sheet of foam board underneath to support it. Then I use my circular saw with a guide for clean, straight cuts. I made all of my cuts and quickly sanded everything.
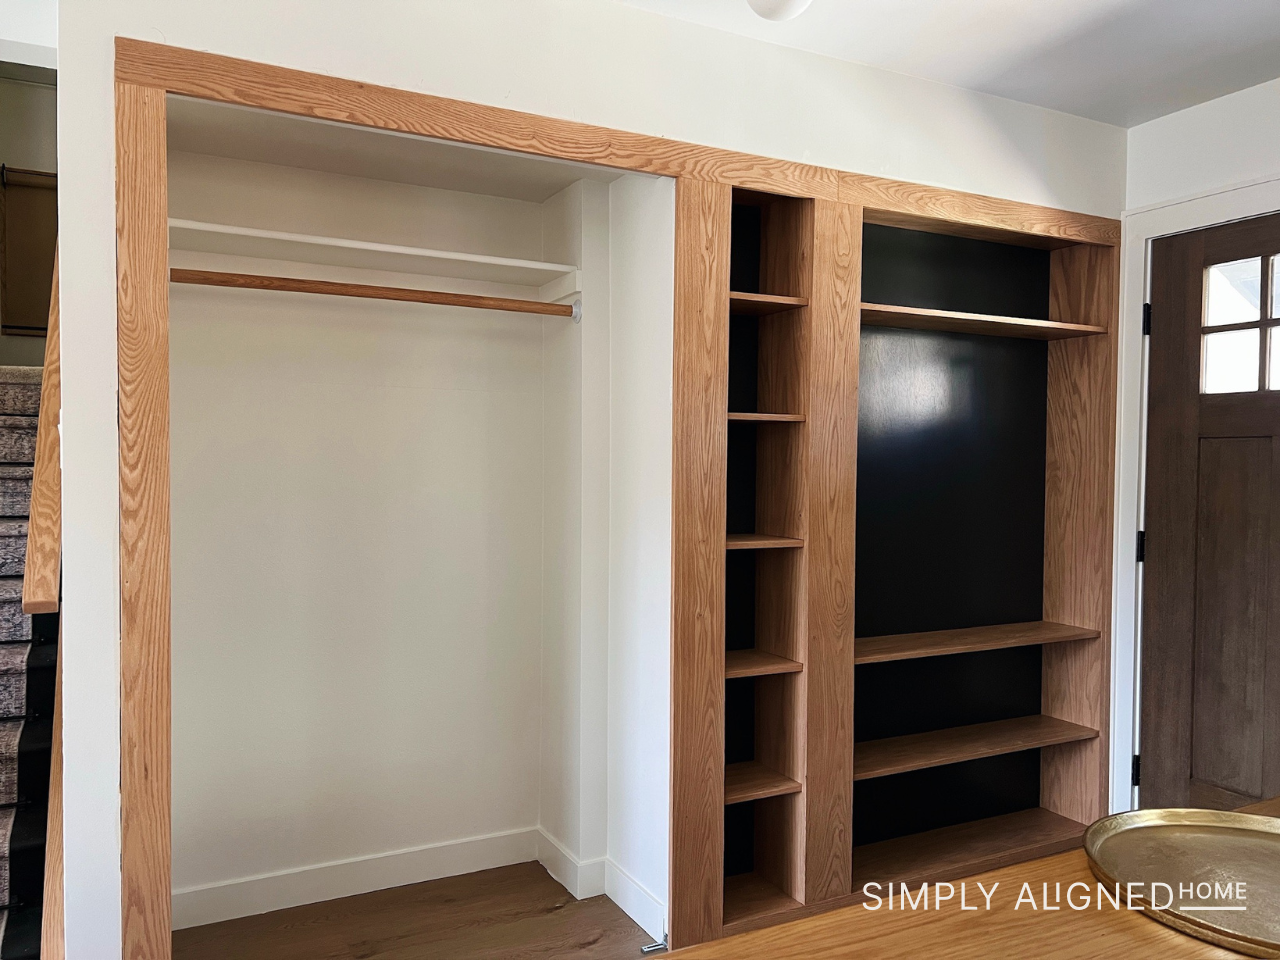
For this build, I decided to experiment with a new joinery method: dado joints! If you’re not familiar, a dado joint is where you cut a groove into one piece of wood that another piece can slide into. I used my router to create the channels, and the shelves fit perfectly into place. This technique takes a little more prep time, but it makes for a super strong and clean assembly—definitely worth the effort!
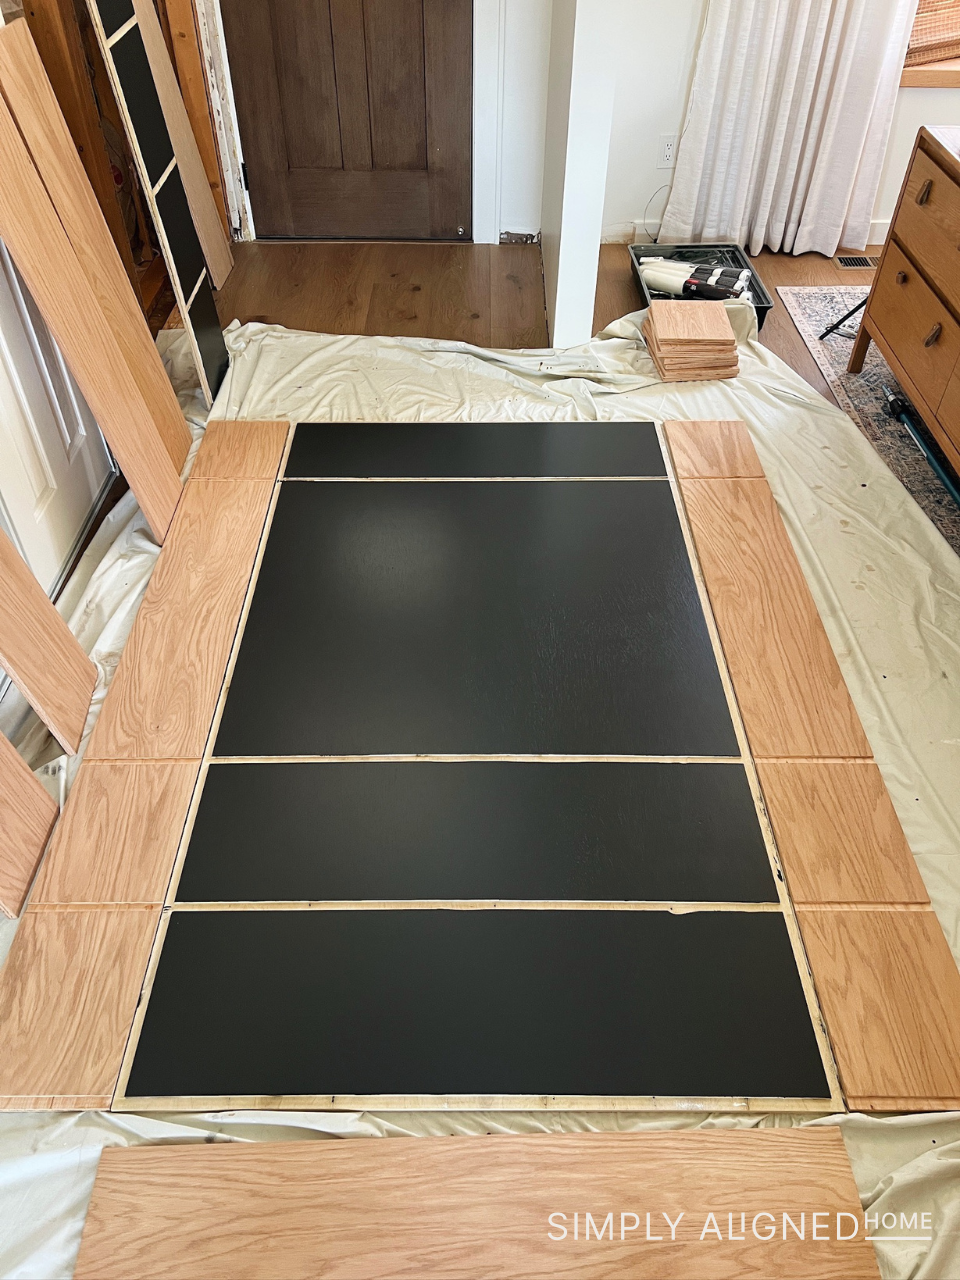
I painted the back panel in Iron Ore by Sherwin Williams, one of my favorite moody tones. I thought this would be a great way to tie the entryway into our living room built-in! Then I stained the side panels and shelves using my go-to staining method.
Once everything was dry, I assembled the units using wood glue and my DeWalt finish nailer, then installed them directly into the wall.
Trim
I wasn’t 100% sure how I wanted to trim everything out at first, so (of course) that meant a little more demo. I used my multi-tool to cut a clean line in the drywall where the trim would sit.
Then I started with the top trim board—making sure it was level—before securing it with my brad nailer. After that, I added the vertical trim pieces. It’s always wild to me how much of a difference trim makes. It really pulls everything together!
Closet Doors
The doors that I bought for this project were a hardwood, but I want them to be oak to match everything in my kitchen and entryway. I got an adhesive backed red oak wood veneer for these doors so they would match! This was so much easier than the veneer I applied on the doors of my son’s closet!
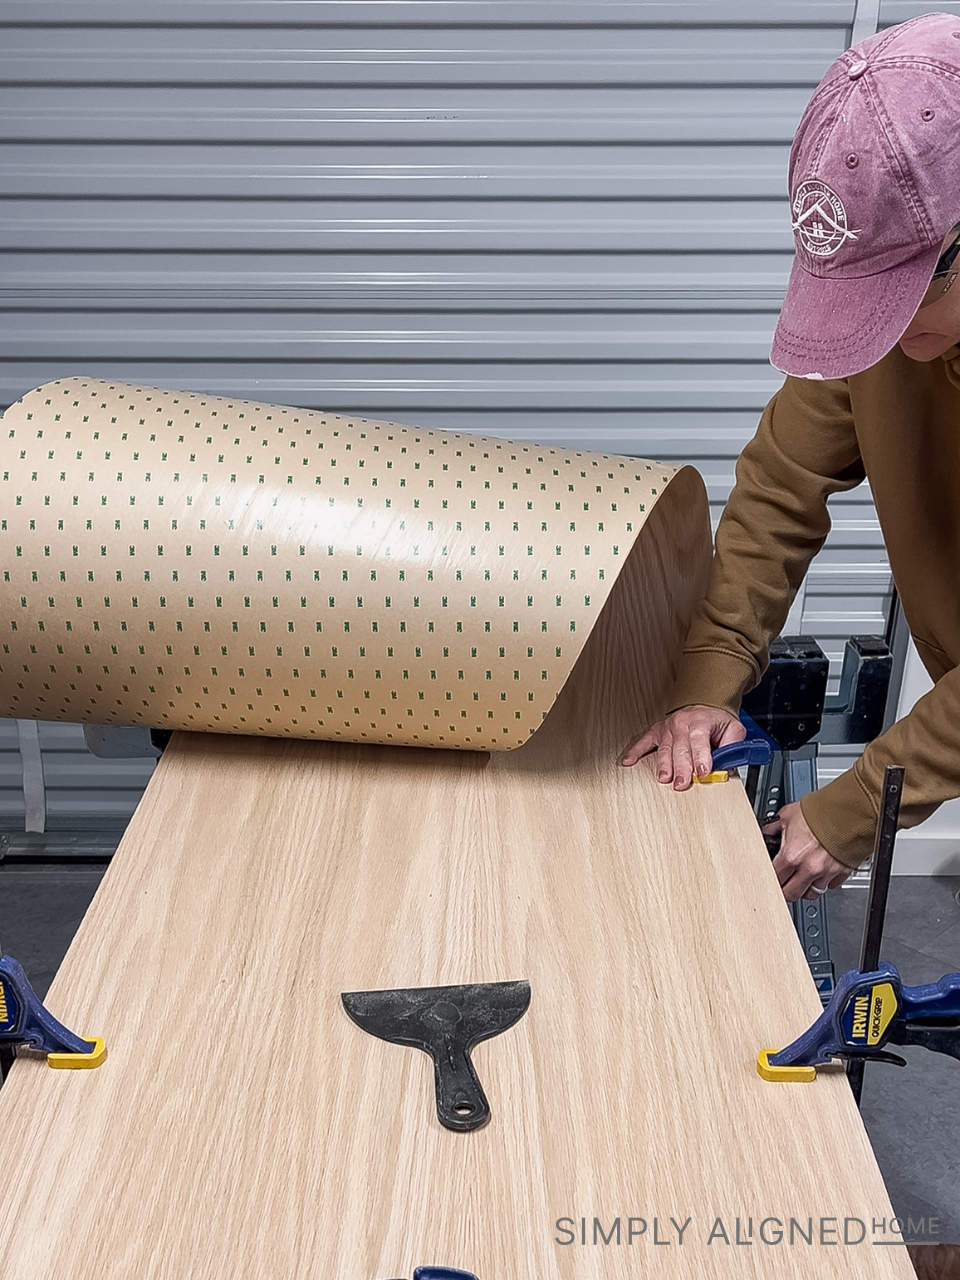
I went ahead and applied the veneer using clamps and a putty knife to smooth out any bubbles. Then, I used a straight edge and knife to cut off the excess as well as the line between the bifold doors. I added edge banding to the sides of the doors since they would be visible when the doors were open!
Door Trim
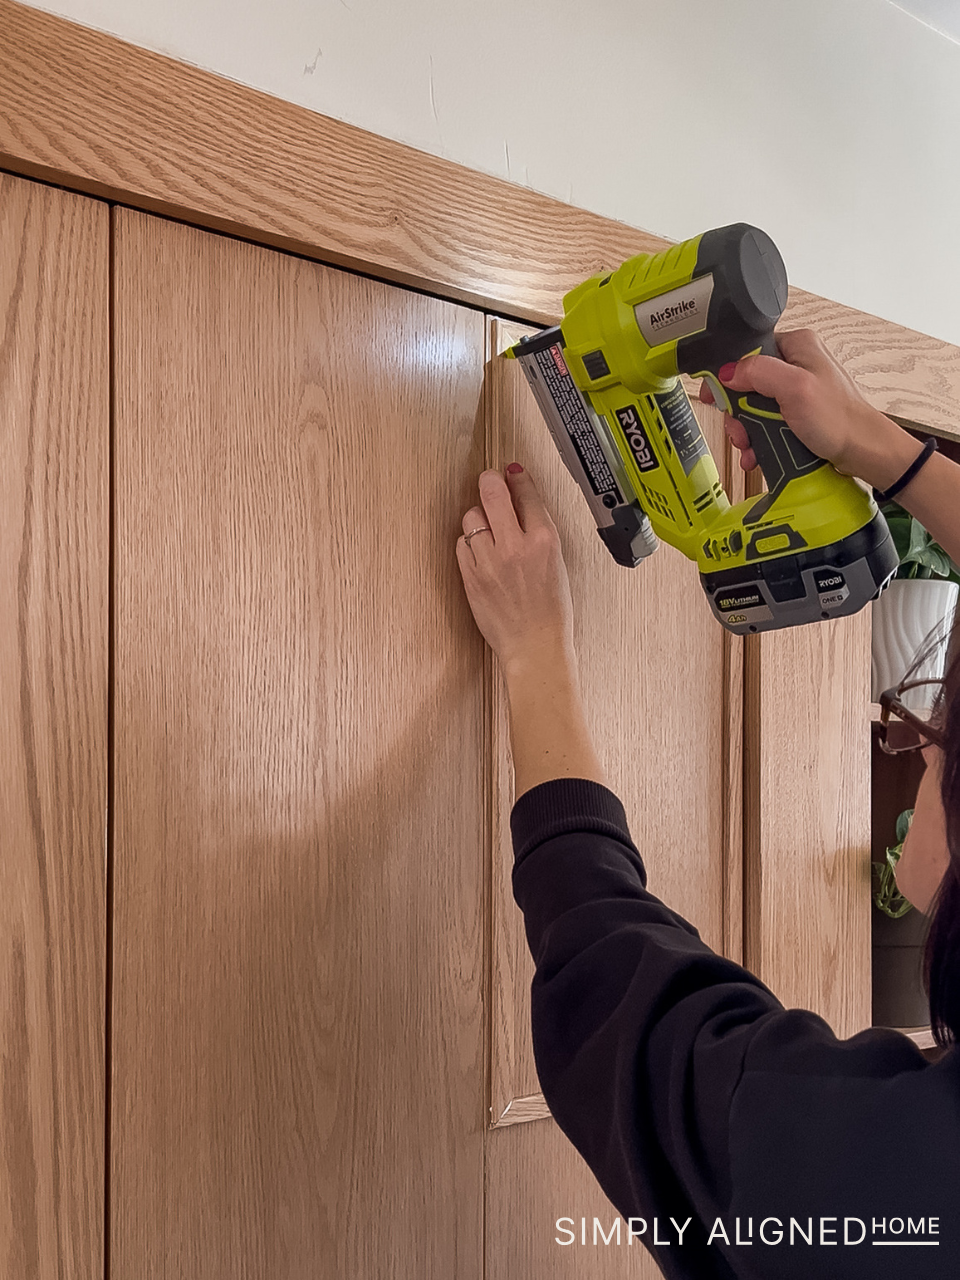
Next up, trim for the doors! I installed trim to give the doors a stylistic element. I used red oak screen moulding and installed it with Quick N’ Thick glue and my ryobi pin nailer.
I’m so happy with how this project turned out! The cubbies are super functional, the shelves are perfect to add a bit of style and a custom element. I also love how the trim on the doors adds some character and dimension.
Let me know what you think of the new built-ins! And if you’ve ever had to pivot mid-project, I’d love to hear about it—drop a comment below!

**Note: I am not a professional and do not claim to be an expert. Please be sure to always read instructions for all tools and products. Safety is very important and should be your top priority. Wear necessary protection when using tools (eye wear, hearing protection, gloves, etc.) and dust masks when sanding or cutting. Simply Aligned Home is not responsible for any injury or damage. All of my designs are not professionally designed and are for private use only.**
Materials Used
Tools Used