
In this article, I’ll guide you through the easiest way to paint shiplap without a sprayer, ensuring a smooth, professional finish.
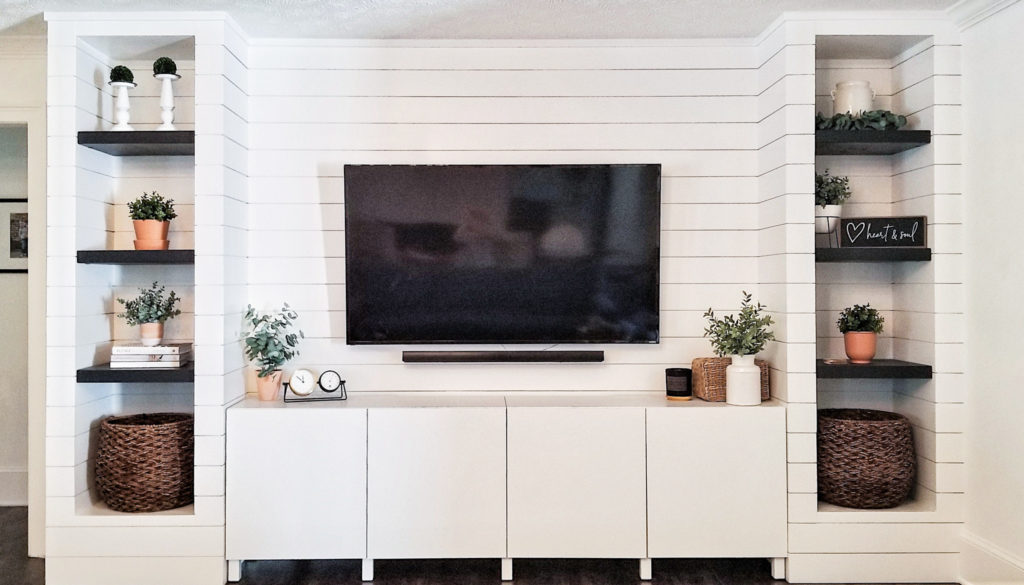
Painting shiplap can transform any room, adding character and a fresh look to your space. While a paint sprayer might seem like the quickest method, not everyone has access to one, or perhaps you’re looking for a simpler, less messy alternative.
I know I don’t always like the prep it takes to use a paint sprayer so I thought I would walk you through what I do instead!
**This post contains affiliate links to products that I used or recommend. If you purchase something through an affiliate link, I may receive a small percentage of the sale at no extra cost to you. I really appreciate your support!**
How To Paint Shiplap If Your Not Using A Paint Sprayer
Whether you’re a seasoned DIY enthusiast or a beginner looking to tackle your first project, this step-by-step approach will make painting shiplap an achievable task! From choosing the right tools and mastering the technique of getting into those tiny grooves, I’ve got you covered.
Let’s dive into the world of shiplap painting!
Paint Between Shiplap Boards Using a 2 Inch Angled Brush
When painting shiplap seams I prefer to paint between shiplap boards with a 2 inch angled brush for larger projects and full walls. The angled brush, because of its wider bristles and angled edge, is perfect for getting into the seams between the boards.
Hold the angled brush lightly and run it along the seams of the boards. This helps in blending the paint well into the shiplaps surface, ensuring there are no thick spots or drips. It’s like using a fine-tooth comb to tidy up, making sure every part looks just right.
When using your brush, make sure you are doing this in small sections and then quickly following up with the paint roller. Painting in sections will ensure you don’t have brush strokes on the face of the shiplap boards.
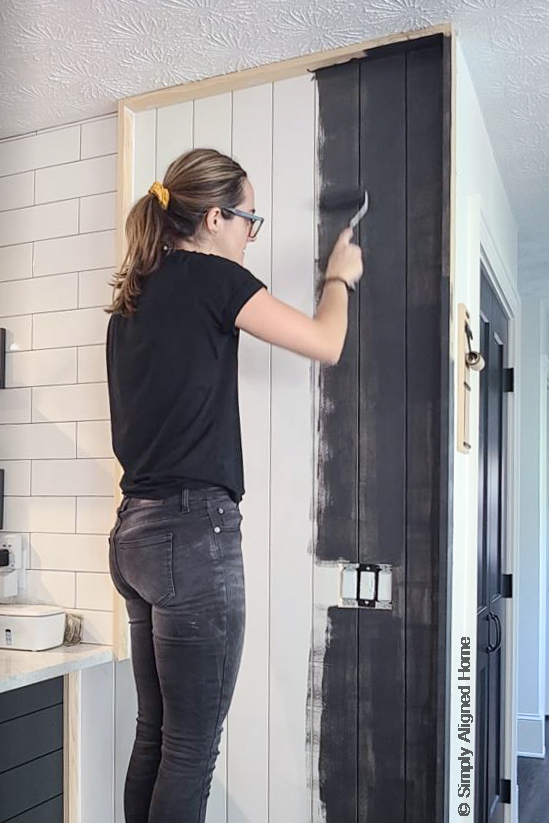
This step is key for a professional-looking finish that makes your shiplap walls look seamless and beautifully painted.
If you have smaller projects you could also add in a small craft brush to get paint deeper in the shiplap seams. This kind of brush is just the right size to get paint into those small spaces without making a mess on the board’s surface.
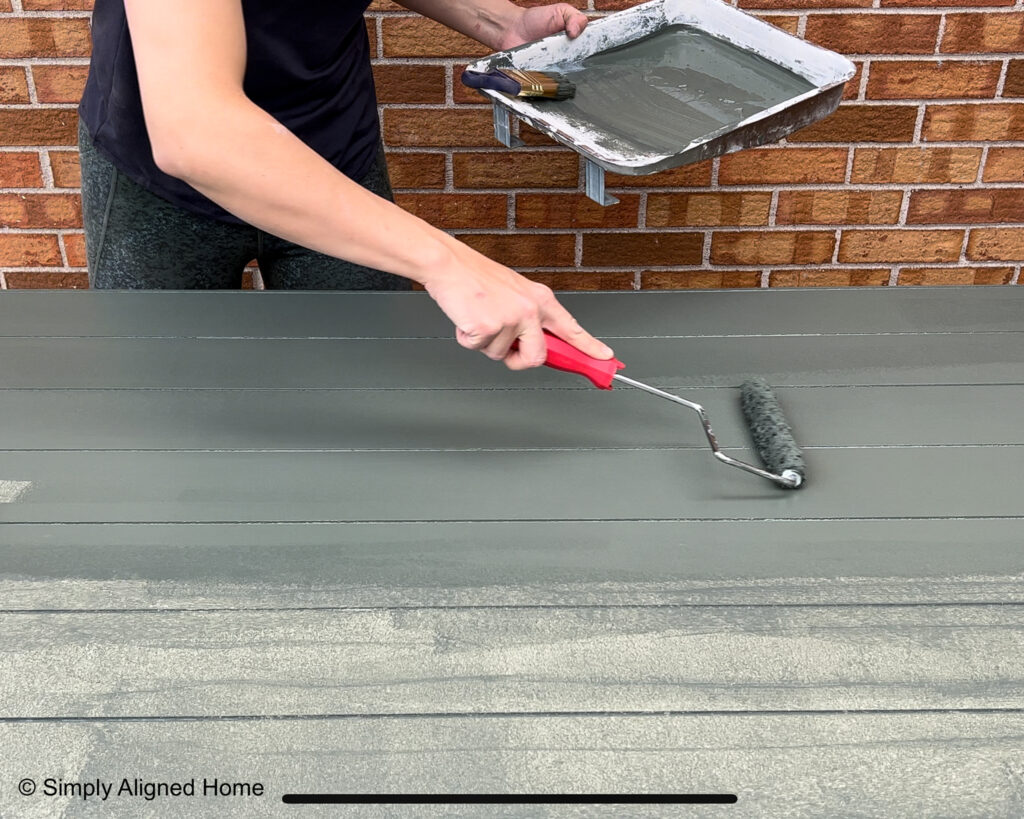
Paint The Face Of The Shiplap Using A Roller
I do my best to fully cover the seams of the shiplap on the first coat. Once the first coat dries, I make sure that the seams were adequately covered. If they were, I focus on achieving a nice finish on the surface of the shiplap with a paint roller for the second coat. This helps me even out the paint across the entire wall, making sure everything looks uniform.
Final Thoughts
I’ve got to say, the transformation of my shiplap walls in the past years has been truly remarkable! And I would like to think it’s largely because of this painting method! Using the craft brush to get into those tight seams, then coming in smoothing it all out with the angled brush. Lastly, using the roller to bring it all together has been essential in achieving that crisp, professional look.

**Note: I am not a professional and do not claim to be an expert. Please be sure to always read instructions for all tools and products. Safety is very important and should be your top priority. Wear necessary protection when using tools (eye wear, hearing protection, gloves, etc.) and dust masks when sanding or cutting. Simply Aligned Home is not responsible for any injury or damage. All of my designs are not professionally designed and are for private use only.**
Materials Used
Tools Used
- Optional: Craft Brush
- 2 in Angled Brush
- Paint Roller
- Paint Pail
