
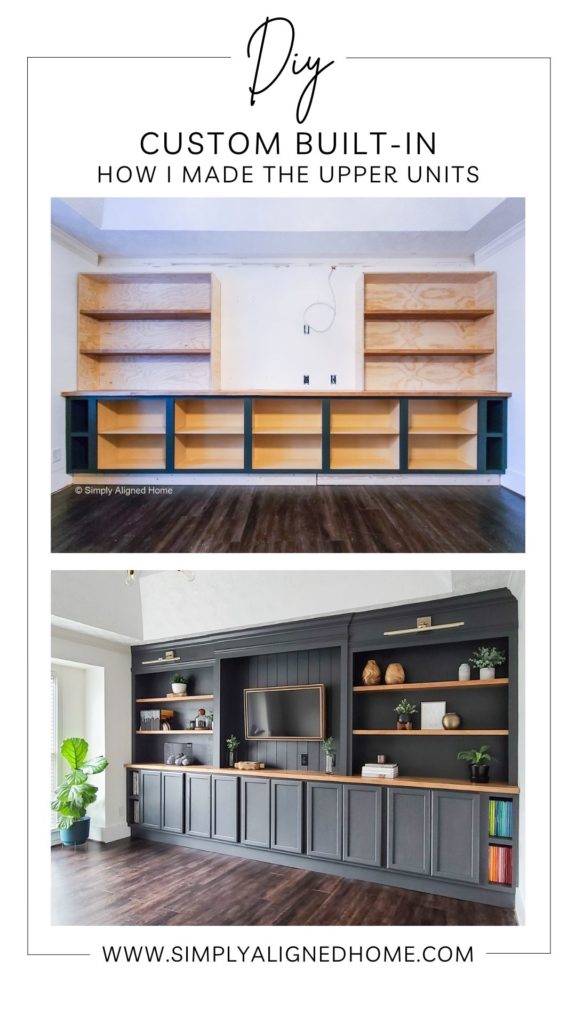
Want to tackle a large custom built-in unit, but not sure how?? I’m sharing all of the details on how I made this gorgeous built-in for my dining room/office! I broke the build into three manageable sections. I started by installing the base cabinets, then I made the upper units and I finished it all off with some trim! In this post, I will share how I made and installed the upper units.
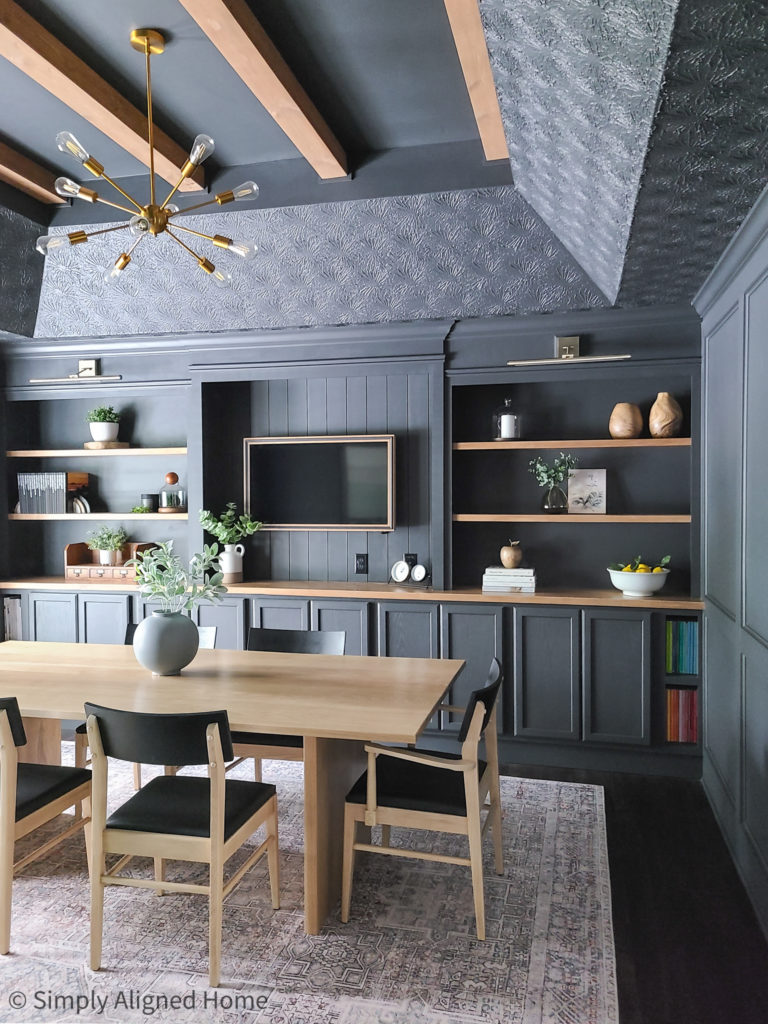
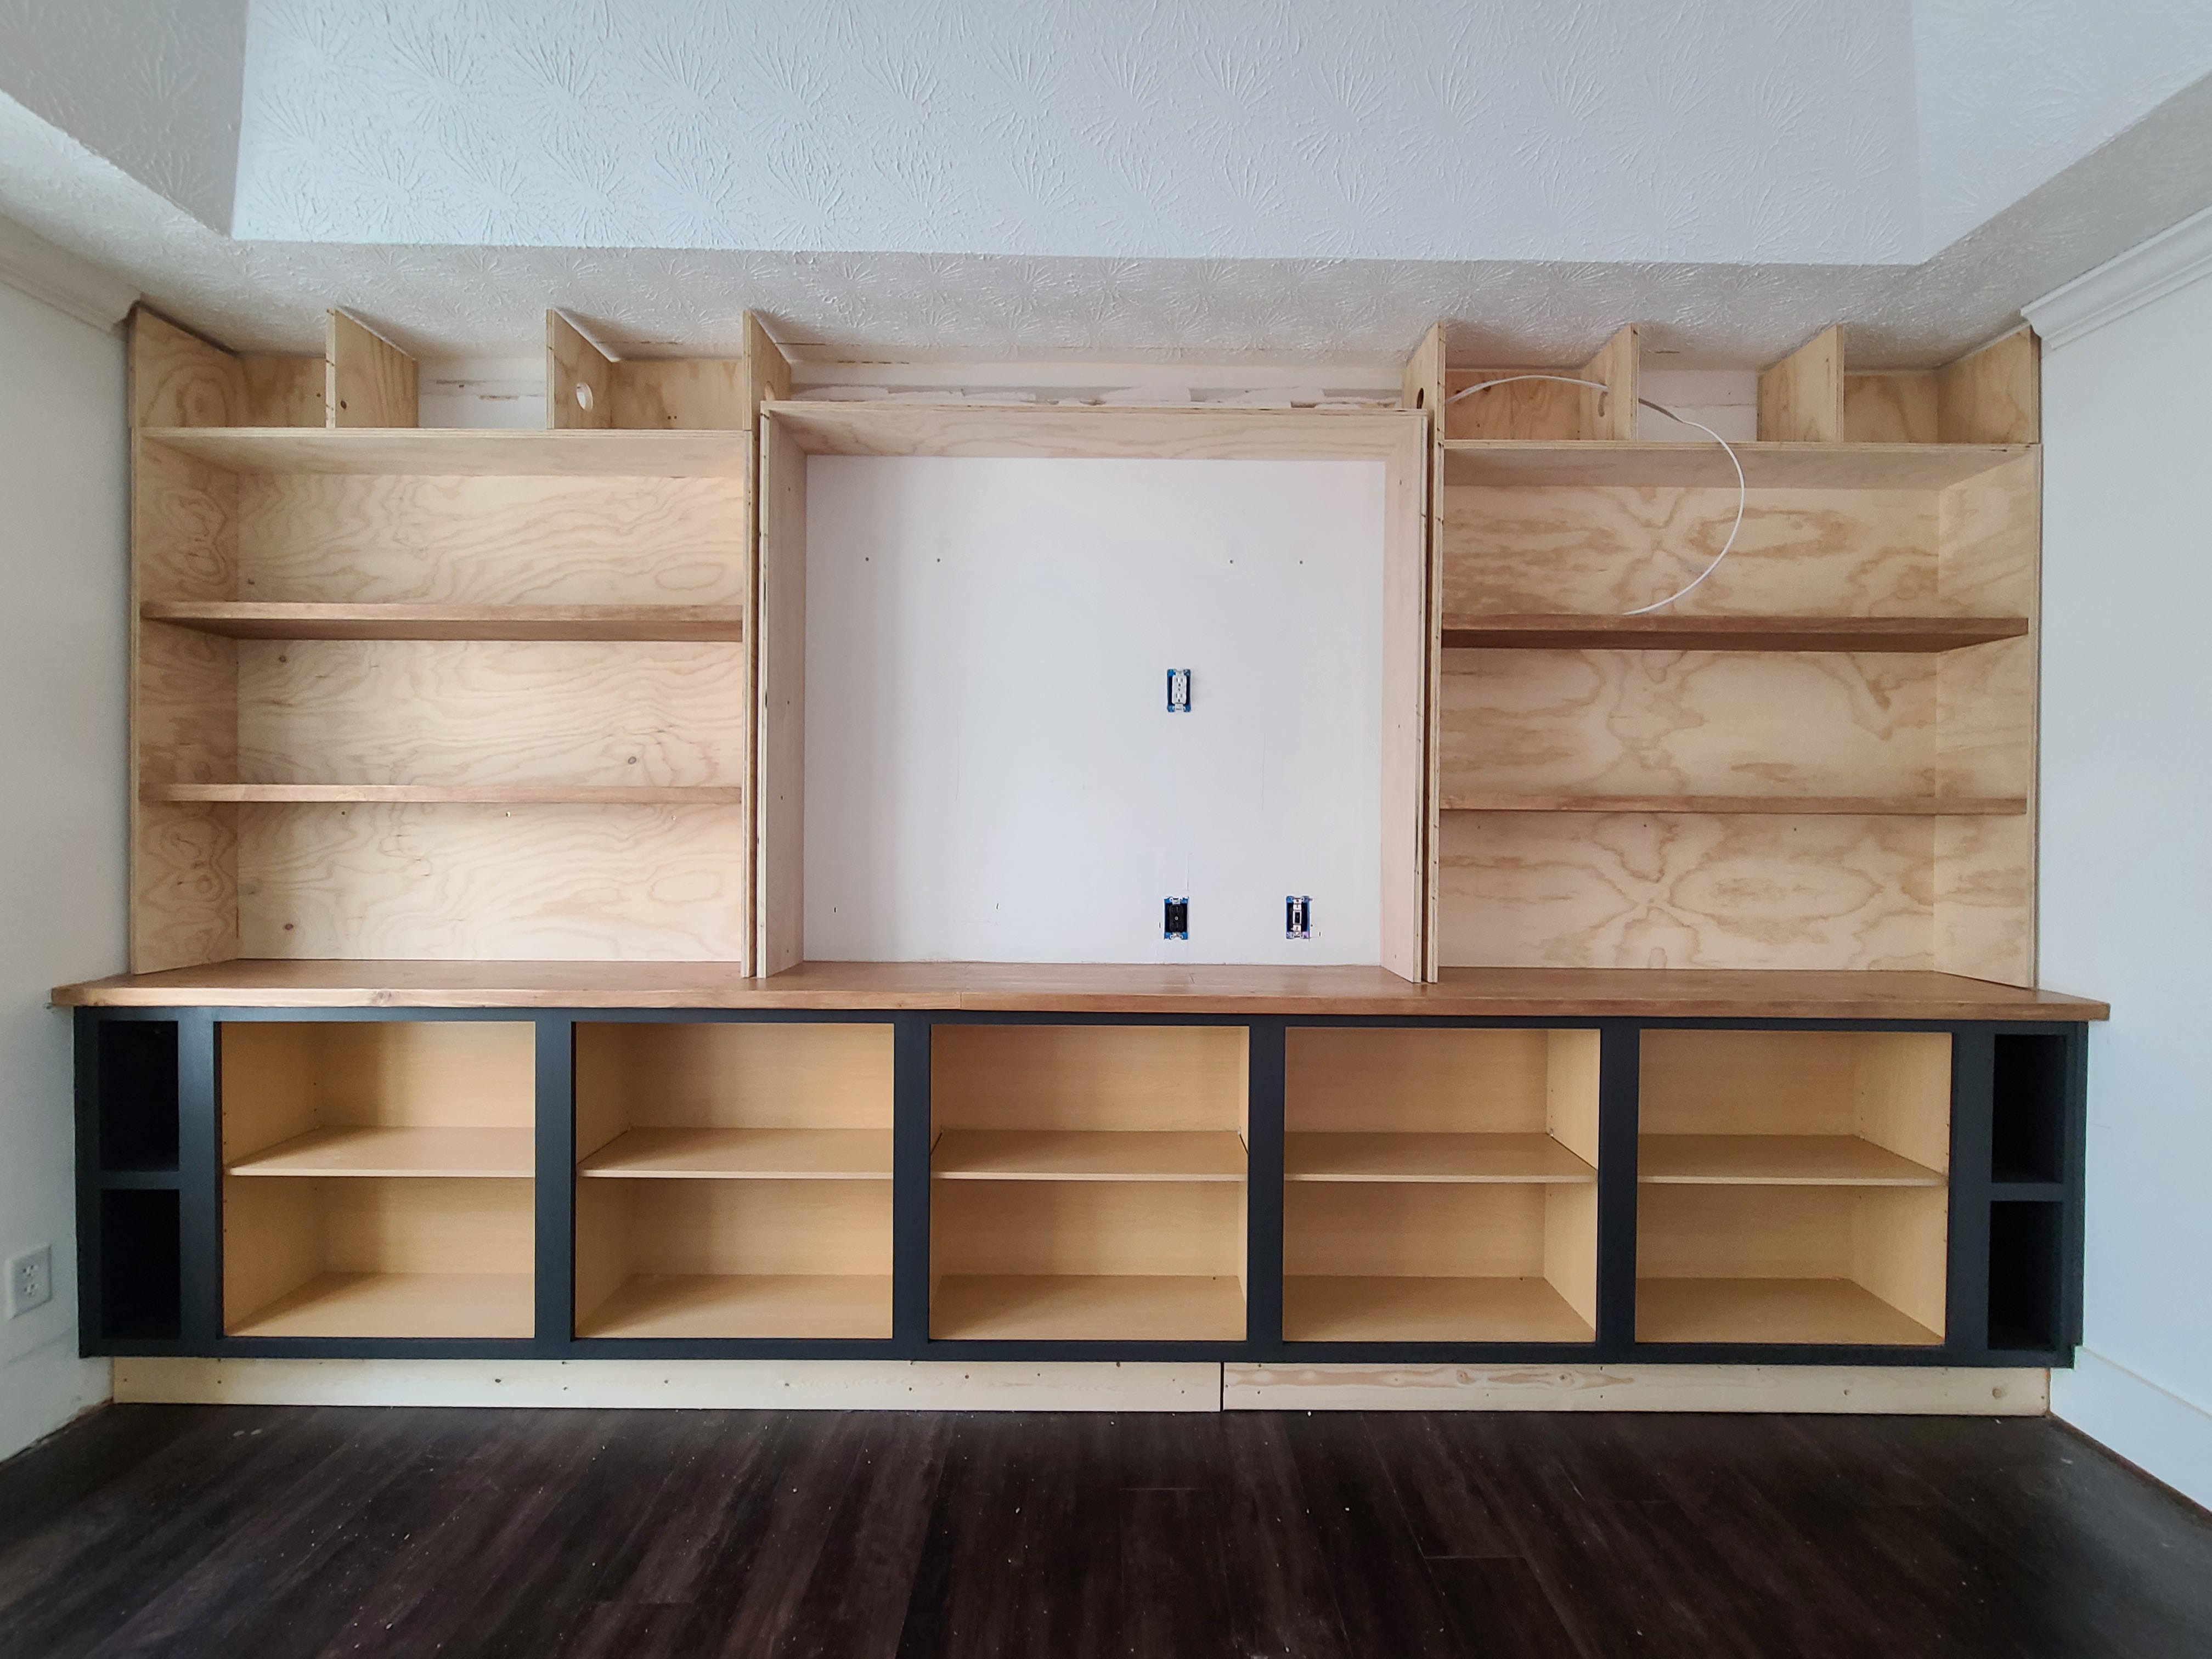
I split the upper unit into three individual sections. The two side units would have shelving, while the middle unit would be a space for a TV or artwork. Although this room was originally a formal dining room, it is now a dining room/office. I wanted to make it both functional and beautiful!
**This post contains affiliate links to products that I recommend. If you purchase something through an affiliate link, I may receive a small percentage of the sale at no extra cost to you. I really appreciate your support.**
Make the Shelves
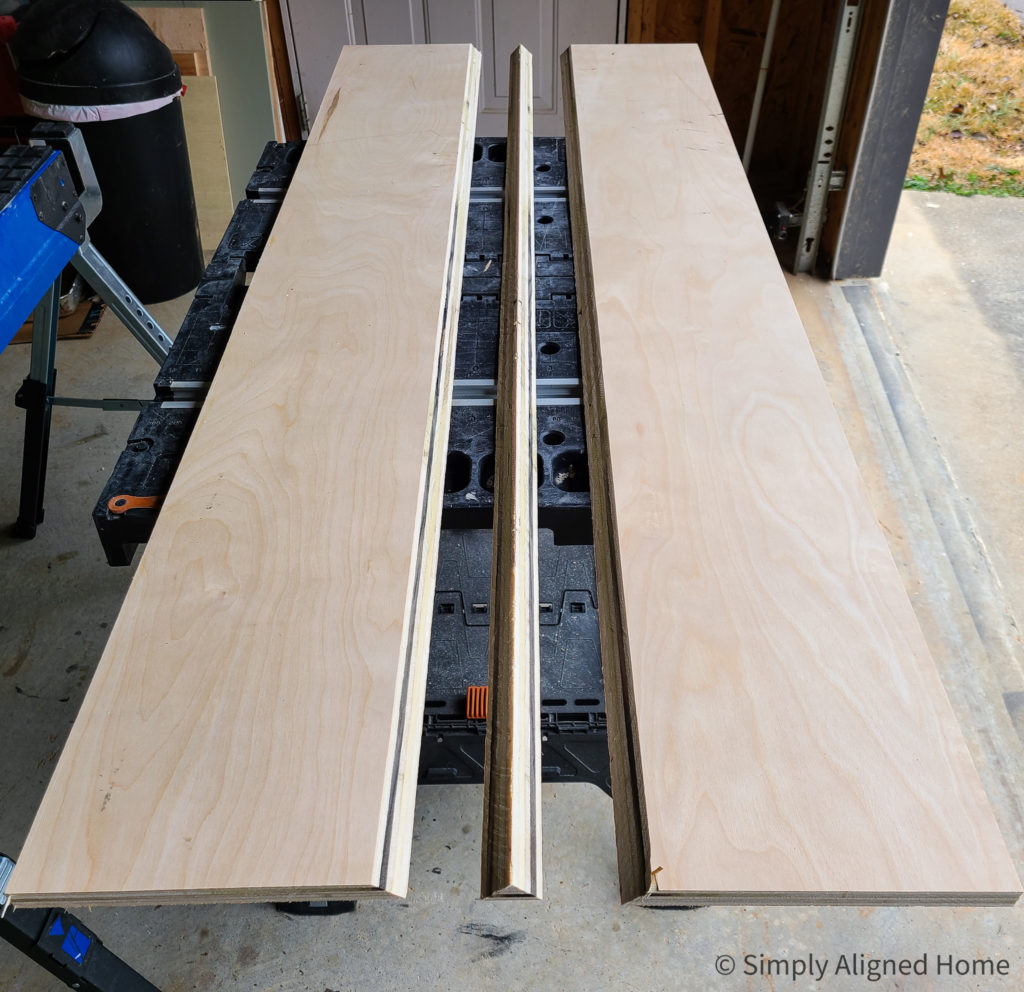
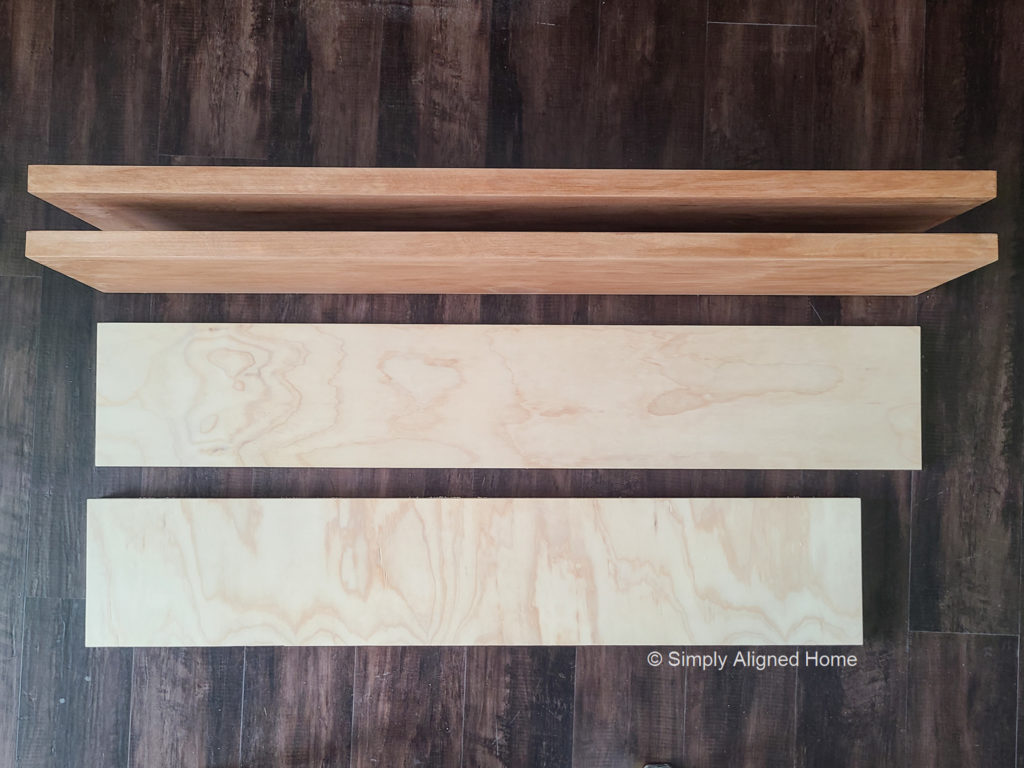
I wanted nice, thick stained wood shelves for the side units. I decided to make these out of 3/4″ thick birch plywood. Birch plywood stains really well and I knew it would give me a pretty finished product.
Each shelf is made up of three pieces (top, bottom and front). I started by ripping the top piece on a 45 degree angle on my table saw. Once I had the top piece ripped, I flipped the plywood over and made another 45 degree rip cut. This gave me the small, triangle shaped piece that is the front piece. For the final rip cut, I set my table saw back to 0 degrees and cut the bottom piece of the shelf.
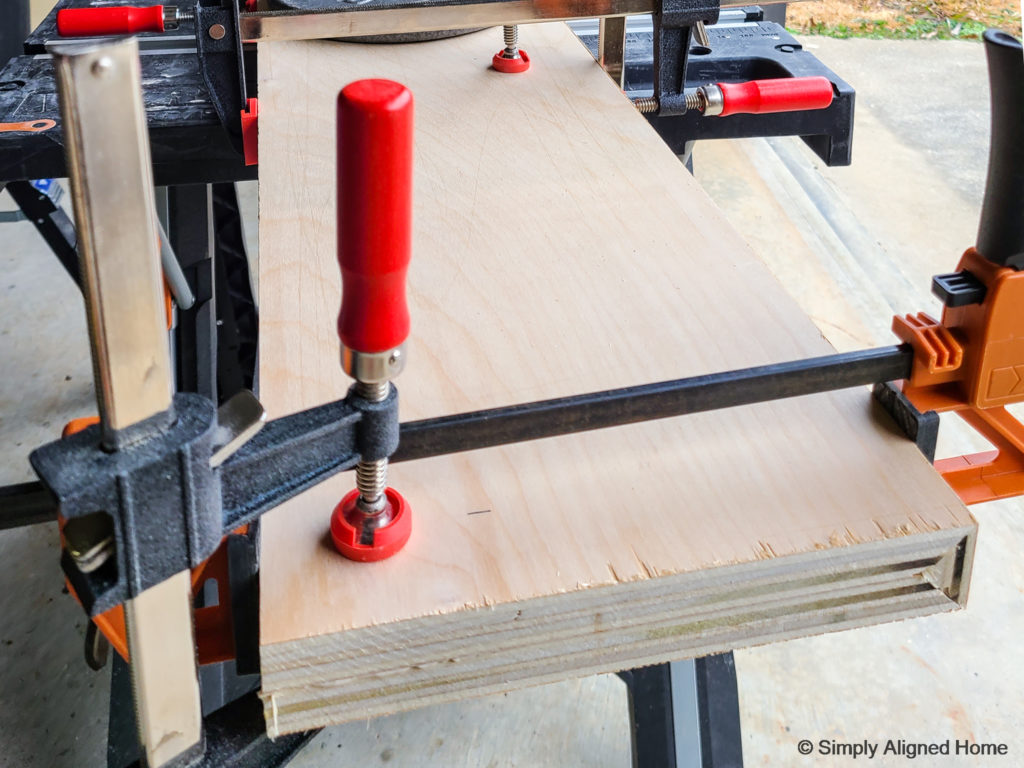
With all three pieces cut, I was able to assemble the shelf. I did this by applying wood glue to all of the interior sides of the shelf. To evenly apply the wood glue, try using a glue brush to spread the glue.
I fully assembled the shelf and used several clamps to hold the pieces together until the wood glue dried. It’s best to allow the wood glue to dry for 24 hours.
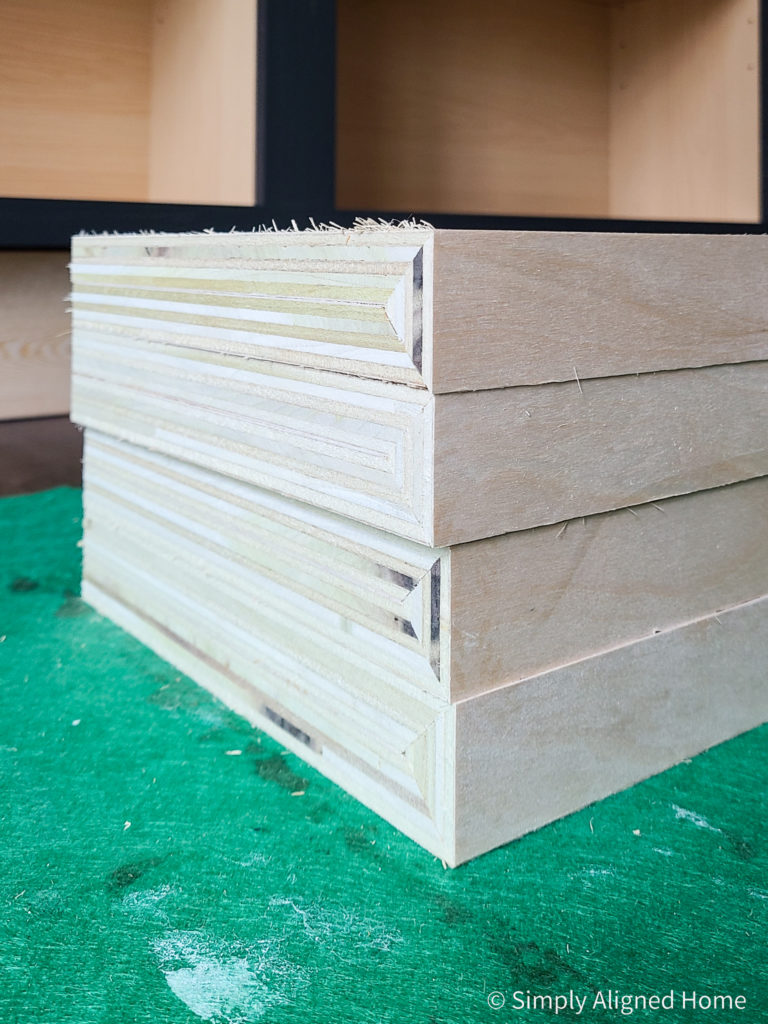
As soon as the wood glue dried, I cut the shelf down to length with my miter saw. I made sure to cut both ends of the shelf so that the three pieces of wood lined up perfectly. I did a light sanding of the surfaces of the shelves and smoothed out the front edges.
Stain and Seal the Shelves
I thought it would be easiest to stain and seal the shelves before I assembled the shelving units. I will be painting the interior of the shelving units after assembly and if the shelves are sealed, the paint will easily wipe off of the shelves (since I’m a super messy painter). I chose to wait to paint the units until after assembly because I used wood glue and I needed raw wood for assembly.
I applied a coat of wood conditioner and stained the shelves using a water based stain in Early American. I then applied two coats of a water based poly with a light sanding between coats.
Now the shelves were ready for assembly!
Assemble the Shelving Units
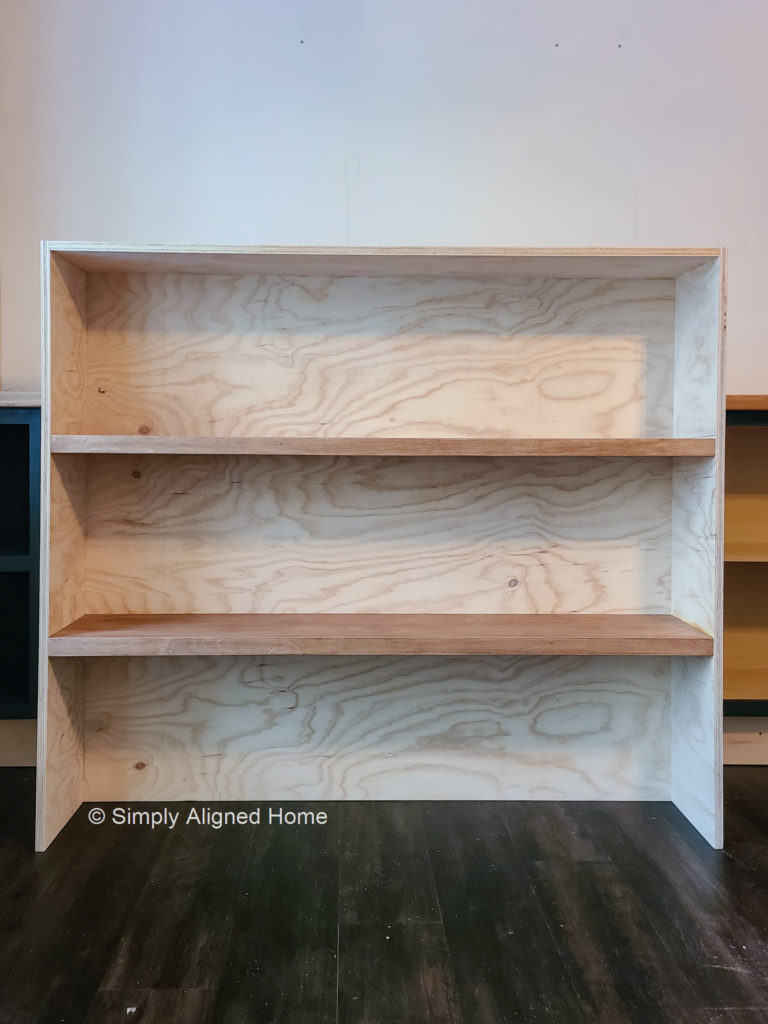
I used a 3/4″ paint grade plywood for the frame of the shelving units. Paint grade plywood is cheaper than a stain grade. It usually has more imperfections and is made from a lower quality wood.
I cut a back panel, two side panels and a top panel for each shelving unit. The top panel was the same width as the shelves.
To assemble the shelving units, I used wood glue and construction screws. I started by screwing the top panel and two shelves to one of the side panels. I applied wood glue and then screwed through the other side panel and into the top panel and shelves.
With everything secured to the one side panel, I installed the other side panel. It can be tricky to know exactly where to screw through the side panels. I like to draw a line on the outside of the side panel exactly where I need to screw through. If the shelves are properly lined up, you should screw right into the center of the shelves.

The last part of the shelving units was the back panel. I laid the assembled parts face down, applied glue and then laid the back panel on the assembly. I drew my lines where I needed to screw and used construction screws to finish the assembling.
Install the Shelving Units
The upper units were rather heavy once fully assembled. I had my husband help me lift them onto the countertop.
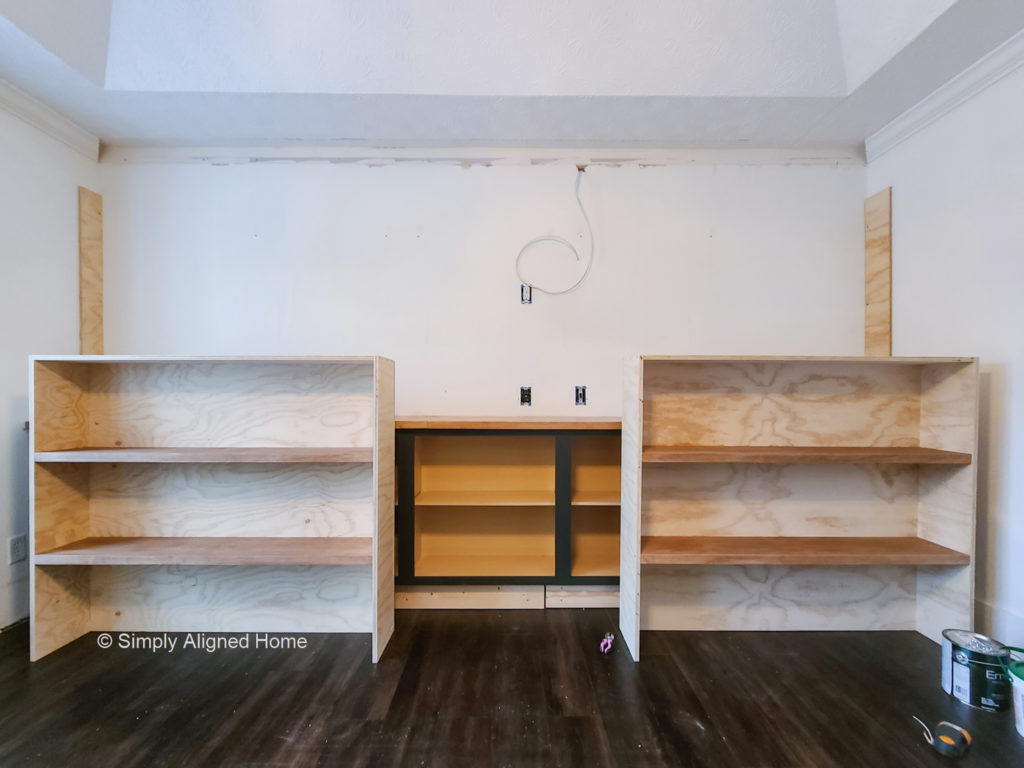
Before I secured the shelving units to the walls, I secured a strip of 3/4″ plywood to the back corner of the wall on each side. I installed another 3/4″ strip of plywood to the wall where the front of the shelving unit would hit. This will space the shelving unit off of the wall enough for me to add a thicker face frame.
I then set the shelving units in place and secured them to the wall studs in several places. I marked my stud locations on the wall and ceiling when I installed the base unit for future reference.
Build and Install Frame for Center Unit
The center unit was much simpler than the shelving units. It just consisted of two side panels and a top panel.
I made the center unit slightly taller and deeper than the shelving units. This would not only give the unit interest and depth, but it would make trimming the unit easier (I’ll talk more about that in the next post).
I spaced the center unit 3/4″ off of the shelving units using 3/4″ strips of plywood and screwed it to the shelving units.
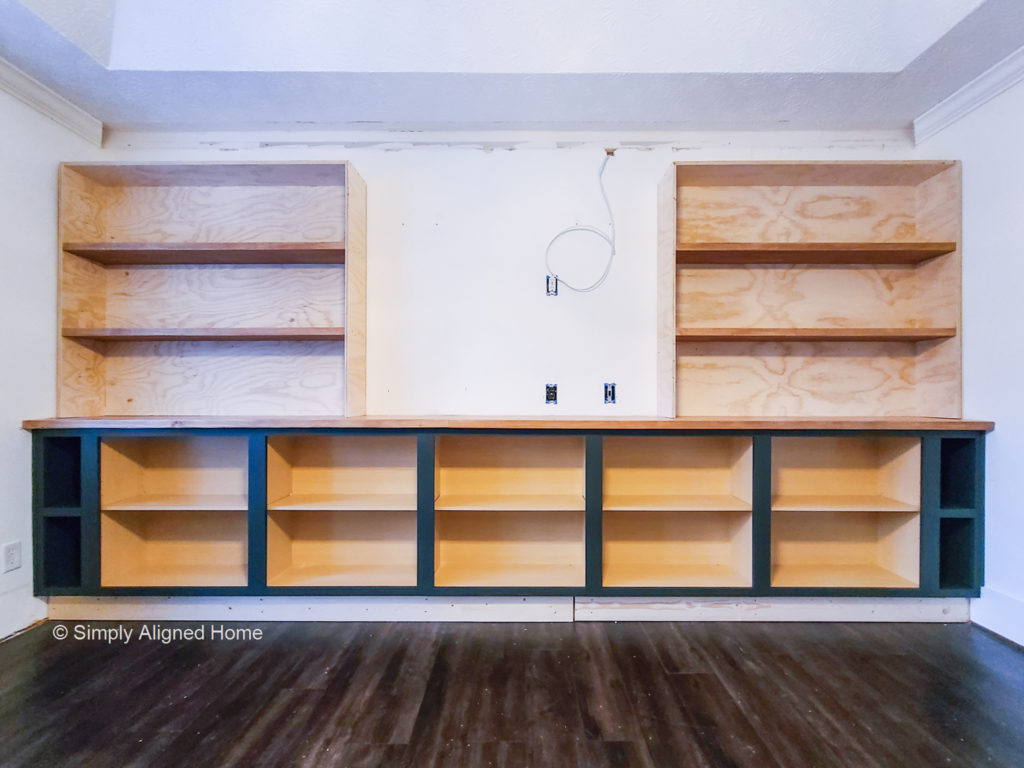
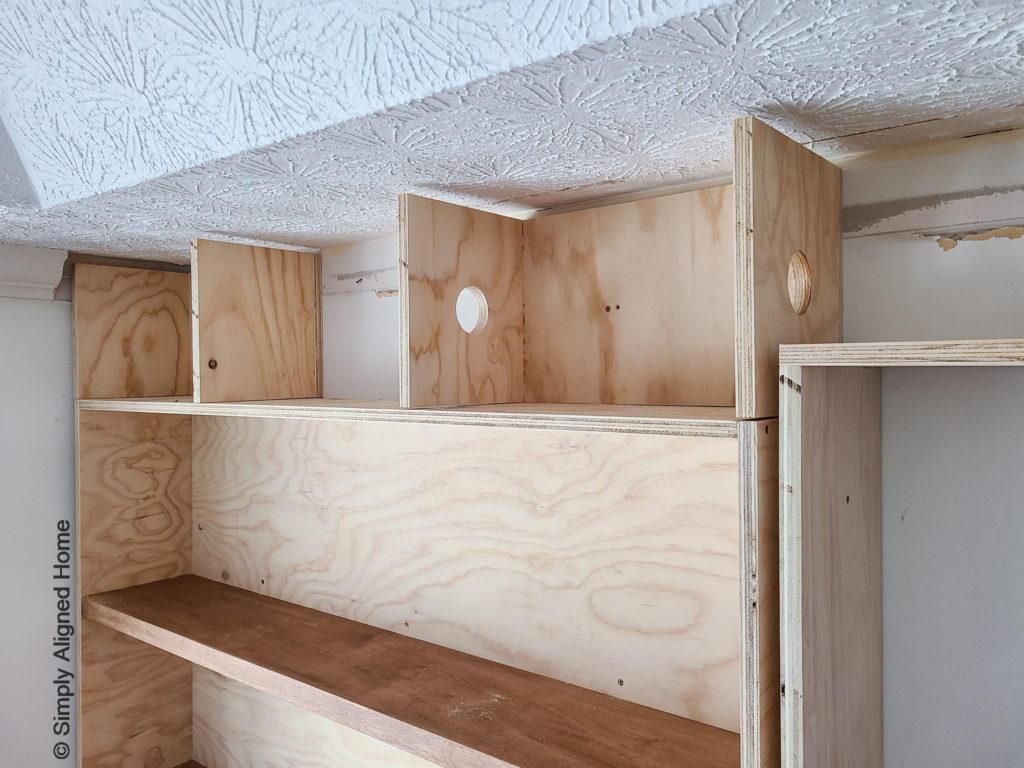
Build and Install Upper Framing
With the shelving and center units complete, the upper frame was the last part of the framing. For my unit, the upper frame would double as an electrical chase (for my picture lights) and support for the trim work. I will not go into detail about the electrical for this project. I am not an electrician and codes are different for every area. It is important to do your research and hire licensed professionals when necessary.
For the upper frame, I made four boxes the same depth as the shelving units. I placed them on top of the shelving units and secured them to the studs.
The upper unit is now ready to be trimmed out. This is when it all comes together and begins to look like one complete unit!
I broke the build of this unit into three separate parts for ease of explanation (and because I like to break large projects into small, manageable sections). Be sure to check out the first and final parts of the this build: Custom Built-In: How to Install Base Cabinets and Custom Built-In: How to Finish with Trim and Paint.

**Note: I am not a professional and do not claim to be an expert. Please be sure to always read instructions for all tools and products. Safety is very important and should be your top priority. Wear necessary protection when using tools (eye wear, hearing protection, gloves, etc.) and dust masks when sanding or cutting. Simply Aligned Home is not responsible for any injury or damage. All of my designs are not professionally designed and are for private use only.**
Love it – looks beautiful! Where did you get the book lights if you don’t mind me asking?
Thank you!! I ordered them on Amazon.
What color and brand is the grey paint
It is Sherwin-Williams Iron Ore.
What color paint was used?
It is Sherwin-Williams Iron Ore.
How did you trim out the front of the bookshelves? Could you detail that?