
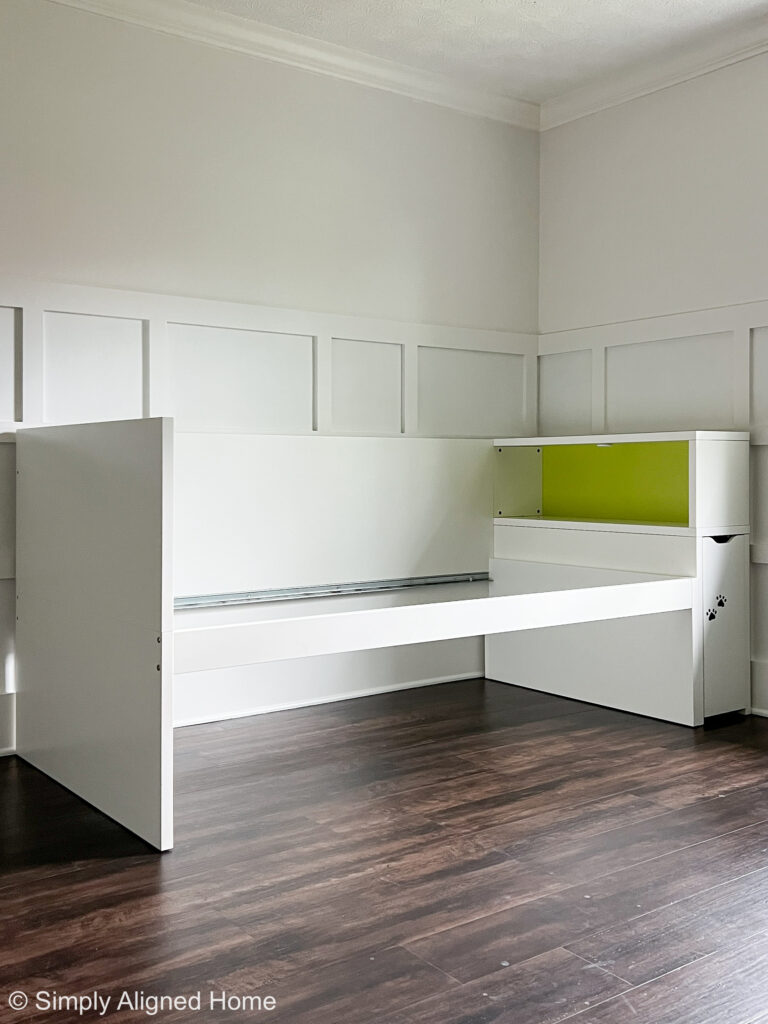
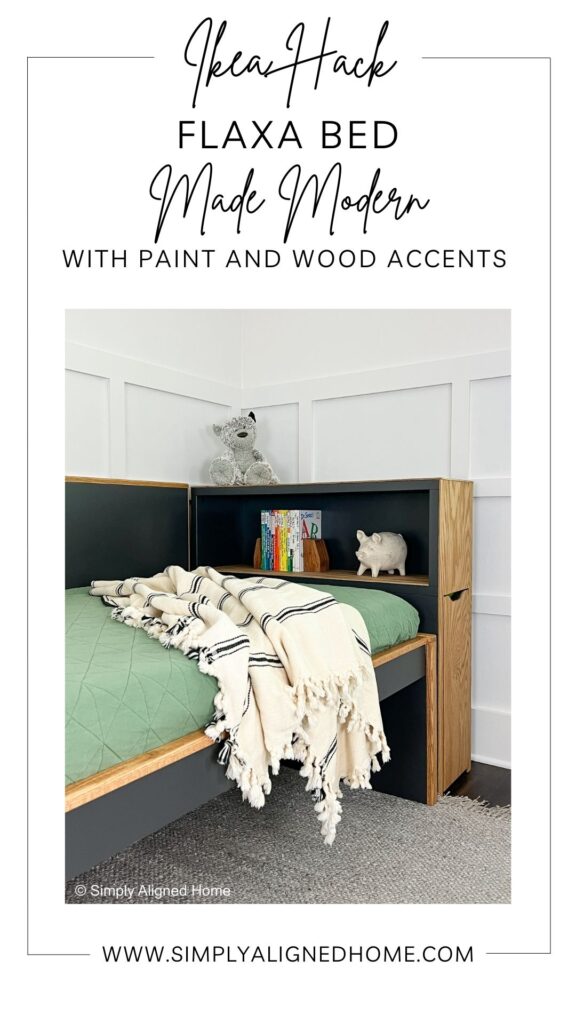
Who doesn’t love a good IKEA hack?! IKEA has very affordable furniture that often has a simple design. When I see a piece of their furniture, I often think about how I can improve the appearance. I purchased an IKEA Flaxa bed second hand and did just that! Here’s how I took a simple, white bed and made it into a modern beauty.
**This post contains affiliate links to products that I used or recommend. If you purchase something through an affiliate link, I may receive a small percentage of the sale at no extra cost to you. I really appreciate your support.**
Paint the Bed
Before I could add any wood accents to the bed, I needed to paint it. I didn’t want to have to work around the wood to when painting.
I didn’t bother painting the parts that would be covered by wood. However, I wish I would have painted all of the major surfaces because I had to paint the ends after the fact (more on that later).
Lightly Sand the Bed
I decided to use an oil-enriched enamel meant for cabinets and furniture in a satin finish. In order for it to really adhere to the IKEA Flaxa bed frame, I needed to sand and prime the bed first.
I started by lightly sanding the bed using a 220 grit sanding sponge. I simply wanted to scuff up the smooth surface. This will allow the primer to adhere better.
Once I was done sanding, I wiped all of the sanding dust off. It’s best to use tack cloth to really get all of the sanding dust.
Prime the Bed
With the bed lightly sanded, I was able to prime it. I did two coats of primer on all surfaces to be painted.
I used a 2″ angled brush (my favorite) to apply the primer in the corner and near the edges and used a roller to smooth it all out.
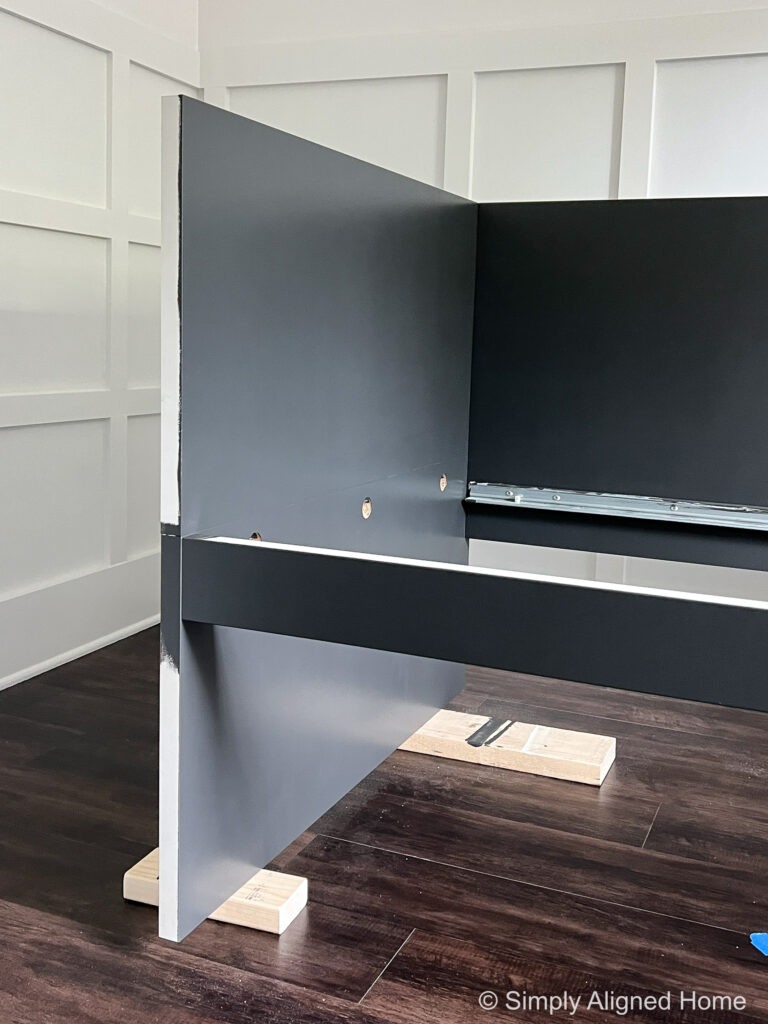
Paint the Bed
I allowed the primer to fully dry before I applied the paint. As I mentioned, I selected an oil-enriched enamel that could be tinted any color. I went with my (current) favorite color…Iron Ore!
I applied the paint with a brush and roller. This enamel leaves a nice, smooth finish. The application doesn’t have to be perfect, but I did make sure I didn’t have any obvious lines in the paint.
One warning about oil based and oil enriched paints…they stink! I kept the window open, fan on and had a few odor absorbers in the room to try to minimize the smell.
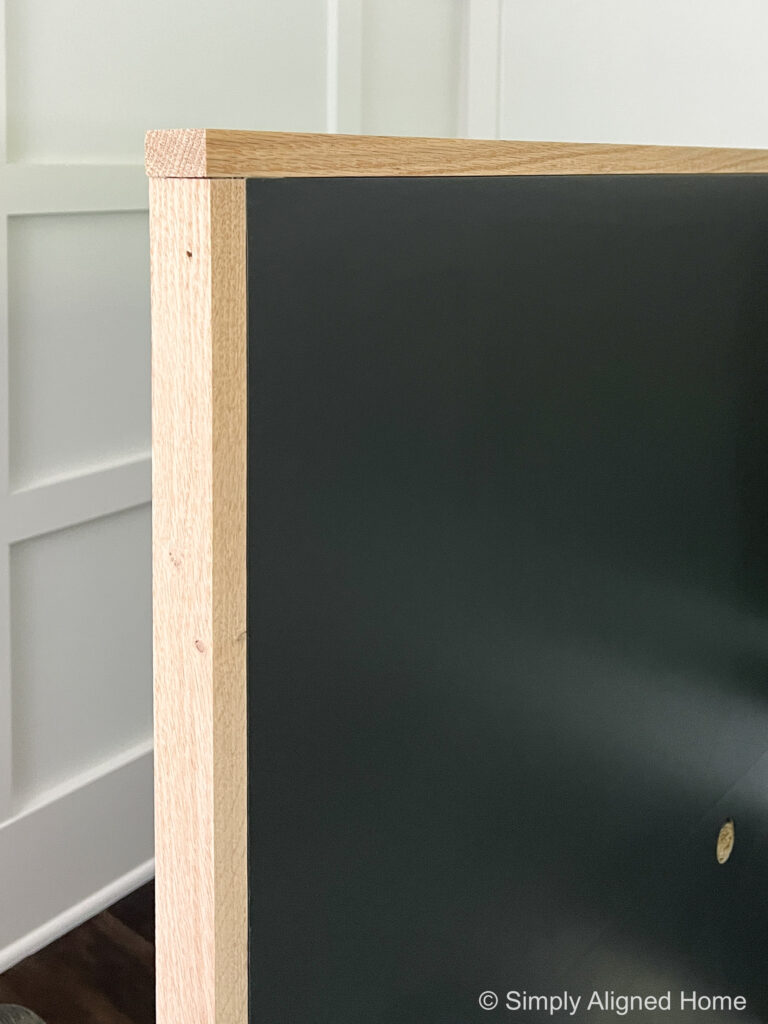
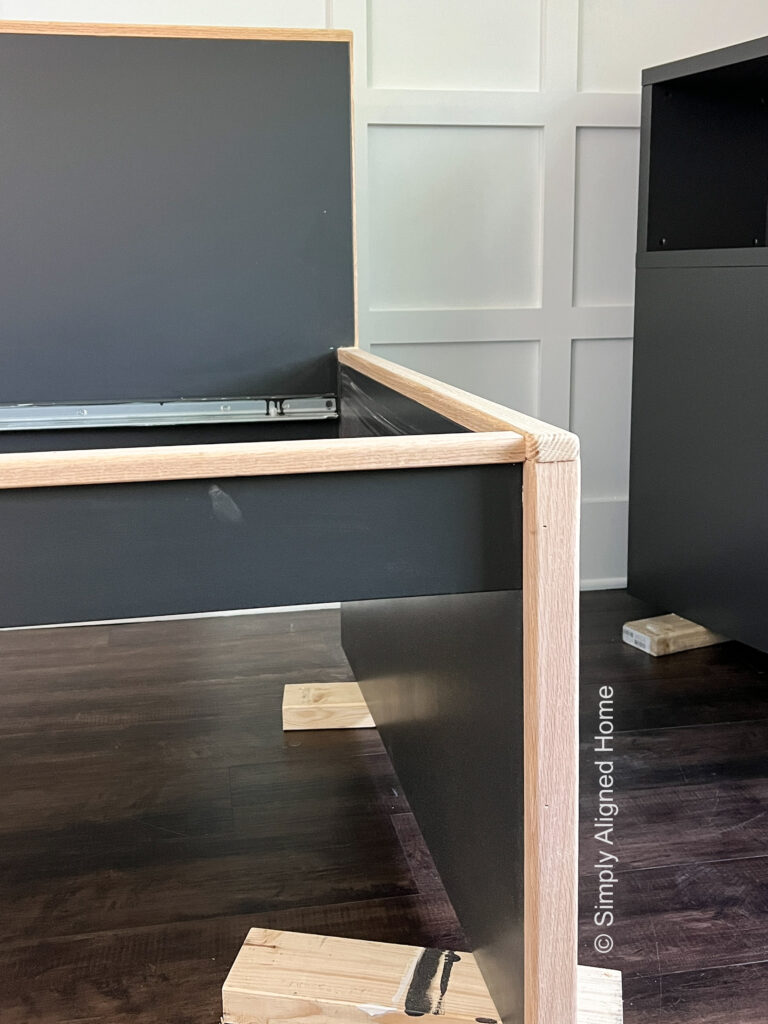
Trim Out the Bed
I feel like adding wood accents to any piece of furniture really makes it feel rich. I thought that oak wood accents would be the perfect addition to this IKEA Flaxa bed flip!
Add Wood Trim to the Bed
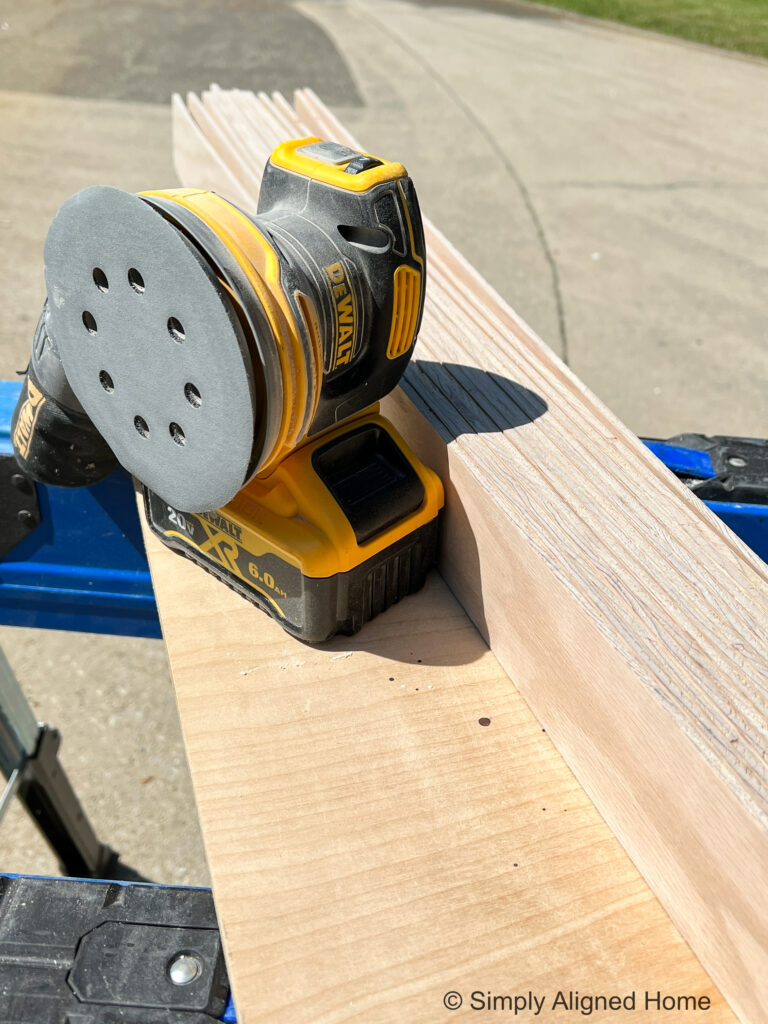
As soon as the paint was dry, I started trimming out the bed with 1×2 oak boards. I thought it would be a great idea to secure the wood to the bed before I routed the edges…I’ll explain later why that was a bad idea!
I added the trim one piece at a time. I would measure one edge of the bed and attach the wood before I went on to the next piece. This ensure that I didn’t make any mistakes with my cuts (the price of wood is no joke right now).
After I cut the wood, I did a light sanding with 220 grit sandpaper and my orbital sander. I also smoothed any edges that wouldn’t be routed (like the edges on the underside) with a 220 grit sanding sponge.
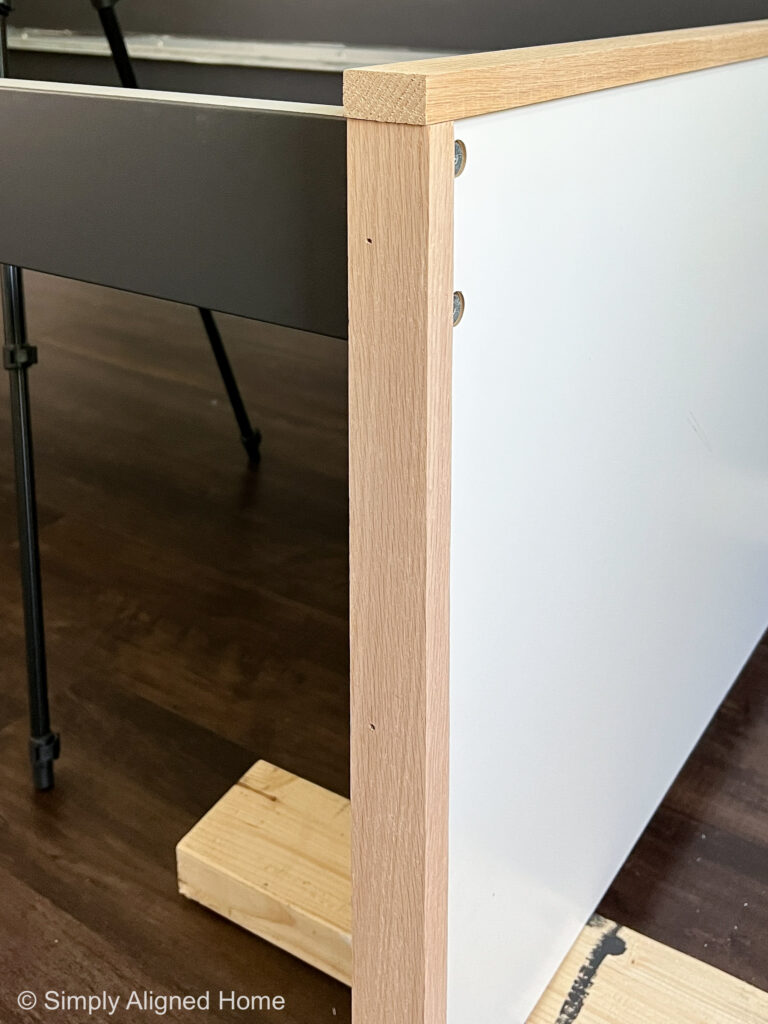
I used both construction adhesive and finish nailer to secure the wood to the IKEA Flaxa bed.
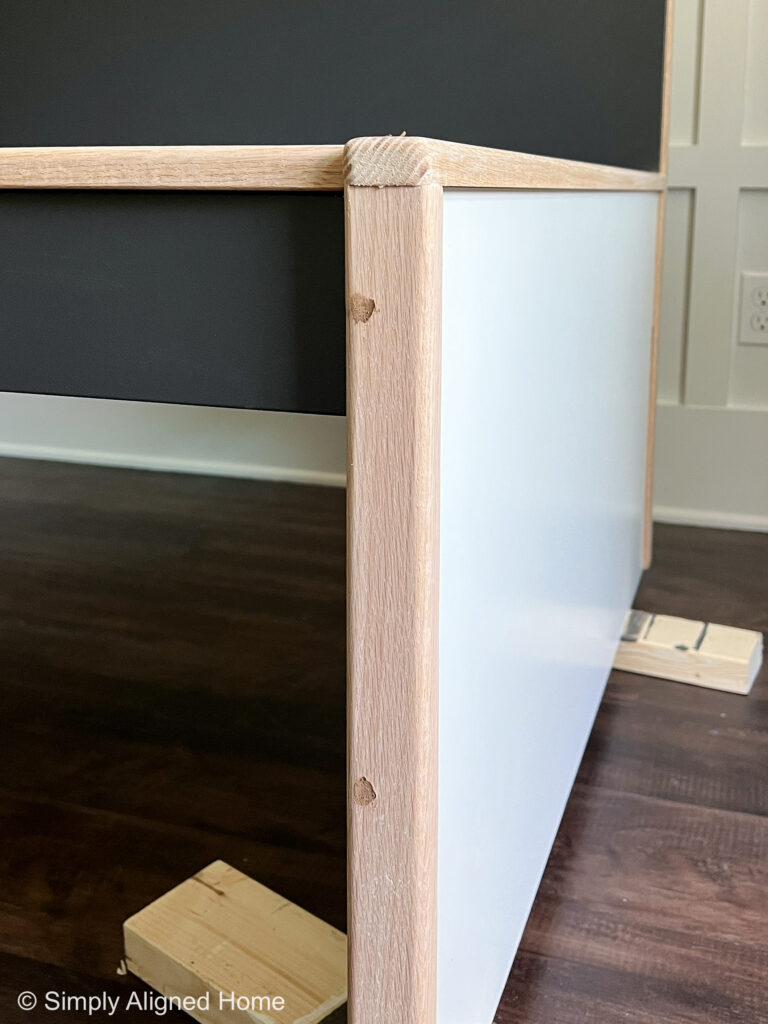
Route the Edges of the Wood
I decided to add the wood trim to the bed before I routed the edges so that the seams were smooth and continuous. Big mistake! It made a huge mess inside!! I definitely should have routed the edges before I attached the wood to the bed.
I used a round over bit and my palm router to remove any corners and sharp edges of the wood. I am all about safety…kids and corner/sharp edges just don’t mix!
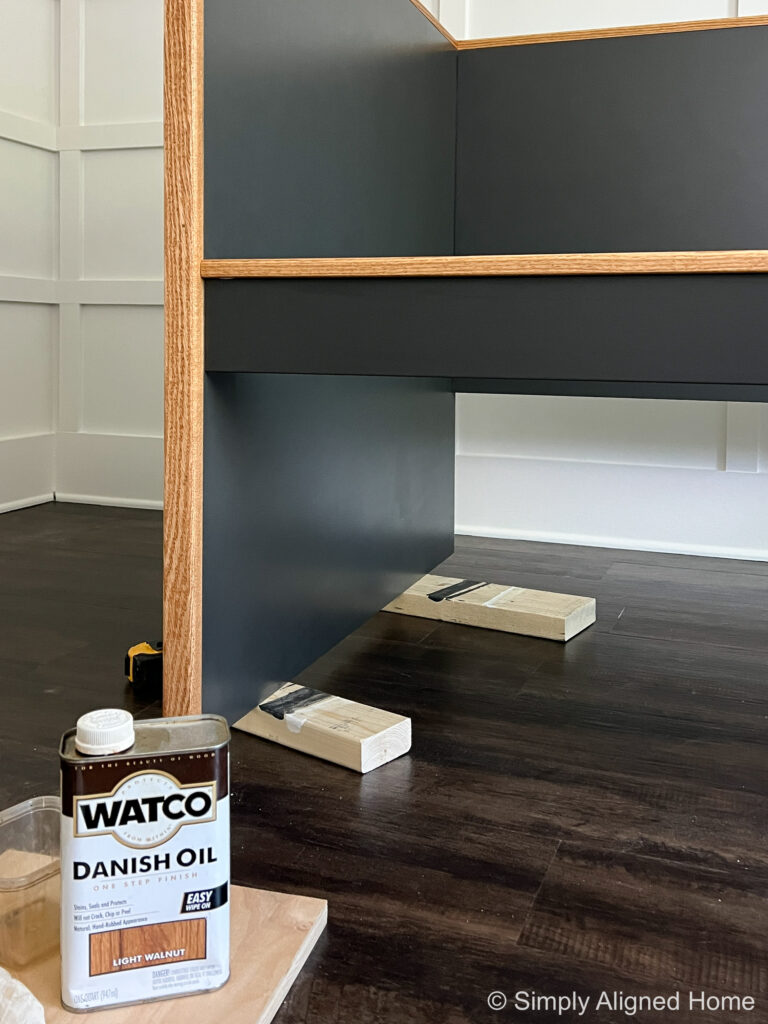
Stain and Seal the Wood
Before I stained the wood, I filled the nail holes with wood filler and sanded it smooth once dry.
I recently used Watco Danish Oil for the first time on the master bed that I built…and I love it!! It is a stain and sealer in one and has an amazing finish.
I applied one coat of Watco Danish Oil in Light Walnut to the wood on the bed. Again, since it is an oil based product, it does smell. I kept the window open, fan going and an odor absorber in the room. It did take a few days for the smell to fully go away.
Add Wood Slats to the Bed
I initially planned on adding a solid sheet of 1/4″ oak plywood to the ends of the bed. I wasn’t able to find large sheets of plywood at the time, so I changed my design to include wood slats instead. I’m so glad I did…the end results are so much better than a plain sheet of plywood would have been!
If you haven’t seen the slat wall I did with 3/4″ plywood, you need to check it out! It’s one of my favorite accent walls!!
Rip and Cut the Wood Slats
Since I wasn’t able to find large sheets of plywood, I used 2’x4′ sheets of 1/4″ oak plywood to make my slats. I ripped the plywood into 2-1/2″ wide strips with my table saw. I then cut them down to the correct length using my miter saw.
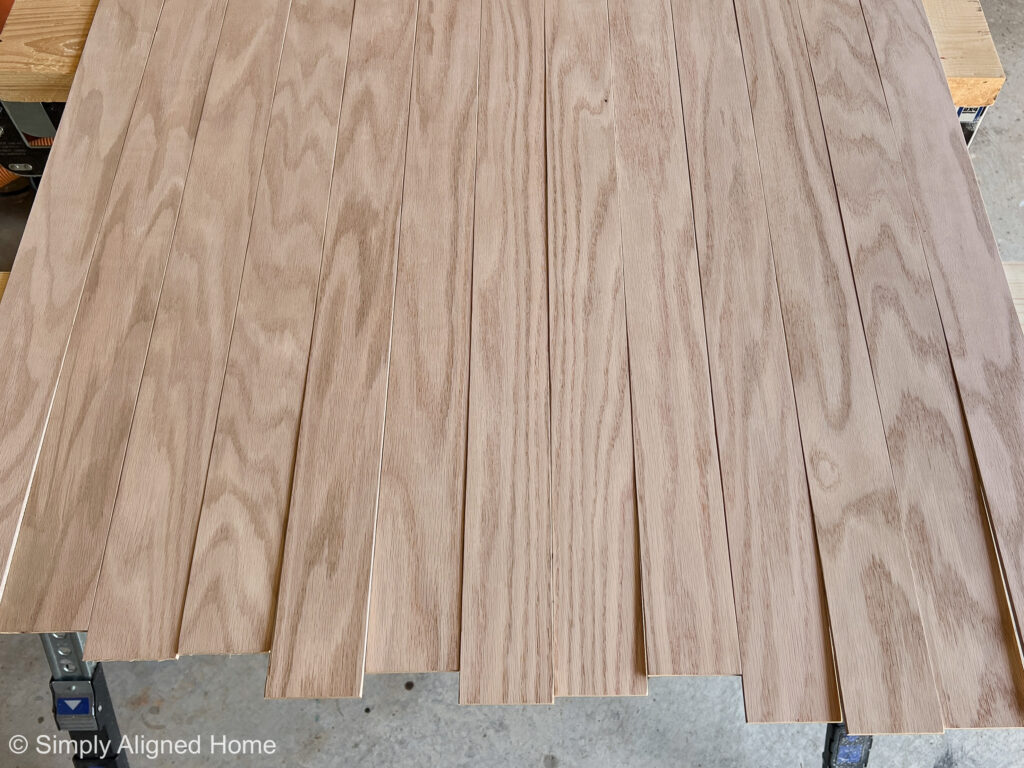
Once all of the slats were cut, I put them all together to quickly sand the cut edges. I smoothed the edges with a 220 grit sanding sponge to be sure there weren’t any rough spots.
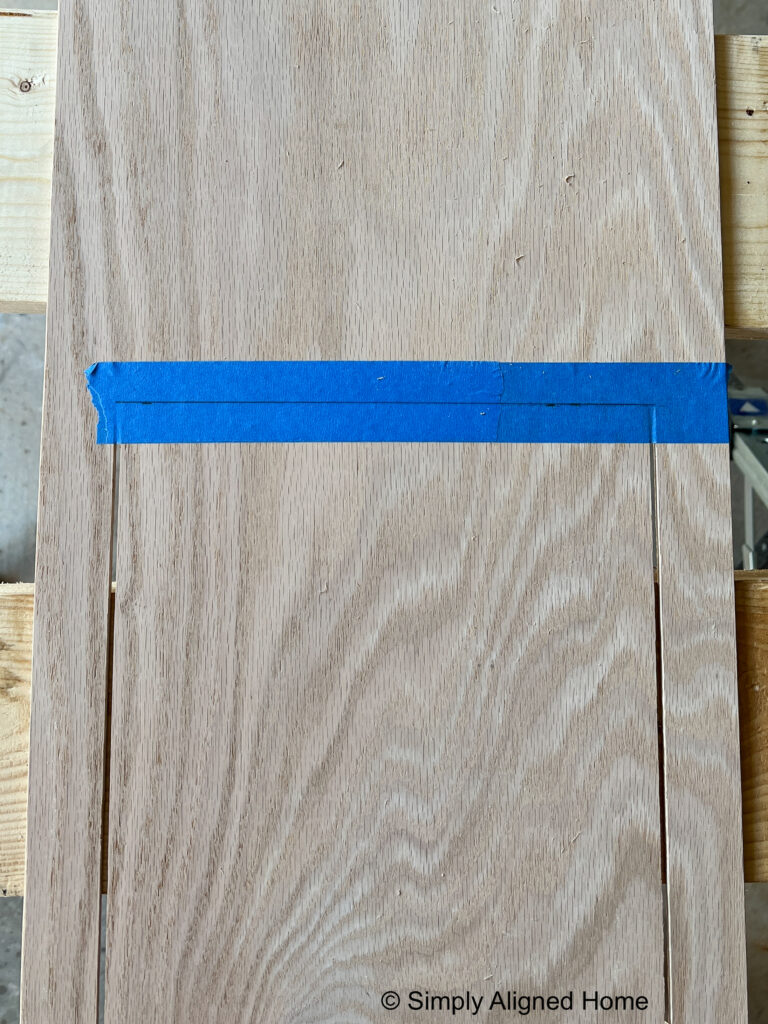
Cut Out for Screws
There were a few spots where the wood slats covered screws that were used to assemble the IKEA Flaxa bed. I wanted to be able to disassemble the bed without removing the slats. Therefore, I needed to drill out holes where the screws were located.
To mark the hole locations, I applied paint to the screw head or hole surrounding the screw. I then put the wood slat in place, making sure to push it into the wet paint. When I removed the wood slat from the bed, I was able to see where I needed to drill the holes.
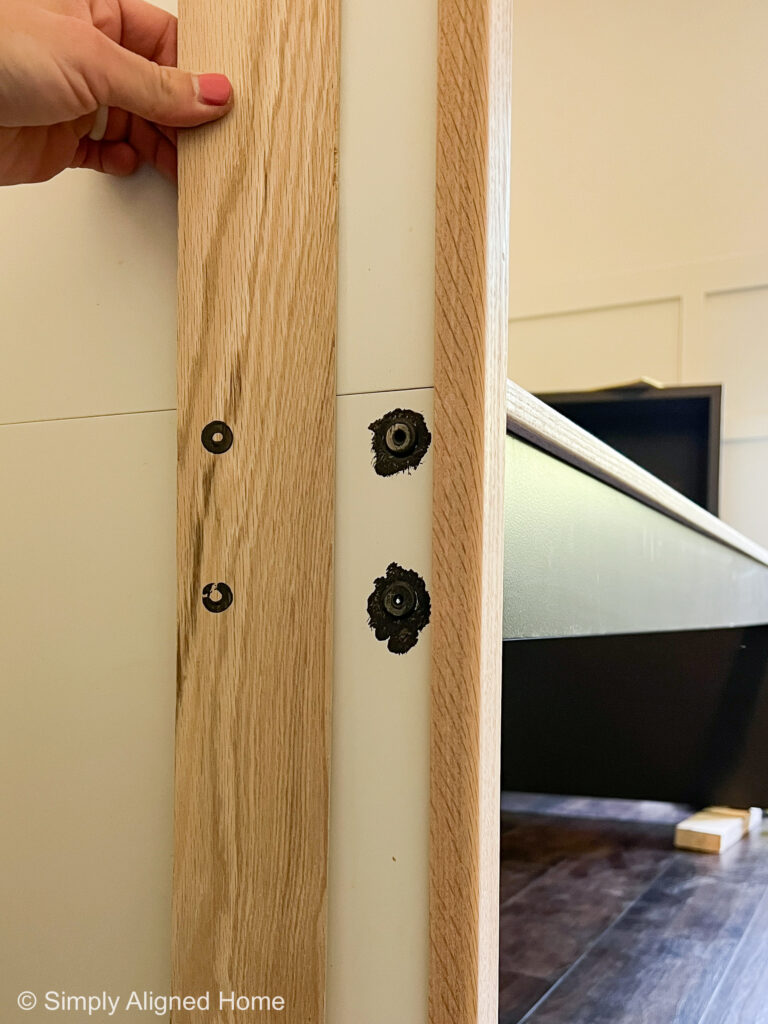
The holes needed to be a little bigger than my standard drill bits, so I used a forstner bit to drill the holes.
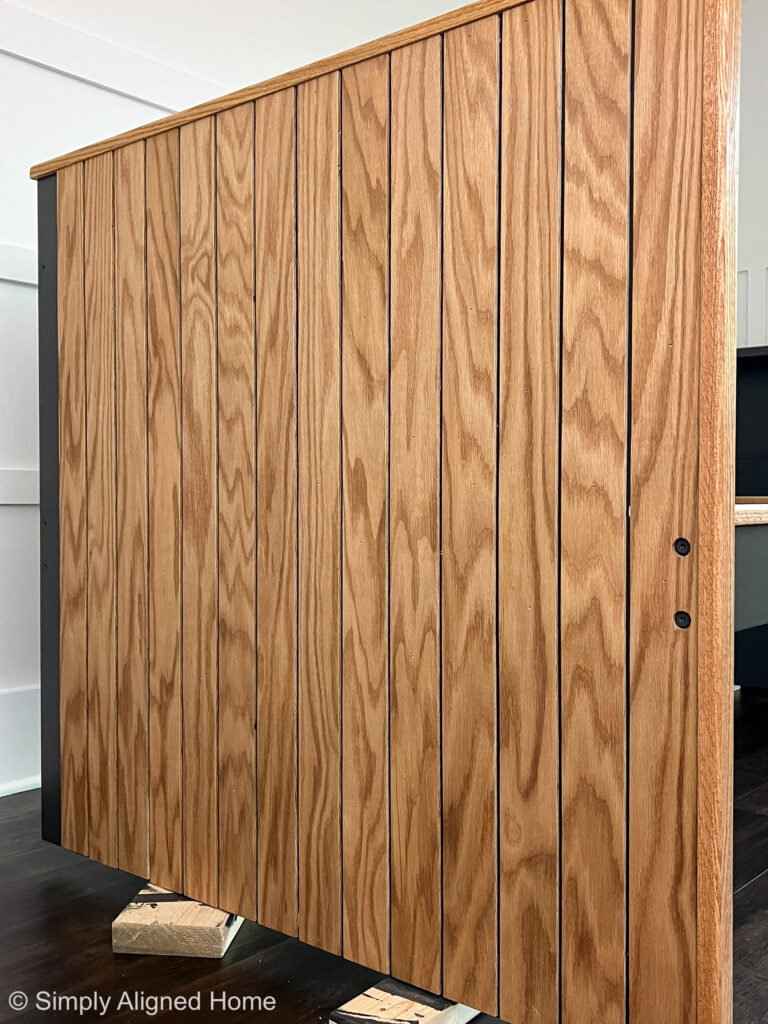
Stain and Seal the Wood Slats
Unlike the wood trim, I decided to stain the slats before I installed them on the bed. This allowed them to dry and hopefully smell a little less before I installed them. I used the same Watco Danish Oil to stain and seal the slats.
Add the Wood Slats to the Bed
Before I could attach the slats to the bed, I needed to paint the ends of the bed. If I would have known I was installing slats, instead of a solid piece of plywood, I would have painted the ends when I painted the rest of the bed.
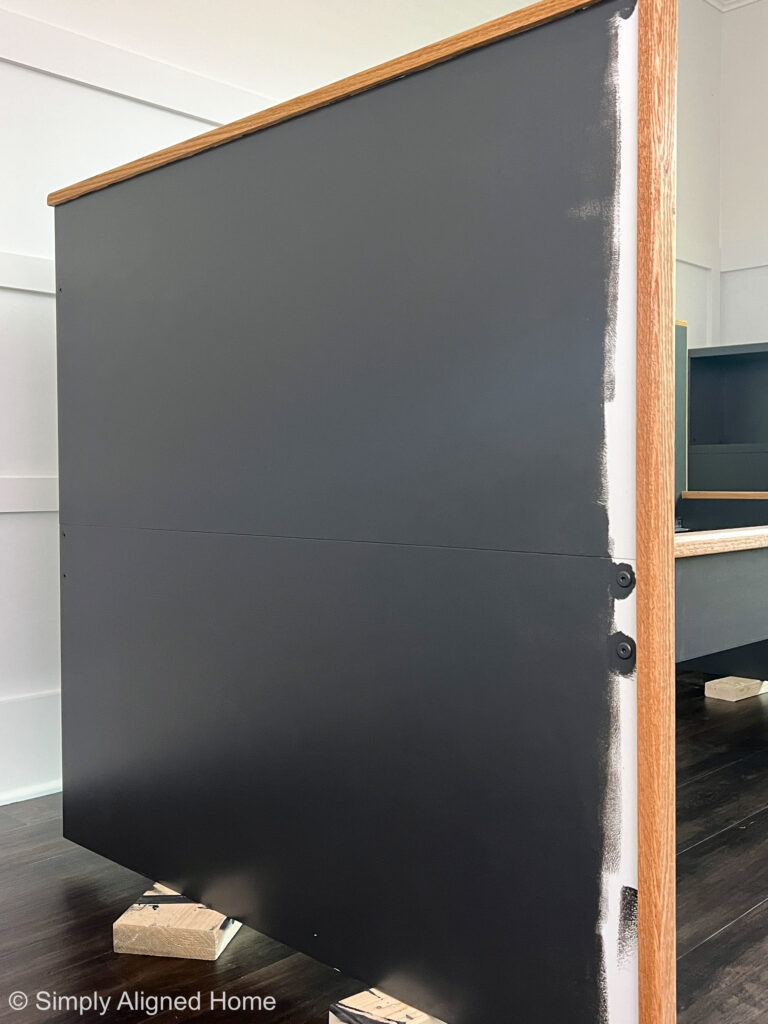
Once it was painted, I secured the wood slats to the bed with glue and my brad nailer. I used a scrap piece of the 1/4″ plywood as a spacer for the slats. Having a spacer always makes the install much quicker!
Brad nails leave a smaller hole than a finish nail. I decided that the nail holes would be more obvious if I tried to fill them with wood filler, so I left them alone. You really don’t notice the holes unless if you are searching for them.
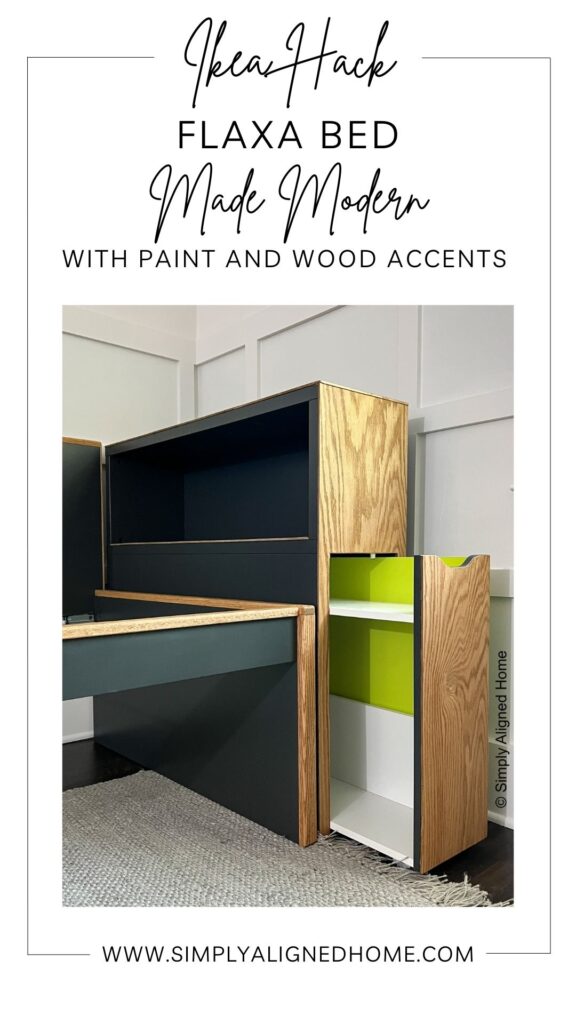
Wrap the Headboard with Wood
I initially planned to wrap the IKEA Flaxa headboard with pieces of 1x oak. I decided this wouldn’t be the best idea for two reasons. One, it would make the unit more top heavy, which wouldn’t be very safe for the kids. Two, wood is just too darn expensive right now!! I decided to use 1/4″ oak plywood instead.
Rip and Cut the Wood
I started by ripping the plywood with my table saw. The headboard needed three different pieces of plywood: one for the inside shelf, one for the top of the unit and one for the front of the unit.
The pieces for the top and front of the unit were ripped to the same width. The one for the shelf was just a little narrower. Once everything was ripped, I cut them to the correct length.
Since the front of the unit included a drawer, I needed to cut out a piece for the drawer. I started by cutting the piece to fit the headboard unit. I made the vertical cuts with my table saw and the horizontal cut using a jigsaw.
This left me with a piece that was the perfect width to cover the drawer. I cut this piece down to the correct length. I then held it up to the drawer, traced the cutout on the plywood and cut it with my jigsaw.
Stain and Seal the Wood
I stained the pieces of wood for the headboard outside, like I did with the wood slats. I allowed them to dry for a few hours before I attached them to the headboard.
Attach the Wood
The final part of the IKEA Flaxa bed flip was to attach the wood to the headboard. I used construction adhesive and 1″ brad nails to attach the plywood to the headboard.
Since the drawer for the headboard was made of slightly thinner boards, I had to use 3/8″ brad nails to secure the plywood to it.
This IKEA Flaxa bed with storage headboard looks nothing like it did when I originally purchased it! It’s crazy what some paint and wood accents can do to a piece of furniture!!
If you liked this transformation, be sure to check out the IKEA hack I did with a cube storage unit!

**Note: I am not a professional and do not claim to be an expert. Please be sure to always read instructions for all tools and products. Safety is very important and should be your top priority. Wear necessary protection when using tools (eye wear, hearing protection, gloves, etc.) and dust masks when sanding or cutting. Simply Aligned Home is not responsible for any injury or damage. All of my designs are not professionally designed and are for private use only.**
You are so clever!