
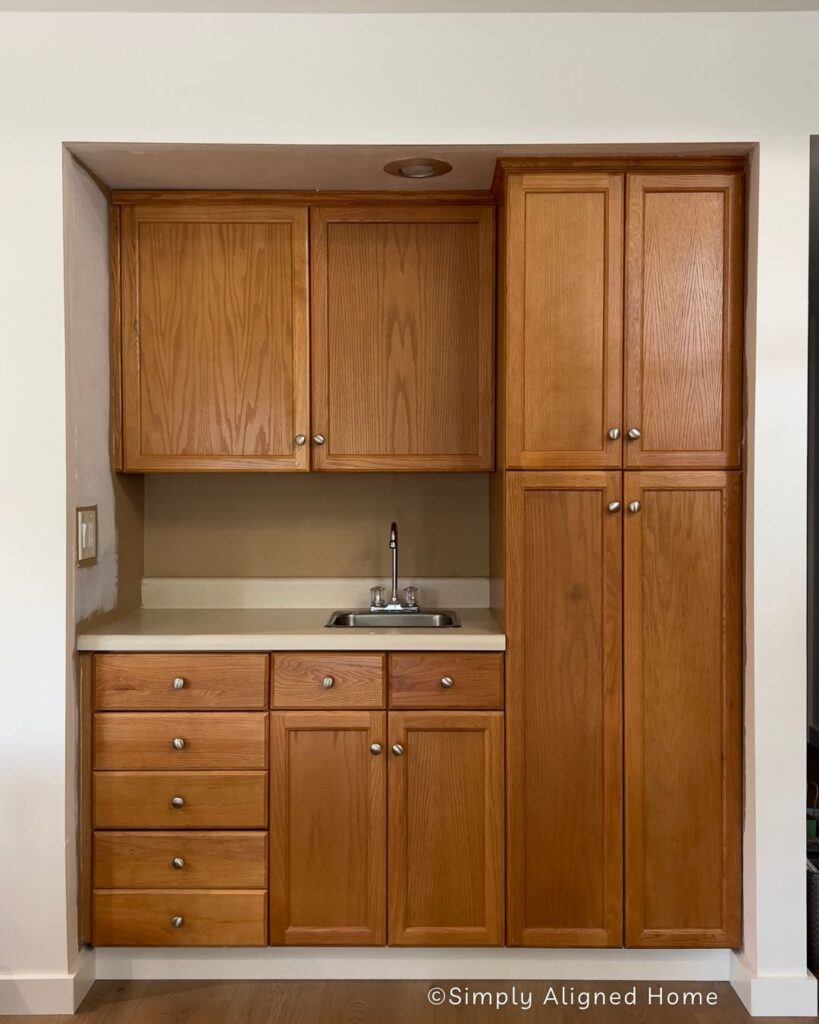
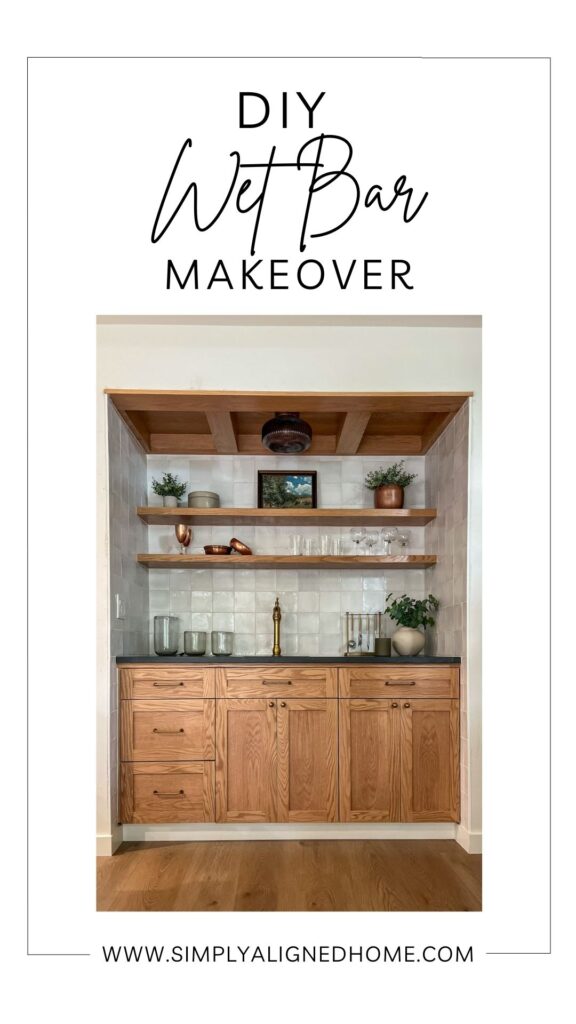
My family and I recently moved across the country and purchased a split-level home. After finishing our kitchen expansion and complete renovation, I set my sights on revamping the cabinet-heavy wet bar space. The goal was to have it seamlessly blended with our freshly updated kitchen.
**This post contains affiliate links to products that I used or recommend. If you purchase something through an affiliate link, I may receive a small percentage of the sale at no extra cost to you. I really appreciate your support!**
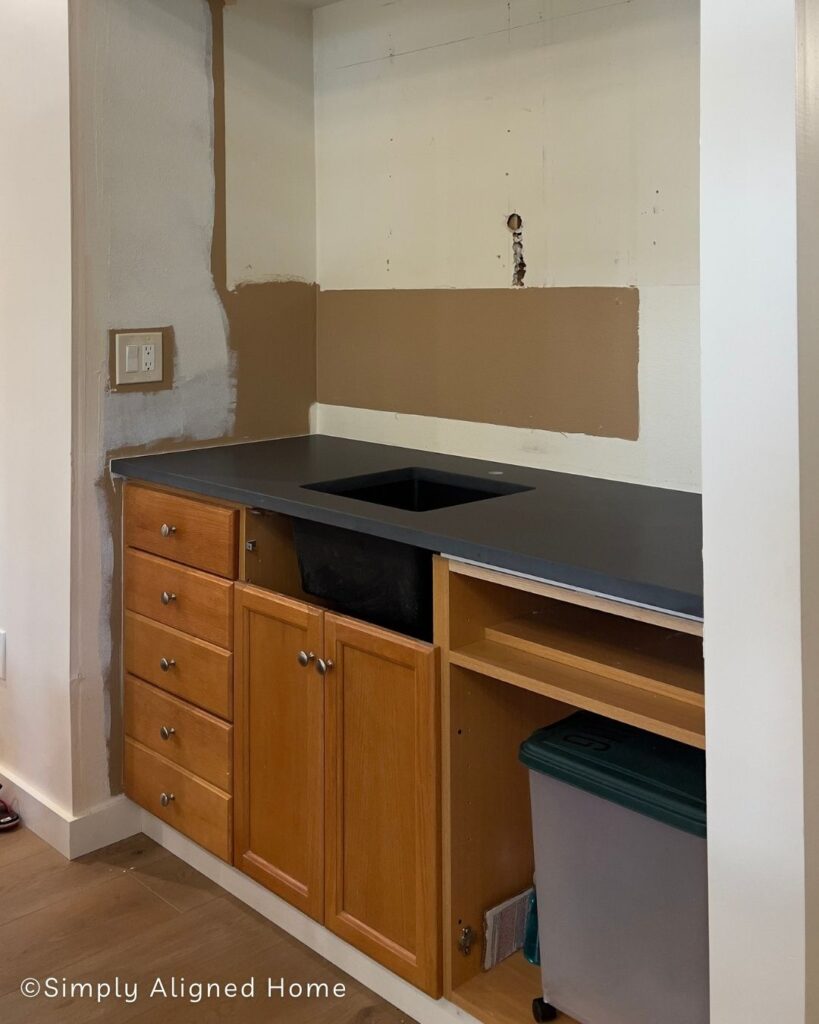
Cabinet And Countertop Demo
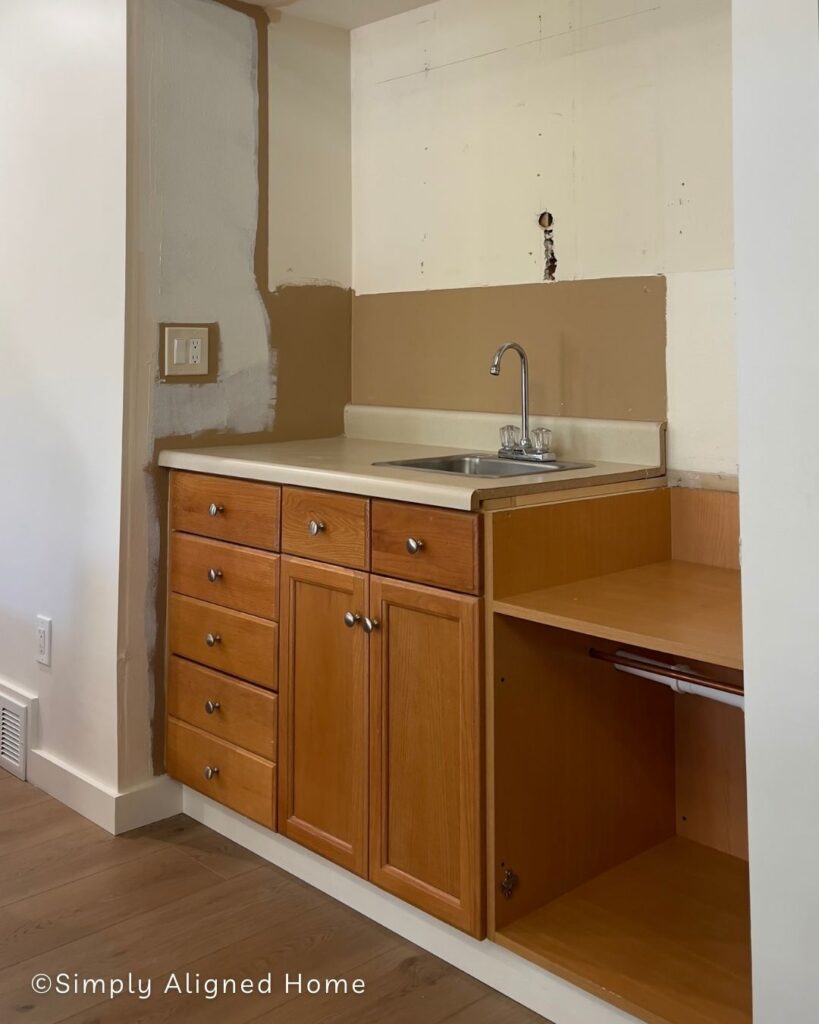
Our first task in transforming this space was to remove the existing upper cabinets. On one side, a towering cabinet reached the ceiling and I thought this space would be awesome for a beverage fridge. After cleaning out the cabinets I came to realize there was plumbing in the bottom of the tall cabinet. Which then prompting me to use a compact circular saw to just trim it down to countertop height instead of removing the full cabinet.
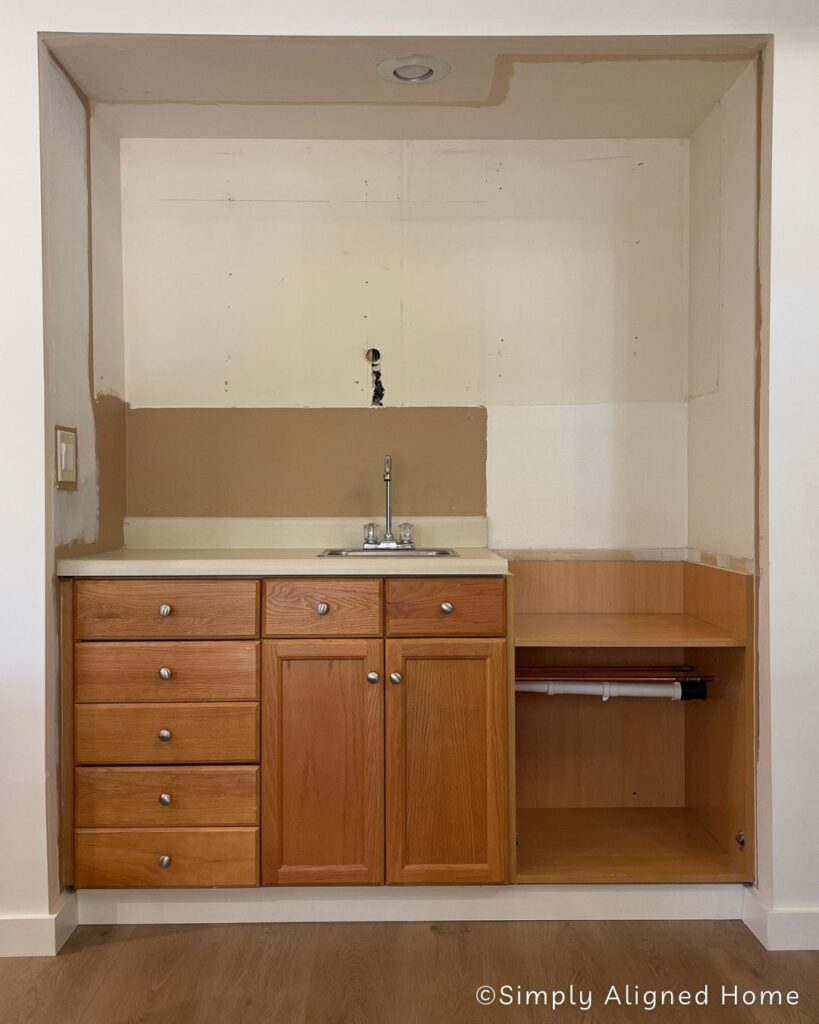
Next up, I proceeded to eliminate the current countertop to obtain a template for the installation of matching quartz countertops, mirroring the ones we used in our kitchen.
DIY Coffered Ceiling
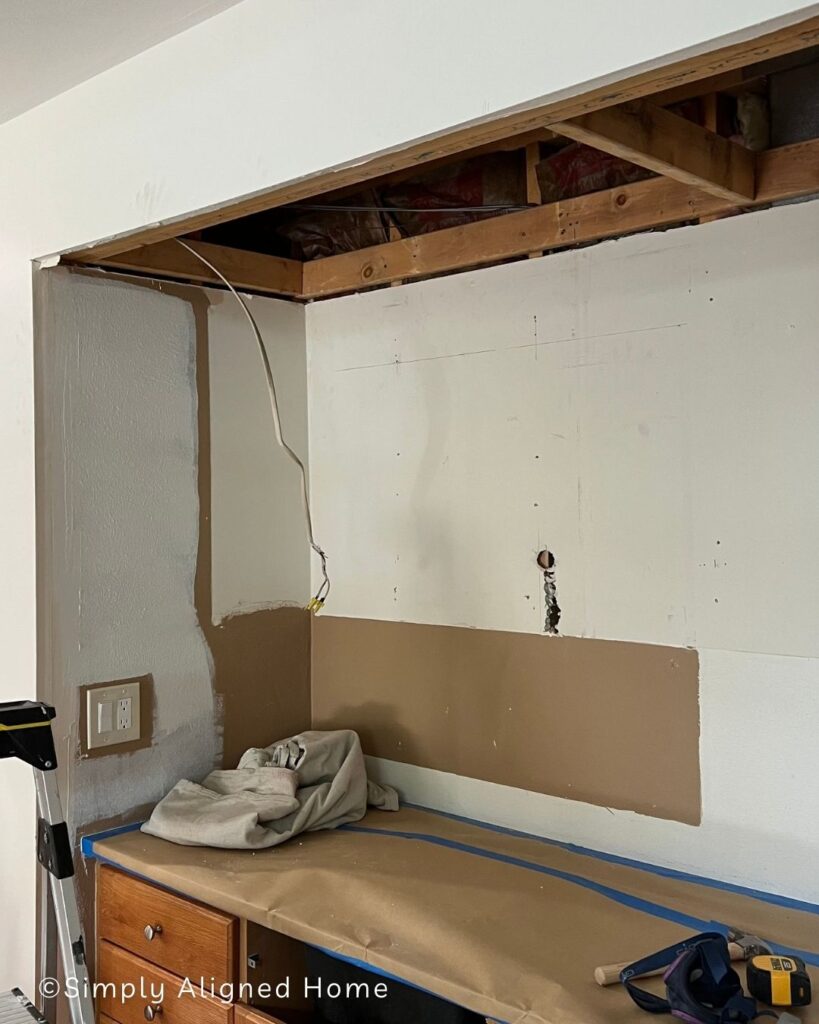
After, our new quartz countertops were installed I did a little exploratory demo to the ceiling. At first my plan was to tile the ceiling but, the more I thought about it I didn’t feel comfortable putting tile on the drywall. I had this fear that the weight of the tile would make it all come down eventually.
I made the decision to swap out the ceiling drywall with cement board. Prior to this, I checked to see if it was possible to replace the current can light with a pendant light kit. While examining this, I initially thought I had come across some loose wiring. But, upon removing the entire ceiling, it turned out there was no cause for concern.
Once, the whole ceiling was down it sparked new ideas for the ceiling that I liked way better than tiling!
In my garage, I had some spare oak flooring which I sanded down and treated with my trusted water-based stain mixture. Once the boards were stained, the next step proved to be quite intriguing. I aimed to install the flooring on the upper side of the supports. Which meant I needed to cut out one of the ceiling supports to accommodate the flooring. To join the boards together, I used a trim puller.
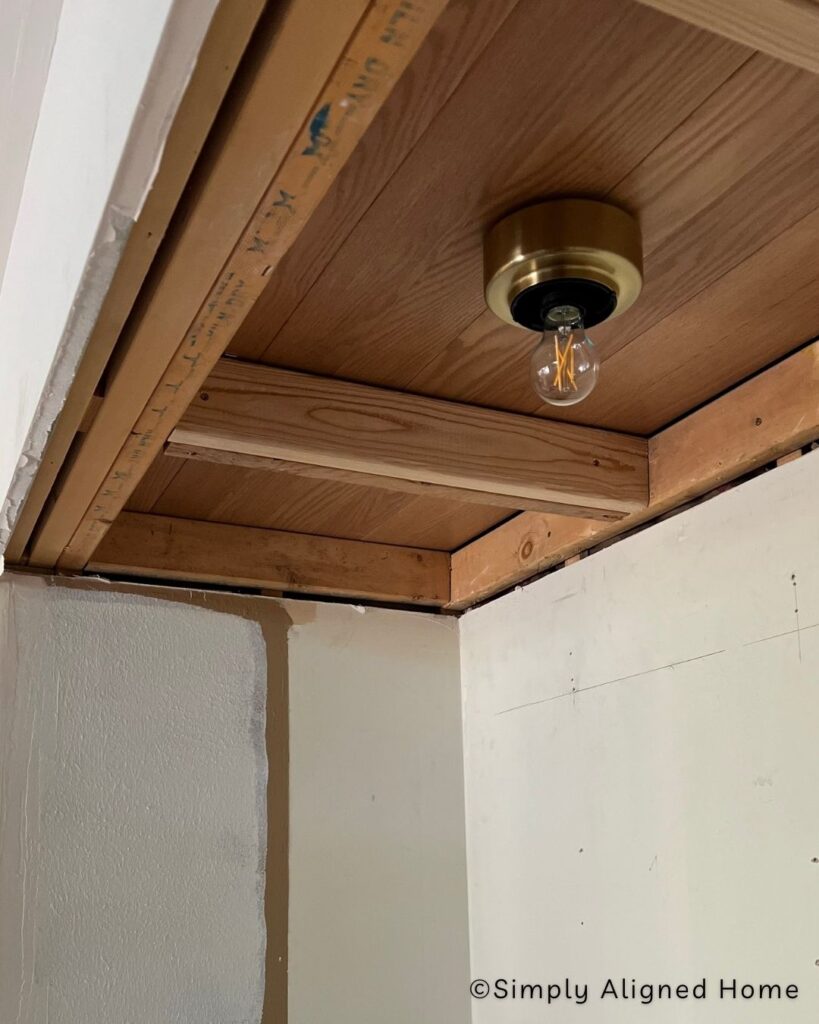
In order to prevent any potential board shifting, I attached small angle brackets to the ceiling support. There were no secure anchoring points available during installation of the floor boards.
Wrapping The ceiling supports
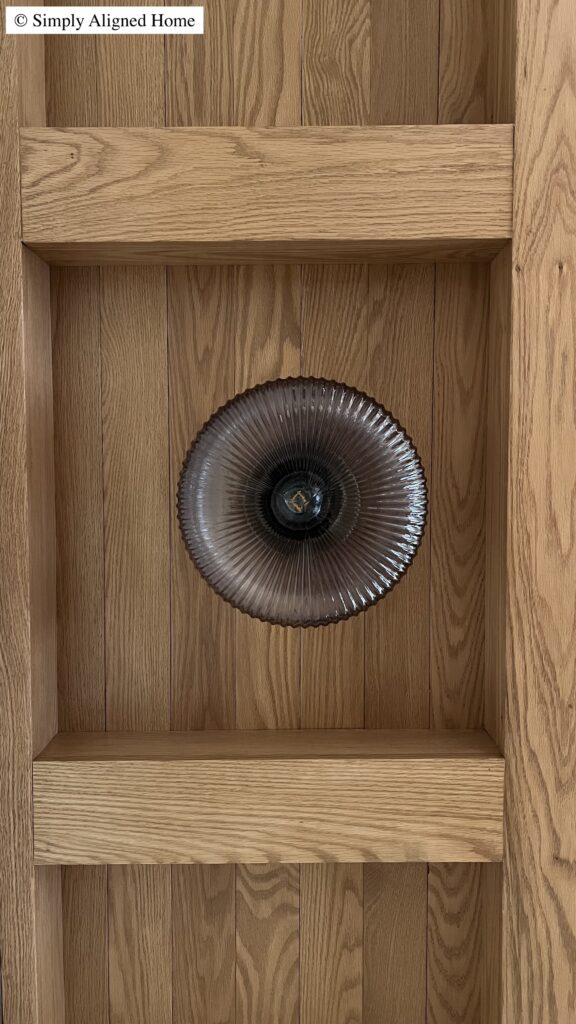
Once, I had all the floorboards installed I added a few more 2×4 supports to the ceiling. Next, up I took red oak boards from Home Depot and started wrapping any of the 2×4 supports you could see.
To finish off the look I filled all nail holes, sanded everything down smoothly and stained plus sealed everything to match.
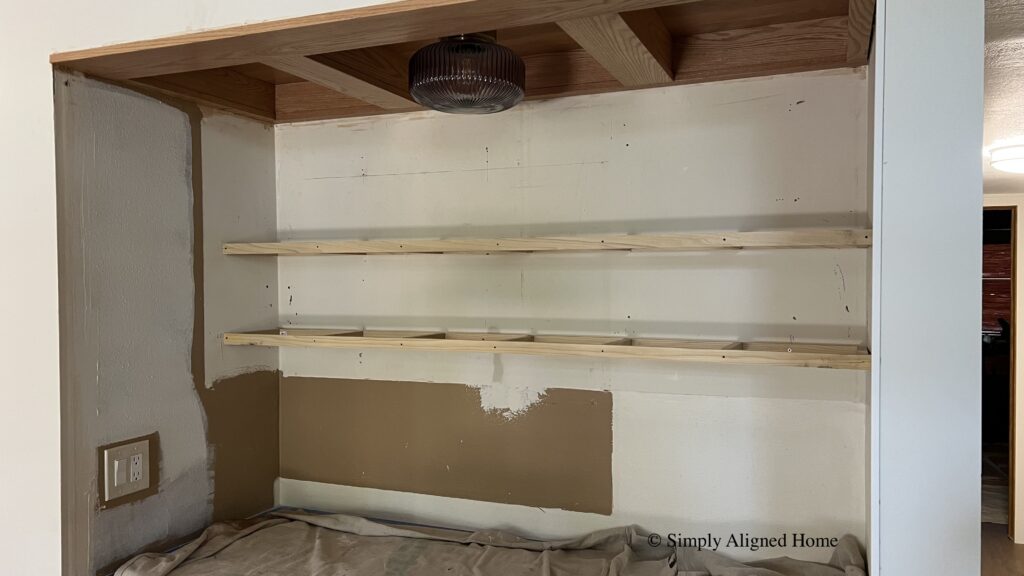
Tiling Backsplash
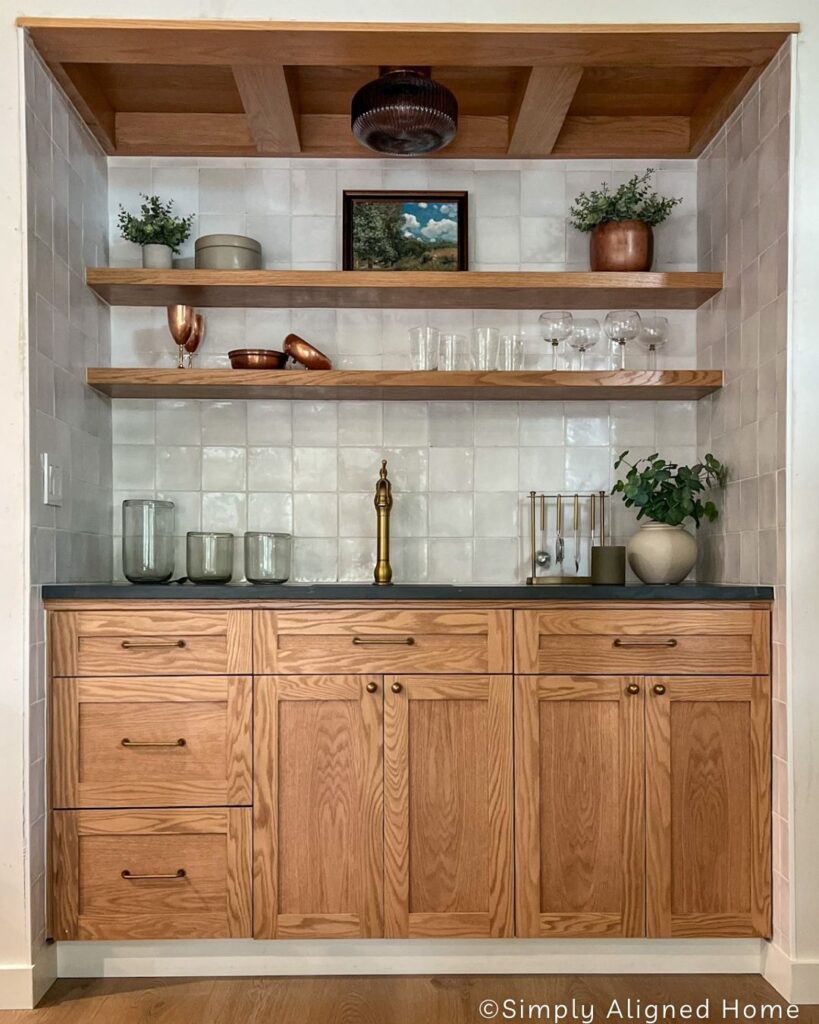
With our newly installed countertops and coffered ceiling in place, the next step was tiling the backsplash. Before I could tile I had to install our floating shelf brackets that I constructed from poplar wood.
For a detailed guide on how I created these exact brackets, you can read the comprehensive tutorial on my floating shelf construction.
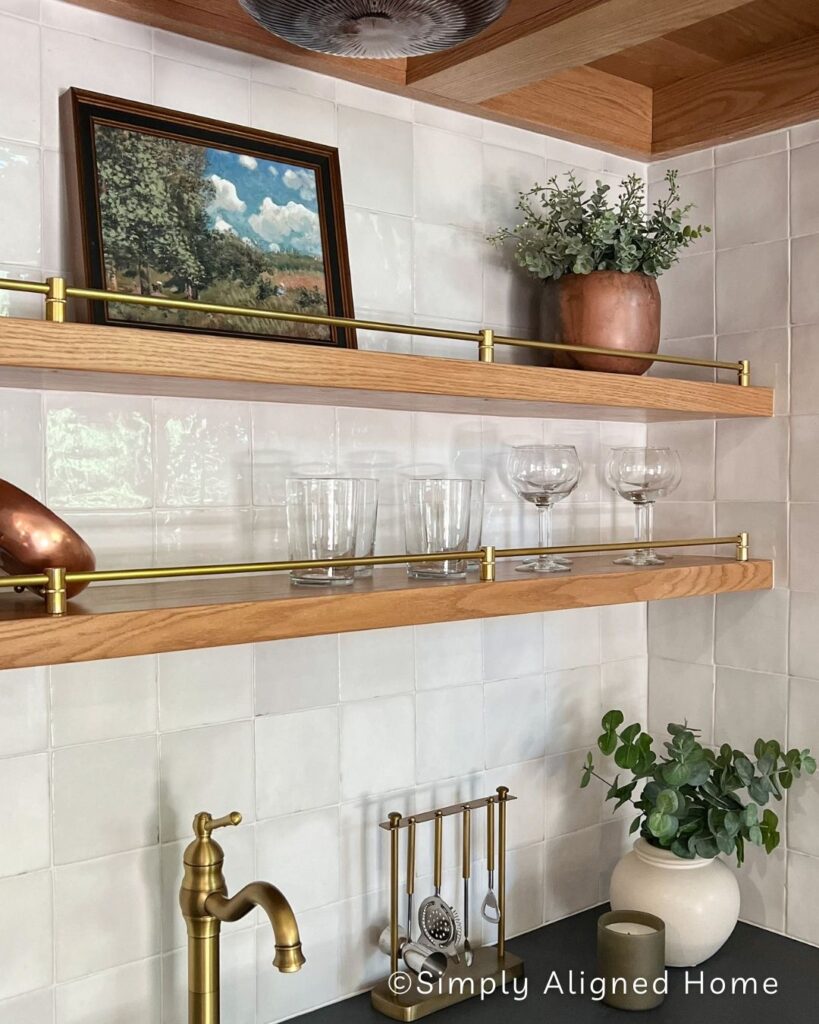
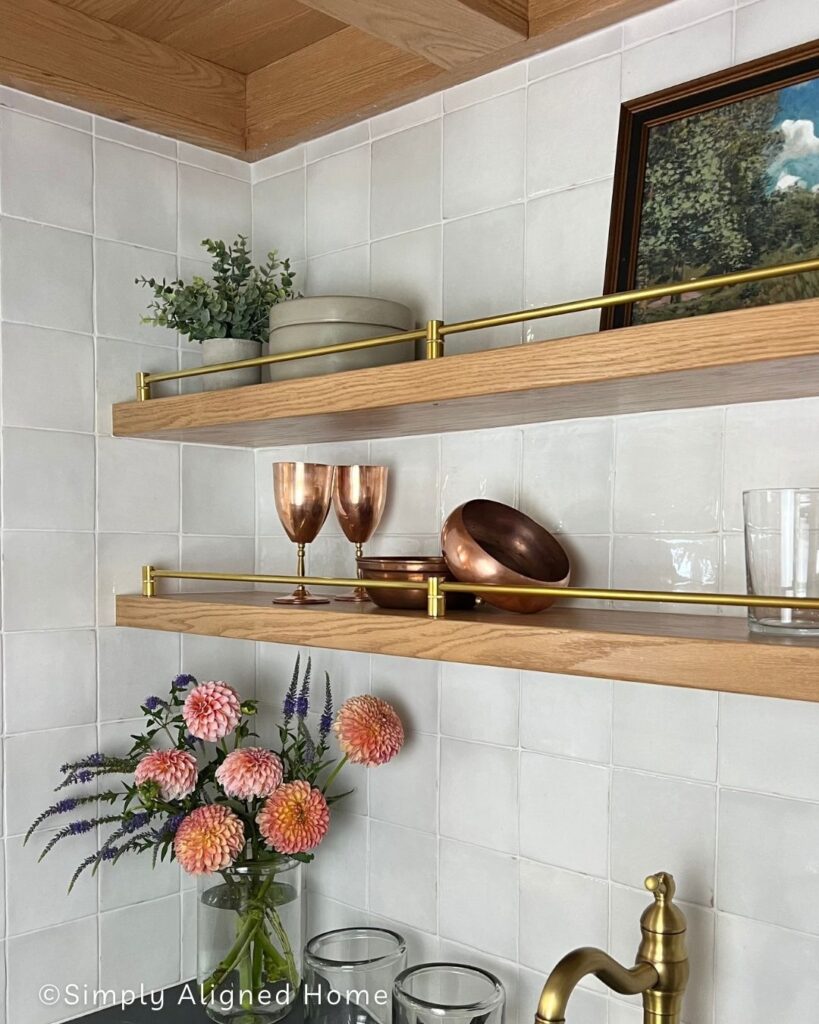
With the shelf brackets securely in place, it was time to prepare the tile. I opted for Zellige Perla Polished Ceramic Tiles from Floor & Decor. Prior to installation, I soaked the tiles to prevent them from drawing excessive moisture from the mortar during the installation process.
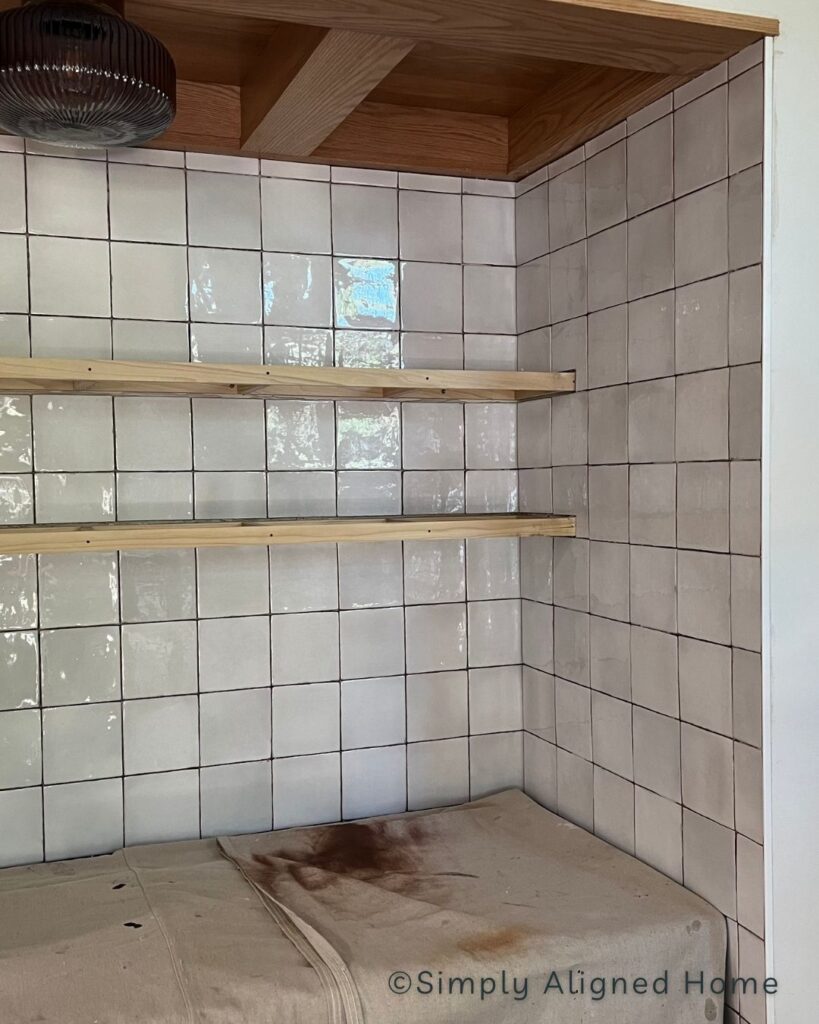
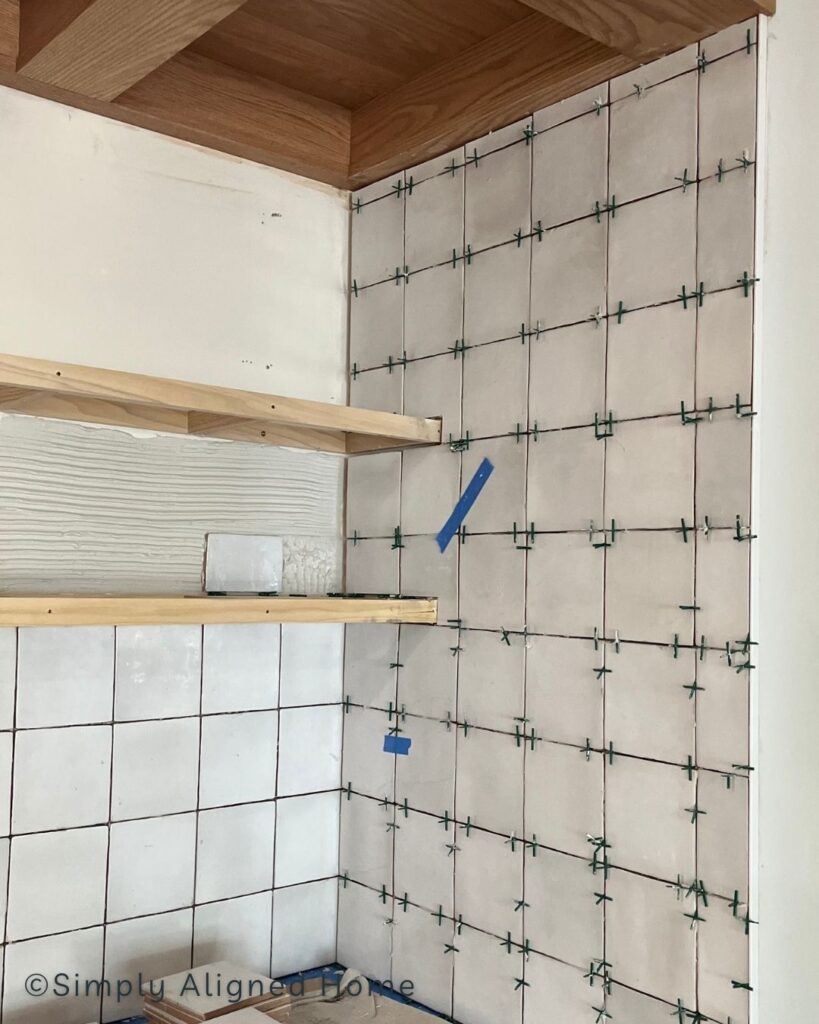
While installing the tiles, I chose to use spacers, even though they might not be necessary with Zellige tile. Zellige tile is known for its inherent imperfections. After, I was done tiling and everything was dry I grouted with Mapei Flexcolor Grout in the color Avalanche. Light colored grout with the light colored tiles helps hide any imperfections. Plus I love the look of light colored tiles and grout together!
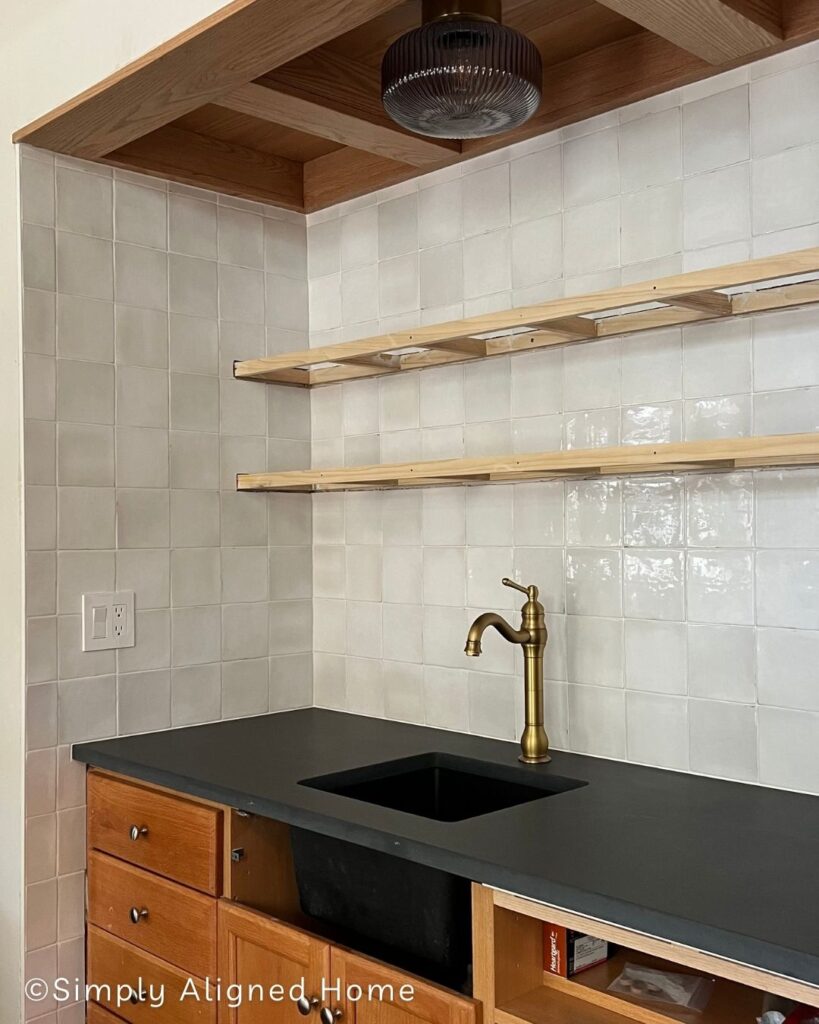
Thin Floating Shelves
Once I was done tiling it was time to wrap the floating shelf brackets. Like I mentioned I have a whole tutorial on this process and you can read more there.
To maintain a cohesive look, I opted to use oak when wrapping my shelves. Once the oak was in place, I proceeded to fill the nail holes, stain the shelves, and apply a sealing finish. To elevate the overall appearance of the wet bar area, the final touch to these shelves involved the installation of stunning brass railings.
Adding New Cabinet Doors
The final step to finishing this wet bar makeover was adding all new cabinet doors. Instead of building all my cabinet doors from scratch I opted to order them from The Cabinet Door Store website. Once they arrived I stained them my go to stain color and hung them on the existing cabinet frames.
What are your thoughts on the before and after transformation? Pretty impressive, don’t you think? I’m absolutely thrilled with the final result. It’s a significant improvement for our family, and it seamlessly blends with our kitchen. I can already envision this space being put to great use in the days ahead.

**Note: I am not a professional and do not claim to be an expert. Please be sure to always read instructions for all tools and products. Safety is very important and should be your top priority. Wear necessary protection when using tools (eye wear, hearing protection, gloves, etc.) and dust masks when sanding or cutting. Simply Aligned Home is not responsible for any injury or damage. All of my designs are not professionally designed and are for private use only.**
Decor And Finishing Touches
- Brass Rail
- Cabinet Knobs
- Cabinet Drawer Pulls
- Zellige Tile
- Ceiling Light
- Faucet
- Sink Basket and Strainer
- Small Faux Plant
- Bar Tool Set
Materials Used
What countertop did you use? I believe I heard quartz, maybe on Insta, but can you provide the details? Have been looking at black/dark counters for my kitchen and love your inspo!