Tools are the heart and soul of any do-it-yourself enthusiast’s toolkit. Whether you’re a seasoned woodworker or just getting started with home improvement projects, the right tools can make all the difference. Join me as I share my most loved DIY tools that have become my trusted companions.
In this post, I’ll introduce you to 10 essential DIY tools that can truly simplify your life. If you’re new to the world of DIY, I recommend starting with my previous post on the “Top 5 Tools Every Beginner Needs” before diving into this one.
It’s important to master the basics first, and once you’ve got those under your belt, these additional tools can be seamlessly integrated into your toolkit, further enhancing your DIY experience.
**This post contains affiliate links to products that I used or recommend. If you purchase something through an affiliate link, I may receive a small percentage of the sale at no extra cost to you. I really appreciate your support!**
10 Essential DIY Tools To Make Your Life Easier
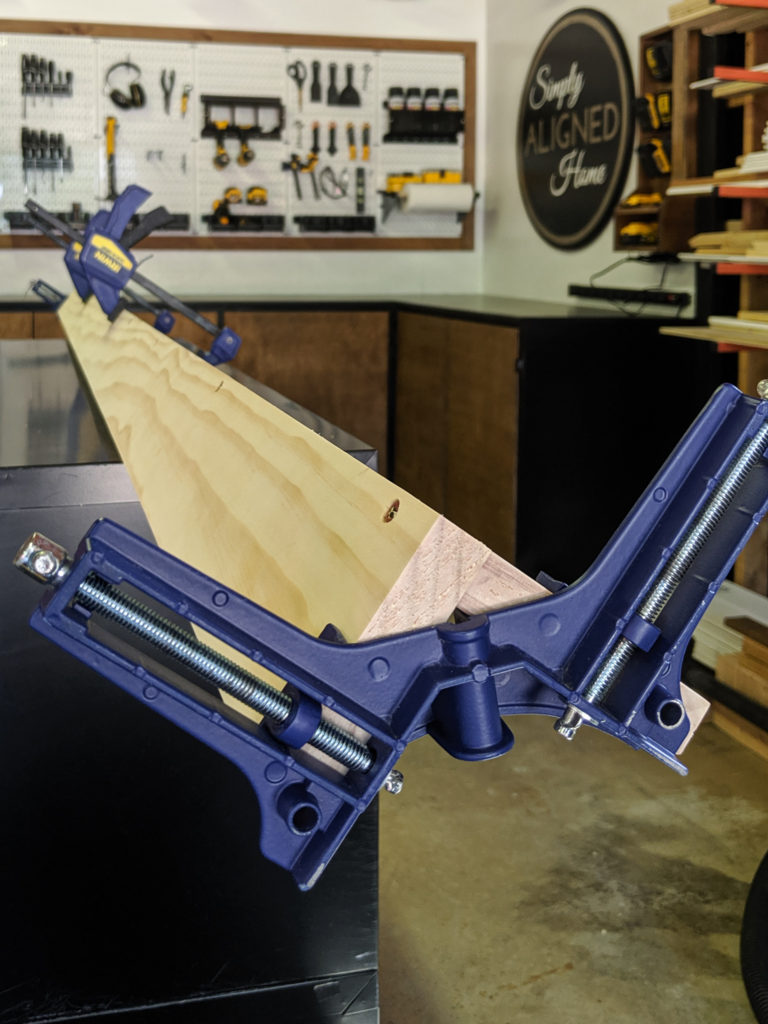
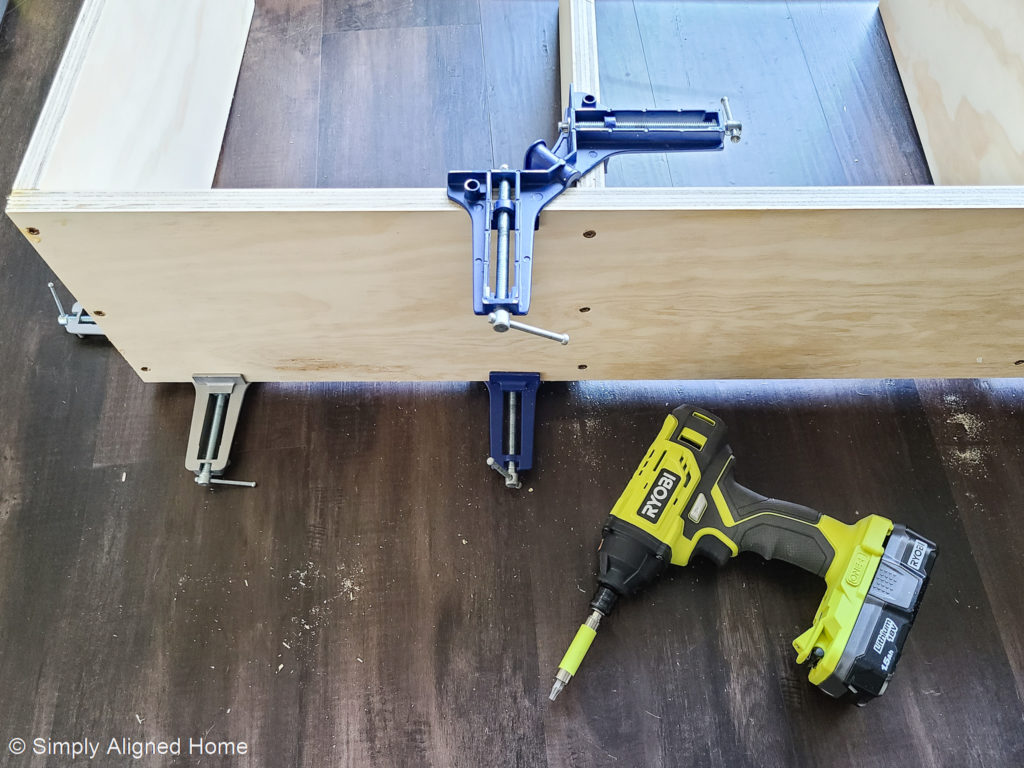
Corner Clamp
A corner clamp is an amazing tool in woodworking and DIY projects. The clamps significantly simplify your tasks and makes your life easier in several ways:
- Hands-Free Operation: Using a corner clamp means you don’t have to rely on a second set of hands to hold pieces together while you secure them in place. This hands-free method allows you to work independently, which can be especially helpful when working alone.
- Precise Right Angles: Corner clamps are designed to hold two pieces of material at a perfect 90-degree angle. This is particularly important in woodworking, as accurate angles are crucial for the structural integrity and aesthetics of your projects.
I love using corner clamps for making many projects, for example I used them while building these built-in shelves in my Modern Bay Window Bench area.
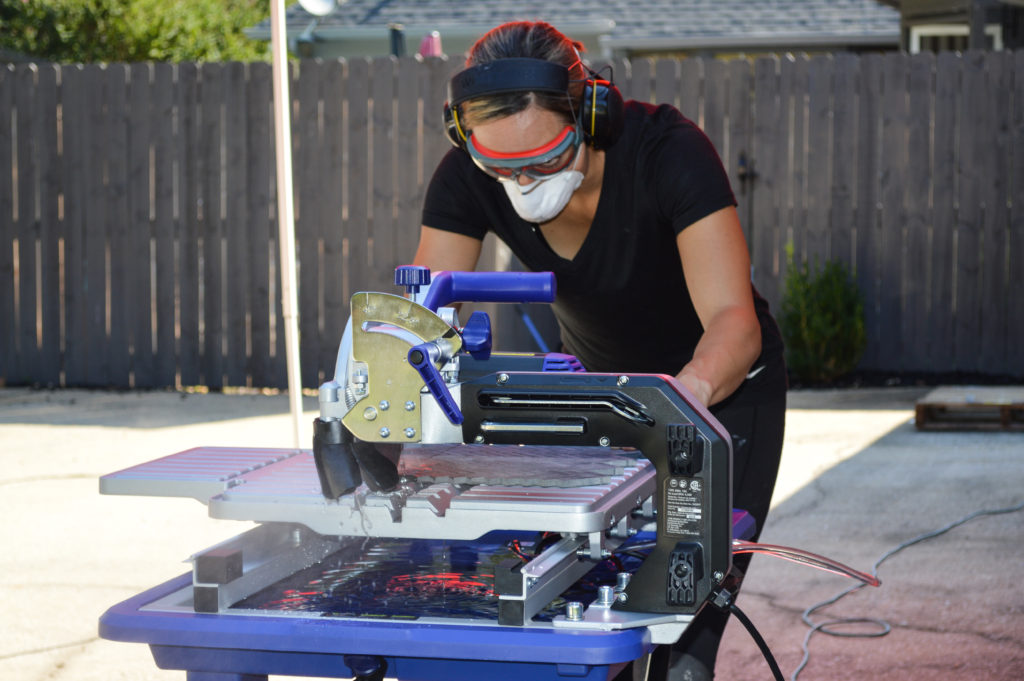
Wet Tile Saw
If your going to be doing any projects with tile, I suggest getting a wet tile saw. A wet tile saw is a specialized saw designed for cutting various types of tile materials, such as ceramic, porcelain, marble and granite.
It’s called a “wet” tile saw because it uses a continuous stream of water to cool the cutting blade and to keep the tile material and blade lubricated during the cutting process.
Here’s why I suggest a wet tile saw is great and highly valuable for tile-related projects:
- Smooth Edges: The water-cooled blade minimizes chipping and edge damage, resulting in smooth, polished cut tiles. This is crucial when working with tiles with delicate surfaces, such as glazed tiles.
- Ease of Use: These saws are generally user-friendly, with adjustable settings for cutting depth and angle. Even beginners can quickly learn how to operate them effectively.
- Efficiency: Wet tile saws cut through tiles quickly and efficiently, reducing the time required to complete tiling projects.
Caulk Finishing Tool
This caulk finishing tool is huge when it comes to projects that require caulk. All you do is lay a bead of caulk and run this along the seam to smooth out the caulk line.
There are two things I must warn you about though:
- If you are using it on a rough surface, the rubber on the caulk finisher will begin to wear down and little pieces will come off.
- It is really easy to waste a lot of caulk using this tool, so be sure you are using just the right amount of caulk.
If your aware of those two things the tool itself comes in handy! Overall I would still suggest using one.
Paint Can Pour Spout
This little guy right here is amazing! It’s less than $1 and it takes the mess out of pouring paint. It clips right on the side of the paint can and is really easy to clean. I have worn out a few of these…definitely worth the money! I have also seen newer versions that you keep on the paint can for storage.
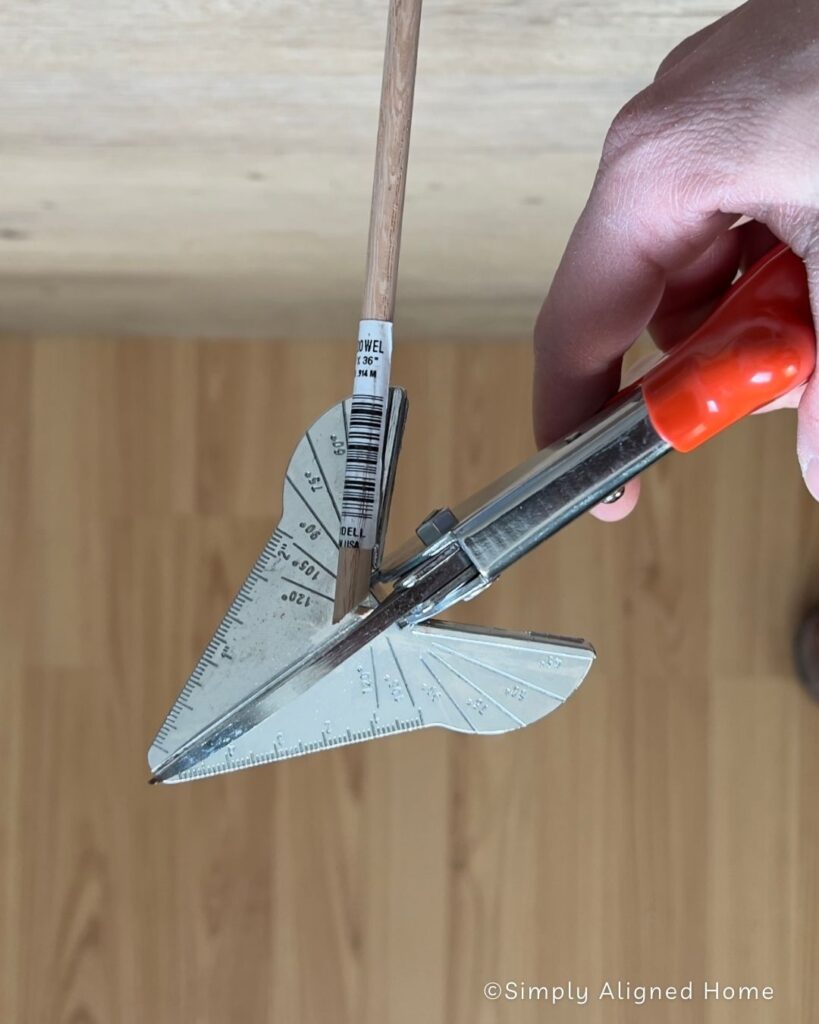
Carpenter Square
The carpenter square is an inexpensive tool to add to your toolkit! Some may think really a carpenter square but hear me out:
- Checking for Square: Carpenter squares are essential for checking the squareness of various projects, such as corners, walls, and door frames. This ensures that the elements of your project fit together correctly, reducing the need for adjustments and rework.
- Accurate Measurements: This one kind of goes with checking for squareness but, carpenter squares have precise right-angle markings, which allow carpenters to quickly and accurately measure and mark 90-degree angles.
With a carpenter’s square in your toolkit, you’ll find that your carpentry work becomes more efficient, professional, and hopefully error-free!
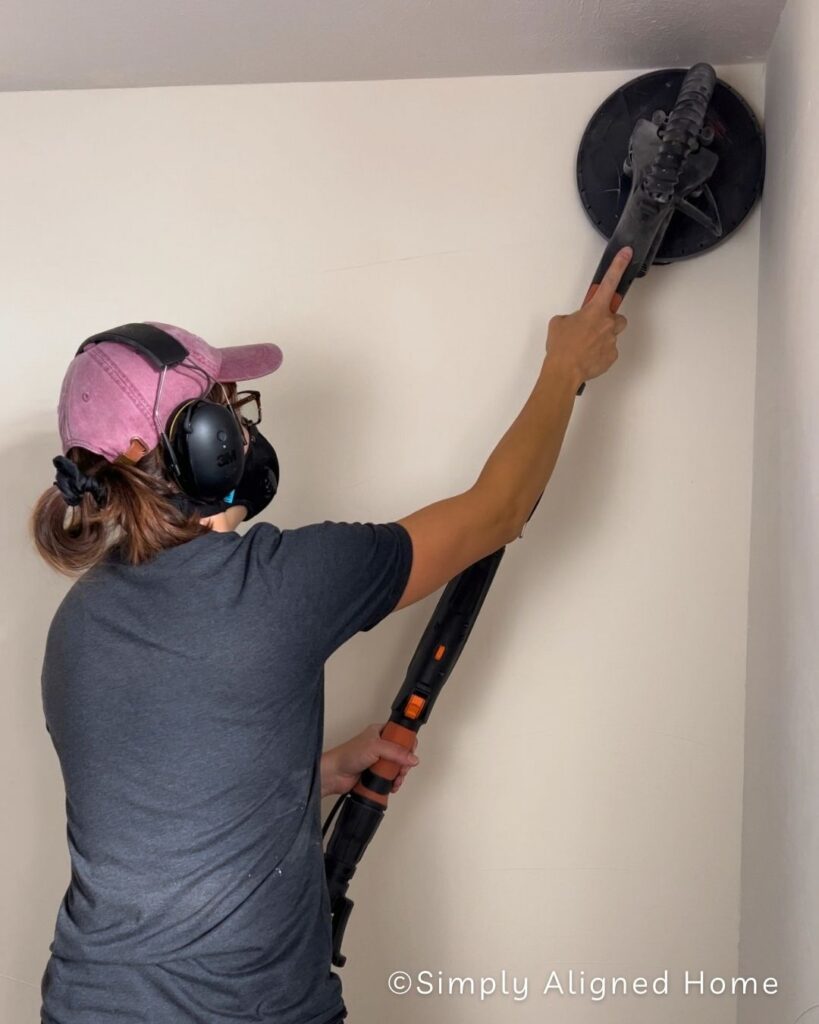
Drywall Sander
Next up, is my trusty drywall sander! If you want to see me use this on a project check out this article: How To Skim Coat Walls. I have put this thing to the test in our new home and I couldn’t be happier that I bought one.
The pros of owning a drywall sander are:
- Faster Sanding: Drywall sanders are equipped with a powerful motor and a large sanding surface, which enables you to sand drywall surfaces quickly and efficiently. This significantly reduces the time and effort required for sanding large areas.
- Dust Control: Many drywall sanders can be connected to a vacuum. This feature helps keep the workspace cleaner by capturing the majority of the dust produced during sanding.
- Smoother Finish: Lastly, drywall sanders are designed to provide a consistent and smooth finish to your drywall surfaces. They eliminate uneven spots, ridges, and imperfections, allowing for professional-grade results.
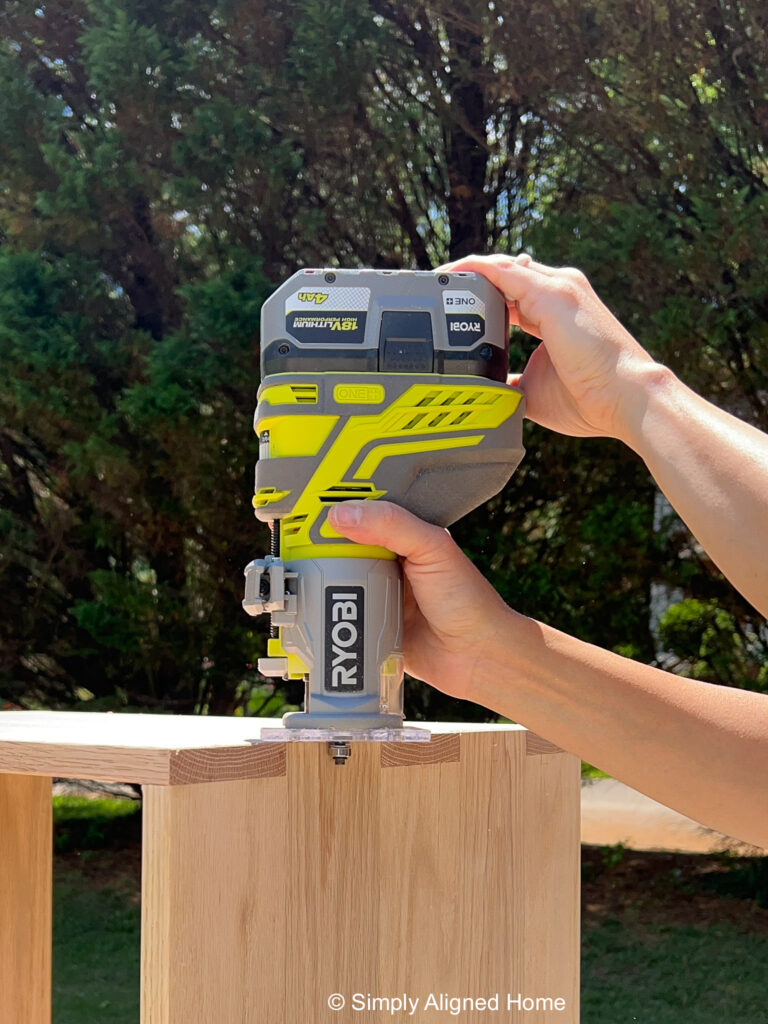
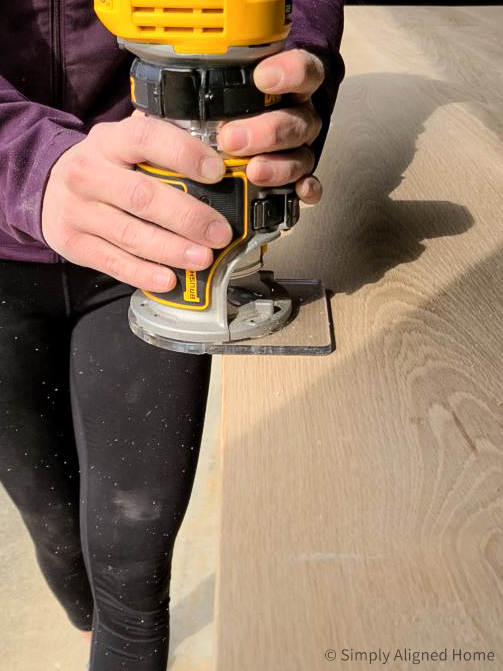
Router
If your ready to take your DIY projects up a notch get yourself a Router. Here are some of the key pros of having a router in your toolkit:
- Customization: Routers offer the ability to customize your work by creating unique details and designs. Whether you’re adding decorative edges to furniture or making intricate inlays, a router allows for creativity and personalization in your projects.
- Joinery: Routers are indispensable for creating strong and precise joinery. They can be used to cut dovetail joints and box joints, providing the necessary strength and stability for your woodworking creations.
Some projects that I have used a router for were these Modern Nightstands that I built recently and this Modern White Oak Dining Table.
Miter Shear Cutter
Miter shear cutters are such an underrated tool to have. Let me tell you why:
- No Need for Power: Unlike power tools, miter shear trimmers are manual devices, so they don’t require electricity or batteries. This makes them portable and suitable for use in areas without power sources.
- Portability: Miter shear trimmers are typically lightweight and easy to transport. This makes them suitable for projects that are inside. Less running up and down the stairs and outside to the garage to use the miter saw.
- Clean and Precise Cuts: Miter shear trimmers are designed for making clean and precise miter cuts, especially in materials like molding, trim, and plastic. They ensure straight, accurate, and polished cuts without splintering or damaging the material.
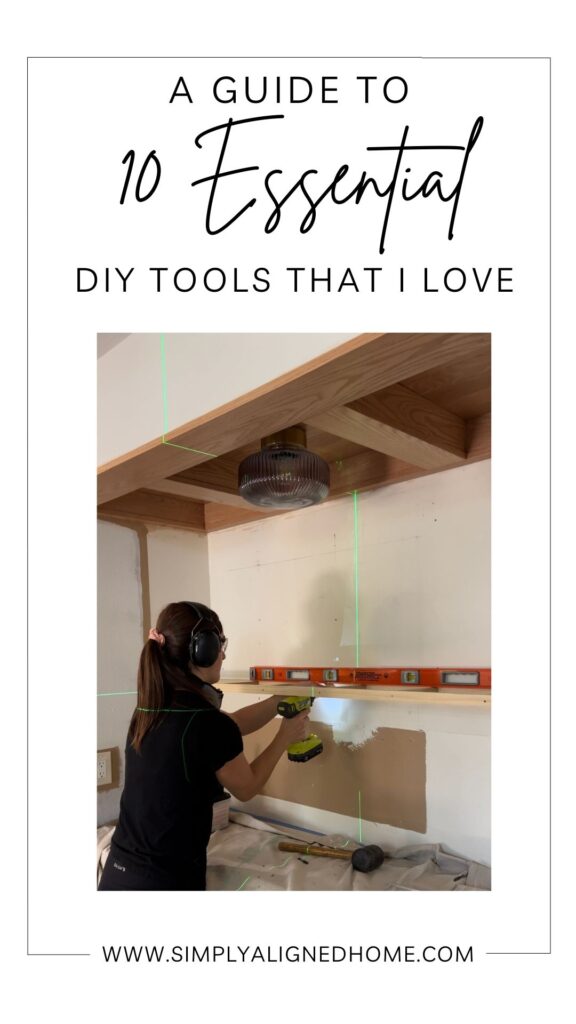
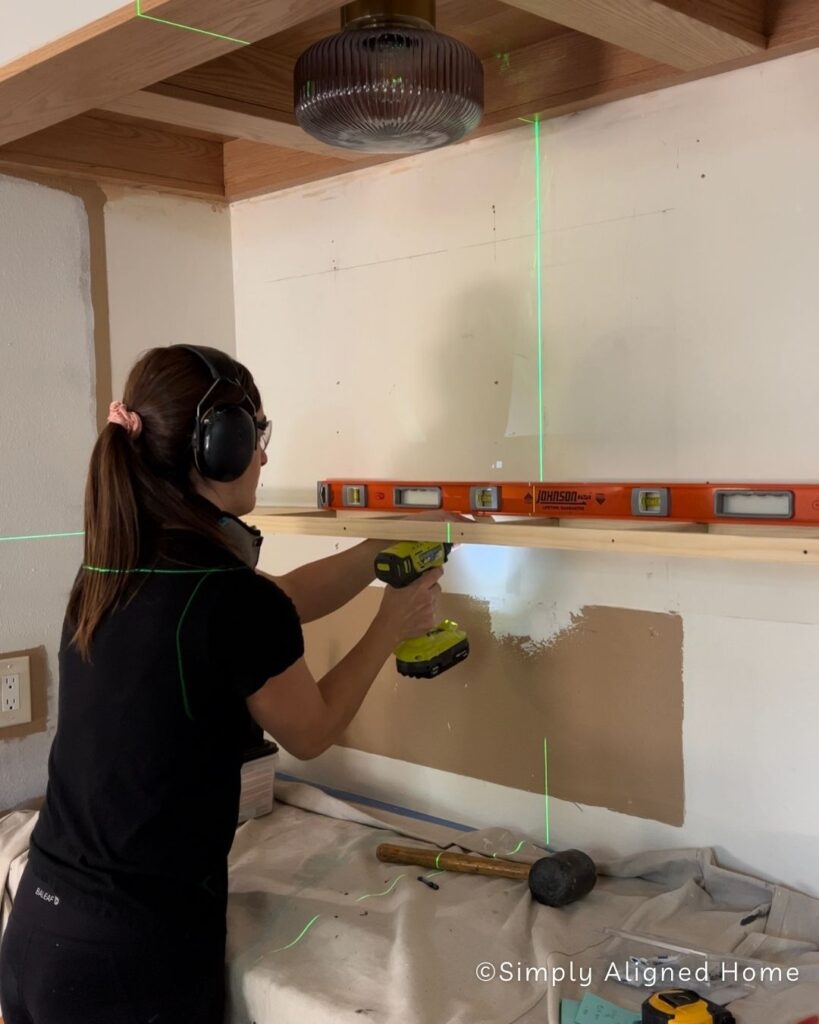
Self Leveling Laser Level
Having a self leveling laser level is a game changer! I have used it for so many projects, the last project it came super handy for was my Wet Bar Makeover. Some of the pros to using a self leveling laser are:
- Reduced Errors: The laser level minimizes the risk of measurement and alignment errors, reducing the likelihood of reworking and saving both time and materials.
- Long-Range Visibility: Many self-leveling laser levels offer long-range visibility, making it easier to work across larger spaces or outdoors, even in bright lighting conditions. The laser is always so easy to see!
- Efficiency: With a self-leveling level, you can complete tasks more quickly. You don’t have to spend extra time manually leveling or aligning, which can save you valuable time on your projects.
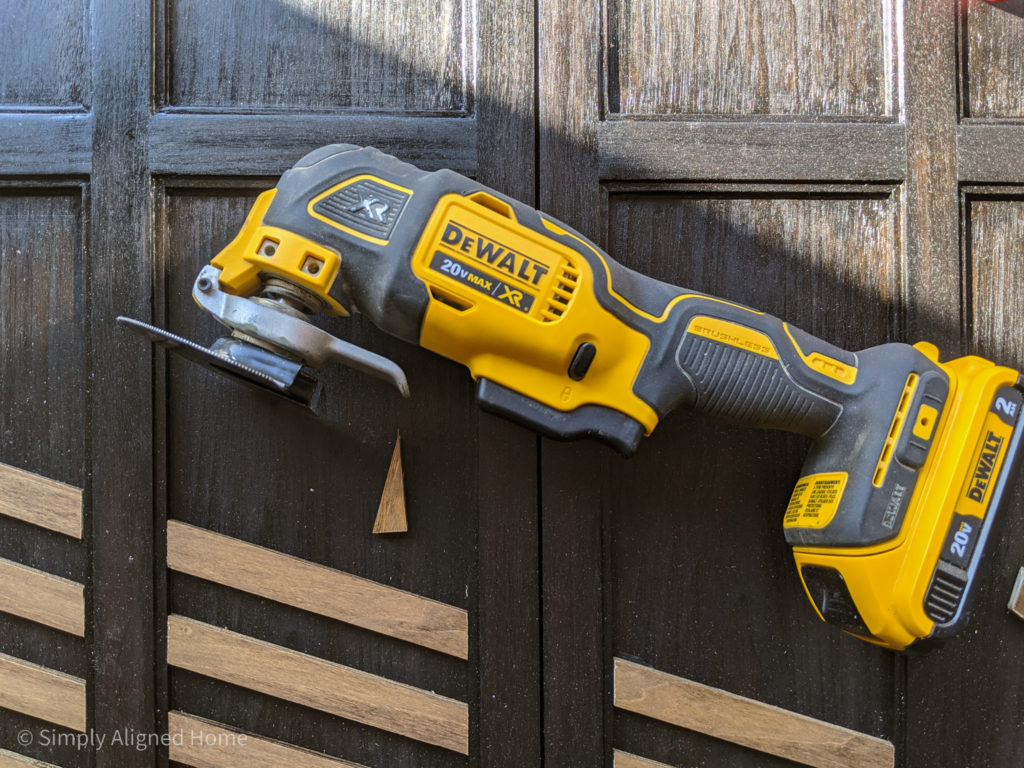
Oscillating Multi-Tool
The multi-tool is a good one! It definitely is loud and not my favorite sound but it comes in handy for more things than I can count. Here are the key pros of having an oscillating multi-tool:
- Access to Tight Spaces: The compact design and oscillating motion of these tools enable you to access and work in confined or hard-to-reach areas, such as corners, edges, and inside cabinets.
- Versatility: Multi-tools are incredibly versatile tools capable of performing a wide variety of tasks, including cutting, sanding, grinding, scraping, and more. They can replace several single-function tools in your toolkit, saving both space and money.
- Plunge Cutting: The ability to make plunge cuts without an entry point is a valuable feature, particularly for flooring, doorways, and other tasks requiring precise cuts in the middle of a material.
These 10 essential DIY tools have been the cornerstone of my creative journey, and helping me transform projects into masterpieces. Whether you’re a seasoned craftsman or just beginning to explore the world of DIY, having the right tools at your disposal can make all the difference.
Remember, in the realm of DIY, the right tools are your trusted companions on the path to turning your dreams into tangible realities. Happy building!

**Note: I am not a professional and do not claim to be an expert. Please be sure to always read instructions for all tools and products. Safety is very important and should be your top priority. Wear necessary protection when using tools (eye wear, hearing protection, gloves, etc.) and dust masks when sanding or cutting. Simply Aligned Home is not responsible for any injury or damage. All of my designs are not professionally designed and are for private use only.**
Tools Used
- Corner Clamp
- Wet Tile Saw
- Caulk Finishing Tool
- Paint Can Pour Spout
- Carpenter Square
- Drywall Sander
- Router
- Miter Shear Cutter
- Oscillating Multi-Tool
- Self Leveling Laser Level